- I Tried Both: Apple Watch 9 vs Fitbit Charge 6
- Best Places to Print Photos Online

Why Your Computer is So Slow and 16 Ways to Fix It
Bugs, too many open apps, poor Wi-Fi, and much more could be the culprit(s)
:max_bytes(150000):strip_icc():format(webp)/matthew.s.smith.biopic-075658983c0849d5b7b0e849f94070cc.jpg "how to solve pc slow problem")
- Beloit College
:max_bytes(150000):strip_icc():format(webp)/jonfishersquare-93eb80e77a004035887f56816d3623c5.jpg "how to solve pc slow problem")
- Wichita Technical Institute
In This Article
Jump to a Section
Why Your Computer is Slow All of a Sudden
- Solutions to Try
My Computer Is Still Slow. Now What?
- Frequently Asked Questions
Does it seem like your computer is slower than it used to be? You're not imagining things; there are many reasons why a computer slows down but, usually, you can get your speed back.
Computer performance issues are a headache and the causes can be mysterious, as there are thousands of software bugs, drive issues, and other issues that might cause a slow computer.
You could have a virus, be downloading multiple large files at once, have too many open apps and programs open, opened too many tabs on your web browsers without closing them, have poor Wi-Fi or internet connections . . . the list goes on and on.
Thankfully, there's some good news. You can root out the cause of a slow computer with comprehensive solutions, narrow down the possible causes, and get back up to speed.
These solutions are generally applicable to Windows 11, 10, 8.1, 8, 7, and even Vista.
How to Fix a Slow Computer
These solutions are arranged from the least to most disruptive, so it's best to follow them in order. There's no need to reinstall Windows if your slow computer is the result of too many open browser tabs. Also, skipping steps might hide the real cause of the problem.
Restart your computer . This step will eliminate any one-time bugs or software conflicts that cause slow performance and provide a clean slate for additional troubleshooting.
You might be tempted to skip this step. Don't! It can solve your problem in a few seconds with minimal effort.
Close browser tabs , and don't open more than a few at once. Browser tabs can begin to tax system resources, especially RAM, as your computer attempts to organize data from numerous websites so you can quickly view it when you return to a tab. Closing tabs can provide an immediate boost on PCs with 4GB of RAM or less.
Open Task Manager by pressing Ctrl+Shift+Esc simultaneously, and be sure to click the "more details" drop-down arrow at the bottom of the Task Manager window. Look for tasks that are using more than 50% of your PC's CPU or memory resources. To close a task, right-click the task and then click End Task . Read our advanced Task Manager guide to learn more about this useful utility.
Check your power settings and turn off power-saving mode . Windows PCs typically ship with settings that prioritize performance, but it's possible to change the default settings by mistake. This is particularly true of laptops, which often slip into power-saving mode to conserve battery life.
Improve your Wi-Fi signal . The problem you perceive as a slow PC might be a spotty internet connection. You can check this with an i nternet speed test . Poor Wi-Fi will make websites load slowly, message services lag, and cloud storage services fail.
Search for and halt any large downloads or uploads on your computer. Downloading or uploading a file can consume a surprising amount of processor and storage resources on older PCs. Halting the file transfer should provide an immediate improvement if this is the culprit.
Cloud storage services are the most likely cause of excessive file transfers, as they download and upload files automatically in the background.
Similar to this and tip 5 before it, is to halt simultaneous downloads/uploads elsewhere on your network. Your computer could be fairly fast and not using the network at all, but if three other devices in your house are streaming Netflix and YouTube, or playing online games, the network is still effected and it could make it seem like your computer is to blame.
Turn off Windows' unnecessary visual effects . Windows uses shadows and animations to make the operating system look modern, but these effects can slow down some Windows PCs. Turning them off might give your system the boost it needs.
Enable Windows ReadyBoost . This feature can turn an external USB storage device into a home for temporary storage, which is similar to upgrading your computer's RAM, though not quite as effective. ReadyBoost is a great way to use an old USB thumb drive.
If this solution works, it's a sure sign your computer needs more RAM to perform its best. Consider upgrading your RAM soon.
Free up space on your hard drive . Windows, and other installed programs, use space on the hard drive to store temporary files that they can quickly access later. A packed hard drive makes this onerous or impossible, which reduces performance.
This solution asks you to delete applications and files, which you might not want to do. Moving files to a free cloud storage service is a simple, fast solution that will free up space without deleting files you'd rather keep
Delete temporary files . In some cases, the temporary files Windows uses to improve performance can grow too large, consuming too much hard drive space and slowing performance.
Reduce or change startup programs . Many programs, like online messaging services or cloud storage services, start automatically when your computer boots. These programs often run in the background, so you might forget they're installed.
Don't forget to also check your browser extensions, as having too many of these running at one time can slow you down, too.
Update Windows . A new version of Windows may fix a bug causing your performance problems. Windows Update can also install new drivers for your PC's hardware, which often improves performance.
Install an antivirus program. Malware can cause your computer to slow by using system resources to perform tasks behind the scenes. This usually won't be obvious in Task Manager because malware is often designed to hide from prying eyes.
An antivirus program can find malware that's causing performance issues, but antivirus programs can be demanding on system resources, as well. You may need to uninstall the antivirus program if it seems to worsen performance.
Defragment your hard drive . This is rarely required on a modern PC, which is why it's near the bottom of this list. However, the list of possible solutions is starting to grow slim, so it's worth a shot before trying the final and most dramatic options.
Reset Windows using the operating system's built-in utilities. This option is nearly as effective as a clean reinstall, which is the final solution we'll offer, and much easier to perform. This will fix your performance issues if they're caused by a bug or configuration issue in Windows itself.
Resetting or reinstalling Windows will remove most or all locally stored files on your PC. Be certain that you've backed up files you want to keep.
Perform a clean reinstall of Windows . If all else fails, reinstalling Windows is your final hope. A complete reinstall will remove absolutely everything on your computer, including most (but not all) malware that might've snuck into your hard drive.
The solutions in this guide are exhaustive. If your computer is still slow, then the computer is either too old to run modern software well or has defective hardware causing a performance problem.
You'll need to take your computer to a repair shop for further troubleshooting or consider a newer, faster PC to replace your current machine.
To fix a slow internet connection , stop background programs that hog bandwidth, make sure your router and modem are working, avoid signal interference, and scan for malware. Check your router settings to speed up your connection, or call your internet service provider if the problem persists.
To increase download speeds in Windows , turn off background apps, delete temporary files, switch DNS servers, or try a different web browser. Use a download manager and download one thing at a time. If possible, use an Ethernet cable or move closer to the router.
To make your PC start up faster , disable unnecessary startup programs, clear some space on your boot drive, tweak your BIOS, and scan for malware. If Windows startup is still slow, upgrade your SSD/memory.
Get the Latest Tech News Delivered Every Day
- How to Fix Slow PC Startup
- What Should I Upgrade on My PC?
- How to Fix It When Windows 11 Is Slow
- How to Fix a Critical Process Died Windows 10 Error
- How to Fix a Critical Process Died Windows 11 Error
- How to Fix High CPU Usage in Windows 11
- The 7 Best Ways to Speed Up Your Computer
- How to Fix a Computer That Turns On and Then Off
- How to Fix a Frozen Computer
- How to Fix a Samsung Tablet That’s Running Slow
- How to Increase Download Speed in Windows 10
- How to Fix It When a Samsung Tablet Isn't Connecting to a PC
- The Best Ways to Clear RAM on Your Mac or Windows Computer
- How to Check CPU Usage in Windows 11
- 13 Ways to Get More RAM on Your Laptop
- 10 Ways to Fix 100% Disk Usage in Windows 10

My computer is running slow, what steps can I do to fix it?

Below are recommendations that users can follow to help speed up a computer and make it run faster or determine why it's running slow. It should be noted that this page only covers an overall slow computer and not a computer that starts slow or has a slow Internet connection. To diagnose those issues, visit the following pages.
- What to do if my Windows computer starts slowly?
- Why is my Internet connection so slow?
If your computer has not been rebooted recently, reboot it before following the steps below. Rebooting the computer can fix many problems and is an easy first step.
- How to restart Microsoft Windows.
- How to restart a Mac.
Background programs
One of the most common reasons for a slow computer is programs running in the background . Remove or disable any TSRs and startup programs that automatically start each time the computer boots.
- How to identify what startup programs are safe to disable.
- How to remove TSRs and startup programs.
To see what programs are running in the background and how much memory and CPU (Central Processing Unit) they are using, open Task Manager . If you are running Windows 7 or higher, run Resmon to understand better how your computer resources are used.
If you have an antivirus scanner on the computer, spyware protection program, or another security utility, make sure it's not scanning your computer in the background. If a scan is in progress, it decreases the overall performance of your computer. If this is the case, allow the scan to complete, and the computer's performance should improve.
Disable Windows search indexing
The Windows operating system indexes content, like files and folders, to improve Windows search performance. Windows also caches some file properties to help improve some functionality of other programs. Unfortunately, search indexing and property caching can slow down the performance of Windows and programs running in Windows. Turning off the Windows search indexing can free up valuable system resources and improve overall performance.
To turn off Windows search indexing, follow the steps below.
- In the Windows search box , type services and press Enter , or select the Services app in the search results.
- In the Services window, find the Indexing Service or Windows Search service. Right-click that service and select Stop to turn off the service.
- Right-click that service again and select Properties .
- In the properties window, click the Startup type drop-down menu and select Disabled to prevent the service from starting each time you turn on your computer.

- Click OK to save the settings change.
Delete temp files
As a computer runs programs, temporary files are stored on the hard drive. Deleting these temp files help improve computer performance.
Windows computers
First, we suggest using the Windows Disk Cleanup utility to delete temporary files and other files no longer needed on the computer.

Unfortunately, the Disk Cleanup may not delete every file in the temp directory. Therefore, we also suggest deleting temporary files manually.
- Open the Start menu or press the Windows key , then type %temp% in the Search field.
In Windows XP and prior, click the Run option in the Start menu and enter %temp% in the Run field.
- Press Enter , and a Temp folder should open.
- Delete all files found in this folder, if any files are in use and cannot be deleted, they can be skipped.
Free hard drive space
Verify there is at least 500 MB of free hard drive space. The free space allows the computer to have room for the swap file to increase in size and give room for temporary files .
- How to find how much hard drive space is available.
- How to regain computer hard drive space.
- How to uninstall software in Windows.
Bad, corrupt, or fragmented hard drive
Check the hard drive for errors.
With Windows, run ScanDisk , chkdsk , or something equivalent to verify there is nothing physically wrong with the computer's hard drive .
- How to use Microsoft ScanDisk.
With macOS, access the Disk Utility program, and use the First Aid option to check the hard drive for errors.
- How to scan a drive for errors in macOS.
Make sure the hard drive is not fragmented
Run Defrag to help ensure that data is arranged in the best possible order.
- How to run Microsoft Defrag.
Test hard drive
Use other software tools to test the hard drive for errors by looking at the drive's SMART (Self-Monitoring Analysis and Reporting Technology).
- How to test a hard drive for failures.
Scan for viruses

If your computer is infected with one or more viruses , it may run more slowly. If your computer doesn't have an antivirus program installed, run Trend Micro's free Housecall online utility to scan and remove viruses on your computer. We also recommend you install an antivirus program for active protection against viruses.
Scan for malware
Spyware and other malware can cause computer problems, including slower performance. Even if an antivirus scanner is installed on the computer, we also recommend running a malware scan. Use the free version of Malwarebytes to scan your computer for malware.
Hardware conflicts
Verify that the Device Manager has no conflicts. If any exist, resolve these issues, as they could be causing your problem.
- How to Identify problems in the Windows Device Manager.
Update the operating system
To update a computer running Microsoft Windows, run Windows Update .
- How to update a Microsoft Windows computer.
To update a macOS computer, run Software Update. To upgrade the operating system, use the App Store.
- How to upgrade your Mac operating system.
Disable browser plug-ins
If your computer runs especially slow when using your web browser, consider turning off any browser plug-ins, add-ons, or extensions.
- How to disable or remove browser extensions.
Update your drivers
Ensure you have the latest drivers for your computer hardware, especially the latest video drivers . Having out-of-date drivers can cause an assortment of issues, including slow performance.
- What hardware device drivers should be updated?
Reboot the computer again
After making any of the changes above, reboot your machine.
Run a registry cleaner
If you have a Mac computer, skip this section, as there is no registry in macOS.
We usually do not recommend registry cleaners. However, if you followed all the steps above and your computer is still slow, try running a registry cleaner on the computer.
- Do I need a Windows registry cleaner?
Memory upgrade

You may need more memory if you have had your computer for over two years. Today, we suggest computers have a minimum of 4 GB of memory ( RAM ) for a 32-bit system and 8 GB for a 64-bit system. With enough memory for programs to run within memory, your computer doesn't need to swap information stored in memory to the swap file . If the hard drive light is continuously active, the computer is frequently swapping information between your memory and the hard drive.
- How to find how much RAM is installed on a computer.
- How much memory or RAM should my computer have?
- What type of computer memory to use in a memory upgrade.
Hard drive upgrade

One of the biggest bottlenecks of a computer is the hard disk drive . Upgrading from a standard hard drive (e.g., a 5400 RPM (Revolutions Per Minute)) to a solid-state drive ( SSD ) can drastically improve the computer's performance.
- How to find the hard drive type and specifications.
- How to install a hard drive or SSD.
Computer or processor is overheating
Make sure your computer and processor are not overheating. Excessive heat can cause a decrease in the computer's performance because most operating systems automatically reduce the processor's speed to help compensate for heat-related issues.
- What should be the temperature of my computer processor?
Dust, dirt, and hair can also constrict proper airflow inside your computer, which causes a computer to overheat. Ensure your computer case is clean and that the fans are not obstructed.
- Steps on cleaning your computer.
Increase or upgrade the processor speed

Increasing the processor's ( CPU ) speed can improve your computer's performance. There are two options for increasing processor speed: overclocking or upgrading.
Overclocking a processor means increasing its speed beyond what it's designed to run stably. While overclocking can increase the processor speed, the increase is often not significant, resulting in a 10% or 20% speed increase at most. Furthermore, the processor itself must be capable of being overclocked. You would need to find the specifications for the processor in your computer to determine if it can be overclocked. An overclocked processor generates more heat, thus requiring a more powerful heat sink and fan to pull the excess heat away from the processor.
A safer alternative to overclocking is upgrading the processor in your computer. You would need to get the specifications for your motherboard to determine what type of newer processor may be used in it. Then, install the new processor in place of the existing processor.
- How to install a computer processor.
Erase the computer and start over
If none of the solutions above resolve your issues, another option is to reinstall the operating system, or erase everything and start over.
- How to erase a hard drive and start over?
Erasing everything on your computer and reinstalling the operating system can increase performance by eliminating old software or drivers. Installing a fresh copy of macOS or Windows, programs, and the latest drivers helps verify no software-related issues are causing your computer to be slow.
Hardware issues
If your computer is still slow after trying the recommendations above, there's likely a more serious hardware-related issue (e.g., a failing component). Examples of failing hardware could include the hard drive , CPU , RAM (Random-Access Memory), motherboard , or other components.
Run hardware diagnostic tests using the UBCD ( Ultimate Boot CD ) utility to help determine if your computer has a bad piece of hardware.
Old computer

If your computer is over five years old, it performs slower than a new one. As more advanced programs are released, they are optimized to run more efficiently on newer computers. Older computers cannot run these new programs as well, which causes them to perform more slowly. Furthermore, new software tends to be more demanding, another problem for old hardware. We recommend you consider purchasing a new computer or upgrading your current one.
- How often should I buy a new computer?
Related information
- Other basic computer troubleshooting steps.
- What makes a computer fast and powerful?
- How to know which games my computer can run.
- How to increase processor speed.
- Should I change my Microsoft Windows page file size?
- See our slow definition for all links relating to slow computers.
- Hard drive help and support.
- Microsoft Windows help and support.
20 tips and tricks to increase PC performance on Windows 10
Does your computer feel sluggish? If so, use these tips to help speed up Windows 10.

Although Windows 10 is a fast operating system, the performance will start degrading at some point due to many factors, including compatibility issues and bugs, viruses or other types of malware, hardware problems, and more.
If your computer is getting slower, it does not necessarily mean you have to replace it with a new system. Simple software and hardware tweaks can significantly speed up the Windows 10 experience.
This guide will walk you through a long list of ways to speed up, optimize, and improve the performance of your computer — whether it has an older or modern hardware configuration.
1. Restart computer
Shutting down and restarting your computer is perhaps one of the first things you can do to speed up the system. (It might be obvious, but it's not the first thing that usually comes to mind.)
When the device restarts, the computer usually terminates the applications and processes. The data loaded into memory also gets cleared, which helps to resolve everyday performance and stability issues due to keeping the operating system running for a long time.
To shut down and restart your computer to speed up Windows 10, use these steps:
- Open Start .
- Click the Power button.
- Select the Shut down option.
- Quick tip: The "Sleep" or "Hibernate" options do not reset the system or clear the data in memory.

- Press the power button to turn on the computer.
After you complete the steps, Windows 10 will restart, and this time the performance should be noticeably improved.
Get the Windows Central Newsletter
All the latest news, reviews, and guides for Windows and Xbox diehards.
2. Disable startup apps
On Windows 10, many apps can register themselves to start automatically during startup and continue to run in the background, wasting system resources that can slow down the experience.
When you try to speed up Windows 10, it's recommended to disable all the apps running at startup, or at least those you do not use regularly.
To disable apps at startup on Windows 10 to speed up the system, use these steps:
- Open Settings .
- Click on Apps .
- Click on Startup .
- Click the Sort by menu and select the Startup impact option.
- Turn off the toggle switch for any unnecessary app (especially those marked as "High impact" by the system).

- Restart your computer.
Once you complete the steps, the computer should start faster than before. Of course, the improvement gain will vary depending on the apps you disabled and hardware configuration.
3. Disable apps relaunch on startup
Windows 10 has a feature that restarts the apps from your last session after a reboot, even before you sign in. Although this is a convenience feature that can speed up the process of quickly resuming where you left off, it can also impact system performance.
If the feature to restart apps at startup is enabled, you can disable it with these steps:
- Click on Accounts .
- Click on Sign-in options .
- Under the "Restart apps" section, turn off the toggle switch.

After you complete the steps, the apps running on the desktop won't reopen during the next restart, speeding up the overall system performance.
4. Disable background apps
On Windows 10, some apps can continue to run tasks in the background even when you're not using them. If you want to speed up your computer as much as possible, you can decide which apps can operate in the background or disable the feature to block all apps.
To stop apps from running in the background to speed up Windows 10, use these steps:
- Click on Privacy .
- Click on Background apps .
- Turn off the toggle switch for the apps you want to stop running in the background.

- (Optional) Turn off the "Let apps run in the background" toggle switch to disable the feature for all modern apps (excluding win32 apps).
Once you complete the steps, apps will not waste any more resources when you do not actively use them to increase system performance.
5. Uninstall non-essential apps
Typically, new devices come with applications you do not need, including the usual bloatware and system tools you will never use, which will only waste space on the drive and resources. When trying to increase the system performance, you should always remove those non-essential applications.
To uninstall non-essential apps on Windows 10, use these steps:
- Click on Apps & features .
- Select the app to remove.
- Click the Uninstall button.

- Click the Uninstall button again. Or continue with the on-screen directions to finish removing the app.
After you complete the steps, you may need to repeat the instructions to uninstall other non-essential apps from the device.
6. Install quality apps only
Old and poorly designed apps and apps that load unnecessary features can negatively affect the performance of your computer. Also, just because an app comes from a company you trust does not mean it's a good app.
Only install good apps if you want to keep your device healthy and snappy. Typically, you want to install apps available from the Microsoft Store because they've been reviewed for security and performance. If the app is not in the store, only download apps from trusted sources and confirm they work on Windows 10.
If you are unsure, you can research online to get more information about the app. For example, you can check the software vendor's forums to check whether users are experiencing issues or post a question in the forums to find out more details.
To install apps from the Microsoft Store on Windows 10, use these steps:
- Open Microsoft Store .
- Use the search box to find an app.
- Select the app from the result.

- Click the Install button.
Once you complete the steps, the app will install on your device. If the app is not in the Microsoft Store, download the installer from the trusted source, and follow the vendor support website steps to install and configure the program.
7. Clean up hard drive space
Whether you have a traditional Disk Hard Drive (HDD) or Solid-State Drive (SSD), it's never wise to run Windows with a full hard drive because it will affect performance.
If the device has relatively new hardware and you notice apps, managing files, and other tasks are struggling to complete, it is likely because the drive is running out of space. Usually, this becomes more evident after the drive is filled with around 70 percent of the total capacity.
One way to prevent the storage from impacting performance is to use the Storage settings to delete temporary and unnecessary files to reclaim space.
To free up space with to speed up Windows 10, use these steps:
- Click on System .
- Click on Storage .
- Under the "Local Disk" section, click the Temporary files option. (If you do not see the option, click the "Show more categories" option to view the remaining items in the list.)

- Check the files you want to delete to reclaim space and improve system performance.
- Quick tip: When selecting the temporary files, remember that checking the Downloads option will delete everything inside the "Downloads" folder. If you want to keep these files, do not check this option. Also, you can select to delete the "Previous Windows Installation(s)" item (if applicable).
- Click the Remove files button.

Once you complete the steps, the device's performance should be noticeably improved if the system can reclaim enough space.
In addition to using the Storage settings, you can also use the OneDrive Files On-demand feature to free up space. You can use these instructions to set up Files On-demand on your device.
If you cannot reclaim enough space, use this guide to find more ways to optimize the storage on your computer.
8. Use drive defragmentation
Organizing the data can increase responsiveness if you have a computer with older hardware and a traditional rotating platters hard drive.
To run the defragmentation tool to speed up the system drive, use these steps:
- Under the "More storage settings" section, click the Optimize Drives option.

- Select the drive that needs defragmentation.
- Click the Optimize button.

After you complete the steps, the tool will rearrange the files to make them accessible more quickly the next time they are needed, translating into noticeable performance improvement. The only caveat is that the process can take a long time, depending on the data stored on the drive. (If you have an older system, it is best to leave the process running overnight.)
If you have a computer with an SSD, using the defragmentation tool will run the trim command to inform the storage device of the blocks with data that can be safely erased. This process can significantly improve performance because the drive won't have to erase the blocks during the writing data process.
9. Configure ReadyBoost
In addition, to use the defragmentation tool on computers with older hardware, you can also use the ReadyBoost feature to boost performance.
ReadyBoost is not new to Windows 10. It's been around for years as a feature that uses a flash drive or SD card to cache files to boost the overall system performance. (If the device has an SSD, this feature won't be available since it won't offer additional benefits.)
To enable ReadyBoost to speed up your computer, connect a USB flash drive and use these steps:
- Open File Explorer .
- Click on "This PC" from the left pane.
- Under the "Devices and drives" section, right-click the USB flash drive and select the Properties option.

- Click on the ReadyBoost tab.
- Select the "Dedicate this device to ReadyBoost" option.

- Click the Apply button.
- Click the OK button.
Once you complete the steps, the removable drive should help boost the computer's performance.
We recommend the SanDisk Extreme Go if you need a USB flash drive to use with ReadyBoost because of its storage capacity, reliability, and price.

Reliable storage
The SanDisk Extreme Go (CZ800) is an excellent choice to use with the ReadyBoost feature. The USB drive offers up to 128GB of storage with fast transfer speeds of up to 200MB/s, it's backed by a strong brand, and it is affordable.
10. Perform malware scan
When a device starts to run very slowly, this could indicate a malware infection. Typically, viruses, spyware, and other malware types are known to take up many system resources making a device unusable.
Although Windows 10 comes with the Microsoft Defender Antivirus, it does not guarantee that malware will make its way into the system. If you suspect the device has been infected, you should try running a full virus scan.
To run a full virus scan on Windows 10, use these steps:
- Search for Windows Security and click the top result to open the app.
- Click on Virus & threat protection .
- Under the "Virus & threat protection updates" section, click the "Check for updates" option.

- Click the Check for updates button.

- Click on Virus & threat protection from the left pane.
- Under the "Current threats" section, click the Scan options option.

- Select the Full scan option.

- Click the Scan now button.
After you complete the steps, Microsoft Defender Antivirus should detect and remove any malware impacting performance.
Microsoft Defender Offline scan
If you cannot use the default antivirus because it's not running, updates don't work, or scanning problems, the device probably has one of those tricky malware that cannot be removed while the system is running. If this is the case, the antivirus can perform an offline scan.
To complete a Microsoft Defender Antivirus offline scan, use these steps:
- Select the "Microsoft Defender Offline scan" option.

Once you complete the steps, the system will automatically restart into the offline experience of Microsoft Defender, and it will perform a scan to detect and remove any threats that could not be removed while Windows 10 was running.
If you use other anti-malware solutions like Malwarebytes, Bitdefender , Trend Micro , or Norton , check their support documentation to remove viruses and other malicious programs.
11. Install latest update
Microsoft proactively releases updates to address problems, add new features, and patch security vulnerabilities. While sometimes updates are the reason for things not working correctly, maintaining the update can speed up your computer.
Install cumulative updates
On Windows 10, updates happen automatically, but depending on the update or the device's configuration, they don't always download and install as soon as they become available. If your computer is running slower than usual, it could be possible that an update is available to improve performance.
To install updates manually on Windows 10, use these steps:
- Click on Update & Security .
- Click on Windows Update .

- (Optional) Under the "Optional updates available" section, click the "Download and install now" option if there's a cumulative update available.
- Click the Restart now button.
After you complete the steps, the new update should help to improve system performance.
Upgrade to latest version
If the device has an older version of Windows 10, upgrading to the most recent version can help speed up the performance or introduce new features that could make you more productive to get work done faster.
To upgrade to the most recent version of Windows 10, use these steps:

- Under the "Feature Update" section, click the "Download and install" option if a new version is available. (If the option is unavailable, the computer already has the most recent version installed, or the latest version is not yet fully compatible with your hardware configuration.)
Once you complete the steps, the device will restart to apply the new version, improving the overall system performance.
Update device drivers
If your computer is running slow because of a compatibility issue or a poorly designed driver, you could resolve the issue by installing the most recent or pre-release version of the driver from the manufacturer's support website manually.
Before proceeding, you need to download the latest available driver package from the manufacturer's website, uncompress the files using the self-extracting or .zip extension file , and then use these steps:
Quick note: It is recommended to use the manufacturer support website instructions to complete this task. If instructions are not available, you can refer to the steps below.
- Search for Device Manager and click the top result to open the app.
- Expand the branch for the device driver causing problems. For example, Display adapters .
- Right-click the device and select the Update driver option.

- Click the "Browse my computer for driver software" option.

- Under the "Search for drivers in this location" section, click the Browse button.

- Select the folder with the device driver installation files.
- Click the Next button.
- Click the Close button.
After you complete the steps, the new version of the driver will install to fix compatibility or any other issues affecting the system and boost performance.
On Windows 10, there are multiple ways to update device drivers. If you need additional assistance, you can use this guide outlining different methods to update a driver manually .
Update applications
Outdated apps can slow down a computer, usually due to bugs or compatibility problems with a newer version of Windows 10.
While apps from the Microsoft Store can update automatically, you have to install updates manually for many traditional desktop apps. If you have an app affecting performance, check your software support website for a newer update and the instructions to apply it.
To update Microsoft Store apps manually on Windows 10, use these steps:
- Click the Library button from the bottom-left corner.
- Click the Get updates button.

Once you complete the steps, if updates are available, they will download and install automatically.
12. Switch to high performance power plan
Windows 10 includes different plans ( Balanced , Power saver , and High performance ) to optimize the power usage on your computer. If you want to boost the system performance, use the "High performance" option since it allows the device to use more power to operate faster.
To select a new power plan on Windows 10, use these steps:
- Click on Power & sleep .
- Under the "Related settings" section, click the "Additional power settings" option.

- Click the "Show additional plans" option (if applicable).
- Select the "High-performance power" plan.

If you don't see any plans, you may need to create a custom power plan to improve performance using the "High performance" settings.
On laptops, you can also change the mode to increase performance by tapping or clicking the battery icon in the taskbar's notification area and selecting the Best performance option using the slider.
13. Disable system visual effects
On Windows 10, you will find many visual effects, from animations to shadows to more advanced visual elements, such as blur and transparency, and part of the Fluent Design language.
Although these effects can make the experience more visually appealing, they also require resources that can slow down computers with older hardware. However, you can disable these effects to save resources and make Windows 10 feel faster.
Disable visual effects
To disable animations, shadows, smooth fonts, and other effects on Windows 10, use these steps:
- Click on About .
- Under the "Related settings" section, click the "Advanced system settings" option from the right pane.

- Click the Advanced tab.
- Under the "Performance" section, click the Settings button.

- Click the Visual Effects tab.
- Select the "Adjust for best performance" option to disable all the effects and animations.
- Quick tip: Using this option will also affect the way fonts are rendered. If you want to keep fonts crisp and more readable, select the Custom option, clear all the settings, but leave the "Smooth edges of screen fonts" option checked.

Once you complete the steps, the visual effects will be disabled, and interacting with elements (windows and menus) will feel more responsive.
Disable transparency effects
To speed up Windows 10 disabling transparency effects, use these steps:
- Click on Personalization .
- Click on Colors .
- Turn off the Transparency effects toggle switch.

After you complete the steps, Windows 10 will feel faster, and the device will free up some system resources for more critical tasks.
14. Disable search indexing
Although Windows 10 search is an important feature to find apps, settings, and files, the indexing process can sometimes consume resources that can negatively impact the experience – especially on low-end devices. If you want to improve the system performance as much as possible, you can exclude specific locations to prevent the indexer from using resources excessively.
To configure the indexer to improve system performance on Windows 10, use these steps:
- Click on Search .
- Click on Search Windows .
- (Optional) Turn on the "Respect Device Power Mode Settings" toggle switch.
- Quick note: When you enable this feature, the system will temporarily throttle or pause search and updates to the index database to extend battery life while on battery power.
- Under the "More Search Indexer Settings" section, click the "Advanced Search Indexer Settings" option.

- Click the Modify button.

- Click the Show all locations button.

- Under the "Change selected locations" section, clear all the selected locations.

Once you complete the steps, Windows Search will continue to run on your device, but Windows 10 will no longer index the specified locations, improving the overall performance.
15. Increase page file size
On Windows 10, the "page file" is a hidden file on the drive that works as memory, and it acts as an overflow of the system memory, which holds data for apps currently running on the computer.
If you increase the size of the paging file, it can help boost system performance.
To modify the page file to increase performance on Windows 10, use these steps:
- Under the "Related settings" section, click the "Advanced system settings" option.
- Under the "Virtual memory" section, click the Change button.

- Clear the "Automatically manage paging files size for all drives" option.
- Select the Custom size option.
- Specify the initial and maximum size for the paging file in megabytes.
- Quick tip: Typically, it is recommended to use a number one and a half times the total available memory for the "Initial size" and three times of available memory for the "Maximum size" when possible. You can confirm the total amount of memory available on the About settings page.

- Click the Set button.
- Click the OK button again.
After you complete the steps, the device will restart, and you should notice a performance boost while using apps. The performance will be more noticeable when configuring the page file in a Solid-State Drive.
If the new settings are causing issues or performance does not improve, you can always revert the changes with the same instructions outlined above. However, on step 9 , select the System managed size option and check the "Automatically manage paging files size for all drives" option.
16. Restore previous working state
Sometimes your device will slow down after installing a new system update, driver, or application. If you cannot determine why the computer is slow, you can undo any changes by restoring the previous working state using a System Restore point.
To apply a restore point to fix performance issues on Windows 10, use these steps:
- Search for Create a restore point and click the top result to open the System Properties app.
- Click the System Protection tab.
- Click the System Restore button.

- Select the most recent restore point to resolve the performance issue.

- Click the "Scan for affected programs" button to identify the apps that will be removed if they were installed after the restore point was created.
- Click the Finish button.
Once you complete the steps, the computer will roll back to a previous state bringing back when performance was not an issue.
System Restore is not enabled by default. This means you must set it up before you can revert system changes .
17. Repair Windows setup files
If the computer shows performance issues, it could be due to corrupted system files. If this is the case, you can use the Deployment Image Service and Management Tool (DISM) and System File Checker (SFC) command-line tools to fix the setup without reinstallation.
Fix installation files with DISM
To use DISM to repair corrupted system files to improve performance and stability on Windows 10, use these steps:
- Search for Command Prompt , right-click the top result, and click the Run as Administrator option.
- Type the following command to repair the installation and press Enter : DISM /Online /Cleanup-image /Restorehealth

After completing the steps, the device should operate normally if the utility has finished successfully. You should also use the SFC command-line tool if the scan had issues. (You can always learn more about this feature in our DISM walkthrough guide .)
Fix installation files with SFC
To use SFC to repair corrupted system files on Windows 10, use these steps:
- Search for Command Prompt , right-click the top result and click the Run as Administrator option.
- Type the following command to repair the installation and press Enter : sfc /scannow

Once you complete the steps, the tool should be able to fix any problem affecting performance.
You can check this guide with more details on using the System File Checker tool, including the steps to view scan details, repair individual files, and perform an offline system repair.
18. Reset device to factory defaults
Alternatively, you can reset the computer to the factory default settings to start fresh with a clean copy of Windows 10 to improve startup and shutdown, battery life, and overall system performance.
Warning: If you choose to erase your files, you should consider creating a full backup or copying your files to an external drive before proceeding.
To reset a device to its default settings on Windows 10, use these steps:
- Click on Recovery .
- Under the "Reset this PC" section, click the Get started button.

- Click the Keep my files button. (You can also click the Remove everything button to erase everything and install a clean copy of Windows 10.)

- Select the Local reinstall option.
- Quick tip: If you want a clean installation of Windows 10 without the apps that came pre-installed with the device or if the Local reinstall option does not work, select the Cloud download option.

- Click the Reset button.
After you complete the steps, Windows 10 will be reinstalled, removing previous configurations, settings, and apps to help you boost system performance. If you select the option to remove everything, remember to restore your files from a previous backup after the process.
If you want to install Windows 10 from scratch, check out our in-depth guide to do a clean installation.
19. Upgrade to faster drive
If you are not noticing performance improvements even after the reset process, it might be time to upgrade the hard drive to an SSD.
Upgrading to a Solid-State Drive is perhaps one of the best ways to increase performance on older hardware. Usually, SSDs do not have moving parts like traditional hard drives, meaning data can be read and written much faster.
When you replace an HDD with an SSD , Windows 10 will boot noticeably faster, apps will launch and run quicker, and the overall performance will be snappier and faster.

If you plan to upgrade to an SSD, we recommend the Samsung 860 EVO because of its fast performance, reliability, and five-year warranty.

Blazing speeds
The Samsung 870 EVO is one of the most popular Solid-State Drives (SSD) because of its reliability and price. It also offers excellent performance (up to 560MB/s read and 530MB/s write speeds) compared to traditional hard drives, and every drive is backed with a five-year warranty.
20. Upgrade system memory
Insufficient system memory can also be why your computer is running slow, especially if you work with multiple apps and many open tabs in the web browser.
To determine whether your computer needs more memory, you must first confirm the total amount of memory installed on the device and how the system uses it.
To view the total amount and current memory usage on Windows 10, use these steps:
- Search for Task Manager , and click the top result to open the app.
- Click the Performance tab.
- Click on Memory from the left pane.
- On the right, check the total amount of RAM in the top-right corner, and in the bottom-left corner, under "In use (Compressed)," you can find the out total amount of memory currently in use.

If the total amount of "in use" memory is constantly high (around 80 percent), it's time to add memory sticks.
Although adding more memory is relatively straightforward, finding a compatible kit can be tricky. Always use Task Manager to find out the type of memory you need and whether any slots are available . It is also recommended to check your device manufacturer's website to find more specific information about the memory requirements.
More resources
For more helpful articles, coverage, and answers to common questions about Windows 10, visit the following resources:
- Windows 11 on Windows Central — All you need to know
- Windows 10 on Windows Central — All you need to know

Cutting-edge operating system
A refreshed design in Windows 11 enables you to do what you want effortlessly and safely, with biometric logins for encrypted authentication and advanced antivirus defenses.

Mauro Huculak is technical writer for WindowsCentral.com. His primary focus is to write comprehensive how-tos to help users get the most out of Windows 10 and its many related technologies. He has an IT background with professional certifications from Microsoft, Cisco, and CompTIA, and he's a recognized member of the Microsoft MVP community.
- 2 Microsoft will put the next Call of Duty on Xbox Game Pass, reveal planned for Games Showcase
- 3 This may well be the cheapest I've EVER seen the Xbox Elite Series 2 controller
- 4 Ubisoft's XDefiant has one huge advantage over Call of Duty
- 5 Microsoft VP describes the new iPad Pro as having a "3 legged OS" and it sums up my own past experience better than I ever could
PC running slow? Here's how to speed things up
You don't need to throw the whole computer away. We'll walk you through some easy ways to get your PC back in shape.

There's nothing more frustrating than a sluggish computer.
Whether you're using your PC to get work done or have fun , a slow computer can make life way more frustrating than it needs to be. Laggy performance speed can render your computer pretty much useless -- especially when you can barely open a window, load a website or even start up your system.
If you've been suffering lately, now's the perfect time to take a few minutes to go through some of the tried-and-true troubleshooting steps. You can make it so much easier to use your PC. You can give yourself a temporary reprieve from saying bad things about your computer under your breath. Better yet, you can do all of it for free.
I promise it's doable on your own. Well, technically on your own -- I'll walk you through how to fix your computer's sluggish performance by digging into Task Manager, controlling how many apps open at startup and a few other tips and tricks I've learned along the way.
And if you do end up needing to purchase a whole new computer, these are the best desktop PCs for 2022 and the best laptops for 2022 .
Task Manager is like a magic crystal ball
Think of Task Manager as a window into your PC's health. The app gives you insight into what's taxing the processor, how much memory something is taking up and even how much network data a program has used.
An easy way to open Task Manager in Windows 10 is to right-click on the Taskbar and select Task Manager from the list of options. In Windows 11, click on the magnifying glass on the Taskbar and search for Task Manager .
Task Manager's default view doesn't show a lot of information beyond which apps are currently running (handy if you already know if you want to close one out). To view what really matters, click More Details in the bottom left corner.

Use Task Manager to monitor your system.
By default, this list is broken down into Apps and Background Processes. It's refreshed constantly, with the various columns constantly updating. My advice is to let Task Manager run for a few minutes and watch it. Watch for apps that shoot up to the top of the list, then disappear a few seconds later. Look for processes that stay at the top of the list with high memory or CPU use. Not sure what a process is? Google its name to find out more.
To close an app or process that you suspect may be partly responsible for slow performance, click on the listing then click End Task .
Also read: Want to download Windows 11? You need to do these two things first
Three more common reasons for a slow PC
There are far too many apps and services to create a succinct list of what's likely slowing down a PC, but that doesn't mean there aren't likely culprits. Here are some of the top issues that we all experience on a PC.
Antivirus scans
After watching your system running slow with Task Manager open, you may have noticed that your antivirus software is routinely near the top of the list. Antivirus software can slow down your system while it's actively scanning your computer for malware and viruses.
Instead of letting your antivirus program scan whenever it sees fit, schedule it to run at times when you're not likely to be using your PC, such as overnight or during your lunch hour. Changing the schedule for scans will depend on the program you use, but generally, you can open the app and go to the settings pane.

Startup apps can slow everything down.
Too many apps are running at login
If your PC takes forever to be responsive after you log into your Windows account, then you probably have far too many apps trying to run at startup. You can edit the list of apps and services that begin running when you log in to your computer by opening Task Manager and clicking on the Startup tab.
Go through the list and remove anything that you don't need to have loaded and ready the moment your PC turns on by clicking the app name, followed by Disable .

That's a whole lot of Chrome in Task Manager.
Some web browsers are resource hogs
Your web browser could be the culprit, especially if you've lost count of the number of windows and tabs you have open. Each browser window and tab takes up memory and processing power and, over time, that will begin to slow down your PC.
You can view a breakdown of extensions and tabs that could be to blame in Task Manager by clicking on the arrow next to your browser's name. Alternatively, if you use Chrome, it has a built-in task manager of its own. Launch it by pressing Shift+Esc while using Chrome, or click on the menu button > More Tools > Task manager .
If you find that your browser is often causing your PC to slow to a crawl, try a different browser or keep an eye on how many tabs or windows you have open at a given time.

Pausing OneDrive sync can speed up your PC.
Battle-tested solutions
There's a wide range of methods available for troubleshooting and speeding up your PC. Below are some steps to take that should, at the very least, temporarily speed up your slow computer:
- Close running apps when you're done. Make sure they're not running in the notification tray (next to the volume and Wi-Fi indicators). When you close some apps, such as Slack, they keep running in the background. Usually, you can completely close apps that keep running with a right-click on the app icon and select quit or exit.
- Pause OneDrive syncing . This is something even Microsoft admits can slow down your computer. Pause OneDrive by clicking on the OneDrive icon in the notification tray, select More and then Pause syncing .
- Check available storage space and hard drive health. If your hard drive or SSD is running out of space or is getting old, it could be failing. I use CrystalDisk Info (Standard Edition) to get basic insights into my drives. It's a free app that quickly scans your drives and tells you their current health status. If you aren't comfortable testing your hard drive, take your computer to a technician who can properly diagnose the issue and, if required, upgrade your storage.
- Regularly turn off your computer. Don't just restart it, but completely power it off and walk away for a few minutes. This gives your computer a chance to clear out memory and start fresh the next time it's turned on.
If none of the above suggestions speeds up your computer to a level that you're happy with, you can try reducing animations, changing themes and toggling other Windows 10-specific settings . If you're trying to get remote help, make sure you know the best way to take screenshots on Windows 10 . If you're more of an Apple household, you're in luck: We have recommendations for speeding up a slow Mac , too.
Currently shopping for
Choose a different computer, how to fix a slow computer.
It’s a common scenario: your computer slows down, becomes unresponsiveness with long load times, and makes the simplest tasks frustrating. That’s when you ask yourself — how can I fix a slow computer?
Understanding and fixing a slow computer can seem like a daunting task. Happily, it’s not! This guide will show you how to fix a slow PC with six simple steps, so let’s jump straight in!
Looking to speed up your laptop instead? Check out our complete guide on How to Make Your Laptop Run Faster.
Why is my computer so slow?
If you notice your computer starting to slow down, it’s likely because you have too many programs running at once. Powering several programs at once takes a lot of processing power, impacting performance and speed. There are two ways to fix this: first, decreasing the number of programs running, and second, increasing your computer’s memory and processing power.
Whether you need to disable some start-up programs, defrag your hard drive, or upgrade your hardware, this article will help you discover why your computer is running slowly and how to fix it.
1. Identify programs that slow down your computer
There are two ways to fix this issue: decrease the number of programs running, or increase your computer’s storage and processing-memory power.
How to find out which programs are slowing down your PC
Your computer might be being bombarded by high-level apps that start automatically and run in the background, or maybe by a program you opened and then forgot to close.
Closing, or even removing unnecessary programs, can instantly speed up a slow computer.
To do this, simultaneously press Ctrl, Alt , and Delete on your keyboard, and select Task Manager . On the Processes tab, you'll see which programs are open, and how much CPU and memory they’re using. You can then close any programs you're not using.
If they're programs you rarely use or no longer need, then also consider uninstalling them.
How to disable start-up programs
Some computer programs automatically open when you start up your device. Disabling these start-up programs is another way to speeding up your computer.
Go back into Task Manager , and the Start-up tab will show you any programs set to open when you start your computer. Consider what you really need to open automatically, then turn off the other programs using the Disable button in the bottom corner.
2. Check your web browser and add-ons
If your computer's running slowly while you surf the internet, you should make sure you're running the latest version of your web browser. If there’s an option to install new versions automatically, then enable it.
Another browser hack is to avoid having unnecessary add-ons and extensions. Depending on your browser, you should be able to find a menu called Add-ons or Extensions to view and delete any you no longer use.
3. Defragment your hard disk drive (HDD)
HDDs save data in small groups across the disk. Over time, different pieces of related data end up spread all over the place. It then takes longer for the system to find each piece of data and bring it back together when you open a program or app.
Defragmenting (or defragging) your HDD will bring related bits of data back together, and speed up your system.
Note: SSDs do not need to be defragmented since their technology is entirely different than HDDs.
To defrag your HDD, click on the Start menu or Windows button, select Control Panel , then System and Security . Under Administrative Tools , click on Defragment your Hard Drive.
You can choose for the process to run on a regular schedule, or you can click Analyze Disk and determine if the process needs to be run immediately.
4. Identify hardware limiting your computer's speed
Identifying and replacing outdated hardware can make an older computer feel brand new! An upgrade can also be significantly less expensive than buying a new computer.
Your storage drive and memory (RAM) are the two key pieces of hardware most related to the speed of your computer. A dated storage drive will slow down your performance, even when defragmented, while too little memory offers limited resources to run multiple programs.
5. Upgrade storage with an SSD
The critical difference between a traditional HDD and an SSD is the technology behind it.
An HDD has moving parts, which mechanically move an actuator arm across a spinning platter to find each data portion. In comparison, an SSD accesses data near instantly using flash memory chips, retrieving things like documents, images, and videos more quickly while using less power.
There are several varieties of SSDs you can explore to boost a slower PC. Crucial offers both internal NVMe SSDs and SATA SSDs ; however, you'll need to consider a variety of factors first, such as compatibility , your system requirements, and your budget.
External SSDs offer all the benefits of internal SSDs without the need to swap out the drive inside your computer. Plus, they can be used with multiple systems and devices via an external USB cable.
Use the Crucial® System Selector or System Scanner to find the right SSD to speed up your system.
6. Add more memory
Unlike the long-term storage of your SSD or hard drive, RAM acts as short-term storage, temporarily holding current data so that it can be quickly accessed.
Think of it as a desktop space where you have laid out the files, notes and tools that you are using right now.
Every time you do one of the following things, you're using RAM memory:
- Moving your mouse
- Opening and switching between internet browser tabs
- Typing an email
- Creating a spreadsheet
- Editing photos or videos
- Playing a game, listening to music, or watching a video
The more RAM you have, the more of these tasks your computer can handle at once. Adding more memory is a straightforward way to fix recurring slowdowns.
Upgrading your memory may sound intimidating, but it's easy. With a screwdriver, your owner's manual and a good how-to-install RAM guide , you’ll have new memory in your computer within just a few minutes. No computer tech or prior knowledge required!
The bottom line — what to do if your computer is running slow
You don't have to make monumental changes to fix a slow computer.
With a few small, manageable changes, you’ll see immediate and lasting results.
These changes and upgrades will make your PC faster, and ultimately save you time, stress and money!
Ready to upgrade but not sure what you need? Let's find out:
3 step system selector.
Fill in your system details below and we'll show you 100% compatible upgrades, guaranteed when you buy from Crucial.
- Enter manufacturer:
- Enter product line:
- Enter model:
Get that new PC feeling!
Does your slow PC need a boost? Millions of customers have trusted the Crucial System Scanner to find memory and storage upgrades. In minutes, learn how much memory and storage your PC or Mac can support, then buy 100% guaranteed compatible upgrades with confidence.
I've read and agree to the terms & conditions
Don't want to scan your system?
Related videos
Crucial How To: Installing Crucial RAM into a desktop
Crucial how to: installing a crucial® m.2 pcie nvme ssd - part 1, level up with crucial: ddr5 ram explained.
We're sorry, but there is not enough quantity in stock to complete this order
How-To Geek
10 quick steps to increase pc performance.
Want a faster PC? Here are some quick tips for boosting performance.
Quick Links
Check your startup programs, adjust your restart settings, remove bloatware and superfluous apps, check your storage space, tweak the power plan, shut down onedrive, stop background updates, speed up menus and animations, recovering from a sudden slow down, hard drive tips, consider upgrading your pc's hardware.
We live in the future. Your living room speaker turns on the coffee pot, a robot vacuums the house, and the thermostat knows when you get home. But even in this amazing era of automation, your PC still needs some manual help when it slows down.
When a computer is slow to boot up, a common ailment is having too many startup programs. To fix this in Windows 10, press the Windows key, and then type (and select) Task Manager.
When the Task Manager opens, click the "Startup" tab . Here, you'll see all the programs that are set to turn on when Windows boots up. Take a look at the column on the far right labeled Startup Impact. Examine anything rated as having a "high" or "medium" impact and decide whether it's really important.
Do you really need Steam to start up when you sign in to your PC, for example? If all you do on this PC is game, then the answer might be yes. If it's a multi-purpose PC, the answer is almost definitely "no." You don't want to turn off anything that's mission-critical, even it does have a "high" impact, but take a good look at everything.
Once you've decided what will be turned off, select them one at a time with your mouse and click Disable in the lower right corner.
Related: How to Manage Startup Applications in Windows 8 or 10
When your computer restarts automatically because of a system or program update, by default Windows 10 tries to reopen everything that was open on the desktop before the shutdown. It's a nice feature, but it can also impact performance, and turning it off is easy.
Open the Settings app (click "Start" and then select the settings cog) in the lower left of the Start Menu. Inside the Settings app, select Accounts > Sign-In Options. Then under Privacy turn off the slider labeled "Use My Sign-In Info To Automatically Finish Setting Up My Device And Reopen My Apps After An Update Or Restart."
Related: How to Stop Windows 10 From Reopening Your Previous Applications After Restarting Your PC
Startup apps are just half the problem. Some programs have little helper utilities that run in the background even when an app isn't running. You don't want to turn these off manually unless you're familiar with what they're doing. A better approach is to just unload the apps that you never or rarely use, including bloatware applications that came preinstalled on your PC .
Right-click on any superfluous Windows 10 Store apps in the Start menu and select "Uninstall." This works for regular desktop apps as well, but we still recommend the old school Control Panel method for removing those.
Related: How to Open the Control Panel on Windows 10
Windows 10 provides more built-in information for viewing and managing your PC's storage . To find it, open the Settings app again and select System > Storage. This section shows a summary of your usage of the system's primary storage, including how much space apps and features are using, as well as your large files and folders, temporary files, and so on. Typically, the storage usage should have a blue bar indicating how close to full it is. When the bar turns red, you have a problem and need to start unloading files to other drives (or delete them).
Using this feature can help you figure out what to delete (or unload), but there are a few things you don't want to touch. First, even if you see a ton of them in the "Apps & features" section, do not uninstall any of the Microsoft Visual C++ redistributables . It looks redundant, but different programs depend on different versions.
Also, if you see anything in the "Other" section any folders labeled AMD, Nvidia, or Intel should be left alone. You also don't want to touch the System & Reserved section.
In general, if you don't know what something does, then don't uninstall or delete it.
In this section, you can also activate a feature called Storage Sense, which automatically deletes temporary files and other junk when it's not needed.
Related: Use Windows 10's New "Free Up Space" Tool to Clean Up Your Hard Drive
By default, Windows 10 uses a "balanced" power usage plan that can sometimes hamper performance. The balanced plan keeps your CPU speed lower when it's not in use, and puts key components in their respective power-saving modes during times of low demand.
You can ratchet things up by opening the Control Panel (click "Start" and type "Control Panel"), and select "Power Options." On the next panel, click "Show Additional Plans" and then select the "High Performance" option.
Related: Should You Use the Balanced, Power Saver, or High Performance Power Plan on Windows?
If you're not using OneDrive, this is an easy way to cut down on superfluous system resource usage. The easiest thing to do is turn off OneDrive under the Startup tab in Task Manager---if it's there. You can also open the Start menu, and under the "O" section, right-click "OneDrive" and select "Uninstall." This will remove OneDrive from your PC , but all your files will still be on OneDrive.com.
It's wise to copy your OneDrive files to another section of your PC before you do this.
Related: How to Disable OneDrive and Remove It From File Explorer on Windows 10
There is something you can do to stymie Windows Update and other background download features in Windows. Left unchecked, these processes may drag down your connection performance, as well as the machine's. Set your home Wi-Fi or wired Ethernet connection as metered from Settings > Network & Internet > Wi-Fi, or Settings > Network & Internet > Ethernet.
This tells Windows 10 not to download any large updates while on that Wi-Fi connection---at least for a little while. Eventually, it will force an upgrade, but this setting helps most of the time. It also stops some apps from pinging servers, which can help reduce the performance of background processes.
Related: How, When, and Why to Set a Connection as Metered on Windows 10
Like other versions of the operating system, Windows 10 uses visual effects that can reduce performance. These are items such as animations , window translucency, shadow effects, and so on.
To open this search for "Performance" in the taskbar, and then select "Adjust The Appearance And Performance Of Windows."
By default, Windows 10 tries to pick the settings that are best for your PC, but you can also select the option that says "Adjust For Best Performance," then click "Apply." Another alternative is to go through the list manually and uncheck what you don't want to use.
This change probably won't do much on mid-range and high-end machines, but budget devices with limited ram and weaker CPUs can benefit.
Related: How to Speed Up Menu Animations in Windows
If your PC is suddenly slowing down, there are two culprits to look at right away. First, open the Settings > Update & Security > View Update History. Were any updates installed around the time your PC started slowing down? If so, search online by the update's KB number (it's in brackets at the end of each update title), and see if anyone else is complaining about it on PC news sites, forums, or Reddit posts.
If a good amount of people are having trouble since that update, then you may need to uninstall it or wait for Microsoft to send a fix---that could take a while.
Related: How to Roll Back Builds and Uninstall Updates on Windows 10
Next, run a standard scan for malware, and then do an offline scan with Windows Defender to make extra sure that everything is fine.
Related: How to Find and Remove Malware With Microsoft Defender Offline
This last tip doesn't affect PCs with solid-state drives (by the way, if you don't have an SSD yet, we highly recommend getting one ), but it's good advice for those with hard drives.
Spinning drives can do with a little extra maintenance from time to time. These are good old fashioned moves that longtime PC users should be familiar with.
First, use the Defragment and Optimize Drives utility. Search for it in the taskbar and it will pop up. Select the drives you want to deal with, and then select the "Optimize" button. You can also turn on automated optimization. Windows defragments and optimizes your drives automatically , but it's a good idea to check and run it manually if your PC is slow.
Next, is the disk cleanup utility ---again, search for "Disk Cleanup" from the taskbar or Start menu's search box. Choose the drive you want to clean up and run it.
There's also the ReadyBoost feature , which uses a USB stick as a cache. As we've discussed before, however, we're not convinced this will do much to boost performance.
These tips are only a small portion of what you can do. Other good ideas including looking at the Page file , turning off search indexing , and updating component drivers .
If these steps don't show enough of a boost in performance, then it might be time to look at upgrading your PC hardware . Switching to an SSD or an M.2 drive offers the most noticeable improvement, while installing more RAM if your PC has 8GB or less is also a good idea.
Related: The Five Best PC Upgrades to Improve Performance
- Best Mac Apps
- Unknown Caller
Digital Trends may earn a commission when you buy through links on our site. Why trust us?
Is your PC acting up? Here’s how to fix it
Whether you have one of the best desktop computers or a 10-year-old PC, things can go wrong sometimes. Freezes, crashes, overheating, or even the dreaded Blue Screen of Death (BSOD) — there are plenty of issues that sometimes plague PC users, and when it happens to you, you might feel at a loss as to what to do.
PC issues? Start here
Freezes and poor performance, overheating, storage and ram problems, gaming problems, blue screens.
Good news — not every malfunction requires taking the PC to a professional repair service (although some of them definitely do). If you’re unhappy with the way your PC performs, start by checking out our comprehensive guide to troubleshooting a PC, because it might turn out to be the only thing you need to get it all fixed. On the other hand, if your computer won’t turn on at all, we have a separate guide for you .
There are a few things that can be helpful in the majority of scenarios, so let’s start with them. Freezes and performance drops might be the result of a bogged-down system, a background process that didn’t shut down correctly, or having too many programs open at once. In those instances, there are a few safe bets to try out.
- Air cooling vs. liquid cooling: Which is best for your PC in 2024?
- A new standard is raising the bar for HDR on PC
- Best Antivirus Deals: Protect your PC or Mac from just $35
Restart the PC
“Have you tried turning it off and on again?” You might be surprised to find out that it’s a legitimate problem-solver. If your PC is misbehaving, make it a habit to restart it.
Your microphone doesn’t work? Your frames per second (fps) dropped? Your Task Manager won’t load? Just restart and see if that helps.
If your PC is entirely frozen and you can’t restart it the proper way, simply press down the power button and hold it until the PC turns itself off. Keep in mind that doing this will not let your PC save any of your previous work, so beware of potential data loss.
Update your drivers
When is the last time you’ve updated your drivers? Admittedly, it’s easy to forget, but it’s better to remember.
In theory, if you’re running a modern PC with Windows 10 or Windows 11 , your computer will check for drivers every so often and update them automatically. This has made life a lot easier, but sometimes, a driver might slip through the cracks and not be updated.
Start by checking Windows Update -> Optional Updates . Windows will show you a list of possible drivers. Other than that, you might need to search for the manufacturer of a certain part and look up the drivers yourself. The most common drivers to search for include the graphics card, the chipset ( motherboard ), and audio drivers.
Stay away from programs that promise to update your drivers for you. There are some decent ones, but more often than not, you’ll run into trouble — either through bad driver updates or straight-up malware .
Sometimes, you may need to roll back a driver or uninstall it and install it all over again. In those cases, type Device Manager into the Windows search bar and pick the hardware you want to do this for (for example, the display adapter, also known as the graphics card ).
Next, navigate to the Drivers tab and either roll back or uninstall the driver. Keep in mind that this could have adverse effects on your PC, so be ready to perform a clean driver install right away.
Use the Task Manager
The Task Manager in Windows keeps tabs on a lot of different things, from CPU, GPU, and RAM usage to all the processes and applications that are currently running. Sometimes, all you need to do to fix your PC is to kill a couple of particularly heavy processes.
Enter the Task Manager by pressing Ctrl + Alt + Delete on your keyboard. In the Processes tab, look through everything and see if any are marked as Not Responding — those should be the first to go. Next, you can sort by either CPU or Memory and see which ones are hogging most of your PC’s resources. Click on the ones you want to shut down and then press End task in the bottom right corner.
Be mindful, however. Some of these processes will be necessary for your PC to run and shutting them down might make it completely unusable — at least until after you restart it. Moreover, you will lose data when closing programs like this. If you’re not sure what to close, it’s better not to close anything.
Common culprits behind bad performance here will include all kinds of browsers, games, and programs. Those are usually safe to close, too, but you may lose your progress if you haven’t saved.
If none of this helped, no worries — it’s time to get down to the nitty-gritty and try to fix your PC based on the issue.
System Restore
Perhaps you’ve recently installed a new app and all of your problems can be traced back to that moment. If that’s the case, using Windows System Restore might be a good option for you, provided that you’ve got any restore points to go back to. Remember that going back in time may also revert any and all changes you’ve made since that point, meaning that you might lose some files.
Here’s how to perform a system restore in Windows 10 and 11:
- Type Control Panel into the Windows Search bar.
- Once in the Control Panel, type Recovery into the search bar at the top right.
- Select Recovery and then Open System Restore .
- In the pop-up window, click Next and then pick a restore point that you want to go back to, and then click on Scan for affected programs .
- Windows will tell you which items and programs will be removed if you use a particular restore point.
- If you still want to proceed, click Close -> Next -> Finish to restore your system.
Your PC could be freezing or performing poorly for any number of reasons. Hardware problems, software issues, having too many programs open all at once, or driver conflicts are just some of the possible causes. Diagnosing the problem will lead you to a fix, but you can start by trying some of the most common solutions first.
If you’ve already restarted your PC, updated your drivers, and shut down the processes that might have caused this, here’s what you can do.
When running certain apps
If opening a certain program or game always ends in your PC (or the app itself) freezing up, or your PC simply becomes really slow, here are a few steps to try:
- Restart the program by killing it in Task Manager ( Ctrl + Alt + Delete ) and opening it again.
- Reinstall the program. The best way to do this is to do a clean install, meaning remove all related files (usually found in C:Program Files or on another drive) and then install it again from scratch.
- Make sure that you have the correct version of the program. Windows users can type System information into the Search bar to check which version of the operating system they’re running, then compare it to the program in question.
- Close background processes and apps and let the program run without any issues. Browsers with many tabs open are common culprits.
- Check whether the program is compatible with your system — for instance, older computers use an old Microsoft .NET Framework, and that can cause issues.
Random freezes or bad performance
If your PC freezes or underperforms seemingly for no reason, you’ll probably need to dig deeper to find the cause. However, you can try the steps outlined above and see if any of them help, and here are a few more that could work.
Reset this PC
This is a functionality in Windows 10 and 11 that lets you start fresh without losing all your files, or even format your PC and lose everything, but hopefully, also be rid of any potential software-related issues.
If you’re able to, back up your data to an external drive. Remember that some versions of Reset this PC will also uninstall all of your programs, so you may lose app settings and other files, too.
We don’t recommend doing a full format unless it’s necessary. Go through the options in Windows and see what works best for you.
Unplug external drives and peripherals
Something as simple as a conflict between your PC and an external drive or even a mouse can make it freeze. This can especially happen if you’re installing a new device and it’s adding its own drivers. Try to unplug these devices one by one and see if you can find the cause. A good idea is to first shut down your PC, unplug any external drives and things you don’t need to keep it running, and then turn it on again.
Change your power plan in Windows
If you feel like your PC is underperforming but it shouldn’t be, the power plan might be the cause. If you’ve got your PC in power saver mode (especially common for laptops), it might be throttling itself to save energy and/or battery, but at the cost of performance.
To navigate to the power settings easily, simply type in Power into the Windows Search bar and then navigate to the Power & Sleep Settings . You can adjust if and when your PC will go to sleep when inactive here, but the more important parts are hidden under Additional power settings on the right side of the window.
Here, you can pick the power plan. If you’re in power-saver mode, you should probably swap to a balanced plan. However, if you’re already running that, it’s usually safe to try the high-performance plan. Be mindful that it might put more of a strain on your PC and will use more energy.
Once you’ve picked out your power plan, you can fiddle with it a little bit more by clicking on Change plan settings -> Change advanced power settings . If you have an HDD, you can adjust it here to make it always stay on, potentially improving performance.
Overheating is a computer’s greatest enemy. If the components inside your PC don’t get enough air, they may deteriorate faster, perform poorly, or even break down entirely. If you suspect your PC might be heating up a bit too much, you should first check whether that is true.
To check the temperatures of certain components, such as the GPU or the CPU, it’s best to download a utility tool like HWiNFO or NZXT Cam . While the latter was made by a manufacturer of various PC parts, you don’t need to have any NZXT products to use it.
Both programs are fairly straightforward — just install them and let them run for a bit when your PC is idle, and then when you’re doing something resource-heavy, such as playing a game.
CPU and GPU temperatures are the ones you want to pay the most attention to. An idle temperature of 30 to 50 degrees Celsius for both of those components is usually okay, and this applies to both high-end CPUs or GPUs and budget options. When your PC is working hard, you might see temps reaching 80 degrees Celsius or above — but anything beyond that is a worrying sign that could be impacting the performance of your PC.
If you feel like the temperatures are beyond what’s reasonable, and, most importantly, your PC is struggling while those high temps are happening, you’re in luck — we have a comprehensive guide to addressing overheating problems in your PC .
While the CPU is the heart of your computer, your storage drives can wreak havoc on the performance of your PC if they’re not doing well. This is especially true in the case of the SSD or the HDD that your system is installed on.
Fortunately, there are a few things you can do to check the health of your SSD/HDD. We also have a dedicated guide on how to test RAM , so you might want to start there, and then circle back here for some tips on testing your storage drives.
Check your PC health
While Windows has its own, fairly limited PC health checker, it’s best to use a program like CrystalDiskInfo to diagnose any possible issues with your storage drive. Run it and scan your PC, then keep an eye out for any errors or warnings about drive failure.
If anything is amiss, it might be time to replace your SSD but feel free to consult a professional first if you’d rather salvage the drive. In any case, backups are more necessary than ever now as your drive may be headed toward failure.
Use Chkdsk and SFC
Chkdsk, or Check Disk, is a utility that you can use within the Windows Command Prompt . It can scan and repair your drives for you, and while it might seem a little barebones compared to some software (such as the aforementioned CrystalDiskInfo), it’s easy to use and can help in diagnosing and fixing common issues. It’s among the most useful commands to learn and keep in mind in case of PC problems. Use it in the event of system crashes, shutdowns, file corruption or loss, and similar issues.
Before we begin, a word of warning — running Check Disk on a failing drive and attempting to fix it could potentially result in data loss. If you’d rather be safe than sorry, we recommend backing up before doing this.
Here’s what to do:
- Type in Command Prompt into the Windows Search bar.
- Right-click it and then select Run as administrator .
- In the Command Prompt, type in chkdsk followed by the drive you want to check (usually C: for system drives). Example command: chkdsk C:
If Windows doesn’t find any problems, you’re in the clear. If it does, you can try to use chkdsk [drive letter] /f to have it fix errors on the disk or chkdsk [drive letter] /r for it to locate bad sectors and repair them. The /r command also performs the same tasks as the /f command, so you don’t need to run them one after another.
There’s also one more command that could prove to be helpful, so try it while you’re already here. Type in SFC /scannow for your PC to scan through all of your Windows system files and attempt to repair potential errors.
Other solutions
If you still suspect that your SSD or HDD may be the root of the problem, here are a few other things worth looking into:
- Defragment your HDD , which could help optimize file storage and improve your PC’s performance. If you have an SSD, this doesn’t apply.
- Free up some storage space. A drive that barely has any space left will begin to perform poorly over time. Consider buying an external drive for backup and storage purposes.
- Format your SSD as a last resort, hopefully restoring it to its former glory. This will delete all of the data on the drive.
Playing games is only as immersive as your PC allows it to be. If you’re experiencing frame rate drops, screen tearing, or crashes, the whole experience goes down the drain. Running games at 60 fps is often considered to be the sweet spot, if only because many people use standard 60Hz monitors. However, the better your PC build , the higher the expectations, and if your computer can only output 60 fps on a 144Hz monitor, you might want to improve its performance.
Troubleshooting gaming-related issues is often easier to fix with a simple Google search, as people on various forums and communities often come up with ideas to fix game-specific problems. However, here are a few things to try that can be done in most games.
Tweak the settings
Some of the most demanding games require a beastly PC to run. Adjusting the settings might, therefore, be your best bet to win back some performance — provided you’re not on a $3,500 PC equipped with an RTX 4090 , in which case you should be able to play everything at maximum for the years to come.
Here are some of the settings that might give you the best fps boost if turned down or disabled:
- Texture Quality and Projected Textures
- Water Effects
- Lighting effects
- Anti-Aliasing
- Ambient Occlusion
- View Distance
In addition, if you’re playing with ray tracing enabled, disabling it should drastically improve performance in most games.
If you’re experiencing screen tearing, enabling V-Sync or Adaptive Sync should help, but it will also take its toll on overall performance and frame rates. It’s also worth checking whether your monitor’s refresh rates align with those in the game because if there’s a discrepancy there, screen tearing is likely to happen.
You might also consider lowering the resolution, but in all honesty, this should be an absolute last resort. In fact, running the game at a different resolution than your monitor’s native resolution might make screen tearing even worse. If you’re currently playing at 4K or 1440p, dropping down to 1080p might improve performance, but the game will look considerably worse. In all fairness, if you already have a 4K monitor , there’s no reason to play at a lower resolution — it’s more likely that hardware upgrades are in order instead.
Update your GPU drivers
We’ve already covered updating your drivers in general, but graphics drivers are especially crucial to gaming performance. Nvidia, AMD, and Intel all have tools that make updating your graphics drivers easier.
If you’re using an Nvidia GPU, we recommend downloading GeForce Experience to manage your driver installs. In addition, you can record your gameplay and track performance with this tool. Those with AMD cards can check out AMD Software: Adrenalin Edition , while Intel owners can turn to Intel Arc Control .
Other things to try
The truth is that the majority of this guide can also apply to gaming issues, so there’s no use in me repeating these things in this section. If you’re experiencing frame rate drops, overall low fps, or crashes, try the following (most of which I’ve covered above):
- Check temperatures of your CPU and GPU while gaming and see if temp spikes coincide with times of poor performance in the game.
- Perform a clean install of the game.
- Buy an SSD (if you don’t have one) and install your games on it instead of an HDD.
- Make sure that your PC is powerful enough to handle the title. Most computers without discrete graphics may struggle with AAA games.
- Close all background processes and programs that aren’t necessary. Watching movies or browsing the internet at the same time as gaming is quite taxing on your PC.
- Make sure that you have enough RAM — monitor RAM usage with the Task Manager while gaming and buy some extra memory if your PC is struggling.
While the actual Blue Screen of Death (BSOD) is a lot less intimidating now than it used to be, the sad smiley leaves no room for doubt — if your PC gets hit by a BSOD, that often means trouble. When you get a BSOD, your entire operating system crashes, and you lose everything you’ve been working on after the last time you saved. It’s sort of a cry for help from your PC, but on the surface, it might seem like nothing much has happened to cause this problem.
Microsoft itself refers to blue screens as stop code errors sometimes. They’re essentially a preventative measure that is meant to keep your PC from being damaged even more. In short, something bad enough has happened to your PC that made it think that it’s time to call it quits and restart before things get even worse. Both hardware and software problems can be the culprit here, and sometimes, there’ll be no rhyme or reason as to why you’re hit by a BSOD at that particular time. However, it’s crucial to investigate these errors.
In modern PCs (Windows 10 and 11), BSOD simply lets you know that your PC ran into a problem and needs to restart. Before it does, it’ll investigate the issue and will usually leave a crash dump file (.dmp) in a designated folder. Looking through this later can help point you in the right direction, although it can be pretty confusing. It’s usually easier to search for the stop code assigned to your particular BSOD, which you’ll find at the bottom of the screen. Newer PCs may also get a QR code that you can scan with your smartphone to look up the problem immediately.
Troubleshooting a BSOD
Don’t panic — the majority of BSODs can be fixed without any professional help, and for the rest of them, you might need to swap some hardware or dig deeper into troubleshooting. Start by writing down the stop code that came up with your blue screen and look it up in Microsoft’s tutorial to troubleshooting BSOD errors .
Your first step will always be trying to revert any recent changes. This can mean new hardware, be it inside the PC or external drives, but also new software. Depending on the situation, you may need to start Windows in Safe Mode and uninstall the problematic software or roll back drivers. We have handy guides for entering Safe Mode for both Windows 10 and Windows 11 .
Assuming you’ve gone through Microsoft’s guide and haven’t found a solution, there’s one more thing you can safely try: Windows Event Viewer. You can access it by typing Event Viewer into the search bar. Event Viewer keeps track of everything that happens to your PC, including critical events such as a BSOD or a crash, errors, and warnings.
Check out the critical errors that occurred on your PC. A lot of the information that you’ll get here is quite technical, but a quick Google search with the right terms could help you find a solution. Look up the event source, such as Kernel-Power, as well as the error code, and try the solutions you’ll find.
Keep in mind that some of them could get your PC in even more trouble, though. For instance, advanced users may recommend that you alter the Windows registry, but deleting the wrong file in the registry can make your PC completely refuse to boot. Approach with caution.
PC issues are almost unavoidable. If you use a computer long enough, you’ll run into some problems with it at one point or another, be it network issues or complete crashes. However, if you take steps to protect your data and keep your PC healthy, you’ll avoid some of the most common pitfalls. Here’s what you should do on a fairly regular basis to keep your PC in shape.
Scan for viruses and malware
Cybersecurity threats are more common than ever in this day and age, but our PCs are also a lot better equipped to handle a lot of them. Windows 10 and Windows 11 come with their own Windows Defender, and it’s decent enough to the point that many people stopped using antivirus software altogether.
With that said, it’s still safer to use one of the best antivirus programs to protect yourself. More advanced users might also want to use a malware scanner, such as Malwarebytes , or programs like Spybot Anti-Malware to add an extra layer of protection.
Stay up to date
Keep your drivers up to date, but also run regular Windows Updates, as they often come with new security measures that could prove to be helpful. They also offer fixes to known problems. However, fresh updates can sometimes impact your PC’s performance , so that’s yet another thing for you to check if you’re not happy with the way your computer performs. (On another note, if your PC is currently downloading a Windows Update in the background, that’s probably why it’s suddenly super slow.)
Back up your data
You’ve probably heard this a hundred times before, but it’s always worth repeating — regular backups are crucial. If you’ve got all your data safely stored on an external HDD or in the cloud, even a worst-case scenario is not so bad. For example, a full format can sometimes help tremendously, but it’s out of the question if your data isn’t backed up.
Similarly, don’t forget to set up system restore points. That way, if you need to use System Restore, you’ll have a safe point to go back to. Check out our guide if you’re not sure how to set it up.
Editors' Recommendations
- Nvidia might power your next handheld gaming PC
- A friendly reminder that your PC power supply will eventually destroy itself
- Gaming laptops vs. desktops: here’s how to decide which to buy in 2024
- How to choose the best RAM for your PC in 2024
- How hot is too hot for your CPU?

Microsoft Teams was introduced in 2017 as a unified communication and collaboration platform aimed at helping businesses and organizations get things done. Microsoft leveraged the company's existing Office software experience and created a unified experience between Teams, Office 365, and Skype for Business. However, as with all software, things don't always go according to plan. Sometimes you can run into Teams problems.
We're big Teams users here at Digital Trends -- it's our go-to communication and meeting tool -- and we've come across a few issues ourselves over the years. In the event you're having Microsoft Teams issues, here's how to fix some of the most common problems.
There's no question that consoles are increasingly becoming more like PCs, but thanks to Nvidia, it appears that the opposite may be taking place too.
According to a new report by Wccftech, Nvidia is working with its partners to create a new ecosystem for gaming on small form factor (SFF) PCs. When it comes to Nvidia, many of us think of some of the best graphics cards that are as powerful as they are massive, like the RTX 4090. However, Nvidia is planning to flip that narrative and set its sights on an unexpected target.
It's tough to find the right gaming CPU for your next PC. We've benchmarked dozens of processors to find the best CPU for gaming, and there's a clear winner right now: AMD's Ryzen 7 7800X3D. Although the latest chip from Team Red claims the crown, there are still several other great options on the market.
Whatever your needs and budgets, though, we have options from AMD and Intel that will be great performers. We're focused on gaming here, but if you want a processor that can game and get work done, make sure to check out our list of the best processors.
Is Your Windows PC Slow on Startup? Try These 10 Fixes
While browsing the internet, you may have come across suggestions such as switching to an SSD, updating the graphics card driver, increasing RAM, and updating Windows. However, even after following these recommendations, if your Windows PC is still taking too long to boot, what choices do you have? That’s exactly what we will discuss today.
Table of Contents
1. Is Your Fast Startup Enabled
Fast Startup is a feature that enables your Windows computer to boot up quickly, but sometimes it can also be the main culprit for slow PC startup. In such cases, disabling it could be a wise decision. With that said, here’s how to disable Fast Startup on your Windows:
1. Open the Windows Search Box and look for the Choose a power plan setting. Once found, click on it.
2. Now on the left sidebar, click the Choose what the power buttons do option .
3. To edit Shutdown settings, click on Change settings that are currently unavailable .

4. Lastly, enable the Turn on fast startup setting and hit the Save changes button.

Note: Fast Startup doesn’t work on restart.
If you’re not seeing the Fast Startup option on your computer, it could be because hibernation is not enabled. To enable it, just open the Command Prompt (Admin) or Windows PowerShell (Admin) from the Windows Search Box and enter the following command:

2. Do You Have Too Many Startup Apps
Many apps on your Windows computer run in the background, and some automatically configure themselves to start at boot, leading to strain on your system and slowing down startup speed.
Here’s how to disable startup apps:
1. Press Ctrl + Shift + Esc from your keyboard to open the Task Manager .
2. Next, click the hamburger menu (3-bar) and select Startup Apps .
3. Now right-click on the app and choose the Disable option.

Quick Note: Don’t blindly disable any app you see. If the app is essential, keep it enabled or manually start it.
3. Disable Web Apps From Running in the Background
Many browsers allow web apps or extensions to run in the background, even after you close the browser. This can slow down boot times on Windows 10 or 11 computers. Since Chrome is popular, we’ll show you how to disable background apps in Chrome. For other browsers, simply Google search “disable background apps” followed by your browser name.
For Chrome, navigate to Chrome Settings > System and disable Continue running background apps when Google Chrome is closed .

Tip: Learn how to make your Google Chrome faster on your Windows .
4. Run CHKDSK Scan
CHKDSK is a command that scans and repairs file system errors on your drives. It can fix corrupt or missing files, potentially resolving slow startup issues on your laptop or PC.
Here’s how to use CHKDSK (Check Disk) to repair or fix the hard drive/SSD:
1. Type CMD in your Windows Search box and right-click on the Command Prompt .
2. After that, select Run as administrator .

3. Now type the following command based on your need:
- chkdsk [drive letter]: – It only identifies errors in the file system of your hard disk and does not fix any of them.
- chkdsk [drive letter]: /f – It scans your drive and fixes any error it finds in the system file.
- chkdsk [drive letter]: /r – It tries to fix errors on both the software and hardware part of the drives. For example, if any sector of the drive is damaged, it will try to recover the data and relocate it to a good sector.

4. If it shows the “chkdsk cannot run” message, type “Y” and press Enter key to schedule the scan after the computer restarts.
5. Perform SFC Scan
If your Windows PC is starting up slowly because of an error in the Windows system file, you can use the SFC command. This command is specifically designed to locate and fix errors in the Windows file system. To do that, open the Command Prompt (Admin) , enter the command sfc /scannow , and press Enter .
That’s all. It will begin scanning your computer for errors and fix them if any are found.

6. Is Your BIOS Outdated or Corrupted
The BIOS is responsible for initializing hardware components and providing the basic instructions for the computer to start up. So we believe updating the BIOS may resolve the issue.
However, this method carries some risks and if the update is not performed correctly or interrupted, it can make your computer unusable. Therefore, take proper precautions before proceeding with this method.
7. Have You Checked for Virus
Malware infections can significantly slow your computer’s startup. Fortunately, a good 3rd-party antivirus software or the built-in Windows Security app can protect you from many viruses.
Here’s how to use Windows Security on your PC:
1. Go to Windows Search and look for Windows Security app.
2. Open the app and navigate to Virus & threat protection section. On the right side, click on the Scan options .
3. Finally, select the Full scan option and click Scan now .

We also advise you to remove any pirated software or games from the PC, as they are one of the biggest sources of malware and can easily degrade your computer’s performance, including boot speed.
8. Remove 3rd-Party Anti-virus Software
As mentioned earlier, Windows has built-in anti-virus software, so there’s no need for additional anti-virus software. Moreover, it also impacts both your PC’s performance and startup speed. Therefore, unless you require a specific feature not provided by the built-in software, it’s best to avoid installing additional anti-virus apps.
To check if your current antivirus is slowing down your boot time, uninstall it and see if startup speed improves.
9. Is Your PC Running on Virtual Memory
When your Windows PC runs out of memory, it uses your storage as virtual memory (to prevent crashing). However, Windows automatically adjusts this allocation, which can slow down startup. To avoid this, you can manually set the virtual memory size. Here’s how:
Note: For faster boot times, prioritize increasing RAM over relying heavily on virtual memory.
1. Type performance in the Windows Search Box and click “Adjust the appearance and performance of Windows” .
2. Now switch to the Advanced tab and hit the Change button (under virtual memory).

3. After that, uncheck “Automatically manage paging file size for all drives” .
4. Select the drive , choose Custom size , and set the initial and maximum size.
5. Once done, click Set and OK to confirm.

6. After a pop-up message, hit the OK button and restart your computer to see the effect
10. If Possible, Switch to SSD
We have seen how fast the computer boots up when switched from HDD to SSD and the difference is massive. So if you have an old computer or laptop that is running on a hard disk, try switching to SSD. You will see a noticeable difference in your boot times.
Pro Tip: Check for loose internal cable connection in your PC.
If none of the above methods work, the only option left is to either reset your Windows computer or do a fresh installation. We have already published an article on how to reset Windows without losing files . Make sure to check it out.

With 3 years of expertise in Windows, Steam, Android, Samsung TV, and Google Chrome, Rahul specializes in offering insightful solutions to address your everyday technology-related challenges.
You may also like
How to disable automatic driver updates on windows..., 6 free tools to create a bootable usb..., 9 fixes for poor print quality on an..., is copy and paste not working on windows..., 6 fixes for windows computer restarts instead of..., you need to try these fixes when whatsapp..., 7 fixes for sd card not showing up..., how to enable snipping tool to show recent..., 6 fixes for bluetooth device connected but no..., 10 fixes for snipping tool not working on....

Contribute to the Windows forum! Click here to learn more 💡
May 10, 2024
Contribute to the Windows forum!
Click here to learn more 💡
Windows 10 Forum Top Contributors: Ramesh Srinivasan - neilpzz - Volume Z - franco d'esaro - _AW_ ✅
Windows 10 Forum Top Contributors:
Ramesh Srinivasan - neilpzz - Volume Z - franco d'esaro - _AW_ ✅
- Search the community and support articles
- Search Community member
Ask a new question
My Windows 10 is running slow. How do I fix it?
Report abuse.
Reported content has been submitted
Replies (5)
- Independent Advisor
306 people found this reply helpful
Was this reply helpful? Yes No
Sorry this didn't help.
Great! Thanks for your feedback.
How satisfied are you with this reply?
Thanks for your feedback, it helps us improve the site.
Thanks for your feedback.
If your windows 10 is running slowing then, increase virtual memory in windows 10 which will make you windows 10 smoother and efficient.
Step 1:- Click on Start menu and click on settings option.
Step 2:-Search for performance and adjust performance and appearance of the windows.
Step 3:- A new window will open .You can go to advanced tab.
Step 4:- There you will find a virtual memory option ,Select on change.
Step 5:- You can unselect the Automatically manage paging file size for all drives and click on custom size.
Step 6:-You can adjust initial size and maximum size.
Step 7:- Press ok to save the changes.
Get back to us if the issue still insists. Thanks and Best Regards:
BTS Merchandise
103 people found this reply helpful
18 people found this reply helpful
14 people found this reply helpful
96 people found this reply helpful
Question Info
- Performance and system failures
- Norsk Bokmål
- Ελληνικά
- Русский
- עברית
- العربية
- ไทย
- 한국어
- 中文(简体)
- 中文(繁體)
- 日本語
- Accessories
- Entertainment
- PCs & Components
- Wi-Fi & Networks
- Newsletters
- Digital Magazine – Subscribe
- Digital Magazine – Info
- Smart Answers
- Best laptops
- Best antivirus
- Best monitors
- Laptop deals
- Desktop PC deals
When you purchase through links in our articles, we may earn a small commission. This doesn't affect our editorial independence .
How to solve the 10 most common tech support problems yourself

Whether you’re dealing with your dad’s decade-old computer or your own custom-built gaming rig, troubleshooting PC problems is a part of everyday life. Before you make that $50 support call, though, try your hand at homebrew tech support. We spoke to some of the best support reps in the business about the most common problems they fix—and how you can do it yourself.
Try this first
I know it sounds like a no-brainer, but before you do anything else, restart your computer. Matthew Petrie of Falcon Northwest technical support says that most of his customers solve their problems with this simple step. “This long-standing maxim can work wonders,” says Petrie.
While you’re at it, make sure that your operating system is fully updated by running Windows Update. Neglecting updates could deprive you of important bug and performance fixes.
If you’re having problems with a peripheral, try switching it on and off. If that doesn’t work, try disconnecting and reconnecting the device. As a last resort, download the latest drivers and perform a full reinstall.
My computer is too slow
The first step to fixing a slow computer is to verify that your machine is the actual source of the problem. Videos that seem to buffer forever, and websites that take ages to load, may not be your computer’s fault. Geek Squad agent Derek Meister claims that many people mistakenly identify a slow system as the problem when “it’s actually not the computer, [but] their broadband connection.” See “Downloads are taking forever” below for instructions on how to use Speedtest.net to diagnose a slow connection.
If the problem is your PC, check whether you have plenty of free space on the hard drive holding your operating system. Windows needs room to create files while your system is running. If your hard drive is maxed out, performance suffers. Now is the perfect time to clear some space.
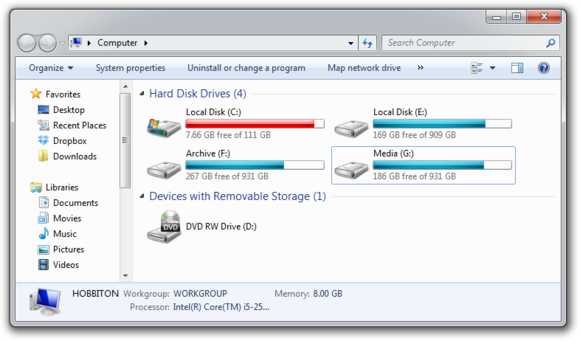
Microsoft’s System Configuration tool is your next-best bet for tackling slow performance. Many applications launch automatically when your machine boots up, which can stretch out boot time—especially on older, slower PCs. Make a habit of trimming the startup items. Open the tool by pressing Windows-R, typing msconfig , and pressing the Enter key.
Checking the Startup Item and Manufacturer columns is the best way to figure out which potential performance-killers you can safely disable. Avoid messing with any of the services and programs that have Microsoft Corporation listed as the manufacturer. Items such as AdobeAAMUpdater, Google Update, Pando Media Booster, Spotify, and Steam Client Bootstrapper are all fair game. Regardless, err on the side of caution: If you’re not sure what the program or service does, don’t disable it.
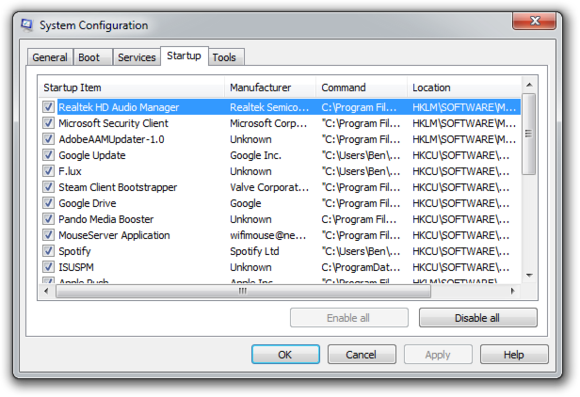
Once you’ve made all your changes, click OK and restart the computer. It should boot up quicker and feel noticeably faster.
Downloads are taking forever
Speedtest.net is your best friend when you’re having connectivity problems. Run a speed test to see what your download and upload speeds are—ideally they should be at least 50 percent of your Internet service provider’s advertised speeds, with a ping under 100 milliseconds.
If the speeds seem solid, make sure that you aren’t inadvertently downloading or uploading anything. Many torrent downloading programs run in the background and minimize into the system tray instead of the taskbar.

Check your network hardware. Updates for network cards aren’t all that common, but if your card’s manufacturer offers a newer driver, download it. Resetting your router and modem can help with connection problems, too. Most routers and modems have reset buttons, but pulling the power cable for a second or two can do the same thing. Don’t cut the power for much longer, or the hardware may reset itself to factory defaults.
Still having problems? Call your ISP, which can tell you whether the problem is on your end. As a last-ditch measure, the ISP could reset the master connection to your home.
My machine keeps restarting
Hardware problems are hard to diagnose and solve. First, confirm that you aren’t just getting the latest wave of Windows updates, which can automatically restart your computer during installation. Then work on updating all of your critical system drivers. Your graphics card, motherboard, and network card drivers are crucial.
“Sometimes it can be viruses, sometimes it can be adware, sometimes it can be overheating, and sometimes it can be something as simple as making sure your video card is updated,” Geek Squad’s Meister says.
Is your computer making weird noises ? If you’re lucky all you’ll need to do is give the machine a thorough cleaning . Modern computers have safeguards that shut down the system if a component is overheating, which can be the cause of frequent restarts when you’re running resource-intensive programs or video games.
Pop-up ads are appearing on my desktop
If you’re not running your Web browser and are still getting pop-up ads on your desktop, you’ve most likely installed adware—a program that displays unwanted ads. Although benevolent adware exists, most of the time adware is up to no good. Getting rid of it isn’t easy. “There’s a ton of little system-utility tools out there that promise to clean up everything, with names like PC Speed-up, PC Speed Pro, PC Speedifier,” Geek Squad’s Meister says. “A lot of times those programs are not going to do much. Some programs will work, others are snake oil.”
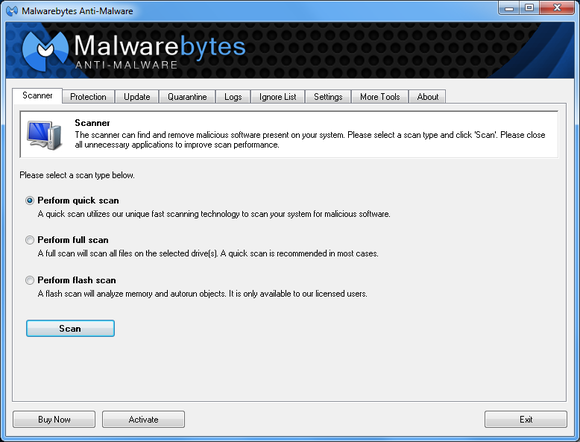
Running a full scan with credible antivirus software is your first step. If that program doesn’t find and remove the adware, turn to Malwarebytes Anti-Malware Free , a great utility for removing all types of malware. Just make sure to disable your standard antivirus software before running it.
“Multiple antivirus programs working at the same time will often result in problems,” Falcon Northwest’s Petrie says. “You only want one active, real-time antivirus scanner installed, but it doesn’t hurt to run an additional ‘on demand’ virus or malware scanner.”
Searching online for the name of the advertised product can sometimes yield solutions from fellow victims. If all else fails, there’s always the nuclear option: a complete system reinstall. It might take a long time, but it’s the only surefire way to remove adware or spyware. Remember to back up all your personal files.
Google doesn’t look right
Browser hijackers are a particularly nasty breed of malware. Such programs take over your Web browser and can stealthily redirect your Google searches and other queries to fake pages meant to steal your personal information or to further infect your system.
Running a real-time antivirus utility is the best way to stay safe. If your browser has already been hijacked, uninstall the browser and use your antivirus program in conjunction with Malwarebytes to remove the intruder.
My Wi-Fi keeps disconnecting
Spotty wireless connections can be a puzzler. Is it your computer? Your router? Your ISP? Try a few things before calling your Internet service provider.

Confirm that your computer is within range of your wireless router. Weak signals mean weak connections. Next, make sure your PC’s wireless card has the latest drivers. Try letting Windows troubleshoot for you by right-clicking the Wi-Fi icon in the taskbar and selecting Troubleshoot problems .
I keep seeing ‘There is a problem with this website’s security certificate’
Sometimes the biggest problems have the easiest fixes. According to support technicians, the lion’s share of issues are due to an incorrect system clock.
Website security certificates sync up with your computer’s clock. Old computers in particular run the risk of having a dead CMOS battery—the watch battery in your computer that keeps its system clock ticking. Click the clock in the system tray and select Change date and time settings to correct any issues.
My printer won’t print
Let’s assume that your printer’s drivers are up-to-date, and that it has enough paper and ink or toner to print. Try turning the printer off and on. Unplug the printer and plug it back in. Check your printer’s print queue by looking for the printer icon in the system tray and double-clicking it. The print queue shows you the status of each job as well as the general status of your printer.
Ensure that ‘Use Printer Offline’ isn’t checked. Sometimes, printing while your printer is turned off can cause Windows to set your printer to work offline, and that can stall jobs sent later.
I can’t open email attachments
If you have ever encountered an attachment that you couldn’t open, it was probably because you didn’t have the software necessary to view the file.
The usual suspect is the .pdf file, for which you can download a free PDF reader. If your problem involves a different file format, a quick search on the attachment’s file extension (the three letters after the period in the filename) should tell you what type of program you need. If the attachment lacks a file extension (which might happen if it was renamed), adding it back should set things right.
My favorite program isn’t working on my new PC
Before you call tech support, make sure that the software you’re trying to run is compatible with your operating system. Older software might not function on Windows 8, and an app created for Mac OS X definitely won’t run on your Windows PC. A 32-bit program might run on your 64-bit operating system, but it doesn’t work the other way around.
If an online game balks, you might be missing the required plug-ins—Java and Flash are the usual culprits. Most browsers will alert you to install these items if necessary.
When to throw in the towel
Falcon Northwest’s Petrie recommends connecting with tech support for “any problems that you aren’t comfortable addressing personally.” When in doubt, it’s better to steer clear of voiding a warranty or potentially damaging your system. “Being aware of your own skill set and limitations is important,” says Petrie, because “it’s often easy to make matters worse.” If you think the problem is too complicated, call up a more knowledgeable friend , or bite the bullet and work with a professional tech support service .
- PRO Courses Guides New Tech Help Pro Expert Videos About wikiHow Pro Upgrade Sign In
- EDIT Edit this Article
- EXPLORE Tech Help Pro About Us Random Article Quizzes Request a New Article Community Dashboard This Or That Game Popular Categories Arts and Entertainment Artwork Books Movies Computers and Electronics Computers Phone Skills Technology Hacks Health Men's Health Mental Health Women's Health Relationships Dating Love Relationship Issues Hobbies and Crafts Crafts Drawing Games Education & Communication Communication Skills Personal Development Studying Personal Care and Style Fashion Hair Care Personal Hygiene Youth Personal Care School Stuff Dating All Categories Arts and Entertainment Finance and Business Home and Garden Relationship Quizzes Cars & Other Vehicles Food and Entertaining Personal Care and Style Sports and Fitness Computers and Electronics Health Pets and Animals Travel Education & Communication Hobbies and Crafts Philosophy and Religion Work World Family Life Holidays and Traditions Relationships Youth
- Browse Articles
- Learn Something New
- Quizzes Hot
- This Or That Game
- Train Your Brain
- Explore More
- Support wikiHow
- About wikiHow
- Log in / Sign up
- Computers and Electronics
- Operating Systems
How to Stop Windows from Freezing: Easy Troubleshooting Guide
Last Updated: December 5, 2022 Fact Checked
This article was written by Garnik Ovsepyan and by wikiHow staff writer, Nicole Levine, MFA . Garnik Ovsepyan is a Computer Specialist and the Owner of HeliX PC based in Burbank, California. With over 25 years of experience, Garnik specializes in custom computer builds, computer repairs, virus removal, computer tune-ups, hardware and software troubleshooting and installations, diagnostics, and data backup and recovery. There are 9 references cited in this article, which can be found at the bottom of the page. This article has been fact-checked, ensuring the accuracy of any cited facts and confirming the authority of its sources. This article has been viewed 402,819 times.
Does your Windows PC keep freezing or locking up? Whether your computer is frozen right now, hangs at startup or shutdown, or freezes at random, there are easy ways to narrow down the cause and fix the problem permanently. This wikiHow article will cover several simple troubleshooting tricks that are sure to help you resolve issues with freezing and hanging on Windows 10, 11, and 8.1.
Things You Should Know
- If a particular app has locked up Windows, press Ctrl + Shift + Esc to open Task Manager, select the app, and then click End Task.
- Malware and viruses can cause your PC to freeze, so make sure to run a full or offline scan with Windows Defender.
- You can check your RAM, scan your hard drive(s) for errors, and repair corrupted system files using simple built-in tools.
- Windows Update can check for and install updated drivers that may resolve issues. But if an update caused your PC to freeze, you can always roll it back.
If Your PC is Frozen Right Now

- If the screen went black when your computer froze, try pressing Windows key + Ctrl + Shift + B to reset your video card drivers. [1] X Trustworthy Source Microsoft Support Technical support and product information from Microsoft. Go to source

- If you can't open Task Manager this way, try pressing Ctrl + Alt + Del and then clicking Task Manager . You can also right-click the Start menu and select Task Manager .
- Once Task Manager opens, look for the app using the most CPU, Memory, Disk, or GPU resources.
- To stop the problem app, click its name and select End Task . It may take a few moments for the app to close.

- If your PC's screen turned blue before it froze (an error known as the Blue Screen of Death ), you can analyze the crash dump files to see which software, hardware, or drivers lead to the crash.
Disconnect Devices at Startup & Shutdown

Run a Malware & Virus Scan

- Press Windows key + S and type security .
- Click Windows Security .

- Full scan: This does a deep scan of all files on your PC and can take up to an hour.
- Microsoft Defender Antivirus (offline scan): This scan reboots your PC into safe mode without internet support to remove more difficult malware. The scan shouldn't take more than 15 minutes.

Check for Software and Driver Updates

- Click the Windows Start menu and select Settings .
- For Windows 10, click Update & Security > Windows Update . On Windows 11, just click Windows Update .

- Sometimes BIOS/UEFI updates , third-party hardware, and other manufacturer updates won't be available through Windows Update. You can check your manufacturer's support website to find out if any updates are available directly through them.
- If a BIOS update is available, make sure your PC is plugged in to a reliable power source before flashing the BIOS. Otherwise, if your PC loses power during the update, you could render your computer unbootable.
Try a Simplified Startup

- Press Windows key + S .
- Type msconfig and press Enter .

- Press Windows key + S and type startup apps .
- Click Startup Apps in the search results. [3] X Research source

- You can always launch these apps from the Start menu as needed even if they don't start automatically.

Scan the File System

- If you're using Windows 11, you may see Windows Terminal (Admin) . This will work, too.

- This command connects to Windows Update to get the necessary files required to fix corruption. It can take up to 30 minutes to complete, but typically won't take that long.
- After a few moments, you'll see "The operation completed successfully." At that point, you can continue to the next step.

- If corrupted files are detected, they'll be replaced with repaired versions.
- If the scan does not find corruption, you'll see the message "Windows Resource Protection did not find any integrity violations."
- If you see a message that says, "Windows Resource Protection could not perform the requested operation," try running the scan again in Safe Mode .
Check Your Hard Drive

- If you have multiple hard drives, remember to check them all.

- Repeat for all drives connected to your PC.
Run a RAM Test

- First, save any work you have open, as your PC will reboot to use the tool.
- Type mdsched.exe and press Enter .

- The scan may take a while, so feel free to get up and come back later.
- Because this tool won't always show the test results, we'll show you how to find them once Windows boots back up.

- If no errors are found, the issue is not likely related to RAM.
Disable Link State Power Management

Clear Cached and Unneeded Files

- Type disk cleanup .
- Click Disk Cleanup . [8] X Trustworthy Source Microsoft Support Technical support and product information from Microsoft. Go to source

- If you're still low on hard drive space, your PC may continue to freeze and crash. Check out these tricks for freeing up hard drive space.
Roll Back the Latest Update

- If you're unable to use Windows at all because it keeps freezing, try booting into Safe Mode before you perform these steps.

- Most updates will attempt to reinstall automatically, so you might want to pause updates to see if uninstalling this latest update fixes your problem. To pause updates, return to Windows Updates and select a time period on "Pause Updates."
Run a System Restore

- If you don't have any restore points, you'll need to try another method.

- System Restore will not affect your personal files.

Disable Fast Startup (Windows 8.1)

Reset Your PC

- If the freezing does not continue, reinstall your apps one by one to narrow down the problem. If a particular app brings back the symptoms, the issue is related to that app or a device driver it uses to run.
- If the freezing continues after resetting your PC and doesn't correlate with an app or device you've installed, the issue is likely hardware related.
Expert Q&A

You Might Also Like

- ↑ https://support.microsoft.com/en-us/windows/troubleshooting-black-or-blank-screens-in-windows-51ef7b96-47cb-b454-fcab-fac643784457
- ↑ https://support.microsoft.com/en-us/topic/troubleshoot-windows-8-1-windows-8-or-windows-7-hangs-or-freezes-752adf9f-d1c4-e766-a9d5-6081b88de359
- ↑ https://www.asus.com/us/support/FAQ/1044726
- ↑ https://www.dell.com/support/kbdoc/en-us/000126064/how-do-i-run-the-system-file-checker-in-microsoft-windows
- ↑ https://support.microsoft.com/en-us/windows/using-system-file-checker-in-windows-365e0031-36b1-6031-f804-8fd86e0ef4ca
- ↑ https://social.technet.microsoft.com/wiki/contents/articles/53235.windows-10-built-in-tools-for-hard-disk-health-check.aspx
- ↑ https://answers.microsoft.com/en-us/windows/forum/all/how-do-i-see-the-results-of-memory-diagnostic-i/36f9d014-256a-4757-927a-d85ade3b0c09
- ↑ https://support.microsoft.com/en-us/windows/disk-cleanup-in-windows-8a96ff42-5751-39ad-23d6-434b4d5b9a68
- ↑ https://support.microsoft.com/en-us/windows/use-system-restore-a5ae3ed9-07c4-fd56-45ee-096777ecd14e
About This Article

- Send fan mail to authors
Is this article up to date?

Featured Articles

Trending Articles

Watch Articles

- Terms of Use
- Privacy Policy
- Do Not Sell or Share My Info
- Not Selling Info
Keep up with tech in just 5 minutes a week!
100% Disk Usage in Windows 10? 18 Tips and Tricks to Fix This Issue
Got 100% disk usage in Windows 10? Here are several tips and potential fixes. One is bound to help you fix this annoying Windows issue.
Quick Links
100% disk usage in windows 10: fixed.
- Run Disk Check
- Update Your Anti-Virus
- Check Windows Search
- Disable SysMain
- Block Flash
- Switch Web Browsers
- Fix Any Issues With Skype
- Fix the PCI-Express Firmware Bug
- Problems Caused by Steam
- Disable Diagnostic Tracking
- Windows Update
- Reset Virtual Memory
- Activate High Performance Mode
- Install the Latest SATA Drivers
- Problems With PC's Power Supply (PSU)
- Windows Help
- Problems With WaasMedicAgent.exe
- Disable Prefetch
Disk Usage Should Rarely Be 100%
Windows 10 is largely a reliable operating system, but one problem has plagued it since launch: the 100% disk usage bug .
Resulting in system-wide hangs and freezes, the bug appears in various scenarios and is straightforward to resolve, if you know what you are looking for.
One of the following fixes should resolve any Windows 10 100% disk usage bug whether your computer uses an HDD or SSD storage.
When the error was first discovered, only a few culprits were found. But as time passed, despite the 100% disk usage error being reported to Microsoft, more causes of this bug have been discovered.
Click the link above for each possible cause of the bug to see how to fix it. Check the steps one at a time, referring to the Windows Task Manager after each to confirm whether the disk’s 100% usage has dropped and Windows 10 is back to normal.
Even if you find a solution, a Windows Update could reset the changes you've made. Bookmarking this page will help you find it in the future and run through the fixes again.
1. Run Disk Check
This performance issue is most obvious when attempting to use Windows Search to find a file or program, and anything else that requires the drive to do some work (perhaps copying and pasting a group of files).
To establish whether it is a problem that is affecting you, when your computer next slows down, use Task Manager to run a disk check.
First, press Ctrl+Alt+Del and select Task Manager (or right-click the Taskbar and select Task Manager, or hit Ctrl+Shift+Esc ). Note that this may take some time to open with the drive being under strain.
On the Processes tab look for the Disk column. If you're having problems with drive performance, this will be at 100%, and shaded red to indicate whether you have a problem or not.
Problem sectors on your HDD can cause the 100% disk usage issue in Windows 10. However, using Windows' built-in disk check can fix this:
- Open Windows Explorer
- Select This PC
- Right-click on the C: drive and select Properties > Tools
- Under Error checking click on Check > Scan drive
Wait while the system scans the drive; a reboot may be required for a full disk repair. This should deal with the error.
2. Update Your Anti-Virus
As with any performance issue, the first thing to do is confirm that your computer hasn't been infected with malware. Your security software should be able to deal with this, whether it's a free app or a paid suite.
At the very least, tools like Malwarebytes Anti-Malware should be able to scan your system drive and detect any problems. Note that with a heavy load on your drive already this may take a while.
If threats are found, use the software's recommendations to discard them and reboot. Next, check your drive's performance again. Hopefully, you've resolved the issue; if not, then malware wasn't to blame, so read on.
3. Check Windows Search
The next thing to check is whether the 100% disk usage error has anything to do with Windows Search.
A bug in Windows 10 results in a "search loop" that causes an increased load on the system drive.
To stop this and prevent it from happening during your current session (until Windows is rebooted):
- Right-click Start
- Select Windows PowerShell (Admin)
- Enter net.exe stop "Windows search"
That should solve most of the issues. If there is no change, even after rebooting, you can permanently disable Windows Search and Indexing.
- Press WIN+R
- Type msc , then click OK
- In the Services window that opens find Windows Search and double-click to open
- You can also click Stop to abort the service
- Click OK to save your changes.
A few moments after disabling Windows Search, your Windows 10 performance should improve considerably. If not, move on…
4. Disable SysMain
Another Windows 10 feature identified as a potential cause of the 100% disk usage issue is the superfetch service . Since Windows 10 1809 (the 2018 Windows 10 October Update) this has been renamed to "SysMain."
To prevent this service from causing the disk usage issue, open another Windows PowerShell (Admin) and enter:
Again, wait a few moments to check whether this has had any effect on your computer's performance. You should also run Check Disk in PowerShell:
You'll be informed that your PC must be rebooted for Check Disk to complete, so make sure you have closed all your applications first.
If this doesn't work, it is likely that you're experiencing a frustrating iteration of this issue that is simple to resolve.
5. Block Flash
Flash remains one of the most vulnerable aspects of modern computing and should be disabled. Adobe killed off its multimedia plugin in 2020, so there's little reason to keep using it, especially as Flash seems to be one of the most common culprits for the 100% hard disk usage in Windows 10 with the Google Chrome browser.
To disable Flash in Google Chrome browser:
- Open Menu > Settings > Privacy and security
- Click Site Settings
- Find Flash and set the toggle to Block sites from running Flash
- Click Back to confirm, then restart the browser
The next thing to do is update to the latest version of Chrome. In most cases this happens automatically, but if not just go to Menu > Help > About Google Chrome and wait for the update to complete.
If you can't see any of the options, don't worry. It simply means that your version of Chrome has already updated and no longer supports Flash.
6. Switch Web Browsers
It may not be Flash that is impacting on your browser performance.
Another cause could be the browser itself, particularly if you're using Google Chrome.
The obvious option is to choose a different browser. Windows 10 already has two browsers built in. You probably don't want to use Internet Explorer, but Microsoft Edge is an adequate replacement for Chrome.
Several browsers are available, some better than others.
7. Fix Any Issues With Skype
Another widely used application could also be causing your 100% HDD usage is Skype. In an era when online collaboration and video meetings is increasing, Skype is a likely culprit.
Since Skype has been more closely integrated with Windows 10, it is a little trickier to deal with. What you can do, however, is stop Skype from running to help determine if it is the cause of the issues.
- Press Win + I to open Settings
- Click Skype, then Advanced options
Head back to the Task Manager to see the change. You may also consider finding a Skype alternative for Windows . If the 100% disk usage bug tends to happen straight after Windows loads, it's a good idea to disable Skype from autoloading. Under Runs at log-in , change the switch from On to Off .
Further issues with Skype can also be dealt with in this screen. You can Repair , Reset , and even Uninstall Skype to aid with your troubleshooting.
8. Fix the PCI-Express Firmware Bug
Some drivers don't run quite as they should in Windows 10. One that has been discovered to be causing 100% HDD use is the StorAHCI.sys driver, which has a firmware bug. StorAHCI.sys intended for storage devices connected to the PC or laptop motherboard via Advanced Host Controller Interface PCI-Express.
To find out if this is the problem and rule it out:
- Right-click Start and choose Device Manager
- Expand IDE ATA/ATAPI Controllers
- Double-click the AHCI Controller entry
- In the Driver tab select Driver Details
If the driver listed as C:\Windows\system32\DRIVERS\storahci.sys , you could be affected by this bug. From there, follow the steps below:
- Close the driver details box
- In the Details tab select Device instance path from the drop-down menu
- Right-click the value, then Copy .
- Launch Notepad and Paste the contents
- Next, press WIN+R and type regedit , and click OK
- Find HKEY_LOCAL_MACHINE\System\ CurrentControlSet\Enum\PCI\ and use the pasted string from Notepad to open the correct AHCI Controller, followed by the random number.
Here, expand Device Parameters\Interrupt Management\ MessageSignaledInterruptProperties and you should see MSISupported listed in the right-hand pane. Double-click this, then change the Value data: to 0 .
Click OK to confirm and follow the instructions to restart Windows.
9. Problems Caused by Steam
Enjoy gaming and have Steam installed? There's a good chance this digital delivery system is causing 100% disk usage.
Usually this is due to update delivery, causing the background downloader to get caught in a loop. Clear the Steam cache to fix this.
First, make sure you have exited Steam. Where Steam is a likely cause of the 100% disk usage error, it may hang when you try to exit. In this case, use the Windows 10 Task Manager to close the software.
Next, open the Win + R run box and enter
You'll see a dialogue box, informing you that content will be deleted.
Click OK to proceed.
Note that games and saves will be retained, so there is no risk of them being deleted.
10. Disable Diagnostic Tracking
It's worth considering the impact of diagnostic tracking in Windows 10. A feature that you might have otherwise disabled for privacy reasons, it has been blamed for 100% HDD use on many PCs.
When it comes to reducing your hard disk drive usage, it's quicker to simply disable the DiagTrack service. If this is the source of the 100% disk usage error in Windows 10, you can stop the service from launching.
However, to do this you'll need to access Command Prompt in administrator mode.
- Click Start and type cmd in the search box
- In the results select Run as administrator
- Input sc config "DiagTrack" start= disabled
- Input sc stop "DiagTrack"
When you're done, close the command prompt. You might also reboot Windows.
11. Windows Update
Windows Update may also be a culprit. This usually only happens when Windows Update has a problem (which is typically due to a file refusing to download). You have two options here:
- Leave your computer alone ---shut all your open applications and wait. Eventually, the files will download, but depending on how Windows Update is scheduled on your computer, it may require a reboot.
- Shutdown your computer ---once you've done that, restart and wait for Windows Update to resolve the problem.
Once the update has finished downloading, it's wise to run it as soon as possible. Remember to check any previous fixes for 100% disk usage before proceeding; as noted above, Windows Update can reverse these fixes.
12. Reset Virtual Memory
Virtual memory is a combination of RAM and hard disk space and can be responsible for overuse of your HDD. If there isn't enough RAM to perform a task, the HDD is used to supplement the RAM. Data moved to the HDD is then returned to RAM when required.
If you've made it this far, and you've yet to solve the 100% disk usage issue, it could be worth resetting your virtual memory.
- Press Windows+Break/Pause
- In the Advanced tab go to Performance > Settings
- Select the new Advanced tab
- Clear the checkbox for Automatically manage paging file size for all drives
- Next, select the Windows drive (usually C:) and then Custom size
- Add an Initial size and a Maximum size ; note both are measured in MB rather than GB
These numbers can be confusing, so with the first value, rely on the recommended option. For the maximum value, aim for a figure no more than 1.5 times your system RAM .
For instance, a computer with 4GB of RAM should have no more than 6.5GB (6144MB).
The next step is to clear the temporary files that have been used in the previous virtual memory allocation.
- Open Run with WIN+R
- Enter temp and click OK
- In the temp directory, select all files with Ctrl+A and hit Delete
13. Activate High Performance Mode
Windows' standard power modes are prone to the 100% disk usage bug but switching to high performance often overcomes the problem.
The downside, of course, is that your computer will use more power. Thanks to modern processor design this shouldn't be a massive issue. However, notebooks and desktop replacement laptops may take a hit on battery life.
To change to high performance:
- Click WIN+X > Power Options
- In the Power & sleep screen click Additional power settings
- Here, choose High performance , then OK
If this isn't a displayed option, you'll need to create your own custom power plan. Click Create a power plan , then choose High performance . Give the plan a name, tweak any personal settings you need then select it as a power plan to use.
In a moment or two, the 100% disk usage issue should drop to less than 10%.
14. Install the Latest SATA Drivers
Could a storage device driver be resulting in the 100% disk usage error?
Your Windows 10 computer almost certainly uses SATA connections for hard drives, SSDs, and optical drives. If the drivers aren't up-to-date, the disk usage error can occur.
Avoid this by upgrading to the latest SATA drivers.
- Right click Start
- In the Power User menu select Device Manager
- Expand Storage controllers
- Identify the correct controller for your SATA devices
- Select the Browse my computer for driver software option
- Next, choose then Let me pick from a list of available drivers on my computer
- Here, choose Standard AHCI Controller and see how this impacts performance
You may need to reboot Windows for this to take effect. Note that if it doesn't work, you can still try this by checking the manufacturer's website for a new driver. This can be installed using the instructions that accompany it.
15. Problems With PC's Power Supply (PSU)
There is a chance that your computer's hardware is causing the 100% disk usage issue in Windows: specifically, the PSU.
If disk usage issues can be attributed to excessive disk activity, then it follows there might be a power-related cause.
100% disk usage has been spotted on Windows 10 laptops running on the battery. Once plugged into the power adaptor, the issue resolves. Similarly, the problem has been shown to alleviate once a new PSU is installed in a desktop PC.
Check our guide to the best PC power supply units to help you choose a replacement.
16. Windows Help
Another issue that has been traced to 100% disk usage in Windows 10 is the operating system's built-in active help tool. You'll have noticed this feature that pops up when you're doing something for the first time with useful tips and suggestions.
If you suspect this is causing a problem in Windows 10 with disk usage, you can disable it:
- Press WIN+I to open Settings
- Here, select System > Notification & actions
A few moments later, things should improve.
17. Problems With WaasMedicAgent.exe
Incorrectly identified as a virus or malware, WaasMedicAgent.exe (part of the Windows Update Medic Service) is a Microsoft system process that checks downloaded Windows Update files. If there is a problem with the data, the files are downloaded again – a process that could leave your HDD at 100%.
To fix this:
- Press WIN+R to open a Run box
- Enter regedit then OK to open Registry Editor
- Before proceeding, make a registry backup with File > Export , saving the backup somewhere safe
- In the browser bar, paste this path: Computer\HKEY_LOCAL_MACHINE\SYSTEM\CurrentControlSet\Services\WaaSMedicSvc
- In the right pane, right-click Start and choose Modify
Disabling the update medic is an extreme step to take. However, it is one way to avoid Windows 10 disk usage hitting 100%.
18. Disable Prefetch
Prefetch is a unique Windows file, first introduced with Windows XP, that helps you by loading frequently used programs into your Windows memory for faster startup of your operating system (for more information, you can take a deep dive into our short guide on Prefetch files ).
While the feature is no doubt a boost for performance, it can cause problems like high CPU usage, especially if you have low memory space, to begin with. In such cases, disabling Prefetch can free up some memory for you.
To do that, follow the steps below:
- Head to the Start menu search bar, type in 'registry,' and select the best match.
- Then head to the following location and hit Enter : “HKEY_LOCAL_MACHINE\SYSTEM\CurrentControlSet\Control\Session Manager\Memory Management\PrefetchParameters”
- Double-click on EnablePrefetcher to open the key and set the Value data to 0 to turn off Prefetch.
Now that you've disabled the Prefetch, you should immediately see an improvement in your CPU's performance.
There is no reason for Windows 10’s disk load to be anything close to 100%, under normal usage. A slow computer is one with a problem, and if you cannot fix it by disabling a browser plugin, stopping services, or running your antivirus software, then the problem may well be hardware related.
Try these fixes the next time your Windows computer slows down. Be sure to check your Windows Experience Index periodically to identify performance issues needing immediate resolution.
How to fix performance issues after upgrading to Windows 11 23H2
If you notice that your PC is performing slower than usual after upgrading to version 23H2, then resetting the Windows Security app may help.

- To fix performance issues on Windows 11 23H2, you may have to reset the “Windows Security” app and enable the “Memory Integrity” feature.
- To reset the Windows Security app, open PowerShell (admin) and run the “Get-AppxPackage Microsoft.SecHealthUI -AllUsers | Reset-AppxPackage” command.
- To disable “Memory Integrity,” open Windows Security > Device Security > Core isolation details , and turn on the feature.
UPDATED 12/18/2023: On Windows 11 23H2 , you may need to reset the Windows Security app to resolve performance issues, and in this guide, I will outline the steps to complete this task. If you notice a degradation in CPU performance or GPU problems like sudden stutters and drastic FPS drops after upgrading to version 23H2 , you’re not the only one. As it turns out, a few users have reported a significant reduction in processor and graphics performance after updating to Windows 11 23H2 using the clean installation or in-place upgrade through Windows Update.
Some of these reports have been posted on Reddit and Microsoft forums (via Neowin ), revealing drops in processor performance of up to eight percent, in addition to random frame drops and shutter in gaming and games crashing after updating to the latest video drivers.
Although the company has yet to confirm an issue with the new version of the operating system, a user also reported that they had received an answer from Microsoft advising them to reset the Windows Security app, enable Core Isolation, and turn on virtualization in the UEFI to resolve the issue.
In this guide , I’ll teach you the steps to improve the CPU and GPU performance after upgrading to Windows 11 23H2.
Fix performance issues with CPU and GPU on Windows 11 23H2
To fix performance problems on Windows 11 23H2, use these steps:
Open Start on Windows 11.
Search for PowerShell , right-click the top result, and select the Run as administrator option.
Type the following command to change the execution policy and press Enter :
Type the following command to reset the Windows Security app and press Enter :

Restart the computer into the UEFI (BIOS) and turn on processor virtualization on your computer.
Start Windows 11 again.
Open the Windows Security app.
Click on Device Security .
Click the “Core isolation details” setting.
Turn on the Memory integrity toggle switch.

Restart the computer.
Once you complete the steps, this process should resolve the performance issues on your computer after upgrading to Windows 11 23H2 from Windows Update or clean installation. (At least, this should improve the CPU performance.)
On a personal note, I haven’t experienced these issues on my installations, but these instructions appear to have helped users restore the performance close to the levels of version 22H2.

Mauro Huculak is a Windows How-To Expert who started Pureinfotech in 2010 as an independent online publication. He has also been a Windows Central contributor for nearly a decade. Mauro has over 14 years of experience writing comprehensive guides and creating professional videos about Windows and software, including Android and Linux. Before becoming a technology writer, he was an IT administrator for seven years. In total, Mauro has over 20 years of combined experience in technology. Throughout his career, he achieved different professional certifications from Microsoft (MSCA), Cisco (CCNP), VMware (VCP), and CompTIA (A+ and Network+), and he has been recognized as a Microsoft MVP for many years. You can follow him on X (Twitter) , YouTube , LinkedIn and About.me . Email him at [email protected] .
- How to install CAB file for updates and drivers on Windows 10
- Windows 11 update KB5032286 deprecates Steps Recorder app
We hate spam as much as you! Unsubscribe any time Powered by follow.it ( Privacy ), our Privacy .
- Mobile Computing
- Good to know
- VPN for streaming
- VPNs for gaming
- Privacy news
- VPN reviews
- Windows 11 News
- Windows 11 Help
- Windows tips
- Windows Update
- Data Recovery
- File Sharing
- Microsoft Office
- Firefox add-ons
- Chrome Extensions
- Internet Explorer
- Microsoft Edge
- Google Maps
- Google Android
- Thunderbird
- Crypto & Blockchain
- Development
- Music and Video
Microsoft releases the May 2024 Security Updates for Windows

Microsoft has released security updates for all supported versions of its Microsoft Windows operating system and other company products.
This security updates overview provides system administrators and home users with information on the released patches and changes. It highlights information about each of the supported Windows versions, lists known issues, and offers guidance on downloading and installing the updates.
You can check out the April 2024 update overview here, in case you missed it or want to go back to it.
Microsoft Windows Security Updates: May 2024
You may download the following Excel spreadsheet to get a list of released updates. Click on the following link to download the archive to the local device: Microsoft Windows security updates May 2024
Executive Summary
- Microsoft released security patches for 60 unique vulnerabilities.
- No critically rated security issues.
- Windows clients with issues are: Windows 10 version 21H2 and 22H2, Windows 11 version 22H2 and 23H2.
- Windows Server clients with issues: Windows Server 2008 and Windows Server 2022
Product overview
Each supported version of Windows and their critical vulnerabilities are listed below.
- Windows 10 version 22H2: 42 vulnerabilities, 0 critical, 41 important, and 1 moderate
- Windows 11 version 22H2 : 40 vulnerabilities, 0 critical, 39 important, and 1 moderate
- Windows 11 version 23H2 : 40 vulnerabilities, 0 critical, 39 important, and 1 moderate
Windows Server products
- Windows Server 2008 R2 (extended support only): 22 vulnerabilities: 0 critical, 21important, and 1 moderate
- Win dows Server 2016 : 29 vulnerabilities: 0 critical, 28 important, and 1 moderate
- Windows Server 2019 : 44 vulnerabilities: 0 critical, 43 important, and 1 moderate
- Windows Server 2022: 45 vulnerabilities: 0 critical, 44 important, and 1 moderate
Windows Security Updates
Windows 10 version 22H2
- Support Page: KB5037768
Updates and improvements:
- Adds Microsoft account related notifications in Settings > Home.
- Improves the reliability and quality of widgets on the lock screen.
- Improves the reliability of Windows Search.
- Update size is reduced by about 20% thanks to new technique.
- Fixes an issue that could affect Virtual Secure Mode (VSM) scenarios.
- Fixed an issue that might affect domain controllers.
- Fixed a stability issue that affected some wireless earbuds.
- Security updates.
- Plus all changes of the April 24 Preview update .
Windows 11 version 22H2 and 23H2
- Support Page: KB5037771
- Added application promotions to the Recommended section of the start menu.
- Fixes a slow file transfer issue affecting Server Message Block (SMB) clients.
- Improves quality of the widgets icon on the taskbar.
- Improves reliability of widgets on the lock screen.
- Plus all changes of the A pril 2024 Preview update .
Windows Security updates
2024-05 Cumulative Update for Windows 10 Version 1507 ( KB5037788 )
2024-05 Cumulative Update for Microsoft server operating system version 21H2 for x64-based Systems ( KB5037782 )
2024-05 Cumulative Update for Windows 10 Version 21H2 and Windows 10 Version 22H2 ( KB5037768 )
2024-05 Dynamic Cumulative Update for Windows 11 ( KB5037770 )
2024-05 Security Monthly Quality Rollup for Windows Server 2008 ( KB5037800 )
2024-05 Security Only Quality Update for Windows Server 2008 ( KB5037836 )
2024-05 Security Monthly Quality Rollup for Windows Embedded Standard 7 and Windows Server 2008 R2 ( KB5037780 )
2024-05 Security Only Quality Update for Windows Embedded Standard 7 and Windows Server 2008 R2 ( KB5037803 )
2024-05 Security Monthly Quality Rollup for Windows Server 2012 ( KB5037778 )
2024-05 Security Monthly Quality Rollup for Windows Server 2012 R2 ( KB5037823 )
2024-05 Cumulative Update for Windows Server 2016 and Windows 10 Version 1607 ( KB5037763 )
2024-05 Cumulative Update for Windows Server 2019 and Windows 10 Version 1809 ( KB5037765 )
2024-05 Cumulative security Hotpatch for Azure Stack HCI, version 21H2 and Windows Server 2022 Datacenter: Azure Edition for x64-based Systems ( KB5037848 )
Non-Security updates
2024-05 Update for Windows 10 Version 22H2, Windows 10 Version 21H2, Windows 10 Version 21H1, and Windows 10 Version 20H2 ( KB5001716 )
2024-05 Cumulative Update for .NET Framework 3.5 and 4.8.1 for Windows 10 Version 22H2 and Windows 10 Version 21H2 ( KB5037587 )
2024-05 Cumulative Update for .NET Framework 3.5 and 4.8.1 for Windows 11 ( KB5037591 )
2024-05 Cumulative Update for .NET Framework 3.5 and 4.8 for Windows 10 Version 22H2 and Windows 10 Version 21H2 ( KB5037592 )
2024-05 Cumulative Update for .NET Framework 4.8 for Windows Server 2016 and Windows 10 Version 1607 ( KB5037926 )
2024-05 Cumulative Update for .NET Framework 3.5 and 4.8.1 for Microsoft server operating system, version 22H2 for x64 ( KB5037929 )
2024-05 Cumulative Update for .NET Framework 3.5 and 4.8 for Microsoft server operating system, version 22H2 for x64 ( KB5037930 )
2024-05 Cumulative Update for .NET Framework 3.5 and 4.8.1 for Windows 11 ( KB5037931 )
2024-05 Cumulative Update for .NET Framework 3.5 and 4.7.2 for Windows Server 2019 and Windows 10 Version 1809 ( KB5037932 )
2024-05 Cumulative Update for .NET Framework 3.5 and 4.8 for Windows Server 2019 and Windows 10 Version 1809 ( KB5037933 )
2024-05 Cumulative Update for .NET Framework 3.5 and 4.8 for Windows 11 ( KB5037934 )
2024-05 Dynamic Update for Microsoft server operating system for x64-based Systems ( KB5037958 )
2024-05 Cumulative Update for .NET Framework 3.5 and 4.8.1 for Microsoft server operating system, version 23H2 for x64 ( KB5038075 )
2024-05 Cumulative Update for .NET Framework 3.5, 4.8 and 4.8.1 for Microsoft server operating system version 21H2 for x64 ( KB5038282 )
2024-05 Cumulative Update for .NET Framework 3.5, 4.7.2 and 4.8 for Windows Server 2019 and Windows 10 Version 1809 ( KB5038283 )
2024-05 Cumulative Update for .NET Framework 3.5, 4.8 and 4.8.1 for Windows 10 Version 21H2 ( KB5038284 )
2024-05 Cumulative Update for .NET Framework 3.5, 4.8 and 4.8.1 for Windows 10 Version 22H2 ( KB5038285 )
2024-05 Cumulative Update for .NET Framework 3.5, 4.8 and 4.8.1 for Windows 11 ( KB5038286 )
2024-05 Security and Quality Rollup for .NET Framework 4.8 for Windows Embedded Standard 7 and Windows Server 2008 R2 ( KB5037916 )
2024-05 Security and Quality Rollup for .NET Framework 4.6.2 for Windows Embedded Standard 7, Windows Server 2008 R2, and Windows Server 2008 ( KB5037917 )
2024-05 Security and Quality Rollup for .NET Framework 4.8 for Windows Server 2012 for x64 ( KB5037922 )
2024-05 Security and Quality Rollup for .NET Framework 4.8 for Windows Server 2012 R2 for x64 ( KB5037923 )
2024-05 Security and Quality Rollup for .NET Framework 4.6.2, 4.7, 4.7.1, 4.7.2 for Windows Server 2012 for x64 ( KB5037924 )
2024-05 Security and Quality Rollup for .NET Framework 4.6.2, 4.7, 4.7.1, 4.7.2 for Windows Server 2012 R2 for x64 ( KB5037925 )
2024-05 Security and Quality Rollup for .NET Framework 3.5.1, 4.6.2, 4.7, 4.7.1, 4.7.2, 4.8 for Windows Embedded Standard 7 and Windows Server 2008 R2 ( KB5038288 )
2024-05 Security and Quality Rollup for .NET Framework 3.5, 4.6.2, 4.7, 4.7.1, 4.7.2, 4.8 for Windows Server 2012 ( KB5038289 )
2024-05 Security and Quality Rollup for .NET Framework 3.5, 4.6.2, 4.7, 4.7.1, 4.7.2, 4.8 for Windows Server 2012 R2 ( KB5038290 )
2024-05 Security and Quality Rollup for .NET Framework 2.0, 3.0, 3.5 SP1, 4.6.2 for Windows Server 2008 ( KB5038291 )
Known Issues
Description : After installation of the update, users may be unable to change their account profile picture.
Workaround: none available at the time.
Description : Devices that use Microsoft Connected Cache (MCC) may download updates or apps from the public Internet instead, if they use DHCP Option 235 and have a recent update installed.
Workaround: Configure Microsoft Connected Cache endpoint in DOCacheHost policy as indicated in Cache hostname. Additionally, DOCacheHostSourcehas to be set to 1or removed as indicated in Cache hostname source. By default, the DOCacheHost and DOCacheHostSource policies have no value.
(OLD) Description: Desktop icons may be moved around unexpectedly between monitors when using Copilot on more than one monitor. Users may also experience "other alignment issues" according to Microsoft.
Workaround: none. Microsoft may disable Copilot on multimonitor devices.
(OLD) Description: Copilot in Windows is not supported if the taskbar is located vertically on the right or left side of the screen.
Workaround: align the taskbar horizontally, either at the top or bottom of the screen.
Security advisories and updates
- ADV 990001 -- Latest Servicing Stack Updates
Microsoft Office Updates
You find Office update information here .
How to download and install the May 2024 security updates

Most non-managed Windows devices receive security updates automatically. Administrators may speed up the installation in the following way:
- Select Start, type Windows Update and load the Windows Update item that is displayed.
- Select check for updates to run a manual check for updates.
Direct update downloads
Below are resource pages with direct download links, if you prefer to download the updates to install them manually.
- KB5037768 -- 2024-5 Cumulative Update for Windows 10 Version 21H2
Windows 11 version 22H2
- KB5037771 -- 2024-5 Cumulative Update for Windows 11 version 22H2
- KB5037771 -- 2024-5 Cumulative Update for Windows 11 version 23H2
Additional resources
- May 2024 Security Updates release notes
- List of software updates for Microsoft products
- List of the latest Windows Updates and Services Packs
- Security Updates Guide
- Microsoft Update Catalog site
- Our in-depth Windows update guide
- How to install optional updates on Windows 10
- Windows 11 Update History
- Windows 10 Update History
Related content

Microsoft releases the April 2024 Security Updates for Windows

Overview of the March 2024 Windows Security Updates
The windows security updates for february 2024 are here.

Microsoft confirms 0x80070643 error during Windows update installation
Fix 0x80070643 - Error Install Failure when trying to install Windows Update
The first windows security updates of 2024 are here.
amen i did and had to reformat my pc and i am getting alwyer to sue microsoft because they knowed the updates was BAD
She only pays Sims 2 , she says the newer ones not good. You know happy wife happy life? As far as me, stopped updating my Win 10 , as I say F- MS.
There is really no security, just SPY ware. Now I will take off my tinfoil hat.
Known issue with localisation version of KB5037765 https://support.microsoft.com/en-us/topic/may-14-2024-kb5037765-os-build-17763-5820-82d1aefb-093c-4e4a-a729-cd4a829750ad
Win updates are out for me. No need for them as they just slow down the system. Have enough security in place, I don’t worry. Using win 10, since Feb,of 2024 had nothing but slowdowns thanks to defender trying to take control. Reinstalled 10 , NO updates allowed its running like new. My wife still uses 7. No malware ever. So updates will never happen. What are they related to Boeing Aircraft?
Do it the other way. Update your OS but deactivate Defender and uninstall Microsoft Edge. For protection, use uBlock Origin in your browser, a custom hosts file and common sense. Your current solution is: Luck. For best results use Windows 10 LTSC and get updates until 2032. Just Google “Installing Windows 10 IoT Enterprise LTSC 2021 – sysconf 16”. As much as I love Windows 7, it’s now time to let go. It was a fantastic OS.
@Bobo, I will never forget some the winter nights, me and my family, around near the fireplace, while snowing outside till the roof… my father was writing some mails with his awesome old laptop with W7. He still has W7 installed in his old computer, it still works perfect. Good times. Past is pure longing.
cumulative update gets stuck at spinning dots with a black screen after reboot
on reboot i get stuck at spinning dots with a black screen… great update MS!!
Another boat load of updates what could possibly go wrong? Everything actually.
Still getting errors on update KB5034441 which is an ongoing problem.
Why doesn’t MS provide a troubleshooter to resolve this problem?
Some issues here for me too, taskbar crashes so often that I had to remove this update. So sad, always again with little or big issues. However the laser printer was working fine, that’s good news. Anyway the taskbar issue was too weird to maintain this update installed at my W11 laptop. Meanwhile, my Kubuntu notebook is working fine with W10 working now as a virtual machine. I only maintain W11 waiting for the W12 OS. In other case I would have uninstalled it as faster as I can.
The easiest fix with KB5034441 is to hide it with wumgr or WU Minitool : https://github.com/DavidXanatos/wumgr https://www.majorgeeks.com/files/details/windows_update_minitool.html
By the way, the old well-known MS utility for this purpose (show/hide updates) still works pretty well. I use it occasionally. It’s original name: wushowhide.diagcab BLAKE3 CEC6D1767D11CCB970F01C2ABD89CEF6DB80F0145F44215CAC2DB5A3FB988DDC
what microsoft did not tell any one was get ready to refomat your pc their up dates are crap and they need to stop the updates because they are the cause of the mess in windows 11 so i say go back to windows 10 that works great no bugs like in windows 11 and more safe because of microsoft letting hacker using ai break in to window and steal the main core they could not stop them because ai does not work and is a clear danger so far where i live a about 24000 are set to go back to windows 10 you see microsoft can’t fix the mess in windows 11 because they do the mess and forgot how to fix it because they fired all of their tec’s no tec’s at microsoft support just other people that use windows 11 microsoft you are fired
God, please do help us! Thanks for the article. :]
Leave a Reply Cancel reply
Save my name, email, and website in this browser for the next time I comment.
Advertisement
Spread the word, hot discussions.

Recently Updated

Latest from Softonic
About ghacks.
Ghacks is a technology news blog that was founded in 2005 by Martin Brinkmann. It has since then become one of the most popular tech news sites on the Internet with five authors and regular contributions from freelance writers.
- Legal Information
- Terms of use
- Privacy Policy
- Cookie Policy
- Cookie settings
- Advertise with Us
- Martin Brinkmann
- Mike Turcotte
- Mark as New
- Report Inappropriate Content
- All forum topics
- Previous topic
Link Copied

Community support is provided during standard business hours (Monday to Friday 7AM - 5PM PST). Other contact methods are available here .
Intel does not verify all solutions, including but not limited to any file transfers that may appear in this community. Accordingly, Intel disclaims all express and implied warranties, including without limitation, the implied warranties of merchantability, fitness for a particular purpose, and non-infringement, as well as any warranty arising from course of performance, course of dealing, or usage in trade.
For more complete information about compiler optimizations, see our Optimization Notice .
- ©Intel Corporation
- Terms of Use
- *Trademarks
- Supply Chain Transparency
How To Fix All iOS 17.5 iMessage Issues

If you need to fix iOS 17.5 iMessage issues, you’ve come to the right place. As an iPhone 15 Pro user, there are a few things I like more than being in the blue text club, but an additional update started giving me problems with iMessage. Fortunately, while it seems like a complex issue, most of the ways to fix the problem are super easy. You mostly need to navigate particular settings for a solution. Let’s take a look at every iPhone user’s favorite chat app.
How Do I Fix iOS 17.5 Message Issues?
Likely the fastest way to fix iOS 17.5 message issues is to ensure you have a proper cellular or Wi-Fi connection, and then ensure iMessage is enabled. Other, smaller issues might be having an impact on you sending messages as well.
However, before moving on to more advanced solutions, consider the following for common issues:
- Check your storage : If you’re having issues specific to multimedia messages, such as sending and receiving images or videos, you may need to check your storage .
- Force quit Messages : You may just need to soft reset the Messages app. Swipe up from the bottom of your screen to bring up your App Carousel, then swipe up on your Messages app to quit it. Restart your Messages app by opening it.
- Force restart your device : Doing a force reset can rid the Messages app of any small bugs. Go to Settings > General > Shut Down and swipe the Power Off slider to the right. Restart your device with the Power button.
If none of the above works for you, let’s take a look at some deeper solutions.
1. Reactivate iMessages
Time needed: 2 minutes
If you are having issues with iMessages or your Messages app in general, reactivating the app may just do the trick.

2. Reset All Settings
If none of the above solutions work and you’re still having device issues, you may simply want to reset all of your settings.
- Go to Settings .

There are a lot of reasons to love iOS 17, but iMessages not working isn’t one of them. However, it’s most likely a problem that is easy to fix, rather than a problem with your entire phone. Of course, if you continue to have issues, it never hurts to contact Apple Support to see if there’s a deeper issue lurking. Don’t let a tiny error prevent you from sending and receiving the messages you want and need.
If you have any additional feedback or suggestions, please let us know in the comments.
Leave a Reply Cancel reply
You must be logged in to post a comment.
This site uses Akismet to reduce spam. Learn how your comment data is processed .
- Nick deCourville
How to troubleshoot problems that occur when you start or use Word
This article describes how to troubleshoot problems that may occur when you start or use Microsoft Word. Use the following methods in the order in which they are presented. If you try one of these methods and it does not help, go to the next method.
Verify or install the latest updates
You might have to set Windows Update to automatically download and install recommended updates. Installing any important, recommended, and optional updates can frequently correct problems by replacing out-of-date files and fixing vulnerabilities. To install the latest Microsoft Office updates, see Update Office and your computer with Microsoft Update . For list of the latest Office updates, see Office Updates . If your issue is not resolved after you install the latest Windows and Office updates, go to method 2. It's a good idea to make sure that your computer has the latest updates installed for Windows. Updates often fix software problems. Before you use any of the following methods, try first to install updates. After you install the updates, restart your computer, and then start Word.
Troubleshoot problems that occur when you start Word
IMPORTANT: Follow the steps in this section carefully. Serious problems might occur if you modify the registry incorrectly. Before you modify it, back up the registry in case there are problems and you need to restore it later.
Method 1: Insert your document into another file
The final paragraph mark in a Word document contains information about the document. If the document is damaged, you may be able to retrieve the text of the document if you can omit this final paragraph mark. To access a document but leave its final paragraph mark behind, follow these steps:
Click File > New > Blank Document.
On the Insert tab, click Object , and then click Text from File .
Select the file that you want to open and insert, and then click Insert .
Method 2: Start Word by using the /a switch
The / a switch is a troubleshooting tool that is used to determine where a problem may exist in Word. The / a switch prevents add-ins and global templates from being loaded automatically. The /a switch also locks the settings files to prevent it from being read or modified. To start Word by using the /a switch, follow these steps:
Click Start > Search , then type "Run" and press Enter.
In the Run popup window, type "winword /a", and press Enter.
For more information about the / a switch, see Description of the "/a" startup switch in Word .
If the problem does not occur when you start Word by using the /a switch, try the next method to determine the source of the problem.
Method 3: Delete the Word Data registry subkey
Most of the frequently used options in Word are stored in the Word Data registry subkey. A common troubleshooting step is to delete the Word Data registry subkey. When you restart Word, the program rebuilds the Word Data registry key by using the default settings. NOTE: When you delete the Word Data registry subkey, Word resets several options to their default settings. For example, Word resets the "most recently used file" list on the File menu. Also, Word resets many settings that you customize in the Options popup window. IMPORTANT: Follow the steps in this section carefully. Serious problems might occur if you modify the registry incorrectly. Before you modify it, back up the registry in case there are problems and you need to restore it later. To delete the Word Data registry subkey, follow these steps:
Exit all Office programs.
Type "regedit" in the Search box and then press Enter.
Locate the following registry subkey, as appropriate for the version of Word that you are using: Word 2016: HKEY_CURRENT_USER\Software\Microsoft\Office\16.0\Word\Data Word 2013: HKEY_CURRENT_USER\Software\Microsoft\Office\15.0\Word\Data Word 2010: HKEY_CURRENT_USER\Software\Microsoft\Office\14.0\Word\Data Word 2007: HKEY_CURRENT_USER\Software\Microsoft\Office\12.0\Word\Data Word 2003: HKEY_CURRENT_USER\Software\Microsoft\Office\11.0\Word\Data
Click Data , and then click File > Export .
Name the file "Wddata.reg", and then save the file to the desktop.
Click Edit > Delete , then click Yes .
Exit the Registry Editor and start Word.
If Word starts and works correctly, you have resolved the problem (a damaged Word Data registry key). You may now have to change several settings to restore your favorite options in Word. If the problem is not resolved, restore the original Word Data registry subkey, and then try the next method below.
Restore the original Word Data registry key
To restore the original Word Data registry subkey, follow these steps:
Double-click the Wddata.reg icon on the desktop.
Click Yes , and then click OK .
If restoring the Word Data registry subkey doesn’t work, go to the next procedure.
Method 4: Delete the Word Options registry key
The Word Options registry key stores options that you can set in Word. These settings are divided into default and optional groups. Default settings are created during the program setup. Optional settings are not created during setup. You can change both the default and optional settings in Word. To delete the Word Options registry key, follow these steps:
Type regedit in the Search box (in Windows 10, Windows 8.1, or Windows 8) or in the Start Search box on the Start menu (in earlier versions of Windows), and then press Enter.
Locate the following registry subkey, as appropriate for the version of Word that you are running: Word 2016: HKEY_CURRENT_USER\Software\Microsoft\Office\16.0\Word\Options Word 2013: HKEY_CURRENT_USER\Software\Microsoft\Office\15.0\Word\Options Word 2010: HKEY_CURRENT_USER\Software\Microsoft\Office\14.0\Word\Options Word 2007: HKEY_CURRENT_USER\Software\Microsoft\Office\12.0\Word\Options Word 2003: HKEY_CURRENT_USER\Software\Microsoft\Office\11.0\Word\Options
Click Options , and then click File > Export .
If Word starts and works correctly, you have resolved the problem (a damaged Word Options registry key). You may now have to change several settings to restore your favorite options in Word. If the problem is not resolved, restore the original Word Options registry key, and then try the next method.
To restore the original Word Options registry key
To restore the original Word Options registry subkey, follow these steps:
Double-click the Wdoptn.reg icon on the desktop.
Method 5: Replace the Normal.dot or Normal.dotm global template file
You can prevent formatting, AutoText, and macros that are stored in the global template file from affecting the behavior of Word and any documents that you open. To do this, replace the global template file. IMPORTANT: This method includes renaming the global template file so that Word does not find it as expected when it restarts. This forces Word to re-create the global template file. By doing this, you save the original file in case you have to restore it. Be aware that when you rename the global template file, several settings are reset to their defaults, including custom styles, custom toolbars, macros, and AutoText entries. Therefore, we strongly recommend that you save the global template file and do not delete it. ADDITIONAL NOTE: In certain situations, you may have more than one global template file. For example, this occurs if multiple versions of Word are running on the same computer, or if several workstation installations exist on the same computer. In these situations, make sure that you rename each global template file so that it clearly reflects the appropriate Word installation. To rename the global template file, follow these steps:
Click Start > Search , type "cmd", and then press Enter.
At the command prompt, type the command that corresponds to your version of Word: Word 2016, Word 2013, Word 2010, or Word 2007: "ren %userprofile%\AppData\Roaming\Microsoft\Templates\Normal.dotm OldNormal.dotm" Word 2003: "ren %userprofile%\AppData\Roaming\Microsoft\Templates\Normal.dot OldNormal.dot"
Press Enter.
At the command prompt, type "exit" and press Enter.
Start Word.
If Word starts correctly, you have resolved the problem. In this case, the problem is a damaged global template file. Now, you may have to change several settings to restore your favorite options. NOTE: The old global template file may contain customizations that can't be easily re-created. These customizations may include styles, macros, and AutoText entries. In this case, you may be able to copy the customizations from the old global template file to the new global template file by using the Organizer. For more information about how to use the Organizer to copy macros and styles, press F1 in Word to open Microsoft Word Help, type "rename macros" in the Search field, and then click Search to view the topic. If the problem is not resolved, restore the original global template file, and then go to the next section.
Restore the original global template file
To restore the original global template file, follow these steps:
Method 6: Disable the Startup folder add-ins
When you start Word, Word automatically loads templates and add-ins that are located in the Startup folders. Conflicts or problems that affect an add-in can cause problems in Word. To determine whether an item in a Startup folder is causing the problem, temporarily disable the registry setting that points to these add-ins. To do this, follow these steps:
Start Windows Explorer, type "windows ex" in the Search field, and then press Enter.
At the command prompt, type the command that corresponds to your version of Word: Word 2016, 64-bit C2R installation: "%programfiles%\Microsoft Office\root\office16\Startup\" Word 2016, 32-bit C2R installation: "%programfiles% (x86)\Microsoft Office\root\office16\Startup\" Word 2016, 64-bit MSI installation: "%programfiles%\Microsoft Office\office16\Startup\" Word 2016, 32-bit MSI installation: "%programfiles% (x86)\Microsoft Office\office16\Startup\" Word 2013, 64-bit C2R installation: "%programfiles%\Microsoft Office\root\office15\Startup\" Word 2013, 32-bit C2R installation: "%programfiles% (x86)\Microsoft Office\root\office15\Startup\" Word 2013, 64-bit MSI installation: "%programfiles%\Microsoft Office\office15\Startup\" Word 2013, 32-bit MSI installation: " %programfiles% (x86)\Microsoft Office\office15\Startup\" Word 2010: "%programfiles%\Microsoft Office\Office14\Startup\" Word 2007: "%programfiles%\Microsoft Office\Office12\Startup\" Word 2003: "%programfiles%\Microsoft\Office\Office11\Startup\"
Right-click one of the files that is contained in the folder, and then click Rename .
After the file name, type .old, and then press Enter. IMPORTANT: Important Make a note of the original file name so that you can restore the file, if it is necessary.
If you can no longer reproduce the problem, you have found the specific add-in that causes the problem. If you must have the features that the add-in provides, contact the vendor of the add-in for an update. If the problem is not resolved, rename the add-in by using its original name, and then repeat steps 3 through 6 for each file in the Startup folder.
If you can still reproduce the problem, type the following path in the address bar of Windows Explorer, and then click OK . Windows 10, 8.1, 8, or 7: "%userprofile%\AppData\Roaming\Microsoft\Word\Startup" Windows XP: "%userprofile%\Application Data\Microsoft\Word\Startup"
Repeat steps 3 through 6 for each file in this Startup folder.
If the problem is not resolved after you disable the Startup folder add-ins, go to the next method.
Method 7: Delete the COM add-ins registry keys
You can install COM add-ins in any location. Programs that interact with Word install COM add-ins. To determine whether a COM add-in is causing the problem, temporarily disable the COM add-ins by deleting the registry keys for the COM add-ins. To delete the COM add-ins registry keys, follow these steps:
Click Start < Search , type "regedit", and then press Enter.
Locate this registry subkey: HKEY_CURRENT_USER\Software\Microsoft\Office\Word\Addins.
Click Add ins , and then click File > Export .
Name the file "WdaddinHKCU.reg", and then save the file to the desktop.
Click Edit > Delete , and then click Yes .
Locate this registry subkey: HKEY_LOCAL_MACHINE\Software\Microsoft\Office\Word\Addins
Name the file "WdaddinHKLM.reg", and then save the file to the desktop.
Exit the Registry Editor and Start Word.
If the problem is resolved, you have determined that a COM add-in program is causing the problem. Next, you must determine which COM add-in program is causing the problem.
Determine which COM add-in program is causing the problem
To determine which COM add-in program is causing the problem, follow these steps:
Double-click the Wdaddin.reg icon on your desktop.
Click Yes, and then click OK .
If you're using Word 2016, Word 2013, or Word 2010:
Click File > Options.
Click Add-Ins .
In the Manage list, click COM Add-Ins , and then click Go . NOTE: If an add-in is listed in the COM Add-Ins popup window, uncheck the add-in box. If more than one add-in is listed, uncheck only one add-in box at a time. This procedure helps determine which add-in is causing the problem.
Click OK to close the COM Add-Ins popup window.
Click File > Exit.
If you're using Word 2007:
Click the Microsoft Office button, and then click Word Options.
Click Add-ins .
Click the Microsoft Office button, and then click Exit Word .
If the problem is resolved when you start Word, you have determined which COM add-in is causing the problem. If you must have the features that the add-in provides, you must determine which add-in includes those features so that you can contact the vendor for an update. If the problem is not resolved when you start Word, repeat steps 4 and 5 for each COM add-in that's listed until you determine which add-in is causing the problem. To restore the COM add-ins, repeat step 4, but select the check box for each COM add-in that you want to restore.
Method 8: Change the default printer
To change the default printer, follow these steps:
Right-click Microsoft XPS Document Writer , and then click Set as default printer .
If the problem is resolved after you start Word, you have determined that the printer is causing the problem. If this is the case, contact the vendor to see whether there is an update for the printer driver.
Microsoft Support options
If you can't resolve this problem, you can use Microsoft Support to search the Microsoft Knowledge Base and other technical resources for answers. You can also customize the site to control your search. To start your search, go to Microsoft Support website.

Need more help?
Want more options.
Explore subscription benefits, browse training courses, learn how to secure your device, and more.

Microsoft 365 subscription benefits

Microsoft 365 training

Microsoft security

Accessibility center
Communities help you ask and answer questions, give feedback, and hear from experts with rich knowledge.

Ask the Microsoft Community

Microsoft Tech Community

Windows Insiders
Microsoft 365 Insiders
Was this information helpful?
Thank you for your feedback.
COMMENTS
Open Task Manager by pressing Ctrl+Shift+Esc simultaneously, and be sure to click the "more details" drop-down arrow at the bottom of the Task Manager window. Look for tasks that are using more than 50% of your PC's CPU or memory resources. To close a task, right-click the task and then click End Task.
The tips are listed in order, so start with the first one, see if that helps, and then continue to the next one if it doesn't. 1. Make sure you have the latest updates for Windows and device drivers. 2. Restart your PC and open only the apps you need. 3. Use ReadyBoost to help improve performance. 4. Make sure the system is managing the page ...
On Windows 8, 8.1,10, and 11 there's now a startup manager in the Task Manager you can use to manage your startup programs. Right-click the taskbar and select "Task Manager" or press Ctrl+Shift+Escape to launch it. Click over to the Startup tab and disable startup applications you don't need.
Right-click that service and select Stop to turn off the service. Right-click that service again and select Properties. In the properties window, click the Startup type drop-down menu and select Disabled to prevent the service from starting each time you turn on your computer. Click OK to save the settings change.
To shut down and restart your computer to speed up Windows 10, use these steps: Open Start. Click the Power button. Select the Shut down option. Quick tip: The "Sleep" or "Hibernate" options do ...
Launch it by pressing Shift+Esc while using Chrome, or click on the menu button > More Tools > Task manager . If you find that your browser is often causing your PC to slow to a crawl, try a ...
To stop unnecessary apps from opening automatically, select Start in the taskbar, or tap the Windows key, to bring up a list of applications. Locate and select Settings to open the Settings window. Next, locate and select Apps, then Startup. Here, you'll find the programs that start automatically.
Make sure the system is managing the page file size. Check for low disk space and free up space. Adjust the appearance and performance of Windows. Pause OneDrive syncing. Disable unnecessary startup programs. Check for and remove viruses and malware. Restore your PC from a system restore point. Tips to improve performance in Windows. If your ...
If the inside of your PC is dusty, it can prevent the CPU fan (s) from running effectively, which can significantly slow it down. You can use a can of compressed air and a lint-free cloth to remove dust. If you have a laptop, you can use gentle bursts of compressed air to remove crumbs and dust from the ports. 12.
Make sure the system is managing the page file size. Check for low disk space and free up space. Adjust the appearance and performance of Windows. Pause OneDrive syncing. Disable unnecessary startup programs. Check for and remove viruses and malware. Restore your PC from a system restore point. Tips to improve performance in Windows. If your ...
There are two ways to fix this: first, decreasing the number of programs running, and second, increasing your computer's memory and processing power. Whether you need to disable some start-up programs, defrag your hard drive, or upgrade your hardware, this article will help you discover why your computer is running slowly and how to fix it. 1.
Press the Windows key on your keyboard, then type "Device Manager" and click the search result to open Device Manager. This will take you to a list of all of the hardware (like your Bluetooth driver) installed on your computer. [3] Scroll to and select the category that is slow and unresponsive.
To fix this in Windows 10, press the Windows key, and then type (and select) Task Manager. When the Task Manager opens, click the "Startup" tab. Here, you'll see all the programs that are set to turn on when Windows boots up. Take a look at the column on the far right labeled Startup Impact. Examine anything rated as having a "high" or "medium ...
Type Control Panel into the Windows Search bar. Once in the Control Panel, type Recovery into the search bar at the top right. Select Recovery and then Open System Restore. In the pop-up window ...
5. Check for slow services. Press Windows key + R and type services.msc and press Enter. In the list of all services that start with your Windows 10, look for any services that take too long to launch. Right-click each service and change the settings from Default to Automatic (Delayed Start).
The fix: To see which programs are slowing down your laptop, press the Windows + X keys on your keyboard and select Task Manager. Then go to the Processes tab and click the header of any column to see which programs are using the most resources. Finally, select a program and click End Task to force quit it.
Credit: Microsoft. When you check Task Manager for CPU usage, you can also check the Startup tab. Make sure you recognize the applications that are loaded and running. You may not recognize every ...
CHKDSK is a command that scans and repairs file system errors on your drives. It can fix corrupt or missing files, potentially resolving slow startup issues on your laptop or PC. Here's how to use CHKDSK (Check Disk) to repair or fix the hard drive/SSD: 1. Type CMD in your Windows Search box and right-click on the Command Prompt. 2.
If you are facing a Slow PC, you can use this feature to fix the problem. Please follow these steps thoroughly: Step 1: Open Control Panel by going to Search and typing " Control Panel ". Step 2: In the Control Panel, change View By to Large Icons. Step 3: Click on Troubleshooting.
Step 1:- Click on Start menu and click on settings option. Step 2:-Search for performance and adjust performance and appearance of the windows. Step 3:- A new window will open .You can go to advanced tab. Step 4:- There you will find a virtual memory option ,Select on change.
Make a habit of trimming the startup items. Open the tool by pressing Windows-R, typing msconfig, and pressing the Enter key. Checking the Startup Item and Manufacturer columns is the best way to ...
1. Press Control + X on the keyboard. This opens the Power User menu, where you'll find a quick link to run the command prompt or Windows PowerShell as an administrator. You can use this tool to scan for and repair correct Windows system files, which can help fix issues with freezing and hanging.
There is no reason for Windows 10's disk load to be anything close to 100%, under normal usage. A slow computer is one with a problem, and if you cannot fix it by disabling a browser plugin, stopping services, or running your antivirus software, then the problem may well be hardware related.
To fix performance problems on Windows 11 23H2, use these steps: Open Start on Windows 11. Search for PowerShell, right-click the top result, and select the Run as administrator option. Type the following command to change the execution policy and press Enter: Set-ExecutionPolicy Unrestricted. Type the following command to reset the Windows ...
Win updates are out for me. No need for them as they just slow down the system. Have enough security in place, I don't worry. Using win 10, since Feb,of 2024 had nothing but slowdowns thanks to defender trying to take control.
Press the Windows key + R to open the Run dialog box. Type 'control.exe /name Microsoft.CredentialManager' and press Ctrl + Shift + Enter to open Credential Manager with administrative privileges. Select Windows Credentials. Find any Generic Credentials related to Microsoft Office. Click on them and select Remove from the popup menu.
I have the exact same PC with the exact same problem. If I wanted to export a video on Premiere, it would either close on its own or give me a blue screen. Sometimes both! I had no problems playing video games, except when using RPCS3 when it compiles shaders. Same issue there. Anything that requires heavy CPU load just tears down the whole ...
Fortunately, while it seems like a complex issue, most of the ways to fix the problem are super easy. You mostly need to navigate particular settings for a solution. Let's take a look at every ...
Programming note: Tune in to CNN NewsNight: Solar Storm, hosted by Abby Phillip and Bill Weir, tonight from 10 p.m. to 12 a.m. ET. For the latest on the massive solar storm, head over to CNN's ...
Before you use any of the following methods, try first to install updates. After you install the updates, restart your computer, and then start Word. Troubleshoot problems that occur when you start Word. IMPORTANT: Follow the steps in this section carefully. Serious problems might occur if you modify the registry incorrectly.