The Ultimate Beginners Guide To Game Development In Unity

Unity is a great tool for prototyping everything from games, to interactive visualisations. In this article, we run through all you need to know to get started using Unity.
First, a little bit about me: I’m a hobbyist unity developer, 3d modeler and graphic designer who’s worked with Unity and Blender for over 5 years. I’m now a Financial Maths student at University College Dublin, and occasionally I do freelance graphic design, web prototyping, and game prototyping.


Introduction
This article is aimed at anyone who has never used Unity before, but has some previous experience programming or in web design / development. By the end of this article, you should have a good general overview of the engine as well as all the necessary functions and code to start making a basic game.
If you want to make games
There’s really very few options when it comes to Indie Game development. The three main choices if you want to build games are Unreal, Unity or GameMaker.
Unity is probably the least opinionated of the 3 platforms. It gives you a very raw product out of the box, but is highly flexible, well-documented, and highly extensible to build pretty much any genre of game you can think of.
There are plenty of highly successful games such as Escape from Tarkov (FPS), Monument Valley (Puzzler), and This War of Mine (Strategy / Survival) all built in Unity.
In reality the engine you build your first game on is probably not critical, so my advice is just to pick one and go with it.
If you want to prototype user experiences
Since unity is just an engine with a bunch of physics, animation, and real time 3d rendering, it’s also a great space to make fully fledged interactive prototypes for UX studies.
Unity has full support for VR and AR and hence could be a great tool for exploring architecture, automations and simulations with clients.
Sections to this article
- Unity Editor Window
Unity Game Objects
Unity builtin components, creating custom components, structure of a monobehaviour, manipulating gameobjects, collision detection, advanced features, advice for newcomers, nice resources and communities, unity editor window.
The editor window is split up into a couple of sections. We will cover this very briefly as we will refer to it constantly throughout the article. If your familiar with this already just skip past!

Scene View: Allows placement and movement of GameObjects in the Scene
Game View: Previews how the player will see the scene from the camera
Inspector: Provide details on the selected GameObject in the scene.
Assets / Project: All prefabs, textures, models, scripts etc are stored here
Hierarchy: Enables nesting and structuring of GameObjects within the scene
Now we’re good to start!
What are GameObjects
GameObjects are the core building block of everything in the Unity games engine. The name almost gives it away:
Anything you place within a scene in Unity must be wrapped in a ‘game object.’
If you’ve got a web design background, you can think of GameObjects as being a lot like <div> elements! Extremely boring containers, but are highly extensible to create complex functionality or visuals.

Literally everything from particle effects, cameras, players, UI elements, … (the list goes on) is a GameObject.
Creating Hierarchy
Like a <div> in web development, a GameObject is also a container. Just as you nest <div>s to create varied and desirable layouts or abstractions you may wish to do the same with games objects.
The logic behind nesting game objects is much the same as web development, I’ll give a few examples…
Clutter & Efficiency
Web Analogy: You’ve got many similar elements which may be dynamically generated on the fly in response to user interaction and want to keep them tidy.
Unity Translation: Your building a Minecraft clone and you’ve loads of blocks in the scene, you need to add and remove ‘chunks’ of blocks from the scene for performance reasons. Thus having them parented to an empty GameObject for each chunk makes sense, as deleting the chunk parent removes all the children blocks.
Positioning
Web Analogy: You want to keep the position of the content contained ‘relative’ to the container and not to the web page.
Unity Translation: You’ve created a bunch of helper drones which hover around the player. You would really not rather write code to tell them to chase after the player, so instead you instantiate them as children of the player game object.
The Actor Component Model
GameObjects on their own are pretty useless — as we’ve seen they’re pretty much just containers. In order to add functionality to them we have to add components, which are essentially scripts written in either C# or Javascript.
Unity works off an Actor Component model, put simply the GameObjects are the actors and the Components are your scripts.
If you’ve written any web apps before you’ll be familiar with the idea of creating small reusable components such as buttons, form elements, flexible layouts that have various different directives and customisable properties. Then assembling these small components into larger web pages.
The big advantage of this approach is the level of reusability and clearly defined communication channels between elements. Likewise in game development, we want to minimise the risk of unintended side effects. Small bugs tend to spiral out of control if you’re not careful, and are extremely difficult to debug. Thus creating small, robust and reusable components is critical.
Key Built-in Components
I think it’s time for a few examples of the built in components provided by the Unity Games engine.
- MeshFilter: Allows you to assign materials to a 3D mesh to a GameObject
- MeshRender: Allows you to assign materials to a 3D Mesh
- [Box | Mesh]Collider: Enables detection of GameObject during collisions
- Rigidbody: Enables realistic physic simulation to act on GameObjects with 3d Meshes and will be trigger detection events on box colliders
- Light: Illuminates portions of your scene
- Camera: Defines the player viewport to be attached to a GameObject
- Various UI Canvas Components for displaying GUIs
There are loads more, but these are the main ones you’ll need to get familiar with. One tip is that you can access all the docs for these through the unity manual and scripting reference offline wherever you are:

The builtin components control physics and visuals primarily, but to really make a game, you’re going to need to accept user input and manipulate those standard components as well as the GameObjects themselves.
To start creating components, go into the desired GameObject > Add Component > type the name of your new component in the search bar > new script (c#).
As a general recommendation I’d advise against using Javascript in Unity. It hasn’t been kept updated with all the great stuff that came with ES6, and most of the more advanced stuff relies on C# stuff ported over to Javascript… It just becomes a one giant work-around in my experience.
Key Functions
All components inherit from the MonoBehaviour Class. It includes several standard methods, most importantly:
- void Start() which is called whenever an object containing the script is instantiated in the scene. This is useful anytime we want to perform some initialisation code, eg. set a player’s equipment after they spawn into a match.
- void Update() which is called every frame. This is where the bulk of code involving user input will go, updating various properties such as the motion of the player in the scene.
Inspector Variables
Often we want to make components as flexible as possible. For example all weapons might have a different damage, rate of fire, has_sight etc. Whilst all the weapons are essentially the same thing we may want to be able to create different variations quickly through the unity editor.
Another example where we might want to do this is when creating a UI component that tracks user mouse movements and places a cursor in the viewport. Here we might want to control the sensitivity of the cursor to movements (if the user was using a joystick or gamepad vs a computer mouse). Thus it would make sense to have these variable easy to change both in edit mode and also experiment with them during runtime.

We can do this easily by simply declaring them as public variables in the body of the component.

Accepting user input
Of course, we want our game to respond to user input. The most common ways to do that are using the following methods in the Update() function of a component (or anywhere else you like):
- Input.GetKey(KeyCode.W) Returns True W key is being held down
- Input.GetKeyDown(KeyCode.W) Returns True when W key is first pressed
- Input.GetAxis(“Vertical”), Input.GetAxis(“Horizontal”) Returns between -1,1 mouse input movement
Once we have user input we want GameObjects within our scene to respond. There are several types of responses we may consider:
- Translation, Rotation, Scale
- Create new GameObjects
- Sending messages to existing GameObjects / components
Transformations
GameObjects all have a transform property which enable various useful manipulations on the current game object to be performed.

The methods above are fairly self explanatory, just note that we use lowercase gameObject to refer to the GameObject which owns this specific instance of the component.
In general it’s a good practice to use local[Position,Rotation] rather than the global position / rotation of an object. This usually makes it easier to move objects in a manner that makes sense, as the local space axis will be oriented and centered on the parent object rather than the world origin and x,y,z directions.

If you need to convert between local and world space (which often is the case) you can use the following:

As you can imagine, there is some fairly simple linear algebra behind this hinted at by the ‘Inverse’ in the method name.
Creating new GameObjects
Since GameObjects are basically everything in your scene, you might want to be able to generate them on the fly. For example if your player has some sort of projectile launcher you might want to be able to create projectiles on the fly which have their own encapsulated logic for flight, dealing damage, etc…
First we need to introduce the notion of a Prefab . We can create these simply by dragging any GameObject in the scene hierarchy into the assets folder.

This essentially stores a template of the object we just had in our scene with all the same configurations.

Once we have these prefab components we can assign them to inspector variables (as we talked about earlier) on any component in the scene, so that we can create new GameObjects as specified by the prefab at any time.
We can then perform ‘instantiation’ of the prefab and manipulate it to the desired location in the scene and establish the necessary parent relationships.

Accessing other GameObjects and Components
Often we need to communicate with other GameObjects as well as their associated components. Once you have a reference to a game object this is pretty simple.
ComponentName comp = some_game_object.GetComponent<ComponentName>();
After that you can access any of the public methods / variables of the component in order to manipulate the GameObject. This is the straightforward bit, however actually obtaining the reference to the GameObject can be done in several ways…
Access via inspector variable
This is the most straightforward. Simply create a public variable for the GameObject, as we’ve demonstrated earlier with the prefabs, and manually drag and drop it onto the component via the inspector. Then access the variable as above.
Access via tagging
We can tag GameObjects or prefabs via the inspector and then use the find game object functions to locate references to them.

This is simply done as below.
GameObject some_game_object = GameObject.FindGameObjectWithTag(“Brick”);
Access via transform
If we wish to access components in some parent object we can easily do this via the transform attribute.
ComponentName comp = gameObject.transform.parent.GetComponent<ComponentName>();
Access via SendMessage
Alternatively if we want to send a message to many other components or wish to message an object which is far up a nested hierarchy, we can use the send message functions, which accept the name of the function followed by the arguments.
gameObject.SendMessage(“MethodName”,params); // Broadcast message
gameObject.SendMessageUpwards(“MethodName”, params); // Only received by components which are nested above.
You may have heard of this before when people compare FPS games that are ‘physics based’ or ‘ray based’. Raycasting is essentially like having a laser pointer which, when it comes into contact with a ‘collider’ or ‘rigidbody’, it returns a ‘hit’ and passes back the details of the object.
There are two scenarios where this comes in handy (There’s probably loads more):
- If you were designing a weapon system for a game, you could use raycasting for hit detection, and even customise the length of the ray so that melee items ‘hit’ only at short ranges
- Create a ray from the mouse pointer to a point in 3d space, ie if you wish the user to be able to select units with their mouse in a strategy game.

As you can see, the code for this is a little bit more involved. The key thing to understand is that to cast a ray to where the mouse is pointing in 3d space requires the ScreenPointToRay transformation. The reason for this is the camera is rendering a 3d space as a 2d viewport on your laptop screen, so naturally there is a projection involved to transfer back to 3d.
Earlier we mentioned the Collider and Rigidbody components which can be added to an object. The rule for collisions is that one object in the collision must have a rigidbody and the other a collider (or both have both components). Note that when using raycasting, rays will only interact with objects with collider components attached.
Once setup within any custom component attached to the object, we can use the OnCollisionEnter, OnCollisionStay and OnCollisionExit methods to respond to collisions. Once we have the collision information we can get the GameObject responsible and use what we learned earlier to interact with components attached to it as well.

One thing to note is that rigid-bodies provide physics such as gravity for objects, so if you want this turned off you will need to check the is_kinematic on.

We won’t go into any of this now but perhaps in a future article — just to make you aware that they exist.
Creating GUI’s
Unity has a fully fledged UI engine for laying out the GUI for your game. In general these components work pretty similarly to the rest of the engine.
Extending the Unity Editor
Unity enables you to add custom buttons to your inspectors so that you can affect the world during edit mode. For example, to help with world building you might develop a custom tool window for building modular houses.
Unity has a graph-based animation system which enables you to blend and control animations on various objects such as players implementing a bone based animation system.
Materials and PBR
Unity runs off a physically-based rendering engine which enables real time lighting and realistic materials. The reality is you will either need to learn 3d modeling first or use models made and optimised by someone else before you get to this, in order to make stuff that actually looks good.
If you’re planning on writing your first game, don’t underestimate the complexity and time it takes to write even the most trivial of games. Remember most of the games that come out on Steam have teams working on them for years full-time!
Pick a simple concept and break it down into small achievable milestones. It’s highly recommended to separate your game into as small independent components as possible, as you’re much less likely to run into bugs if you keep the components simple rather than monolithic code blocks.
Before you go and write any code for any part of your game, go and research what someone else has done before to solve the same problem — chances are they’ll have a much slicker solution.
Game design has one of the best communities of any out there, and there are loads of highly skilled pros in the industry who put content up for free or for next to nothing. It’s a field that requires 3d Modelers, Concept Artists, Game Designers, Programmers and so on. I’ve linked some great general resources that I’ve come across for each of these fields below:
Concept Art
- Feng Zhu Design School (Over 90 hour long concept art tutorials)
- Tyler Edlin Art (Great BST art community with feedback from pros on monthly challenges)
- Art Cafe (Interviews and Workshops with Famous Concept Artists)
- Trent Kaniuga (Illustrator and 2D artist who’s also making his own game)
3D Modelling
- CG Cookie (Best Mesh Modeling Basics in Blender Ever, they’ve loads of other excellent content for blender)
- Tor Frick (Hard Surface Modelers & Sculptors in Blender)
- Gleb Alexandrov (Short powerful rendering tutorials in Blender)
Game Design
- DoubleFine Amnesia Fortnight (GameDevs who do a 2 week hackathon and record their entire design process)
- GameMakers Toolkit (Examines Game Design Principles)
Programming
- Handmade Hero (Writing a game and engine from scratch in C)
- Jonathan Blow (Indie dev who livestreams his game development)
- Brackeys (Nice Unity Tutorials)
Hope you guys liked this tutorial! I do a bit of graphic design work as well as game and UI prototypes so check out my portfolio ! I’m also on linked in .
Portfolio | LinkedIn

UCD Financial Maths Student, Learning Data Science, Winning Team @ Citadel Dublin Data Open. www.hugodolan.com/linkedin | Mailing List: http://eepurl.com/gkV7ov
If this article was helpful, share it .
Learn to code for free. freeCodeCamp's open source curriculum has helped more than 40,000 people get jobs as developers. Get started
- Scripting API
- unity3d.com
Unity Manual
- Unity User Manual 2021.1
- 2D game development quickstart guide
Creating a 2D game
Before you create a 2D game, you need to decide on a game perspective and an art style .
To create a 2D game, set up your Unity project and then familiarize yourself with the relevant concepts in the following order:
Fundamentals
Sprites A 2D graphic objects. If you are used to working in 3D, Sprites are essentially just standard textures but there are special techniques for combining and managing sprite textures for efficiency and convenience during development. More info See in Glossary
Building in-game environments
Character animation, user interface.
Profiling, optimizing and testing
GameObjects The fundamental object in Unity scenes, which can represent characters, props, scenery, cameras, waypoints, and more. A GameObject’s functionality is defined by the Components attached to it. More info See in Glossary are fundamental objects in Unity that represent characters, props, scenery, and more. Every object in your game is a GameObject.
GameObjects represent the items in your game; the space in which you place them to build your level is called a scene A Scene contains the environments and menus of your game. Think of each unique Scene file as a unique level. In each Scene, you place your environments, obstacles, and decorations, essentially designing and building your game in pieces. More info See in Glossary . Scenes in Unity are always 3D; when you make a 2D game in Unity, you typically choose to ignore the third dimension (the z-axis) but you can also use it in special cases, for example when making 2.5D games.
The behavior of GameObjects is defined by blocks of functionality called components. The following components are fundamental for 2D games:
Transform : the Transform component A Transform component determines the Position, Rotation, and Scale of each object in the scene. Every GameObject has a Transform. More info See in Glossary determines the Position, Rotation, and Scale of each GameObject in the scene. Every GameObject has a Transform component.
Sprite Renderer A component that lets you display images as Sprites for use in both 2D and 3D scenes. More info See in Glossary : the Sprite Renderer component renders the Sprite and controls how it looks in a scene.
Cameras A component which creates an image of a particular viewpoint in your scene. The output is either drawn to the screen or captured as a texture. More info See in Glossary : devices that capture and display the world to the player. Marking a Camera as Orthographic removes all perspective from the Camera’s view. This is mostly useful for making isometric or 2D games.
Collider 2D : this component defines the shape of a 2D GameObject for the purposes of physical collisions A collision occurs when the physics engine detects that the colliders of two GameObjects make contact or overlap, when at least one has a Rigidbody component and is in motion. More info See in Glossary . See 2D Physics .
Components are UI (User Interface) Allows a user to interact with your application. Unity currently supports three UI systems. More info See in Glossary representations of C# classes; you can use scripts to change and interact with components, or create new ones. See the Scripting section for more details.
All 2D games need scripts A piece of code that allows you to create your own Components, trigger game events, modify Component properties over time and respond to user input in any way you like. More info See in Glossary . Scripts respond to input from the player and arrange for events in the gameplay to happen when they should.
For details on how to use scripts in Unity see Scripting Overview . Also see the Unity Learn Beginner Scripting course.
Scripts are attached to GameObjects, and any script you create inherits from the MonoBehaviour class.
Sprites are 2D graphic objects. You use Sprites for all types of 2D games. For example, you can import an image of your main character as a Sprite.
You can also use a collection of Sprites to build a character. This allows you greater control over the movement and animation of your characters.
Importing and setting up Sprites
Import your Sprites with Unity’s recommended settings; see Importing and Setting Up Sprites .
Rendering Sprites
Use the Sprite Renderer component to render your Sprites. For example, you can use the Sprite Renderer to change the color and opacity of a Sprite.
See the Introduction to the Sprite Renderer Learn tutorial . Sorting SpritesBy organizing Sprites in layers, you can create an illusion of depth. You can sort Sprites according to many strategies. See Sorting Sprites for full details. For example, you might sort Sprites along the y-axis, so that Sprites that are higher up are sorted behind Sprites that are lower, to make the Sprites that are higher appear further away than the Sprites that are lower.
To set the overlay order of Sprites, use Sorting Layers .
To group GameObjects with Sprite Renderers , and control the order in which they render their Sprites, use Sorting Groups .
Sprite Atlas
You can use a Sprite Atlas A texture that is composed of several smaller textures. Also referred to as a texture atlas, image sprite, sprite sheet or packed texture. More info See in Glossary to consolidate several Textures into a single combined Texture. This optimizes your game and saves memory. For example, you can add all your Sprites associated with a particular character or purpose to a Sprite Atlas.
See the Introduction to the Sprite Atlas Learn tutorial .
Environment design refers to the process of building your game’s levels and environments. You can combine the environment design tools in this section in whichever way makes the most sense for your game; for example, you can make a top-down game using only 9-slice, or you can make a side on platformer with Tilemap and SpriteShape.
9-slicing is a 2D technique that allows you to reuse an image at various sizes without needing to prepare multiple assets. Unity can dynamically stretch and tile designated parts of a Sprite to allow one Sprite to serve as the border or background for UI elements of many sizes. See 9-slicing sprites .
For example, you could use 9-slicing to stretch a Sprite to shape when you build a 2D level.

See the Using 9-Slicing for Scalable Sprites Learn tutorial .
The Tilemap A GameObject that allows you to quickly create 2D levels using tiles and a grid overlay. More info See in Glossary component is a system that stores and handles Tile assets for creating 2D levels. Use the 2D Tilemap Editor package (installed by default) to use Tilemaps.
For example, you can use Tilemaps to paint levels using Tiles and brush tools and define rules for how Tiles behave.

See the Introduction to Tilemaps Learn tutorial .
2D Tilemap Extras
To add some extra Tilemap assets to your Project, install the 2D Tilemap Extras package. This package contains reusable 2D and Tilemap Editor scripts that you can use for your own Projects. You can customize the behavior of the scripts to create new Brushes that suit different scenarios.
Isometric Tilemaps
For games with isometric perspective, you can create Isometric Tilemaps .
SpriteShape
In a similar way to a vector drawing tool, SpriteShape provides a more flexible way to create larger Sprites, such as organic-looking landscapes and paths. See the Sprite Shape Profile .
See the Working with SpriteShape tutorial .
There are three different ways you can animate 2D characters:
Frame-by-frame
Frame-by-frame animation is based on the traditional cel animation technique of drawing each moment of an animation as individual images, which are played in fast sequence, like flipping pages on a flipbook.
To do frame-by-frame animation, follow the Frame-by-frame Animation workflow .

See the Introduction to Sprite Animations Learn tutorial .
In cutout animation, multiple Sprites make up the body of a character, and each piece moves to give the visual effect of the whole character moving. This animation style is similar to skeletal animation (see below), except that the Sprites don’t bend.

With skeletal animation, you map a Sprite or a group of Sprites onto an animation skeleton. You can create and define animation bones for characters and objects, that define how they should bend and move. This approach allows the bones to bend and deform the Sprites, for a more natural movement style. To use skeletal animation, you need to use the 2D Animation package (installed by default).
For a 2D Animation workflow, including a guide to working with the Bone Editor, see the 2D Animation documentation .

This section describes your graphics options when using Universal Render Pipeline A series of operations that take the contents of a Scene, and displays them on a screen. Unity lets you choose from pre-built render pipelines, or write your own. More info See in Glossary (URP).
Because you’re using URP with the 2D Renderer, you can use the Light 2D component to apply optimized 2D lighting to Sprites. For details, see Introduction to Lights 2D .

To set up lighting:
Prepare your Sprites for lighting. For details, see Preparing Sprites for Lighting .
Set up normal map A type of Bump Map texture that allows you to add surface detail such as bumps, grooves, and scratches to a model which catch the light as if they are represented by real geometry. See in Glossary and mask Textures. 2D Lights can interact with normal map and mask Textures linked to Sprites to create advanced lighting effects, such as normal mapping . See Setting up normal map and mask Textures .
Create a 2D Light GameObject; see 2D Lights Properties .
Configure the 2D Renderer Data asset; see Configuring the 2D Renderer Asset .
(Optional) if you want to apply 2D Light effects to a pixel The smallest unit in a computer image. Pixel size depends on your screen resolution. Pixel lighting is calculated at every screen pixel. More info See in Glossary art game, see 2D Pixel Perfect .
See the Lighting in URP Learn tutorial .
To define the shape and properties that a Light uses to determine the shadows it casts, use the Shadow Caster 2D component . Increase the Light’s Shadow Intensity above zero.

Enhanced look and feel
Particle systems and post-processing A process that improves product visuals by applying filters and effects before the image appears on screen. You can use post-processing effects to simulate physical camera and film properties, for example Bloom and Depth of Field. More info post processing, postprocessing, postprocess See in Glossary are optional tools that you can use to add polish to your game.
Particle systems
You can use particle systems to create dynamic objects like fire, smoke or liquids, as an alternative to using a Sprite. Sprites are more suited to physical objects. See Particle systems A component that simulates fluid entities such as liquids, clouds and flames by generating and animating large numbers of small 2D images in the scene. More info See in Glossary .

Post-processing
You can use post-processing effects and full-screen effects to significantly improve the appearance of your game. For example, you can use these effects to simulate physical camera or film properties, or to create stylized visuals.
URP has its own post-processing implementation. See Post-processing in the Universal Render Pipeline .

The Physics 2D settings define limits on the accuracy of the physical simulation in your 2D game. See 2D Physics .
This video provides an overview of 2D physics features in Unity 2020.1.
To learn how to use Unity’s 2D physics engine A system that simulates aspects of physical systems so that objects can accelerate correctly and be affected by collisions, gravity and other forces. More info See in Glossary , see the 2D Physics Learn tutorial .
The following 2D physics tools are useful for 2D games.
Rigidbody 2D
Collider 2d, 2d effectors.
A Rigidbody A component that allows a GameObject to be affected by simulated gravity and other forces. More info See in Glossary 2D component places a GameObject under the control of the physics engine. See Rigidbody 2D .

Collider 2D components define the shape of a 2D GameObject for the purposes of physical collisions. You can also use Collider An invisible shape that is used to handle physical collisions for an object. A collider doesn’t need to be exactly the same shape as the object’s mesh - a rough approximation is often more efficient and indistinguishable in gameplay. More info See in Glossary 2D components for input detection. For example, in mobile games you can use them to make Sprites selectable.
The Collider 2D types that you can use with Rigidbody 2D are:
Circle Collider 2D
Box Collider 2D
Polygon Collider 2D
Edge Collider 2D
Capsule Collider 2D
Composite Collider 2D

When you set a Collider 2D as a Trigger (by enabling its Is Trigger property), it no longer behaves as a physical object, and it can intersect with other Colliders without causing a collision. Instead, when a Collider enters its space, Unity calls the OnTriggerEnter function on the Trigger GameObject’s scripts.

Joints attach GameObjects together. You can only attach 2D joints A physics component allowing a dynamic connection between Rigidbody components, usually allowing some degree of movement such as a hinge. More info See in Glossary to GameObjects that have a Rigidbody 2D component attached, or to a fixed position in world space. See 2D Joints .
Use Effector 2D components A functional part of a GameObject. A GameObject can contain any number of components. Unity has many built-in components, and you can create your own by writing scripts that inherit from MonoBehaviour. More info See in Glossary with Collider 2D components to direct the forces of physics in your scene when GameObject Colliders come into contact with each other. See 2D Effectors .
You can add background music and sound effects to your game in Unity; see Audio Overview . Use third-party software to create your audio and import it into Unity with the recommended settings.
If you want to add a menu or help to your game, you need to set up a user interface . To set up a user interface, use Unity UI .
Profiling, optimizing and testing a build
Profiling allows you to see how resource-intensive the different parts of your game are. You should always profile your game on its target release platform; see Profiling your application .
After profiling, you can use the results to make performance improvements and optimizations. See Understanding optimization in Unity .
Test your game and your code with the Unity Test Framework; see Unity Test Framework .

When you’ve finished your game, you’re ready to publish it. See Publishing Builds .

Build skills in Unity with guided learning pathways designed to help anyone interested in pursuing a career in gaming and the Real Time 3D Industry.
Explore a topic in-depth through a combination of step-by-step tutorials and projects.
Create a Unity application, with opportunities to mod and experiment.
Find what you’re looking for with short, bite-sized tutorials.
Set Up Your First Microgame

Unlock your creativity
Download the world’s most popular development platform for creating 2D and 3D multiplatform games and interactive experiences.
Create with Unity in three steps
1. download the unity hub.
Follow the instructions onscreen for guidance through the installation process and setup.
Download for Windows Download for Mac Instructions for Linux
2. Choose your Unity version
Install the latest version of Unity, an older release, or a beta featuring the latest in-development features.
Visit the download archive
3. Start your project
Begin creating from scratch, or pick a template to get your first project up and running quickly. Access tutorial videos designed to support creators, from beginners to experts.
Access our Pro Onboarding Guide

Unity Hub system requirements
OS: Windows 7 SP1+, 8, 10, 64-bit versions only; Mac OS X 10.13+; Ubuntu 16.04, 18.04, and CentOS 7.
GPU: Graphics card with DX10 (shader model 4.0) capabilities.
What is the Unity Hub?
Use the Unity Hub to manage multiple installations of the Unity Editor, create new projects, and access your work.
Simplify your journey
The Unity Hub comes with fun, guided learning paths to help new users become creators more quickly.

Download the Runner template today
Unity’s new Runner template’s feature sets make it easier to create your own unique, high-quality games in a popular genre that will stand out on app stores.

Personalize with Mods
Take the fun of game creation to a whole new level. Through mini-adventures we call Creative Mods, you can easily add your own unique style and ideas to your game.

Share your playable game
Show off your new skills and get instant feedback. In just a few steps, you can publish a playable version of your game on the web to share with anyone.
Plans & Pricing
We offer a range of plans for all levels of expertise and industries.
Browse and download the different releases available for Unity.

Unity Long Term Support (LTS)
The release for creators who value maximum stability and support for their next project, the LTS version rolls up the features and improvements made across the year into a single installation. This is our default release, and it’s recommended for creators who are about to lock in production on a specific version of Unity.

Tech Stream
Tech Stream is for creators who value getting earlier access to new features in order to prepare for future projects. These versions are primarily recommended for the preproduction, discovery, and prototyping phases of development, but they can be used to get ready for the next LTS by enabling earlier feature adoption.

Prerelease technology
Get early access to our latest features, and help us improve quality by providing valuable feedback.
Support and services
Keep your project moving toward the finish line. We offer a variety of support options and services so you can get the right kind of help, at the right time.
Documentation
The Unity User Manual is the definitive repository for in-depth and procedural information on all of Unity’s features, UI, and workflows.
Knowledge Base
Whether you’re creating an account, importing assets, or baking a scene, this comprehensive library of articles created by experts has you covered.
Future-proof your next project with Unity Pro
Unity’s production-proven 3D platform is behind a wide range of innovative games, interactive experiences, and industrial applications today.
We use cookies to ensure that we give you the best experience on our website. Visit our cookie policy page for more information.
Press Herald
Account Subscription: ACTIVE
Questions about your account? Our customer service team can be reached at [email protected] during business hours at (207) 791-6000 .
9 places to nosh on bagels in southern Maine
From old-school spots to foodie favorites, there's a 'hole' lot to try.

You are able to gift 5 more articles this month.
Anyone can access the link you share with no account required. Learn more .
With a Press Herald subscription, you can gift 5 articles each month.
It looks like you do not have any active subscriptions. To get one, go to the subscriptions page .
Loading....
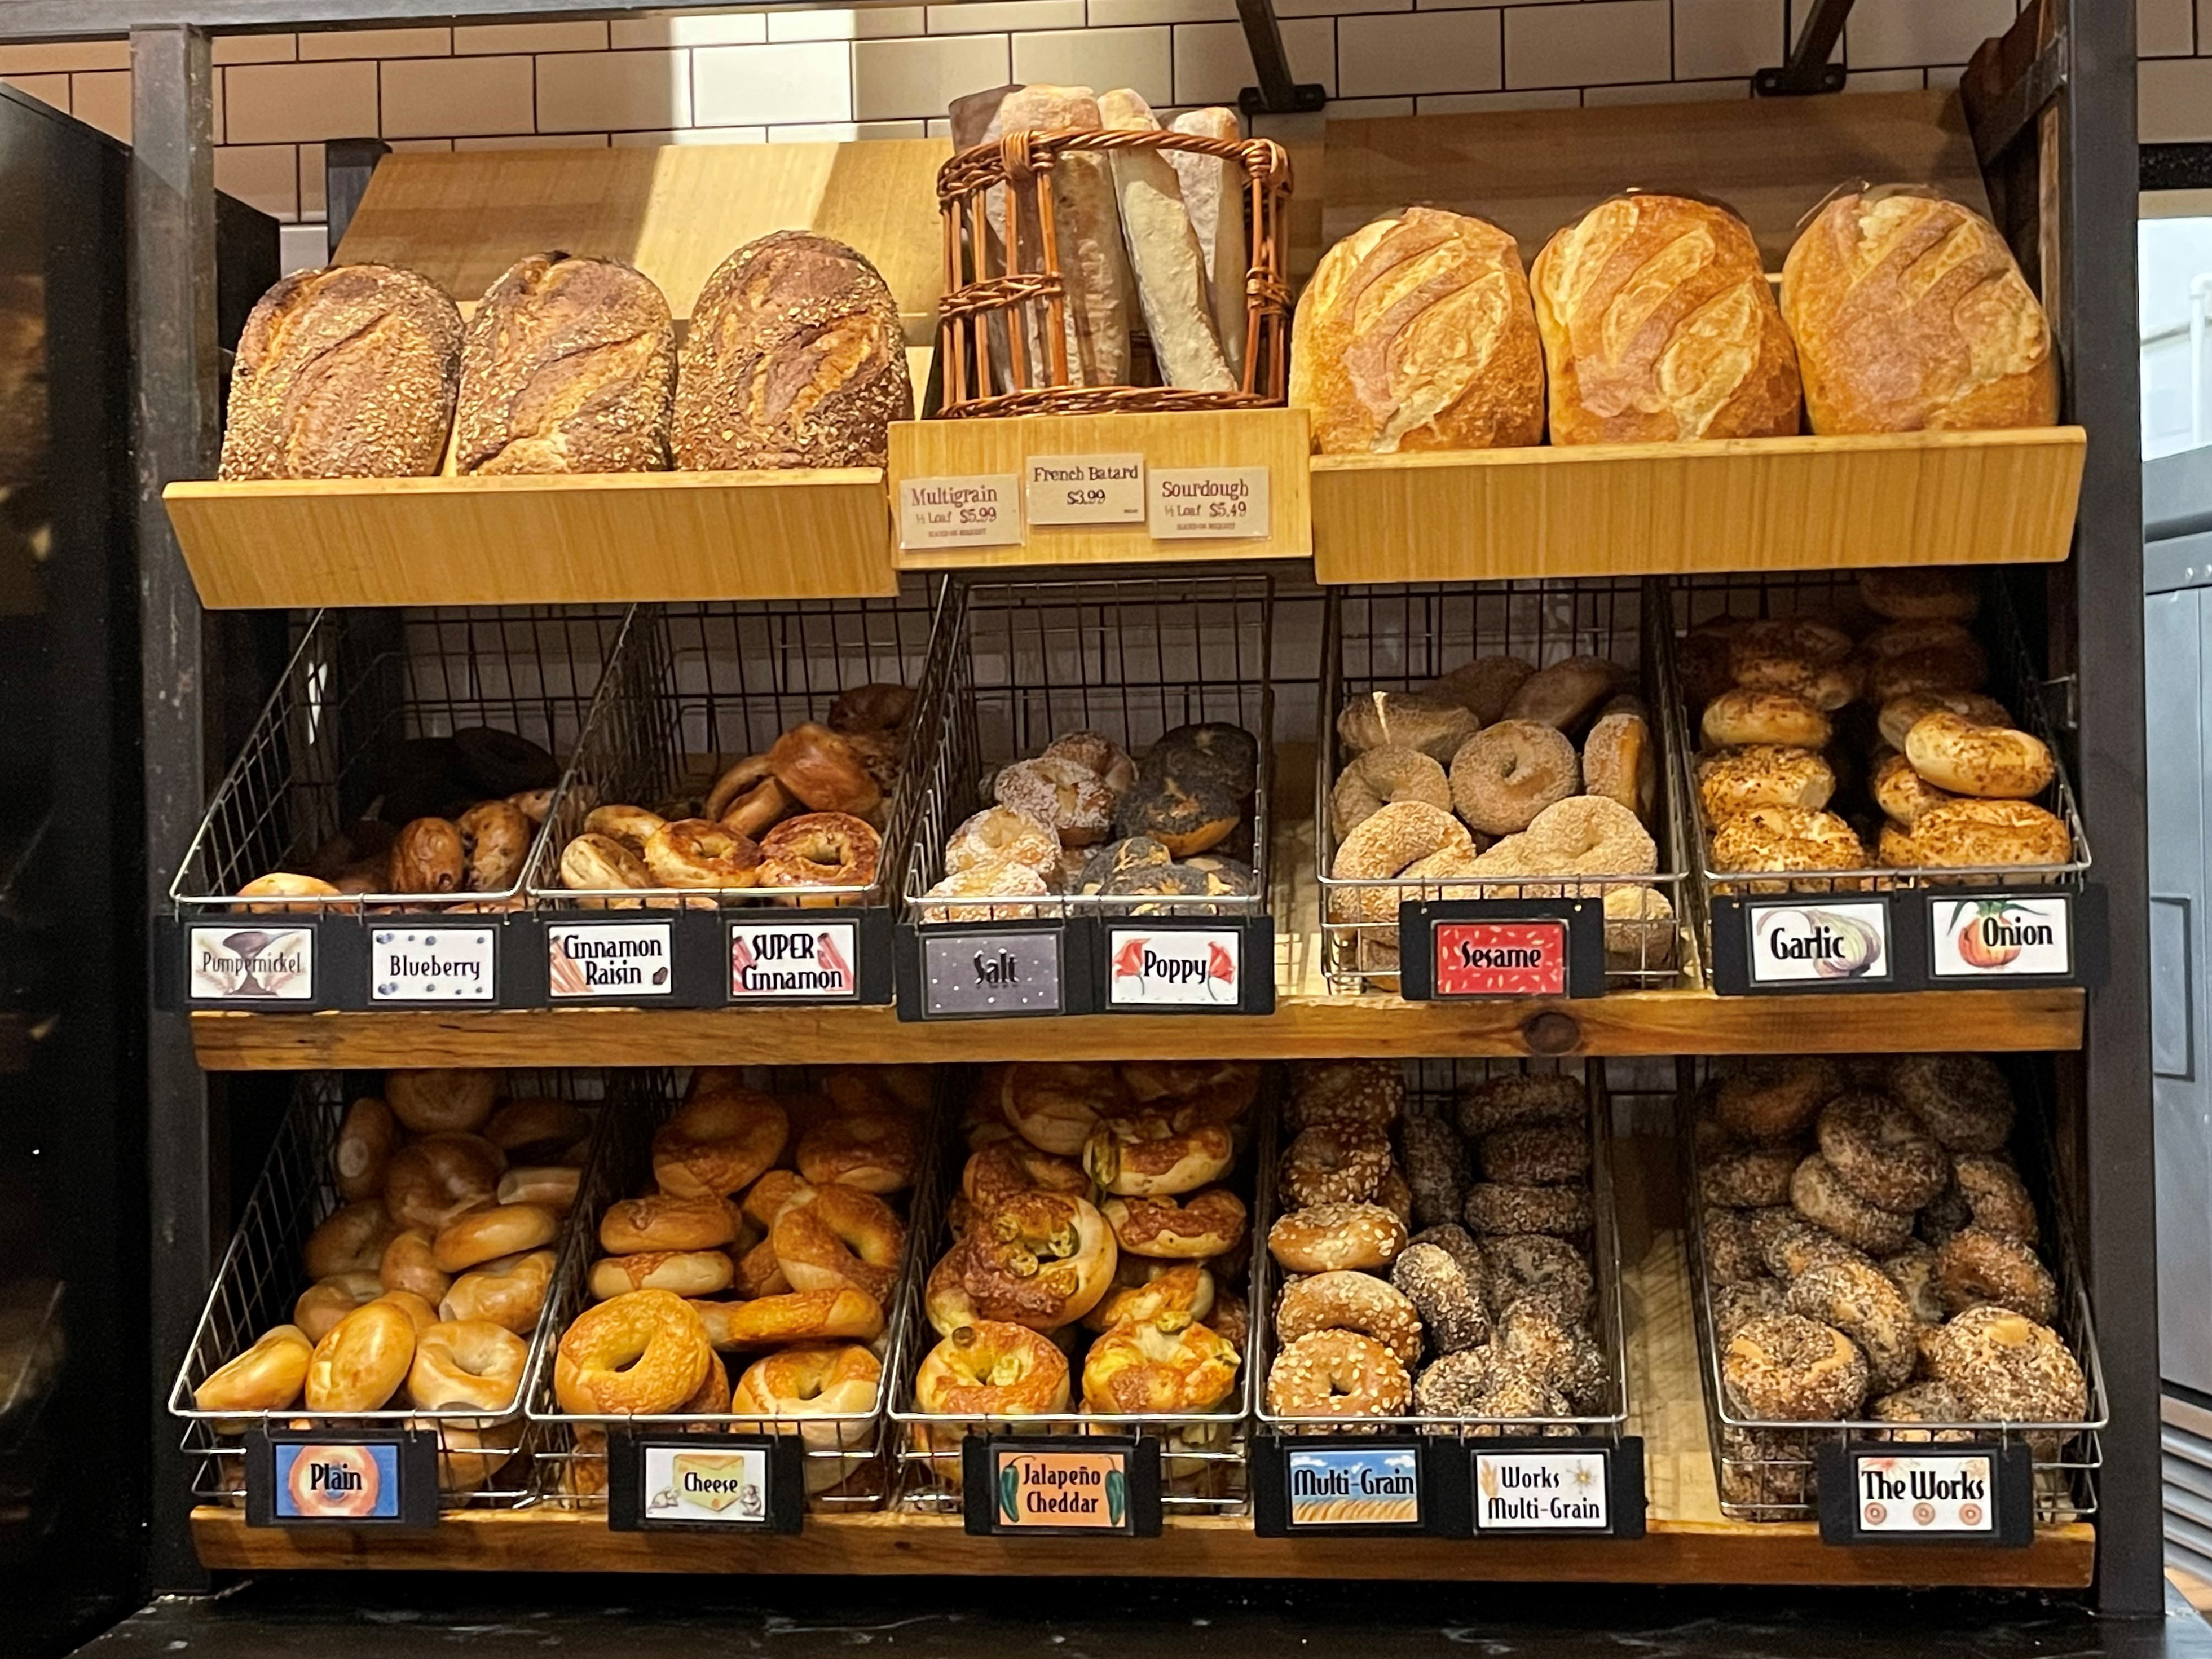
Bread and bagels at The Works Cafe in downtown Portland. Photo by Aimsel Ponti
From New York-style boiled bagels to Montreal-inspired wood-fired ones, there’s lots of great bagels in southern Maine and several shops have the accolades to back that up.
In 2023, Bon Appetit named bagels from Rose Foods and Rover Bagel among the best in the country.
Two years before that, Food & Wine Magazine put Rover, Forage and Scratch Baking Co. on its list of best bagels in the U.S.
Whether you like yours toasted with cream cheese or as the bread for your breakfast sandwich, you can find plenty of styles and flavors from Biddeford to Brunswick.
BEACH BAGELS
The offerings at Beach Bagels include a French toast and marble bagel, and the cream cheese menu comprises spreads like strawberry, olive and honey walnut. Along with breakfast sandwiches, Beach Bagels has hearty breakfast options like omelets and pancakes. Best of all, you’re steps away from a beach stroll. Just don’t let the seagulls steal your bagel. Advertisement
WHEN: 7 a.m. to 3 p.m. daily WHERE: 34 Old Orchard St., Old Orchard Beach. beachbagels.yolasite.com ______________
Dutchman’s opened in 2022 as a pop-up housed at Nomad pizza in Brunswick’s Fort Andross building. It’s since become a permanent fixture there and uses the pizzeria’s wood-fired ovens to bake its bagels. The hand-shaped, honey-boiled bagels come in plain, roasted garlic, poppy and a bagel-of-the-day flavor.
WHEN: 8 a.m. to 1 p.m. Thursday to Sunday WHERE: Fort Andross, 14 Maine St., Brunswick. dutchmans.me ______________
FORAGE MARKET
Making bagels at Forage Market involves a two-day aging process. The bagels are naturally leavened with wild yeast starter and baked next to a hardwood fire. There are usually five flavors available, including sesame and garlic. Breakfast sandwiches (including vegan options) are available. Forage also has a location in Lewiston. Advertisement
WHEN: 7 a.m. to 1 p.m. Monday to Friday, 8 a.m. to 1 p.m. Saturday and Sunday WHERE: 123 Washington Ave., Portland. foragemarket.com _____________
MISTER BAGEL
There are 10 or so Mister Bagel locations in Maine, including South Portland and Falmouth. It all began with the Portland location, which was the first bagel shop to open in Maine. The late Rick Hartglass started Mister Bagel in 1977, and it is still a family business. Music fans will appreciate the breakfast sandwich menu, which includes The David Bowie (bacon, egg and American cheese), the Jimmy Buffett (egg with roast beef and cheddar) and The Lady Gaga (avocado, salt and pepper, with or without egg).
WHEN: 6:30 a.m. to noon Monday to Friday, 7 a.m. to noon Saturday and Sunday WHERE: 599 Forest Ave., Portland. misterbagelforestave.com ______________
At Rose Foods, the menu varies depending on the day, but there are usually six to eight flavors available. For example, should you pop in on a Friday, you’ll find a poppy and onion bialy (a cousin of the bagel that is not boiled). Rose Foods also makes a number of bagel sandwiches, including the Classic Nova with Nova lox and the Classic Whitefish. Advertisement
WHEN: 7 a.m. to 2 p.m. daily WHERE: 428 Forest Ave., Portland. rosefoods.me
______________
ROVER BAGEL
At Rover Bagel, you’ll find wood-fired plain, poppy, sea salt, sesame and everything bagels available most of the time, and the spread game here is strong with cream cheese options like lemon-thyme-honey cream and chili-garlic.
WHEN: 7 a.m. to 1 p.m. Wednesday to Friday, 8 a.m. to 1 p.m. Saturday, 8 a.m. to noon Sunday WHERE: 10 West Point Lane Suite 10-204, Biddeford (Pepperell Mill). roverbagel.com
______________ Advertisement
SCRATCH BAKING CO.
You haven’t lived until you’ve experienced the line of devoted fans waiting for Scratch Baking Co. to open, especially on weekend mornings. Along with the popular Maine sea salt, plain and other everyday flavors, Scratch has a daily special bagel. There’s honeyed rosemary on Wednesday and jalapeno cheddar on Thursday. Scratch is also famous, at least to locals, for its P-Cheese spread. It’s a pimento cheese recipe made with cheddar, mayo, roasted red peppers and seasoning and was passed down to co-owner and head baker Allison Reid by her grandmother, Mern.
WHEN: 7 a.m. to 1 p.m. Wednesday to Saturday, 7 a.m. to noon Sunday WHERE: 416 Preble St., South Portland. scratchbakingco.com ___________
THE MAINE BAGEL
The Maine Bagel is a drive-thru with several breakfast and other kinds of sandwiches available. With a bagel list that features egg and bialy among the standards, the family-owned spot is the perfect place to stop on your way to Pine Point Beach. The Maine Bagel really shines with a dozen kinds of cream cheese spreads, including raisin-walnut, lox, strawberry, cranberry-nut and bacon-chive.
WHEN: 6:30 a.m. to 2 p.m. Tuesday to Friday, 7 a.m. to 1 p.m. Saturday. WHERE: 117 Route 1, Scarborough. themainebagel.com Advertisement
THE WORKS CAFE
The Works Cafe is an institution on the edge of the Portland’s Old Port. It opened in 1990 as Bagel Works before it changed its name in 2002. The original shop in this regional chain opened in Manchester, Vermont, in 1988, and there are 11 locations around New England, though just the one in Maine. Gone are the ’90s-era banana-walnut bagels and cold pizza cream cheese, but The Works Cafe is still a reliable place to grab a salt, multigrain or cinnamon raisin bagel, among others. The menu also has bowls, sandwiches and smoothies.
WHEN: 6 a.m. to 7 p.m. daily WHERE: 15 Temple St., Portland. workscafe.com
Success. Please wait for the page to reload. If the page does not reload within 5 seconds, please refresh the page.
Enter your email and password to access comments.
Forgot Password?
Don't have a commenting profile? Create one.
Hi, to comment on stories you must create a commenting profile . This profile is in addition to your subscription and website login. Already have a commenting profile? Login .
Invalid username/password.
Please check your email to confirm and complete your registration.
Create a commenting profile by providing an email address, password and display name. You will receive an email to complete the registration. Please note the display name will appear on screen when you participate.
Already registered? Log in to join the discussion.
Only subscribers are eligible to post comments. Please subscribe or login first for digital access. Here’s why .
Use the form below to reset your password. When you've submitted your account email, we will send an email with a reset code.
Send questions/comments to the editors.
Member Log In
Please enter your username and password below. Already a subscriber but don't have one? Click here .
Not a subscriber? Click here to see your options
IMAGES
VIDEO
COMMENTS
Make a game, in a game. Start creating with ready-made Unity Microgames. Each Microgame comes with its own collection of Mods: fun and easy customizations that also introduce you to game design, logic, visuals and more. Get started. Create with the bricks. Have a blast with this FPS. Meet your new 2D buddy. Rev it up with 3D Karting.
Find out how to use Unity and begin your learning journey with free online resources, courses, tutorials, and more. Unity for beginners. Get started with Unity ... Make a video game without any coding experience. Learn more. Bring your existing programming skills into Unity. Learn more. Create 2D and 3D games in Unity.
Roll A Ball. I have implemented post-processing techniques to enhance the visual appeal of the game. Specifically, after each collision event where the ball consumes a box, I have incorporated an animation that dynamically increases the size of the ball. In this course you will start your journey into 3D Game Development with Unity.
Free tutorials, courses, and guided pathways for mastering real-time 3D development skills to make video games, VR, AR, and more. My Learning ... Content Type. Pathways. Build skills in Unity with guided learning pathways designed to help anyone interested in pursuing a career in gaming and the Real Time 3D Industry. ... Learn to Make Games by ...
Unity Playground removes the need to code by providing an array of one-task components that are easy to use and mix. In this tutorial, discover the basics of using this project to make your own simple games. ... Build skills in Unity with guided learning pathways designed to help anyone interested in pursuing a career in gaming and the Real ...
Learn to develop games using the Unity game engine in this complete course for beginners. This course will get you up and running with Unity. Free game asset...
Do you want to learn how to make a video game in Unity, the most popular game engine in the world? Watch this beginner tutorial on YouTube, where you will learn the basics of Unity in less than an ...
Code games with Unity. New creators can download Unity for free and begin with ready-made Unity Microgames and Mods. Then dive into our tutorials to explore the structure of C#, the programming language used in Unity. Learn how to write simple C# scripts to create gameplay, mechanics, visual effects, AI systems and more. Download Unity.
Game Dev Beginner helps by delivering well-researched, deep dive tutorials on basic beginner subjects, often answering the questions that nobody else thought were important. Learn how to make games in Unity, with deep-dive tutorials that help beginners master the basics.
Learn how to make games in Unity, with free, in-depth tutorials that will show you how to create gameplay, build game systems and write your own C# scripts. Unity Tutorial Categories. Advanced Scripting.
Unity Translation: Your building a Minecraft clone and you've loads of blocks in the scene, you need to add and remove 'chunks' of blocks from the scene for performance reasons. Thus having them parented to an empty GameObject for each chunk makes sense, as deleting the chunk parent removes all the children blocks.
Have fun learning to code by making your own games! Join us for Jr Programmer: Learn to Create with Code Pt. 1, a free, four-week program where you'll gain foundational skills in Unity and C# programming to be able to create your own real-time 3D interactive games and experiences.
Create a 2D RPG in just one hour! Creator Kits are simple game projects available on Unity Learn that you can make in about an hour. The 2D RPG Kit is code-free, so you can focus on learning about the Unity Editor and customizing the game based on your own ideas and interests. Create your first 2D RPG. The Explorer: 2D Kit by Unity.
This guide will take you through some of the most important steps of getting started and up to speed in Unity, finding key learning resources, and planning out the lifecycle of producing a 2D game. It's based on best practice principles that will make sense for you, regardless of your previous experience. If you are interested in developing ...
Get started making your first video game! Download Unity: https://store.unity.com/?aid=1101lPGj ️ Donate: https://www.paypal.com/donate/?hosted_button_id=VC...
Light your Scenes to add depth and mood to your environments and to help the player experience the game world you've created. To set up lighting: Create a Light. Right-click in the Hierarchy window to open the GameObject menu, select Light, and select a type of Light to add to your scene. See Types of Light.
This is a full length series upload for those who don't want to go through all 23 tutorials. Want to know how to make your first game in Unity? In this tutor...
Creating a 2D game. Before you create a 2D game, you need to decide on a game perspective and an art style. To create a 2D game, set up your Unity project and then familiarize yourself with the relevant concepts in the following order: Fundamentals. Scripting. Sprites A 2D graphic objects. If you are used to working in 3D, Sprites are ...
Learn about programming for game development, from the very beginning with these easy to follow video tutorials. ... Effects 2D Mobile & Touch XR Physics User Interface For Educators AI & Navigation More. Content Type. Pathways. Build skills in Unity with guided learning pathways designed to help anyone interested in pursuing a career in gaming ...
4. Create a Microgame project: Hub 3.x. 8. 1. In Unity Hub, select the Projects tab, then click New project (top right corner). 2. The New Project window will open up. Next, set your Editor Version to the latest LTS: click the Editor Version dropdown, then find and select the latest LTS version you just installed. 3.
The official Unity 3D tutorials, from Unity itself, are divided into two sections. There are tutorials for learning the actual engine, then there are "services and production" tutorials, which teach you some "extra" features we'll talk about later. The tutorials for learning the engine will walk you through building different games.
If you are interested in learning how coding works in Unity, we provide free resources on our Learn site, such as: . Creator Kit: Beginner Code: In this short beginner project, you'll explore the basics of C# code for Unity in the context of an action RPG.; Create with Code: In this official course from Unity, you will learn to Create with Code as you program your own exciting projects from ...
In this video I go over replacing graphics and showing how and where to download the new project graphics for free. Connect With M...
Read the latest game development guides, e-books, webinars, case studies, as well as other resources for industry experts, in Unity's resource hub.
1. Download the Unity Hub. Follow the instructions onscreen for guidance through the installation process and setup. 2. Choose your Unity version. Install the latest version of Unity, an older release, or a beta featuring the latest in-development features. Visit the download archive. 3. Start your project.
C/C++. Since 2016, many Unity programming languages have been deprecated by the company, in favor of C#. Despite the robust Unity library and all the available tools, C# gives, sometimes you might want to use plugins. C++ is the most common Unity development language used for plugin creation. People use plugins for a number of reasons ...
Gone are the '90s-era banana-walnut bagels and cold pizza cream cheese, but The Works Cafe is still a reliable place to grab a salt, multigrain or cinnamon raisin bagel, among others. The menu ...