

How to create or add a slide in Microsoft PowerPoint

In Microsoft PowerPoint , a presentation is made up of multiple slides. There are several ways to create or add a slide in a PowerPoint presentation. After adding slides, you can move the slides around to adjust the order or sequence, and delete slides.
For instructions on how to add, move, and delete slides in PowerPoint, click a link below and follow the steps.
- Insert new slide.
- Copy and paste existing slide.
- Insert slide from another presentation.
- Move a slide.
- Delete a slide.
Insert new slide
To insert a new, blank slide in a presentation, select your version of PowerPoint and follow the steps.
PowerPoint Online (web version)
Powerpoint desktop application.
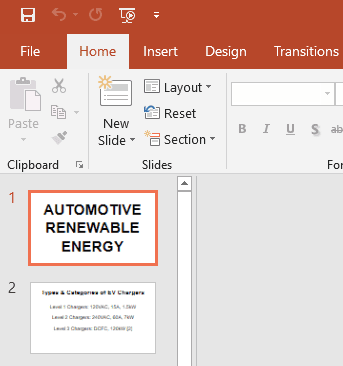
In the slide preview pane on the left, click the slide immediately above where you want to insert a new slide. Then, right-click the highlighted slide and select New Slide in the pop-up menu. The new, blank slide is inserted into the presentation below the slide you clicked.

- In the slide preview pane on the left, click with your mouse in-between two slides where you want to insert a slide.

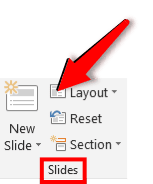
- In the PowerPoint Ribbon , on the Home or Insert tab, click the New Slide option.
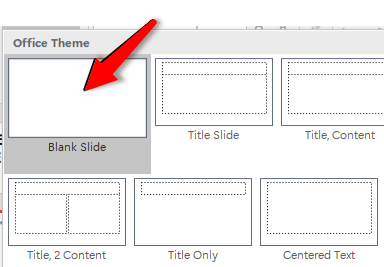
- In the drop-down menu that opens, select the type of slide to insert from the slide layout . The new slide is inserted into the presentation where you clicked in step 1 above.

Copy and paste existing slide
To add a copy of an existing slide to a presentation, follow the steps below.
- In the slide preview pane on the left, find the existing slide you want to copy.
- Using your mouse, right-click that slide and select Copy in the pop-up menu .
- Determine where you want to add the copied slide. Right-click the slide above where you want to paste it.
Insert slide from another presentation
To add a slide from another presentation, follow the steps below.
Inserting a slide from another PowerPoint presentation is only possible in the Microsoft PowerPoint desktop application. PowerPoint Online does not support this capability.
- In the slide preview pane on the left, left-click with your mouse in-between two slides where you want to insert a slide.
- In the PowerPoint Ribbon, on the Home or Insert tab, click the New Slide option.
- In the drop-down menu that opens, click the Reuse Slides option at the bottom.

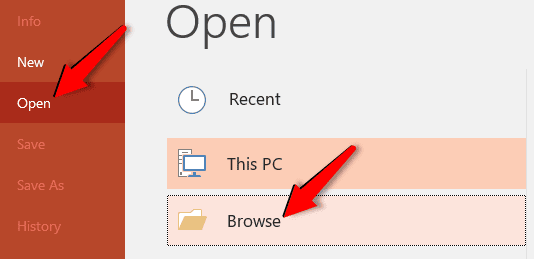
- In the Reuse Slides pane that opens on the right, click the Browse button.
- Find and select the PowerPoint presentation file with the slide you want to add to the currently open presentation, and click the Open button.
- A preview of the slides is displayed below the Browse option. Click the slide you want to insert into the currently-open presentation. A new slide is inserted, with text from the selected slide included in the new slide.
- To also apply the formatting of the selected slide to the newly-inserted slide, right-click the selected slide and select Apply Theme to Selected Slides .

Move a slide
To move a slide to another location in a PowerPoint presentation, follow the steps below.
- In the left preview pane, find the slide you want to move.
- Press and hold the left mouse button on the slide, then drag the slide up or down to where you want to move it.
- Release the left mouse button when you have dragged the slide to its new location.

Delete a slide
To delete a slide in a PowerPoint presentation, follow the steps below.
- Open the PowerPoint presentation.
- In the left preview pane, click the slide you want to delete.
- Press the Delete or Del key to delete the slide.
Related information
- How to change the background color of a slide in PowerPoint.
- How to insert a picture in Microsoft PowerPoint.
- How to add or remove slide transitions in Microsoft PowerPoint.
- How to add a video to a Microsoft PowerPoint presentation.
- How to insert a sound file into a PowerPoint presentation.
- How to start and stop a PowerPoint slide show.
- See our PowerPoint page for related links and information.
- Microsoft PowerPoint help and support.
- Computer software help and support.
- Slidesgo School
- PowerPoint Tutorials
How to Add Page Numbers in PowerPoint

Adding slide numbers is a good way to know how many slides are left before reaching the end of the presentation. In this new Slidesgo School tutorial, you’ll learn how to enable slide numbering step by step.
Adding Slide Numbers
Editing slide numbers, enabling slide numbers in our templates.
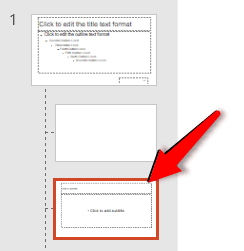
- Open your presentation in PowerPoint.
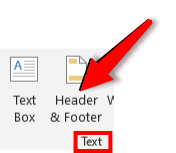
- Go to the Insert tab.
- In the Text group, click Header & Footer. A new window will open.
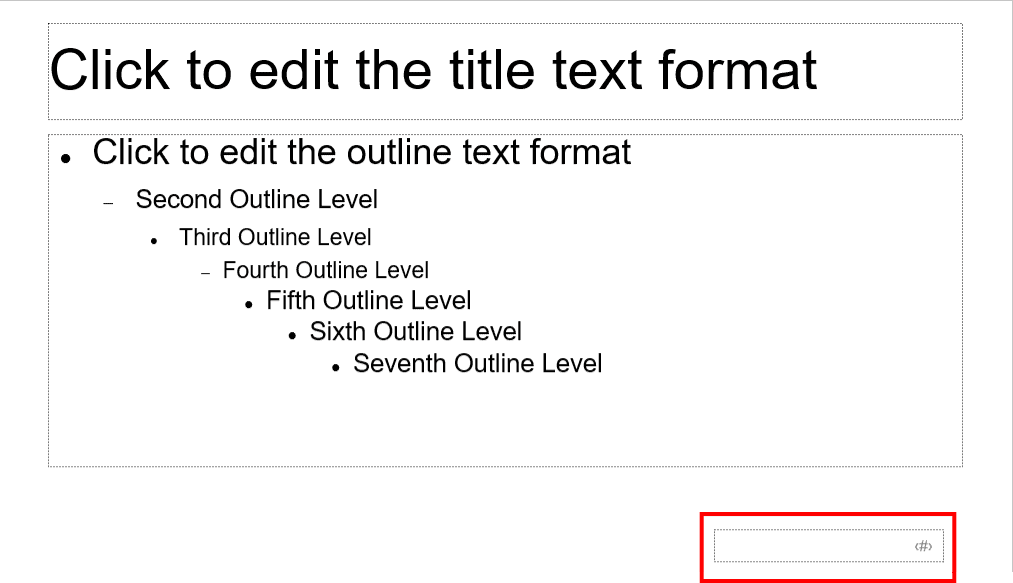
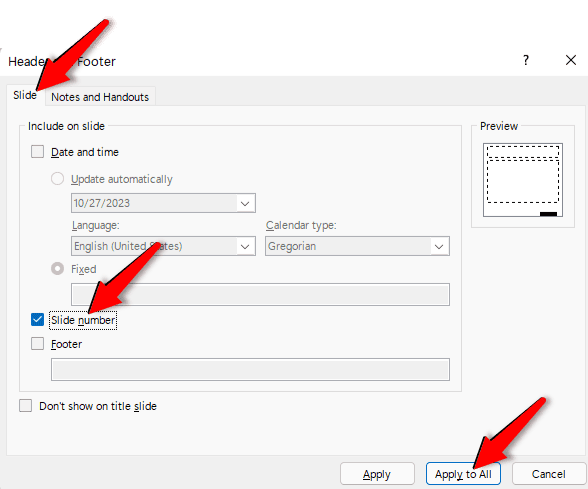
- Header & Footer buttonCheck “Slide number” to enable it. You’ll see a little box highlighted in black on the preview.
- If you don’t want to apply slide numbering or any other header or footer element to the title slide, check “Don’t show on title slide”.
- Once done, to apply these changes only to the selected slide, click Apply. If you want to apply the changes to all the slides, click Apply to All (the title slide will be skipped if you’ve checked “Don’t show on title slide”).
- Now you can edit the style of the slide numbers to adapt it to your needs.
- Some of our templates might require a different procedure in order to add slide numbering. We recommend that you read the last section of this tutorial.
- Run PowerPoint and open the presentation in which the slide numbers are enabled.
- If you want to edit the style of the text, you can do so in each individual slide. In fact, you can adjust the size, color, font, position, etc.
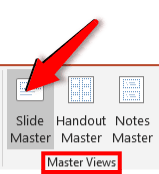
- If you want to adjust these parameters for all the slides at once, you need to do so in the slide master. Go to the View tab and, in the Master Views group, click Slide Master.
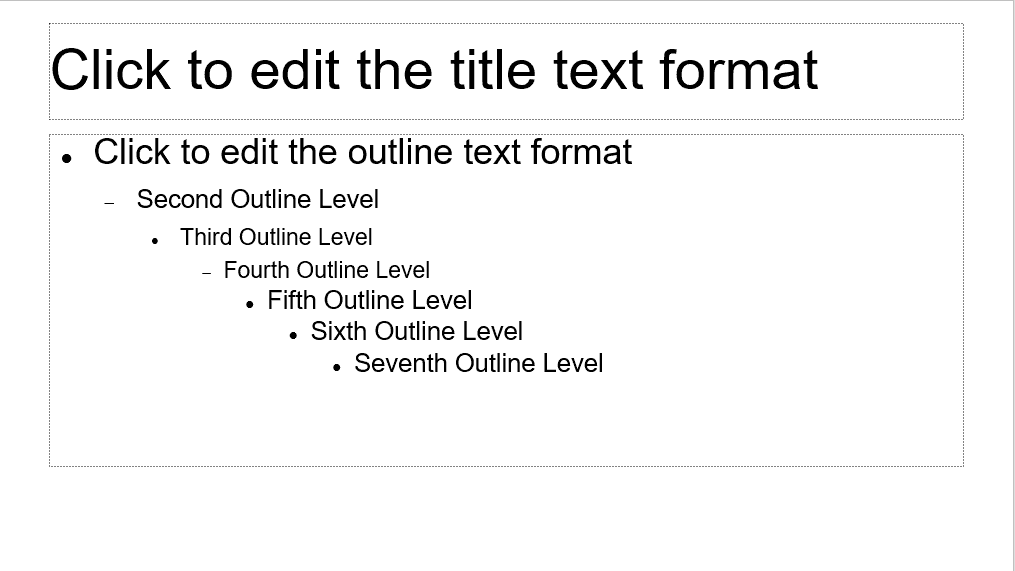
- Select the slide master (the first one, which acts as the parent slide). Then, click the slide number box, which is the one that contains the text “<#>”.
- Make any adjustments until you’re happy with the results. If you need to modify anything related to the typography, you’ll find the relevant options on the Home tab. To modify anything related to the text box, go to the Shape Format tab. You can also move the text box around to change its position.
- Once you’re done, go to the Slide Master tab and click Close Master View. The changes will be applied to all the slides.
- Please note that if you make any adjustment on any slide, it will be overridden by any further modification made on the slide master.
- Open our template in PowerPoint.
- Go to the View tab and, in the Master Views group, click Slide Master.
- Select the slide master (the first one, which acts as the parent slide).
- Go to the Slide Master tab and, in the Master Layout group, click Master Layout. A new window will open.
- Check “Slide numbers” and click OK. A text box will appear at the bottom-right corner with the text “<#>”.
- For this box to appear in all the slides, make sure you check “Footers”, located in the Master Layout group, on the Slide Master tab. This box needs to be checked for all the layout masters (please note that selecting multiple layout masters at the same time and checking this box doesn’t work as intended, since the change will be applied only to the current layout master).
- Now you can enable slide numbers as explained in the first section of this tutorial.
Do you find this article useful?
Related tutorials.

New feature available: edit our templates with Canva
Whenever you need to create, Slidesgo is there. We’re continually enhancing your presentation design process with templates that are primed to impress for any occasion. And in order to let your ideas flow best, comfort is key. How could Slidesgo help you with this? By making you feel right at home with our resources, no matter your preferred platform.You spoke, and we listened. Now, your favorite slides can be accessed on a new platform: Canva! This new format adds to our existing options (PowerPoint and Google Slides), expanding your ways to utilize our first-rate presentation content. We’ve started with a selection of Canva-ready...

How to print PowerPoint notes
Crafting an impactful PowerPoint slideshow and delivering a captivating presentation are distinct skills. The first focuses on designing appealing visuals to convey a clear message, while the second involves employing effective presentation techniques to ensure the audience grasps the idea. The content of this article will help you with the latter part of this process, guiding future presenters on how to print PowerPoint with speaker notes to enhance your presentations success and effectiveness.

Discover Our Online Presentation Software for Free
We have great news for you today! If you’ve been a Slidesgo fan for years (or months, or weeks, or days, or mere hours, we welcome everyone!), you’ll probably know for now that our templates are available mostly in two formats: for use in Google Slides and PowerPoint.Google Slides is a free tool, since you only need a Google account in order to use it. PowerPoint, on the other hand, is part of the Microsoft Office suite, so it’s not a free program, but that didn’t stop it from being one of the most popular options in the world!What if we...

Webinar: Presentation Audit
With more than 15,000 templates released on Slidesgo and a user base composed of millions of people, we estimate that the total number of presentations created adds up to… um, a lot! Our team of professional designers work very hard to provide you with editable slides so that the only thing you need to do is, well, customize the elements to your liking. Starting from any given template, the results may vary a lot depending on the person who edited the contents.Have you ever wondered “Is my presentation good enough?” and wished that an expert on presentations looked at your template...
Critical PowerPoint Shortcuts – Claim Your FREE Training Module and Get Your Time Back!
How to add slide numbers in PowerPoint (Step-by-Step)
- PowerPoint Tutorials
- Shortcuts & Hacks
- January 11, 2024
Adding slide numbers in PowerPoint should be an easy and straightforward task, but it is not. The way that PowerPoint manages your slide numbers is confusing.
While confusing and frustrating, the last thing you want to do – and I have done this before myself – is manually add the page numbers to the slides yourself.
Manually adding slide numbers is a classic 101 timewaster that you will instantly regret for two reasons.
The first reason is, manually doing anything in PowerPoint that PowerPoint can automatically do for you (even if it requires a little research), is never an effective use of your time. If you want to have a life outside of the office slaving away in PowerPoint, you will want to push as many of these types of tasks as possible back on to PowerPoint.
The second reason is, after you manually add your slide numbers in PowerPoint, you will have to manually update them again as you add or remove slides from your presentation. If you thought it was tedious to manually add the slide numbers in the first place, believe me when I say that it is ten times as tedious to have to manually update them again, and triple-check that all your slides are numbered correctly.
Follow along with me below and see the advanced trouble shooting video at the bottom of the page if you are still having issues.
NOTE: When printing your slides as handouts, be aware that it is your slide number (NOT the page number) that displays for each page of the speaker notes you print. To learn how to add speaker notes to PowerPoint (and some of the tricks to working with them), read my guide here .
Table of Contents
[watch] how to add slide numbers in powerpoint.
You are currently viewing a placeholder content from Youtube . To access the actual content, click the button below. Please note that doing so will share data with third-party providers.
Adding slide numbers in PowerPoint is one of those things that should be simple and easy (like it is in Microsoft Word) …but it’s not.
And just so we are on the same page, in this article you can use the term slide number and page number interchangeably. They are the same thing in this case.
While a lot of people can “properly” add them to the PowerPoint Slide Master , they still can’t get them to properly show up in the Normal View . And if you work in the professional services industry, this is something you’ll want to get right! The last thing you want to do is torpedo the overall quality of your presentation simply because you can’t get your slides properly numbered.
Take your PPT skills to the next level
Setting up your slide numbers in the slide master view.
When you are adding slide numbers to PowerPoint, or troubleshooting your slide numbers, the first place to check is your Slide Master.
That is because the Slide Number field is driven and controlled by your Slide Master.
Continue reading to see how this is done. If your Slide Numbers are already set up properly on your Slide Master, you move to the next section.
1. Navigate to your Slide Master
In all versions of Microsoft PowerPoint, the slide numbers (or page numbers) for your presentation are driven from the Slide Master View. As such, this is one of the best places to check first if you are having trouble adding slide numbers in PowerPoint, or if your slide numbers are not properly displaying.

To navigate to the Slide Master view in PowerPoint, simply:
- Navigate to the View tab in your Ribbon
- Select the Slide Master command
If you frequently need to use your Slide Master, you can use the Shift + Normal icon shortcut to jump to the slide master.
2. Navigate to your Parent Slide (the big slide)

In the Slide Master view, navigate to the Parent slide on the top left. This will be the first and largest the slide listed on the left side of your screen.
3. Open the Master Layout dialog box to find the Slide Number field

To open the Master Layout dialog box in PowerPoint, simply:
- Navigate to the Slide Master tab in your Ribbon
- Click Master Layout to open the dialog box
The Master Layout dialog box is where you set the Title, Text, Date, Slide number, and Footer for your PowerPoint presentation. To expand your knowledge and learn how to create a template in PowerPoint, read our guide here .
NOTE: PowerPoint is a contextual program, in that it only displays tabs for the views you are in, or the objects you have selected. If you do not see the Slide Master tab in the ribbon, that means that you have not properly navigated to your Slide Master yet. See step #1 above.
4. Select the Slide Number field
In the Master Layout dialog box, make sure you have a check mark next to Slide number . Selecting this option adds the slide number object to the Parent Slide, that you can then use to automatically add and update all the slides numbers in your presentation (instead of manually adding them yourself).
You can additionally add the Title, Text, Date and/or Footer objects if you don’t already have them on your Parent Slide. These are the fields you will want to set up and properly format if you are building a PowerPoint template for your team or company.
After you select which elements you want to appear on your slides, click OK .

5. Place and format your Slide Number
With the slide number added to your Master Slide , you can now format and/or place it wherever you want. In this case, I’ve placed mine in the upper right-hand corner of my slide.
Where you place it on your Parent Slide determines where the numbers show up (by default) on all of your Child Slides. In the below picture, you can see I placed my slide number in the upper right hand corner of my slide.

NOTE: By default, your slide numbers populate to all the Child Slides (the little slides in the Slide Master view) in your presentation. If they do not, you will need to cycle through the Child Slide layouts and delete the old page numbers individually, and then click the Footers icon in the Ribbon to add them back (another area where slide numbers in PowerPoint can be a pain).
To learn how to set up and format the Parent Slide and Child Slides for your PowerPoint template , read my guide here .
6. Close out of the Slide Master view

Before you exit out of the Slide Master view, I recommend double-checking that your slide numbers are properly set up both on the Parent Slide, and all the individual Child Slides. If you accidentally missed one, now is the time to catch it.
Once you are sure the slide numbers are all where they are supposed to be, you can click out of the Slide Master View:
- Click the Slide Master tab
- Select Close Master View
Applying your slide numbers in the Normal View
Once you’ve set up and formatted the Slide Number field in the Slide Master view, you are ready to move on and add them to your presentation.
As an analyst or associate who is in charge of the deck, it is important to keep in mind that just because the Slide Number field is properly set up in the Slide Master, DOES NOT mean they will automatically show up in your presentation.
Continue reading to see the next steps to make sure your slide numbers properly display in PowerPoint.
1. Open the Slide Number dialog box

Now that you have setup (or double-checked) that your slide numbers are set up properly in the Slide Master view, now we can add them here in the Normal View of PowerPoint (woo-hoo). Let’s start by opening the Header and Footer dialog box as follows:
- Navigate to the Insert tab
- Select the Slide Number command
You can alternatively use the Alt + Shift + D keyboard shortcut to open the Header and Footer dialog box. If you want to learn additional PowerPoint shortcuts like this that will save you time, read my shortcut guide here .
Regardless of how you get to the Header and Footer dialog box, this is the best and proper place to add, remove, and/or manage your presentations:
- Date and time
- Slide numbers
The goal again is to get PowerPoint to do the heavy lifting for you here. Even if this dialog box is new and a little confusing to you, it is worth getting this right as it will save you a ton of time in the future.
2. Apply your Slide Numbers

NOTE: The option to “Don’t show on title slide” can easily catch you off guard. That’s because the title slide in PowerPoint is NOT what you probably think it is. For more information, on what the title slide actually is in PowerPoint, read my guide here .
Within the Header and Footer dialog box, make sure there is a checkmark next to the Slide number .
With it selected, you get a preview of where your slide numbers will appear in the upper right-hand corner of the dialog box. After that, select either:
- Apply , applies your slide number to the individual slide you are working on.
- Apply to All , applies slide numbers to all of the slides within your presentation (assuming that each of the Child Slide layouts has your slid number on it).
Assuming you want to add slide numbers to all your slides in PowerPoint, click Apply to All . Clicking Apply to All, PowerPoint automatically adds the slide numbers to all your slides, based on the formatting and positioning you set up on the slide master.
As you can see in the picture below, the slide numbers now display (just as I set them up on the Slide Master).

Troubleshooting slide numbers that won't show up
If you followed along with me above and you still can’t get your slide numbers to properly display in PowerPoint, I have you covered.
In the following video, I highlight a few extra steps you can take to make sure your page numbers show up in PowerPoint.
If you still can’t figure out what is happening with your slide numbers, leave a comment or send me a note and I will do my best to help you out.
Final thoughts
You did the right thing by looking up how to add slide numbers in PowerPoint. The worst possible thing you can do is get so fed up with the PowerPoint page numbering system, that you manually add them yourself.
Another good point to remember is that you can use the Header and Footer dialog box to quickly remove all the slide numbers from your presentation. Simply unselect the Slide number option and click Apply to All and PowerPoint will automatically remove them all from your presentation.
While we all wish that adding page numbers in PowerPoint was as easy as it is in Word, that’s why you are paid the big PowerPoint bucks.
If you enjoyed this slide number tutorial and want to take your PowerPoint skills to the next level, check out our online training courses and other PowerPoint tutorials here .
🔒 Unlock the PowerPoint Shortcuts Trusted by Industry Leaders KKR, American Express, HSBC, and More!
Join over 114,880 professionals from diverse fields including consulting, investment banking, advertising, marketing, sales, and business development who have supercharged their PowerPoint game with our proven methods.
✅ Customize compelling presentations effortlessly.
✅ Master time-saving techniques for faster deck creation.
✅ Boost your career prospects with top-notch PowerPoint skills.
Get FREE access to the Critical PowerPoint Shortcuts module of our premium training course by entering your name and email below.
DISCLAIMER: PC Users Only!
We respect your privacy and will keep your info safe and confidential.
Related Articles
- What is a broken link chart in PowerPoint (and how to fix it)?
- Bar chart trick: Right aligning categories (PPT, Word, and Excel)
- PowerPoint settings: program level vs. presentation level
- What is a linked Excel chart in PowerPoint?
- Set Up Slide Show: Customize how your PPT presentations run
About The Author

This Post Has 9 Comments

Thanks for your guidance but it doesn’t completely work. I have one Master and two layouts. It will only add the page number to one of the layouts. No matter how many times I try to insert the slide number and apply to all, when ever I add a new slide, it only puts the slide number on one layout but not the other! Very frustrating because I followed all of your steps perfectly.

Thank you thank you thank you. Have been desperately trying to populate a submaster with slide numbers for a day now. The trick of RE-clicking on Title and Footers boxes up in the Maser Slide menu, while selecting my submaster slide, finally did the trick !

So happy to be able to help, Fran! Those little slide numbers can be tricky, despite appearances. Cheers!

Great vid. thanks.
Thanks for commenting, and happy this was a help to you! Cheers!

Thanks for the super-concise speed training on this – I was starting to pull my hair out! Again Microsoft prove they are the most clumsy legacy software developers on the planet!!
Hi Mathias! Glad to have been able to help. Yes, this is still a trickier issue than it should be, but luckily, there is a solution! Cheers

WOW! What an amazing and fast video. I will definitley bookmark this site!!
So happy to hear that, Anna! Thank you and let us know if there’s any other nagging problem we can solve for you. Cheers
Comments are closed.
Popular Tutorials
- How to Strikethrough Text (l̶i̶k̶e̶ ̶t̶h̶i̶s̶) in Word, Excel & PowerPoint
- How to Make Animated Fireworks in PowerPoint (Step-by-Step)
- Strikethrough Shortcut (l̶i̶k̶e̶ ̶t̶h̶i̶s̶) for Word, Excel & PowerPoint
- How to Create a Flash Card Memory Game in PowerPoint (Like Jeopardy)
- Keyboard Shortcuts Not Working: Solved
PowerPoint Tutorial Categories
- Strategies & Opinions
- Presentation Design
- Pictures, Icons, Videos, Etc.
- New Features
- Miscellaneous
- Charts & Data Viz
We help busy professionals save hours and gain peace of mind, with corporate workshops, self-paced courses and tutorials for PowerPoint and Word.
Work With Us
- Corporate Training
- Presentation & Template Design
- Courses & Downloads
- PowerPoint Articles
- Word Articles
- Productivity Resources
Find a Tutorial
- Free Training
- For Businesses
We help busy office workers save hours and gain peace of mind, with tips, training and tutorials for Microsoft PowerPoint and Word.
Master Critical PowerPoint Shortcuts – Secure Your FREE Training Module and Save Valuable Time!
⌛ Master time-saving expert techniques.
🔥 Create powerful presentations.
🚀 Propel your career to new heights.
We value your privacy – we keep your info safe.
Discover PowerPoint Hacks Loved by Industry Giants - KKR, AmEx, HSBC!
Over 114,880 professionals in finance, marketing and sales have revolutionized their PPT skills with our proven methods.
Gain FREE access to a full module of our premium PowerPoint training program – Get started today!
We hate spam too and promise to keep your information safe.
You are currently viewing a placeholder content from Facebook . To access the actual content, click the button below. Please note that doing so will share data with third-party providers.
- PRO Courses Guides New Tech Help Pro Expert Videos About wikiHow Pro Upgrade Sign In
- EDIT Edit this Article
- EXPLORE Tech Help Pro About Us Random Article Quizzes Request a New Article Community Dashboard This Or That Game Popular Categories Arts and Entertainment Artwork Books Movies Computers and Electronics Computers Phone Skills Technology Hacks Health Men's Health Mental Health Women's Health Relationships Dating Love Relationship Issues Hobbies and Crafts Crafts Drawing Games Education & Communication Communication Skills Personal Development Studying Personal Care and Style Fashion Hair Care Personal Hygiene Youth Personal Care School Stuff Dating All Categories Arts and Entertainment Finance and Business Home and Garden Relationship Quizzes Cars & Other Vehicles Food and Entertaining Personal Care and Style Sports and Fitness Computers and Electronics Health Pets and Animals Travel Education & Communication Hobbies and Crafts Philosophy and Religion Work World Family Life Holidays and Traditions Relationships Youth
- Browse Articles
- Learn Something New
- Quizzes Hot
- This Or That Game
- Train Your Brain
- Explore More
- Support wikiHow
- About wikiHow
- Log in / Sign up
- Computers and Electronics
- Presentation Software
- PowerPoint Presentations
How to Insert Slide Numbers in PowerPoint
Last Updated: January 22, 2024 Fact Checked
How to Add Slide Numbers
How to format slide numbers.
This article was co-authored by wikiHow staff writer, Nicole Levine, MFA . Nicole Levine is a Technology Writer and Editor for wikiHow. She has more than 20 years of experience creating technical documentation and leading support teams at major web hosting and software companies. Nicole also holds an MFA in Creative Writing from Portland State University and teaches composition, fiction-writing, and zine-making at various institutions. This article has been fact-checked, ensuring the accuracy of any cited facts and confirming the authority of its sources. This article has been viewed 47,963 times. Learn more...
This wikiHow guide teaches you how to number the slides in your PowerPoint presentation on your Windows PC or Mac. You can add slide numbers easily on the Insert tab and change the look and position of each number on your master slide.
Things You Should Know
- To add slide numbers to your presentation, click the "Insert" tab, select "Header & Footer," check the box next to "Slide number," and click "Apply All."
- The position, font, size, and color of your slide numbers is determined by your slide master.
- To format your slides, click the "View" tab, select "Slide Master," click the first master slide, and edit the placeholder (the hashtag symbol) as needed.

- If you don't want a slide number to appear on the first (title) slide, check the box next to "Don’t show on title slide" at the bottom-left corner.
- All slides, including hidden slides, are included in the slide count. You'll also see slide numbers when you print your presentations. [2] X Trustworthy Source Microsoft Support Technical support and product information from Microsoft. Go to source

- If slide numbers aren't showing up, the slide number placeholder was removed from your slide master . Skip down to this method to learn how to insert them if they're not showing up.
- To remove all slide numbers, return to Insert > Header & Footer , uncheck "Slide Number," and click Apply to All .
- To remove just one slide number, select the slide in the left panel, go to Insert > Header & Footer , uncheck "Slide Number," and click Apply .

- Click the Insert tab, then click Text Box in the toolbar.
- Click and drag a text box in any blank area of the slide. You can always reposition it later.
- Click inside the text box.
- Click Slide Number in the toolbar. You'll now see the hash symbol in the text box—the slide number placeholder.

- Click the Home tab.
- Click the slide number placeholder to select it.
- To change the color, click the "A" with a line under it in the toolbar, then select a color.
- To change the font face and size, use the drop-down menus in the toolbar.
- You can also make slide numbers bold, italicized, or underlined as you would other text. [3] X Trustworthy Source Microsoft Support Technical support and product information from Microsoft. Go to source
- To return to your presentation, click Normal on the View tab.
Expert Q&A
- You can also change the position of headers, footers , text boxes, and other elements when editing the master slide. Thanks Helpful 0 Not Helpful 0

You Might Also Like

- ↑ https://support.microsoft.com/en-us/office/add-page-numbers-date-and-time-or-footer-text-to-all-slides-in-powerpoint-for-mac-abb23f0c-760a-46ef-940e-be5074d3f287
- ↑ https://support.microsoft.com/en-au/office/change-the-fonts-in-a-footer-on-a-slide-ad433255-2de8-441e-99c8-b26a99b04d74
About This Article

To add slide numbering to your PowerPoint presentation, start by opening your presentation in PowerPoint. Then, click the "Insert" tab and select "Header & Footer" on the toolbar. Check the box next to "Slide number"—the preview in the upper-right corner of the window will update to display where the slide number will appear on each slide. If the first slide in your presentation is a title slide and you don’t want a number on it, place a checkmark next to "Don't show on title slide." Click "Apply to All" to add the slide number to each slide in your presentation. If the slide number doesn't look right on one of your slides, you can move it to a different location—just hover the mouse cursor over the slide number until it turns to a crosshair, then click-and-drag it somewhere that looks a little better. You can also change the position of your slide number on all slides at once by editing the Slide Master. Click the "View" tab, click "Slide Master" on the toolbar, and then click your Slide Master at the top of the left panel. Hover the mouse cursor over the slide number until it turns to a crosshair, then drag it to another location. Another thing you can do while editing the Slide Master is to change the size, font, or color of the slide number—double-click the slide number to select it, highlight the number, and then use the font face, size, and color options on the small menu above your cursor. Click "Close Master View" when you're finished. Any changes you made to the slide numbers in the Slide Master will apply to all slides in the presentation. Did this summary help you? Yes No
- Send fan mail to authors
Is this article up to date?

Featured Articles

Trending Articles

Watch Articles

- Terms of Use
- Privacy Policy
- Do Not Sell or Share My Info
- Not Selling Info
wikiHow Tech Help Pro:
Level up your tech skills and stay ahead of the curve
How to add page numbers to your PowerPoint slides to organize your presentation
- You can add page numbers to your PowerPoint slideshow through the "Slide Master" page, which lets you edit your entire slideshow at once.
- Once you add page numbers to your PowerPoint slideshow, you can edit where they appear on the slides.
- Page numbers are great for helping both you and your audience follow along during a long PowerPoint presentation.
- Visit Business Insider's Tech Reference library for more stories .
Putting page numbers in a PowerPoint presentation can help you keep track of where you are when you're presenting. It can also help if you're printing your presentation, or if you're dividing up the work between a few people and want each person to take a few specific slides.
Because it's such a useful detail, adding page numbers to your PowerPoint slides should be easy — however, it's a bit more complicated than it should be.
So, if you decide you want to add page numbers to your PowerPoint presentation, here's how to do it the right way. This works for PowerPoint on your Mac or PC.
Check out the products mentioned in this article:
Apple macbook pro (from $1,299.00 at apple), acer chromebook 15 (from $179.99 at walmart), how to add page numbers to powerpoint presentations.
1. In PowerPoint, click "View" in the list of options at the top of the window, and then click on "Slide Master."
2. Click on the parent slide at the very top of the slide menu.
3. In the "Slide Master" tab, click "Master layout" to bring up a dialog box.
4. In the "Master Layout" placeholders box, make sure you have "Slide Numbers" checked — it's the default setting, but it may be turned off for some templates.
5. Your slide number placeholder will appear with a # symbol in it. Use your cursor to move it to the position you'd like it in — it shows up on all of your slides in the same position by default.
6. Return to the Slide Master tab and click the red 'X' labeled "Close Master View." This will close the Slide Master so you can go back to editing slides individually.
7. Next, go to the "Insert" tab and click "Slide Number," under "Text," to bring up the Header and Footer dialog box.
8. In the Header and Footer box, check the box next to "Slide Number" to have your numbers show, in the spot you indicated, on your slide.
You can also check the "Don't Show On Title Slide" box if you don't want your title slide to be counted as a numbered page.
9. When you're finished, either click "Apply," to apply the slide number to only the slide you're currently working on, or "Apply to All" to apply slide numbers to all the slides in your presentation.
Note that even if you click Apply to All, slide numbers won't appear on slides for which you've manually removed the slide number placeholder.
Related coverage from Tech Reference :
How to add a border to slides in powerpoint, and give your slideshow a sleek design, how to embed a youtube video into your microsoft powerpoint presentations using a mac or pc, how to convert google slides to a powerpoint presentation in 4 easy steps, how to convert a powerpoint to google slides in 2 different ways, how to copy or duplicate a powerpoint slide and put it anywhere in your slideshow.
Insider Inc. receives a commission when you buy through our links.
Watch: These basement renovations hide slides and secret rooms
- Main content
- Stream Your Favorite Sports
- Where to Watch WNBA Games
How to Add Page Numbers in PowerPoint
Keep track of your progress using slide numbers
:max_bytes(150000):strip_icc():format(webp)/KarenMarcus-b36dca4c46e7441c8a50744f9a5c0260.jpg "powerpoint insert page")
- University of Colorado at Denver
- Colorado State University
What to Know
- PC: Open PowerPoint in Normal view and go to the first slide > Insert > Slide Number .
- Then, in the Header and Footer dialog, select the Slide tab. Next, select Slide number .
- Mac: In Normal view, go to Insert > Slide Numbe r. Select Slide Number and enter the starting number.
This article explains how to add page numbers to a PowerPoint presentation on a PC and a Mac. Instructions apply to PowerPoint 2019, 2016, 2013, 2010; PowerPoint for Microsoft 365, PowerPoint for Microsoft 365 for Mac, and PowerPoint 2016 for Mac.
How to Add Slide Numbers in PowerPoint on a PC
Just as you would add page numbers to a Word document to help readers keep track of their place, add page numbers in PowerPoint to help you and your audience keep track of where you are in the presentation .
Open your PowerPoint presentation in Normal view.
Navigate to the first slide in your presentation.
Go to Insert and, in the Text group, select Slide Number .
In the Header and Footer dialog box, select the Slide tab.
In the Include on slide area, place a check next to Slide number . In the Preview area, you’ll see a representation of where the slide number will appear on your slide.
- If you want the slide number to appear only on the current slide, select Apply .
Navigate to each slide you want slide numbers to appear on and perform these steps again. For example, if you want slides 1, 3, and 5 to have slide numbers, repeat the process three times.
- If you want the slide number to appear on all slides, select Apply to All .
- If you want to apply slide numbers to all but the first slide, place a check next to Don’t show on title slide and select Apply to All .
- If you want to add slide numbers to your notes pages, select the Notes and Handouts tab, place a check next to Page number , and select Apply to All .
If you want the slide numbering to start with a number other than 1, go to Design and, in the Customize group, select Slide Size > Custom Slide Size . Under Number slides from , select the beginning number you want.
In PowerPoint 2010, go to Design and, in the Page Setup group, select Page Setup . Then, under Number slides from , select the beginning number you want.
You're done!
How to Add Slide Numbers in PowerPoint on a Mac
To add slide numbers on a Mac:
Go to Insert and select Slide Number .
In the Header and Footer dialog box, place a check next to Slide Number and enter the number you want the numbering to begin with. The Preview area shows how the slide number will appear on your slide.
If you don’t want numbering to appear on the first slide, place a check next to Don’t show on title slide .
Select Apply to apply only to the current slide or select Apply to All to apply to all slides.
Get the Latest Tech News Delivered Every Day
- How to Create a PowerPoint Footnote
- How to Add Page Numbers in Word
- Remove Slide Numbers From PowerPoint Slides
- How to Merge PowerPoints
- Slide Layouts in PowerPoint
- How to Print PowerPoint Slides
- How to Select More Than One Slide in PowerPoint
- How to Add Page Numbers in Google Docs
- Adding Sounds, Music or Narration to PowerPoint Slide Shows
- Loop a PowerPoint Slide Show
- How to Add Music to PowerPoint
- How to Hide and Unhide a Slide in PowerPoint
- How to Do a Voiceover on PowerPoint
- Using Design Themes in PowerPoint
- How to Add Audio to PowerPoint
- How to Add Animation to PowerPoint
Home » Microsoft Powerpoint » How to Insert Page Numbers in PowerPoint
How to Insert Page Numbers in PowerPoint
In PowerPoint, inserting page numbers on slides is the same as placing slide numbers on them. You can insert slide numbers on some of your slides or all, provided the layouts contain placeholders.
Note: If the slides have no placeholders, or you have deleted the placeholders, the slide numbers will not display.
Let us show you in simple steps how to insert slide numbers on slides in PowerPoint.
Step #1: Open PowerPoint Slide
Open PowerPoint.
Step #2: Ensure Slide Number Placeholder Appears in Slide Master
Click on the View tab in the top menu bar to change the ribbon.

In the section Master Views , click on the Slide Master icon.
This will open the Slide Master view.
In the thumbnails on the left, click on the slide number 1 .
Note: Placeholders may not be present or visible.
Click on the Slide Master tab in the top menu bar to change the ribbon.

In the Master Layout section, click on the Master Layout icon.

A Master Layout dialog box will open.
Switch on the Slide number Placeholder.
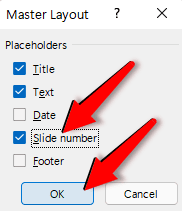
Click on the OK tab at the bottom to close the dialog box.
The Slide Master now has a slide number placeholder.
Step #3: Ensure Slide Number Placeholder Appears in Layouts

In the thumbnails on the left, click on the layout in which you want slide numbers to appear.
In the Master Layout section, click and select the Footers checkbox.

The layout now has a slide number placeholder.

Step #4: Insert Slide Number in Placeholders

Click on the Insert tab in the top menu bar to change the ribbon.

In the section Text , click on the Header & Footer icon.
This will open the Header and Footer dialog box.
Click on the Slide tab.
Click on and select the Slide number check box.
Click on the Apply tab if you want to apply slide number only on one slide.
Click on the Apply to All tab if you want to apply slide numbers to all slides.
Step #5: Return to Normal View

In the section Presentation Views , click on the Normal icon.
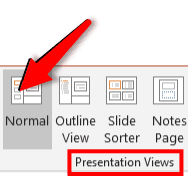
PowerPoint will display the regular presentation.

The slide number will be visible in its placeholder at the bottom right-hand corner of the slide.

Note: Slide number may not appear immediately. You may have to apply a slide layout to the slide.
Step #6: Apply a Slide Layout to a Slide
In the thumbnails on the left, select the slide where you want to display the slide number.
Click the Home tab in the top menu bar to change the ribbon.

In the section Slides , click on the Layouts icon.
A drop-down menu will appear.
Click on the layout for the current slide to apply it.
Return to Normal view as in Step #5.
We have shown you in simple steps how to insert page/slide numbers in PowerPoint slides. If you have any questions, let us know in the comments section below.
1 thought on “How to Insert Page Numbers in PowerPoint”
good to hear and learn much from you
Leave a Comment Cancel reply
Save my name, email, and website in this browser for the next time I comment.
How-To Geek
6 ways to create more interactive powerpoint presentations.
Engage your audience with cool, actionable features.
Quick Links
- Add a QR code
- Embed Microsoft Forms (Education or Business Only)
- Embed a Live Web Page
- Add Links and Menus
- Add Clickable Images to Give More Info
- Add a Countdown Timer
We've all been to a presentation where the speaker bores you to death with a mundane PowerPoint presentation. Actually, the speaker could have kept you much more engaged by adding some interactive features to their slideshow. Let's look into some of these options.
1. Add a QR code
Adding a QR code can be particularly useful if you want to direct your audience to an online form, website, or video.
Some websites have in-built ways to create a QR code. For example, on Microsoft Forms , when you click "Collect Responses," you'll see the QR code option via the icon highlighted in the screenshot below. You can either right-click the QR code to copy and paste it into your presentation, or click "Download" to add it to your device gallery to insert the QR code as a picture.
In fact, you can easily add a QR code to take your viewer to any website. On Microsoft Edge, right-click anywhere on a web page where there isn't already a link, and left-click "Create QR Code For This Page."
You can also create QR codes in other browsers, such as Chrome.
You can then copy or download the QR code to use wherever you like in your presentation.
2. Embed Microsoft Forms (Education or Business Only)
If you plan to send your PPT presentation to others—for example, if you're a trainer sending step-by-step instruction presentation, a teacher sending an independent learning task to your students, or a campaigner for your local councilor sending a persuasive PPT to constituents—you might want to embed a quiz, questionnaire, pole, or feedback survey in your presentation.
In PowerPoint, open the "Insert" tab on the ribbon, and in the Forms group, click "Forms". If you cannot see this option, you can add new buttons to the ribbon .
As at April 2024, this feature is only available for those using their work or school account. We're using a Microsoft 365 Personal account in the screenshot below, which is why the Forms icon is grayed out.
Then, a sidebar will appear on the right-hand side of your screen, where you can either choose a form you have already created or opt to craft a new form.
Now, you can share your PPT presentation with others , who can click the fields and submit their responses when they view the presentation.
3. Embed a Live Web Page
You could always screenshot a web page and paste that into your PPT, but that's not a very interactive addition to your presentation. Instead, you can embed a live web page into your PPT so that people with access to your presentation can interact actively with its contents.
To do this, we will need to add an add-in to our PPT account .
Add-ins are not always reliable or secure. Before installing an add-in to your Microsoft account, check that the author is a reputable company, and type the add-in's name into a search engine to read reviews and other users' experiences.
To embed a web page, add the Web Viewer add-in ( this is an add-in created by Microsoft ).
Go to the relevant slide and open the Web Viewer add-in. Then, copy and paste the secure URL into the field box, and remove https:// from the start of the address. In our example, we will add a selector wheel to our slide. Click "Preview" to see a sample of the web page's appearance in your presentation.
This is how ours will look.
When you or someone with access to your presentation views the slideshow, this web page will be live and interactive.
4. Add Links and Menus
As well as moving from one slide to the next through a keyboard action or mouse click, you can create links within your presentation to direct the audience to specific locations.
To create a link, right-click the outline of the clickable object, and click "Link."
In the Insert Hyperlink dialog box, click "Place In This Document," choose the landing destination, and click "OK."
What's more, to make it clear that an object is clickable, you can use action buttons. Open the "Insert" tab on the ribbon, click "Shape," and then choose an appropriate action button. Usefully, PPT will automatically prompt you to add a link to these shapes.
You might also want a menu that displays on every slide. Once you have created the menu, add the links using the method outlined above. Then, select all the items, press Ctrl+C (copy), and then use Ctrl+V to paste them in your other slides.
5. Add Clickable Images to Give More Info
Through PowerPoint's animations, you can give your viewer the power to choose what they see and when they see it. This works nicely whether you're planning to send your presentation to others to run through independently or whether you're presenting in front of a group and want your audience to decide which action they want to take.
Start by creating the objects that will be clickable (trigger) and the items that will appear (pop-up).
Then, select all the pop-ups together. When you click "Animations" on the ribbon and choose an appropriate animation for the effect you want to achieve, this will be applied to all objects you have selected.
The next step is to rename the triggers in your presentation. To do this, open the "Home" tab, and in the Editing group, click "Select", and then "Selection Pane."
With the Selection Pane open, select each trigger on your slide individually, and rename them in the Selection Pane, so that they can be easily linked to in the next step.
Finally, go back to the first pop-up. Open the "Animations" tab, and in the Advanced Animation group, click the "Trigger" drop-down arrow. Then, you can set the item to appear when a trigger is clicked in your presentation.
If you want your item to disappear when the trigger is clicked again, select the pop-up, click "Add Animation" in the Advanced Animation group, choose an Exit animation, and follow the same step to link that animation to the trigger button.
6. Add a Countdown Timer
A great way to get your audience to engage with your PPT presentation is to keep them on edge by adding a countdown timer. Whether you're leading a presentation and want to let your audience stop to discuss a topic, or running an online quiz with time-limit questions, having a countdown timer means your audience will keep their eye on your slide throughout.
To do this, you need to animate text boxes or shapes containing your countdown numbers. Choose and format a shape and type the highest number that your countdown clock will need. In our case, we're creating a 10-second timer.
Now, with your shape selected, open the "Animations" tab on the ribbon and click the animation drop-down arrow. Then, in the Exit menu, click "Disappear."
Open the Animation Pane, and click the drop-down arrow next to the animation you've just added. From there, choose "Timing."
Make sure "On Click" is selected in the Start menu, and change the Delay option to "1 second," before clicking "OK."
Then, with this shape still selected, press Ctrl+C (copy), and then Ctrl+V (paste). In the second box, type 9 . With the Animation Pane still open and this second shape selected, click the drop-down arrow and choose "Timing" again. Change the Start option to "After Previous," and make sure the Delay option is 1 second. Then, click "OK."
We can now use this second shape as our template, as when we copy and paste it again, the animations will also duplicate. With this second shape selected, press Ctrl+C and Ctrl+V, type 8 into the box, and continue to do the same until you get to 0 .
Next, remove the animations from the "0" box, as you don't want this to disappear. To do this, click the shape, and in the Animation Pane drop-down, click "Remove."
You now need to layer them in order. Right-click the box containing number 1, and click "Bring To Front." You will now see that box on the top. Do the same with the other numbers in ascending order.
Finally, you need to align the objects together. Click anywhere on your slide and press Ctrl+A. Then, in the Home tab on the ribbon, click "Arrange." First click "Align Center," and then bring the menu up again, so that you can click "Align Middle."
Press Ctrl+A again to select your timer, and you can then move your timer or copy and paste it elsewhere.
Press F5 to see the presentation in action, and when you get to the slide containing the timer, click anywhere on the slide to see your countdown timer in action!
Now that your PPT presentation is more interactive, make sure you've avoided these eight common presentational mistakes before you present your slides.
- Add pictures Video
- Format pictures Video
- Add a background picture Video
- Create a SmartArt graphic Video
- Group or ungroup objects Video
- Align and arrange objects Video
- Layer objects Video
- Rotate or flip an object Video

Add pictures

Pictures add meaning and visual appeal. You can insert pictures from your computer or from the web.
Insert a picture from your computer
Select Insert > Pictures .
Choose the picture you want and select Insert .
Insert an online picture
Select Insert > Online Pictures .
Select where to get the picture. Sign In if needed.
Choose the picture you want and then select Insert .
Replace a picture
Right-click the picture.
Select Change Picture and select an option:
From a File
From Online Services
From Clipboard
Choose the picture and select Insert .
Make or find pictures in Office

Need more help?
Want more options.
Explore subscription benefits, browse training courses, learn how to secure your device, and more.

Microsoft 365 subscription benefits

Microsoft 365 training

Microsoft security

Accessibility center
Communities help you ask and answer questions, give feedback, and hear from experts with rich knowledge.

Ask the Microsoft Community

Microsoft Tech Community

Windows Insiders
Microsoft 365 Insiders
Was this information helpful?
Thank you for your feedback.
COMMENTS
Add slide numbers or notes page numbers. On the View tab, in the Presentation Views group, click Normal. On the left of your screen, in the pane that contains the slide thumbnails, click the first slide thumbnail in your presentation. On the Insert tab, in the Text group, click Header & Footer. If you want to add slide numbers, click the Slide ...
3. Click Insert. This tab is in the top-left side of your Mac's screen. 4. Click New Slide. It's in the drop-down menu below the Insert tab. Doing so will insert a new slide into the PowerPoint presentation. If you decide to reposition your slide, you can click and drag it up or down in the sidebar to do so. Method 2.
In the slide preview pane on the left, left-click with your mouse in-between two slides where you want to insert a slide. In the PowerPoint Ribbon, on the Home or Insert tab, click the New Slide option.; In the drop-down menu that opens, click the Reuse Slides option at the bottom.; In the Reuse Slides pane that opens on the right, click the Browse button.; Find and select the PowerPoint ...
Adding Slide Numbers. Open your presentation in PowerPoint. Go to the Insert tab. Insert tab. In the Text group, click Header & Footer. A new window will open. Header & Footer button. Header & Footer buttonCheck "Slide number" to enable it. You'll see a little box highlighted in black on the preview.
To add slide numbers, open a PowerPoint presentation with several slides added and then click the "Insert" tab. From here, you'll need to select the "Header & Footer" button in the "Text" section. This will bring up the "Header and Footer" options box. To add slide numbers to your PowerPoint slides, click the "Slide Number" checkbox in the ...
1. Open the Slide Number dialog box. Now that you have setup (or double-checked) that your slide numbers are set up properly in the Slide Master view, now we can add them here in the Normal View of PowerPoint (woo-hoo). Let's start by opening the Header and Footer dialog box as follows: Navigate to the Insert tab.
How To Add A New Slide In Microsoft PowerPoint Presentation. In this tutorial, you will learn how to insert a new slide in PowerPoint. When you create a new ...
https://www.youtube.com/channel/UCmV5uZQcAXUW7s4j7rM0POg?sub_confirmation=1How to add page/slide numbers in PowerPoint
To add slide numbering to your PowerPoint presentation, start by opening your presentation in PowerPoint. Then, click the "Insert" tab and select "Header & Footer" on the toolbar. Check the box next to "Slide number"—the preview in the upper-right corner of the window will update to display where the slide number will appear on each slide.
How to Add Page/Slide numbers in PowerPoint - the right way. Most presenters just insert the numbers manually. This leads to issues when some slides are rem...
7. Next, go to the "Insert" tab and click "Slide Number," under "Text," to bring up the Header and Footer dialog box. Insert a slide number. Melanie Weir/Business Insider. 8. In the Header and ...
PC: Open PowerPoint in Normal view and go to the first slide > Insert > Slide Number. Then, in the Header and Footer dialog, select the Slide tab. Next, select Slide number. Mac: In Normal view, go to Insert > Slide Numbe r. Select Slide Number and enter the starting number. This article explains how to add page numbers to a PowerPoint ...
Click on the Insert tab in the top menu bar to change the ribbon. In the section Text, click on the Header & Footer icon. This will open the Header and Footer dialog box. Click on the Slide tab. Click on and select the Slide number check box. Click on the Apply tab if you want to apply slide number only on one slide.
In this video author Daniel Stine walks you through how to insert and modify the headers, footers and page numbers in a Microsoft PowerPoint presentation. Th...
Linking to Another Slide in the Same Presentation. Open your presentation and navigate to the slide that will contain the hyperlink. Once there, highlight the text, object, shape, or image to which you want to attach the link. Next, head over to the "Insert" tab and click the "Link" button. In the Insert Hyperlink window that opens ...
Option 1: Insert a Table of Contents With Outline View. If you want to use the titles of your slides as the table of contents, you can copy those titles from Outline View and paste them on the table of contents slide. Go to View > Outline View in the ribbon. You'll see the outline of your slideshow on the left.
In this tutorial, you will learn how to insert webpage in PowerPoint. This method can ease the way you present. No more need to close the PowerPoint and open...
Click and drag to select all the slide titles you want to include, and then right-click and select Copy. On the View tab, select Normal. Switch to the text box on your table of contents slide, and on the Home tab, select Paste > Paste Special. In the Paste Special dialog box, select either Formatted Text (RTF) or Unformatted Text, and click OK.
I show you how to add slide numbers in powerpoint and how to add page numbers in powerpoint in this video. For more videos like how to add powerpoint slide n...
Then, with this shape still selected, press Ctrl+C (copy), and then Ctrl+V (paste). In the second box, type 9. With the Animation Pane still open and this second shape selected, click the drop-down arrow and choose "Timing" again. Change the Start option to "After Previous," and make sure the Delay option is 1 second.
Add slide numbers or notes page numbers. On the View tab, in the Presentation Views group, click Normal. On the left of your screen, in the pane that contains the slide thumbnails, click the first slide thumbnail in your presentation. On the Insert tab, in the Text group, click Header & Footer. If you want to add slide numbers, click the Slide ...
Replace a picture. Right-click the picture. Select Change Picture and select an option: From a File. From Online Services. From Icons. From Clipboard. Choose the picture and select Insert.