Princeton Correspondents on Undergraduate Research

How to Make a Successful Research Presentation
Turning a research paper into a visual presentation is difficult; there are pitfalls, and navigating the path to a brief, informative presentation takes time and practice. As a TA for GEO/WRI 201: Methods in Data Analysis & Scientific Writing this past fall, I saw how this process works from an instructor’s standpoint. I’ve presented my own research before, but helping others present theirs taught me a bit more about the process. Here are some tips I learned that may help you with your next research presentation:
More is more
In general, your presentation will always benefit from more practice, more feedback, and more revision. By practicing in front of friends, you can get comfortable with presenting your work while receiving feedback. It is hard to know how to revise your presentation if you never practice. If you are presenting to a general audience, getting feedback from someone outside of your discipline is crucial. Terms and ideas that seem intuitive to you may be completely foreign to someone else, and your well-crafted presentation could fall flat.
Less is more
Limit the scope of your presentation, the number of slides, and the text on each slide. In my experience, text works well for organizing slides, orienting the audience to key terms, and annotating important figures–not for explaining complex ideas. Having fewer slides is usually better as well. In general, about one slide per minute of presentation is an appropriate budget. Too many slides is usually a sign that your topic is too broad.

Limit the scope of your presentation
Don’t present your paper. Presentations are usually around 10 min long. You will not have time to explain all of the research you did in a semester (or a year!) in such a short span of time. Instead, focus on the highlight(s). Identify a single compelling research question which your work addressed, and craft a succinct but complete narrative around it.
You will not have time to explain all of the research you did. Instead, focus on the highlights. Identify a single compelling research question which your work addressed, and craft a succinct but complete narrative around it.
Craft a compelling research narrative
After identifying the focused research question, walk your audience through your research as if it were a story. Presentations with strong narrative arcs are clear, captivating, and compelling.
- Introduction (exposition — rising action)
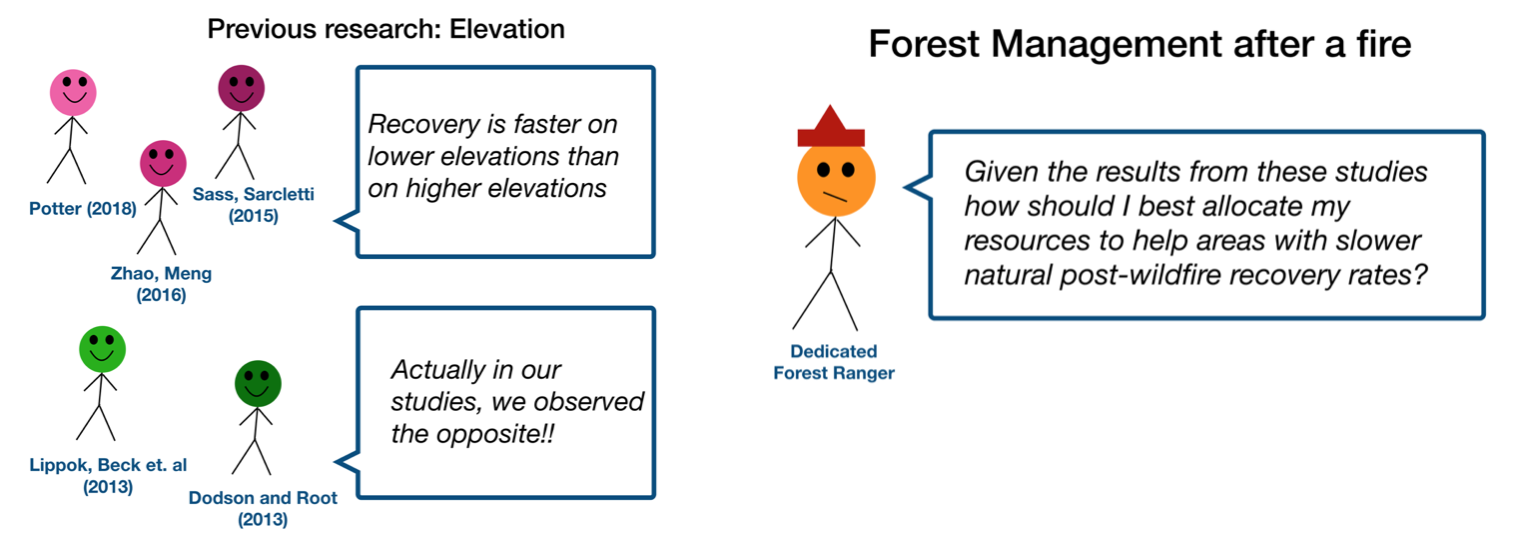
Orient the audience and draw them in by demonstrating the relevance and importance of your research story with strong global motive. Provide them with the necessary vocabulary and background knowledge to understand the plot of your story. Introduce the key studies (characters) relevant in your story and build tension and conflict with scholarly and data motive. By the end of your introduction, your audience should clearly understand your research question and be dying to know how you resolve the tension built through motive.
- Methods (rising action)
The methods section should transition smoothly and logically from the introduction. Beware of presenting your methods in a boring, arc-killing, ‘this is what I did.’ Focus on the details that set your story apart from the stories other people have already told. Keep the audience interested by clearly motivating your decisions based on your original research question or the tension built in your introduction.
- Results (climax)
Less is usually more here. Only present results which are clearly related to the focused research question you are presenting. Make sure you explain the results clearly so that your audience understands what your research found. This is the peak of tension in your narrative arc, so don’t undercut it by quickly clicking through to your discussion.
- Discussion (falling action)
By now your audience should be dying for a satisfying resolution. Here is where you contextualize your results and begin resolving the tension between past research. Be thorough. If you have too many conflicts left unresolved, or you don’t have enough time to present all of the resolutions, you probably need to further narrow the scope of your presentation.
- Conclusion (denouement)
Return back to your initial research question and motive, resolving any final conflicts and tying up loose ends. Leave the audience with a clear resolution of your focus research question, and use unresolved tension to set up potential sequels (i.e. further research).
Use your medium to enhance the narrative
Visual presentations should be dominated by clear, intentional graphics. Subtle animation in key moments (usually during the results or discussion) can add drama to the narrative arc and make conflict resolutions more satisfying. You are narrating a story written in images, videos, cartoons, and graphs. While your paper is mostly text, with graphics to highlight crucial points, your slides should be the opposite. Adapting to the new medium may require you to create or acquire far more graphics than you included in your paper, but it is necessary to create an engaging presentation.
The most important thing you can do for your presentation is to practice and revise. Bother your friends, your roommates, TAs–anybody who will sit down and listen to your work. Beyond that, think about presentations you have found compelling and try to incorporate some of those elements into your own. Remember you want your work to be comprehensible; you aren’t creating experts in 10 minutes. Above all, try to stay passionate about what you did and why. You put the time in, so show your audience that it’s worth it.
For more insight into research presentations, check out these past PCUR posts written by Emma and Ellie .
— Alec Getraer, Natural Sciences Correspondent
Share this:
- Share on Tumblr


- Publication Recognition
How to Make a PowerPoint Presentation of Your Research Paper
- 4 minute read
- 124.9K views
Table of Contents
A research paper presentation is often used at conferences and in other settings where you have an opportunity to share your research, and get feedback from your colleagues. Although it may seem as simple as summarizing your research and sharing your knowledge, successful research paper PowerPoint presentation examples show us that there’s a little bit more than that involved.
In this article, we’ll highlight how to make a PowerPoint presentation from a research paper, and what to include (as well as what NOT to include). We’ll also touch on how to present a research paper at a conference.
Purpose of a Research Paper Presentation
The purpose of presenting your paper at a conference or forum is different from the purpose of conducting your research and writing up your paper. In this setting, you want to highlight your work instead of including every detail of your research. Likewise, a presentation is an excellent opportunity to get direct feedback from your colleagues in the field. But, perhaps the main reason for presenting your research is to spark interest in your work, and entice the audience to read your research paper.
So, yes, your presentation should summarize your work, but it needs to do so in a way that encourages your audience to seek out your work, and share their interest in your work with others. It’s not enough just to present your research dryly, to get information out there. More important is to encourage engagement with you, your research, and your work.
Tips for Creating Your Research Paper Presentation
In addition to basic PowerPoint presentation recommendations, which we’ll cover later in this article, think about the following when you’re putting together your research paper presentation:
- Know your audience : First and foremost, who are you presenting to? Students? Experts in your field? Potential funders? Non-experts? The truth is that your audience will probably have a bit of a mix of all of the above. So, make sure you keep that in mind as you prepare your presentation.
Know more about: Discover the Target Audience .
- Your audience is human : In other words, they may be tired, they might be wondering why they’re there, and they will, at some point, be tuning out. So, take steps to help them stay interested in your presentation. You can do that by utilizing effective visuals, summarize your conclusions early, and keep your research easy to understand.
- Running outline : It’s not IF your audience will drift off, or get lost…it’s WHEN. Keep a running outline, either within the presentation or via a handout. Use visual and verbal clues to highlight where you are in the presentation.
- Where does your research fit in? You should know of work related to your research, but you don’t have to cite every example. In addition, keep references in your presentation to the end, or in the handout. Your audience is there to hear about your work.
- Plan B : Anticipate possible questions for your presentation, and prepare slides that answer those specific questions in more detail, but have them at the END of your presentation. You can then jump to them, IF needed.
What Makes a PowerPoint Presentation Effective?
You’ve probably attended a presentation where the presenter reads off of their PowerPoint outline, word for word. Or where the presentation is busy, disorganized, or includes too much information. Here are some simple tips for creating an effective PowerPoint Presentation.
- Less is more: You want to give enough information to make your audience want to read your paper. So include details, but not too many, and avoid too many formulas and technical jargon.
- Clean and professional : Avoid excessive colors, distracting backgrounds, font changes, animations, and too many words. Instead of whole paragraphs, bullet points with just a few words to summarize and highlight are best.
- Know your real-estate : Each slide has a limited amount of space. Use it wisely. Typically one, no more than two points per slide. Balance each slide visually. Utilize illustrations when needed; not extraneously.
- Keep things visual : Remember, a PowerPoint presentation is a powerful tool to present things visually. Use visual graphs over tables and scientific illustrations over long text. Keep your visuals clean and professional, just like any text you include in your presentation.
Know more about our Scientific Illustrations Services .
Another key to an effective presentation is to practice, practice, and then practice some more. When you’re done with your PowerPoint, go through it with friends and colleagues to see if you need to add (or delete excessive) information. Double and triple check for typos and errors. Know the presentation inside and out, so when you’re in front of your audience, you’ll feel confident and comfortable.
How to Present a Research Paper
If your PowerPoint presentation is solid, and you’ve practiced your presentation, that’s half the battle. Follow the basic advice to keep your audience engaged and interested by making eye contact, encouraging questions, and presenting your information with enthusiasm.
We encourage you to read our articles on how to present a scientific journal article and tips on giving good scientific presentations .
Language Editing Plus
Improve the flow and writing of your research paper with Language Editing Plus. This service includes unlimited editing, manuscript formatting for the journal of your choice, reference check and even a customized cover letter. Learn more here , and get started today!

- Manuscript Preparation
Know How to Structure Your PhD Thesis

- Research Process
Systematic Literature Review or Literature Review?
You may also like.

What is a Good H-index?

What is a Corresponding Author?

How to Submit a Paper for Publication in a Journal
Input your search keywords and press Enter.
Home Blog Presentation Ideas How to Create and Deliver a Research Presentation
How to Create and Deliver a Research Presentation

Every research endeavor ends up with the communication of its findings. Graduate-level research culminates in a thesis defense , while many academic and scientific disciplines are published in peer-reviewed journals. In a business context, PowerPoint research presentation is the default format for reporting the findings to stakeholders.
Condensing months of work into a few slides can prove to be challenging. It requires particular skills to create and deliver a research presentation that promotes informed decisions and drives long-term projects forward.
Table of Contents
What is a Research Presentation
Key slides for creating a research presentation, tips when delivering a research presentation, how to present sources in a research presentation, recommended templates to create a research presentation.
A research presentation is the communication of research findings, typically delivered to an audience of peers, colleagues, students, or professionals. In the academe, it is meant to showcase the importance of the research paper , state the findings and the analysis of those findings, and seek feedback that could further the research.
The presentation of research becomes even more critical in the business world as the insights derived from it are the basis of strategic decisions of organizations. Information from this type of report can aid companies in maximizing the sales and profit of their business. Major projects such as research and development (R&D) in a new field, the launch of a new product or service, or even corporate social responsibility (CSR) initiatives will require the presentation of research findings to prove their feasibility.
Market research and technical research are examples of business-type research presentations you will commonly encounter.
In this article, we’ve compiled all the essential tips, including some examples and templates, to get you started with creating and delivering a stellar research presentation tailored specifically for the business context.
Various research suggests that the average attention span of adults during presentations is around 20 minutes, with a notable drop in an engagement at the 10-minute mark . Beyond that, you might see your audience doing other things.
How can you avoid such a mistake? The answer lies in the adage “keep it simple, stupid” or KISS. We don’t mean dumbing down your content but rather presenting it in a way that is easily digestible and accessible to your audience. One way you can do this is by organizing your research presentation using a clear structure.
Here are the slides you should prioritize when creating your research presentation PowerPoint.
1. Title Page
The title page is the first thing your audience will see during your presentation, so put extra effort into it to make an impression. Of course, writing presentation titles and title pages will vary depending on the type of presentation you are to deliver. In the case of a research presentation, you want a formal and academic-sounding one. It should include:
- The full title of the report
- The date of the report
- The name of the researchers or department in charge of the report
- The name of the organization for which the presentation is intended
When writing the title of your research presentation, it should reflect the topic and objective of the report. Focus only on the subject and avoid adding redundant phrases like “A research on” or “A study on.” However, you may use phrases like “Market Analysis” or “Feasibility Study” because they help identify the purpose of the presentation. Doing so also serves a long-term purpose for the filing and later retrieving of the document.
Here’s a sample title page for a hypothetical market research presentation from Gillette .

2. Executive Summary Slide
The executive summary marks the beginning of the body of the presentation, briefly summarizing the key discussion points of the research. Specifically, the summary may state the following:
- The purpose of the investigation and its significance within the organization’s goals
- The methods used for the investigation
- The major findings of the investigation
- The conclusions and recommendations after the investigation
Although the executive summary encompasses the entry of the research presentation, it should not dive into all the details of the work on which the findings, conclusions, and recommendations were based. Creating the executive summary requires a focus on clarity and brevity, especially when translating it to a PowerPoint document where space is limited.
Each point should be presented in a clear and visually engaging manner to capture the audience’s attention and set the stage for the rest of the presentation. Use visuals, bullet points, and minimal text to convey information efficiently.

3. Introduction/ Project Description Slides
In this section, your goal is to provide your audience with the information that will help them understand the details of the presentation. Provide a detailed description of the project, including its goals, objectives, scope, and methods for gathering and analyzing data.
You want to answer these fundamental questions:
- What specific questions are you trying to answer, problems you aim to solve, or opportunities you seek to explore?
- Why is this project important, and what prompted it?
- What are the boundaries of your research or initiative?
- How were the data gathered?
Important: The introduction should exclude specific findings, conclusions, and recommendations.

4. Data Presentation and Analyses Slides
This is the longest section of a research presentation, as you’ll present the data you’ve gathered and provide a thorough analysis of that data to draw meaningful conclusions. The format and components of this section can vary widely, tailored to the specific nature of your research.
For example, if you are doing market research, you may include the market potential estimate, competitor analysis, and pricing analysis. These elements will help your organization determine the actual viability of a market opportunity.
Visual aids like charts, graphs, tables, and diagrams are potent tools to convey your key findings effectively. These materials may be numbered and sequenced (Figure 1, Figure 2, and so forth), accompanied by text to make sense of the insights.

5. Conclusions
The conclusion of a research presentation is where you pull together the ideas derived from your data presentation and analyses in light of the purpose of the research. For example, if the objective is to assess the market of a new product, the conclusion should determine the requirements of the market in question and tell whether there is a product-market fit.
Designing your conclusion slide should be straightforward and focused on conveying the key takeaways from your research. Keep the text concise and to the point. Present it in bullet points or numbered lists to make the content easily scannable.

6. Recommendations
The findings of your research might reveal elements that may not align with your initial vision or expectations. These deviations are addressed in the recommendations section of your presentation, which outlines the best course of action based on the result of the research.
What emerging markets should we target next? Do we need to rethink our pricing strategies? Which professionals should we hire for this special project? — these are some of the questions that may arise when coming up with this part of the research.
Recommendations may be combined with the conclusion, but presenting them separately to reinforce their urgency. In the end, the decision-makers in the organization or your clients will make the final call on whether to accept or decline the recommendations.

7. Questions Slide
Members of your audience are not involved in carrying out your research activity, which means there’s a lot they don’t know about its details. By offering an opportunity for questions, you can invite them to bridge that gap, seek clarification, and engage in a dialogue that enhances their understanding.
If your research is more business-oriented, facilitating a question and answer after your presentation becomes imperative as it’s your final appeal to encourage buy-in for your recommendations.
A simple “Ask us anything” slide can indicate that you are ready to accept questions.
1. Focus on the Most Important Findings
The truth about presenting research findings is that your audience doesn’t need to know everything. Instead, they should receive a distilled, clear, and meaningful overview that focuses on the most critical aspects.
You will likely have to squeeze in the oral presentation of your research into a 10 to 20-minute presentation, so you have to make the most out of the time given to you. In the presentation, don’t soak in the less important elements like historical backgrounds. Decision-makers might even ask you to skip these portions and focus on sharing the findings.
2. Do Not Read Word-per-word
Reading word-for-word from your presentation slides intensifies the danger of losing your audience’s interest. Its effect can be detrimental, especially if the purpose of your research presentation is to gain approval from the audience. So, how can you avoid this mistake?
- Make a conscious design decision to keep the text on your slides minimal. Your slides should serve as visual cues to guide your presentation.
- Structure your presentation as a narrative or story. Stories are more engaging and memorable than dry, factual information.
- Prepare speaker notes with the key points of your research. Glance at it when needed.
- Engage with the audience by maintaining eye contact and asking rhetorical questions.
3. Don’t Go Without Handouts
Handouts are paper copies of your presentation slides that you distribute to your audience. They typically contain the summary of your key points, but they may also provide supplementary information supporting data presented through tables and graphs.
The purpose of distributing presentation handouts is to easily retain the key points you presented as they become good references in the future. Distributing handouts in advance allows your audience to review the material and come prepared with questions or points for discussion during the presentation.
4. Actively Listen
An equally important skill that a presenter must possess aside from speaking is the ability to listen. We are not just talking about listening to what the audience is saying but also considering their reactions and nonverbal cues. If you sense disinterest or confusion, you can adapt your approach on the fly to re-engage them.
For example, if some members of your audience are exchanging glances, they may be skeptical of the research findings you are presenting. This is the best time to reassure them of the validity of your data and provide a concise overview of how it came to be. You may also encourage them to seek clarification.
5. Be Confident
Anxiety can strike before a presentation – it’s a common reaction whenever someone has to speak in front of others. If you can’t eliminate your stress, try to manage it.
People hate public speaking not because they simply hate it. Most of the time, it arises from one’s belief in themselves. You don’t have to take our word for it. Take Maslow’s theory that says a threat to one’s self-esteem is a source of distress among an individual.
Now, how can you master this feeling? You’ve spent a lot of time on your research, so there is no question about your topic knowledge. Perhaps you just need to rehearse your research presentation. If you know what you will say and how to say it, you will gain confidence in presenting your work.
All sources you use in creating your research presentation should be given proper credit. The APA Style is the most widely used citation style in formal research.
In-text citation
Add references within the text of your presentation slide by giving the author’s last name, year of publication, and page number (if applicable) in parentheses after direct quotations or paraphrased materials. As in:
The alarming rate at which global temperatures rise directly impacts biodiversity (Smith, 2020, p. 27).
If the author’s name and year of publication are mentioned in the text, add only the page number in parentheses after the quotations or paraphrased materials. As in:
According to Smith (2020), the alarming rate at which global temperatures rise directly impacts biodiversity (p. 27).
Image citation
All images from the web, including photos, graphs, and tables, used in your slides should be credited using the format below.
Creator’s Last Name, First Name. “Title of Image.” Website Name, Day Mo. Year, URL. Accessed Day Mo. Year.
Work cited page
A work cited page or reference list should follow after the last slide of your presentation. The list should be alphabetized by the author’s last name and initials followed by the year of publication, the title of the book or article, the place of publication, and the publisher. As in:
Smith, J. A. (2020). Climate Change and Biodiversity: A Comprehensive Study. New York, NY: ABC Publications.
When citing a document from a website, add the source URL after the title of the book or article instead of the place of publication and the publisher. As in:
Smith, J. A. (2020). Climate Change and Biodiversity: A Comprehensive Study. Retrieved from https://www.smith.com/climate-change-and-biodiversity.
1. Research Project Presentation PowerPoint Template
A slide deck containing 18 different slides intended to take off the weight of how to make a research presentation. With tons of visual aids, presenters can reference existing research on similar projects to this one – or link another research presentation example – provide an accurate data analysis, disclose the methodology used, and much more.
Use This Template
2. Research Presentation Scientific Method Diagram PowerPoint Template
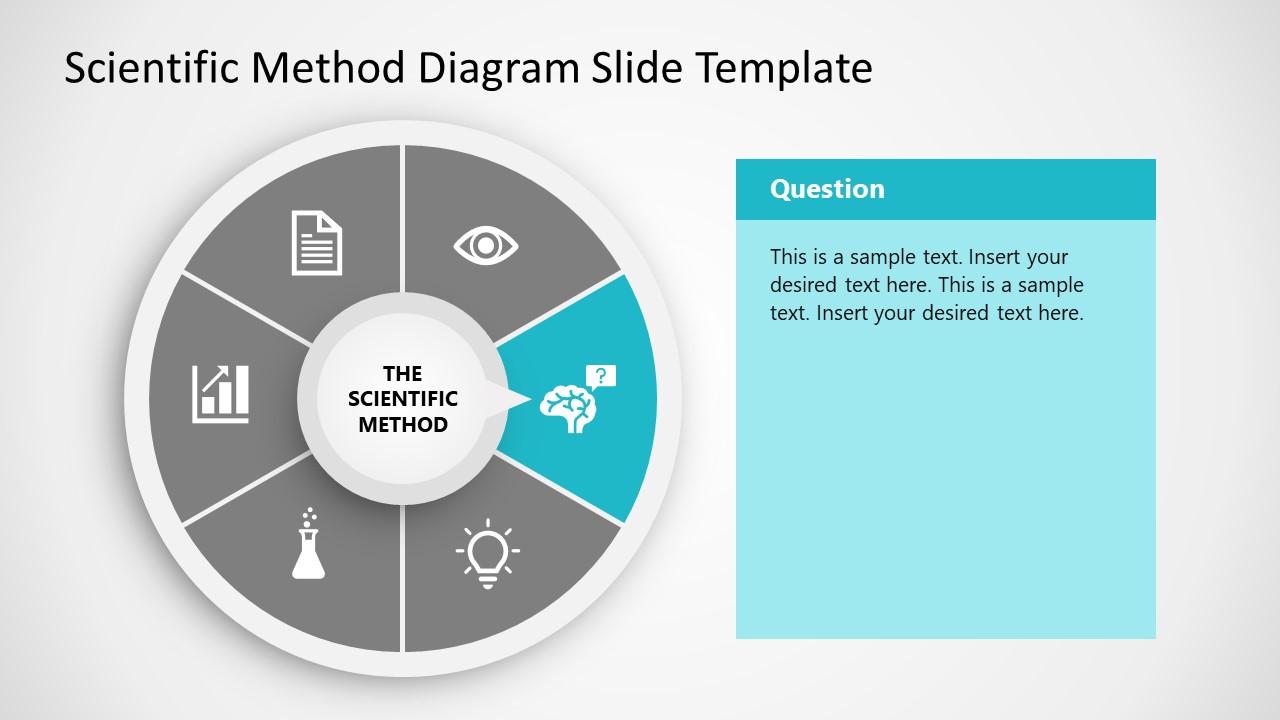
Whenever you intend to raise questions, expose the methodology you used for your research, or even suggest a scientific method approach for future analysis, this circular wheel diagram is a perfect fit for any presentation study.
Customize all of its elements to suit the demands of your presentation in just minutes.
3. Thesis Research Presentation PowerPoint Template

If your research presentation project belongs to academia, then this is the slide deck to pair that presentation. With a formal aesthetic and minimalistic style, this research presentation template focuses only on exposing your information as clearly as possible.
Use its included bar charts and graphs to introduce data, change the background of each slide to suit the topic of your presentation, and customize each of its elements to meet the requirements of your project with ease.
4. Animated Research Cards PowerPoint Template
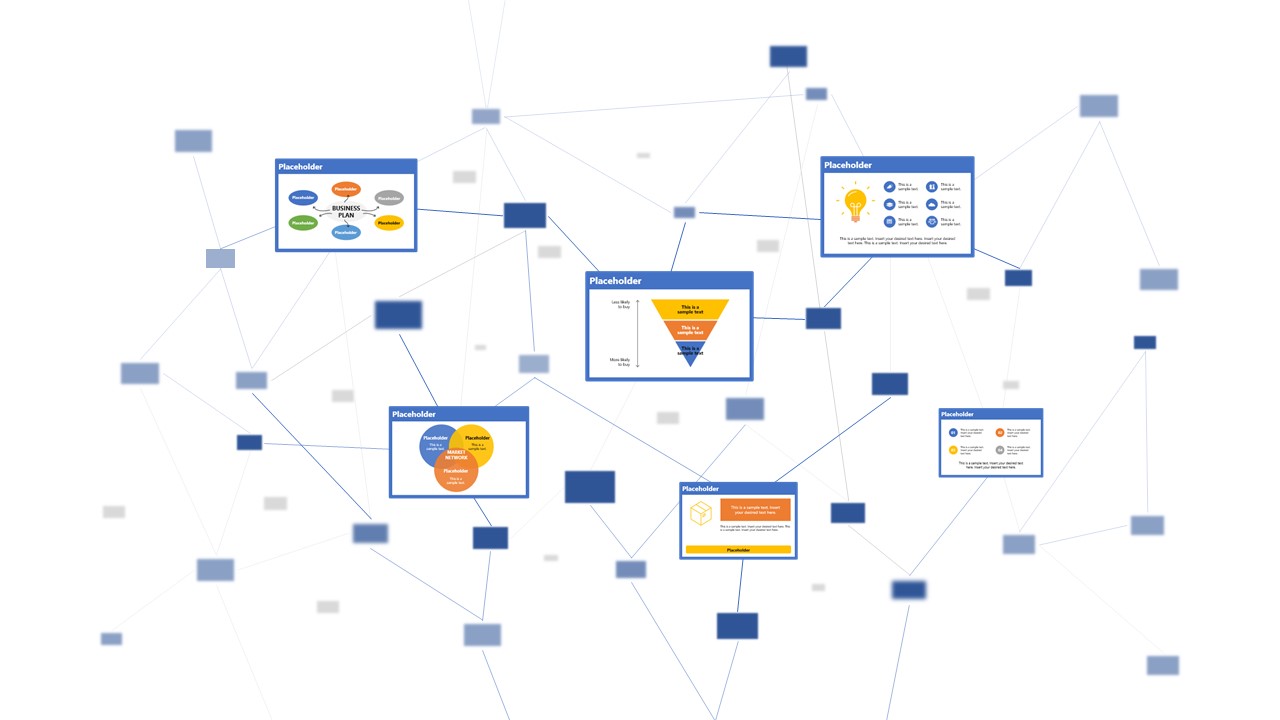
Visualize ideas and their connection points with the help of this research card template for PowerPoint. This slide deck, for example, can help speakers talk about alternative concepts to what they are currently managing and its possible outcomes, among different other usages this versatile PPT template has. Zoom Animation effects make a smooth transition between cards (or ideas).
5. Research Presentation Slide Deck for PowerPoint
With a distinctive professional style, this research presentation PPT template helps business professionals and academics alike to introduce the findings of their work to team members or investors.
By accessing this template, you get the following slides:
- Introduction
- Problem Statement
- Research Questions
- Conceptual Research Framework (Concepts, Theories, Actors, & Constructs)
- Study design and methods
- Population & Sampling
- Data Collection
- Data Analysis
Check it out today and craft a powerful research presentation out of it!
A successful research presentation in business is not just about presenting data; it’s about persuasion to take meaningful action. It’s the bridge that connects your research efforts to the strategic initiatives of your organization. To embark on this journey successfully, planning your presentation thoroughly is paramount, from designing your PowerPoint to the delivery.
Take a look and get inspiration from the sample research presentation slides above, put our tips to heart, and transform your research findings into a compelling call to action.

Like this article? Please share
Academics, Presentation Approaches, Research & Development Filed under Presentation Ideas
Related Articles

Filed under Design • March 27th, 2024
How to Make a Presentation Graph
Detailed step-by-step instructions to master the art of how to make a presentation graph in PowerPoint and Google Slides. Check it out!

Filed under Presentation Ideas • February 29th, 2024
How to Make a Fundraising Presentation (with Thermometer Templates & Slides)
Meet a new framework to design fundraising presentations by harnessing the power of fundraising thermometer templates. Detailed guide with examples.

Filed under Presentation Ideas • February 15th, 2024
How to Create a 5 Minutes Presentation
Master the art of short-format speeches like the 5 minutes presentation with this article. Insights on content structure, audience engagement and more.
Leave a Reply

- Joyner Library
- Laupus Health Sciences Library
- Music Library
- Digital Collections
- Special Collections
- North Carolina Collection
- Teaching Resources
- The ScholarShip Institutional Repository
- Country Doctor Museum
Presentations: Oral Presentations
- Poster Design
- Poster Content
- Poster Presentation
- Oral Presentations
- Printing & Archiving
Oral Presentations Purpose
An Oral Research Presentation is meant to showcase your research findings. A successful oral research presentation should: communicate the importance of your research; clearly state your findings and the analysis of those findings; prompt discussion between researcher and audience. Below you will find information on how to create and give a successful oral presentation.
Creating an Effective Presentation
Who has a harder job the speaker? Or, the audience?
Most people think speaker has the hardest job during an oral presentation, because they are having to stand up in a room full of people and give a presentation. However, if the speaker is not engaging and if the material is way outside of the audiences knowledge level, the audience can have a difficult job as well. Below you will find some tips on how to be an effective presenter and how to engage with your audience.
Organization of a Presentation
Introduction/Beginning
How are you going to begin? How are you going to get the attention of your audience? You need to take the time and think about how you are going to get started!
Here are some ways you could start:
- Ask the audience a question
- make a statement
- show them something
No matter how you start your presentation it needs to relate to your research and capture the audiences attention.
Preview what you are going to discuss . Audiences do not like to be manipulated or tricked. Tell the audience exactly what you are going to discuss, this will help them follow along. *Do not say you are going to cover three points and then try to cover 8 points.
At the end of your introduction, the audience should feel like they know exactly what you are going to discuss and exactly how you are going to get there.
Body/Middle
Conclusion/End
Delivery and Communication
Eye Contact
Making eye contact is a great way to engage with your audience. Eye contact should be no longer than 2-3 seconds per person. Eye contact for much longer than that can begin to make the audience member feel uncomfortable.
Smiling lets attendees know you are happy to be there and that you are excited to talk with them about your project.
We all know that body language says a lot, so here are some things you should remember when giving your presentation.
- Stand with both feet on the floor, not with one foot crossed over the other.
- Do not stand with your hands in your pockets, or with your arms crossed.
- Stand tall with confidence and own your space (remember you are the expert).
Abbreviated Notes
Having a written set of notes or key points that you want to address can help prevent you from reading the poster.
Speak Clearly
Sometimes when we get nervous we begin to talk fast and blur our words. It is important that you make sure every word is distinct and clear. A great way to practice your speech is to say tongue twisters.
Ten tiny tots tottered toward the shore
Literally literary. Literally literary. Literally literary.
Sally soon saw that she should sew some sheets.
Avoid Fillers
Occasionally we pick up fillers that we are not aware of, such as um, like, well, etc. One way to get rid of fillers is to have a friend listen to your speech and every time you say a "filler" have that friend tap you on the arm or say your name. This will bring the filler to light, then you can practice avoiding that filler.
Manage Anxiety
Many people get nervous when they are about to speak to a crowd of people. Below are ways that you can manage your anxiety levels.
- Practice, Practice, Practice - the more prepared you are the less nervous you will be.
- Recognize that anxiety is just a big shot of adrenalin.
- Take deep breaths before your presentation to calm you down.
Components of an Oral Research Presentation
Introduction
The introduction section of your oral presentation should consist of 3 main parts.
Part 1: Existing facts
In order to give audience members the "full picture", you first need to provide them with information about past research. What facts already exist? What is already known about your research area?
Part 2: Shortcomings
Once you have highlighted past research and existing facts. You now need to address what is left to be known, or what shortcomings exist within the current information. This should set the groundwork for your experiment. Keep in mind, how does your research fill these gaps or help address these questions?
Part 3: Purpose or Hypothesis
After you have addressed past/current research and have identified shortcomings/gaps, it is now time to address your research. During this portion of the introduction you need to tell viewers why you are conducting your research experiement/study, and what you hope to accomplish by doing so.
In this section you should share with your audience how you went about collecting and analyzing your data
Should include:
- Participants: Who or what was in the study?
- Materials/ measurements: what did you measure?
- Procedures: How did you do the study?
- Data-analysis: What analysis were conducted?
This section contains FACTS – with no opinion, commentary or interpretation. Graphs, charts and images can be used to display data in a clear and organized way.
Keep in mind when making figures:
- Make sure axis, treatments, and data sets are clearly labeled
- Strive for simplicity, especially in figure titles.
- Know when to use what kind of graph
- Be careful with colors.
Interpretation and commentary takes place here. This section should give a clear summary of your findings.
You should:
- Address the positive and negative aspects of you research
- Discuss how and if your research question was answered.
- Highlight the novel and important findings
- Speculate on what could be occurring in your system
Future Research
- State your goals
- Include information about why you believe research should go in the direction you are proposing
- Discuss briefly how you plan to implement the research goals, if you chose to do so.
Why include References?
- It allows viewers to locate the material that you used, and can help viewers expand their knowledge of your research topic.
- Indicates that you have conducted a thorough review of the literature and conducted your research from an informed perspective.
- Guards you against intellectual theft. Ideas are considered intellectual property failure to cite someone's ideas can have serious consequences.
Acknowledgements
This section is used to thank the people, programs and funding agencies that allowed you to perform your research.
Questions
Allow for about 2-3 minutes at the end of your presentation for questions.
It is important to be prepared.
- Know why you conducted the study
- Be prepared to answer questions about why you chose a specific methodology
If you DO NOT know the answer to a question
Visual Aids
PowerPoints and other visual aids can be used to support what you are presenting about.
Power Point Slides and other visual aids can help support your presentation, however there are some things you should consider:
- Do not overdo it . One big mistake that presenters make is they have a slide for every single item they want to say. One way you can avoid this is by writing your presentation in Word first, instead of making a Power Point Presentation. By doing this you can type exactly what you want to say, and once your presentation is complete, you can create Power Point slides that help support your presentation.
Formula for number of visual aids : Length of presentation divided by 2 plus 1
example: 12 minute presentation should have no more than 7 slides.
- Does it add interest?
- Does it prove?
- Does it clarify?
- Do not read the text . Most people can read, and if they have the option of reading material themselves versus listen to you read it, they are going to read it themselves and then your voice becomes an annoyance. Also, when you are reading the text you are probably not engaging with the audience.
- No more than 4-6 lines on a slide and no more than 4-6 words in a line.
- People should be able to read your slide in 6 seconds.
- << Previous: Poster Presentation
- Next: Printing & Archiving >>
- Last Updated: Apr 11, 2024 9:02 AM
- URL: https://libguides.ecu.edu/c.php?g=637469
Oral Presentations: Tips, Significance, Design, Guidelines & Presentation
1) Know your audience
It is always a good idea to structure your talk so that anyone in the audience can understand what you are presenting. A good scientist should be able to present complex, scientific ideas, no matter how technical, in a simple, easy to follow manner. Complexity is not a necessity, it is an annoyance.
Understand your purpose. This way you can get the point of your talk across appropriately and affectively by catering to your specific audience.
2) Be organized
- Whether you are giving a 15 minute talk or a 45 minute talk, make sure you give yourself enough time to deliver all the information you want in a calm manner. Allocate time for questions/answers.
- Be able to summarize your presentation in five minutes.
- Be concise. Use your space wisely. Use illustrations. Check grammar, spelling, and lay out of each slide.
- Keep an outline with you during the presentation; it will help you stay on track.
- Prepare back up slides. These will come in handy if a question comes up about a topic that needs further explanation.
3) Presentation
Practice your talk enough so that you have flow, but no so much that you have the entire talk memorized. Memorizing your talk will bore you and your audience, as it will be monotonous.
4) Be professional
- Know what you are presenting and be ready to answer question during and after the presentation. Do not answer questions vaguely. A knowledgeable scientist is specific and accurate with his/her information.
- Dress up to present with confidence and respect for the audience and the science involved.
- Be enthusiastic. Scientific talks can be boring, as often they are full of technical jargon. Be clear and talk simplistically.
- Make sure the presentation is visually pleasing. Add pertinent graphics and use fewer words.
5) Be aware of technical problems.
Make sure the format you choose for your presentation is compatible with your style of speech. Also, be prepared for technical disasters just before your talk. Be able to give your talk in another format just in case your first choice (ex: PowerPoint presentation) fails to load.
Significance
Oral presentations are an excellent means of communicating basic science or clinical research. Unlike a poster presentation or a written manuscript, the audience during an oral presentation is more attentive as they are focused on the presenter. For the researcher, this is a rare opportunity to shine! In as few as five minutes, the researcher can convey scientific information and give a years worth work some meaning that can be useful to thousands of people. Of course, this also means that in as little as five minutes, the researcher can cause a great deal of confusion by giving a bad presentation.
Just as is the case with written manuscripts and poster presentations, oral presentations must also communicate research to include all aspects of the scientific method. There are, however, no rules as to what order and which format this should be done in. In order to deliver a successful talk, the presenter should be organized, prepared, and enthusiastic about the research being presented.
Design: A General Guideline
Regardless of whether you choose a PowerPoint presentation or transparencies to deliver your talk, here are some general guidelines to keep in mind when designing your presentation.
1) Title (include authors and affiliations)
2) Introduction (Background, Purpose, Hypothesis)
3) Method (A brief introduction to the methodology without too much technical Jargon)
4) Results (Use graphs/charts/table, Provide an extra slide/transparency with a summary of the results, Explain the results)
5) Conclusions/Discussion (Clear explanation of the results, Clinical implications)
6) Future work (Provide information on where the project is headed)
7) Acknowledgment
Presentation
There some people for whom public speaking is as natural as having a conversation with their friends. Conveniently, however, public speaking is an art that can be perfected with enough practice. Here some things to consider before and during the presentation:
- Do not go over the time limit.
- Speak clearly and concisely. Be coherent. Do not ramble, play with the pointer, or move around in circles.
- Dress appropriately.
- Make eye contact.
- Make sure that each slide/transparency is not cluttered with too many points and ideas. Graphs, tables, and charts should be clearly labeled and easy to interpret.
- Practice your talk, but do not memorize a script.
- Be visually and orally interesting.
- Answer questions in a calm, non-condescending manner; do not argue with or interrupt the questioner.
- Be polite and graceful.
- Give a presentation that is focused with one underlying message.
System Status:
- Faculty Resources
- Instructional Resources
- Instructional Technology Guide
- Instructional Videos
- Best Practices for Video
Research-Based Presentation Design Guidelines
Effective multimedia design is based on what we know about cognitive psychology. If you use visual aids like PowerPoint in your course videos, read the tips below.

This guide leverages relevant cognitive psychology research (discussed in our other article " Multimedia Learning Principles ") to provide specific, evidence-based recommendations for designing and delivering effective presentations. But your PowerPoint deck is only one part of your "educational performance," which, broadly speaking, is a fusion of pictures, text, and spoken words. To maximize learners' engagement, retention, and transfer of the material, all three elements must be strategically deployed.
This guide relies heavily on Richard Mayer's Multimedia Learning and Stephen Kosslyn's Clear and to the Point: 8 Psychological Principles for Compelling PowerPoint Presentations . Both authors apply similar foundations in cognitive psychology to generate best practices for designing effective multimedia learning materials.
We hope this guide will be particularly helpful to instructors creating lecture videos but should prove useful to those delivering synchronous or in-person presentations.
The Short Version
Use images instead of text when possible., use high-resolution, royalty-free images., use no more than 4 bullets per slide., make objects appear only when mentioned., dim objects after they're discussed., draw attention to salient information., avoid using decorative images., when distributing, add alt text to images..

Based on his experiments investigating the efficacy of multimedia messages, Richard Mayer defines what he calls the Redundancy Principle: "People learn better from graphics and narration than from graphics, narration, and printed text" (118). Duplicative images and onscreen text lead to extraneous cognitive processing by learners both because they have more to look at onscreen and because they'll spend unconscious effort trying to compare what they're hearing and what they're seeing.
So what comes from Mayer appears to be a suggestion to use either an image OR words, but not both (though labels are fine if they're important). But we also know from neurological research that images and words end up getting encoded in different places in the brain, and that encoding imagery uses less cognitive effort than encoding words (Grady et al, 2706). (This is probably an evolutionary phenomenon, given the importance of retaining visual information in one's immediate environment.) So in some ways, research has proved that a picture really can be worth a thousand words.
What this boils down to is if you have an image that can represent your material, use that image exclusively on your slide and remove any text that might accompany it unless it's necessary for your students' understanding. It'll be "stickier" in the students' minds.
The bottom line: If an image can represent your slide content, use it exclusively on your slide without any onscreen text.

When using images, try to find the highest resolution you can. "Resolution" refers to the number of pixels that comprise the image. The more pixels there are, the more quality - and the greater the file size.
You can always shrink an image without reducing its quality, but don't increase its size over 100% or the original. If you do, the quality of the image will visibly decrease as it pixelates, which can either make it more difficult to understand or even unconsciously communicate "low quality" to your viewers!
In addition, when recording videos you should be particularly careful about using copyrighted images in your visual aids. While most course materials aren't public, Fair Use doesn't provide instructors with blanket protection from infringement and it's possible your video could get out. Try to use royalty-free image sites (such as Pixabay) to find an image that could work for you. You could also leverage the surprisingly robust features of your presentation software to design your own images, even by piecing together shapes. (Note that all of the imagery in this article was created using royalty-free images and PowerPoint.)
If it's truly necessary to use a copyrighted image in your slide, you should attempt to contact the publisher to obtain the appropriate permissions. If you find images under a Creative Commons license, be sure to abide by the license and cite appropriately.
The bottom line : Use high-resolution images if possible, and don't enlarge them above 100% of their original size. Use royalty-free imagery, attribute appropriately, or create your own images if needed.

If you've ever suffered from "Death by PowerPoint," you've probably experienced slides crammed full of text: sub-sub-bullets, complete sentences, entire paragraphs, or worse. This is most often the result of instructors using visual presentations as memory aids rather than as instructional tools for learners. We've all heard about the value of taking a student-centered approach to pedagogy; presentation design can embody that methodology.
With respect to determining how much text is appropriate, there are several cognitive psychology principles at work. As we discussed in our Multimedia Learning Principles article, we have two channels for processing a multimedia message. When presented with a large amount of text, the visual channel is oversaturated, and learners' verbal channels struggle to attend effectively to your words as they try to read what's on screen. They also spend cognitive effort comparing the printed and spoken words.
Also in our article on Multimedia Learning Principles, we discussed what occurs during active processing as well as the various types of cognitive load that learners experience. Given that active learning first necessitates the selection of relevant information from an instructional message, providing succinct text will help reduce students' germane load since you're doing some of the selection work for them.
So now that we know why less text is important, is it possible to quantify a recommendation?
A variety of studies have shown that humans can reliably retain 4 concepts in working memory - the so-called "rule of four." The brain can "chunk" information to improve retention, however, so each of these 4 concepts can have up to 4 component pieces of information.
To see the rule of four and chunking principles in effect, check out the video below.
So - we can retain information better when there are four or fewer units, and using recognizable groupings of more than four units helps to improve retention. With all of this in mind, a good rule of thumb is to try to restrict yourself to four or fewer bullets per slide, with four or fewer units of information contained within each bullet.
One way to quantify these "units" of information is to count the number of verbs and nouns (Kosslyn, 77). For example, the phrase "Use four bullets per slide" has 3 units of information: "use," "bullets," and "slide."
Another way to think about this: just use less text in your slides. It may not always be possible, but can be an important goal for which to strive, especially if it helps you break your presentation into more slides. Ultimately, though, remember that your visual aid is intended for your students - not to help you remember what you need to discuss. If possible (or if necessary), use your presentation software's "notes" feature to make sure you don't forget to discuss anything.
Remember what we discussed earlier, though: images tend to be "stickier" than words in long-term memory. If you can find a meaningful image that can replace some or all of the text on your slide, use that instead (using labels as needed, of course).
The bottom line : Try to use four or fewer bullets on a slide, each with four or fewer concepts. Favor images over text whenever appropriate.

Mayer's multimedia messaging experiments led him to what he termed the Temporal Contiguity Principle: "Students learn better when corresponding words and pictures are presented simultaneously rather than successively" (153). Mayer discusses this principle largely in the context of whether to present narration after or during a corresponding animation. While common sense might suggest that encountering the information twice in succession (in two different forms) would lead to better transfer and retention, it was instead when the narration and animation were presented simultaneously.
Now, chances are that you're not planning on narrating over a series of silent animated movies as your presentation - but it's important to remember that presentation software is, in and of itself, a kind of animation tool. Moving to a new slide is essentially a simple animation.
But in the context of the Temporal Contiguity Principle, think about a learner arriving on a slide that already has all of its visual content present at the start. With so much information for your learners to look at, you risk cognitive overload as they read the entire slide - including all the parts that may not yet be relevant or comprehensible - while also trying to process your spoken words.
Building your bullets and images one at a time provides visual cues to your learners about where you are in the presentation and what's relevant to the current moment of knowledge construction. Making clear what specific visual elements are related to what's being discussed maximizes your learners' ability to integrate what they see and what they hear simultaneously.
So, add simple animations to your slides. Leverage build-ins or entrance effects to have objects appear on your slide only when you mention them - bullets, images, graphs, shapes - anything. Stick to subtle effects like fade-ins or even just appearing unless a particular animation offers additional impact to your message.
The bottom line : Make objects appear only when you discuss them.

As we discussed earlier, Mayer's Temporal Contiguity Principle implies that we should make information appear only when mentioned. Well, the converse is true as well: information that's already been discussed should be visually de-emphasized. In reinforcing where exactly you are within the visual information on your slide, you're reducing your learners' cognitive load by encouraging them to focus their efforts on a smaller set of visual information while also maintaining the conceptual connection with the previous information.
In his book providing detailed presentation design guidelines based on a similar set of cognitive psychology principles as Mayer, Stephen Kosslyn identifies seven high-level principles, one of which is the Principle of Salience: "Attention is drawn to large perceptible differences" (7). Given that our brains are wired to notice strong differences in contrast (such as this bold text ), de-emphasizing past information provides a cue to learners that you're moving on to other visual information on the slide and helps direct their attention appropriately.
You can de-emphasize objects onscreen by adding an "emphasis" (PowerPoint) or "action" (Keynote) animation to a bullet, such as reducing the opacity of the object to 25% (or increasing its transparency to 75%). Add the animation at the same time a new object appears.
The bottom line : Visually de-emphasize items that have already been discussed.

The Signaling Principle indicates that "People learn better when cues that highlight the organization of the essential material are added" (Mayer, 108). These cues, Mayer writes, "are intended to guide learners' attention to essential material and to guide learners' organization of the essential material into a coherent structure" (117). Leveraging what we discussed in our article about multimedia learning , signaling can reduce extraneous load, foster germane load, and assist with the selection and organization of materials that must occur during active learning.
While these cues can be verbal (such as explicitly stating where you are in your presentation based on an outline you presented at the start) the visual cues within your presentation play an extremely strong role in facilitating your students' understanding. For example, if you present a complex graph, do something either when designing your presentation (e.g. add arrows, labels, zoom in, etc.) or during your presentation (e.g. use your mouse as a pointer) to draw your learners' attention to the most important or relevant pieces of information.
While making objects appear and dim at the appropriate times highlights salient information as well, for more complex images it's important to draw learners' attention to the most relevant parts. As is often the case in effective presentation design, this helps reduce learners' extraneous load when presented with a surfeit of visual information.
The bottom line : design your slides with arrows, circles, or other visual cues that draw viewers' attention to particularly important details. Failing that, leverage pointers or other indicators during your recording.

Richard Mayer identifies three main categories of images that are helpful to learners: representational images, which portray an individual object; organizational images, which illustrate relationships between objects (or between parts of an object); and explanative images, which illustrate how a system works (236).
Decorative images, on the other hand, are "illustrations that are intended to interest the reader but that do not enhance the message of the passage" (Mayer, 236). They distract students from learning goals, add to their extraneous load, and squander their limited cognitive resources.
Now, on the surface, it may seem like adding some decorative imagery to your more text-heavy slides might be a good thing, to give them some visual interest and foster a little more engagement with your presentation. As Mayer points out, this is arousal theory: "the idea that students learn better when they are emotionally aroused by the material" (93). Unfortunately, decorative images end up becoming "seductive illustrations": images added solely to add some visual interest. Unfortunately research has confirmed that these details are retained better than the presentation's central points (Mayer, 97).
So, if an image - indeed, if any content - doesn't directly support the completion of your students' learning objectives, don't include it. While we do recommend using images instead of text when possible as well as using less text overall, don't include imagery for imagery's sake.
Remember - an effective multimedia message should be designed to create the conditions for maximal learning. Some of your slides may end up being less visually interesting, but especially when paired with our other tips, you'll be helping your learners spend their cognitive resources more effectively.
The bottom line : Don't add images that don't directly support your students' learning.

Given how deleterious decorative imagery can be to our cognitive resources, all the images you've included in your presentation should support your students' learning. If there are students who can't perceive that visual content, however, their learning is compromised compared to their classmates.
If you intend to distribute your presentation file digitally (for example, uploading it to your LMS for students to download), you should ensure that all the images included in the presentation have what's called "alt text": text-based metadata embedded into the image that displays onscreen when the image fails to load and that describes it for screen reader software. These image descriptions are essential in ensuring that your materials are accessible to learners with visual disabilities.
Adding alt text within many applications is often just a matter of right-clicking an image, clicking the appropriate menu option, and typing in a description. A good alt tag should be specific and concise. And while it should communicate the relevant part(s) of the image, it shouldn't require the learner to listen to a lengthy description.
The bottom line : Add alt tags to all images in presentations you intend to distribute digitally.
PowerPoint shouldn't be vilified or glorified. Presentation software is just a tool, and it could be used effectively or poorly to communicate a message. Kosslyn sums it up well in his book Clear and to the Point : "PowerPoint presentations can help people understand by making both memory and processing easier for them" (12).
It is true that presentations designed this way require more effort to produce. If you're struggling to devote the time needed in pre-production to make your slides more pedagogically effective, some low-hanging fruit you can bite off (so to speak) is to use tools during your presentation to draw your students' attention, such as turning your mouse cursor into a laser pointer. Let Kosslyn's principles of Salience and Discriminability remind you that "attention is drawn to large perceptible differences," and those differences "must differ by a large enough proportion or they will not be distinguished" (7-8).
It's important to note that if you abide by these research-based best practices, it's likely that your presentation won't work as effectively as a standalone artifact. It's not meant to. Your slide deck is part of a larger presentation that includes pictures, text, and spoken words, all employed strategically to maximize learning. If it's important that your presentation be legible on its own, consider developing an alternate version.
Fiorella, L., Stull, A. T., Kuhlmann, S., & Mayer, R. E. (2019). Instructor presence in video lectures: The role of dynamic drawings, eye contact, and instructor visibility. Journal of Educational Psychology , 111(7), 1162–1171. https://doi.org/10.1037/edu0000325
Grady, C. L., McIntosh, A. R., Rajah, M. N., & Craik, F. I. M. (1998). Neural correlates of the episodic encoding of pictures and words. Proc. Natl. Acad. Sci . USA, 95, 2703–2708.
Kosslyn, S. (2007). Clear and to the point: 8 psychological principles for compelling PowerPoint presentations . New York: Oxford University Press.
Mayer, R. E. (2009). Multimedia learning (2nd ed.). Cambridge, England: Cambridge University Press.
Interested in consulting with a member of the Multimedia Services team? Contact us at [email protected] .
Research Presentation Guide
Presenting your research is a key component of conducting research. Some students conduct research to gather a more in-depth look into their field. Others are looking to build their research skills and portfolio. Whatever your reason may be for presenting, the task can seem a little intimidating at first. One way to combat this presentation anxiety is with careful preparation and understanding what is expected from your presentation. Knowing the guidelines for each type of presentation is the first step to making sure your presentation is a good representation of all of your hard work.

General Guidelines

Oral & Performance Presentation

Poster & Creative Works Presentation
1. be organized.
Know the clear and unifying point of your research, and be able to communicate it to an audience.
2. Use the format of your academic discipline
Most research in the sciences and some social sciences is organized in the following components (or versions of them):
- Introduction
- Acknowledgements
In other disciplines, these components may be less formal, but all research should have an introduction, address a question or problem, and discuss or analyze the results of its inquiry. Consult with your faculty mentor regarding selecting the best format for your presentation. The Purdue Online Writing Lab has a lot of resources for student researchers including style guides. Students can also search past Student RSCA Conference and Creative Activities and Research Symposium (CARS) abstracts through the Bronco ScholarWorks University Library website , CSU Scholar Works RSCA Conference Abstract Collection , CSU ScholarWorks CARS Abstracts Collection.
3. Make your research as accessible as possible to a broad academic audience, without sacrificing its disciplinary rigor.
4. anticipate possible questions.
Take notes on questions (and the names and addresses of the contacts you’ll make while discussing your work).
5. Rehearse your presentation in advance.
6. credit all sources; be truthful; respect your audience, oral & performance presentation guidelines.
- This format includes an 12-minute presentation, followed by a 2 minute Q&A session per project.
- Projects are grouped closely according to the selected project discipline.
- Entrants in the Oral category will present their research in-person at the conference, and may use slides or other materials to aid their presentation. Entrants in the Performance category may perform a piece they have given or a work they have created; their oral presentation should focus on the rationale and historical context underlying their interpretation of the material. All presenters will be required to be present for the live Q&A.
- Examples: Oral: PowerPoint presentation. Performance: Dance, music, poetry reading, theatre, film.
- NOTE: You can select to be placed in a "competitive presentation" to be judged, or to present in a session without a judges' panel or "non-competitive presentation". There are only ten competitive sessions at the Student RSCA Conference. Winners from each judged session will receive a $100 cash award and go on to represent Cal Poly Pomona at the CSU Student Research Competition .
Dr. Victoria's Bhavsar's "Professional Presentations"
Preparing & presenting.
We encourage you to use the tips below that will best help you prepare your for your oral or performance presentation.
- Rehearse your presentation in advance with friends or family. Make sure that it is no more than twelve-minutes long. Ask your rehearsal audience what they have learned to see if you're getting your point across.
- Establish early a clear and unifying point and repeat at least three times during your presentation.
- Clearly explain the applicability of your research to your discipline and/or the real world.
- Face your audience; speak slowly and clearly and project your voice to the back of the room. Whether you are working from notes (or slides) or reading from a text, make eye contact with your audience as frequently as you can.
- If you're speaking from notes, number them so that you won't lose your place, and remember the general outline of the points that you want to make and the order in which you'll make them. If you're reading, read slowly enough to understand what you're reading (at a rate of about two minutes per double-spaced page).
- If you are using visual aids, prepare them well in advance and make sure they are clear.
- Keep words to a minimum on visual aids; make sure they are readable from the back of the room. Words should be large enough to read from several feet away, but don’t use all caps. Avoid using light colors for words such as yellow or orange. The size of the typeface should be at least 14 point .
- Number your visual aids so you always know the order in case they get dropped or misplaced.
- Watch your audience response; if they seem lost, slow down.
- Bring a pen and pad of paper for notes and to record names and addresses of contacts.
Equipment & Visual Aids
Student presenters with questions about computer or technical support should contact the event organizers in advance at [email protected] .
For the campus conference held in-person, Cal Poly Pomona will provide computers, projectors, and screens for students making oral presentations with visual aids. (PowerPoint is the only supported presentation software, it is the students’ responsibility to make sure the format, version, and presentation software works on the provided computers.) All computers are PCs. Participants should not bring their own computers.
- Students should bring presentations in a PC-compatible format on a USB memory drive.
- Presentations prepared on a Mac must be rehearsed at least once in advance on a PC to ensure compatibility.
- All presenters must indicate clearly the equipment they will need when abstracts are initially submitted.
PPT Slides Examples
Aside from posters, sometimes students might have to present their research using slides. Here are some examples of slides ranging from basic, busy and organized.
Basic Slides with Good Visuals (PDF)
Busy Slides that are Hard to Read (PDF)
Slides Organized into Sections (PDF)
Participating in a Panel
- A faculty moderator will chair your panel. They will introduce you and other presenters to the audience, describe the session's topic, keep time, and facilitate a brief discussion following each presentation. It is essential that panels keep on schedule; moderators will stop presenters if they appear likely to run over their allotted time.
- Arrive a minimum of 15 minutes before the beginning of your session and check-in with the moderator so they know you are there and ready to present. For in-person conferences, this will allow you time to upload your presentation to the computer n the presentation room. Stay for the duration and be an active listener. Do not arrive late or leave following your presentation; this is discourteous to other presenters.
- Check all support materials in advance (back-up PowerPoint presentations, handouts, transparencies, etc.) to avoid unnecessary delays in starting your presentation.
- Have a backup plan in the event of equipment failure (for instance, we recommend that you bring transparencies or handouts to guard against computer malfunctions if you're using PowerPoint). For the virtual conference, have a back-up link to your presentation in case there moderator has issues with sharing your pre-recorded presentation with the audience.
- Listen to other panelists’ presentations and participate in discussions that follow.
Judging Oral Criteria
The criteria below are used at the CSU Systemwide Student Research Competition that occurs after the annual conference in March. Ten student projects are selected from the campus conference to represent Cal Poly Pomona at the CSU Systemwide Student Research Competition that occurs later in the spring term (April/May each year). Each oral & performance presentation will be judged on the following:
- Clarity of purpose
- Appropriateness of methodology
- Interpretation of results
- Value of the research or creative activity
- Ability of the presenter to articulate the research or creative activity
- Organization of the material presented
- Presenter's ability to handle questions from the panel and general audience
Student RSCA Conference Oral & Performance Presentation Judging Criteria Rubric & Tips
Judging Criteria Ruberic: View PDF
OUR Conference Judging Tips Video:
Poster & Creative Works Presentation Guidelines
- Poster & Creative Works presentations are carefully prepared to be a live in-person presentation and present a 1-minute elevator pitch to give to your audience.
- Prepare and print a 4 ft x 3 ft poster and be available to answer questions through a 1:1 interaction with audience members.
- Presenters will interact with their audience on a 1-1 basis. Presenters engage viewers through conversation and feedback about the work they have on display.
- After all the student presenters have had a chance to speak, there will be general discussion period where you will have additional time to speak to your fellow presenters and audience members in the session.
- Session length is usually around 1 hour long.
- Visual Aid: Poster, artwork, prototypes, and design projects.
- REQUIRED : A poster or project to share with the audience. Poster size: 4ft x 3ft Landscape.
- NOTE : This presentation type will not be judged .
A poster template can be found below. It is available for students to use but not required. It can be edited by selecting File > Download a Copy.
Poster Template
We encourage you to use the tips below that will best help you prepare your poster and creative works presentation.
- Rehearse your presentation in advance with friends or family. Make sure that it is no more than two-minutes long. Ask your rehearsal audience what they have learned to see if you're getting your point across.
- If you are using visual aids, prepare them well in advance and make sure they are clear.
Participation in a Panel
- Have a backup plan in the event of equipment failure (for instance, we recommend that you bring transparencies or handouts to guard against computer malfunctions if you're using PowerPoint).
Poster Format & Style
In-Person Poster Format Guidelines
Poster presentations should be no larger than 4'(width) x 3'(height) Landscape. When you apply to present, the conference will provide specific guidelines on whether your poster will be pinned to bulletin board or mounted on a hard backing that will be displayed on an individual easel. Follow the instructions provided by the specific conference. Also please note: NO TAPE, VELCRO, GLUESTICKS, or other permanent fasteners should be visible. If you require a special set-up for your presentation such as a table to display a prototype or design project, please notify the conference so that they can accommodate your request.
Space on a poster is limited, so pick wisely what to present. Your display should be self-explanatory and have a logical flow—others should be able to follow the order even if you are not present. Start with a rough draft of your design on paper, using graph paper or post-it notes to simulate sections.
Place your title at the top of the poster and make sure that the text is large (usually at least 2 inches in height) and clear. Include your name and major, and the name of your faculty mentor and his/her department name, the name of your school and the names of other co-authors. Incorporate appropriate graphics in your poster. Label or describe any charts, tables, figures, graphs, or photos that you use. Make sure all edges line up evenly. Edit, review, and spell check all the elements of your poster display. Be sure to firmly attach all materials to your poster board (spray adhesive, found in art supply stores, works best).
In-Person Poster Style Guidelines
- Don't use more than two fonts. Instead use bold, italic and font size to set type differently. Times New Roman, Arial, and Garamond are suggested typefaces.
- Titles should be at least 2 inches high.
- The body type for the main sections should be at least 18 point if possible.
- Words should be large enough to read from several feet away, but don’t use all caps.
- Stick to a color scheme (try a couple that complement or contrast with each other such as black or navy on white). Try mounting text and figures on colored paper, or using some colored font.
- Be consistent with your white space between sections of text, figures and headings; white space should be ample so the poster doesn't’t look crammed.
A poster template can be found here . It is available to use but not required. It can be edited by selecting File > Download a Copy.
Student RSCA Conference Poster Guidelines
Poster/Creative Works Showcase
- The session length is usually around 1 hour long.
- REQUIRED: A poster or project to share with the audience. Poster size: 4ft x 3ft Landscape.
- Posters must be printed on paper, not backed on poster board
- If you will be bringing a prototype and need a table or plug in to display the visual aid, please email [email protected] so that we place you in a row with tables
Resources for Printing Posters
- Bronco Copy n Mail (on-campus, BSC), Diamond Bar PostNet, Office Depot, and FedEx (ranges from $16-$66)
- The College of Environmental Design (ENV) is currently offering a printing service in their printing lab, located in Bldg. 3, Room 1644. The printing service covers 3' x 4' posters with a fee of $25. ( https://www.cpp.edu/env/resources/isb.shtml )
- Reminder: Posters must be printed on paper, not backed on poster board.
- - Google Chrome
Intended for healthcare professionals
- Access provided by Google Indexer
- My email alerts
- BMA member login
- Username * Password * Forgot your log in details? Need to activate BMA Member Log In Log in via OpenAthens Log in via your institution
Search form
- Advanced search
- Search responses
- Search blogs
- How to prepare and...
How to prepare and deliver an effective oral presentation
- Related content
- Peer review
- Lucia Hartigan , registrar 1 ,
- Fionnuala Mone , fellow in maternal fetal medicine 1 ,
- Mary Higgins , consultant obstetrician 2
- 1 National Maternity Hospital, Dublin, Ireland
- 2 National Maternity Hospital, Dublin; Obstetrics and Gynaecology, Medicine and Medical Sciences, University College Dublin
- luciahartigan{at}hotmail.com
The success of an oral presentation lies in the speaker’s ability to transmit information to the audience. Lucia Hartigan and colleagues describe what they have learnt about delivering an effective scientific oral presentation from their own experiences, and their mistakes
The objective of an oral presentation is to portray large amounts of often complex information in a clear, bite sized fashion. Although some of the success lies in the content, the rest lies in the speaker’s skills in transmitting the information to the audience. 1
Preparation
It is important to be as well prepared as possible. Look at the venue in person, and find out the time allowed for your presentation and for questions, and the size of the audience and their backgrounds, which will allow the presentation to be pitched at the appropriate level.
See what the ambience and temperature are like and check that the format of your presentation is compatible with the available computer. This is particularly important when embedding videos. Before you begin, look at the video on stand-by and make sure the lights are dimmed and the speakers are functioning.
For visual aids, Microsoft PowerPoint or Apple Mac Keynote programmes are usual, although Prezi is increasing in popularity. Save the presentation on a USB stick, with email or cloud storage backup to avoid last minute disasters.
When preparing the presentation, start with an opening slide containing the title of the study, your name, and the date. Begin by addressing and thanking the audience and the organisation that has invited you to speak. Typically, the format includes background, study aims, methodology, results, strengths and weaknesses of the study, and conclusions.
If the study takes a lecturing format, consider including “any questions?” on a slide before you conclude, which will allow the audience to remember the take home messages. Ideally, the audience should remember three of the main points from the presentation. 2
Have a maximum of four short points per slide. If you can display something as a diagram, video, or a graph, use this instead of text and talk around it.
Animation is available in both Microsoft PowerPoint and the Apple Mac Keynote programme, and its use in presentations has been demonstrated to assist in the retention and recall of facts. 3 Do not overuse it, though, as it could make you appear unprofessional. If you show a video or diagram don’t just sit back—use a laser pointer to explain what is happening.
Rehearse your presentation in front of at least one person. Request feedback and amend accordingly. If possible, practise in the venue itself so things will not be unfamiliar on the day. If you appear comfortable, the audience will feel comfortable. Ask colleagues and seniors what questions they would ask and prepare responses to these questions.
It is important to dress appropriately, stand up straight, and project your voice towards the back of the room. Practise using a microphone, or any other presentation aids, in advance. If you don’t have your own presenting style, think of the style of inspirational scientific speakers you have seen and imitate it.
Try to present slides at the rate of around one slide a minute. If you talk too much, you will lose your audience’s attention. The slides or videos should be an adjunct to your presentation, so do not hide behind them, and be proud of the work you are presenting. You should avoid reading the wording on the slides, but instead talk around the content on them.
Maintain eye contact with the audience and remember to smile and pause after each comment, giving your nerves time to settle. Speak slowly and concisely, highlighting key points.
Do not assume that the audience is completely familiar with the topic you are passionate about, but don’t patronise them either. Use every presentation as an opportunity to teach, even your seniors. The information you are presenting may be new to them, but it is always important to know your audience’s background. You can then ensure you do not patronise world experts.
To maintain the audience’s attention, vary the tone and inflection of your voice. If appropriate, use humour, though you should run any comments or jokes past others beforehand and make sure they are culturally appropriate. Check every now and again that the audience is following and offer them the opportunity to ask questions.
Finishing up is the most important part, as this is when you send your take home message with the audience. Slow down, even though time is important at this stage. Conclude with the three key points from the study and leave the slide up for a further few seconds. Do not ramble on. Give the audience a chance to digest the presentation. Conclude by acknowledging those who assisted you in the study, and thank the audience and organisation. If you are presenting in North America, it is usual practice to conclude with an image of the team. If you wish to show references, insert a text box on the appropriate slide with the primary author, year, and paper, although this is not always required.
Answering questions can often feel like the most daunting part, but don’t look upon this as negative. Assume that the audience has listened and is interested in your research. Listen carefully, and if you are unsure about what someone is saying, ask for the question to be rephrased. Thank the audience member for asking the question and keep responses brief and concise. If you are unsure of the answer you can say that the questioner has raised an interesting point that you will have to investigate further. Have someone in the audience who will write down the questions for you, and remember that this is effectively free peer review.
Be proud of your achievements and try to do justice to the work that you and the rest of your group have done. You deserve to be up on that stage, so show off what you have achieved.
Competing interests: We have read and understood the BMJ Group policy on declaration of interests and declare the following interests: None.
- ↵ Rovira A, Auger C, Naidich TP. How to prepare an oral presentation and a conference. Radiologica 2013 ; 55 (suppl 1): 2 -7S. OpenUrl
- ↵ Bourne PE. Ten simple rules for making good oral presentations. PLos Comput Biol 2007 ; 3 : e77 . OpenUrl PubMed
- ↵ Naqvi SH, Mobasher F, Afzal MA, Umair M, Kohli AN, Bukhari MH. Effectiveness of teaching methods in a medical institute: perceptions of medical students to teaching aids. J Pak Med Assoc 2013 ; 63 : 859 -64. OpenUrl

How to Make an Effective Research Presentation
Presentation software programs have advanced to the point where you no longer need to be an experienced designer to put together a compelling piece of collateral that conveys your findings about academic research in exactly the right way. With the right materials, the right presentation software, and a little bit of time, you can visualize any data that you have in the form of a terrific presentation that sells your research better than numbers alone ever could. However, this does not mean that you shouldn’t keep in mind a few things. As both a marketing tool and a means to convey information, presentations are helpful because they are malleable—the format can essentially be anything you need it to be at any given time. The other side of this, however, is that there are certain traps that are all too easy for even experts to fall into that will harm your ultimate message, not help it. If you wish to learn how to make a professional research presentation as an author, or a researcher, then you should avoid some mistakes at all costs.
Mistakes to Avoid
As a researcher or a student, your number one goal isn’t just to provide insight into a topic—it’s to do so in a compelling way. It is important to communicate ideas in a way that is both easy to understand for people who haven’t completed the work you have and to do so in a compelling and engaging way. In many ways, it’s a lot like telling a story—albeit one that is heavily research-oriented. Every story has a beginning, middle, and end and you need to ensure that the content in the presentation has a proper narrative flow.
In many ways, your presentation will operate exactly along the same lines. To that end, always remember to make sure that the information is presented not only in the right manner but also in the right order to complement intent and maximize impact. If you have three subtopics within a presentation, all of which are related but are still different ideas, don’t mix and match the content. Don’t jump from one topic to the other and back again—you’re only going to lose focus and eventually, the attention of your reader.
If you start preparing your presentation and realize that you’re actually kind of covering two distinct and different topics, don’t be afraid to break one presentation into two. You’ll be able to devote more attention to promoting each idea and you’ll walk away with two great pieces of research presentations instead of one “okay” one.
Length of Your Presentation
Another element of your presentation that you need to pay extremely close attention to is the length. This goes back to another one of the old rules of storytelling: “Whatever you do, don’t overstay your welcome.” While it is true that presentations are naturally designed to be a longer form than something like an Infographic, it’s important to recognize when you’re asking too much of your reader/viewer. A presentation isn’t just a visualized form of something like a white paper. It’s a unique medium all unto itself.
When you start preparing your presentation for the first time, feel free to include as many slides or as much information as you want. Also, don’t forget that there are three versions of your presentation that will exist—the initial outline, the “first draft” of the presentation and the final edited version that you release. Make an effort to only include information that A) is needed to understand your research topic, and B) is necessary to contextualize your findings or the points you’re trying to make. Go through your presentation from start to finish and really try to experience it with fresh eyes—the same way your audience will.
Does it feel like the end of your presentation is getting a little sluggish? You feel that it should be over but there are ten slides to go still. Be precise in your editing process —rest assured that you’ll thank yourself when the end result is much more powerful than it would be if it had remained bloated.
The Power of Presentations
In many ways, presentations provide a unified experience where you can have text, images, video, and more. Remember that human beings are visual learners— visuals are processed up to 60,000 times faster than text and people have a much easier time understanding complex information when it is paired with relevant images as opposed to just text. As an author, researcher, or student, your job is to take complicated ideas and present them in a way that is appealing to a larger audience. Presentations are one of the most essential ways for you to do exactly that. The central message you are trying to convey—the thesis, if you will—needs to be strong enough to justify the creation of a presentation in the first place.
It needs to be a big enough topic to warrant a lengthy experience and a compelling enough story that demands to be told in this particular format above all others. If you start from that simple foundation and build outward, you’ll be left with the best type of marketing tool—one that promotes your research for you and one that people can’t wait to share with their friends and colleagues.
About the Author
Payman Taei is the founder of Visme , an easy-to-use online tool to create engaging presentations, infographics, and other forms of visual content. He is also the founder of HindSite Interactive , an award-winning Maryland based digital agency specializing in website design, user experience, and web app development.
Rate this article Cancel Reply
Your email address will not be published.

Enago Academy's Most Popular Articles

- Reporting Research
Beyond the Podium: Understanding the differences in conference and academic presentations
Conferences can be captivating as it where knowledge meets presentation skills. They serve as dynamic…

- Old Webinars
- Webinar Mobile App
How to Ace Your Next Virtual Academic Conference
Identifying the right conference Designing video presentations Handling Q&A professionally Tips for virtual networking

- Global Korea Webinars
국제회의를 위한 연구발표 준비하는 방법
올바른 컨퍼런스 식별하기 프레젠테이션 설계 전략 질의응답 확인 및 관리 네트워킹에 대한 효과적인 팁

- Career Corner
- PhDs & Postdocs
Tips to Present Your Scientific Poster Effectively
This article focuses on the prerequisites and tips on developing a poster/e-poster. Traditionally, scientific posters…

A Researcher’s Guide to Making the Most of Academic Conferences
Academics know the importance of attending conferences as part of their career. Conferences provide valuable…
6 Simple Ways to Handle a Q&A Session at a Conference
4 Quick Tips to Effectively Engage the Audience in Your Research Presentation

Sign-up to read more
Subscribe for free to get unrestricted access to all our resources on research writing and academic publishing including:
- 2000+ blog articles
- 50+ Webinars
- 10+ Expert podcasts
- 50+ Infographics
- 10+ Checklists
- Research Guides
We hate spam too. We promise to protect your privacy and never spam you.
I am looking for Editing/ Proofreading services for my manuscript Tentative date of next journal submission:

As a researcher, what do you consider most when choosing an image manipulation detector?

- Event Website Publish a modern and mobile friendly event website.
- Registration & Payments Collect registrations & online payments for your event.
- Abstract Management Collect and manage all your abstract submissions.
- Peer Reviews Easily distribute and manage your peer reviews.
- Conference Program Effortlessly build & publish your event program.
- Virtual Poster Sessions Host engaging virtual poster sessions.
- Customer Success Stories
- Wall of Love ❤️
How to Present Your Research (Guidelines and Tips)

Published on 01 Feb 2023

Presenting at a conference can be stressful, but can lead to many opportunities, which is why coming prepared is super beneficial.
The internet is full to the brim with tips for making a good presentation. From what you wear to how you stand to good slide design, there’s no shortage of advice to make any old presentation come to life.
But, not all presentations are created equal. Research presentations, in particular, are unique.
Communicating complex concepts to an audience with a varied range of awareness about your research topic can be tricky. A lack of guidance and preparation can ruin your chance to share important information with a conference community. This could mean lost opportunities in collaboration or funding or lost confidence in yourself and your work.
So, we’ve put together a list of tips with research presentations in mind. Here’s our top to-do’s when preparing to present your research.
Take every research presentation opportunity
The worst thing you could do for your research is to not present it at all. As intimidating as it can be to get up in front of an audience, you shouldn’t let that stop you from seizing a good opportunity to share your work with a wider community.
These contestants from the Vitae Three Minute Thesis Competition have some great advice to share on taking every possible chance to talk about your research.
Double-check your research presentation guidelines
Before you get started on your presentation, double-check if you’ve been given guidelines for it.
If you don’t have specific guidelines for the context of your presentation, we’ve put together a general outline to help you get started. It’s made with the assumption of a 10-15 minute presentation time. So, if you have longer to present, you can always extend important sections or talk longer on certain slides:
- Title Slide (1 slide) - This is a placeholder to give some visual interest and display the topic until your presentation begins.
- Short Introduction (2-3 slides) - This is where you pique the interest of your audience and establish the key questions your presentation covers. Give context to your study with a brief review of the literature (focus on key points, not a full review). If your study relates to any particularly relevant issues, mention it here to increase the audience's interest in the topic.
- Hypothesis (1 slide) - Clearly state your hypothesis.
- Description of Methods (2-3 slides) - Clearly, but briefly, summarize your study design including a clear description of the study population, the sample size and any instruments or manipulations to gather the data.
- Results and Data Interpretation (2-4 slides) - Illustrate your results through simple tables, graphs, and images. Remind the audience of your hypothesis and discuss your interpretation of the data/results.
- Conclusion (2-3 slides) - Further interpret your results. If you had any sources of error or difficulties with your methods, discuss them here and address how they could be (or were) improved. Discuss your findings as part of the bigger picture and connect them to potential further outcomes or areas of study.
- Closing (1 slide) - If anyone supported your research with guidance, awards, or funding, be sure to recognize their contribution. If your presentation includes a Q&A session, open the floor to questions.
Plan for about one minute for each slide of information that you have. Be sure that you don’t cram your slides with text (stick to bullet points and images to emphasize key points).
And, if you’re looking for more inspiration to help you in scripting an oral research presentation. University of Virginia has a helpful oral presentation outline script .

A PhD Student working on an upcoming oral presentation.
Put yourself in your listeners shoes
As mentioned in the intro, research presentations are unique because they deal with specialized topics and complicated concepts. There’s a good chance that a large section of your audience won’t have the same understanding of your topic area as you do. So, do your best to understand where your listeners are at and adapt your language/definitions to that.
There’s an increasing awareness around the importance of scientific communication. Comms experts have even started giving TED Talks on how to bridge the gap between science and the public (check out Talk Nerdy to Me ). A general communication tip is to find out what sort of audience will listen to your talk. Then, beware of using jargon and acronyms unless you're 100% certain that your audience knows what they mean.
On the other end of the spectrum, you don’t want to underestimate your audience. Giving too much background or spending ages summarizing old work to a group of experts in the field would be a waste of valuable presentation time (and would put you at risk of losing your audience's interest).
Finally, if you can, practice your presentation on someone with a similar level of topic knowledge to the audience you’ll be presenting to.
Use scientific storytelling in your presentation
In scenarios where it’s appropriate, crafting a story allows you to break free from the often rigid tone of scientific communications. It helps your brain hit the refresh button and observe your findings from a new perspective. Plus, it can be a lot of fun to do!
If you have a chance to use scientific storytelling in your presentation, take full advantage of it. The best way to weave a story for your audience into a presentation is by setting the scene during your introduction. As you set the context of your research, set the context of your story/example at the same time. Continue drawing those parallels as you present. Then, deliver the main message of the story (or the “Aha!”) moment during your presentation’s conclusion.
If delivered well, a good story will keep your audience on the edge of their seats and glued to your entire presentation.
Emphasize the “Why” (not the “How”) of your research
Along the same lines as using storytelling, it’s important to think of WHY your audience should care about your work. Find ways to connect your research to valuable outcomes in society. Take your individual points on each slide and bring things back to the bigger picture. Constantly remind your listeners how it’s all connected and why that’s important.
One helpful way to get in this mindset is to look back to the moment before you became an expert on your topic. What got you interested? What was the reason for asking your research question? And, what motivated you to power through all the hard work to come? Then, looking forward, think about what key takeaways were most interesting or surprised you the most. How can these be applied to impact positive change in your research field or the wider community?
Be picky about what you include
It’s tempting to discuss all the small details of your methods or findings. Instead, focus on the most important information and takeaways that you think your audience will connect with. Decide on these takeaways before you script your presentation so that you can set the scene properly and provide only the information that has an added value.
When it comes to choosing data to display in your presentation slides, keep it simple. Wherever possible, use visuals to communicate your findings as opposed to large tables filled with numbers. This article by Richard Chambers has some great tips on using visuals in your slides and graphs.
Hide your complex tables and data in additional slides
With the above tip in mind: Just because you don’t include data and tables in your main presentation slides, doesn’t mean you can’t keep them handy for reference. If there’s a Q&A session after your presentation (or if you’ll be sharing your slides to view on-demand after) one great trick is to include additional slides/materials after your closing slide. You can keep these in your metaphorical “back pocket” to refer to if a specific question is asked about a data set or method. They’re also handy for people viewing your presentation slides later that might want to do a deeper dive into your methods/results.
However, just because you have these extra slides doesn’t mean you shouldn’t make the effort to make that information more accessible. A research conference platform like Fourwaves allows presenters to attach supplementary materials (figures, posters, slides, videos and more) that conference participants can access anytime.
Leave your audience with (a few) questions
Curiosity is a good thing. Whether you have a Q&A session or not, you should want to leave your audience with a few key questions. The most important one:
“Where can I find out more?”
Obviously, it’s important to answer basic questions about your research context, hypothesis, methods, results, and interpretation. If you answer these while focusing on the “Why?” and weaving a good story, you’ll be setting the stage for an engaging Q&A session and/or some great discussions in the halls after your presentation. Just be sure that you have further links or materials ready to provide to those who are curious.
Conclusion: The true expert in your research presentation
Throughout the entire process of scripting, creating your slides, and presenting, it’s important to remember that no one knows your research better than you do. If you’re nervous, remind yourself that the people who come to listen to your presentation are most likely there due to a genuine interest in your work. The pressure isn’t to connect with an uninterested audience - it’s to make your research more accessible and relevant for an already curious audience.
Finally, to practice what we preached in our last tip: If you’re looking to learn more about preparing for a research presentation, check out our articles on how to dress for a scientific conference and general conference presentation tips .
5 Best Event Registration Platforms for Your Next Conference
By having one software to organize registrations and submissions, a pediatric health center runs aro...
5 Essential Conference Apps for Your Event
In today’s digital age, the success of any conference hinges not just on the content and speakers bu...
Illinois Office of Undergraduate Research

Present & Publish
Presentation guidelines.
- Conference Opportunities
- Research Journals
The following resources provide useful advice in preparing your research for presentations, orally or in poster form, at a variety of venues including at department and college events, the Undergraduate Research Symposium, and professional conferences.
Making a poster
Building a poster using powerpoint.
Downloadable Research Poster Template - University of Illinois Identity Standards Using Powerpoint – University of New Hampshire Free Research Poster PowerPoint Templates – posterpresentations.com
Creating and Discussing Research Posters
Creating Effective Poster Presentations – North Carolina State University Speaking Guidelines for Engineering and Science – Penn State University Poster Design Guide – Cain Project, Rice University Presentation Help – University of New Hampshire
Poster Presentation Tips
Tips on Poster Presentations at Professional Conference - California State University Northridge University of Pittsburgh Douglas College University of New Hampshire University of North Carolina
Oral / PowerPoint Presentations
Self Coaching Worksheet, Part 1 and Part 2 – University of New Hampshire Resources – University of New Hampshire Oral Presentation Help – University of New Hampshire Reducing Public Speaking Anxiety – University of New Hampshire Terrible Presentations (…and how not to give one) – University of Wisconsin-Madison
How to Create a Research Poster
- Poster Basics
- Design Tips
- Logos & Images
What is a Research Poster?
Posters are widely used in the academic community, and most conferences include poster presentations in their program. Research posters summarize information or research concisely and attractively to help publicize it and generate discussion.
The poster is usually a mixture of a brief text mixed with tables, graphs, pictures, and other presentation formats. At a conference, the researcher stands by the poster display while other participants can come and view the presentation and interact with the author.
What Makes a Good Poster?
- Important information should be readable from about 10 feet away
- Title is short and draws interest
- Word count of about 300 to 800 words
- Text is clear and to the point
- Use of bullets, numbering, and headlines make it easy to read
- Effective use of graphics, color and fonts
- Consistent and clean layout
- Includes acknowledgments, your name and institutional affiliation
A Sample of a Well Designed Poster
View this poster example in a web browser .

Image credit: Poster Session Tips by [email protected], via Penn State
Where do I begin?
Answer these three questions:.
- What is the most important/interesting/astounding finding from my research project?
- How can I visually share my research with conference attendees? Should I use charts, graphs, photos, images?
- What kind of information can I convey during my talk that will complement my poster?
What software can I use to make a poster?
A popular, easy-to-use option. It is part of Microsoft Office package and is available on the library computers in rooms LC337 and LC336. ( Advice for creating a poster with PowerPoint ).
Adobe Illustrator, Photoshop, and InDesign
Feature-rich professional software that is good for posters including lots of high-resolution images, but they are more complex and expensive. NYU Faculty, Staff, and Students can access and download the Adobe Creative Suite .
Open Source Alternatives
- OpenOffice is the free alternative to MS Office (Impress is its PowerPoint alternative).
- Inkscape and Gimp are alternatives to Adobe products.
- For charts and diagrams try Gliffy or Lovely Charts .
- A complete list of free graphics software .
A Sample of a Poorly Designed Poster
View this bad poster example in a browser.

Image Credit: Critique by Better Posters
- Next: Design Tips >>
- Last Updated: Jul 11, 2023 5:09 PM
- URL: https://guides.nyu.edu/posters
Do You Access Periop 101 from a learning platform outside of AORN? View Important Notice. »
This website uses cookies. to enhance your browsing experience, serve personalized ads or content, and analyze our traffic. By clicking “Accept & Close”, you consent to our use of cookies. Read our Privacy Policy to learn more.
- Nursing Research Presentations
- Guidelines & Resources
- Clinical Resources
- Nursing Research
Taking Your Research to the Masses: Publishing Your Results
From project to presentation to publication.
Dr. Rod Hicks presents the steps and tips for publishing your research study and results.
Project Dissemination Phase
Dr. Rod Hicks continues the steps and tips for publishing your research study and results.
Association of periOperative Registered Nurses
Become an aorn partner.
Connect with our more than 44,000 AORN Members through advertising, exhibits, sponsorships, and more!
AORN Enterprise
Quick links.
- Books, Articles, & More
- Curriculum Library
- Archives & Special Collections
- Jerry Falwell Museum
- Scholars Crossing
- Research Guides
- Student Support
- Faculty Support
- Interlibrary Loan
- Research Week
- Research Week: April 15-18, 2024
Research Week: Oral Presentations (In Person)

Additional Navigation
Oral presentations will be held throughout the week and scheduled based on the research category. Please consult the Research Week Schedule .
Oral presentations must follow the guidelines below.
Categories and Judging Rubrics
- Theoretical Proposal
- Textual or Investigative
- Creative and Artistic
Oral Presentation Guidelines
Oral presentations will take place in technology-enhanced rooms in the Jerry Falwell Library. IT support will be on standby for any technical difficulties. All presentation rooms include:
- a projector with large screen
- an audio system
- wireless internet
- a laptop preloaded with the approved presentation file that was submitted in the proposal portal.
Oral presentations:
- must be no more than 15 minutes in length.
- may use any of the 16×9 PowerPoint presentation slides found on the bottom of this page . ( PowerPoint files must be converted to PDFs before they are submitted .)
- will have a moderator stationed in the front row of the room to track the presentation time and give the presenter a three-minute warning.
Participant Guidelines
Students must:
- review the Research Week Schedule in advance to ensure availability to participate at that time. ( Rescheduling of presentation times is not allowed due to the availability of judges .)
- be physically present and present from the front of the room.
- check in at the welcome desk in JFL’s upper atrium between 8:30 a.m. and 3:30 p.m. on the day of their assigned presentation time.
- bring their presentation on a USB flash drive and keep a copy of it in their email as a backup.
- be ready to present at their assigned location at least 10 minutes prior to their presentation time. ( The schedule is strictly enforced. )
- be prepared to answer questions in the five minutes immediately following the presentation.
- dress professionally .
Best Practices
Please review the video created by the Jerry Falwell Library on Best Practices for Giving Virtual Presentations .
Helpful Resources
Students are encouraged to explore last year’s oral presentation proposals and slide presentations .
Professional Courtesy
Attendees are asked to be quiet and respectful of others while they are presenting. No one will be allowed to enter the room once a presentation begins, and leaving during a presentation is highly discouraged.

- Forms and Helpful Resources
- For New Grantseekers
- Federal Grant Information
- Managing Your Grant
- Fellowships
- IRB Policies, Procedures and Forms
- Institutional Animal Care and Use Committee (IACUC)
- Symposium on Undergraduate Research and Creative Expression (SOURCE)
- Sharing your Research
- Fall Interdisciplinary Research Symposium (FIReS)
- Summer Research Program and SIReS
- Oral Presentation Guidelines
An oral presentation provides a chance for students to present their research by reading a paper and/or showing PowerPoint slides to a group of interested faculty, students, and judges. These presentations will allow students to experience what it is like to present their research at a conference in their discipline.
Students making oral presentations will be organized into 90 minute sessions.
During each session, four students (or four groups of students working on the same project) from varying disciplines will present. Each student or group will have 15 minutes to present, followed by five minutes for questions and answers from the audience. A timer will sound at the 13-minute mark, letting you know when you have only two minutes left to wrap up.
At each session a faculty moderator will introduce the students and keep track of the allotted time. Several faculty judges will also be present at each session.
Guidelines for Oral Presentations:
- As with poster presentations, students are required to submit an abstract of their oral presentation via the Abstract Online Submission Form in ValpoScholar.
- If you have Google or PowerPoint slides, you will need to upload a copy of those slides to a Google Drive as instructed by the director of SOURCE at least 48 hours in advance . The director will then upload all slides onto the computer in the presentation room. You must also bring a flash drive copy of your slides as a backup on the day of the presentation.
- Practice your presentation in advance so that you know it will be within the 15-minute mark.
- A good rule of thumb is that it takes two minutes to read one page, so your paper should be no longer than seven to eight standard, double-spaced pages.
- Although you are not expected to memorize your presentation, you should be familiar enough with the material to make frequent eye contact with your audience.
- Handouts are not required, but if you choose to bring handouts to your presentation, you should bring 10 copies.
- Summarize your research succinctly: stating your thesis, argument, purpose, and research methods
- Present the evidence that supports your thesis
- Point out any conclusions you have reached
- Explain the larger significance of your research for your field
- Finally, students should consult with their faculty sponsor about the best way to present their material. Your faculty sponsor has probably made many such presentations and can give you some good tips.
- Institutional Review Board (IRB)
- Poster Presentation Guidelines
- Poster Presentation Resources
- SOURCE/Graduate Symposium 2022 (Final Program...
- be_ixf; php_sdk; php_sdk_1.4.26
- https://www.valpo.edu/sponsored-and-student-research/student-research/resources/oral-presentation-guidelines/

Which presentation format should you choose for your UC Tech 2024 proposal?
- by Kayla Lee
- May 03, 2024
The format of your presentation can greatly influence its effectiveness, affecting the level of audience engagement and message memorability. To help you select the best format to enhance your presentation, we have listed key characteristics of each one.
As you review the list below, you should also consider:
- Desired outcome : What is your purpose? Is it to spread knowledge or collaborate with others to form new ideas?
- Engagement strategy : How do you want to engage attendees? Are the interactions hands-on? Are they collaborative or individual?
Presentation Formats
Active learning/experiential activities (variable length, maximum 30-45 minutes) .
These guided, participatory activities afford facilitators and attendees the opportunity to share ideas with each other and learn by doing. They include:
- Multiple forms of active engagement to connect new concepts with prior knowledge (e.g. hands-on activities, writing, discussion, problem solving, question generation, reflection, etc.).
- Low bar for participation by inviting all attendees to engage in the activities and with each other.
- Opportunities for spontaneous discussion to bounce ideas off each other.
- Timely feedback and opportunity for reflection from presenter(s) and attendees.
- Relationship development and nurturing from learner to self, learner to others, and learner to the world at large.
Birds of a Feather Meetings (45 minutes)
These meetings allow attendees with common interests to gather and discuss issues. They include:
- Casual, informal atmosphere for attendees to come together.
- Flexibility and adaptability to short and long discussions about issues that may not fit within other presentation formats.
- Conversational engagement between presenter(s) and attendees to share diverse perspectives and ask questions.
- Networking opportunities to engage, collaborate, and build relationships with like-minded individuals.
Interactive Presentations (45 minutes)
These sessions are opportunities to share topics of interest through an innovative, thought-provoking format that fosters belonging. They include:
- Nonlinear format , allowing presenter(s) to jump around to content that attendees find interesting.
- Interactive content (e.g. videos, animations, polls, games), adding fun, novelty, and a personalized touch to the presentation.
- Real-time participation and interaction between presenter(s) and attendees throughout the entire presentation, adding spontaneity and increasing attention to the material.
Panel Discussions (45 minutes)
These sessions feature two to four dynamic presenters coming together to explore a shared topic. They include:
- Multiple perspectives by presenters, offering different approaches to a topic.
- Structured conversations led by a moderator for an organized, respectful, and productive exchange of ideas.
- Audience engagement , often at the end of the panel for attendees to seek clarification or deeper discussion.
Poster Sessions (20 minutes)
These sessions demonstrate the use of an emerging technology or innovative practice for teaching and learning. They include:
- Visibility for your research in its early stage of development.
- Short, insightful discussion and critique from peers to improve your work or discuss new ideas.
- Networking opportunities to engage, collaborate, and build relationships with other attendees who are interested in your research.
Standard Presentations (45 minutes)
These sessions are opportunities to present in-depth on a project. They include:
- Detailed presentation about a project to provide a comprehensive overview of your work.
- Structured, focused delivery through clear sections, key points, and a logical flow.
- Audience engagement at the end of the presentation through a Q&A.
- SUGGESTED TOPICS
- The Magazine
- Newsletters
- Managing Yourself
- Managing Teams
- Work-life Balance
- The Big Idea
- Data & Visuals
- Reading Lists
- Case Selections
- HBR Learning
- Topic Feeds
- Account Settings
- Email Preferences
How to Present to an Audience That Knows More Than You
- Deborah Grayson Riegel

Lean into being a facilitator — not an expert.
What happens when you have to give a presentation to an audience that might have some professionals who have more expertise on the topic than you do? While it can be intimidating, it can also be an opportunity to leverage their deep and diverse expertise in service of the group’s learning. And it’s an opportunity to exercise some intellectual humility, which includes having respect for other viewpoints, not being intellectually overconfident, separating your ego from your intellect, and being willing to revise your own viewpoint — especially in the face of new information. This article offers several tips for how you might approach a roomful of experts, including how to invite them into the discussion without allowing them to completely take over, as well as how to pivot on the proposed topic when necessary.
I was five years into my executive coaching practice when I was invited to lead a workshop on “Coaching Skills for Human Resource Leaders” at a global conference. As the room filled up with participants, I identified a few colleagues who had already been coaching professionally for more than a decade. I felt self-doubt start to kick in: Why were they even here? What did they come to learn? Why do they want to hear from me?
- Deborah Grayson Riegel is a professional speaker and facilitator, as well as a communication and presentation skills coach. She teaches leadership communication at Duke University’s Fuqua School of Business and has taught for Wharton Business School, Columbia Business School’s Women in Leadership Program, and Peking University’s International MBA Program. She is the author of Overcoming Overthinking: 36 Ways to Tame Anxiety for Work, School, and Life and the best-selling Go To Help: 31 Strategies to Offer, Ask for, and Accept Help .
Partner Center
Purdue Online Writing Lab Purdue OWL® College of Liberal Arts
Welcome to the Purdue Online Writing Lab

Welcome to the Purdue OWL
This page is brought to you by the OWL at Purdue University. When printing this page, you must include the entire legal notice.
Copyright ©1995-2018 by The Writing Lab & The OWL at Purdue and Purdue University. All rights reserved. This material may not be published, reproduced, broadcast, rewritten, or redistributed without permission. Use of this site constitutes acceptance of our terms and conditions of fair use.
The Online Writing Lab at Purdue University houses writing resources and instructional material, and we provide these as a free service of the Writing Lab at Purdue. Students, members of the community, and users worldwide will find information to assist with many writing projects. Teachers and trainers may use this material for in-class and out-of-class instruction.
The Purdue On-Campus Writing Lab and Purdue Online Writing Lab assist clients in their development as writers—no matter what their skill level—with on-campus consultations, online participation, and community engagement. The Purdue Writing Lab serves the Purdue, West Lafayette, campus and coordinates with local literacy initiatives. The Purdue OWL offers global support through online reference materials and services.
A Message From the Assistant Director of Content Development
The Purdue OWL® is committed to supporting students, instructors, and writers by offering a wide range of resources that are developed and revised with them in mind. To do this, the OWL team is always exploring possibilties for a better design, allowing accessibility and user experience to guide our process. As the OWL undergoes some changes, we welcome your feedback and suggestions by email at any time.
Please don't hesitate to contact us via our contact page if you have any questions or comments.
All the best,
Social Media
Facebook twitter.
IMAGES
VIDEO
COMMENTS
Rule 2: Spend only 1 minute per slide. When you present your slide in the talk, it should take 1 minute or less to discuss. This rule is really helpful for planning purposes—a 20-minute presentation should have somewhere around 20 slides. Also, frequently giving your audience new information to feast on helps keep them engaged.
Presentations with strong narrative arcs are clear, captivating, and compelling. Orient the audience and draw them in by demonstrating the relevance and importance of your research story with strong global motive. Provide them with the necessary vocabulary and background knowledge to understand the plot of your story.
Here are some simple tips for creating an effective PowerPoint Presentation. Less is more: You want to give enough information to make your audience want to read your paper. So include details, but not too many, and avoid too many formulas and technical jargon. Clean and professional: Avoid excessive colors, distracting backgrounds, font ...
In the case of a research presentation, you want a formal and academic-sounding one. It should include: The full title of the report. The date of the report. The name of the researchers or department in charge of the report. The name of the organization for which the presentation is intended.
Research Presentation Guidelines Presentation in brief: The presentation is a group project. Think of this as a visual version of your paper. The presentation should include: a short intro, your hypotheses, a brief description of the methods, tables and/or graphs related to your findings, and an interpretation of your data. The presentations ...
Practice a 1- to 2-minute pitch until you feel comfortable. The poster and your pitch must be aimed at the audience that will be present. The clearer and more rational your poster layout, the easier it will then be for you to make a strong pitch. —Srinivas.
Components of an Oral Research Presentation. Introduction. The introduction section of your oral presentation should consist of 3 main parts. Part 1: Existing facts. In order to give audience members the "full picture", you first need to provide them with information about past research.
Oral presentations are an excellent means of communicating basic science or clinical research. Unlike a poster presentation or a written manuscript, the audience during an oral presentation is more ... here are some general guidelines to keep in mind when designing your presentation. 1) Title (include authors and affiliations) 2) Introduction ...
Visualize Data Instead of Writing Them. When adding facts and figures to your research presentation, harness the power of data visualization. Add interactive charts and graphs to take out most of the text. Text with visuals causes a faster and stronger reaction than words alone, making your presentation more memorable.
Use images instead of text when possible. Use high-resolution, royalty-free images. Use no more than 4 bullets per slide. Make objects appear only when mentioned. Dim objects after they're discussed. Draw attention to salient information. Avoid using decorative images. When distributing, add alt text to images. Expand All.
General Guidelines. 1. Be organized! Know the clear and unifying point of your research, and be able to communicate it to an audience. 2. Use the format of your academic discipline. Most research in the sciences and some social sciences is organized in the following components (or versions of them): Abstract. Introduction.
Delivery. It is important to dress appropriately, stand up straight, and project your voice towards the back of the room. Practise using a microphone, or any other presentation aids, in advance. If you don't have your own presenting style, think of the style of inspirational scientific speakers you have seen and imitate it.
Presentation software programs have advanced to the point where you no longer need to be an experienced designer to put together a compelling piece of collateral that conveys your findings about academic research in exactly the right way. With the right materials, the right presentation software, and a little bit of time, you can visualize any data that you have in the form of a terrific ...
Taking this perspective can make presenting your research much less stressful because the focus of the task is no longer to engage an uninterested audience: It is to keep an already interested audience engaged. Here are some suggestions for constructing a presentation using various multimedia tools, such as PowerPoint, Keynote and Prezi.
Journal of The Association of Physicians of India V ol. 65 September 2017. 72. Presenting Research Paper: Learning the steps. Sandeep B Bavdekar 1, Varun Anand2, Shruti Vyas3. Professor and Head ...
-There is a time limit. Only the first 20 minutes of a student's presentation and oral defense are scored. Stop scoring after the 20 minute mark.-Once the student has presented to a live panel, and the presentation is recorded, do not repeatedly rewind or re-listen to recorded presentations in order to determine the score.
AP® Research — Presentation and Oral Defense 2021 Scoring Guidelines. NOTE: To receive the highest performance level presumes that the student also achieved the preceding performance levels in that row. ADDITIONAL SCORES: In addition to the scores represented on the rubric, teachers can also assign scores of 0 (zero). A score of. A score of.
Discuss your findings as part of the bigger picture and connect them to potential further outcomes or areas of study. Closing (1 slide) -If anyone supported your research with guidance, awards, or funding, be sure to recognize their contribution. If your presentation includes a Q&A session, open the floor to questions.
Presentation Guidelines . The following resources provide useful advice in preparing your research for presentations, orally or in poster form, at a variety of venues including at department and college events, the Undergraduate Research Symposium, and professional conferences. Making a poster Building a Poster Using PowerPoint
Research posters summarize information or research concisely and attractively to help publicize it and generate discussion. The poster is usually a mixture of a brief text mixed with tables, graphs, pictures, and other presentation formats. At a conference, the researcher stands by the poster display while other participants can come and view ...
Guidelines & Resources Clinical Resources Nursing Research Nursing Research Presentations; Taking Your Research to the Masses: Publishing Your Results From Project to Presentation to Publication. Dr. Rod Hicks presents the steps and tips for publishing your research study and results. ...
Oral Presentation Guidelines. Oral presentations will take place in technology-enhanced rooms in the Jerry Falwell Library. IT support will be on standby for any technical difficulties. All ...
Oral Presentation Guidelines. An oral presentation provides a chance for students to present their research by reading a paper and/or showing PowerPoint slides to a group of interested faculty, students, and judges. These presentations will allow students to experience what it is like to present their research at a conference in their discipline.
Interactive Presentations (45 minutes) These sessions are opportunities to share topics of interest through an innovative, thought-provoking format that fosters belonging. They include: Nonlinear format, allowing presenter (s) to jump around to content that attendees find interesting. Interactive content (e.g. videos, animations, polls, games ...
Summary. What happens when you have to give a presentation to an audience that might have some professionals who have more expertise on the topic than you do? While it can be intimidating, it can ...
Mission. The Purdue On-Campus Writing Lab and Purdue Online Writing Lab assist clients in their development as writers—no matter what their skill level—with on-campus consultations, online participation, and community engagement. The Purdue Writing Lab serves the Purdue, West Lafayette, campus and coordinates with local literacy initiatives.
After considering the public's suggestions, panelists work to determine which treatments to recommend. They consider four factors: the overall strength of the evidence, the balance of benefits to potential harms, patients' values and preferences, and the applicability or generalizability of the evidence. They parse their recommendations ...
The consortium of "The Future is in Applied Artificial Intelligence" Project designed the first competency-based applied artificial intelligence curriculum at the higher-education institution level. The development was based on advanced system research on existing artificial intelligence-related resources and surveying target groups of teachers, information technology students, and ...