- Amazon Prime Day Early Deals
- Summer Sales: Waterproof Bluetooth Speakers

How to Fix It When Wi-Fi Keeps Disconnecting on Windows 10
Quick fixes for random Wi-Fi disconnected Windows 10 errors
:max_bytes(150000):strip_icc():format(webp)/BradStephenson-a18540497ccd4321b78479c77490faa4.jpg "how to solve the wifi problem in windows 10")
- Western Sydney University
:max_bytes(150000):strip_icc():format(webp)/ryanperiansquare-de5f69cde760457facb17deac949263e-180a645bf10845498a859fbbcda36d46.jpg "how to solve the wifi problem in windows 10")
- Western Governors University
- The Ultimate Laptop Buying Guide
A Windows 10 laptop or computer that keeps disconnecting from a Wi-Fi internet connection can be frustrating and inconvenient. This article will walk you through what could be causing the Wi-Fi disconnected errors and how to fix any Windows 10 or internet issues that you uncover.
There are some other tips you may want to try first if you’re having trouble making the initial connection to a Wi-Fi network .
Why Does My Wi-Fi Keep Disconnecting?
If your Windows 10 computer keeps disconnecting from Wi-Fi connections at home, in the office, or elsewhere, such as a café or airport, many potential causes could be at play. However, they usually fall under one of the following categories:
- A weak or limited Wi-Fi connection
- An overwhelmed router or tethered smartphone
- A combination of Windows 10 conflicts or incorrect settings
How to Fix Windows 10 Wi-Fi Disconnected Problems
Here’s what to do when your Windows 10 Wi-Fi keeps disconnecting again and again. Make sure to work through this list of solutions in order: Starting with the fastest and easiest tips to more advanced and time-consuming fixes.
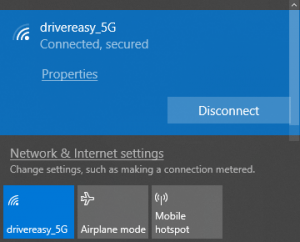
Turn your Wi-Fi off and on again . If your Windows 10 computer keeps disconnecting from Wi-Fi, turn it off via the Action Center , waiting a minute, and then turn it back on again. Doing this will make a new connection to the Wi-Fi hotspot.
Move closer to the Wi-Fi source. The further you are away from the Wi-Fi broadcast, the weaker and less stable your internet connection will be. Try to move as close as possible to it and aim to get as strong a signal as possible by checking the internet icon in the Windows 10 taskbar.
Restart your Windows 10 computer . A classic tech tip but an effective one. Performing a basic restart can fix a variety of issues.
Disable Bluetooth . Sometimes a connection to a Bluetooth device can cause conflicts which can make a Wi-Fi connection disconnect.
Check the website or service. Your Wi-Fi connection and Windows 10 device may be fine, and it could just be the service you’re trying to access that’s down. Thankfully, there are many ways to check if Paramount+ is down , Amazon is offline , Twitch is glitching , and many other services are down. Even YouTube TV can go down from time to time.
Cancel any active downloads on your Windows 10 device. Many public Wi-Fi connections, and those in cafes and other small businesses, often place significant restrictions on how much and how fast you can download content. If you’re using such a connection, try sticking to basic web browsing and app usage.
Try a different Wi-Fi connection . Many public wireless internet options, such as the Wi-Fi offered by McDonald's and Starbucks , can be poor quality with slow speed, download restrictions, and an inability to cope with a high number of users connecting at the same time. Search for a nearby alternative signal or move to a location with better internet access if it comes to it.
Cancel any downloads on your smartphone . If your computer keeps disconnecting from Wi-Fi while it’s tethered to your smartphone , it may be that your phone is overwhelmed by too much activity. Stop any updates or downloads that you may have going on your phone, and try not to use it while accessing the internet on your computer.
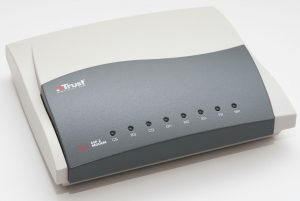
Check your router . Recurring Windows 10 Wi-Fi disconnected errors may not have anything to do with your computer. Inspect your internet router to make sure that it’s working correctly and that all of its LED lights are showing a strong connection.
Reboot your router . A quick router reboot can often fix any Wi-Fi disconnection problems.
Change your VPN location and privacy settings . Switch your VPN location to a different state or country and reducing the level of security or privacy, and see if this improves your Wi-Fi stability.
Disable your VPN. Your VPN may be interrupting your Wi-Fi connection. Turn it off and see if that fixes the problem. If your disconnection issues persist, feel free to turn your VPN back on again.
Update Windows 10 . Downloading and installing the latest Windows 10 update can fix a variety of bugs in addition to making your device more secure when accessing the internet.
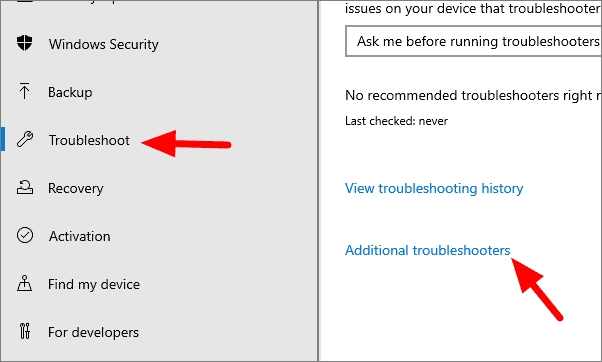
Run a troubleshooter. Open Settings and click Update & Security > Troubleshoot . Run any recommended troubleshooters. Then click Additional troubleshooters and run the ones for Internet Connections , Incoming Connections , and Network Adapter .
Update Windows 10 drivers . Your device drivers may be damaged or in need of an update. Try updating drivers relating to Network adapters .
Change network discovery from Public to Private. Changing this setting will make your Windows 10 device more visible to other users around you, but it can also fix Wi-Fi disconnected problems.
Reset your Windows 10 WLAN AutoConfig settings. Press Windows + R , type services.msc , and click OK . Once the new window pops up, double-click WLAN AutoConfig , choose Automatic from the Startup type menu, click Apply , and then click OK .
Try a Windows 10 network reset . This should be your last resort, as it reinstalls every network adapter on your device.
Get the Latest Tech News Delivered Every Day
- How to Fix It When Your Wi-Fi Network Is Not Showing Up
- What to Do When Windows 11 Can't Connect to a Network
- What to Do When Windows 10 Can't Connect to a Network
- How to Fix It When TikTok Isn't Working
- How to Fix it When a Chromebook Won't Connect to Wi-Fi
- How to Fix Overscan in Windows 10 to Fit to Screen
- How to Fix It When There's No Internet Connection
- How to Fix It When Facebook Messenger Isn’t Sending Messages
- How to Fix It When a Laptop Isn't Connecting to a Mobile Hotspot
- How to Reset Network Settings on Mac
- How to Fix a USB Wi-Fi Adapter That Keeps Disconnecting
- How to Enable a Wi-Fi Adapter
- How to Fix Netflix Error Code NW-2-5 on Any Device
- How to Fix It When Bluetooth Headphones Keep Cutting Out in Windows 11
- How to Fix It When Reddit Apps Aren’t Working
- How to Fix a Surface Pro Not Connecting to Wi-Fi
How to Fix WiFi Network Connection Issues in Windows 10
Easily fix Wi-Fi network connection issues on your Windows 10 computer using these simple steps.

Most of us depend on the Internet, both for personal and professional work. There are times when the system is unable to connect to the network, thus preventing you from accessing the Internet or any mapped drives.
Ever since wireless networks become popular, we have been largely dependent on them. They are convenient but prone to issues, therefore we must have a basic understanding of the issues and their fix.
Most of the issues with a network connection are generally trivial and can be resolved at home in a few simple steps. In this article, we will discuss how to fix network connection issues in Windows 10.
Fixing Network Connection Issues
Try these fixes one by one and check if the network connection issue is resolved.
Check if Wi-Fi is On
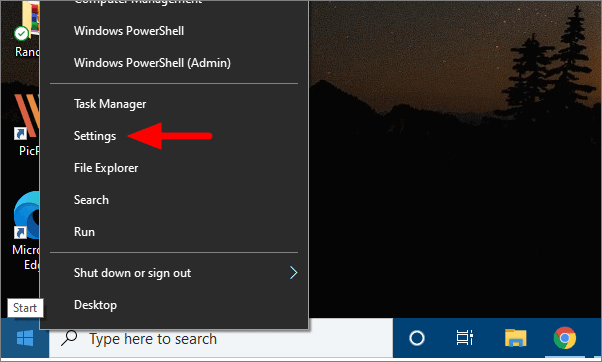
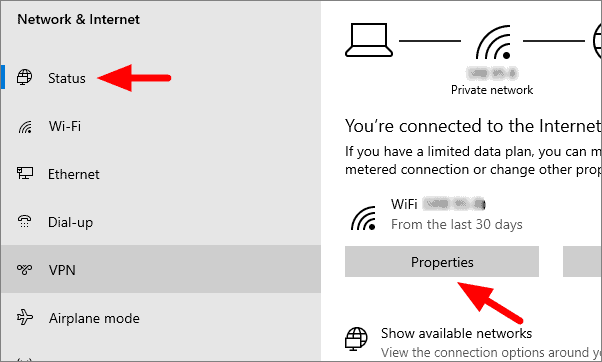
The first thing to check if you are not able to connect to a Wi-Fi network is if the Wi-Fi in your device is turned on. To check, right-click on the Start Menu and select ‘Settings’.
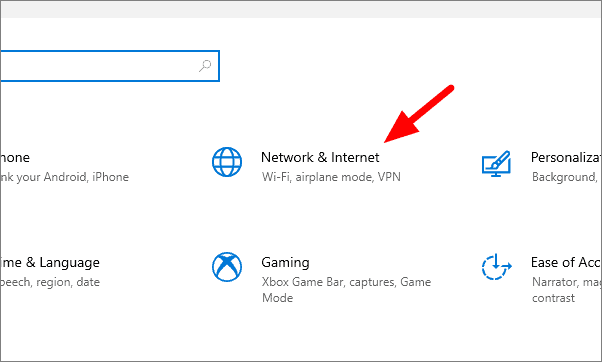
You will see the various system settings option, click on ‘Network and Internet’.
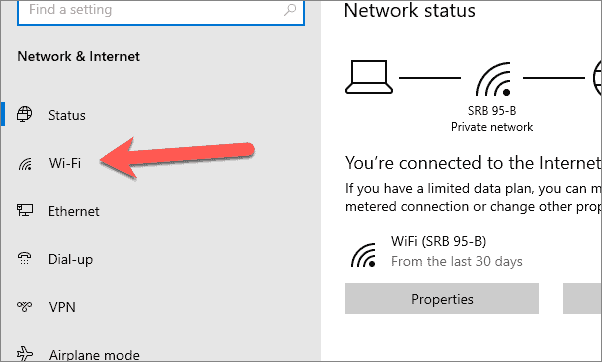
In ‘Network and Internet’ settings, click on Wi-Fi on the left panel.
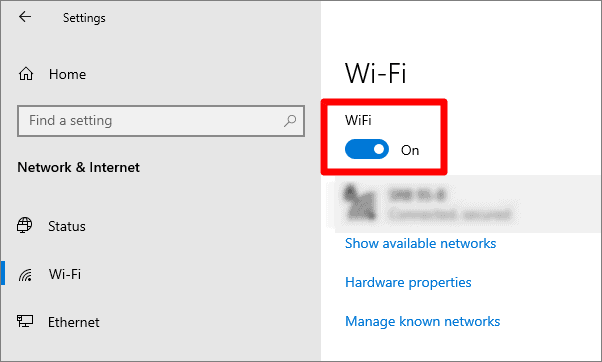
Check if the Wi-Fi is on or off at the top. If it is off, that is the reason you are unable to connect to a network.
Check IP Settings
If the network issue is not resolved yet, you can try checking and if required, change the IP settings to Automatic.
To check IP settings, go to the ‘Status’ tab in Network and Internet settings and then click on properties. The properties of the Wi-Fi network you are connected to presently will open.
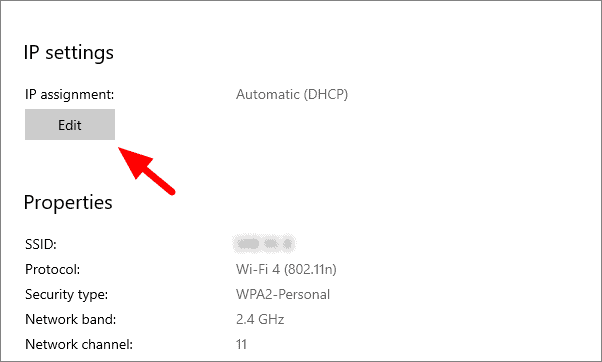
Scroll down and search for IP settings. Check if IP assignment is set to Automatic. In case it is set to Manual, click on ‘Edit’ to change it.
To change the IP settings, click on the box and select Automatic (DHCP), and then click on ‘Save’.
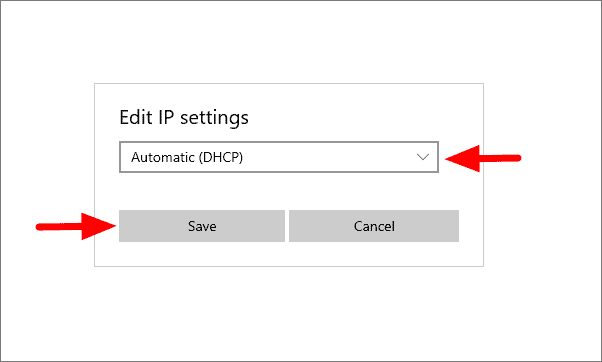
You should now be able to connect to a network and access the internet.
Restart/Reset the Router
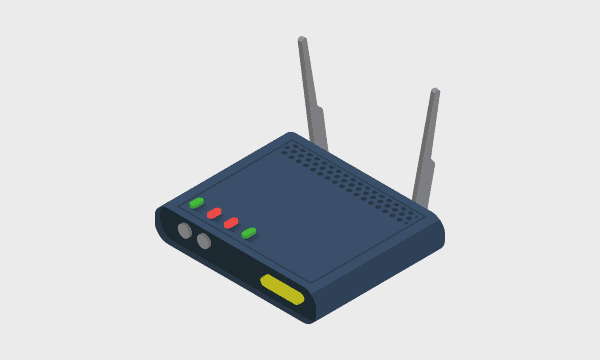
Many a time, a problem with the router could prevent you from connecting to the network. If your router has been on for a long time, restarting it could do the trick. Restart your router and check if the network issue has been fixed.
If restarting the router does not work, you can also reset it. Check for the reset button behind the router and press it for 15-30 seconds, depending on the model of the router, to reset it. When you reset a router, it will return to the default settings. You will then have to set the SSID (Service Set Identifier) and a password.
Change Position or Use a Different Device
Sometimes, you are unable to connect to a network as your device does not receive the signal. To fix this issue, move closer to the router and then try connecting to the network. If you are now able to connect to the network, there is an issue with either the system hardware and the router.
If you are still unable to connect, try using a different device to connect to the network. In case there is an issue with your device and not the router, you should now be able to connect to the network.
Change in SSID or Password
Another common issue that prevents you from connecting to a network is a change in SSID (network name) or password. Say, you have been using a network for a long time but have not accessed it recently and now are unable to connect to it. There is a chance that the network password has been changed. Check if there has been a change, and use the new password to connect in case there was.
Turn Off Windows Defender Firewall
Windows Defender Firewall can also prevent your device from accessing the internet due to several reasons. To check if this is the issue, turn off Windows Defender Firewall and see if you can access the internet.
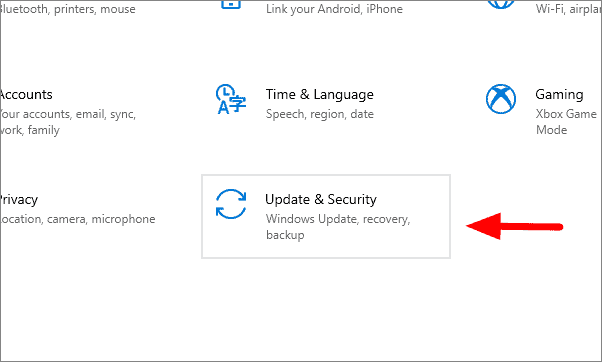
To turn off Windows Defender Firewall, select ‘Update & Security’ in system settings.
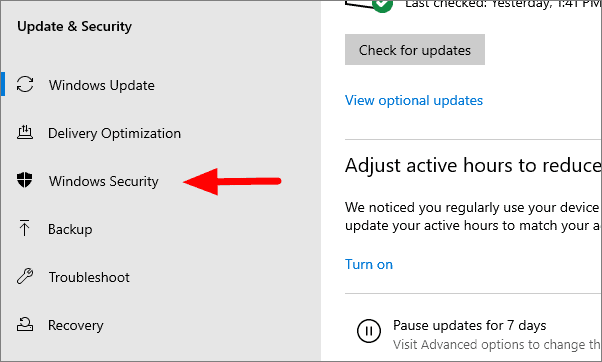
In Update & Security, click on ‘Windows Security’ at the left.
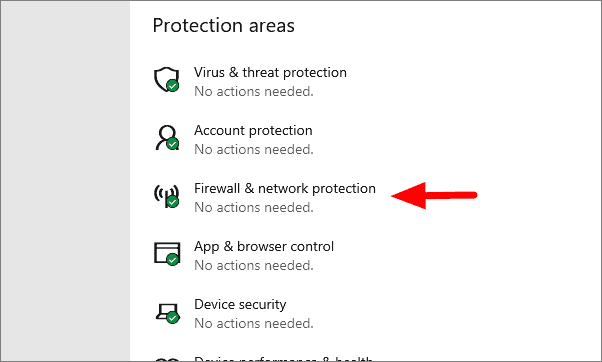
In this window, you will see the various ‘Protection areas’. Since we want to turn off the firewall, click on ‘Firewall & network protection’.
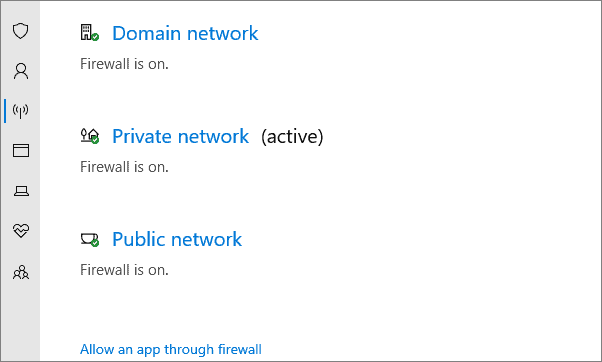
Click on the network type you are currently connected to. Your current network type is the one with ‘active’ written next to it.
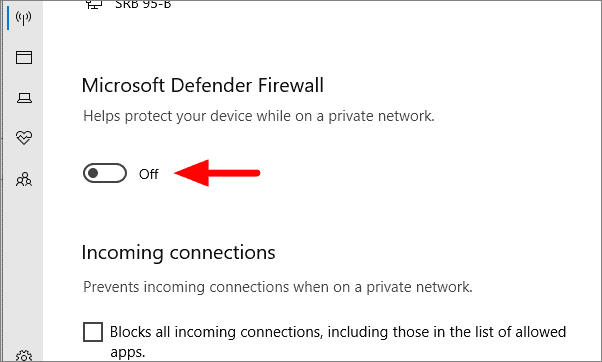
You can now turn off the Microsoft Defender Firewall by clicking on the toggle button.
Open any browser and check if you are able to connect to the internet.
Update Windows
If you are still unable to connect to a network or access the internet, there could be an issue with the system. If there is any software-based issue, Windows will probably release a fix for it with the update. Updating the Windows to the latest version can help resolve the network connectivity issue.
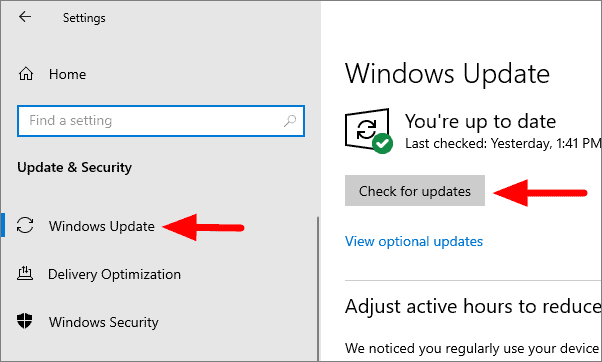
To check for updates, go to the ‘Windows Update’ tab in Update & Security and then click on ‘Check for updates’ at the right.
If there are any pending updates, download, and then install them.
Run Troubleshooter
Windows built-in troubleshooter can also help identify and fix the problem preventing from connecting to the network. Troubleshooting is an efficient method to fix most of the problems with the system. Even if the troubleshooter is unable to fix the problem, it identifies them, thus enabling us to use other resources for the fix.
To run Network troubleshooter, open the ‘Troubleshoot’ tab in Update & Security, and then click on ‘Additional troubleshooters’.
In the additional troubleshooters window, scroll and select ‘Network Adapter’, and then click on ‘Run the troubleshooter’.
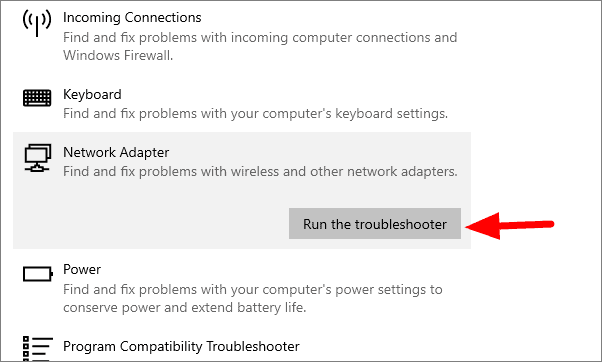
If you can connect to a network but cannot access the Internet, try running the ‘Internet Connections’ troubleshooter.
Follow the steps in the troubleshooter window to resolve the problem with network connectivity.
Do a Network Reset
Doing a network reset will change your network settings back to default. If any setting is preventing connection to a network, a network reset will do the job here.
Go to the ‘Status’ tab in Network & Internet settings.

Scroll down in the Status tab and click on ‘Network reset’.
The Network reset window will open, click on ‘Reset now’ and if prompted, click on ‘Yes’.
We have discussed several fixes, and these fixes will definitely help resolve the network connectivity issue with your device. Moreover, all the fixes are simple and do not require any technical expertise to understand and execute.

Claude Sonnet 3.5 vs. ChatGPT-4o: Which is better?

5 best AI Web Browsers in 2024

7 best AI search engines in 2024
Get all the latest posts delivered straight to your inbox., member discussion.

Why You Should Consider Switching to Linux After Windows 10 Support Ends

What to Do After Microsoft Ends Support for Windows 10?

How much will Windows 10 Updates Cost from Next Year?

How to Use AI Eraser in Photos App on Windows 11 and 10

How to Fix Windows 10 Update KB5034441 Error 0x80070643
TechRepublic
Account information.

Share with Your Friends
How to diagnose and fix Wi-Fi network problems using a Windows 10 PC
Your email has been sent

Good home Wi-Fi is a necessity for the modern professional. With more people working from home than ever before due to the COVID-19 pandemic, Wi-Fi can be the difference between a good day’s work and a frustrating, unproductive few hours.
Unfortunately, Wi-Fi has become the remote professional’s coronavirus paradox: It’s absolutely necessary for work, but more people working from home means more Wi-Fi networks congesting the average neighborhood, more bandwidth being used, and less Wi-Fi reliability.
SEE: Future of 5G: Projections, rollouts, use cases, and more (free PDF) (TechRepublic)
Luckily, some of the most common Wi-Fi problems are easily fixed. Not all of them, of course: If your connection is slow whether you’re wired or wireless, there’s probably too many people using the internet in your area, and no one short of your ISP can resolve that issue.
How to choose the right Windows 10 Wi-Fi analytics tool
Unlike macOS, Windows 10 doesn’t have a built-in wireless diagnostics tool . There are a lot of third-party options to choose from, but when it comes to doing something as sensitive as scanning all of the devices on a network and compiling data about the machine the app is running on you want a trusted program. For that, it’s best to look in the Microsoft Store , where apps have to pass a certification test prior to being published.
For this guide, I’m using one of the most popular wireless diagnostics tools for Windows 10, WiFi Analyzer by Matt Hafner ( Figure A ). WiFi Analyzer is free with premium options available, but all of the essential tools you need to diagnose common Wi-Fi problems are included with the free version.

How to assess your signal strength with WiFi Analyzer
When you open WiFi Analyzer you’ll be greeted with the screen in Figure B , which shows a variety of information about your Wi-Fi connection, like your network, its channel, your device ID, and other details. All of the data presented on this screen is displayed in real time.

At the top of Figure B you’ll notice a circle that reports on the quality of your connection, a bar that shows your RSSI, and four icons. The icons are highlighted orange (from left to right) if WiFi Analyzer thinks you have a bad connection, are on a bad channel, don’t have internet access, or if your connection isn’t secure.
The circle with a percentage in it reflects whether or not your connection can be improved, and is a visual representation of the quality of your connection. If it appears orange (as it does in Figure B ), that’s because one of the four conditions shown in the icons isn’t met, or your RSSI is out of acceptable range.
RSSI is a reading of signal strength measured in dBm, and scales from 0, being the best, to -120, which is the worst. Typically, you’ll find signal ranges in the -80 dBm to -40 dBm. If you get much lower than -80 you’ll probably notice connection problems.
The information displayed on this screen updates in real time, so if you notice that your signal isn’t good try moving closer to your Wi-Fi router. The number on the bar should move toward 0. If your router isn’t in a good spot, and you can’t realistically move your computer, try moving the router to see if your signal strength gets stronger or weaker.
How to figure out what Wi-Fi channel to switch to
Wi-Fi channels are small slices of the overall Wi-Fi frequency band that routers can broadcast and computers can tune in to. Routers can simultaneously operate on the same channel, but the more routers on a single channel the more noise is generated, which can degrade signal strength and make internet connectivity spotty and unreliable.
You may have noticed that the star icon in Figure B was orange, indicating that my Wi-Fi wasn’t on the best channel.
If you click on the Analyze tab in WiFi Analyzer you’ll be shown a graph of all the Wi-Fi channels on your band (2.4GHz or 5GHz), and which networks are using them ( Figure C ).

The Analyze screen is an excellent way to visualize which channels are crowded in your area, and it also recommends which channel to switch to, shown on the bottom of the screen. In Figure C , you can see that my current connection is the strongest on Channel 1, but also that Channel 1 is quite congested, as are channels 6 and 8. WiFi Analyzer recommends switching to channel 11, because even though there are several other networks using that channel their strength is fairly weak, meaning they’re less likely to interfere with my signal.
For this example I’m using a 2.4GHz network because it better illustrates network congestion. If you click on the 5GHz button on the bottom of the screen the view will switch over to nearby 5GHz signals ( Figure D ), but will only give a channel recommendation if you switch to a 5G connection.

If WiFi Analyzer tells you that there’s a better channel to switch to there are two ways to go about doing it.
First, and easiest, is all dependent on the type of Wi-Fi router you have. Some routers are designed to search for the best channel whenever they power up, so the first thing you can try is rebooting your Wi-Fi router and checking to see what WiFi Analyzer says about your connection when it restarts.
SEE: Return to work: What the new normal will look like post-pandemic (free PDF) (TechRepublic)
If your router is configured to automatically search for the best channel you should see it on WiFi Analyzer’s recommended channel, or whichever one the router thinks is best. If a reboot doesn’t change the channel despite WiFi Analyzer showing it to be quite crowded then you probably don’t have automatic channel searching enabled or available on your router.
Without automatic channel finding, you’re stuck changing your router’s channel yourself. The way this is done is to log in to your Wi-Fi router using its IP address or login page URL, both of which vary based on the type of router you have. To find out how to log in to, and change settings on, your Wi-Fi router you’ll need to consult the manufacturer’s website or documentation that came with it.
If you want to learn more about how to read the various bits of information in WiFi Analyzer, be sure to click on the Learn tab, which will direct you to a variety of resources and WiFi Analyzer tutorials from Matt Haffner, who built the app.
Subscribe to the Innovation Insider Newsletter
Catch up on the latest tech innovations that are changing the world, including IoT, 5G, the latest about phones, security, smart cities, AI, robotics, and more. Delivered Tuesdays and Fridays
- How to become a network administrator: A cheat sheet
- 5G: What it means for IoT (free PDF)
- Network security policy
- What is SDN? How software-defined networking changed everything
- The best VPN services for 2020
- 5G: More must-read coverage

Create a TechRepublic Account
Get the web's best business technology news, tutorials, reviews, trends, and analysis—in your inbox. Let's start with the basics.
* - indicates required fields
Sign in to TechRepublic
Lost your password? Request a new password
Reset Password
Please enter your email adress. You will receive an email message with instructions on how to reset your password.
Check your email for a password reset link. If you didn't receive an email don't forgot to check your spam folder, otherwise contact support .
Welcome. Tell us a little bit about you.
This will help us provide you with customized content.
Want to receive more TechRepublic news?
You're all set.
Thanks for signing up! Keep an eye out for a confirmation email from our team. To ensure any newsletters you subscribed to hit your inbox, make sure to add [email protected] to your contacts list.
How-To Geek
How to fix when wi-fi won't connect.

Your changes have been saved
Email Is sent
Please verify your email address.
You’ve reached your account maximum for followed topics.
The Best Bluetooth Speakers of 2024
The best laptop accessories of 2024, the best laptops of 2024, quick links, double check the wi-fi password, see if the connection requires a wi-fi login page, restart your connecting device, "forget" the wi-fi network and try again, restart your wi-fi router or access point, no internet access check your modem, make sure wi-fi settings are compatible with your device, try a different frequency band, consider distance and interference; change channel, try a different device or wi-fi adapter, try updating your wi-fi adapter's driver, try a different router.
It's frustrating when a Wi-Fi connection doesn't work, and a lot of things can go wrong. We'll walk you through a few common troubleshooting techniques that can help, starting with the methods you should try first.
To connect to most Wi-Fi routers, you'll need a password . This password is set by the owner of the router or access point. If there's even a one character typo in the password, you won't be able to connect.
Related: How to Find Your Wi-Fi Password
So make sure you have the right Wi-Fi password: Ask for it again, if necessary, to double check, or write it down twice on a piece of paper. Then re-enter it in the Setup or Configuration app of the connecting device and see if that helps. If not, move ahead to another step.
Some businesses (such as hotels, restaurants, airlines, and more) provide an "open" Wi-Fi network that restricts access using a Wi-Fi login page or portal in a web browser . These login pages make you sign in with a special username and password provided by the business.
Related: How to Connect to Starbucks Wi-Fi
If you've connected to a Wi-Fi access point in the settings or configuration app on your device but aren't seeing any internet access, try opening your browser on that device and visiting any website. If the business uses a login page, you'll usually be automatically redirected to the login page where you can enter the credentials properly.
If you're having trouble connecting to a Wi-Fi access point, another easy troubleshooting tip you can perform is to reboot or restart the device you're trying to connect with.
Related: Why Does Rebooting a Computer Fix So Many Problems?
Restarting a gadget solves many problems caused by temporary bugs because it forces the device to reload its software and settings from scratch. After restarting, try to connect via Wi-Fi again. If it works, you're ready to go. If it's still not working, move on to another suggestion below.
We've already mentioned double-checking and re-entering the Wi-Fi password. As a next step, open the configuration app (Settings on iPhone, for example), and tap the name of the Wi-Fi network you're trying to connect to, then select an option to delete or "forget" the saved settings of the Wi-Fi network. How you do this varies by the device you're using. We have instructions about how to forget Wi-Fi networks on iPhone or iPad , Android , Mac , Windows , and Chromebook .
Related: How to Forget a Wi-Fi Network on Android
After that, you can either scan for networks and attempt to connect again or enter the information for the Wi-Fi access point manually. This technique is particularly helpful if the router has changed its Wi-Fi settings but the device you're using to connect is still configured with older settings (such as an older password or different security settings).
If you're still having trouble connecting to your Wi-Fi router---and you have control over the router or access point itself---you can try restarting it to see if that helps clear any temporary bugs or error states that might be making it malfunction. Similar to restarting the connecting device, restarting your router forces it to reload its settings from scratch, which can solve a variety of problems.
Related: How to Make Your Phone Useful When There's No Internet
Just be aware that restarting your router might disrupt other people using the network (perhaps streaming a TV show, doing a backup, gaming, video chatting, or otherwise), so make sure you give them a warning first.
If you're connected to your Wi-Fi access point but you're still not getting internet access, the problem could be with the modem (cable, DSL, wireless, or otherwise) that is feeding the internet connection to your Wi-Fi router.
Related: Why Am I Connected to Wi-Fi But Not the Internet?
First, check with your ISP to see if there is an internet outage in your area. If there isn't an outage, restart your modem (unplug it, wait 30 seconds, then plug back in), and make sure the Ethernet cable (if there is any) between your modem and your router isn't damaged or unplugged.
Related: How to Reboot Your Router and Modem
Many older devices with Wi-Fi don't support modern Wi-Fi security connection standards. So unless you have your router set to a backward-compatible security mode, those older devices won't be able to connect.
Related: The Difference Between WEP, WPA, and WPA2 Wi-Fi Passwords
For example, the Nintendo DS (released in 2004) only supports WEP security and not newer standards like WPA or WPA2. Similarly, some older devices cannot access the newer frequency bands used by some routers, so make sure your router supports legacy bands such as 2.4 GHz if that is the case.
Most modern Wi-Fi routers support connections through at least two different frequency bands, with 2.4 GHz and 5 GHz being the most common.
Related: What's the Difference Between 2.4 and 5 GHz Wi-Fi (and Which Should I Use)?
Some routers will automatically connect compatible devices to the higher-frequency band, but others require you to connect to a different SSID for each frequency.
For troubleshooting, it's important to know that 5 GHz connections offer higher speeds but less range than a 2.4 GHz connection. So if you're having trouble getting a reliable signal on your router's 5 GHz band, try forcing a 2.4 GHz connection instead---or move closer to the router.
Related: 5 GHz Wi-Fi Isn't Always Better Than 2.4 GHz Wi-Fi
Wi-Fi is handy, but it isn't perfect. Wi-Fi's radio signal follows the inverse square law , which means the strength of the signal decreases exponentially (dropping off rapidly) as you increase the distance between yourself and the router. If you do have a signal strength problem, you can move closer to the router or consider installing a larger antenna , more powerful router , or a Wi-Fi repeater or range-extender at some point in your network.
Related: Why Does Running My Microwave Kill My Wi-Fi Connectivity?
Also, you might consider investigating potential radio interference from devices such as microwaves or other gadgets that use similar frequencies (2.5 GHz or 5 GHz in particular). In those cases, you can either disable the interfering devices or route around them with a wired connection to a second Wi-Fi access point on the other side of the interfering device.
If you suspect interference, you can try to set your Wi-Fi to use a different channel , which might avoid certain types of interference---especially with other nearby Wi-Fi networks (run by neighbors or businesses).
Related: How to Find the Best Wi-Fi Channel for Your Router on Any Operating System
At this point, it's a good idea to see if you can connect to the Wi-Fi network using a different device than the one you're having trouble with. If so, the problem is likely with the connecting device itself and not the router. It could also be a problem with the unique combination of your device and the router, which usually comes into play related to your Wi-Fi settings, as we'll address below.
Related: How To Upgrade Or Replace Your PC's Wireless Card
Also, Wi-Fi adapters sometimes go bad or have buggy drivers. If your device supports plugging in other Wi-Fi adapters (such as internal PCe cards or USB adapters ), then you can try to purchase a new Wi-Fi adapter and either replace the one currently in your device or disable the old one and activate the new one. If the new adapter works, then your original Wi-Fi adapter is malfunctioning. If the new adapter doesn't work, then you're looking at a larger problem that other troubleshooting suggestions in this list might help.
If you're using a Windows or Linux PC with a Wi-Fi network adapter (whether built-in or otherwise), it's possible that updating the driver for the Wi-Fi adapter could solve your problem and allow you to connect to the Wi-Fi access point successfully.
Related: How to Update Drivers on Windows 11
To update a driver in Windows, you'll need to find the latest driver for your adapter from the manufacturer's website and follow the instructions in our guides for Windows 10 or Windows 11 . To update a hardware driver in Linux, you'll need to have more technical knowledge, but we've written about that as well. Once you've updated, restart your PC and attempt to connect again. If it works, then you're good to go.
And finally, if nothing else works, your router might be simply bad. If so, you can contact the support staff of the manufacturer and ask for repair or replacement options. Or if the router is older and you're ready to upgrade anyway, it may be time to buy a completely new model. Here's a good all-around model that we've tested from Asus, for example:

ASUS AX6000 WiFi 6 Gaming Router (RT-AX88U) - Dual Band Gigabit Wireless Router, 8 GB Ports, Gaming & Streaming, AiMesh Compatible, Included Lifetime Internet Security, Adaptive QoS, MU-MIMO
A great all-around Wi-Fi router for most people.
If that router doesn't suit you, we've written a review guide to other high-quality routers that you can consider. Whichever one you choose, hopefully it will solve your connection issues. Good luck!
Related: The Best Wi-Fi Routers of 2023
Sign up for our daily newsletter
- Privacy Policy
- Advertise with Us
How to Fix Wi-Fi Not Working Issue in Windows

Wi-Fi, it’s safe to say, permeates every aspect of our existence. It’s there when we wake up, when we have dinner, and some claim its waves are interfering even with our very brains. In short, Wi-Fi is important, and when it stops working on Windows, it can feel like our lives grind to a halt. This guide provides some fixes for a faulty or broken Wi-Fi connection on your Windows device.
Good to know : Is your Wi-Fi no longer showing up? If the router appears to be working, it could be that settings changed and the network isn’t publicly broadcasting its SSID anymore. Here’s how to connect to hidden Wi-Fi networks on Windows .
A Few Easy Methods
1. check your windows wi-fi settings, 2. restart wi-fi direct virtual adapter, 3. disable power management on wi-fi, 4. reset network settings, 5. redo the network stack, 6. check whether your firewall or antivirus is preventing network connection, 7. run the network and internet troubleshooter, 8. disable vpn during windows startup, 9. turn off ieee 802.1x ethernet authentication, 10. restart wireless nic in bios, frequently asked questions.
There are a few obvious, easy methods that directly or indirectly help solve the Wi-Fi not working issue on your Windows device. Most network problems start with the router , modem, or access point.
Unplugging the Internet source and plugging it back in later can help fix your Windows Internet access. You can also do a simple restart of your PC after several minutes or hours. Any Wi-Fi issues caused by your Internet Service Provider or cable company usually get resolved in that duration. If none of these methods help you resolve the issue, continue with the solutions below.
Is the router broken? If you need a new one, consider these Wi-Fi 6 routers .
First, are other devices connecting to your Wi-Fi network without issue? If they are, then read on, as your problem must be related to your Windows PC.
- Go to “Settings -> Network & internet -> Wi-Fi.”
- You can also open “Wi-Fi Settings” directly from the search menu or the Wi-Fi icon in the system tray.

- If your Wi-Fi problem is related to your router, the first port of call should be to turn it off, then on again.

- In the Wi-Fi menu, you can also click “Manage known networks.”

- Get Windows to “Forget” the network you’re trying to connect to, then reconnect to it again.

- Go back to the “Manage known networks” page. Click “Show available networks.”
- The Wi-Fi network you recently forgot should be displayed once again. Click its “Connect” button, and enter the network security key followed by “Next.”

All that failing, the remaining fixes are more advanced.
Tip : not good at remembering strings of letters and numbers? Learn how to view saved Wi-Fi passwords in Windows , and give yourself a break.
The faulty Wi-Fi connection problem can stem from the Microsoft Wi-Fi Direct Virtual Adapter. This is responsible for turning Windows into a Wi-Fi hotspot, however, so bear in mind that disabling this to fix your Wi-Fi will also disable the Portable Hotspot function.
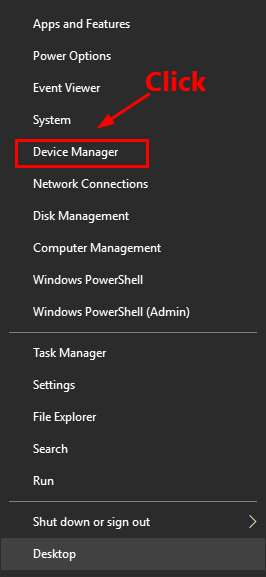
- Go to “Device Manager.” (Search for it in the Start menu search bar.)
- Click “View -> Show hidden devices.”

- Scroll down to “Network adapters,” right-click “Microsoft Wi-Fi Direct Virtual Adapter,” then “Disable device.”

- Confirm that you want to disable the device by clicking “Yes.”
- Repeat the above steps for all other “adapters.”

- Reboot your PC, and check whether the Wi-Fi is working again.
- The Wi-Fi adapter automatically refreshes after a PC restart. If it remains disabled, right-click the adapter to enable it.

While you’re in the Device Manager, disable power management for the wireless network adapter that’s having trouble. By default, that setting should already be activated in the latest Windows versions.
- Under Network adapters, look for the adapter with the word “Wireless” or “Wi-Fi” in it (this will vary depending on the make of your card), then right-click it and click “Properties.”
- In the following example, three such adapters are highlighted.

- In the new window, click the “Power Management” tab, and uncheck the “Allow the computer to turn off this device to save power” box.

- If the above option is checked by default, you don’t need to do anything.
FYI : experiencing slow network speed? Try kicking unwanted connections off your Wi-Fi .
Another solution, with no negative side effects, is to reset the network settings in Windows. This will uninstall and reinstall all your system’s network drivers, hopefully removing any issues.
- Go to “Settings -> Network & internet -> Advanced network settings -> More settings -> Network reset.” To do this in Windows 10, navigate to “Settings -> Network & internet -> Status -> Network reset.”

- Click the “Reset now” button next to “Network reset.”

- A pop-up window will ask, “Are you sure you want to reset your network settings?” Click “Yes” to confirm.

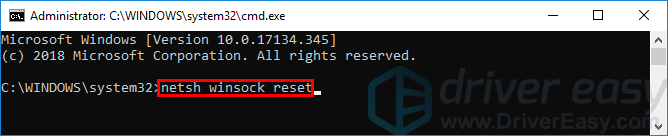
Close on the heels of a network reset, Windows allows you to redo its network stack using a series of commands on the Command Prompt in administrator mode. It essentially requires you to use the following commands in succession followed by Enter :
Tip : you don’t really need an antivirus program in 2023 , but if you still want one, check out these robust options.
Although quite rare, it may happen that your Windows firewall or antivirus software is blocking the Wi-Fi connection. Providing the necessary permissions to the Wi-Fi network can fix the problem.
- Open Windows Security from the Start menu search.
- Scroll down to the “Firewall & network protection” menu. Click “Public network.”

- Check whether your Wi-Fi network is listed under “Active public networks.” If it isn’t showing here, that means the Microsoft Defender Firewall is blocking your Internet access, or there is an issue with the router.
- This is a temporary glitch that can happen in older Windows versions and should be fixed after a restart. Otherwise, turn the router on/off once and see whether the home network is showing under “Active public networks” again. You can also “Forget” the network on your Windows device and reconnect to it. (See method 1.)

- For those using an external firewall, go to its app settings and add/edit/remove the Wi-Fi network in question.
- Finally, if you believe your external antivirus is the source of trouble, uninstall it from your computer.

Windows has a powerful utility called the Network and Internet troubleshooter that can diagnose what is wrong with your device (missing drivers, adapter issues, router IP addresses, etc.). It can plug those gaps easily, and get your device connected once again.
- Go to “Settings -> System -> Troubleshoot -> Other troubleshooters -> Network and Internet.”
- Click “Run” to open the troubleshooter window. Follow its on-screen instructions to get connected to the Internet.

Tip : should you switch from a VPN to Tor ? Our article outlines the differences between the two ways of ensuring privacy on the Internet.
Are you using a VPN on top of your Wi-Fi network? VPN programs are sometimes automatically installed in your Windows startup folder and connect to your network Wi-Fi as soon as you sign in to your desktop. This can cause your Wi-Fi connection to fail. It’s better to wait until your Windows device has connected to the local Internet before turning on the VPN.
- Go to the settings section on any of your installed VPN apps.
- Disable the option that automatically launches the VPN once you turn on your device.

- Alternatively, enter Ctrl + Alt + Del to open the “Task Manager,” and scroll down to the “Startup apps” menu.
- Right-click to disable any VPN apps from the startup menu.

If you are getting your Wi-Fi through an Ethernet cable, disable 802.1X, a protocol used for secure authentication that may require a separate sign-in prompt, but can also cause connection failures.
- Go to “Network & internet,” and check the connection status of your Ethernet cable.
- If the Ethernet connection says, “Connecting, Action needed” instead of “Connected,” ensure that the Ethernet cable is properly connected. It has to be plugged in to the correct Ethernet port on your Windows device.
- If the connection issue persists, click the “Ethernet” menu.

- Click the “Edit” button next to “Authentication settings.”

- Turn off IEEE 802.1X authentication, save the setting, then restart your device.

This one won’t be possible for everyone, as different motherboard manufacturers have different options available in the BIOS, but it’s worth a try.
- To enter your BIOS, repeatedly press either the Del , F8 , F10 , or F2 key (this may vary according to manufacturer) as your PC is booting. If Windows starts up, it wasn’t done correctly, and you need to reboot and try again. Read on to learn more about the many different methods of accessing Windows BIOS .
- Once you’re in the BIOS, look for a menu called “Power Management, “Wireless,” “Wireless LAN” or similar.
- Uncheck or disable the “WLAN” option in your BIOS, click “Apply” or “Save changes” (if there’s such an option), then reboot your PC.

- After you’ve logged back in, use your keyboard BIOS access keys again to go back to the BIOS screen and re-enable “WLAN,” then reboot.
Tip : learn the various ways to change the Administrator in Windows .
Why does my Wi-Fi suddenly stop working?
If your Wi-Fi drops suddenly, and it’s hard to pin it down, the Wi-Fi signal isn’t strong enough. There can be interference due to walls or other obstacles, and the problem continues even after a simple network reset. To overcome this on a Windows device, consider using a long-range portable Mi-Fi device , moving the router very close to the laptop or PC, and replacing the software or drivers on your PC.
Why is my laptop not detecting my Wi-Fi?
If your laptop completely fails to detect a nearby Wi-Fi signal, the network adapter could be at fault. The problem can be fixed using the “Network & Internet” troubleshooter or by reinstalling and updating the network drivers from Device Manager.
Image credit: Unsplash . All screenshots by Sayak Boral.
Our latest tutorials delivered straight to your inbox

Sayak Boral is a technology writer with over eleven years of experience working in different industries including semiconductors, IoT, enterprise IT, telecommunications OSS/BSS, and network security. He has been writing for MakeTechEasier on a wide range of technical topics including Windows, Android, Internet, Hardware Guides, Browsers, Software Tools, and Product Reviews.

How to fix Wi-Fi problems on Windows 10 version 1909, November 2019 Update
If after installing the Windows 10 November 2019 Update you're experiencing Wi-Fi issues, then use these four solutions to fix the problem to get back online.

On Windows 10, Wi-Fi issues like unable to connect to a network, slow wireless speeds, missing configuration, and wireless adapter not working, seem to be among the common problems you’ll often encounter when installing a new feature update, even after installing the November 2019 Update, version 1909 .
These problems usually happen because of driver compatibility, undesired configuration changes, or a particular bug, which could be as a result of system changes introduced in a new version. However, other times, there are other factors that can cause Wi-Fi problems. For instance, the network adapter driver can get damaged during the upgrade process. You don’t have the latest driver installed, which happened to work with the previous version, but it doesn’t with the new version of Windows 10. There could be some configuration problems, and a number of other things.
If you’re unable to connect to the internet, the device randomly disconnects, or speed are not adequate, there are some troubleshooting steps that you can follow to fix most Wi-Fi problems on your Windows 10 device after an upgrade.
In this guide , you’ll learn a several methods to troubleshoot and fix the Wi-Fi problems after installing the Windows 10 November 2019 Update .
How to fix Wi-Fi using Network Adapter troubleshooter
- How to fix Wi-Fi using Network reset
- How to fix Wi-Fi using updated network driver
How to fix Wi-Fi uninstalling Windows 10 November 2019 Update
Windows 10 has a troubleshooting tool in the Settings app to fix most common wireless and other network adapters problems automatically.
Use these steps to use the Network Adapter troubleshooter:
Open Settings on Windows 10.
Click on Update & Security .
Click on Troubleshoot .
Select the Network Adapter option.
Click the Run the troubleshooter button.

Select the network adapter you’re intending to fix — for instance, Wi-Fi .

Click the Next button.
Once you complete the steps, the troubleshooter will detect and fix the Wi-Fi problem on your device. After the process completes, open your web browser and try to connect online. If everything is working again, you’re all done. If it’s still not working, try the following method.
How to fix Wi-Fi using network adapter reset
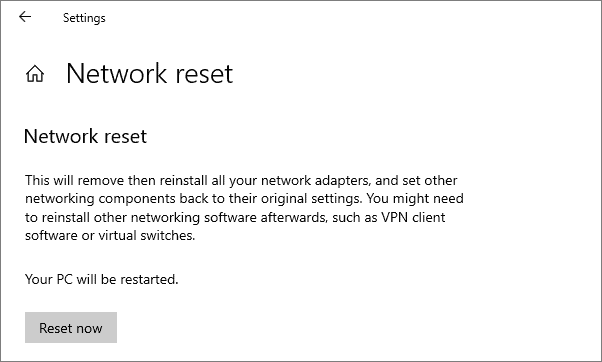
If the troubleshooter didn’t work, you can use the network reset feature that removes and reinstalls all the network adapters on your computer. This process resets all the networking components and restores the defaults settings, which can help to fix slow speeds or other problems trying to connect to the internet.
Use these steps to reset your Wi-Fi adapter on Windows 10 after installing the November 2019 Update:
Open Settings .
Click on Network & Internet .
Click on Status .
Click the Network reset link.

Click the Reset now button.

Click Yes to confirm.
Click the Close button.
Restart your computer.
After completing the steps, you may need to reinstall other networking software, including VPN client or virtual switch software. In addition, you’ll need to manually reconnect to any wireless network, which may require to enter the passcode again.
You can also watch the video tutorial below to see in more details, the steps to fix a wireless adapter on Windows 10.
If everything is working again, you’re all done. If it’s still not working, try the following method.
How to fix Wi-Fi updating network adapter driver
In the case that you’re still noticing slow Wi-Fi speeds, or problems connecting to the internet, the issue could be an outdated network driver.
You can resolve this issue downloading and installing the latest driver from the network adapter manufacturer’s support website.
Use these steps to update the wireless adapter driver on Windows 10:
Open Start .
Search for Device Manager , click the top result to open the app.
Expand the Network adapters branch.
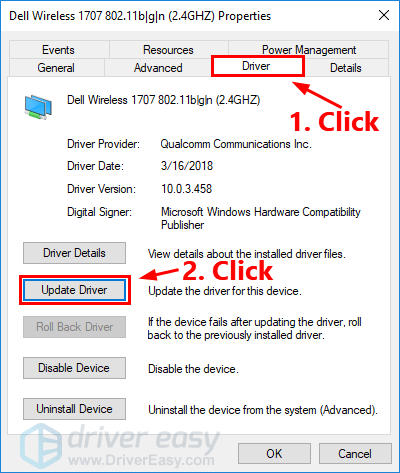
Right-click your Wi-Fi adapter, and select the Update Driver Software option.

Click the Browse my computer for driver software option.

Click the Browse option to locate the adapter driver.
Check the Include subfolder option.
Click the Next button.

Once you complete the steps, you should be able to connect to the wireless network and to the internet.
If nothing seems to work, sometimes, you can also try an older version of the Wi-Fi adapter driver, such as those designed for Windows 8.1 or Windows 7, which might fix the problem temporarily until there is a permanent fix.
In the rare case that you’re still having wireless connectivity problems, then there’s a good chance that the issue is a bug with the Windows 10 November 2019 Update, and you may need to wait until an update becomes available to fix the problem.
If you can’t wait, as a last resort, you can go back to the previous version of Windows 10 until the Wi-Fi problem is resolved, which you can do using this video walkthrough :
In the case that you upgrade from version 1903 to Windows 10 version 1909, then you’ll need to follow these steps to roll back to the previous version.
Alongside all these instructions, it’s a good idea to check your adapter settings on Control Panel > Network and Internet > Network Connections , and opening the adapter’s properties. In the past, there have been reports about TCP settings getting disabled and DNS settings getting reset after an upgrade. In addition, you should always reboot your router to see if it helps to resolve the Wi-Fi slow speed or connectivity problems.
While we’re focusing this guide on Windows 10 version 1909, you can use these steps virtually on any supported version of the operating system to resolve networking problems.
Alternatively, you can also connect online using a wired connection using an Ethernet adapter. If your laptop doesn’t include a port to plug a network cable, you can get an adapter from Amazon.
- StarTech USB 3.0 to Gigabit Adapter | See at Amazon
- Cable Matters SuperSpeed USB 3.0 to Gigabit Adapter | See at Amazon

Mauro Huculak is a Windows How-To Expert who started Pureinfotech in 2010 as an independent online publication. He has also been a Windows Central contributor for nearly a decade. Mauro has over 14 years of experience writing comprehensive guides and creating professional videos about Windows and software, including Android and Linux. Before becoming a technology writer, he was an IT administrator for seven years. In total, Mauro has over 20 years of combined experience in technology. Throughout his career, he achieved different professional certifications from Microsoft (MSCA), Cisco (CCNP), VMware (VCP), and CompTIA (A+ and Network+), and he has been recognized as a Microsoft MVP for many years. You can follow him on X (Twitter) , YouTube , LinkedIn and About.me . Email him at [email protected] .
- Surface Pro X: tech specs and details you need to know
- Windows 10 November 2019 Update, version 1909, finalized
We hate spam as much as you! Unsubscribe any time Powered by follow.it ( Privacy ), our Privacy .
No file downloaded?

Driver Easy
Home › Knowledge Base › Network issues
[SOLVED] Wi-Fi not working on Windows 10 laptop
Justin Zeng
Fixes to try
- Before we start
- Reboot your network
- Run the network troubleshooter
- Reset network connection settings
- Roll back the driver for your wireless network adapter
- Update the driver for your wireless network adapter
Fix 1: Before we start
- Use another device to connect to the same WiFi network, see if it can connect to the Internet. If it also falls to connect to the Internet, it may suggest it might be a problem with your wireless router or ISP.

Fix 2: Reboot your network
- Shut down your PC.
- Plug in your network devices again and wait until the indicator lights are back to its normal state.
- Restart your PC and connect it to your WiFi network.
Fix 3: Run the network troubleshooter
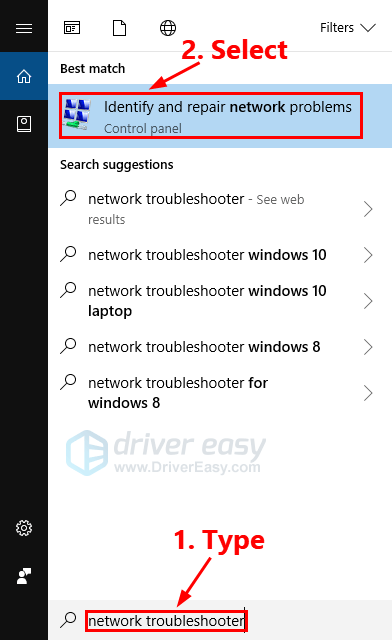
- The network troubleshooter will automatically detect the network problems on your PC. You just need to follow the steps in the network troubleshooter and see if this issue can get fixed.
Fix 4: Reset network connection settings
Fix 5: Roll back the driver for your wireless network adapter
Fix 6: Update the driver for your wireless network adapter
- Download and install Driver Easy.

Related Articles
[solved] call of duty cold war not connecting to online services 2024, [solved] windows 10 wireless adapter missing, [solved] warzone not connecting to online services 2024, [solved] epic games download slow /download stuck, [fixed] qualcomm atheros qca61x4a driver issues in windows 10, how to fix wow51900319 in world of warcraft.
Justin, a Microsoft 365 Certified: Modern Desktop Administrator Associate, is a technical writer and a tech enthusiast. He loves exploring new technologies and writing technical how-to tips to help people fix their computer / driver issues. In his spare time, he enjoys reading books and listening to music.
How to Fix When No Wi-Fi Networks Found on Windows 11 and 10
They're out there, you just can't see them
Does your Microsoft Windows 11 or Windows 10 PC fail to find nearby Wi-Fi networks ? Various items can cause this problem, with a faulty network adapter being the most serious. You can try to resolve the issue by tweaking a few options here and there on your computer. We’ll show you how to do that.
When your computer can’t find nearby wireless networks, the possible causes are that you’ve enabled Windows’ airplane mode, your Wi-Fi feature is turned off, your PC’s network settings are incorrect, and more.

Disable Airplane Mode to Fix No WiFi Networks Found
Windows 11 and 10’s airplane mode allows you to turn off wireless communications on your PC. This disables Wi-Fi as well, causing your PC not to find wireless networks around you.
In this case, turn off your machine’s airplane mode, and your issue will be fixed.
- Press Windows + A on your keyboard to open Quick Settings .
- Select Airplane mode in the menu to disable the feature.

- Search for nearby Wi-Fi networks as usual.
Turn On Wi-Fi on Your Windows 11/10 PC
If your PC can’t find Wi-Fi networks even after disabling airplane mode, ensure your PC’s Wi-Fi option is turned on. After all, this feature is how your PC finds and connects to nearby wireless networks.
On Windows 11
- Open Settings by pressing Windows + I .
- Select Network & internet in the left sidebar.
- Turn on Wi-Fi on the right pane.

On Windows 10
- Access Settings by pressing Windows + I .
- Select Network & Internet .
- Choose Wi-Fi in the left sidebar.
- Turn on the Wi-Fi toggle on the right.

Enable Your PC’s Wi-Fi Network Adapter
Windows allows you to disable your PC’s various network adapters. It’s possible you or someone else has disabled your wireless network adapter, causing your PC not to find nearby Wi-Fi networks.
In this case, enable your network adapter from your PC’s settings menu, and your issue will be fixed.
- Open Control Panel on your Windows PC.
- Select Network and Internet .
- Choose Network and Sharing Center on the following screen.
- Select Change adapter settings in the left sidebar.
- Right-click your disabled network adapter and choose Enable .

- Close Control Panel and try to search for Wi-Fi networks.
Use Windows’ Network Adapter Troubleshooter
Windows includes a Network Adapter troubleshooter that you can use to find and fix issues with your adapters . This tool runs on its own and detects and fixes many problems with your adapters.
- Select System in the left sidebar.
- Choose Troubleshoot > Other troubleshooters on the right pane.
- Select Run next to Network and Internet to launch the troubleshooter.

- Allow the troubleshooter to find and fix your network problems.
- Launch Settings by pressing Windows + I .
- Choose Update & Security in Settings.
- Select Troubleshoot in the left sidebar and Additional troubleshooters on the right pane.
- Choose Network Adapter and select Run the troubleshooter .

- Wait for the tool to detect and resolve problems with your network adapter.
Roll Back Your Network Adapter Drivers
If your no Wi-Fi networks found issue started after Windows installed an update for your network adapter drivers, that update might be faulty. Such broken updates often cause many issues, and one way to resolve those problems is by rolling back the updates.
You can uninstall that update on your PC, which will fix your issue.
- Open the Start menu by pressing the Windows key, find Device Manager , and launch the utility.
- Expand Network adapters , right-click your adapter, and choose Properties .
- Open the Driver tab and choose Roll Back Driver .

- Select your reason for rolling back the driver update and choose Yes .
Update Outdated Wi-Fi Adapter Drivers
One reason your PC fails to find nearby Wi-Fi networks is that your network adapter drivers are outdated. Old drivers and apps often cause many issues with your devices, leading to various error messages.
One way to fix your issue is to bring your adapter drivers to the latest version .
- Launch Device Manager on your PC.
- Expand Network adapters , right-click your adapter, and choose Update driver .

- Select Search automatically for drivers on the following screen.
- Let Device Manager find and install the latest drivers for you.
- Reboot your PC when the drivers are updated.
Uninstall and Reinstall Network Adapter Drivers
If you still can’t find and connect to your wireless networks , your network adapter drivers might be faulty. These drivers may be up to date but still faulty, causing your PC not to find nearby networks.
In this case, remove your installed drivers and let Windows automatically install the new drivers for you. This should fix your issue.
- Expand Network adapters , right-click your adapter, and choose Uninstall device .
- Enable the Attempt to remove the driver for this device option and choose Uninstall .

- Reboot your PC when you’ve removed your network adapter.
- Windows will automatically find and install the appropriate drivers for your network adapter.
Reset Windows’ Network Settings
Windows’ network settings define how your PC makes various network connections. Your machine not showing nearby Wi-Fi networks indicates something is wrong with your network settings.
In this case, you can erase your custom network settings and bring those settings to the default to fix your issue.
- Open Settings on your PC by pressing Windows + I .
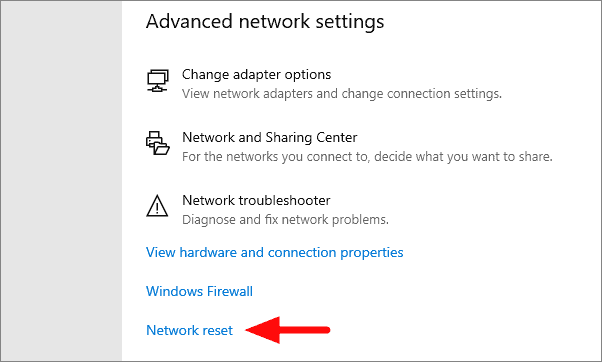
- Choose Advanced network settings on the right.
- Select Network reset .
- Choose Reset now next to Network reset .

- Select Yes in the prompt to confirm your choice.
- Reboot your PC when you’ve reset your settings.
- Select Network & internet .
- Choose Network reset at the bottom of the page.
- Select Reset now on the following screen.

- Choose Yes in the prompt.
- Windows will restart your PC when your network settings are reset.
Make Your Windows PC Find Nearby Wi-Fi Networks
Windows not being able to find nearby wireless networks is a sign that something is wrong with your network adapter. You can use the methods outlined above to fix your adapter’s drivers, your PC’s network settings, and other items to possibly fix your issue.
Once you’ve done that, your PC will be able to find and connect to your chosen Wi-Fi networks, letting you access the world wide web.

Mahesh has been obsessed with technology since he got his first gadget a decade or so ago. Over the last few years, he's written a number of tech articles on various online publications including but not limited to MakeTechEasier and Android AppStorm. Read Mahesh's Full Bio
Read More Posts:

10 ways to troubleshoot and fix any Wi-Fi problems you're encountering
- When you encounter Wi-Fi problems, you can try troubleshooting your network or devices, check with your internet service provider, and more.
- Start by eliminating obvious problems and making sure you know whether it's related to the Wi-Fi network, internet connection, one device or all devices.
- Here are 10 ways to troubleshoot and solve Wi-Fi problems.
It can be hard to imagine or remember the days before Wi-Fi , when you had to run Ethernet cables throughout the house to connect computers to the internet and carry files around on CDs and portable hard drives (affectionately known as "sneakernet").
These days, we take Wi-Fi for granted – right up until it stops working and brings our modern connected household to a complete stop.
How to fix Wi-Fi problems
Here are 10 ways to troubleshoot and solve common Wi-Fi problems.
Basic check: Is the Wi-Fi router running?
It's not out of the question for the plug to have been accidentally pulled or the cat to have stepped on the power button. Make sure the Wi-Fi router's lights are on.
Is the issue related to one device or all devices?
Fixing computer problems like Wi-Fi connection issues often comes down to the process of elimination. That's why technical support technicians often start by asking silly and obvious questions like "is the computer plugged in?" Once you know the Wi-Fi is running, check to see if the problem happens on just one device or on all of them. If you can't connect on your laptop, for example, check your phone to see if you can see Wi-Fi signal strength bars.
Send a ping to Google
One other easy thing you can check for: is the connection problem related to your Wi-Fi network or to your internet service provider's internet signal? Your Wi-Fi network might be fine, for example, but the ISP's internet may be out. To find out, run a ping test using a computer.
1. On your PC, click the Start button search box and type "CMD," then press Enter.
2. In the Command Prompt window, type "ping Google.com."
3. Wait for the result.
If you see an error message, you might not have a working internet connection; continue troubleshooting in the next section. If you see a reply from Google, then you have a working internet connection and the problem lies elsewhere.
You can also log into your account for your internet service provider to check if there's an outage in your area. With many providers, a banner will appear at the top of your account page notifying you of an outage, or you can search for an outage map on the site.
Troubleshooting no service at all
This is unfortunately one of the more common problems people run into — the internet simply doesn't work at all. If none of the devices or computers on your Wi-Fi network can connect, reset both the internet router and Wi-Fi (this might be one device or two different ones). Unplug them, wait two minutes, and plug them back in. If your Wi-Fi doesn't start working again, the problem might be with your internet service provider — call customer service and let them troubleshoot.
Resolving slow or spotty internet in certain rooms
If your Wi-Fi drops out in certain parts of the house on a regular basis, the problem is almost certainly a "dead zone" caused by a router that can't reach everywhere. If possible, move the router to a more central location in the house. Alternatively, you can add a Wi-Fi extender to increase the range of your router.
Troubleshooting slow or spotty internet at certain times of day
If your connection problem isn't related to where you are in the house but is an intermittent problem at certain times of the day, the issue is likely related to a lack of bandwidth; too many devices are connected to the Wi-Fi network and using too much data. If three people are streaming Netflix on different devices at the same time, for example, there's your culprit. If possible, connect devices with an Ethernet cable so they aren't using Wi-Fi, or better yet, take one or more bandwidth hogs offline entirely.
Is your connection slow because of the Wi-Fi network or the ISP?
If you have a connection that's noticeably slow, it can also be helpful to figure out if your poor performance is being caused by a slow internet connection provided by your ISP or if the Wi-Fi network in your home is not working properly. You can do this by running an internet speed test . Run the test at speedtest.net in any browser (on a computer or mobile device). If the internet speed seems normal (at least 10Mbps, for example) the issue is related to your Wi-Fi network, not the internet. Read our detailed guide on how to check the strength of your Wi-Fi for more information.
How to resolve issues with your router
It can be challenging to know exactly what is causing a problem with your Wi-Fi connection, and the router itself has some settings and configurations that might be "breaking" your Wi-Fi network. If possible, check on and update your router's firmware. Most modern routers work with a simple mobile app you can use to check on the firmware and install any available updates. This can resolve issues with your connection reliability and speed. In addition, you can probably use the app to change the channels your router is using to broadcast on its various bands. If your connection is slow or intermittent, changing the channels might significantly improve your Wi-Fi service. For more information, read our article on how to boost your internet connection .
What to do if one device has trouble connecting
Make sure the device's software is up to date. And if your router is a dual-band or tri-band device, try connecting to one of the other Wi-Fi bands. There are any number of reasons why a laptop might connect more easily to one of the 5GHz radios rather than the other, for example.
What to do if your game console can't connect to Wi-Fi
Occasionally, consoles like the Xbox and PS4 can run into trouble connecting to Wi-Fi. Consoles can be affected by the same kind of glitches that affect PCs and mobile devices, but they generally only need to go to one internet location, so troubleshooting can be easier. Open a site like Downdetector in a web browser on your computer or a mobile device and use it to see if the Playstation Network or Xbox Live is down. If so, just wait for the site to come back up. Otherwise, reboot both the router and the console and move them closer together, if possible.
Related coverage from Tech Reference :
'why isn't my internet working': how to identify why you can't connect to the internet and troubleshoot accordingly, how to boost your internet speed at home in 8 ways, and make sure you're not being overcharged for low speeds, 'what is a good internet speed': the internet speeds you should aim for, based on how you use the internet, how to find out how fast your internet is using a free and accurate google speed test, 'why won't my pc connect to wi-fi': 6 ways to troubleshoot your windows computer's internet connection.
Watch: 10 inventions to fight your biggest fashion problems
- Main content
Home » Tech Tips » Windows » How to Fix Wi-Fi Disconnecting Problem in Windows 10?
How to Fix Wi-Fi Disconnecting Problem in Windows 10?
Recently we have used the free upgrade offer from Microsoft to upgrade Windows 8 to the latest Windows 10. Well, the installation was quite smooth with few restarts until we struck up with the first issue. The laptop was not able to connect to the wireless (WiFi) network. After fighting hard to install the latest driver files for the network adapter, finally we could able to connect to the internet through WiFi. It did not last long as we struck with the second issue. WiFi was dropping frequently and there were no proper solutions to resolve the issue. In this article we would like to share all those things we tried to resolve the WiFi connection issues in Windows PC.
Check out our other articles if you are looking for fixing Wi-Fi issues in iPhone and MacBook .

Internet Not Connected
When you have problem with wireless connection, first check whether you can connect to internet by opening a website in Edge or other browser you use. If you notice WiFi icon on the system tray shows a warning with limited or no internet connection then check this article on how to fix this issue. Try the following solutions to ensure you have working internet connection.
1. Run Windows Network Diagnostics
Windows 10 offers a handy option to troubleshoot network related issues. Simply right click on the WiFi icon on the taskbar tray and select “Troubleshoot problems” option.

This will open Windows Network Diagnostics and the system will automatically start detecting the network problems on your PC. Most of the time, this will help to fix wireless related issues. You can also view the detailed information to get the troubleshooting report like below.

2. Network Adapter Issue
When you noticed your PC could not connect to wireless after Windows 10 upgrade, the most possible reason is the network adapter . Follow the below steps to fix this issue:
- Right click on the “Start” menu and choose “Device Manager” or use the “Cortana” search box next to “Start” menu and open “Device Manager”.
- Find out the adapter used on your PC under “Network adapters” section.

- In our case it was “Intel(R) PRO/Wireless 3945ABG”. Go to the provider’s site and download the latest driver file for Windows 10.
- Uninstall the old driver and install the newly downloaded one.
- Click on the “Scan for hardware changes” to re-enable the adapter with the newly installed driver.
This should resolve the problem of connecting to the wireless network.
3. Switch Off Airplane Mode
Windows 10 has an option to switch off wireless connection using quick “Airplane Mode”. Click on the WiFi icon on the tray and check your “Airplane Mode” is disabled.

WiFi Connection Frequently Dropping Off
It took few days to realize that the WiFi connection was dropping off frequently due to the problem in laptop. Since we use VPN it was the first suspect and the router being the second one. As the same VPN and router were perfectly working with the iPhone, we were forced to look into the Windows laptop for clue. When looked into the “Events Viewer”, it confirmed that the network was dropped off frequently with the error message “WLAN AutoConfig service failed to connect to a wireless network”.

At beginning we have tried the following steps:
- Restart the laptop, router and reset VPN settings
- Disable and enable wireless connection
- Troubleshoot the wireless connection
- Disable Windows Defender
- Check “Task Manager” to see any programs are causing the issue
None of these worked out and the problem returns back intermittently. It was time to dig the issue deeper and below is the list of options we tried to fix the issue. For us, finally the option 2 worked out and we could successfully connect to WiFi without dropping off.
Option 1 – Disable Network Discovery
Open “Network and Sharing Center” and click on the the wireless internet connection you are using.

Click on the “Wireless Properties” button under “General” section which will take you to the properties of your wireless connection. Disable the option “Look for other wireless networks while connected to this network” under “Connection” tab.
Note: SSID is the name of your wireless connection, ensure to have a unique wireless connection name for your router to avoid confusion.
Option 2 – Adapter Power Management Settings
Open “ Network and Sharing Centre ” and click on your wireless connection name. This time click on the “Properties” button under “Activity” section.

You will be taken to “Wi-Fi Properties” popup and click on the “Configure” button for your wireless router connection. The next popup will show the network connection properties of your wireless router and disable the option “Allow the computer to turn off this device to save power” under “Power Management” tab.
Option 3 – Disable IPv6
IPv6 addresses are introduced with the depletion of IPv4 addresses and currently both IPv4 and IPv6 are used by most of the services. You can give try by disabling IPv6 connection under your “WiFi Properties”.

Warning: Disabling IPv6 will affect accessing certain websites available only through IPv6 and also you may not able to create workgroup.
Option 4 – Restart Computer Browser Service
Right click on the Windows taskbar and click on the “Task Manager” option. By default the “Browser” services will be in a “Running” status which can be seen under “Services” tab. Right click on the “Browser” service and “Restart” it.

Option 5 – Tun Off Bluetooth Discovery Mode
If you have enabled Bluetooth on your laptop, navigate to Bluetooth settings and click on “More Bluetooth options”. Then disable the option “Allow Bluetooth devices to find this PC” under “Discovery” section.

We have looked into all those Microsoft and other popular forums and it is clearly evident that the wireless connectivity problem is something to do with Windows and not related to the router. Unfortunately the issue is not addressed with any appropriate solution. Though option 2 worked for us, you may need to try out different options to make the WiFi connectivity stable.
About Editorial Staff
Editorial Staff at WebNots are team of experts who love to build websites, find tech hacks and share the learning with community.
You also might be interested in

How to Install and Manage Plugins in WordPress?
Though good theme is most important in building a WordPress[...]

How to Fix Windows 11 Search Not Working Issue?
Microsoft announced Windows 11 will be available for public as[...]

Browser Errors You Should Know
When a site is accessed through a browser like Chrome,[...]
44 Comments
Leave your reply..
I have tried all of these and still have intermittent connection. There is no “browser” service in task manager. Could this possibly be a problem? Does it need to be re enabled somehow?
ipv6 cased the problem….. tyvm :)
no, ipv6 didn’t cause the problem (or not alone), but HIBERNATION (maybe sleep too, didn’t try it yet).
My laptop works perfectly in the workplace but is extremely intermittent when working from home. Would you recommend trying any of the fixes or could this hinder how it works at work???
I used to have a tough time connecting my Wi-Fi but now I simply turn on Airplane Mode, connect to the Wi-Fi, and then turn off Airplane mode. It is such a simple algorithm it may sound silly, but it works fine on my laptop (windows 10).
You are genius. This works!
This post contains the best hands-on method to resolving this issue that I’ve come across. It works nicely even with the unpredictable updates popping up now and then on my laptop.
Option #2 worked for me. Thank You
Option 3 – Disable IPv6 worked for me. Thank you for your time and hints.
Nice to see it helped you!!! Be aware of the impact as mentioned in the article and in other comments.
Power management . . . . . . . . my bluetooth mouse would disconnect all the time. Finally figured out it was the power management setting. Now wifi intermittantly goes off. Can’t believe that I did not think to check power management. Thanks for the clue . . . and the solution!
Nice to see it helped you!!!
New PC came with Windows 10 and I’ve been using a wireless dongle. I’ve been experiencing these wretched drop outs as well. Thank you for putting this very helpful list together. I’ve gone through all of them, and now appear to have a stable internet.
Thanks for posting and nice to see it helped you.
I have the same win10 wifi issue with my laptop. I tried all these options but none of them works. Occasionally I found, if I turn on airplane mode for a few seconds and then turn it off, the wifi will work for a relatively long time. Try it if other ways all failed.
just my 2 cents worth
i got a gateway t-series t6815 with the intel pro 3945ABG , the solution for me was TURN OF THE IPV6 ind right away the wire less started and it still works
thank you ,thank you
Thanks for the inputs. Note, IPv6 may impact accessing certain sites and workgroup creation as mentioned in the article.
I have a Toshiba S55 with Windows 10.
After an hour I have booted it, it is impossible to work. Continously disconnects from my local wifi and cannot see mi wifi to reconnect to it. I have to disable/enable the adapter several times to reconnect and keep an stable link.
Meanwhile my cheapest cell phone and other toshiba with Windows 7 that I have, are working perfecly.
In my opinion, it is a bug. I have the lattest drivers, change from DHCP to fixed IP address, execute a lot of network commands, and reinstall W10. Nothing works!!
Did you try turning off ipv6 ?
In this case, the better option is to contact Toshiba support and try to find a solution from them.
Hi, after a month of fighting with dropping wifi, reinstalling system, bios, wifi card etc I solved issue by… installing card driver that had been released on 01.Nov.2017!!! My wifi stopped working on October,12 this year and now it is working. So, my suggestion is. Try to install drivers one by one starting from the newest.
Thanks for reading and your inputs.
Most of these fixes work only if your connection is stable enough that you can complete them before losing the connection. In my case, I have about 5 seconds before the connection is lost again. Can any of these be done in those few seconds that I’m connected? Or is there a way to modify them without the connection being “live”? I have the most recent update for the wireless driver. All my other devices work fine (but they’re all iOS and macOS).
You can try almost all the above fixes without connecting to internet. If the problem persists, it could be on your Windows OS and not on the wireless adapter. So you can contact your computer support or try repairing Windows 10 .
I tried all of these methods and none of them seem to work for me, it doesn’t even decrease the amount of times it drops out. Do you have any other solutions I could try? My laptop is brand new only a few days old and it started happening all of a sudden, I had no issues the first two days.
Try repairing your Windows or contact your laptop support to get it resolved. Sometimes it could be due to the Windows OS.
I need to uninstall and install the driver files, now the connection looks stable.
Most of the time drivers could cause such problems!!!
Good morning Sir,
Thank you for the detailed instructions. Unfortunately, nothing worked for me.
In option 4 the “browser” by default is stopped. Any idea why? When i try to start it, it goes back to stopped after a while.
Go to the command prompt, enter the below command and hit enter.
sc config Browser start= demand
Restart your PC and try it works.
Option 2-power management helped reduce the drops. But new occurrences of dropping have started to show up. My other laptop (win7) stays up, so I am trying turning off IP6 (thanks for the screenshots to get to that rabbit hole). Although I suspect, I need to turn off Bluetooth as well (running WiFi connected to phone).
Thanks for building such a complete list, with thorough instructions.
Thanks for reading, remember disabling IPv6 ill have other impacts like you can’t setup workgroup.
Thanks so much!
My issue related to Bluetooth Discovery Mode – After 3 days of frustration, Wi-Fi has been up for nearly 24 hours now – thanks for your information and help.
Thank you for the complete solutions
I tried to have option 2, but there was no “Power Management” tab
The wireless driver has to be repaired at each restart of the laptop, with the Intel ProSet app. It disappears at each restart. After the repair it works fine, no disconnections. very unique problem. any solutions please?
For such issue, better contact the manufacturer support.
I have installed Intel PROset/Wireless software v. 19.20.00 and after running it to repair driver the wireless showed up again and worked. Only when IU reboot it is back to the same fault, no wireless showing and have to run the repair software again every time before I can have a wireless connection active. Any permanent solutions? This has also started with the installation of the anniversary edition of Windows 10 on a brand new lenovo thinkpad E570 just unpacked. Another issue is the Hello setup, the software opens a small black windows for a couple of seconds and then it fades aways, not allowing me to setup the fingerprint sign in option. Thanks for the help you can provide, if any.
Best regards
You can try uninstalling the device and reinstall the drivers again. For Hello, you can checkout this guide from Microsoft.
Try adjusting Windows power plan settings for the wireless adapter to “Maximum Performance”.
Thanks for your inputs.
Option 2 work for me as well. Thank You.
Your tutorial is very useful and provides another way to fix Windows 10 Wi-Fi issues. As for me, I used a way which is based on a program to repair Wi-Fi stop working on Windows 10.
I followed the steps to update the wireless driver but failed. Then I used Driver Talent to update and I made it. After reboot, the problem was gone. Thank you for your instruction. You listed the detailed guidance with step-by-step. You are so patient. Thank you again.
You are welcome. Nice to see it helped you.
DOWNLOAD EBOOKS
- SEO Guide for Beginners
- WordPress SEO PDF Guide
- Weebly SEO PDF Guide
- Alt Code Emoji Shortcuts PDF
- Free ALT Code Shortcuts PDF
- View All eBooks
TRENDING TECH ARTICLES
- 600+ Windows Alt Codes for Symbols
- Fix Chrome Resolving Host Problem
- Fix Slow Page Loading Issue in Google Chrome
- View Webpage Source CSS and HTML in Google Chrome
- Fix Safari Slow Loading Pages in macOS
- Fix Windows WiFi Connection Issue
- ROYGBIV or VIBGYOR Rainbow Color Codes
- Fix I’m Not A Robot reCAPTCHA Issue in Google Search
- Structure of HTTP Request and Response
POPULAR WEB TUTORIALS
- Move WordPress Localhost Site to Live Server
- Move Live WordPress Site to Localhost
- Move WordPress Media Folder to Subdomain
- Fix WooCommerce Ajax Loading Issue
- Create a Free Weebly Blog
- Edit Weebly Source Code HTML and CSS
- Add Scroll To Top Button in Weebly
- Add Table in Weebly Site
- How to Add Advanced Data Table Widget in Weebly?
- Up to $500 Free Google Ads Coupon Codes
FREE SEO TOOLS
- Webpage Source Code Viewer
- HTTP Header Checker
- What is My IP Address?
- Google Cache Checker
- Domain Age Checker Tool
- View All Free Web and SEO Tools
© 2024 · WebNots · All Rights Reserved.
Type and press Enter to search
Meet Windows 10 WiFi Problems? Here Are Ways to Solve Them
Have you ever experienced Windows 10 WiFi problems and do you know how to solve them? If you don’t know, then you should read this article carefully because it will offer you several methods to resolve Windows 10 issues. If you want to know more information about WiFi, then you can visit the MiniTool website.
Nowadays, WiFi has become part of your life, therefore, it is pretty disappointing when you meet Windows 10 WiFi problems such as WiFi connected but no internet access . In this article, I have listed several Windows 10 WiFi issues you might encounter and also the solutions to them.
Issue 1: Windows 10 Not Connecting to WiFi
When you trying to connect the WiFi, but there is a message saying that Windows 10 can’t connect to this network, then the culprit may be your network adapter. To fix the Windows 10 not connecting to WiFi error, you should try reinstalling the network adapter.
Here is the way to reinstall the network adapter:
Step 1: Press the Win key + X key at the same time to choose Device Manager .
Step 2: In the newly pop-out window, expand Network adapters and then right-click the network you are currently using to choose Uninstall device .

Step 3: Confirm that you want to uninstall the device by clicking Uninstall .
Step 4: Restart your PC, Windows will reinstall the driver automatically.
According to this method, you can resolve the Windows 10 not connecting to the WiFi problem.
Issue 2: WiFi Doesn’t Have a Valid IP Configuration
If there is a message saying that WiFi Doesn’t Have a Valid IP Configuration, then you will meet the WiFi not Working Windows 10 error. To fix the error, there are two methods you can adopt.
Way 1: Change the network name and password
Step 1: Use an Ethernet cable to connect your router.
Step 2: Enter your router’s IP address in your browser.
Step 3: Log into the portal of the device and then locate the right fields.
Step 4: Be sure that you use the correct type of WiFi security when you change the network name and password.
Way 2: Set the WiFi network’s channel width
Routers can broadcast their networks on different channels, thus, when there are a number of routers in close proximity using the same channel, the airwaves become cluttered. So you just need to log into the portal of your router and find the channel setting , then set it to Auto .
If there is no Auto setting, then you should try different channels and check whether the issue is solved.
Issue 3: Firewall Causes Windows 10 WiFi Not Working
The Firewall is a built-in app on Windows 10, and it protects your PC by either allowing or preventing incoming and outgoing traffic. Nevertheless, it might blunder web access for your entire computer.
This error often occurs when you accidentally changed a setting without realizing or malicious programs overrode your existing rules.
Luckily, there is a solution for you to solve the issue both in Windows Firewall and other third-party antivirus software you are using. Here is the tutorial:
Step 1: Type cmd in the search box and then right-click Command Prompt to choose Run as administrator .
Step 2: Type netsh advfirewall set allprofiles state off and then press Enter .
After doing this, you can check whether you can use the WiFi.
Issue 4: Windows 10 WiFi Driver Issues
If there is something wrong with your WiFi driver, then you will encounter the “Windows 10 WiFi not working” error. You can try to either roll back to an old driver or update the driver.
Follow the detailed instructions to solve Windows 10 WiFi driver issues:
Step 2: Expand Network adapters and then right-click the network you are currently using to choose Properties .
Step 3: Go to the Driver tab, choose either Update Driver or Roll Back Driver . Then follow the prompts shown on the screen to finish the process.

If Windows cannot find any updates for your driver automatically, then you can go to the manufacture’s website to download it.
Issue 5: No WiFi Networks Found
No WiFi networks found is also one of Windows 10 WiFi problems. Before you try to fix the error, you should check whether the router is turned on or you are within the range of the network.
If both things you have done, then the first thing you should do is to update or reinstall your network adapter’s driver follow the methods mentioned above. Besides, you also need to change your WiFi adapter’s region to resolve the problem.
Here is the way to change the WiFi adapter’s region:
Step 1: Find the network driver and right-click it to choose Properties .
Step 2: Go to the Advanced tab, highlight Country Region .
Step 3: Choose the Value according to your location.
Step 4: Click OK to save the changes.
According to this method, you can find WiFi networks.
Issue 6: Need to Forget WiFi Network on Windows 10
If you want to forget the WiFi network on Windows 10 but don’t know how to do, then follow the steps shown below.
Step 1: Press the Win key and I key at the same time to open Settings , then choose Network & Internet .
Step 2: Click Wi-Fi in the left panel, then choose Manage known networks .
Step 3: Highlight the name of the network you want to forget and then choose Forget .
After doing this, you can forget the WiFi network on Windows 10.
Issue 7: Windows 10 Keeps Dropping the WiFi Connection
Windows 10 keeps dropping the WiFi connection is also one of annoying Windows 10 WiFi problems. So if this problem occurs without warning, then the problem may be caused by the power management settings of your network adapter.
In order to solve the problem, you need to disable the computer to turn off this device to save power. Here is the tutorial:
Step 1: Find the network you are currently using, then right-click it to choose Properties .
Step 2: Go to the Power Management tab, then uncheck Allow the computer to turn off this device to save power .
Then you can check whether Windows 10 keeps dropping the WiFi connection.

How to find WiFi password on Windows 10? Check the 4 steps for how to view saved current WiFi password on your Windows 10 computer.
Final Words
If you have some problems with WiFi and don’t know how to solve it, then you should read this article to find the answer. I have listed several Windows 10 WiFi problems and their solutions, hope this article can help you.
About The Author
Position: Columnist

FIX: Wi-Fi Connected But No Internet Access in Windows 10 (Solved)
This tutorial contains instructions to fix the "Wi-Fi Connected but no Internet Access" problem in Windows 10, 8 or 7 OS. So, if your device is connected to a Wireless network and can access other devices on your local network, but cannot be able to reach the Internet, then continue reading below to find out how to resolve the problem.
How to FIX: WiFi is Connected But No Internet access.
The "WiFi connected with no Internet access" problem, can be caused for several reasons, but before you continue to the methods below to fix the problem, perform these steps:
- Step 1 . Verify that other Wi-Fi devices can connect to the same wireless network and access the Internet.
- Step 2 . Turn off the Router/Access point for at least one (1) minute. Then start the router and after one (1) minute restart the computer and see if you have Internet access.
- Step 3. If you 're using a third-party Security/Firewall software, temporarily disable it and check if Internet access has been restored.
- Step 4. Check if you can fix the problem, with the Network Troubleshooter wizard. To do that:
1. From Start menu, select Settings and select Network and Internet . 2. Select Status on the left pane, and then click Troubleshoot. At next, select to diagnose the Wi-Fi network adapter, click Next, and then follow the onscreen instructions to fix the problem.

Method 1. Forget and re-Add the Wireless Network.
Method 2. reset dns address settings., method 3. change advanced dns settings., method 4: reset tcp/ip parameters., method 5. set custom dns server addresses., method 6. uninstall and reinstall the wireless adapter driver., method 7. update wireless adapter drivers from manufacturer's site..
2. Select Wi-Fi on the left side and click Manage known networks.

3. Select the Wireless network and click Forget.

4. Connect to the Wireless network again and check if you have Internet access.
1 . Open Command Prompt as Administrator. to do that:
- In the Search box type: cmd or command prompt
- Right-click on Command Prompt and select Run as Administrator.
2. In the command prompt window, type the following command & press Enter:
- ipconfig /flushdns

3. Restart your PC and check the Internet connection.
3. Right-click at the Wi-Fi Network Connection and choose Properties

4. Then select the Internet Protocol Version 4 (TCP/IPv4) and click Properties again.

5. Click Advanced.

6. Uncheck the Register this connection's addresses in DNS checkbox and click OK twice and Close to close all windows.

7. Restart your computer. 8. Forget and re-add the wireless network. (see Method-1 above)
The "Wi-Fi Connected but no Internet access" issue may appear if the TCP/IP settings have improperly configured. To reset the TCP/IP settings:
1 . Open Command Prompt as Administrator . 2. At command prompt, type the following command and press Enter .
- netsh winsock reset
3. Then type the following command and press Enter .
- netsh int ip reset

4. Close the command prompt window and restart your computer. *
* Note: If after restart, you still haven't Internet access, do the following:
1. Follow the steps 1-3 from the method-3 above and open the Properties of your Wi-Fi Adapter . 2. At 'Wi-Fi Properties' window:
- Uncheck the Internet Protocol Version 6 (TCP/IPv6) checkbox.
- Then click to select the Internet Protocol Version 4 (TCP/IPv4) and click Properties

3. Here, make sure (as in the screenshot below) that the " Obtain IP address automatically " and " Obtain DNS server address automatically " options are checked, and that there are no numbers in any of the fields. (IP Address, Subnet Mask, Default Gateway & DNS Server).

4. When done, click OK twice and then check if the problem is fixed.
5. Select " Use the following DNS server addresses " and type the following Google DNS Server addresses:

6. Press OK (twice) to close network properties.
7. Restart you computer.
The error "Wireless is Connected but no Internet access" problem " can be caused by faulty network driver. So, proceed to uninstall the wireless adapter driver and then let the Windows to reinstall it automatically the next time you restart your system. To uninstall your Wi-Fi network driver, follow the steps below:
1. Navigate to Device Manager . To do that:
- Type devmgmt.msc and press Enter to open the device manager.
![image_thumb[22]](https://www.wintips.org/wp-content/uploads/2019/05/image_thumb22_thumb-2.png "image_thumb[22]")
2. In device manager, expand the Network adapters. 3. Right click on the Wireless adapter and choose Uninstall.

4. Mark the checkbox "Delete the driver software for this device" (if it appears) and click OK on the confirmation window.

5. Restart your PC. 6. After restart let Windows to reinstall the WiFi driver and then try to connect to Internet. *
* Note: If Windows doesn't install the drivers automatically, continue to next method.
1. Download the latest driver for the Wi-Fi adapter from manufacturer's support site. To download the driver, use one of the following options:
a. Connect your PC to Internet via the Ethernet Adapter (LAN Cable), or… b. Download the driver, from another working computer and use a USB drive to transfer the Wi-Fi driver on the PC with the Wi-Fi connection error.
2. If the driver, comes on an ".exe" file, then run it to install the driver, otherwise use the device manager to install the driver. To install the driver for Device Manager:
1. Navigate to Device Manager . 2. Right click on the Wireless adapter and choose Update Driver Software .

3. Choose Browse my computer for driver software.

4. Click Browse and choose the location (folder) of the downloaded driver.

5. If Windows can found an updated version of the driver, click Next to install it.

6. When the driver installation is completed. restart your computer.
That's it! Which method worked for you? Let me know if this guide has helped you by leaving your comment about your experience. Please like and share this guide to help others.
We're hiring
We're looking for part-time or full-time technical writers to join our team! It's about a remote position that qualified tech writers from anywhere in the world can apply. Click here for more details.
- Recent Posts

- How to Install Windows 11 in VMware Player. - July 1, 2024
- Change Date and Time is Greyed Out on Server 2016/2019/2022 (Solved) - June 26, 2024
- How to Disable Side Channel Mitigations in VMware Workstation Player. - June 24, 2024

Konstantinos Tsoukalas
Related posts.

Tutotial , Windows 11
How to Install Windows 11 in VMware Player.
")
How to , Tutotial , Windows
Change Date and Time is Greyed Out on Server 2016/2019/2022 (Solved)

How to , Tutotial , Windows , Windows 10 , Windows 11
How to Disable Side Channel Mitigations in VMware Workstation Player.
Leave a reply cancel reply.
Your email address will not be published. Required fields are marked *
This browser is no longer supported.
Upgrade to Microsoft Edge to take advantage of the latest features, security updates, and technical support.
Advanced troubleshooting wireless network connectivity
- 3 contributors
Try our Virtual Agent - It can help you quickly identify and fix common Wireless technology issues.
Home users: This article is intended for use by support agents and IT professionals. If you're looking for more general information about Wi-Fi problems in Windows 10, check out this Windows 10 Wi-Fi fix article .
Applies to: Windows 10
This overview describes the general troubleshooting of establishing Wi-Fi connections from Windows clients. Troubleshooting Wi-Fi connections requires understanding the basic flow of the Wi-Fi autoconnect state machine. Understanding this flow makes it easier to determine the starting point in a repro scenario in which a different behavior is found.
This workflow involves knowledge and use of TextAnalysisTool , an extensive text filtering tool that is useful with complex traces with numerous ETW providers such as wireless_dbg trace scenario.
This article applies to any scenario in which Wi-Fi connections fail to establish. The troubleshooter is developed with Windows 10 clients in focus, but also may be useful with traces as far back as Windows 7.
This troubleshooter uses examples that demonstrate a general strategy for navigating and interpreting wireless component Event Tracing for Windows (ETW). It's not meant to be representative of every wireless problem scenario.
Wireless ETW is incredibly verbose and calls out many innocuous errors (rather flagged behaviors that have little or nothing to do with the problem scenario). Searching for or filtering on "err", "error", and "fail" will seldom lead you to the root cause of a problematic Wi-Fi scenario. Instead it will flood the screen with meaningless logs that will obfuscate the context of the actual problem.
It's important to understand the different Wi-Fi components involved, their expected behaviors, and how the problem scenario deviates from those expected behaviors. The intention of this troubleshooter is to show how to find a starting point in the verbosity of wireless_dbg ETW and home in on the responsible components that are causing the connection problem.
Known issues and fixes
| OS version | Fixed in |
|---|---|
| Windows 10, version 1803 | |
| Windows 10, version 1709 | |
| Windows 10, version 1703 |
Make sure that you install the latest Windows updates, cumulative updates, and rollup updates. To verify the update status, refer to the appropriate update-history webpage for your system:
- Windows 10 version 1809
- Windows 10 version 1803
- Windows 10 version 1709
- Windows 10 version 1703
- Windows 10 version 1607 and Windows Server 2016
- Windows 10 version 1511
- Windows 8.1 and Windows Server 2012 R2
- Windows Server 2012
- Windows 7 SP1 and Windows Server 2008 R2 SP1
Data collection
Network Capture with ETW. Enter the following command at an elevated command prompt:
Reproduce the issue.
- If there's a failure to establish connection, try to manually connect.
- If it's intermittent but easily reproducible, try to manually connect until it fails. Record the time of each connection attempt, and whether it was a success or failure.
- If the issue is intermittent but rare, netsh trace stop command needs to be triggered automatically (or at least alerted to admin quickly) to ensure trace doesn't overwrite the repro data.
- If intermittent connection drops trigger stop command on a script (ping or test network constantly until fail, then netsh trace stop).
Stop the trace by entering the following command:
To convert the output file to text format:
See the example ETW capture at the bottom of this article for an example of the command output. After running these commands, you'll have three files: wireless.cab, wireless.etl, and wireless.txt.
Troubleshooting
The following view is a high-level one of the main wifi components in Windows.
| Wi-fi Components | Description |
|---|---|
| The Windows Connection Manager (Wcmsvc) is closely associated with the UI controls (taskbar icon) to connect to various networks, including wireless networks. It accepts and processes input from the user and feeds it to the core wireless service. | |
| The WLAN Autoconfig Service (WlanSvc) handles the following core functions of wireless networks in windows: | |
| The Media Specific Module (MSM) handles security aspects of connection being established. | |
| The Native WiFi stack consists of drivers and wireless APIs to interact with wireless miniports and the supporting user-mode Wlansvc. | |
| Third-party wireless miniport drivers interface with the upper wireless stack to provide notifications to and receive commands from Windows. |
The wifi connection state machine has the following states:
- Ihv_Configuring
- Configuring
- Associating
- Authenticating
- Wait_For_Disconnected
- Disconnected
Standard wifi connections tend to transition between states such as:
Reset --> Ihv_Configuring --> Configuring --> Associating --> Authenticating --> Connected
Disconnecting
Connected --> Roaming --> Wait_For_Disconnected --> Disconnected --> Reset
Filtering the ETW trace with the TextAnalysisTool (TAT) is an easy first step to determine where a failed connection setup is breaking down. A useful wifi filter file is included at the bottom of this article.
Use the FSM transition trace filter to see the connection state machine. You can see an example of this filter applied in the TAT at the bottom of this page.
An example of a good connection setup is:
An example of a failed connection setup is:
By identifying the state at which the connection fails, one can focus more specifically in the trace on logs prior to the last known good state
Examining [Microsoft-Windows-WLAN-AutoConfig] logs prior to the bad state change should show evidence of error. Often, however, the error is propagated up through other wireless components. In many cases the next component of interest will be the MSM, which lies just below Wlansvc.
The important components of the MSM include:
Security Manager (SecMgr) - handles all pre and post-connection security operations.
Authentication Engine (AuthMgr) – Manages 802.1x auth requests

Each of these components has its own individual state machines that follow specific transitions. Enable the FSM transition , SecMgr Transition , and AuthMgr Transition filters in TextAnalysisTool for more detail.
Further to the preceding example, the combined filters look like the following command example:
In the next to last line the SecMgr transition is suddenly deactivating: [2] 0C34.2FF0::08/28/17-13:24:29.7512788 [Microsoft-Windows-WLAN-AutoConfig]Port[13] Peer 8A:15:14:B6:25:10 SecMgr Transition DEACTIVATE (11) --> INACTIVE (1) This transition is what eventually propagates to the main connection state machine and causes the Authenticating phase to devolve to Roaming state. As before, it makes sense to focus on tracing prior to this SecMgr behavior to determine the reason for the deactivation.
Enabling the Microsoft-Windows-WLAN-AutoConfig filter will show more detail leading to the DEACTIVATE transition:
The trail backwards reveals a Port Down notification:
[0] 0EF8.1174:: 08/28/17-13:24:29.705 [Microsoft-Windows-WLAN-AutoConfig]Received IHV PORT DOWN, peer 0x186472F64FD2
Port events indicate changes closer to the wireless hardware. The trail can be followed by continuing to see the origin of this indication.
Below, the MSM is the native wifi stack. These drivers are Windows native wifi drivers that talk to the wifi miniport drivers. It's responsible for converting Wi-Fi (802.11) packets to 802.3 (Ethernet) so that TCPIP and other protocols and can use it.
Enable trace filter for [Microsoft-Windows-NWifi] :
In the trace above, we see the line:
This line is followed by PHY_STATE_CHANGE and PORT_DOWN events due to a disassociate coming from the Access Point (AP), as an indication to deny the connection. This denail could be due to invalid credentials, connection parameters, loss of signal/roaming, and various other reasons for aborting a connection. The action here would be to examine the reason for the disassociate sent from the indicated AP MAC (8A:15:14:B6:25:10). This action would be done by examining internal logging/tracing from the AP.
More information
- 802.11 Wireless Tools and Settings
- Understanding 802.1X authentication for wireless networks
Example ETW capture
Wifi filter file.
Copy and paste all the lines below and save them into a text file named wifi.tat . Load the filter file into the TextAnalysisTool by selecting File > Load Filters .
TextAnalysisTool example
In the following example, the View settings are configured to Show Only Filtered Lines .

Was this page helpful?
Coming soon: Throughout 2024 we will be phasing out GitHub Issues as the feedback mechanism for content and replacing it with a new feedback system. For more information see: https://aka.ms/ContentUserFeedback .
Submit and view feedback for
Additional resources
How To Fix WiFi Not Working in Windows 10/8/7

Is your WiFi not working on your Windows 10, 11 PC? Are you again facing connectivity issues with your WiFi network? Is this a recurrent problem for your Windows PC?
Well, if so then don’t worry as we have got you covered with a blog on how to fix the WiFi connection and troubleshoot the probable issues on your own.
WiFi is the most feasible option to obtain access to the internet on all devices simultaneously. Though, WiFi offers plenty of benefits, yet it is not free from issues and errors. Windows users frequently come across WiFi not working issues.
Thus, in this guide we bring forth several reasons which cause WiFi connectivity issues and various hacks as well as troubleshooting methods to fix those issues.
Universal Solution: To Fix WiFi Connection Problems
We have below mentioned all the methods to troubleshoot and fix the most common WiFi issues on Windows 10, 11 PCs. However, if you’re running short on time and just want to know the fastest and safest way to fix Wi-Fi network and internet issues , you may consider using Bit Driver Updater . This program automatically updates all the worn out and outdated device drivers and helps re-establish a connection between your computer and WiFi in just a few clicks.
To fix PC issues related to WiFi network connectivity, click the button below!

Why is Your WiFi Not Working?
Do you wonder why your WiFi is not working? There could be endless reasons as to why your Windows 10, 11 WiFi is not working properly? Let’s take a look at the most common ones:
Device Related Error: It could be that your router or smart device is having some technical glitch which is causing the WiFi to not function correctly.
Network Related Error: If you are able to connect to public WiFi but not to your own home WiFi, then it indicates that the problem lies in your WiFI network.
Internet Related Error: Visit several websites to ensure that it is not a limitation of a particular site which is having geo-restrictions or is a slow loading site by default, then it indicates that the internet speed is slow.
Other Issues:
- It could be due to the physical distance from the router which is reducing the signal strength.
- If the OS of the system is not updated and the hardware is outdated too.
Top 7 Methods to Fix the WiFi Connection Problem in Windows 10, 11:
Here are the topmost advanced solutions that can fix the WiFi connectivity error quickly. Before we go deeper into the steps of the advanced solutions, it is important to try a few quick hacks to see if that can settle the problem.
Method 1: Quick Fixes and Hacks to Try First
A. find out if the wifi is switched off:.
- Going to Settings > Network & Internet > WiFi
- Under “Manage known networks,” click on it to make Windows “Forget” the network and then establish a fresh connection again.

B. Find Out If the Airplane Mode is Turned Off
- Go to the Action Centre of your Windows 10 PC and click expand.
- If the Airplane mode appears to be grayed out, then it is turned off, otherwise the indicator color is blue. If it is not turned off, then click on it to turn it off.

C. Check If The Wireless Router is Functioning Properly
- To ensure this, you can connect the WiFi to other devices and see if it is not functioning there as well.
- Try switching your WiFI router “off” and “on” again.
- Also, ensure that the optical fibre connection (if it’s a wired router) and power connection cables are attached properly to the router.
D. Check If The Internet Connection is Fine
- To do this, you can contact your Internet Service Provider/WIFi Service Provider and see if there is some issue with it.
Now let us proceed to understand the advanced techniques of troubleshooting WiFi not working in Windows 10, 11 PC.
Read Also: Best WiFi Hacking Apps For Android 2020
Method 2: Reboot the Network
When you boot your network again, you can establish a new connection to your ISP (Internet Service Provider) . Here’s how to do it to resolve the Windows 10, 11 WiFi not working issue.
- Turn off your system.
- Remove the modem from the power source for a minute.
- Plug in the network devices once more.
- Let the indicator lights restore back to the normal state.
- Reboot your system and then connect it to your WiFi network.
Method 3: Use the Network Troubleshooter
Being an in-built tool of your Windows 10 system, the network troubleshooter may help to fix the WiFi connection error and resolve network issues.
- Search for the network troubleshooter in the search box of the Windows Start menu.
- Further, choose the Identify and repair network problems option from the appearing list to run the network troubleshooter.

- Let the network troubleshooter complete the scanning procedure.
- Then, follow the on-screen instructions to troubleshoot the detected issue completely.
Finally, connect to the WiFi network and begin working hassle-free again. However, if you see that the problem persists then, try changing the network settings as described in the below method.
Read Also: How To Take a Screenshot on Windows HP Laptop?
Method 4: Reset the Network Settings
With command prompt:.
Reset the network connection settings to see if the WiFi not functioning in Windows 10, 11 error can be fixed this way.
- Open the Command Prompt by typing “cmd” in the search box of the Start menu.

- After that, select to run it as an administrator and authorize permission by clicking “Yes” in the subsequent prompt.
- Write the following commands in the below given order followed by pressing Enter after each one.
- netsh winsock reset
- netsh int ip reset
- ipconfig /release
- ipconfig /renew
- ipconfig /flushdns
Now verify if your WiFi is working fine as before or not. If not, then try the next fix.
Alternative Method:
Resetting the network settings is rather a simple and easy process to get rid of the WiFi not working error. All it does is uninstall and then reinstall your device’s network drivers to remove any issues.
- Go to the Windows Settings app.
- Then, navigate to the Network & Internet section.
- Finally, hit the “Network reset” button to begin the process.

Method 5: Reboot the Wireless NIC in BIOS
Although a complicated method for laymen, yet this method is worth trying to resolve the problem of WiFi not working on the Windows 10, 11 PC. You may take a note that the option to restart the wireless NIC in BIOS may differ from system to system as it depends on the motherboard manufacturer.
You can press either the Del, F8, F10, or F12 keys (subject to change from system to system) to enter the BIOS (basic input/output system) when your system is booting.
After you have entered the BIOS, then search for a menu known as “Power Management.” There should be an option under this called Wireless, Wireless LAN, or something similar to this.
You can now disable this option and restart your system. Repeat the above steps to enter the BIOS again to re-enable the option. This should sort the WiFi connectivity error.
Read More: How To Fix Discord Mic Not Working Issue?
Method 6: Update the Network Driver Adapter
If all the above methods seemed ineffective, then there might be a problem with your network driver adapter . If so, then it will be flagged in the Device Manager with a yellow exclamation mark.
So, the best way to address this issue is by updating the network driver adapter automatically . We recommend the automatic way of updating the network driver adapters because the process is conducted over by a tool, hence it is capable of updating the system drivers with the correct and genuine drivers and saves you from manual errors of installing the wrong programs.
If you are having no clue regarding a good driver updater software , then we suggest using the Bit Driver Updater tool by Bit Guardian GmbH. This tool is the ultimate driver update software when it comes to updating the system drivers of your Windows 10, 11 PC. This tool is enabled with the following features:
- It can completely analyze your system to detect faulty drivers.
- It can backup all your existing drivers and help restore them later.
- It can immensely boost your system performance.
- Offers a one click update feature.

Here is a quick guide to install the correct device drivers with this tool:
- Install the Bit Driver Updater tool by clicking the above link.
- Then, using the feature of “Scan” detect the faulty and damaged device drivers.
- It will retrieve a list of all drivers that are not functioning properly or are not in the correct state.
- Find out the result related to the network driver adapter and click the “Update” button adjacent to it.
- This will prompt the tool to download and install the latest version of the network driver adapter program.
- Restart your computer afterwards and connect to the WiFi network.
Method 7: Use Ethernet Cable and Contact Support
If none of the above fixes work to help you with the Wifi not working problem on Windows PC, then you should try using an ethernet cable instead. This will allow you to understand if the problem is with your router or the ISP. If you see that the network is still not working well, then you should try contacting the support services of the internet service provider.
Solved: Wi-Fi Isn’t Working and Connectivity Errors
So, friends this was all about WiFi connection errors that Windows 10, 11 users face frequently while using WiFi for their day-to-day needs. WiFi is an indispensable part of our lives nowadays and if the WiFi stops working in our Windows 10 system, then it can cause a great impact on a great many things.
Therefore, hopefully with our recommended solutions you were able to re-establish connectivity between your Windows PC system and WiFi. If the issue is not related to some system software or the router, then the aforementioned fixes should definitely come handy for you.
Keep tuning in to our blog site for more articles and information on various technical complications and the techniques by which they can be best resolved.

Leave a Response Cancel reply
Sign me up for the newsletter!
Subscribe to Our Newsletter and stay informed
Don't worry we don't spam
Related Posts

Packard Bell Drivers Download & Updates in Windows 11, 10

How to Open Control Panel Windows 11/10

27 Best Game Boosters and Optimizers for Windows PC in 2024: Free and Paid
How To Fix WiFi Limited Access Problem In Windows 10 / 11
How To Fix WiFi Limited Access Problem In Windows 10 and windows 11:- One of the most frustrating problems regarding Internet is the Limited Access to WiFi Network problem. Why wait for it to solve by itself when we have got the top three solutions stacked up right here for you? Read on, to solve the Limited Access to WiFi Network problem using any one of these three simple methods.
Table of Contents
Method 1 – Restart WiFi adapter
1- Search Device manager in Taskbar search box. Now, click on Device manager to open it
2 – Now, Expand Network adapters
3 – Right click on your wireless adapter and choose disable .
4 -Now, wait for few seconds , after that again , do a right click and choose enable again.

5 – Now, Right click again and then click Enable device.

Method 2 : By Changing Wireless Adapter Power Settings
The first method using which you can solve the limited access to WiFi network problem is by changing the wireless adapter power settings. Follow the steps given below to achieve the same. STEP 1 – Search edit power plan in windows search box.
Step 2 – Now, Click on edit power plan .
Step 3 – Now, click on Change advanced power settings .
- Now you get to see the advanced power options. Scroll down and find the entry named Wireless Adapter Settings to expand it. As next, expand the Power Saving Mode entry.
- For both On battery and Plugged in options, choose the option Maximum Performance from the drop down One By One .
Method 3 – By Resetting the IP Address Using CMD
If both the above listed solutions could not solve your problem, let’s get to the next one. In this one, we are going to change the IP address using the Command prompt .
STEP 1 – First of all, open Command Prompt in the administrator mode. For that, start typing cmd into the search box and when the Command Prompt appears in the search results, right click on it and then click on the Run as administrator option.
STEP 2 – When the Command Prompt with admin rights , when it opens up, type in or copy paste the following command and then hit Enter. That’s it.
If it does not work then type the command given below
Then reboot the PC. If still it does not work then type the 4 commands given below
One of these solutions is sure to solve your problem of limited access to WiFi network. In case you find none of these solutions as working, let us know by leaving comments. We would be happy to help.
Method 4 – By Changing Power Management Option
1. Search Device Manager in Windows Taskbar Search.
2. Click on the Device manager to Open Device manager.
3. Now, Click on Network Adpter to expand the list.
4. Double Click on the WiFi Driver which you are using.
5. Click on Power Management Tab.
6. Now, Uncheck The option saying “ Allow the computer to turn off this device to save power”.
7. Choose OK and Exit.
Method 5 – Disable Auto tuning feature
STEP 1 – Type cmd into the search box and when the Command Prompt appears in the search results, right click on it and then click on the Run as administrator option.
Step 2 -Now, run the commands given below One by One and hit enter each time to execute those commands.
Now, close the cmd window
Method 6 – Change DNS
1 – Open RUN by pressing Windows and R keys.
2 -Now, type ncpa.cpl in the text field given inside the run command box and then click Ok .
3 – Now, Right click on your wireless adapter and select properties .
4 – Now, Double click on Internet Protocol version 4 (TCP/IPV4)
5 – Click on Use the following DNS server addresses :
Preferred DNS server: 8.8.8.8
Alternate DNS server: 8.8.4.4
6 – Click OK .
Method 7 – Switch to a manual IP in Wireless adapter
1 – Search cmd in search box and then right click and click run as admin.
2 – Run IPCONFIG in the command prompt.
3 – Keep the cmd window open and just keep a note of Wirteless connection IP details.
4 – After this, Open RUN command box by hitting Windows and R keys from the keyboard.
2 -Now, Write ncpa.cpl in the text box given inside the run box and then press Ok .
3 – After this , Right click on your wireless adapter and select properties .
5 – Now, select the radio button saying , Use the following IP address and Enter all the IP details you got in command prompt window by using ipconfig command.
6 – Also Click on Use the following DNS server addresses : and enter the DNS values as shown below in both the fields.
7 -Click OK and Apply
Method 8 – By the Reinstallation of WiFi Driver
1. Press the Windows key from your keyboard and type “ Device Manager ” in the search box.
2. Then, just click on the “ Device Manager ” when it appears in the elevated search result.
2. In the Device Manager utility window, expand the “ Network Adapter ” section.
3. Right-click on the WiFi driver you are using, click on “ Uninstall device “.
This will uninstall the driver.
4- Now, restart computer
Method 9 – By Updating Driver
4. Right Click on the WiFi Driver which you are using and Choose update .
5 – Now, Click on search automatically for drivers .
Let it update automatically.
Method 10 – Rolling back the Wireless Driver
1. Type Device Manager in Windows Search box.
2. After this, Click on the Device manager
3. Now,double Click on Network Adpter to expand it.
4. Do a Right Click on the WiFi Driver and Choose Properties .
5 – Now, click on Driver Tab.
6 – Finally, click on Roll back driver.
Now, trya gain again and finally check whether your issue gets resolved or not.
- Fix: There Might A Problem With The Driver for the…
- Fix : Discord You Are Being Rate Limited Error on…
- Display connection might be limited issue in Windows…
- Fix - Sorry, there was a problem mounting the file…
- Fix: Error 1079 Windows Services Fail to Start…
- Fix - Error code 0x80070043 (Windows cannot Access)…
1 thought on “How To Fix WiFi Limited Access Problem In Windows 10 / 11”
all this processes doesn’t work for me
Comments are closed.
Success! Subscription added.
Success! Subscription removed.
Sorry, you must verify to complete this action. Please click the verification link in your email. You may re-send via your profile .
- Intel Community
- Product Support Forums
Wifi driver AX201 not working
- Subscribe to RSS Feed
- Mark Topic as New
- Mark Topic as Read
- Float this Topic for Current User
- Printer Friendly Page

- Mark as New
- Report Inappropriate Content

View solution in original post
- All forum topics
- Previous topic
Link Copied
- « Previous
- Next »

Community support is provided during standard business hours (Monday to Friday 7AM - 5PM PST). Other contact methods are available here .
Intel does not verify all solutions, including but not limited to any file transfers that may appear in this community. Accordingly, Intel disclaims all express and implied warranties, including without limitation, the implied warranties of merchantability, fitness for a particular purpose, and non-infringement, as well as any warranty arising from course of performance, course of dealing, or usage in trade.
For more complete information about compiler optimizations, see our Optimization Notice .
- ©Intel Corporation
- Terms of Use
- *Trademarks
- Supply Chain Transparency
Windows 11/10 Problems, Issues with solutions and fixes
Windows 11/10 problems and issues, 1] windows installation may terminate with something happened message.
In short, performing an in-place upgrade is a better option than going for ISO files of Windows as of now.
2] Start menu cannot hold more than 512 items
3] clipboard issues in windows, 4] microsoft store crashes, 5] wireless networks are not available, 6] start menu or taskbar is not working, 7] windows store apps are not opening, 8] microsoft store is not opening, 9] windows settings app does not open, 10] nvidia graphic cards not compatible, 11] inaccessible_boot_device error, 12] office documents do not open, 13] installation, upgrade & activation problems, 14] windows can’t connect to internet, 15] quick access is not working, 16] windows sound not working, arunkumar@twc.
- Windows 11 vs Windows 10
- Split Screen in Windows 11
- Windows 11 Requirements
- Get Windows 11 for Free
- Screenshot on Windows 11
- Uninstall Windows 11
- Android Apps on Windows 11
What to do if the Wi-Fi option isn’t showing in Windows 11
A missing Wi-Fi icon can make getting online a bit tricky. If your PC or laptop definitely has a Wi-Fi receiver connected, or has built-in Wi-Fi and it's not giving you the option of turning it on, you've got a Wi-Fi problem we'll need to fix. There are a few different causes for this problem, so there are a few potential fixes, too.
Reboot your PC
Run the internet troubleshooter, enable the wi-fi adapter manually, update your wi-fi drivers, adjust your network adapter power settings, run windows update, revert to a system restore point.
Here's how to fix your missing Wi-Fi icon so you can get back online.
What You Need
Desktop PC or laptop
Before you do anything else, just try rebooting your PC. Your Wi-Fi icon may have been switched off or disabled by something, and instead of digging through a range of options to fix it, let's try a quick reboot first. It can often fix problems like this and save you a lot of time and energy.
If that doesn't work, try one of these fixes below.
Windows 11 has its own built-in Internet Connection troubleshooter, so whenever you hit a snag with your network or internet connectivity, it's a great place to start in trying to fix it.
Step 1: Search for "Troubleshoot" in the Windows search bar, and select Troubleshoot settings from the list of results.
Step 2: Select Other troubleshooters .
Step 3: Next to Internet Connections select Run and follow the on-screen instructions.
It's possible that for some odd reason, your network adapter for Wi-Fi has been disabled. Let's re-enable it.
Step 1: Use Windows search to look for Network connections. Select View network connections from the results.
Step 2: If your Wi-Fi adapter is disabled, right-click it and select Enable . Give admin approval if it's requested.
If your Wi-Fi drivers are out of date, or the drivers have become corrupted, that can cause you to lose your Wi-Fi connection. Here's how to update them.
Step 1: Use Windows search to look for Device manager and select the corresponding result.
Step 2: Select the arrow next to Network Adapters to expand the list.
Step 3: Find your main Wi-Fi adapter. In my case it's the Intel Wi-Fi 6E AX210 adapter. Right-click it and select Update driver .
Step 4: Select Search automatically for drivers and follow the on-screen prompts.
Step 5: If Windows doesn't find any new network drivers for your device or motherboard, you can also check the manufacturer website to see if they have released a new network driver. You'll then need to install that manually like you would any other software.
Step 6: Additionally, if updating the driver doesn't work, you can try uninstalling it and reinstalling it manually. To do so, right-click on the Wi-Fi adapter in Device Manager, and select Uninstall device . Then reboot, and once you're back in Windows, reinstall your network driver from the manufacturer's website.
Windows has a number of built-in ways to help you save power to make your PC or laptop more efficient and improve battery life. That can mean turning off your network adapter during certain sleep states, and if they don't come back on, that can cause your Wi-Fi icon to go missing. Here's how to make sure that doesn't happen.
Step 3: Find your main Wi-Fi adapter. Right-click it and select Properties .
Step 4: Select the Power management tab at the top, then ensure that "Allow the computer to turn off this device to save power" is not checked. If it is, uncheck the box by selecting it. Then select OK . If necessary, reboot your PC.
It might seem a bit flippant, but running Windows update can sometimes fix network issues. You'll need an Ethernet port or adapter and cable, but if you can plug them into your PC or laptop, try running Windows update to see if it fixes the issue.
Step 1: Search for "Windows update," and select the corresponding result. Then on the updates page, select the Check for updates button.
Step 2: Install any new major updates and reboot your PC if necessary.
Step 3: Additionally, you could check if there are any extra updates related to networking that are worth doing. On the Windows Update page, select Advanced options followed by Optional updates .
Then select Driver updates and install any relevant updates there.
If you still can't get the Wi-Fi icon back, it might be time to use a system restore. This can roll back your PC or laptop to a time where the Wi-Fi icon wasn't missing. You can do so by searching for System restore and selecting the corresponding result.
For more details, check out our guide on how to use system restore .
Editors’ Recommendations
- What to do when your Windows 11 laptop is plugged in but not charging
- Surprise: Windows 11 is doing much better than we thought
- Can’t get the Windows 11 22H2 update? There could be a good reason why
- Your Phone in Windows 11 now shows recent apps
- What are the requirements to run Windows 11?
- How-To Guides
- Microsoft Windows
- Windows Guides

It's been about four months since Windows 11 first launched, and Microsoft is now talking about what's next for its new operating system.
As many rumors suggested, arriving this year are features like Android Apps, taskbar improvements, and redesigned core applications. Yet in detailing those new features for Windows 11, Microsoft also talked about some trends in the Windows space regarding hybrid work and learning, entertainment, and other consumer habits for everyday tasks.
With more people working, studying, gaming, and streaming from home today, it’s important to have fast, reliable Wi-Fi coverage at home. Regardless of the size of your home, a whole-home mesh Wi-Fi system is one of the best solutions to blanket your house with Wi-Fi.
Unlike a standard router, which broadcasts a Wi-Fi signal over a finite area, mesh networks are able to spread the signal to cover a large home or office. Also known as a whole-home Wi-Fi system, mesh networks came into popularity in 2014 with the launch of the original Eero. Though the idea of a mesh network has been around long before that and was widely used in office and public networks, its entry into the home in the mid-2010s radically changed Wi-Fi for consumers.
Every year, damn near everyone in my family drives out to rural Oregon and piles into my mom's house for the holidays. It's ridiculous. Suddenly, the number of occupants in the house balloons from just two people to well over a dozen -- and every year, mom's Wi-Fi just can't handle all the extra network traffic.
Or at least it couldn't. Things are different this year. I got tired of dealing with glitchy video calls, dial-up-speed page loads, and Netflix movies that would pause to buffer every 15 seconds -- so I made some small adjustments to her network setup. Thanks to those little tweaks, I'm proud to report that my mom's snail-like rural broadband connection can now comfortably handle a house full of web users -- and yours can, too.
Windows 11, version 23H2
June 25, 2024—kb5039302 (os builds 22621.3810 and 22631.3810) preview.
- June 11, 2024—KB5039212 (OS Builds 22621.3737 and 22631.3737)
- May 29, 2024—KB5037853 (OS Builds 22621.3672 and 22631.3672) Preview
- May 14, 2024—KB5037771 (OS Builds 22621.3593 and 22631.3593)
- April 23, 2024—KB5036980 (OS Builds 22621.3527 and 22631.3527) Preview
- April 9, 2024—KB5036893 (OS Builds 22621.3447 and 22631.3447)
- March 26, 2024—KB5035942 (OS Builds 22621.3374 and 22631.3374) Preview
- March 12, 2024—KB5035853 (OS Builds 22621.3296 and 22631.3296)
- February 29, 2024—KB5034848 (OS Builds 22621.3235 and 22631.3235) Preview
- February 13, 2024—KB5034765 (OS Builds 22621.3155 and 22631.3155)
- January 23, 2024—KB5034204 (OS Builds 22621.3085 and 22631.3085) Preview
- January 9, 2024—KB5034123 (OS Builds 22621.3007 and 22631.3007)
- December 12, 2023—KB5033375 (OS Builds 22621.2861 and 22631.2861)
- December 4, 2023—KB5032288 (OS Builds 22621.2792 and 22631.2792) Preview
- November 14, 2023—KB5032190 (OS Builds 22621.2715 and 22631.2715)
- October 31, 2023—KB5031455 (OS Builds 22621.2506 and 22631.2506) Preview
Windows 11, version 22H2
- October 10, 2023—KB5031354 (OS Build 22621.2428)
- September 26, 2023—KB5030310 (OS Build 22621.2361) Preview
- September 12, 2023—KB5030219 (OS Build 22621.2283)
- August 22, 2023—KB5029351 (OS Build 22621.2215) Preview
- August 8, 2023—KB5029263 (OS Build 22621.2134)
- July 26, 2023—KB5028254 (OS Build 22621.2070) Preview
- July 11, 2023—KB5028185 (OS Build 22621.1992)
- June 27, 2023—KB5027303 (OS Build 22621.1928) Preview
- June 13, 2023—KB5027231 (OS Build 22621.1848)
- May 24, 2023—KB5026446 (OS Build 22621.1778) Preview
- May 9, 2023—KB5026372 (OS Build 22621.1702)
- April 25, 2023—KB5025305 (OS Build 22621.1635) Preview
- April 11, 2023—KB5025239 (OS Build 22621.1555)
- March 28, 2023—KB5023778 (OS Build 22621.1485) Preview
- March 14, 2023—KB5023706 (OS Build 22621.1413)
- February 28, 2023—KB5022913 (OS Build 22621.1344) Preview
- February 14, 2023—KB5022845 (OS Build 22621.1265)
- January 26, 2023—KB5022360 (OS Build 22621.1194) Preview
- January 10, 2023—KB5022303 (OS Build 22621.1105)
- December 13, 2022—KB5021255 (OS Build 22621.963)
- November 29, 2022—KB5020044 (OS Build 22621.900) Preview
- November 8, 2022—KB5019980 (OS Build 22621.819)
- October 25, 2022—KB5018496 (OS Build 22621.755) Preview
- October 18, 2022—KB5019509 (OS Build 22621.675) Out-of-band
- October 11, 2022—KB5018427 (OS Build 22621.674)
- September 30, 2022—KB5017389 (OS Build 22621.608) Preview
- Windows 11, version 21H2
- June 11, 2024—KB5039213 (OS Build 22000.3019)
- May 14, 2024—KB5037770 (OS Build 22000.2960)
- April 9, 2024—KB5036894 (OS Build 22000.2899)
- March 12, 2024—KB5035854 (OS Build 22000.2836)
- February 13, 2024—KB5034766 (OS Build 22000.2777)
- January 9, 2024—KB5034121 (OS Build 22000.2713)
- December 12, 2023—KB5033369 (OS Build 22000.2652)
- November 14, 2023—KB5032192 (OS Build 22000.2600)
- October 10, 2023—KB5031358 (OS Build 22000.2538)
- September 26, 2023—KB5030301 (OS Build 22000.2482) Preview
- September 12, 2023—KB5030217 (OS Build 22000.2416)
- August 22, 2023—KB5029332 (OS Build 22000.2360) Preview
- August 8, 2023—KB5029253 (OS Build 22000.2295)
- July 25, 2023—KB5028245 (OS Build 22000.2245) Preview
- July 11, 2023—KB5028182 (OS Build 22000.2176)
- June 28, 2023—KB5027292 (OS Build 22000.2124) Preview
- June 13, 2023—KB5027223 (OS Build 22000.2057)
- May 23, 2023—KB5026436 (OS Build 22000.2003) Preview
- May 9, 2023—KB5026368 (OS Build 22000.1936)
- April 25, 2023—KB5025298 (OS Build 22000.1880) Preview
- April 11, 2023—KB5025224 (OS Build 22000.1817)
- March 28, 2023—KB5023774 (OS Build 22000.1761) Preview
- March 14, 2023—KB5023698 (OS Build 22000.1696)
- February 21, 2023—KB5022905 (OS Build 22000.1641) Preview
- February 14, 2023—KB5022836 (OS Build 22000.1574)
- January 19, 2023—KB5019274 (OS Build 22000.1516) Preview
- January 10, 2023—KB5022287 (OS Build 22000.1455)
- December 13, 2022—KB5021234 (OS Build 22000.1335)
- November 15, 2022—KB5019157 (OS Build 22000.1281) Preview
- November 8, 2022—KB5019961 (OS Build 22000.1219)
- October 25, 2022—KB5018483 (OS Build 22000.1165) Preview
- October 17, 2022—KB5020387 (OS Build 22000.1100) Out-of-band
- October 11, 2022—KB5018418 (OS Build 22000.1098)
- September 20, 2022—KB5017383 (OS Build 22000.1042) Preview
- September 13, 2022—KB5017328 (OS Build 22000.978)
- August 25, 2022—KB5016691 (OS Build 22000.918) Preview
- August 9, 2022—KB5016629 (OS Build 22000.856)
- July 21, 2022—KB5015882 (OS Build 22000.832) Preview
- July 12, 2022—KB5015814 (OS Build 22000.795)
- June 23, 2022—KB5014668 (OS Build 22000.778) Preview
- June 20, 2022—KB5016138 (OS Build 22000.740) Out-of-band
- June 14, 2022—KB5014697 (OS Build 22000.739)
- May 24, 2022—KB5014019 (OS Build 22000.708) Preview
- May 10, 2022—KB5013943 (OS Build 22000.675)
- April 25, 2022—KB5012643 (OS Build 22000.652) Preview
- April 12, 2022—KB5012592 (OS Build 22000.613)
- March 28, 2022—KB5011563 (OS Build 22000.593) Preview
- March 8, 2022—KB5011493 (OS Build 22000.556)
- February 15, 2022—KB5010414 (OS Build 22000.527) Preview
- February 8, 2022—KB5010386 (OS Build 22000.493)
- January 25, 2022—KB5008353 (OS Build 22000.469) Preview
- January 17, 2022—KB5010795 (OS Build 22000.438) Out-of-band
- January 11, 2022—KB5009566 (OS Build 22000.434)
- December 14, 2021—KB5008215 (OS Build 22000.376)
- November 22, 2021—KB5007262 (OS Build 22000.348) Preview
- November 9, 2021—KB5007215 (OS Build 22000.318)
- October 21, 2021—KB5006746 (OS Build 22000.282) Preview
- October 12, 2021—KB5006674 (OS Build 22000.258)

Release Date:
OS Builds 22621.3810 and 22631.3810
For information about Windows update terminology, see the article about the types of Windows updates and the monthly quality update types . For an overview of Windows 11, version 23H2, see its update history page .
Note Follow @WindowsUpdate to find out when new content is published to the Windows release health dashboard.
Gradual rollout
These might not be available to all users because they will roll out gradually.
New! This update adds a new Game Pass recommendation card on the Settings home page. This home page shows on Home and Pro editions when you sign in to Windows using your Microsoft account. The card appears if you actively play games on your PC.
New! The show desktop button is on the taskbar again by default. To change this, right-click the taskbar and choose Taskbar settings . At the lower part of the page, you will find Taskbar behaviors .
New! This update affects File Explorer. You can now create 7-Zip and Tape Archive (TAR) files using the context menu. When you right-click a file, a Compress to item gives you ways to compress a file using tools like gzip, bzip2, and more. There is also a new compression wizard in Additional options . It will help you choose more formats and add details. You can use different types of compression to add many files to archives in other TAR formats. You can also change the compression level and choose the types of data to store in each archive.
New! This update adds support for Emoji 15.1 . Windows supports Unicode symbol-like shapes for family groupings. But Windows will keep using people for them. Also, you can choose the right or left facing direction for some people emoji. The new emoji are:
Horizontal and vertical head shake
Brown mushroom
Broken chain
New! You can now copy files from the Windows Share window. Just click the new Copy button.
New! This update starts the rollout of the new account manager on the Start menu. When you use a Microsoft account to sign in to Windows, you will get a glance at your account benefits. This feature also makes it easy to manage your account settings.
New! This update makes it easier to see when you have selected files or folders in File Explorer. Because of this change, a thin, black border now appears around the item you have selected.
New! We are advancing the Copilot experience on Windows. The Copilot app is now pinned to the taskbar and behaves like an app. This gives you the benefits of a typical app experience. For example, you can resize, move, and snap the window. For existing Windows 11 PCs, the timing of availability and delivery method will vary. This might not be available to all users because it will roll out gradually.
Important This feature only applies to new Windows 11 PCs and new Copilot+ PCs that ship to the European Economic Area (EEA) and other markets where Copilot is available.
This update addresses an issue that affects the touch keyboard. You cannot use it to enter special characters. This occurs when you use the Japanese 106 keyboard.
Normal rollout
This update addresses an issue that affects Snipping Tool. When you use it to record videos on some PCs, the audio has distortions.
This update addresses an issue that affects USB devices. Ejecting them using the Safely Remove Hardware option fails. This occurs when Task Manager is open.
Improvements
Note: To view the list of addressed issues, click or tap the OS name to expand the collapsible section.
Important: Use EKB KB5027397 to update to Windows 11, version 23H2.
This non-security update includes quality improvements. Key changes include:
This build includes all the improvements in Windows 11, version 22H2.
No additional issues are documented for this release.
This non-security update includes quality improvements.
Gradual rollout
New! You can now use OneDrive as a RemoteApp in Azure Virtual Desktop.
This update changes the units for DDR speed from MHz to MT/s.
This update affects process handles. Task Manager releases them more quickly when it stops a process.
This update makes Task Manager more reliable.
This update affects the sort order of processes in Task Manager. Performance is better when you change the order.
This update makes Task Manager more accessible by improving:
Keyboard focus
Tab key navigation
Text scaling
The readout of item names by screen readers
High contrast heatmaps and more.
This update makes resizing the Task Manager window easier when you grab the top of its window.
New! This update improves the Virtual Filtering Platform (VFP) within Windows nodes. Now, VFP has more support for packet drop collection. This will make it easier to troubleshoot issues.
This update addresses an issue that affects Group Policy. It fails to detect when a network’s speed is slow. Instead, it assumes that a fast link is present.
This update addresses an issue that affects Storage Spaces Direct (S2D) and Remote Direct Memory Access (RDMA). When you use them with SMBdirect in your networks, the networks fail. You also lose the ability to manage clusters.
This update addresses an issue that affects GPUs. They do not enter the idle state that stops them from consuming power.
This update adds the registry key HKLM\Software\Microsoft\Windows\DWM ForceDisableModeChangeAnimation (REG_DWORD) . When you set its value to 1 (or a non-zero number), it turns off the display mode change animation. If the value is 0 or the key does not exist, the animation is set to on.
This update brings Country and Operator Settings Asset (COSA) profiles up to date for certain mobile operators.
This update addresses an issue that affects Azure Virtual Desktop sessions. A deadlock stops you from signing in to them.
A firewall profile drops from domain to public. This occurs when multiple interfaces exist, and you add or remove an interface. This update addresses this issue.
An issue occurs in the Windows Filtering Platform (WFP) driver. This issue leads to high system CPU usage. It also reduces throughput under a heavy load. This update boosts network packet processing in WFP. This helps to stop performance from degrading. This update also adds batch processing to reduce CPU load.
The Input Method Editor (IME) candidate list fails to show or shows in the wrong position. This update addresses this issue.
If you installed earlier updates, only the new updates contained in this package will be downloaded and installed on your device.
Windows 11 servicing stack update (KB5039338) - 22621.3801 and 22631.3801
This update makes quality improvements to the servicing stack, which is the component that installs Windows updates. Servicing stack updates (SSU) ensure that you have a robust and reliable servicing stack so that your devices can receive and install Microsoft updates.
Known issues in this update
|
|
|
|
|---|---|---|
| Enterprise users | After installing this update or later updates, you might face issues while upgrading from Windows Pro to a valid Windows Enterprise subscription. Resulting from this operation, you might observe the following symptoms: - OS upgrade operations may fail, and this might be shown in the LicenseAcquisition scheduled task in Task Scheduler -> Task Scheduler Library -> Microsoft -> Windows -> Subscription as ‘Access denied error (error code 0x80070005)’ under ‘Last Run Result’. | We are working on a resolution that will be released on a Windows update in the coming weeks. |
| All users | After installing this update, you are likely to face issues with the taskbar. This issue is only expected to occur if you are using a Windows N edition device or if you turn off the ‘Media Features’ via Control Panel->Programs-> Programs and Features -> Turn Windows features on or off. N editions of Windows include the same functionality as other editions of Windows, except for media-related technologies, Windows Media Player, and certain preinstalled media apps. You might not be able to view or interact with the Taskbar after logging in to your device once the update is installed. Other applications like File Explorer, Desktop and Settings will continue to work. | We are working on a resolution and will provide an update in an upcoming release. |
How to get this update
Before you install this update
Microsoft combines the latest servicing stack update (SSU) for your operating system with the latest cumulative update (LCU). For general information about SSUs, see Servicing stack updates and Servicing Stack Updates (SSU): Frequently Asked Questions .
Install this update
To install this update, use one of the following Windows and Microsoft release channels.
|
|
|
| Yes | Go to > > . In the area, you will find the link to download and install the update. |
|
|
|
| No | None. These changes will be included in the next security update to Windows Update for Business. |
|
|
|
| Yes | To get the standalone package for this update, go to the website. |
|
|
|
| No | You can import this update into Windows Server Update Services (WSUS) manually. See the for instructions. |
If you want to remove the LCU
To remove the LCU after installing the combined SSU and LCU package, use the DISM/Remove-Package command line option with the LCU package name as the argument. You can find the package name by using this command: DISM /online /get-packages .
Running Windows Update Standalone Installer ( wusa.exe ) with the /uninstall switch on the combined package will not work because the combined package contains the SSU. You cannot remove the SSU from the system after installation.
File information
For a list of the files that are provided in this update, download the file information for cumulative update 5039302 .
For a list of the files that are provided in the servicing stack update, download the file information for the SSU (KB5039338) - versions 22621.3801 and 22631.3801 .

Need more help?
Want more options.
Explore subscription benefits, browse training courses, learn how to secure your device, and more.

Microsoft 365 subscription benefits

Microsoft 365 training

Microsoft security

Accessibility center
Communities help you ask and answer questions, give feedback, and hear from experts with rich knowledge.

Ask the Microsoft Community

Microsoft Tech Community

Windows Insiders
Microsoft 365 Insiders
Was this information helpful?
Thank you for your feedback.
IMAGES
VIDEO
COMMENTS
Right click the network icon in the right side of the taskbar and select Diagnose network problems or open Get Help for Network & Internet. Make sure Wi‑Fi is turned on. Select the No internet icon on the right side of the taskbar, and make sure Wi-Fi is turned on. If it isn't, select it to turn it on. Also, make sure Airplane mode is turned off.
To reset the Wi-Fi adapter on Windows 10 to fix any connectivity problems, use these steps: Open Settings. Click on Network & Internet. Click on Status. Click the Network reset option. Click the Reset now button. Click Yes to confirm. Click the Close button. Restart your computer.
Press Windows + R, type services.msc, and click OK. Once the new window pops up, double-click WLAN AutoConfig, choose Automatic from the Startup type menu, click Apply, and then click OK . Try a Windows 10 network reset. This should be your last resort, as it reinstalls every network adapter on your device.
Click on the Globe Icon > Network and Internet Settings > change adapter options. Locate your WiFi adapter on the next screen, and double-click to enable it. To check for issues, you can right ...
To check, right-click on the Start Menu and select 'Settings'. You will see the various system settings option, click on 'Network and Internet'. In 'Network and Internet' settings, click on Wi-Fi on the left panel. Check if the Wi-Fi is on or off at the top. If it is off, that is the reason you are unable to connect to a network.
Select Start > Settings > Network & internet, then turn on Wi-Fi. Next, select More options ( >) next to Wi-Fi, then select Show available networks. If a network you expect to see appears in the list, select it, then select Connect . Open Wi-Fi settings. See if you can use the Wi-Fi network to get to websites from a different device.
If you get much lower than -80 you'll probably notice connection problems. The information displayed on this screen updates in real time, so if you notice that your signal isn't good try ...
To reset the Wi-Fi adapter after installing the Windows 10 version 20H2, use these steps: Open Settings. Click on Network & Internet. Click on Status. Click the Network reset option. Network reset option. Click the Reset now button. Windows 10 network reset. Click Yes to confirm.
Check Your Modem. Make Sure Wi-Fi Settings are Compatible With Your Device. Try a Different Frequency Band. Consider Distance and Interference; Change Channel. Try a Different Device or Wi-Fi Adapter. Try Updating Your Wi-Fi Adapter's Driver. Try a Different Router. It's frustrating when a Wi-Fi connection doesn't work, and a lot of things can ...
In the Wi-Fi menu, you can also click "Manage known networks.". Get Windows to "Forget" the network you're trying to connect to, then reconnect to it again. Go back to the "Manage known networks" page. Click "Show available networks.". The Wi-Fi network you recently forgot should be displayed once again.
Use these steps to use the Network Adapter troubleshooter: Open Settings on Windows 10. Click on Update & Security. Click on Troubleshoot. Select the Network Adapter option. Click the Run the troubleshooter button. Select the network adapter you're intending to fix — for instance, Wi-Fi. Click the Next button.
On your keyboard, press the Windows logo key and X at the same time. Then click Device Manager. You'll be prompted for permission. Click Yes to open Device Manager . Double-click Network adapters to expand the list. Then double-click your wireless network adapter (the device whose name contains the word "wireless").
Open Control Panel on your Windows PC. Select Network and Internet . Choose Network and Sharing Center on the following screen. Select Change adapter settings in the left sidebar. Right-click your disabled network adapter and choose Enable. Close Control Panel and try to search for Wi-Fi networks.
In this video, you will see the ways to fix the No wifi issue with windows 10. Wifi not working to not connecting issue is a common problem with Windows 10.Y...
To find out, run a ping test using a computer. 1. On your PC, click the Start button search box and type "CMD," then press Enter. 2. In the Command Prompt window, type "ping Google.com." 3. Wait ...
Follow the below steps to fix this issue: Right click on the "Start" menu and choose "Device Manager" or use the "Cortana" search box next to "Start" menu and open "Device Manager". Find out the adapter used on your PC under "Network adapters" section. Check Network Adapter in Device Manager. In our case it was "Intel ...
Right-click the network adapter you are using and select Update Driver. If you have access to another internet connection, such as your personal hotspot or a different network, switch your connection temporarily to update your network adapter driver. This can potentially resolve any lingering WiFi connectivity problems on your Windows 10 device ...
Step 1: Press the Win key and I key at the same time to open Settings, then choose Network & Internet. Step 2: Click Wi-Fi in the left panel, then choose Manage known networks. Step 3: Highlight the name of the network you want to forget and then choose Forget. After doing this, you can forget the WiFi network on Windows 10.
If the problem persists, try Method #2. METHOD #2. Reset Network Adapter using Device Manager. Click Windows button + X. Select Device Manager. Open Network Adapters. Right-click on your network adapter, click Uninstall device. In the window that pops up UNCHECK Delete the driver software for this device.
Forget and re-Add the Wireless Network. 1. Click Start > Settings and select Network and Internet. 2. Select Wi-Fi on the left side and click Manage known networks. 3. Select the Wireless network and click Forget. 4. Connect to the Wireless network again and check if you have Internet access.
If intermittent connection drops trigger stop command on a script (ping or test network constantly until fail, then netsh trace stop). Stop the trace by entering the following command: Console. Copy. netsh trace stop. To convert the output file to text format: Console. Copy. netsh trace convert c:\tmp\wireless.etl.
Top 7 Methods to Fix the WiFi Connection Problem in Windows 10, 11: Method 1: Quick Fixes and Hacks to Try First. Method 2: Reboot the Network. Method 3: Use the Network Troubleshooter. Method 4: Reset the Network Settings. Method 5: Reboot the Wireless NIC in BIOS. Method 6: Update the Network Driver Adapter.
The first method using which you can solve the limited access to WiFi network problem is by changing the wireless adapter power settings. Follow the steps given below to achieve the same. STEP 1 - Search edit power plan in windows search box. Step 2 - Now, Click on edit power plan. Step 3 - Now, click on Change advanced power settings.
Helo, i am using Asus TUF F15 FX506HC. the same issue. but i believe i could get wifi working (otherwise i wont be able to reply). today the BT is giving problem. i uninstalled the driver and downloaded the driver from asus. now the BT icon is completely disappear from device manager (even with the "show hidden devices"). i keep on installing the driver, restarted many many time and still ...
Placing your router in an open, central area allows the Wi-Fi signals to freely connect to devices. When you place your router in an enclosed space, the walls block those signals.
If neither is the case, go to Step 10. Right click on the entry for Intel Wi-Fi 6 AX201 and uninstall it, choosing to ... it isn't a final complete fix, the problem is related with some keyboards or mouses wireless, Logitech in my case as soon as I disconnect the wireless keyboard and mouse restart the machine and reinstall the driver the ...
List of Windows 11/10 Problems, Issues that you may be facing - with solutions. Something Happened error, Start Menu or Settings not working, Clipboard issues, etc.
As a result, after installing the drivers, the Intel® Wi-Fi 7 products function with Wi-Fi 6E capabilities on Windows 11*. The Intel's Wi-Fi 7 product " Intel® Wi-Fi 7 BE200 " will support Wi-Fi 6E + 320 MHz/4K QAM (known as EHT - Extremely High Throughput) by default when connecting to a Wi-Fi 7 wireless router/AP.
With more people working, studying, gaming, and streaming from home today, it's important to have fast, reliable Wi-Fi coverage at home. Regardless of the size of your home, a whole-home mesh Wi ...
New! We are advancing the Copilot experience on Windows. The Copilot app is now pinned to the taskbar and behaves like an app. This gives you the benefits of a typical app experience. For example, you can resize, move, and snap the window. For existing Windows 11 PCs, the timing of availability and delivery method will vary.