Voiceover Video Maker
Create stunning voiceover videos online with AI or your own audio
319 reviews


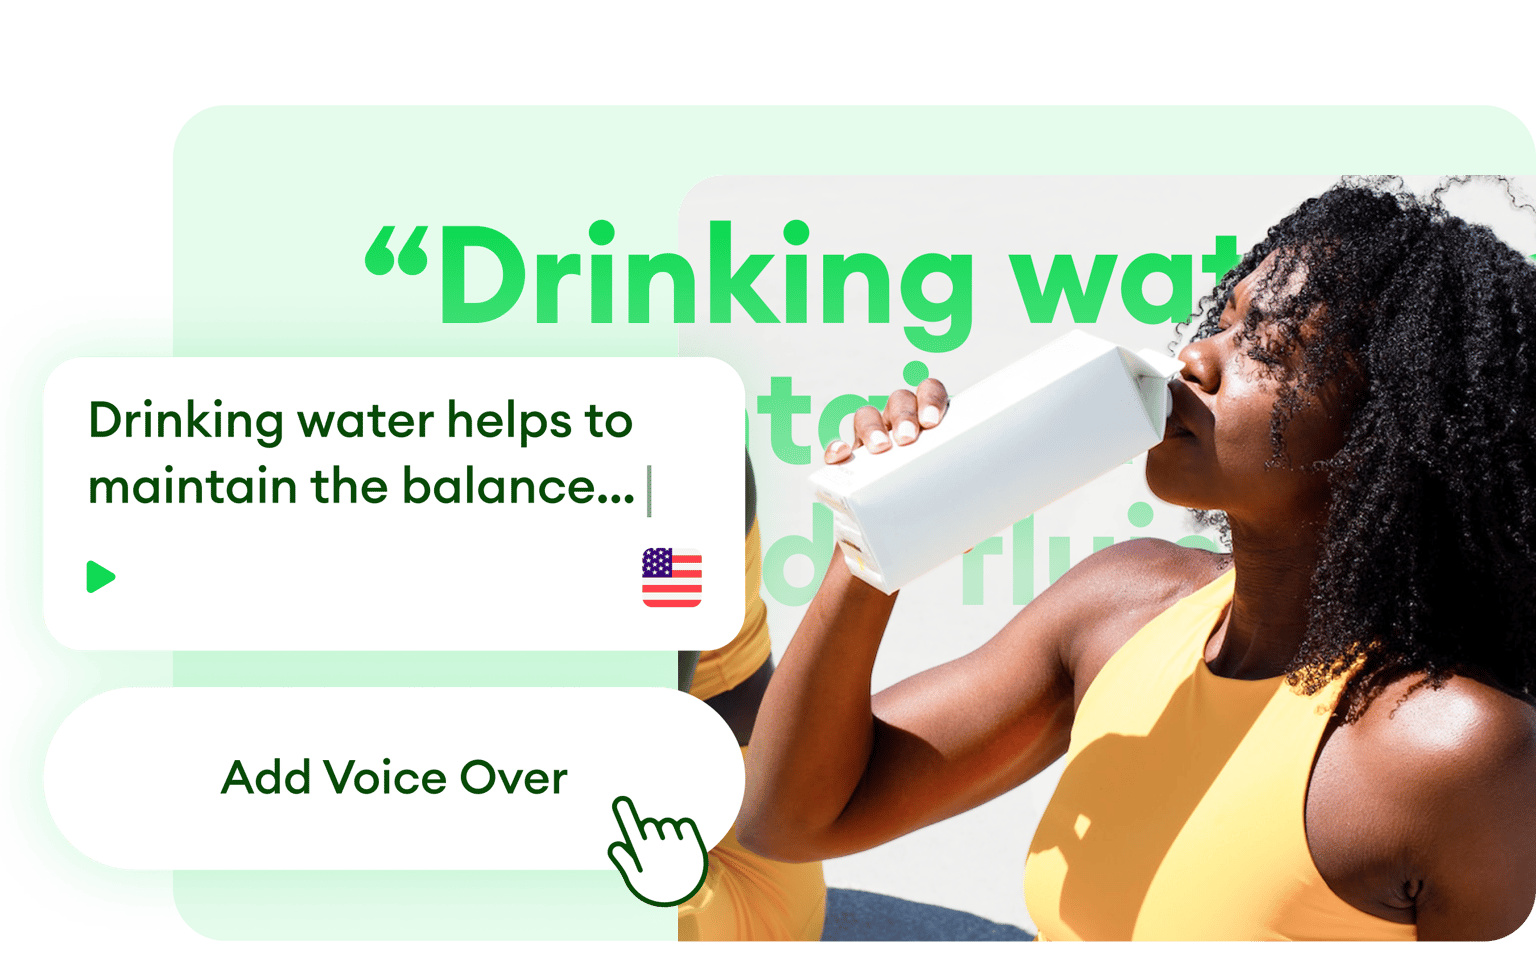
Make voice over videos with AI or your own recordings
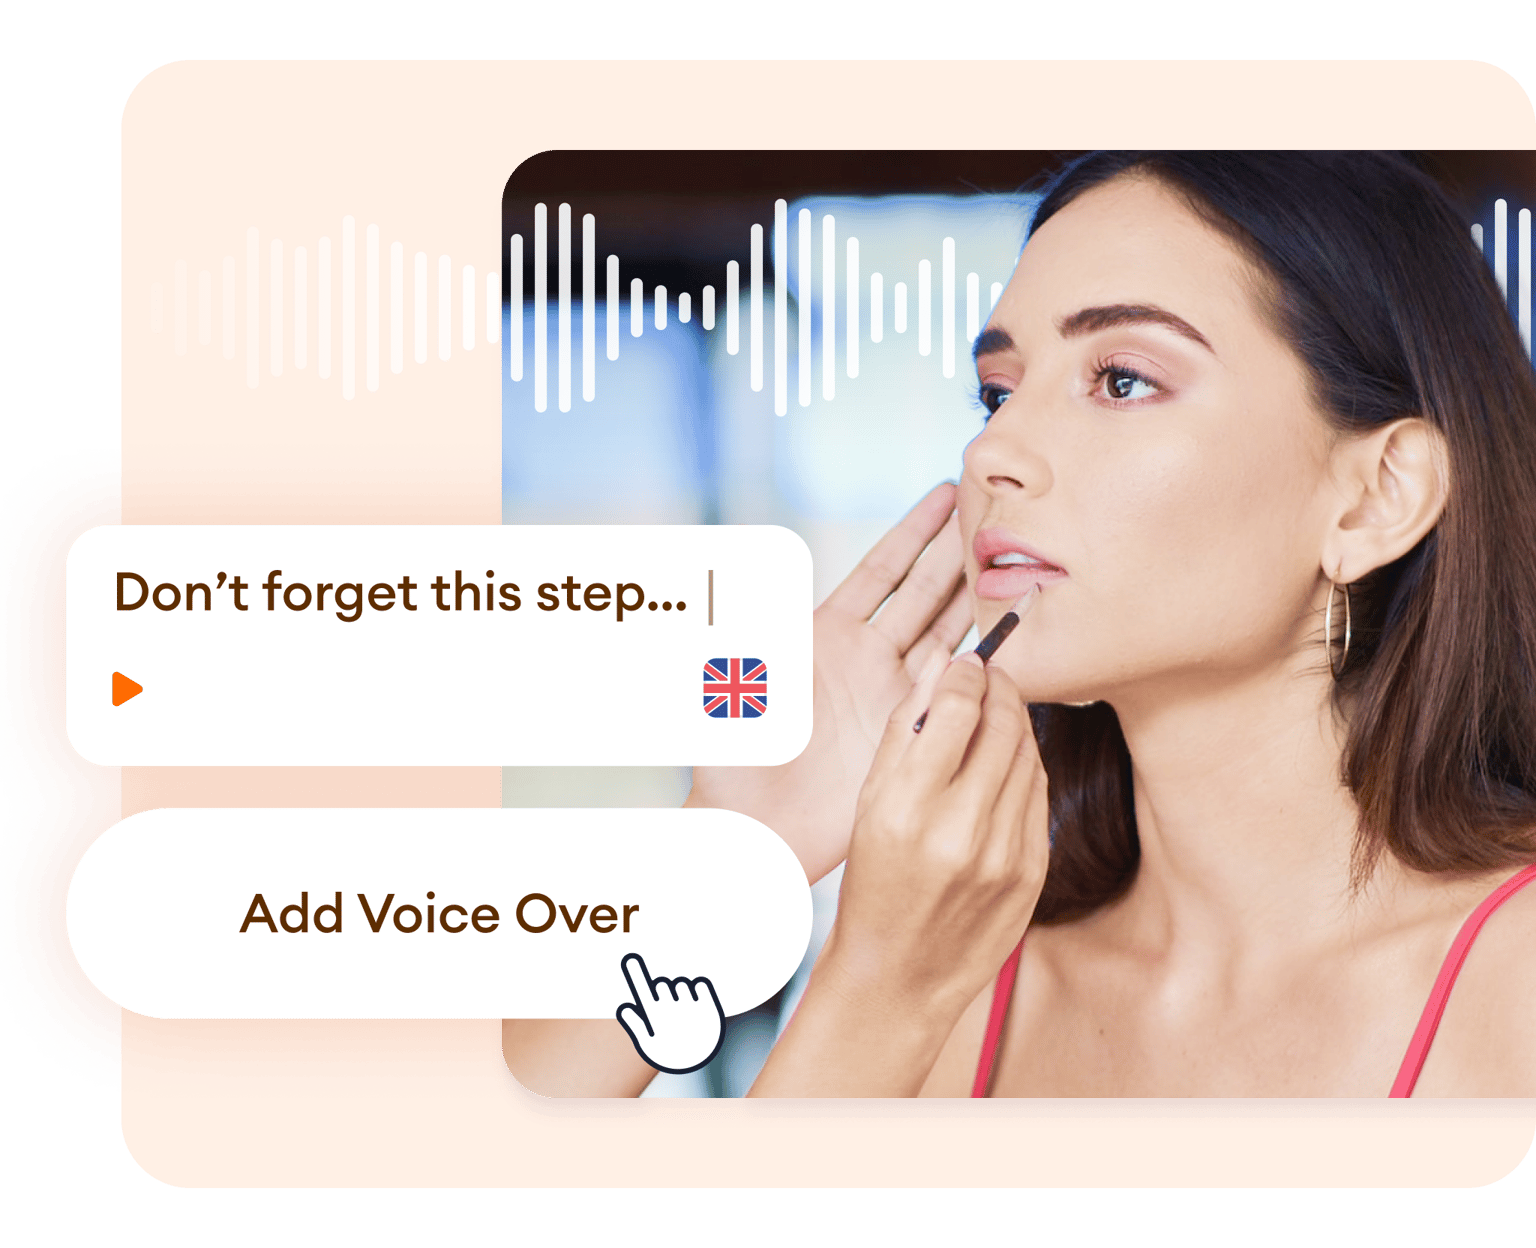
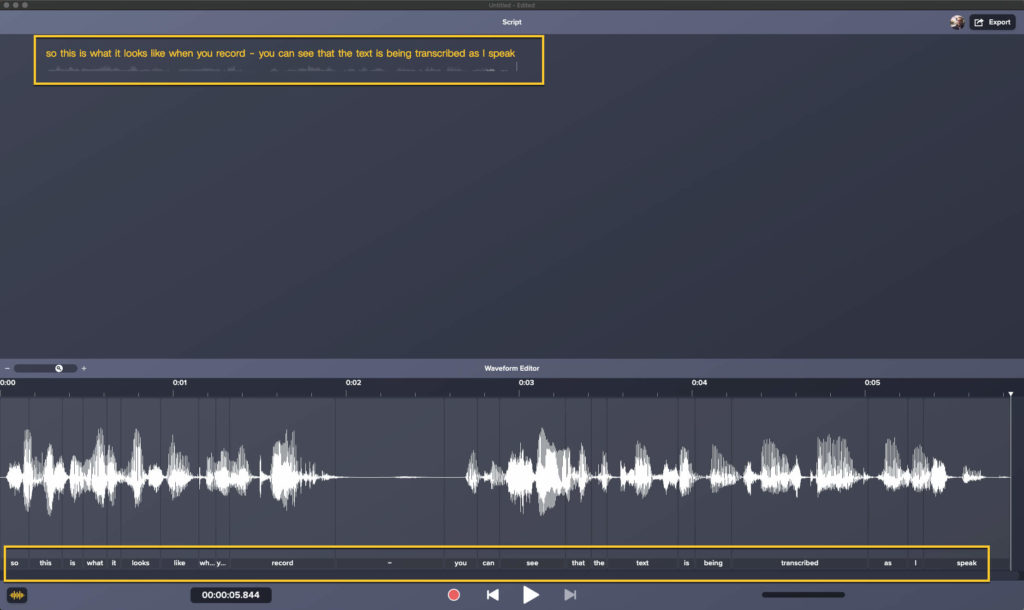
Do you want to create a video with a smooth video voiceover? One that tells the story of someone who uses your product? Or explains the concept behind your business? Or gives a clear and simple tutorial on how to perform a difficult task? Well, VEED is the place for you. You can record your voice right within VEED, upload your audio, OR—use our AI voice to text converter to add instant voiceovers to your video!
How to create a voiceover video:
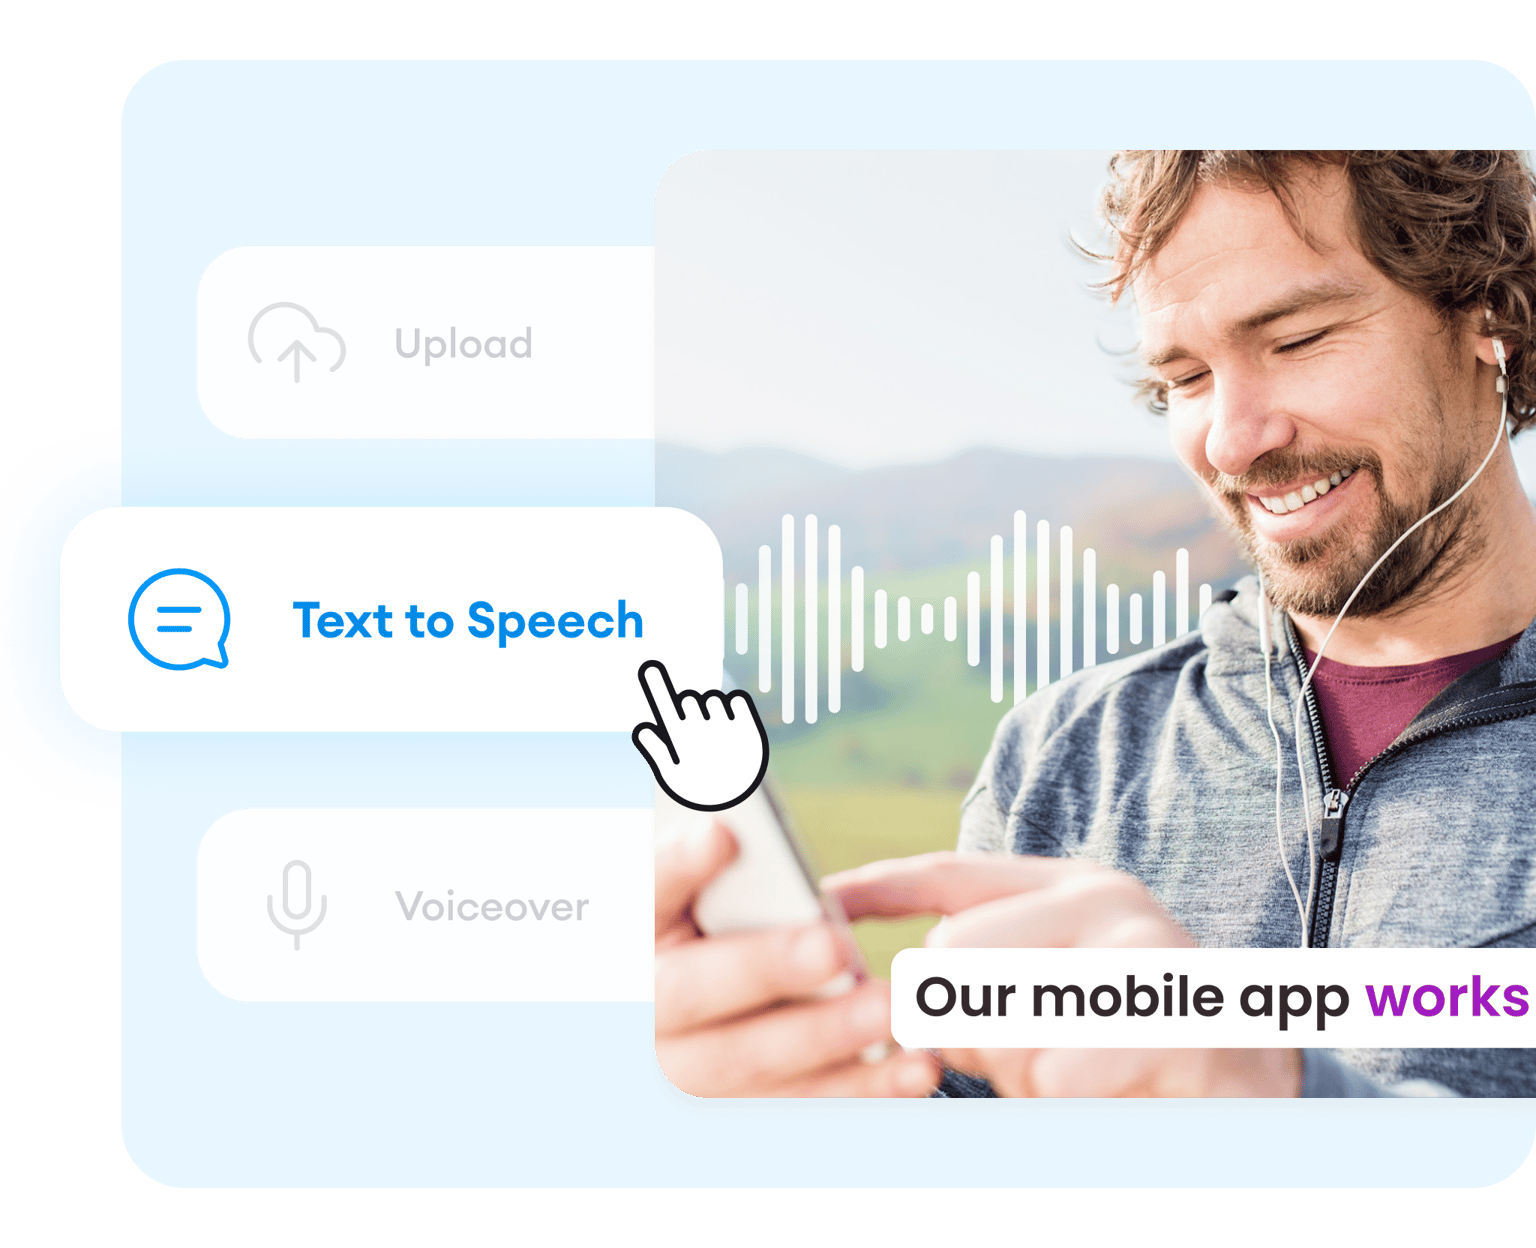
Upload, record, or start with a blank canvas
Add your video and audio to VEED or start recording using our online audio recorder. You can also start with a blank canvas and use images plus the voiceover to create a video.
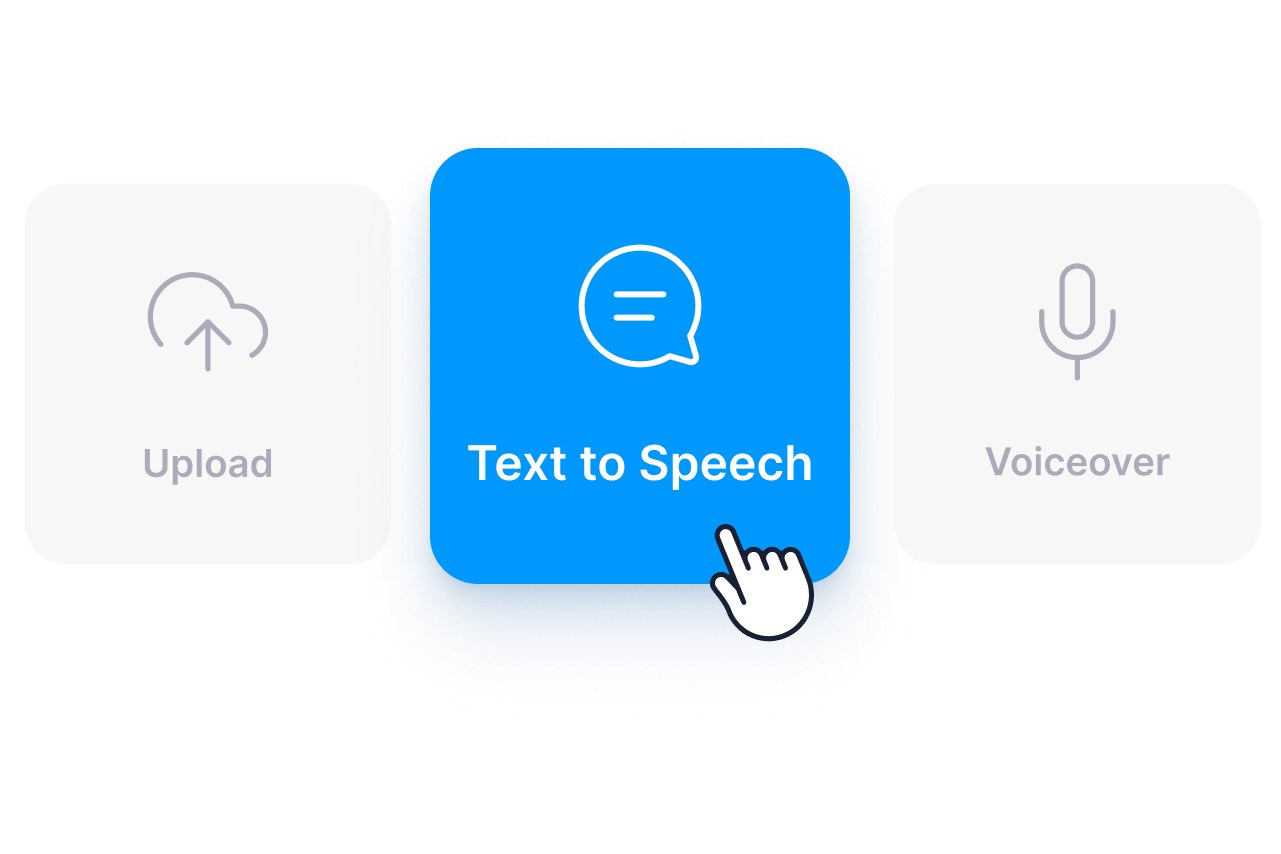
Add your audio or use AI text-to-voice
Using our Audio tool, you can add your audio with a single click. Or use our AI software to convert your text to voiceover. You can copy and paste your text or type it on the text field and convert it to voice.
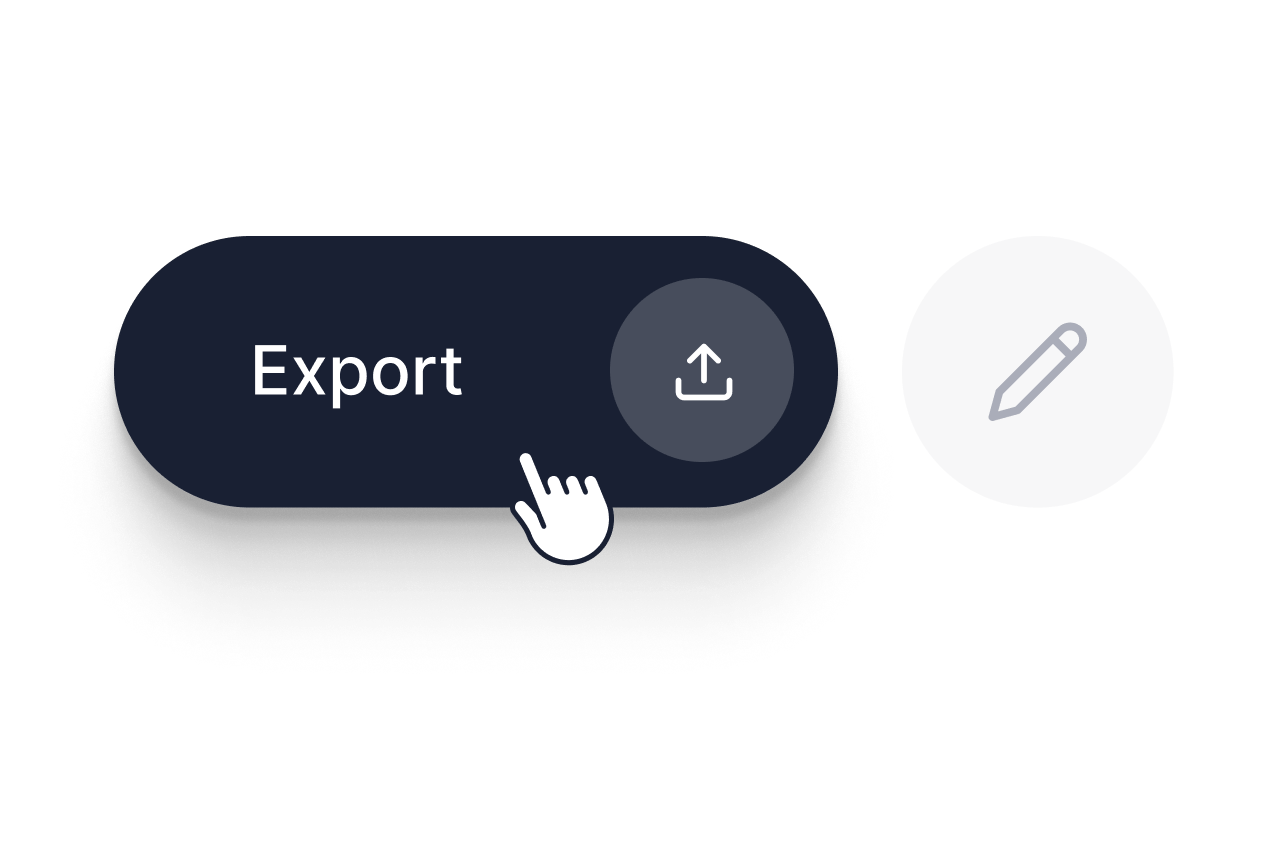
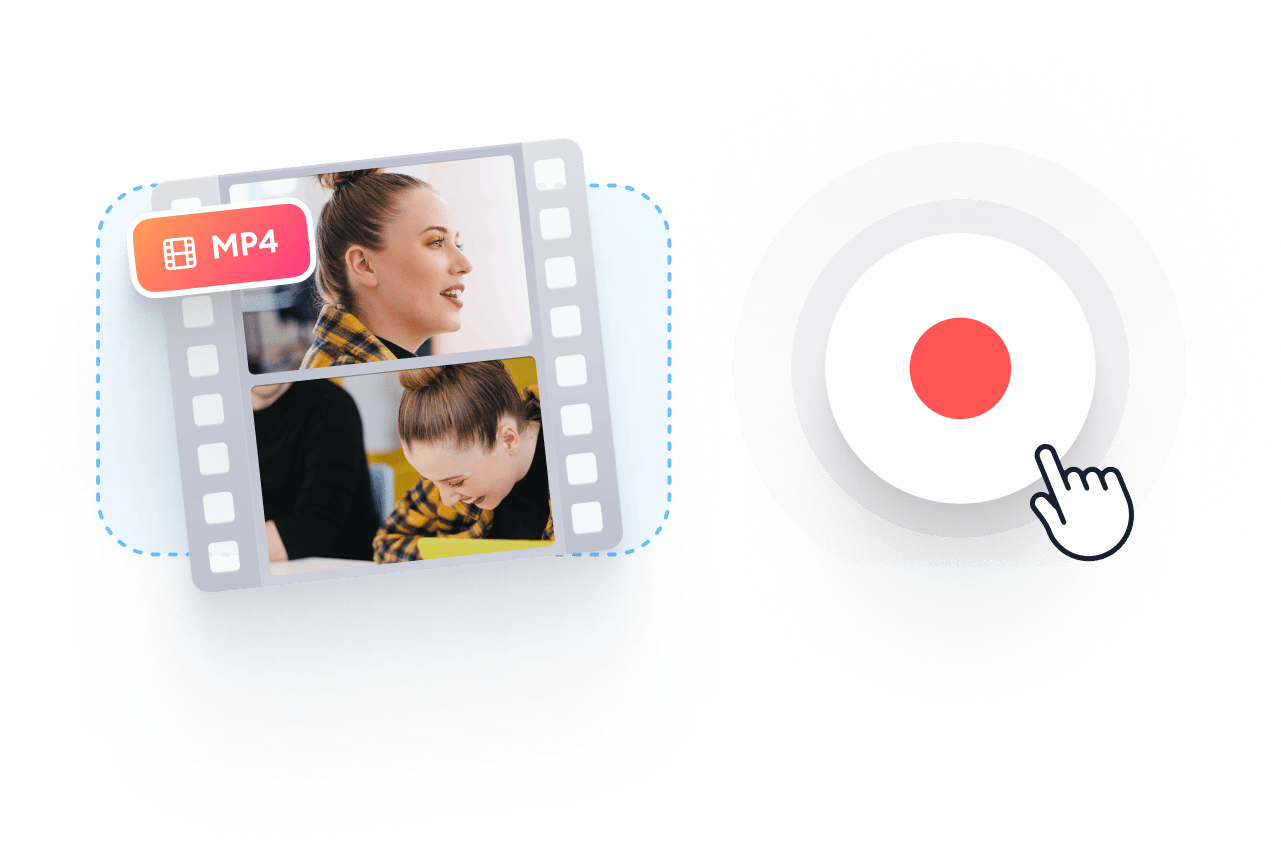
Export or keep creating!
Hit ‘Download’, and you’re ready to share your voiceover video with the world. Resize to fit any social media platform. Or keep exploring our wide range of pro video editing tools to make your video look even more stunning!
Watch this walkthrough of our voiceover video maker:

Why use our voiceover video creator?
Simple We all know recording sound ‘on location’ can have its problems - wind, background noise, cumbersome boom mics. A voiceover video is simple. Record the sound in your own time. Textural A voiceover is a great way to add another textural layer to your video. Add a soundtrack, sound effects, text, logo, and more, to your video. Powerful A video shows us, but the narrator tells us the story. A voiceover video does both, and it’s a powerful and persuasive combo
Create video voiceovers and access all our pro tools!
With VEED, you can create stunning voiceover videos right in your browser. VEED is a professional online video editing suite. Adding voiceovers with our Audio Tool is just one of the many ways you can create stunning video content. Simply drag and drop your recorded voiceover (and your video) into VEED and get editing right away! Adjust timing, split audio and video clips, adjust volume, and more!

Perfect for creating ads that yield results
Voice overs have been used in video advertising since the days of black and white film. Voiceovers are a great way to ‘get inside the heads’ of the people on screen and to understand why they use a product or service. Plus, you can use our AI voice to speech software to instantly create voiceovers, streamlining your marketing content creation!
How do you voice over a video?
Record and upload a video, then upload it to VEED. Record your audio then add it to your video on VEED. It is super easy to do!
What is voiceover video?
A voiceover, as the name suggests, is a recording of someone speaking which is played in a video, but the speaker is not seen.
How do I make a voice over video online?
- Upload your video. Add your video, photos, and images to VEED. It's all online, you can do it right in your browser.
- Upload your audio. Using our Audio tool, you can add your audio with a single click. It's so easy - change the timing, volume, cut, trim, whatever you need.
- Or you can use our AI TTS tool!
Is there an app to do voice overs?
There are many apps that you can use to record voiceovers. All smartphones, for example, have their own default recording app. Simply record your voice using any recording app and upload it along with your video on VEED.
How can I make my voice sound better when recording?
If you are unable to record a clean voiceover, you can clean your audio on VEED. It only takes one click!
What do you need for voice overs?
A basic microphone and a recording app are all you need to record a voiceover. However, you can always invest in better or professional-quality equipment.
Loved by creators.
Loved by the Fortune 500
VEED has been game-changing. It's allowed us to create gorgeous content for social promotion and ad units with ease.

Max Alter Director of Audience Development, NBCUniversal

I love using VEED. The subtitles are the most accurate I've seen on the market. It's helped take my content to the next level.

Laura Haleydt Brand Marketing Manager, Carlsberg Importers

I used Loom to record, Rev for captions, Google for storing and Youtube to get a share link. I can now do this all in one spot with VEED.

Cedric Gustavo Ravache Enterprise Account Executive, Cloud Software Group

VEED is my one-stop video editing shop! It's cut my editing time by around 60% , freeing me to focus on my online career coaching business.

Nadeem L Entrepreneur and Owner, TheCareerCEO.com

When it comes to amazing videos, all you need is VEED
Create a voiceover video
No credit card required
More than a voiceover video maker
VEED is so much more than a voiceover video maker. We help people with all their video needs. If you need to make a video montage for Instagram, an event invitation video for Twitter, or a gaming intro for YouTube - guess what, VEED’s got your back. VEED makes video easy. Check out the links below!

How to Add Voice Over to Video: A Step-by-Step Guide

Looking for our Text to Speech Reader ?
Featured In
Table of contents, step 1: set up your video project, step 2: record your voice over, step 3: add the voice over to your video, step 4: enhance your voice over, step 5: finalize and save your video, bonus tips:, try speechify voiceover for your voiceovers, frequently asked questions.
Adding a voiceover to your video can transform your content, making it more engaging and personal. Whether you're a podcaster looking to add visuals to...
Adding a voiceover to your video can transform your content, making it more engaging and personal. Whether you're a podcaster looking to add visuals to your episodes, a YouTube creator aiming to enhance your tutorials, or a social media influencer crafting catchy TikTok videos, mastering voice over video is essential.
Here’s an easy-to-follow guide using various devices and software, ensuring your video content stands out.
First, create a new project in your video editing software. Whether you're using iMovie on your Mac, a video editor app on your iPhone or iPad, or a robust video maker on your Windows or Android device, the process starts by opening your software and selecting 'New Project'. Import your video clips into the project. You can drag and drop files directly into the timeline or use the import option to add video files from your storage.
Now, it's time to record your voice over. If you prefer using your own voice, make sure you find a quiet place to minimize background noise. Most devices and video editing platforms have a simple 'Record Button' you can press to start recording. Speak clearly and use a high-quality microphone if possible to ensure the audio file sounds professional.
On iOS and Android devices, apps available in the App Store or respective stores often have a user-friendly interface with a big, easy-to-find 'Record' and 'Stop Button'.
If recording isn't an option, or if you want to produce content in multiple languages, consider using AI voice or text to speech technology. This can be a great way to generate professional voiceovers in English or any other language without needing a professional voice over artist.
After recording, add your audio recording to your video timeline. In most video editing software, you simply drag the audio file to align with your video clips. Customize the start and stop points to sync perfectly with the video content. This might involve trimming the audio or adding transitions to smooth out the cuts.
In Speechify Studio , you can import your audio to your library and easily add it to your timeline. Speechify Studio is an AI video editor that let’s you easily import your audio or use text to speech to create your narration for your videos.
This is where you can really polish your video. Add music to create ambiance or include sound effects to highlight key moments. If your video editor supports it, try adding subtitles to make your content more accessible. Also, adjust the audio levels to balance the voice over with any background music, ensuring neither is too overpowering.
Once you’re done, preview your video to check for any last tweaks in your voice over video project. When everything sounds and looks good, hit the 'Save' or 'Export' option to render your video into a single video file. Choose the resolution and format that best fits your needs, aiming for high-quality output, especially if you plan to share it on platforms like YouTube or other social media platforms.
- Practice Makes Perfect : Don’t worry if your first few voiceovers aren’t perfect. Practice and more editing will improve your skills.
- Watch Tutorials : There are countless tutorials online that can help you learn more advanced video editing and audio recording techniques.
- Explore Templates : Many video editors offer templates that can make the process quicker and provide a professional look with minimal effort.
By following these steps, you’ll be able to create engaging and professional-looking voice over videos for any platform, from TikTok to YouTube. Remember, the goal is to make your content as engaging and polished as possible, so take your time to learn and experiment with different tools and techniques.
Cost : Free to try
Speechify is the #1 AI Voice Over Generator. Using Speechify Voice Over is a breeze. It takes only a few minutes and you’ll be turning any text into natural-sounding Voice Over audio.
- Type in the text you’d like to hear spoken
- Select a voice & listening speed
- Press “Generate. That’s it!
Choose from 100’s of voices, and a plethora of languages and then customize each voice to make it your own. Add emotion like whisper, right up to anger and screaming. Your stories or presentations, or any other project can come alive with rich, natural sounding features.
You can also clone your own voice and use it in your voice over text to speech.
Speechify Voice Over also comes loaded with royalty free images, video, and audio that are all free to use for your personal or commercial projects. Speechify Voice Over is clearly the best option for your voice overs - no matter your team size. You can try our AI voice today , for free!
<strong>How do you put a voiceover on a video?</strong>
To add a voiceover to a video, open your video editing software (like Speechify Studio , iMovie on Mac or a video maker app on iPhone and Android), create a new project, and import your video clips. Record your voice over by pressing the 'Record Button', ensuring minimal background noise, then drag the audio file onto your video timeline in the software.
<strong>How do I add AI voice to a video?</strong>
To add AI voice to a video, use text-to-speech features available in many video editing apps, like Speechify Studio , or dedicated platforms. After creating your video project, type in your script, choose the desired AI voice in English or another language, and integrate the generated audio recording into your video timeline.
<strong>What tool is used to add voice over to videos?</strong>
Voice overs to videos are added using video editing software such as Adobe Premiere Pro, Final Cut Pro on Mac, iMovie on iOS, or other video editors available through the App Store and for Windows and Android devices. These tools allow you to record, customize, and sync voice overs with video clips. However Speechify Studio is an AI video editor and AI voice generator app that works right in your browser.
<strong>How can I add another voice to a video?</strong>
To add another voice to a video, open your video project in a video editor, and use the 'Record Button' to capture the new voice over, making sure to stop recording once done. Then, drag this new audio file to align with the existing content in the video, adjusting for transitions and sound effects as needed. AI apps like Speechify studio gives you the ability to choose from 150+ voices and you can add as many as you wish.
Online Tone Generator: The Ultimate Guide to Sound Waves and Audio Testing
Celebrity Voice Generators: A How to

Cliff Weitzman
Cliff Weitzman is a dyslexia advocate and the CEO and founder of Speechify, the #1 text-to-speech app in the world, totaling over 100,000 5-star reviews and ranking first place in the App Store for the News & Magazines category. In 2017, Weitzman was named to the Forbes 30 under 30 list for his work making the internet more accessible to people with learning disabilities. Cliff Weitzman has been featured in EdSurge, Inc., PC Mag, Entrepreneur, Mashable, among other leading outlets.
How to Voice Over a Video [Easily & Quickly For Beginners!]

Key Takeaways:
To voice over a video, you’ll need to:
- Create a great script.
- Find or create a quiet recording environment.
- Use a high-quality microphone.
- Deliver the lines with appropriate emotion and pacing while making sure to synchronize your voiceover with the video’s content.
Do you want to create stunning videos (or audiobooks! ) that require narration but don’t have the funds to hire a professional voice-over artist? Don’t worry! You can learn how to voice over a video by yourself!
As an independent filmmaker and actor myself, I’ve had to do voice-over work on many of my films. For example, in The Damned: Three Days Dead , a supernatural film noir based on a pulp-style graphic novel, I played a character that required a considerable amount of voice-over narration to match the feel of the comic.
This meant many audio recording sessions in the studio after filming wrapped in order to capture all the necessary dialogue. And that’s just one of my projects where voice-over was needed.
Most films I’ve been part of have needed as a minimum ADR (audio dialogue replacement) for some of the actors, which is when the dialogue recorded on set isn’t good enough for the final film and needs to be re-recorded in the studio.
It’s not always easy to know how to do this, especially for beginning filmmakers and video creators!
In this article, we will discuss how to record and edit your best-quality audio voice-over so that it sounds great. We will also provide some tips for making sure your audio quality is top-notch.
Let’s get started!
How to Voice Over a Video

The first thing to know is that a good voice-over is more than just a clear and pleasant-sounding voice.
It’s about understanding the script , the characters (in the case of a fictional or documentary project), and the tone of the project, and then being able to deliver a performance that brings those elements to life.
When it comes to narrative fiction, such as film noir or first-person accounts, which typically use voice-over to recount the inner thoughts or memories of the characters, the cardinal rule is for the voice-over to talk about what we don’t see on screen.
This way, it adds a subtextual layer to the story rather than being redundant.
As professional voice-over actress Tara Strong ( Power Puff Girls , Teen Titans , Family Guy ) once said,
“Many people think voice-over artists just read, there’s much more to it. Without acting beats, scene study, and improving skills, you won’t make it.” Tara Strong
So whether you hire a professional actor or attempt it yourself, the following tips are the things I’ve found most important for doing quality voice-overs for stunning videos:
- Preparation: Get cozy with your script! Read it, feel it, live it. The more you know it inside out, the smoother your recording will go. Remember those notes we took in school? Do the same with your script.
- Hydration: Keep that water bottle handy. A dry throat is a voice-over’s worst enemy. Regular sips keep the voice sounding fresh. Think of it as fuel for your vocal cords.
- Technical Proficiency: Know a bit about the tech side of things. It’s like driving – the better you understand your car, the better your road trip. If something sounds off, you’ll be able to tweak it just right.
- Quiet Environment: Find your quiet zone. A professional sound studio is best, but with careful planning, a room in your home can do as well.
- Clear Articulation: Speak like every word counts – because it does. Slow it down, speak at a measured pace, and ditch the “ums”.
- Emotional Inflection: Don’t be a robot! Feel the script and let your voice express emotions. If you’re excited, sound excited. If it’s a sad bit, let your voice reflect that.
- Timing and Pacing: Think of this as the rhythm of your story. Every pause, speed-up, or slow-down has its place. You’re not just talking; you’re performing a duet with the video, making sure both of you are in perfect harmony.

What is a Voice-Over?
Voice-overs are becoming increasingly popular, but what exactly are they?
Simply put, a voice-over is an audio track of someone speaking, typically used to provide narration for a video clip. Voice-overs can be used for a wide range of purposes, from educational videos to commercials to narrative fiction in movies and television.
For example, The Shawshank Redemption (narrative fiction) and March of the Penguins (documentary) use Morgan Freeman’s amazing recorded voice to narrate two completely different stories in different mediums.
One of the benefits of voice-overs is that they can add a level of professionalism to a project. They can also be used to create a specific mood or atmosphere.
Voice-overs can be recorded differently, depending on the project’s needs. For example, some voice-overs may be recorded in a studio during the sound design process of film and video creation, while others may be recorded at home using a portable recorder or USB microphone.
These days, AI voice generator software tools can even help you add voice to a video without using a microphone or studio!
Regardless of how it is recorded or produced, voice-over recordings can help make projects or professional videos sound better to their intended audience.
Why Is a Good Voice-Over Important?
OK, you know that making videos is important for your brand. But why is the voice over aspect of the videos so important? Let’s take a look at some reasons to get your voiceovers on point!
- Clarify Complex Ideas: A voice-over can explain complicated concepts, making the content more digestible for viewers.
- Personal Connection: Using a real human voice can establish a personal touch that creates a bond between the content and the viewer.
- Brand Identity: Consistent voice-over styles and tones across videos can become synonymous with a brand, aiding in recognition and loyalty.
- Increase Accessibility: For viewers who may have vision impairments or those who prefer audio over visual cues, voice-overs provide an essential mode of understanding.
- Language and Cultural Appeal: Voice-overs can make content more accessible and appealing to different linguistic and cultural groups.
- Fill Visual Gaps: In segments where visual content might be sparse or static, voice-overs can maintain engagement and guide the narrative.
- Professionalism: A polished voice-over can make content appear more authoritative and trustworthy.
- Memory Retention: Auditory information, combined with visuals, can improve viewers’ retention of the material.
- Versatility in Platforms: A good voice-over ensures that even in platforms where the video might be watched without visuals (like in background tabs or minimized windows), the message is still conveyed effectively.
- Set the Tone: Voice-overs determine the mood or atmosphere of the video.
For example, British actors Jim Dale and Stephen Fry have each narrated the Harry Potter series of audiobooks. Though both are professionally made and high-quality productions, there is a marked difference in how each actor delivers the identical words on the page.
While not strictly voice-over, this example illustrates how different voice-acting styles and performances can produce very different audio-quality end products for your audiences!
How to Add a Voice-Over
The traditional way.
There are several ways to add a voice-over to a video, but the traditional method involves recording the audio separately from the video.
This can be done using a standalone external microphone or by recording the audio directly into an editing program. Once the audio file has been recorded, it can be synchronized with the video in the editor.
This method requires planning and coordination but offers the most control over the final product.
For example, any problems with the audio recording can be fixed in the editing program before the video and audio are combined.
This method also allows for more flexibility in timing and pacing, as the audio can be edited independently of the video.
As a result, this is generally considered the best way to add voice-over to a video.

Add Voice-Overs on an iPhone
If you’re looking to add a professional touch to your iPhone videos, one of the best ways to do it is to add a voice-over recording.
Voice-overs can help set a video’s tone and guide viewers through the content. They can also be used to add humor or other emotional elements.
Fortunately, adding a voice-over to an iPhone video is a relatively simple process.
- First, open the Settings app and tap on “Accessibility.” Next, tap on “VoiceOver” and toggle it On.
- Once VoiceOver is enabled, open the Camera app and select the video file you want to edit.
- Tap on the screen with two fingers to bring up the editing menu, then tap on “Add Voiceover.”
- Finally, start recording your voice-over by tapping on the red record button.
- Once you’re finished, tap on “Done” to stop recording, and your voice-over will be added to the video.
Alternatively, you can use the built-in Voice Memos app. Simply record your voice-over and import the file into your video editing app .
You could also use the microphone on your headphones to record the audio directly into your video editing app. If you want to get a little more creative, you can also use a separate recording app to capture ambient sounds or Foley effects to add to your video.
Whatever method you choose, be sure to experiment until you find the one that works best for you!

Add Voice-Overs on an Android Phone
If you want to add voice-over to your video on an Android phone, there are a few different ways you can go about it.
One option is to use a video editing app like FilmoraGo or VivaVideo. These apps let you record your voice directly while editing your video .
Another option is to use a separate audio recording app and import the audio file into the video editor.
A third way is to record your voice using the Voice Recorder app and add the file to your video afterward.
Whichever method you choose, make sure you practice beforehand so that your voice-over is clear and concise.
What Is The Best Voice-Over Software?
There is a lot of voice-over software on the market, so deciding which one is right for you can be tricky. However, there are a few key features that all the best voice-over software programs have in common.
First and foremost, the software should be easy to use and allow you to produce high-quality recordings with minimal effort.
Additionally, the program should provide a wide range of editing tools to help you customize your recordings and a variety of voice effects that can add personality and flair to your performance.
Finally, the best voice-over software will come with a built-in library of audio effects and background music that you can use to enhance your recordings.
With all these features in mind, the program I would recommend (if you don’t mind the steep learning curve) is Audacity . It’s a free and open-source digital audio editor and recording application software, available on multiple operating systems and platforms, and is considered the best free voice editing and recording software on the market today. However, it has a steep learning curve and may not be best for beginners.
If you’re looking for additional options, check out my article on the best voice-over software programs !

If you are looking for a great option for an AI video editing program and voice-over program combined, you can read my article here ! These programs allow you to edit your videos and add voiceover all in one program!
How to Make Your Voice Sound Better
Voice-overs are essential to the audio production process, but many people struggle to produce quality recordings. While it is true that some people are born with “ideal” vocal qualities, there are several things that anyone can do to improve the sound of their voice.
- Warm up your vocal cords before recording . A simple vocal warm-up routine can help to loosen your vocal cords and improve your tone.
- Use proper breathing techniques . When you inhale, allow your stomach to expand rather than your chest. This will give you more support and help to project your voice.
- Focus on enunciation and diction . Be sure to open your mouth and speak clearly when you start talking (avoid mumbling!).
- Use a decent microphone when you record voice over, one that will increase the audio clarity of your voice!
- Ensure your microphone placement is the correct distance from your mouth (2 to 12 inches away, depending on your microphone type).
- Speak at a comfortable volume when recording your voice.
- Experiment with different inflections and pacing . Varying the tone of your voice can help to add interest and personality to your performance.
- And finally, stay hydrated and drink plenty of water as you record. Your throat will thank you!
By taking these simple steps, you can significantly improve the sound of your voice on recordings.
What If I Don’t Like How My Voice Sounds?

If you don’t like how your voice sounds on video at first, you can do a few things to improve the quality.
- Record in a quiet place with minimal background noise : This will help to prevent your voice from sounding muffled or echo-y.
- Use a high-quality microphone : This will ensure that your voice is captured clearly and without distortion.
- Speak confidently and clearly: Pause briefly between sentences to avoid running your words together.
- Use audio editing software: Try a program like Audacity or Adobe Audition to adjust your voice’s pitch and clarity.
Alternatively, you could also try using an Artificial Intelligence Voice Generator! These fantastic programs will create a realistic, human-sounding voice for your words. Check out my article on the best AI voice generators to see if one might work for you!
You can read my full review of the Murf AI text-to-speech program in this article: Murf Review: A Powerful AI Voice Generator.

Best Tools for Voice-Over
There is a lot of software out there that claims to be the best for voice-over work. But what are the best tools for a voice-over? The answer may surprise you.
First and foremost, you need a high-quality microphone for voiceovers . Next to vocal cords, this is possibly the most crucial piece of equipment for any voice-over artist. A good microphone will capture your recorded voice clearly and accurately without picking up too much background noise. It’s also essential to have a pop filter to help reduce lip-smacks, pops, and clicks when you speak.
Next, you’ll need some sort of recording interface. This could be a standalone recorder or an audio interface that connects to your computer. The key here is to find something that gives you excellent sound quality and is easy to use.
Finally, you’ll need voice editing software . This will allow you to clean up your recordings and make necessary adjustments. Again, look for something that is user-friendly and produces high-quality results.
These are just a few of the best tools for voice-over work. With the right equipment, you can produce professional-sounding recordings from the comfort of your own home.
Final Thoughts
If you want to create an excellent voice-over for your next video, we hope these tips have been helpful!
Be sure to speak slowly and enunciate each word to ensure viewers can understand your message. Use emotion in your voice to connect with viewers on an emotional level, and make sure you have a decent microphone and sound editing software to capture your voice quality.
If all this sounds like too much work, consider hiring a professional voice actor or using an AI voice generator software instead!

Common Questions (FAQs)
What app can i voice-over a video.
Many apps allow you to voice-over a video. One popular option is the iMovie app, which is included with macOS and iOS. With iMovie, you can record your voice-over directly into the app or import an existing audio track. Another option is Adobe Premiere Pro, a professional video editing software with a built-in tool to help you easily record sound. Some free apps offer similar functionality, such as WavePad and Audacity.
How do I make a voice-over video for free?
If you want to create a voice-over video but don’t want to spend any money, you can try a few different options. One is to use a free online video editor like WeVideo or Biteable. These platforms allow you to upload video footage and add a wide range of audio tracks, including professional voiceovers. Another option is to record your own voice-over using a simple audio recording program like Audacity. Once you’ve recorded your voice-over, you can add it to your video using a free video editing program like Windows Movie Maker.
What are the best artificial intelligence voice generators?
AI voice generators are great because they offer a realistic alternative to traditional voice synthesis techniques. They can also produce a wide range of voices and accents and can create characters for video games and other applications. While there are many different Artificial Intelligence voice generators on the market, the best ones are detailed in my article on AI voice generators . Each of these generators offers a unique set of features and capabilities, so take a look at each and see what might work best for you!
Interested in creating great videos or films? Check out these other helpful articles!
7 Best AI Video Upscaling Software (Free & Paid)
The 7+ Best AI Video Generators [Text to Video]
How to Make an Independent Film

Filmmaker, Author, Actor and Story Consultant
Neil Chase is an award-winning, produced screenwriter, independent filmmaker, professional actor, and author of the horror-western novel Iron Dogs. His latest feature film is an apocalyptic thriller called Spin The Wheel.
Neil has been featured on Celtx, No Film School, Script Revolution, Raindance, The Write Practice, Lifewire, and MSN.com, and his work has won awards from Script Summit, ScreamFest, FilmQuest and Cinequest (among others).
Neil believes that all writers have the potential to create great work. His passion is helping writers find their voice and develop their skills so that they can create stories that are entertaining and meaningful. If you’re ready to take your writing to the next level, he's here to help!
Similar Posts

Topaz Video Enhance AI vs AVCLabs Video Enhancer AI: The Winner for 2024!

The Best Microphone for Voice Over: Reviewed for 2024

What is Visual Storytelling? Tips, Examples & Trends in 2024
![Why Movie Audiences Still Matter [in 2024+]](https://neilchasefilm.com/wp-content/uploads/2023/12/Why-Movie-Audiences-Still-Matter-768x402.webp "how to make a video and talk over it")
Why Movie Audiences Still Matter [in 2024+]

Studio Indie Films vs True Indie Films: Is There A Difference?

The 21+ Best Filmmaking Books to Read in 2024
Leave a reply cancel reply.
Your email address will not be published. Required fields are marked *
Save my name, email, and website in this browser for the next time I comment.
- Privacy Overview
- Strictly Necessary Cookies
This website uses cookies so that we can provide you with the best user experience possible. Cookie information is stored in your browser and performs functions such as recognising you when you return to our website and helping our team to understand which sections of the website you find most interesting and useful.
Strictly Necessary Cookie should be enabled at all times so that we can save your preferences for cookie settings.
If you disable this cookie, we will not be able to save your preferences. This means that every time you visit this website you will need to enable or disable cookies again.
- June 30, 2024
How to Voiceover a Video Like a Pro

Claire Beveridge
- October 26, 2020

In an ideal world, everyone would have the talent of Morgan Freeman and be able to effortlessly voiceover any video and make it sound brilliant, but sadly, this isn’t the case. Creating a stellar voiceover video does take a tiny bit of work. But not to worry, we’ve outlined a few essential tips on how to voiceover a video that will help make your recording go as smoothly as possible and help you create a thumb-stopping video for your campaign.
Get prepped
You’ll need to prepare a few simple things before you can start recording your voiceover .
Prepare your video. Whether you’re using Lumen5 or a different video creation method, you’ll need video content to work with.
Prepare your script. Whether you’ve written the voiceover script yourself or someone else has, it’ll help to run through the pages a few times out loud. Doing so will allow you to get a feel for the tone and flow of the script. Feel free to mark up your script where you feel there should be a beat, a pause, a change in pace, etc. This will help the recording process go a lot smoother.
Prepare your body. This might sound a little kooky, but warming up your body can be hugely beneficial when recording a voiceover for video. Start with some gentle shoulder rolls and gentle twists side to side to help wake up the spine and then make sure you stand or sit in a correct (and comfortable!) posture. This will help you breathe easier and help you speak in a strong, clear voice.
Prepare your voice. Your voice is probably the most important part when recording your voiceover, so you’ll want to make sure that it’s in the best condition possible. By doing a short, simple warm-up, you’ll stretch out your vocal cords, clear your throat, and relax your throat muscles, giving you a clear, crisp vocal. Professional vocal warm-ups include humming, lip buzzing, and tongue trills.
Modify your environment
Recording in a loud, busy environment is a huge no-no, so try and find the quietest room in your home or office. Professional recording artists often try to create a ‘dead’ sound in a room, which means that the space is free and clear of any ambient noise.
We recommend completely switching off any electronic equipment that you don’t need for the recording, such as a television, computer console, AC, fan, etc. Anything that could be picked up on the microphone — even the slightest buzz — can ruin a recording.
Check your equipment
Whether you’re a novice or have experience recording a voiceover, having the right equipment is a huge benefit to ensuring that your voiceover comes across the way you want it.
Microphone
Recording a voiceover using your computer’s built-in microphone is completely fine, especially if you’re just starting out. But, investing in some amateur or even professional microphone equipment can help take your voice recording to the next level. The Apogee USB Mic is perfect for a more professional look and sound, or the Yeti Mics by Blue are also a good option if you’re feeling more cost-conscious.
A pop filter is an essential part of any recording setup. Placed in front of the mic, the screen filters out any popping sounds that naturally come from your vocal but sound a little strange on a recording. Popping sounds stem from words containing the letters p or b, so if your script contains a lot of words containing these letters, a pop filter might be helpful.
If you’re using a microphone rather than your computer’s built-in recorder, it’s worth investing in a mic stand. This equipment will easily position the microphone at the correct distance, and you’ll be able to stand tall and strong, which will impact your voice’s quality.
Audacity is a free, open-source audio editor that allows you to import, mix, and edit recordings. A great budget solution for those wanting to mix their own recordings.
Logic Pro X
This is where things start to get serious. Logic Pro X is an all-in-one solution that becomes the centre of your recording set up. The workspace replaces the traditional tape recorder, MIDI-sequencer, and mixer that you’d find in a studio and provides you with an extensive set of tools and features that allow you to record, edit, and mix MIDI data.
Want to make creating a voiceover video easier than in the pro software? Try it in Lumen5 today !
In-house or voiceover artist?
Depending on the context of your video, you might want to consider hiring a professional voiceover artist to record your voiceover. This can work well if you have the budget to do so, and your script could benefit from professional pronunciation.
Position your equipment correctly
Positioning is everything when it comes to recording great sound. Try setting up the microphone 8 to 12 inches away from your mouth. The length is close enough that your voice will be clear, but far enough away that your voice won’t sound too muddy.
What makes a good voiceover video?
There are four crucial elements that can make or break a voiceover video.
1. Clear and crisp sound
If your voiceover recording is fuzzy and unclear, not only will your audience struggle to understand your message, you also run the risk of your video coming across as unprofessional. Ensure that you pronounce each word correctly and that you speak clearly.
2. Be human, not robotic
Your voiceover recording needs to sound like it comes from a human. A dull, lifeless, and robotic voice will only prompt your viewers to hit the mute switch and some of your important messaging may be lost.
3. Perfect tempo
You need to make sure that the voiceover matches the video and the pacing of the script. If you rush through and talk fast, this might seem energetic, but the information can easily get lost. On the other hand, if you talk too slowly, your audience might find this boring and mentally tune out. Perfecting the tempo of your voiceover is a must-do if you want to see success.
Think about where in your script you can add some emotion. Are there certain words that you can emphasize for dramatic effect? Is there a point in the script where adding a beat will create laughter from the audience?
How to record a video in Lumen5
Recording a voiceover for your marketing video in Lumen5 couldn’t be easier. But before you whip out the mic and check your environment, there’s a couple of things you need to do.
- Sign up or sign in to Lumen5.
- Create a video to add your voiceover to.
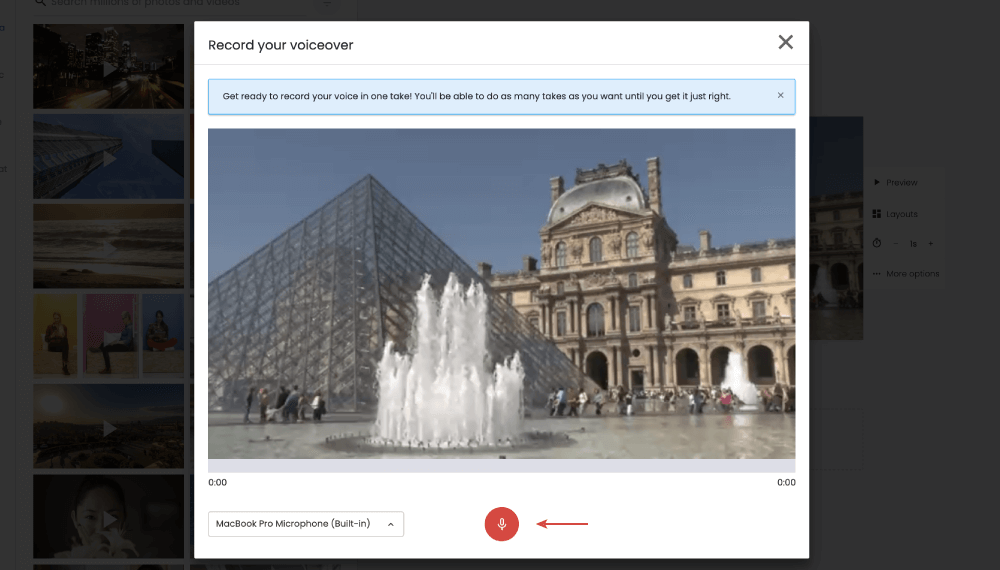
Once you’ve followed these two steps, click ‘Record your own voiceover’ on the upper left of your video creation screen.
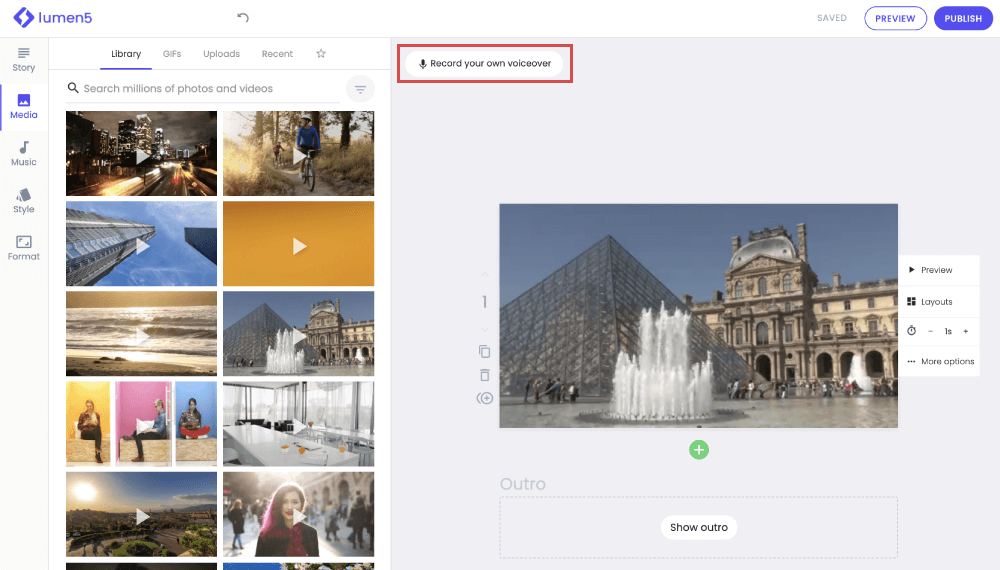
This will open up a box where you can record your voiceover by clicking the red button underneath your video.
Related Posts

AI Voices Explained: Choosing the Best Voice for Your Video Content

How to Use AI Voiceover on Lumen5

Making 3 Videos in 30 Minutes in Lumen5

4 Ways to Improve the Look and Feel of Your Marketing Videos
© 2022. All rights reserved by Lumen5.
How to Do a Voice Over Like a Pro: The Complete Guide

Marketing Content Strategist

Table of contents
What is a voice over, why is a good voice over important for your video, do i need a professional voice talent for great voice over, the essential elements of a good voice over, how can i make my voice sound better on voice overs, how to record a voice over, don’t forget the captions and audio transcription, how’s it feel to be a voice over pro, making a voiceover, the faqs, subscribe to techsmith’s newsletter.
Whether you’re making a YouTube video or recording a presentation, if you make videos — especially how-to and explainer videos — you will almost certainly need to record voice overs. In fact, depending on how many videos you create, you may have to do a lot of voice over work.
For many people, the thought of recording their voice and sharing it with the world is horrifying. Or at least genuinely uncomfortable. But it doesn’t have to be difficult or stressful!
So what is voice over recording? And how do you record voice overs that grab and keep your audience’s attention? Well, buckle up, because you’re about to find out!
In this article, we’ll discuss the ins and outs of what a voice over is, how you can record your own, and go over some voice over tips for beginners. Here’s what you’ll learn:
- How to record, edit, and add your voice over to your video in six easy steps .
- Four things that ensure a great voice over .
- Which audio recording software is best for voice overs?
- How to not hate the sound of your own voice .
The Marketer’s Ultimate Guide to Video
In our FREE ebook, we’ve put together practical strategies to get out of the woods and create engaging, powerful video content on your own that reaches your audience.
A voice over recording (or just a “voice over”) is a person speaking (but not seen) during a video — often describing, highlighting, explaining, or providing additional context to what a viewer sees.
It’s often confused (or equated) with narration. And, while they are similar, they are not quite the same thing.
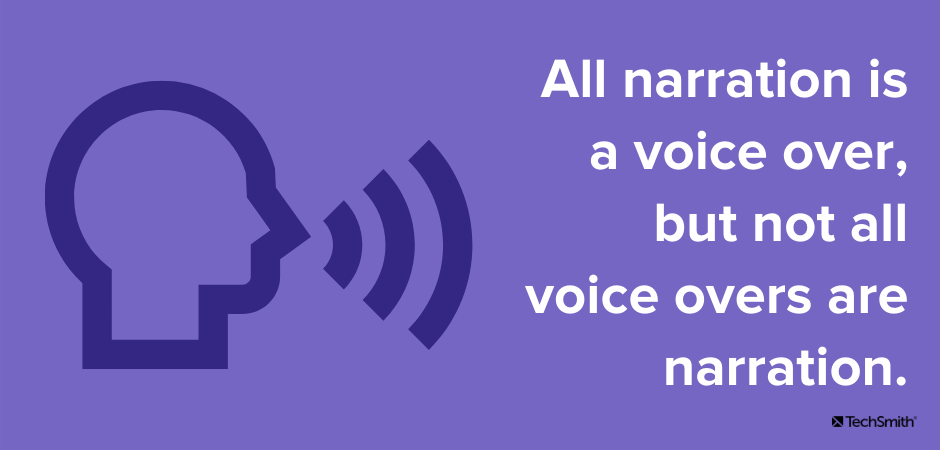
Narration is a specific type of voice over that describes all of the on-screen action, often telling a story based on what’s happening. While narration is more commonly used for entertainment, non-narration voice overs are often used on instructional, informational, and educational videos.
An easy way to think about it: All narration is a voice over, but not all voice overs are narration.
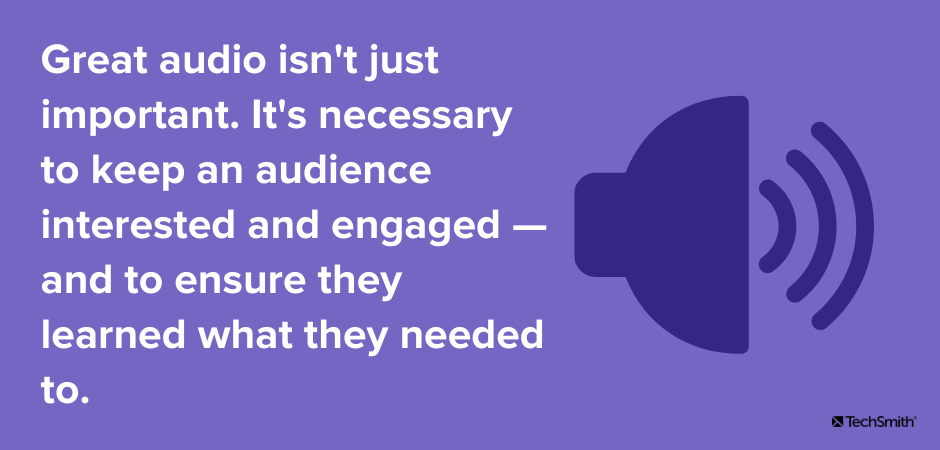
Some might think that the audio portion of a video is less important than the visual aspects, but that’s not true. Most people that watch videos say they are more likely to stop watching a video with bad audio vs. one with lower-quality video.
In fact, a recent TechSmith study of viewing habits showed that more than 25% of video viewers watched a video all the way through because the audio was good — more than those who said professional video style was most important.
This isn’t that surprising when you think about it. While the on-screen elements of your video are what makes it a video, in many cases, it’s the voice over that helps people truly understand what’s being shown.
Muddy, muffled, or otherwise garbled or difficult-to-understand audio tracks are frustrating to viewers. And, for people who are blind, but still need the information your video provides, good audio is essential.
So great audio isn’t just important. It’s a fundamental necessity to keep an audience interested and engaged — and to ensure they get the information they need.
The Easiest and Fastest Way to Record and Edit Voice Over Audio!
Audiate makes recording and editing your voice as simple as editing text in a document.
The short answer: No.
Just because quality voice over is important for the success of your video, it doesn’t mean you need to go to great lengths (and expense) to get it. Some people think you need to have one of those super-snazzy radio voices to produce good voice overs for your videos, but that simply isn’t true.
Sure, if you have the budget and you’re making professional videos, you can hire a professional voice over artist. But it’s not necessary.
With the help of this guide, you’ll soon see why most videos don’t need professional voice overs and that you really can do it yourself! But how can you record your voice over a video? First, you need to know what good voice over is.
When most of us think of great video voice overs, we probably think of actors like Morgan Freeman or James Earl Jones, usually because there’s a tendency to associate voice overs with having a really great voice. And while that can help, it’s not a prerequisite for doing a voice over.
In fact, with a little know-how and some practice, almost anyone can produce a professional-quality voice over for a video. All you have to keep in mind are the key elements that make a voice over stand out:
- Audio clarity and volume
- Vocal tone and inflection
- Pronunciation
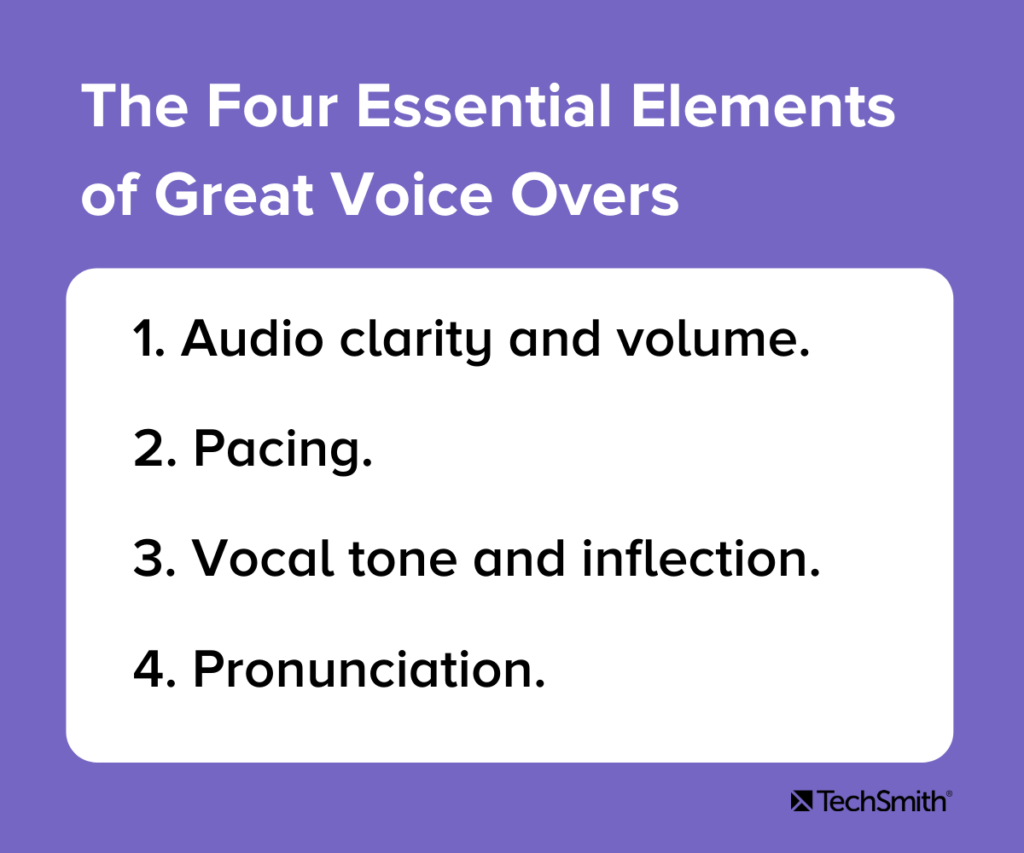
1. Audio clarity and volume
The clarity of your voice and speaking at a comfortable volume may be the most essential parts of great audio.
If your voice over recording is fuzzy or muddy sounding, it will be difficult for people to understand and your audience will be distracted and unable to absorb the information or may simply switch your video off. Either way, they’ll miss your message and you’ll miss an opportunity to share your knowledge.
Similarly, if the volume of your audio is too low, it may be difficult for people to hear. And if it’s too loud, you risk distorting it. Fortunately, there is a solid sweet spot for getting the volume just right, which we’ll talk more about in a moment.
Ever talk with someone who has a really exciting story to tell, but they’re so excited about it that they rush through it and when they’re done you can’t even remember what they were talking about? Or, someone who drones on and on with no end in sight, while you struggle to keep your eyes open?
This is called pacing, and it’s really important to get right. Too fast and your audience won’t know what hit them. To slow and they’re likely to get bored.
The best voice overs have a natural and deliberate pace, which is why you should always write a script (and practice it!) before you start recording as this will help you speak naturally. You should also remember that pacing includes things like pausing now and then to take a breath, either for effect or to give the listener a break to process important information.
3. Vocal tone and inflection
Like pacing, vocal tone and inflection refer to ensuring you speak naturally and pleasantly. You want to sound friendly and engaging, but not so much that you sound fake.
No one wants to sound like a game show host (or like Troy McClure). But, you also want to avoid a monotone robot voice which, like pacing that’s too slow, can be boring and off-putting.
4. Pronunciation and enunciation
The final element of great voice over work is ensuring that you pronounce each word correctly and that you speak clearly enough to be understood. Avoid mumbling, but don’t shout or over-enunciate, either.
Be mindful of your regional accent (yes, we all have them) and pronunciations as they relate to your audience. While it’s perfectly acceptable to “warsh” your hands in Missouri or have a great “idear” in New England, those pronunciations may confuse people from other locations.
Don’t worry, though. No one expects you to sound like a professional voice actor. The best thing you can do is speak naturally and clearly — the rest will follow with practice.
This is the number-one issue most people bring up when they have to do a voice over for their video.
Most of us rarely have to hear our own voices in audio recordings. We’re used to the rich, warm sound of our own voices in our own ears and there’s no way around the fact that you sound different on a recording than you do to yourself.
So how do you stop hating the sound of your own voice? Well, you just have to get used to it.
Think of it this way: Your voice on recordings is how you actually sound to everyone around you. When you speak to others, that’s what they hear. the only one who hears a difference is you.
So, there’s really nothing to be embarrassed or feel shy about.
Everyone who does voice work has to overcome this hurdle. But, like most things, the more you do it, the easier it gets. Once you’ve done enough voice-over work, your voice will sound just as normal on recordings as it does in your own ears.
Of course, if you really can’t get over it, you can always ask someone for help. Whether that means enlisting a friend or colleague, or hiring a professional to do the work for you.
1. Preparing to record
Not all videos need a ton of preparation. Quick one-off screencasts or a fast demonstration of a new user interface for a colleague can probably be done on the fly. But, for videos where you want a more polished look or need to cover more information, a bit of preparation goes a long way.
Find a quiet place to work
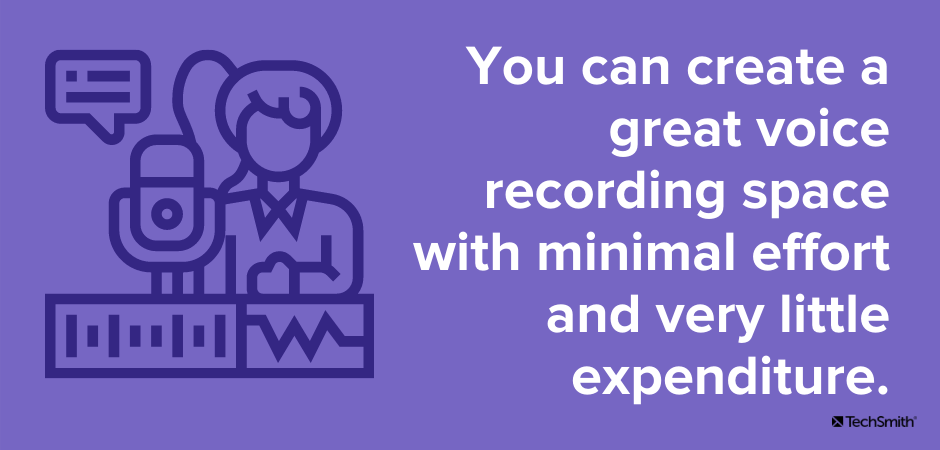
You’ve probably seen what a recording studio looks like. Professional voice over artists typically have a room somewhere with walls covered in sound-absorbing foam, a fancy microphone setup with a pop screen, and a computer workstation that looks like NASA’s Mission Control.
Luckily, you don’t have to go that far to get great results. You can create a great voice recording space with minimal effort and very little expenditure.
First — and most importantly — you’ll want a space that’s free from distracting noises and where you are unlikely to be interrupted. Most decent microphones pick up even faint ambient sounds, and those sounds will make it into your recording.
If your space is at work, avoid areas where you can hear your coworkers talking, etc. Or, plan to record when no one else is in the office.
Wherever you are, be mindful of the sounds of your heating and cooling system. If you can’t find a spot where you can’t hear air rushing through your ducts, you may want to shut down your furnace or AC while you’re recording.
If your recording space is near a window, listen for sounds from outside, such as wind, birds chirping, and dogs barking. Be especially mindful of traffic sounds — particularly loud delivery trucks as these will almost definitely be picked up in your recording.
Nowhere is going to be completely silent, so find the best place you can — even if that means thinking outside the box.
For example, you might find the quietest place you can find to record is in your car (with the engine off, of course). It might not be the ideal setup, but if all you need to do is speak into a microphone, it might be the quietest environment you have access to — and you might be surprised by the results!
Choose a microphone
Next, you need a decent microphone. We won’t go too in-depth with this here, but we do have another article detailing the best microphones for recording video .
What we will say, however, is you should definitely avoid recording your voice ovesr on your laptop microphone, if possible. While built-in mics are fine for the likes of Zoom meetings, even a low-cost external microphone will be better for a video voice over.
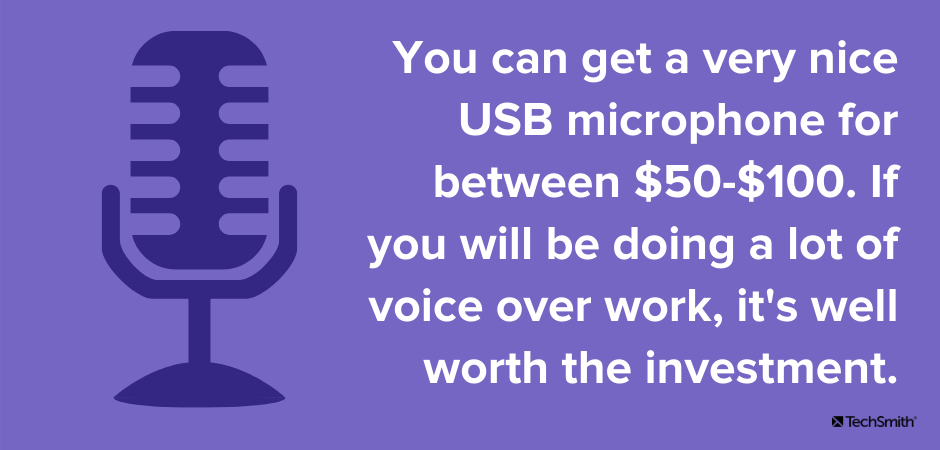
You don’t need to spend hundreds of dollars, either. You can get a decent USB microphone for $50-$100, which is well worth the investment if you’ll be doing a lot of voice over work. However, even the headphones that come with your smartphone (which usually have a small built-in mic) will record a better sound than just your computer’s microphone.
If you do intend to use an external mic, we’d also recommend investing in a pop filter . They’re cheap and help minimize the distracting sounds caused by hard consonants such as “p” and “b.”
Choose your audio software
There’s no shortage of audio recording software on the market and most of them will offer more or less the same level of functionality. But, for the average user, these tools are often complicated and come with a high learning curve to be of any practical use.
So, with that in mind, we’d recommend checking out TechSmith’s Audiate — which comes with a seven-day free trial.
2. Write a script
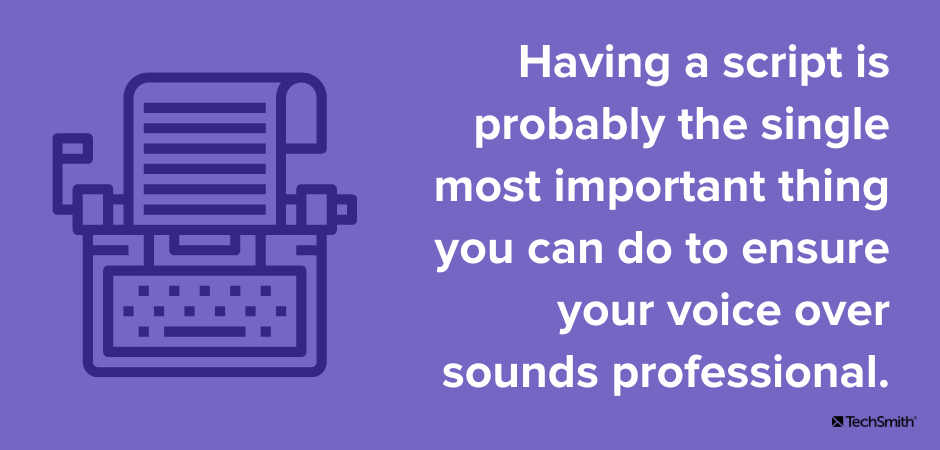
Having a script is probably the single most important thing you can do to ensure your voice over sounds professional. Nothing ruins a good voice over faster than a lot of “uhms” and “ahs” as you try to remember what you wanted to say.
The best scripts will include everything you intend to say, word for word. Taking the time to write this out before recording helps ensure that you will cover everything you want to without the risk of wandering off into unrelated topics.
To write a script, you should first outline the points you want to make and then write the full script based on that outline.
Once it’s written, read your script aloud several times before recording, and be mindful of words or phrases that may feel awkward or difficult to say. A script often sounds and feels different when it’s read out loud compared to how it sounds in your head.
This great blog post will give you more information on writing your script.
3. Do a test recording
Now that all the essential tools are in place, it’s time to record your voice over!
Before you get down to the real thing, though, be sure to run a test recording to ensure your equipment is working as it should, and your audio levels are good.
Even if nothing has changed from the last time you did a voice over, it’s still good practice to run a test first. There’s nothing worse than jumping straight into the recording, only to finish and find that something wasn’t set up properly.
You don’t need to record the entire script for your test recording, but a few paragraphs will give you enough to ensure that the audio is clear and doesn’t include any stray or ambient noises.
Top Tip: When you listen back to your test recording, use headphones to check the audio quality. These will be much better than your computer speakers at picking up any unclear audio, feedback, or weird noises.
While you’ll obviously want the audio to sound good on the cheapest speakers, you (and your audience) will be much happier if you use headphones to check for quality. Remember, many of your viewers will probably listen via headphones, so you want to make sure they have the best possible audio.
Microphone placement
You also want to consider where to place your microphone. If it’s too close to the person speaking, it will pick up all kinds of weird mouth noises and air puffs. However, if it’s too far away you might sound lost in a large room.
Ideally, place the microphone about six to eight inches from your mouth, and slightly below your chin. If you’re using an LAV (clip-on mic), make sure it’s about six to eight inches below your mouth.
You should also be mindful of the surface where you place your mic. Some microphone stands will be susceptible to picking up noises from the desk or table they’re sitting on, so be sure to listen for those types of sounds on your test recording.
Check your volume levels
Getting the volume level right for your audio ensures that it’s easily heard and not distorted. If the volume is too low, your audience will have trouble hearing what you say. If it’s too high, you risk garbled audio or blowing out your people’s ear drums.
While you can always make a video louder and adjust levels when you edit, starting with the best possible audio level as you record is always your best bet.
The folks over at Premium Beat have a great post on recommended audio level settings , but here are a few basics.
- Audio levels are measured in decibels (dB).
- In audio editing, 0db is actually the maximum you want to achieve. It sounds weird, but trust us.
- For the most part, your ideal audio level is between -10db to -20db. Your audio should peak around -6db.
- Never go above 0db, as your audio will distort or “clip.”
Most audio recording software will have indicators that let you know when your audio is in danger of being too loud and clipping.
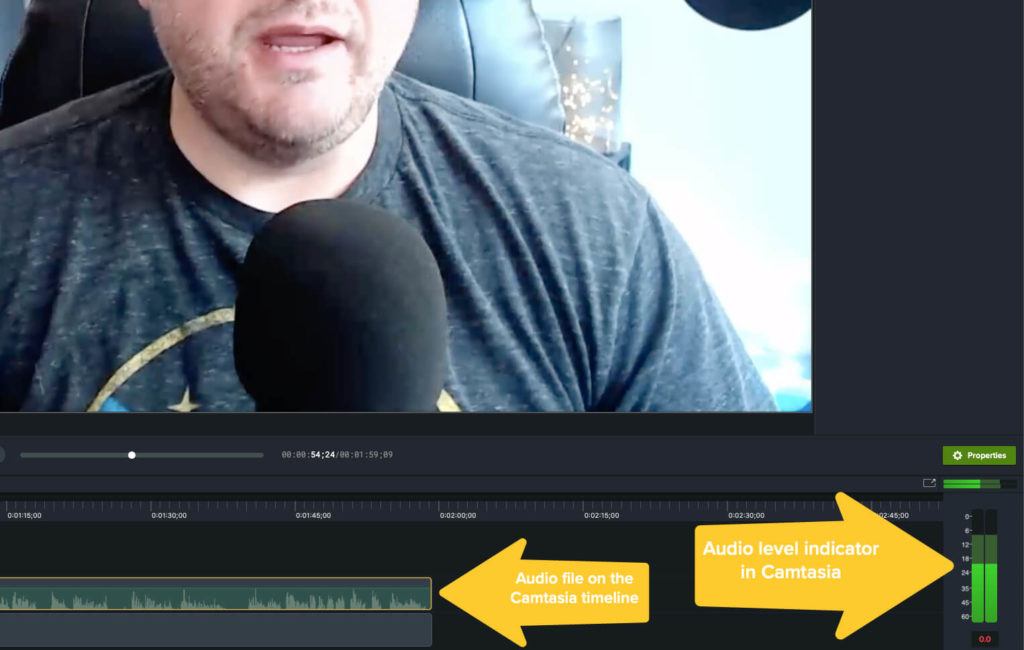
The image above shows TechSmith’s Camtasia interface with the waveform (a graphical representation of your audio recording) on the left and the level indicator on the right. The indicator shows that the audio peaked at just under -6db and is well within the acceptable levels.
4. Record your voice over
Once you’re satisfied with your microphone placement and audio levels, you’re ready to record your voice over! With Audiate, it’s as simple as clicking the record button and speaking.
As you record your script, remember these key tips for ensuring a great voice over:
- Speak slowly and clearly : Enunciate each word, but don’t concentrate on it to such an extent that you sound like a robot.
- Pro Tip : Smiling while you read your script can help you sound happier and more natural.
- Pro Tip : With Audiate, you’ll be able to see and edit your voice over’s text, so you can easily go back and fix any mistakes when you’re done.
- Take breaks : If you struggle with the script or it just gets too hard to keep going, pause your recording and take a break. Rewrite any parts of the script that may be giving you too much trouble and try again.
- Practice makes perfect : As with anything, voice overs get easier the more you do them. Don’t give up if it’s not perfect the first time!
5. Edit your audio
When you finish recording, it’s time to edit. Even if you didn’t make any mistakes, there’s a good chance there’ll be a few things that need fixing. At the very least, you’ll want to trim the beginning and end to remove any dead space.
However, Audiate makes it so easy to edit that you’ll barely have to lift a finger. The video below gives a great overview of how to work in Audiate.
With traditional audio software, you have to hunt through your recording to find your mistakes and edit them individually. Even a short video could take an hour or more to edit depending on how complicated your edits were.
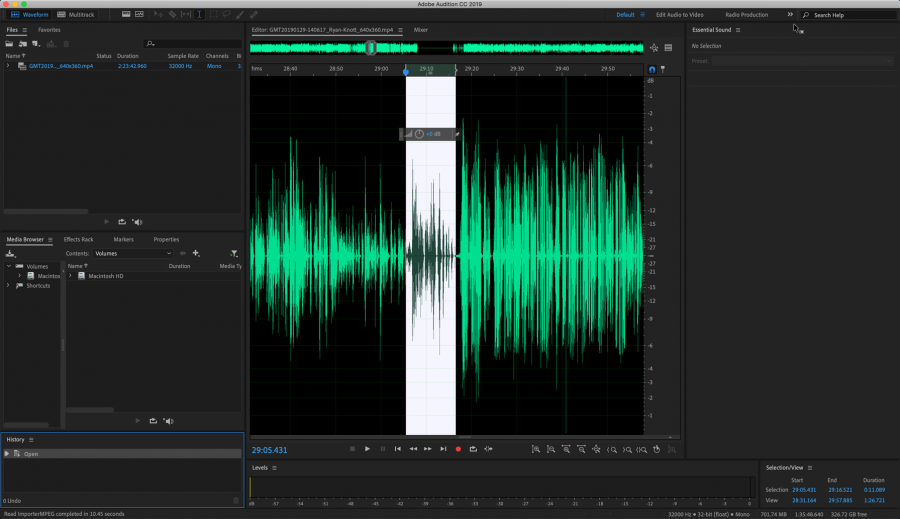
But with Audiate, you can just read the text before highlighting and deleting any mistakes you find. You might also notice that the Audiate interface (below) is much less complicated than the software shown in the screenshot above.
When editing a voice over, it’s always worth listening to the entire recording from start to finish, before making any changes.
While you might find it useful to make some notes to remind yourself of something you want to edit later on, you should try and focus on listening to the overall pacing and tone of your recording on the first listen.
Does it sound like you hoped? Are there any parts that sound rushed, or too slow? Are any words unclear? Did you mumble? Are there weird silences or strange sounds? There’s no better time to answer these questions than on your first listen.
Once you’ve listened o your voice over all the way through you can go back to the beginning and start editing and reducing audio noise . You might also want to cut out any abnormally long silences between sentences or statements.
But remember, pauses are ok! In fact, they’re necessary to help break up the audio and make it feel more natural and conversational.
6. Import your audio into your video editor
In Camtasia, importing and working with audio only takes a couple of clicks and with Audiate, it’s even easier. You might also want to check out this post on syncing audio and video in Camtasia, but for the most part that’s it! You have just successfully recorded your voice over!
It’s worth remembering that Camtasia can also be used to add music to your video , trim your footage and even crop the frames of your videos .
We’ve already mentioned that a large portion of your audience will probably listen to your video via headphones. But, what if we told you that there’s also a high chance that many people will watch your video with no sound at all?
This is why adding captions and subtitles to your video , as well as providing an audio transcription, are so important. For those who can’t, or otherwise won’t, listen to the audio elements of your video, captions allow them to digest all of the information your video provides.
This is another reason why Audiate is so incredibly helpful.
With most other audio tools, you would have to send your audio out to a professional transcription service to have an audio file transcribed and timestamped. Even if you typed out a full script, it won’t have the necessary time stamps to be used as a captions file.
But with Audiate, the transcription happens automatically, complete with time stamps that can be used as captions.
Once you’ve recorded and edited your voice over, you can export that transcription as a caption file (and SRT file) and import it directly into Camtasia. Then, Camtasia will automatically insert the captions into your video. It’s practically magic!
Recording a voice over like a pro is easy when you know what you’re doing, and you have the right tools at your disposal.
However, taking the proper steps before you hit the record button — and then taking the time to edit your audio appropriately — will go a long way to ensure your voice overs sound professional and engaging.
And remember, practice makes perfect! The more you do it, the more natural it will become.
No! You can do great voice over work with minimal investment. All you need to get started is a microphone and audio recording software.
The short answer is you just have to get used to it. But, there are a few things you can do to improve the overall sound of your voice, including speaking from your diaphragm rather than at the top of your throat. Also, be sure to have some water handy for when you’re recording. It’s important to keep your vocal cords hydrated!
There are many options available for audio recording, but if you only need to record voice overs, TechSmith Audiate is your best bet.
Probably not. While a laptop mic is fine for calling into a Zoom meeting, you’ll want an external microphone for your voice over recording. Fortunately, you can pick up a good microphone for between $50-$100.
No! You can do it yourself with great results. You just need the right tools and a little practice.
Note: This post was updated in July 2023 to include new information.
Additional Resources
How to generate ai voice: enhancing your workflow with ai, the easiest way to shorten a video for social media, how to get good audio recordings from your home office.
- Help Center
- 3️⃣ Easy Ways to Voice-Over a Video
How to Voice-Over a Video
- Open the video in Movavi Video Editor.
- Add voice-over to the video.
- Edit the level of background sound.
By clicking the download button, you're downloading a trial version of the program.*

Struggling to find an easy way to voice-over a video? These five tips will help you voice-over your videos with clear quality sound that your listeners will enjoy hearing.
Use the correct gear for your video.
Provide quality sound for your video.
Keep your narration at a certain pace.
Get comfortable with your own speaking voice.
Choose the correct voice-over video software.
Special pick: Movavi Video Editor
Our special pick to add voice over videos is Movavi Video Editor. With this software you can remove background noise and add sound effects. You can adjust the volume of the voice-over using the Audio Properties tool and you can choose which format to save your video in. The program is user-friendly and feature-rich so you can produce videos with quality voice-over audios.
Tips for creating a professional voice-over video
A voice-over recording is an audio track that goes over the main soundtrack or replaces it. It can be narrative or non-narrative. A narrative voice-over typically describes everything that’s happening on the screen, whereas a non-narrative one usually contains explanatory comments and is used in instructional videos.
Adding explanatory audio comments brings your video to a whole new level. If you add voice-over to a video, you provide watchers with one more source of information. The perception of this additional channel of information depends on how well you did as a voice-over. You might not have the professional voice and skills of a news channel speaker, but you can still create a voice-over that’s professional in the way you present information.
Want to know how to record a voice-over professionally? Below are some tips you might want to take into account before you start creating your voice-over video.
From the technical point of view, it’s necessary to use software that enables you to both record a voice-over and tweak it afterward. Of course, there are many video-editing programs and apps available, but not all of them provide users with all the tools they need to create a decent voice-over recording.
We recommend you to get a powerful Mac or Windows 10 voice recorder program. Movavi Video Editor is one such program, as its functionality includes both voice-over recording and adjusting features.
If you use a mobile device to create and edit videos, you can also get a voice-over app from App Store or Google Play. Movavi Clips, available on both platforms, is one of the video-editing apps that support the voice-over option.
Provide good-quality sound
Smooth, clear sound of a comfortable volume is key to a good voice-over video. Good-quality sound invites the audience to continue watching a video, while poor-quality sound urges watchers to quit and look for an alternative option.
Write a script before you record
To ensure your voice-over sounds well-paced and professionally produced, consider writing up a script of what you want to say. The script will prevent you from stuttering, adding filler words, or forgetting your lines. Furthermore, a script will prevent you from talking about topics that are not related to the video.
Your script will also give you a chance to practice your voice-over skills. Read your script a few times before recording so you can adjust your tone of voice and your talking pace.
Use proper pronunciation and enunciation of words
Not everyone has an American accent that people are so accustomed to in movies and on television. That’s why it’s important to use proper pronunciation and enunciation when you speak. If you speak in a strange accent, people may struggle to understand what you’re saying.
You don’t want your listeners to replay certain parts of your video because they don’t understand your words. So speak in a clear voice and always enunciate your words properly. Ideally, you want your listeners to enjoy the sound of your voice and your accent. So avoid mumbling or shouting loudly into the microphone.
Keep up the pace
In order to create a well-structured voice-over, you’d want to keep your narration within a certain pace. If your narrative pace is constantly changing, it can make your voice-over inconsistent and create additional accents where they are not necessary.
Get used to your own voice
Most people feel uncomfortable when hearing their own voice in a recording. It is vital to overcome this awkwardness. The more you practice, the faster you get rid of your discomfort and learn how to voice-over with confidence.
Do test recordings
Using your script and all the tools you have, try doing a test recording first before doing a voice-over on your video. By doing a test run you’ll be able to adjust the sound of your audio and utilize the tools on your voice-over software for the best quality audio.
How to add voice to a video on your computer
To record a voice-over video using a computer, go with Movavi Video Editor. Even if this is your first attempt, you’re going to love the result: the program has a user-friendly interface, so you won’t have any problems understanding what to do. Just download the Movavi voice-over software for your operating system and get started with editing!
If you prefer to watch video guides, below is the Movavi voice-over video editing YouTube tutorial.
Or you can follow this guide on how to add a voice-over to a video.
Step 1. Install the voice-over maker
Launch the installation file and follow the software instructions to complete the process.
Step 2. Open the video in the program
Launch Movavi Video Editor, click the Add Files button and select the video you want to add a voice-over to. The selected file will appear in the Media Bin . Drag and drop your file into the Timeline at the bottom of the program window.

Step 3. Add voice-over to the video
Click the Record Audio button above the timeline to see the audio recording options. Select your recording device from the Audio device list. If you want to keep track of the video while recording your voice-over, check Play video during the recording .
Now it’s time to add voice to the video! Place the red marker at the point on the timeline where you want to start the voice-over and click Start Recording . Click Stop Recording to finish the sound capture.

Step 4. Edit the level of background sound
If the source video has a soundtrack, it will play alongside the voice-over. If the sound interferes with your commentary, you can make the existing soundtrack sound quieter so you can use it as background music or even turn it off.
Select the source soundtrack. It should be right below the video track. Then click the Clip Properties button. Drag the Volume slider left to lower the soundtrack volume. We recommend a volume of around 20% of the original.
To disable the source audio completely, click the Mute track button to the left of the track. If you decide to turn the background sound back on, click the same icon again to unmute the video.

Step 5. Add effects to the voice-over (optional)
If you want to change the way your voice sounds on the recording, select the voice audio track on the Timeline . Open the More Tools section and click Audio Effects , then choose an effect from the drop-down list. You can listen to examples of some of these effects in our YouTube tutorial on how to voice-over a video linked at the top of this page.

How to add voice-over to a video on an iPhone
If you want to edit videos with your iPhone, try Movavi Clips. The application is specifically designed for mobile devices, so you can get the job done in just a few taps. The app is fast and doesn’t need much space. Here’s how to use it.
Step 1. Launch Movavi Clips and add a video file
Follow the link and download the iOS version of the app. Tap on the icon to launch Movavi Clips. Touch the Plus button to add your footage and select Video from the two pictograms that appear. Decide on the aspect ratio according to your needs vertical, widescreen, or square – then tap OK . Select the video file you want to edit and touch Start editing .

Step 2. Add voice to your video
Now you see the main Movavi Clips screen. On the toolbar, tap Voiceover . On the next screen, turn the audio down if needed by moving the Video volume slider. If you want to start the narration from a particular moment, scroll the video until the vertical marker reaches this place (don’t do anything if you want to start from the beginning). Now tap the red button with a microphone on it. After a short countdown, the recording will start. Tap the red button again to stop recording your voice, then touch the Check mark button to apply the voiceover.

Step 3. Save the results
If you like your voiceover, save the video. Tap the Save icon and then the Save button which will appear on the next screen. In just a few minutes, you can use the result anywhere!
The guide above was about recording a voice-over on an iPhone, and below you’ll find how to do a voice-over on a video on Android phones.

How to do a voice-over on an Android phone
If you’re looking for a lightweight and fast mobile video editor, you’ve found it. Get Movavi Clips and you’ll see how simple adding a voiceover can be. Follow this guide to add a voice-over to your video on Android.
Step 1. Run the app and upload a clip
Get Movavi Clips from Google Play. After the download is complete, touch the application icon. Tap the Plus button to add your video and choose the Video option from the pictograms that appear. Find the footage you want to edit and touch it, then tap Start editing . Specify the aspect ratio you need.

Step 2. Record your voice
To add your voice to the video, touch the Voiceover icon on the toolbar. You’ll see a new window with voiceover and sound settings. Touch the Cogwheel icon to adjust the video volume if it is too loud. If you want your voice to appear in the middle of your footage, scroll the video and place the vertical marker wherever you want the voice-over to start. Now begin recording: tap the red Microphone button at the very bottom to begin the countdown. Narrate your clip. After the job’s done, touch the red button again to stop recording and then tap the Check mark icon.

Step 3. Store the result
Use the Floppy disc button to save the clip. Tap Save on the next screen. Your creation is now ready. Share it with your friends!

Tips to improve sound quality when layering audio over a video
Record your sound in a quiet room.
Whether you’re narrating an audiobook or you’re doing a tutorial it’s essential that your record sound in a quiet environment. Don’t record your audio outside because the sound of the wind can muffle your voice. Sit in a room where you can’t hear people walking around or talking in your house because you’ll have to spend more time editing this out later.
Additionally, you don’t want to record in a room that has too much acoustics. You want to work in a room that has sound characteristics that will complement your voice. On the other hand, if you have a quality audio over video software, you can edit out unwanted background noise.
Consider using a microphone
We recommend using a standard microphone to record your voice-over as opposed to your laptop. You can get a relatively affordable USB microphone or use your headphones microphone to record your voice.
If you’re going to use an external microphone, you should also invest in a pop filter to reduce or minimize popping sounds, especially when you speak.
Additionally, you should consider microphone placement. Don’t place the mic too close to your mouth because you don’t want your listeners to hear you breathing. Ideally, you want to place a microphone about 6 inches or 8 inches away from your mouth when you speak.
Adjust your audio level
When doing voice-overs or even placing a dub over someone’s voice on a video, you don’t want the sound to be distorted or too low for your listeners to hear. Audio sound is measured in decibels (dB) and the recommended measurement for voice-overs is between -10 dB and -20 dB.
Your audio shouldn’t exceed 0 dB because it can distort your sound and you may have some crackling noises in the background. With the proper voice-over software, you can adjust the sound of your audio. The software may indicate if your audio is too loud or soft for your listeners so you can adjust it accordingly.
Adjust your vocal tone
When talking over your videos, you want to speak as naturally as possible and talk in an uplifting manner. Speaking in a monotone voice will bore your listeners, which will make them not want to watch your videos. Before you start recording, practice your pace and your tone of voice and make sure you’re speaking in a way that’s not too soft or loud.
Do I need a professional recording studio to record voice-overs?
One of the advantages about using voice-over video software is that it eliminates the need for recording in a studio. Not everyone has the budget to record their audio in a sound booth so you want software that allows you to minimize background noise.
What’s more, if you have a proper microphone, you’ll be able to block out most unwanted background sounds. You can also choose a specific room in your house that’s quiet. Some people even record their voice-over audios inside their cars because it’s the best place to minimize background noise or echoes.
If you want to add voice recording to video content the easy way, then follow this guide. You don’t have to spend lots of money on creating sound studios or investing in expensive sound equipment. All you need is a quiet room, a microphone, and high-quality voice over software to complete the task.
By writing your script out first before doing your voice over you will eliminate using filler words such as “ums” and “uhs” and you’ll be able to practice your tone and pace. With excellent voice-over software and the right speaking voice, you can create professional videos in no time.
Frequently asked questions
How do you add voice to a video on an iphone.
There are several ways you can add a voice-over to your video on iOS. You can choose one of the options below.
Using Movavi Clips
Movavi Clips is a mobile video-editing app available on the App Store. To learn how to add a voice-over with Movavi Clips, use the link below.
Jump to the guide on how to add a voice-over in Movavi Clips
Using iMovie
To add a voice to your video with iMovie, follow these instructions.
Launch the iMovie app on your iPhone and import the video you want to add a voice-over to. On the Timeline , put the vertical marker where you want the voice-over to begin, tap the Plus sign, and choose Voiceover . As soon as you are ready to begin recording, tap Record . First, there will be a three-second countdown, and then you can start talking. Tap Stop when you are ready to finish the recording. A menu will appear offering you to Cancel , Retake , Review , or Accept the recorded voice-over. If you’re content with the result, tap Accept . The recording will appear as a new clip on the Timeline .
How do you match your voice to a video?
You can match your voice to a video using Movavi Video Editor. Just install the program on your PC or Mac and follow our guide.
Download the version for Windows
Download the version for Mac
Launch the program and import your files by clicking the Add Files button in the Import section or simply drag and drop your files into the program window.
Drag your video from the Media Bin onto the Video Track , and your audio onto the Audio Track . If you have two videos with soundtracks you want to match, create an additional Video Track . To do this, click the Plus sign above the Timeline , choose Add Video Track , and then place your second video on the new track.
Select your video and audio (or two videos), open the Tools tab, and select Audio . Here, click Synchronization , then Synchronize . The program will do the rest.
If you’re happy with the result, save your voice-over video. Click Export , name your video, choose the appropriate video format and destination folder, and finally, click Start .
This is it! The automatic audio tracks synchronization feature helps unite soundtracks recorded with multiple devices into a single track. This feature is especially helpful for those who use a camera and a lavalier microphone to record sound.
How to Create a Voiceover on TikTok (Step-by-Step Tutorial)
In this step-by-step tutorial, we're sharing how to do a voiceover on TikTok—both in the TikTok app and with advanced editing tools.

TikTok voice overs are a trend that has bled over into just about every social media platform. Not only do the algorithms reward the use of trending voice effects (remember when everyone’s feed was full of nothing but that one voice that sounds like Nick Kroll?), but voice overs are also just a great tool for content creators.
Don’t want to appear on camera? Add a voice over. Is your recording’s audio unclear? Add a voice over. Making a timelapse video or compiling multiple shots into a single tutorial? Add a voice over.
But how do you add a voice over on TikTok? There are two methods:
- Use the voice over tools in the TikTok app or
- Create and add your TikTok voice over using a video editor
Let’s break down those two methods, step by step, starting with adding voice overs inside the TikTok app.
How to create a voice over on TikTok
- Head over to the TikTok app and tap the plus (+) button to create a video.
- After creating a video, tap "Next" to start editing. Then tap on the microphone icon that's labeled "Voice" to start recording your voice over.
- Your video will start playback, so you'll be able to stop and start your voice over at any sections you'd like.
- Begin recording your voice over at any section in your video; just tap and hold the red recording button when you'd like to add your voice.
- Optionally, you can tap the "Text" icon during Step 2 and then tap "Text to speech" to generate a voice over with an AI voice.
Need more detail? Here's a step-by-step tutorial for creating a TikTok voice over with screenshots:
To get started, open TikTok and create a new video by clicking the plus button at the bottom of your home page.

You can record your video or upload existing video clips from your device.

Now it’s time to create the voice over . There are two ways to do this: by recording your voice in the app or by using TikTok’s text-to-speech feature. First, let’s look at how to record your voice over.
How to record a voice over in TikTok
Step 1: open the voice tool.
In the right-side tool menu of the TikTok editor , look for the Voice tool. It should be denoted by a microphone icon. If you click the more arrow at the bottom of the menu, you’ll see the names of each tool appear beside them.

Click on the Voice tool to open the voice over recording window.
Step 2: Record your voice over
Click on the Record button at the bottom of the screen.

If you have a script you want to stick to, make sure it’s handy so you can read it aloud. You can also just speak off the cuff. TikTok plays the video while you record audio, so you can follow along with what’s happening in the clip as you narrate.

You’ll only be able to record a voice over as long as the video is, so pace your speaking voice. It’s alright if you need a few takes.
You can choose to leave the background audio on or off.

ASMR is still having a moment, so you might want to leave in any aesthetically pleasing, non-distracting background noises like cooking or nature sounds. If there’s speaking in the background that you don’t want competing with the voice over for your viewer’s attention, though, we recommend leaving it off.
Step 3: Add an optional voice effect
Once you’re happy with your voice over, you can add a voice effect. These range from funny to distinguished and can really change the tone of your video. Making a video about a luxe product? Choose one of the more elegant female voices to really sell the audience.

While some of the voices do sound like a silly effect layered over your real voice, a lot of them are highly realistic, synthesized voices. These are a great option if you want to disguise your voice in videos for privacy.
Now you’re ready to finish editing your TikTok and publish it with your recorded voice over. If you don’t want to record any audio at all, you can use the text-to-speech feature instead.
How to create a text-to-speech voice over in TikTok
Step 1: Open the Text tool
In the right-side tool menu of the TikTok editor, look for the Text tool. It should be the one with an uppercase and lowercase ‘A’ icon.

Click on it to open the text editor. Add your voice over text to the screen and set your text’s timing and placement.
Step 2: Turn on text-to-speech
Once you’re done adding your text, you’ll see the Text-to-Speech button go from grayed out to clickable.

Tap on it to open the text-to-speech tool.
Step 3: Choose your text-to-speech voice
As with the recorded voice over voice effects, there are a wide variety of voices to choose from for TikTok’s text-to-speech. You can pick from the Recommended options or browse different voice collections to find the voice best suited to your needs.

The collections include: Humor, Character, Narration, Sports & Games, Singing, and Beauty & Wellness. You can even use a popular Creator’s voice, which appears to be in beta still as there are only two available Creators to choose from.

Tap on a voice to preview how the audio will sound.
There’s pretty significant variance between each voice. For example, “Jesse” is the stereotypical TikTok text-to-speech voice and sounds pretty robotic, while some other voices sound more realistic and even emulate different emotions. Take your time and figure out which voice is best for you then make sure “Apply voice to all text in this video” is checked.
Now all the on-screen text in your TikTok will be converted to text-to-speech voice over with your chosen TikTok voice.
How to create a voice over for TikTok with Kapwing
Not a fan of editing in TikTok? Or maybe you’re creating for a brand account and the video needs to be reviewed and approved before publishing. Whatever the reason, if you’re looking to add voice over to a TikTok using a third-party video editor, we recommend Kapwing.
Kapwing’s voice over tools are built into our easy-to-use online editor, so you can get all your editing done in one place.
First, upload your video to Kapwing as a new project. You can upload files stored on your device or from anywhere with the link.
Just like on TikTok, Kapwing gives you the option to record your voice over in the editor or to generate a voice over from text instead.
Record a TikTok voice over in Kapwing
Step 1: open the recording tool.
Click on the “Record” tab in the left-side tool menu.

You’ll see a few different recording options. Choose “Record Audio.”

This will open the recording window. Make sure your microphone is connected. You can also add your voice over script to the teleprompter .

The teleprompter will autoscroll as you record. Adjust the scroll speed to fit your preferred narration pace. Remember that the pace of your voice over will affect the tone of the video. Upbeat videos should have a lively, faster paced narration. More serious videos, a slower, more stately pace.
Hit record and read (or recite) your voice over script. You have as many takes as you like, so there’s no pressure to get it right the first time.
When you’re finished recording, click the recording button again to stop recording. Your voice over will automatically be added to the project timeline as an audio layer.

Step 3: Add automatic subtitles
Subtitles are mandatory for social media and TikTok is certainly no exception. The good news is you can easily add automatic subtitles to your voiceover in Kapwing.
Open the “Subtitles” tab in the left-side menu and click “ Auto subtitles ” and select your language preferences.

If your video’s background audio has speaking that you don’t want to interfere with your voice over, make sure you only select the voice over layer to add subtitles to. You’ll also want to mute that layer in the timeline.

Once your voice over subtitles have been generated, you can customize the size, placement, and style of the subtitles. We recommend choosing a high contrast color so that your subtitles are clearly legible. You can also use the TikTok Safe Zones filter to make sure they will be visible once you publish your video on TikTok.
Finish editing your TikTok as usual with Kapwing and export. Now it’s ready to publish.
Create a text-to-speech voice over in Kapwing
Another way to create a TikTok voice over with Kapwing is by using our easy voice over generator. This is a good option if you're not looking to invest in voice over equipment just yet.
Step 1: Open the text-to-speech tool
Select the “Audio” tab in the left-side menu then choose the “Text to Speech” tool.

Step 2: Choose your AI voice and language
In the text-to-speech tool, you’ll see two dropdown menus:
- Language of text input and
First, choose your language if it’s not English. There are over 20 voice over languages to choose from.
Next, select your voice over voice. You can preview what the voice sounds like by hitting the play button next to each voice name.

You can also create your own AI-generated voice by cloning your own voice. This is a great option if you want to create voice overs that sound like you without having to record them every time.

Select the “Add new voice” option at the bottom of the dropdown menu to create a voice clone then follow the prompts in the Voice Cloning tool.
Step 3: Add your voice over script
Finally, add your voice over script to the text input box in the text-to-speech tool.

When you’re happy with the script, hit “Generate” and Kapwing will create a voice over from your text input and chosen AI voice as a new layer in the timeline. Subtitles will automatically generate.

Finish editing your TikTok, export, and share online!
Narrate your TikToks with a voice over
Whether you create it in the app or use another tool for generating your voice overs, adding a voice over to your TikToks can increase engagement and reach. Just remember to match the voice (yours or an AI-generated one!) and pacing to your video’s tone and intent.

How to Post Photos and Carousels on TikTok with Photo Mode

How to Make Horizontal TikTok Videos (and Why You Should)

How to Add Captions on TikTok: 3 Methods for 2024
How to Do Voice Overs on Video in the Best Way

If you have not done this before, don’t fret, making a voice over is not hard to achieve as long as you take a good tool. You can use a recorder to record what you do and what you speak at the same time, well, please make sure your microphone is OK. If you are making a video on your computer, you can also choose one excellent screen recording software that can capture videos and sounds simultaneously to help you.
No worries, just read the following parts carefully and you will find a good way that is suitable for you.
How to Voice Over a Video in Different Ways
As mentioned, there are different methods on how to make a voice over on your videos. Whether you are using Windows or Mac, there is a solution that would work best for you. Let’s begin with making voice overs on Windows then we’ll talk about the solution for Mac on the next part.
1. Online Application: the Simplest Way
The first method for making voice over is using Apowersoft Online Screen Recorder . This is a web based application that you can use for free. It doesn’t require installation so all you really need is a reliable Internet connection and your microphone and your preparation for a voice over. There are two ways on how to make a voice over video using this application.
For this method, you will be recording your audio and video at the same time. Apowersoft Online Screen Recorder can capture your screen and webcam video along with audio simultaneously. Now let’s see its key features:
Main Features:
- Record video in different modes like full screen, part of screen, webcam.
- Record audio from computer system, microphone, or both of them.
- Draw lines, arrows, circles, rectangles to highlight your video.
- Convert videos into different formats.
Plus, Apowersoft Online Screen Recorder is user-friendly that you can handle it well even it is your first time. Now, let’s see how it works:
Go to Apowersoft official site and click “Start recording” on this page.

Click “Audio input” and select “Microphone”.

Tap “Record” and choose your preferred option.

Click “Start” to start recording your screen and your voice.

Before doing your voice over, make sure you’re in a quite environment. And then check your mic and make sure it’s working fine. It would also be great if you prepare narration script before you start so as to make your voice flawless. You have the option to record your voice with the system sound or just your voice. As given on the steps above, choose “Microphone” if you wish to record only your own voice. On the other hand, you may choose “Both system sound and microphone” if you wish to record the audio played on your computer along with your own voice.
2. Windows Movie Maker to Do a Voice Over
Another way on how to do voice overs on videos using this application is by recording your voice over and video separately. You can record the video by following the previous steps but without the voice over. Once done with your video, you may record your voice over separately by choosing the “Only audio” option under the “Record” menu. Use WMM to make audio and video streams interleaved.

If you wish to add subtitles on your video, that is also possible using Apowersoft Screen Recorder Pro. To do this, select “Video converter”, add your video and choose “Edit”. Click “Subtitle” on the lower left side and choose the subtitle plug-in saved on your computer. This application supports .ass and .srt formats.
3. iMovie: the Accurate Way for Mac
The next method that we will discuss is for Mac users. If you have a Mac computer, you can use iMovie to make a voice over on your video. Import the video on the application, click anywhere on the video that you would like to give a voice over to and click the “Voice over” icon, which is the microphone icon below the video preview. If you wish to hear the sound while recording, you may select “Play project audio while recording”. If you are not satisfied with the output, select “Undo voiceover” and repeat the steps to retry.

In conclusion, if you are using Mac, iMovie is definitely an accurate way to do a voice over on your video. Well, no matter you are a Windows or a Mac user, Apowersoft Online Screen Recorder is the simplest way to choose, because it can run pretty well on both Windows and Mac, including the newest the newest Mac OS X Mavericks. Even if you do not have prior experience on how to voice over a video you will not have difficulties with this tool. It’s more convenient to record the video and your voice over simultaneously as there’s no need to use a third party application like Movie Maker to combine them.
Related posts:
- Free Alternative to Camtasia
- Comprehensive Review for Snagit
Leave a Comment
Comment (1).
- ApowerREC was Released
- ApowerMirror 1.0 was Released
- Apowersoft Android Recorder 1.0 was released
- Apowersoft released iPhone/iPad Recorder
- Apowersoft Screen Recorder Pro 2.0 was released
- Apowersoft Screen Capture Pro was released
More Resource
- Presentation Maker|How to Create Video Presentation
- Top 5 Practical Mouse Recorders
- Smart Samsung Screen Recorders
- Best HD Video Recorders
- How to Record Your iPhone Screen
- Ways to Record iPhone 8 Screen
- How to record screen on Windows 10
- Record screen on OS X El Capitan
- Record Skype video with ease
Submit Ticket
This website uses cookies that are essential for the operations of this website and its core functions. Other cookies will only be placed with your consent. For more details visit our Cookies Policy.

How to Make a Video: The Only Guide You’ll Ever Need
- how to make a video

Did you know that viewers retain 95% of a message when they watch it in a video as compared to only 10% when reading it in text?
It is no wonder that more content is being uploaded in 30 days than what major television networks in the US have created in the past 30 years .
Even then, many businesses struggle to create videos to engage with their audience, and one of the biggest reasons for this is the myth that creating a video is expensive, time consuming and effort-intensive. But, w ith an Online Editing Tool like InVideo , you can now create thumb-stopping videos in less than 5 minutes, even if you have no prior editing experience!
Create thumb-stopping marketing videos
Without spending hours on editing

In this blog, we break down the exact steps you can follow to get started with video content for your business. Not just that but we’ve also dedicated sections to the two most frequent categories of videos for businesses- YouTube videos and instructional videos . You can dive straight into one of these sections or simply read along to start with the building blocks of how to make a good video.
Here’s what the plan of action looks like:
1. Building blocks of making a good video 2. How to make a YouTube video? 3. How to make an instructional video?
1. Building blocks of making a good video
A. find topics to create videos on.
While you can create a video about anything under the sun, it is important to understand what you bring to the topic and how it is different from everything that is already out there.
Let’s start by answering these 4 questions:

1) What do you want to talk about?
This question is mostly aimed at individual creators who are looking to share their work or passion. If you’re a brand or business, you may want to start by answering question 2 since your content will primarily be centered around your audience and will have to serve their interests.
Assuming that the end goal of your content is to get more people to discover you, the key is to create gold-standard videos consistently. To create consistently, you need to have clarity on what you want to talk about.
So, how do you decide on what you should create videos about?
It’s simple – on a piece of paper make two lists, one of the things that you’re passionate about and the other of the things you know really well or are good at.
At the intersection of these two lists, you’ll find something that you’re both passionate about and good at. For example, if you’re passionate about photography – then there is a list of things that you can naturally talk about – like camera basics, understanding lights, editing images, how to do portrait photography, what lenses are best for street photography, and much more. But if you’ve got a lot of experience with black and white photography then that’s probably the first place you should start creating videos around.

2) Who am I catering to?
While this is a critical step for brands and businesses, it can also be very useful for individual creators who want to identify their audience and create specific content for them.
As a brand, creating content is more than just identifying your target audience. It is important to understand what gets your audience’s attention, what are they actively searching for and how can that tie back to your business.
You can start by creating a persona centered around the problem statement. Think about the age, location (and profession, if applicable) of your desired target audience. This will allow you to understand them better and will help you create content that matches their needs.
For example, if you wanted to create content for photographers who are hobbyists or beginners in the US, between the age group of 15-40 – You can flesh out this persona further in terms of their exact pain points and what they could be looking for.

3) What are they looking for and how can I add immense value to them?
The next thing that can help you find topics to create videos is understanding what your audience is looking for. You can start with where they are going to interact with you – YouTube, Facebook, Instagram, Google.
Auto-recommendation on search engines
YouTube and Google both have an automated search bar that will tell you what are the most popular topics that people are looking for around your topic of interest. You will also see what kind of videos are ranking for them which tells you what kind of content works for this search category.
For example, when you type ‘baking’ in the search box on YouTube, you get the following popular results:

As you’ll keep adding more words to your search query, you’ll keep getting more relevant search intents that can help you derive video ideas.

You can go one step ahead by clicking on any one of the results and check out the videos that have ranked for it.

You can also use filters to check the most recently posted videos, sort them by view count, rating, and duration.

You’ll notice that many titles have similar words – like ‘cake without oven’. This is a keyword and we’ll go deeper into keyword research when we talk about how to make videos for YouTube , so make a note of it. You can try the same thing with Google’s search bar.
Browsing through the top videos will help you understand what kind of content format works best for that topic. Whether it is listicles , interviews, Q&A, how-to videos, etc. More importantly, the top relevant videos for your search query will help you in the next step – which is finding out the content gaps that your video can fill.
4) What gaps can my videos fill / how are they different from the lot?
Every topic you can come up with will already have tons of videos that have already been created. How do you then make sure that your content stands out for your audience?
You can start by looking through the top-raking videos of your search. Select 10 top-ranking videos and make notes on the things you think they could have covered or presented better. These are information gaps that you can fill to make sure that the content of your video appeals to your audience.
How do you find information gaps?
(i) Consume the content yourself
When you watch the video, make a note of the parts in which you press rewind or rewatch a section of the video because you didn’t understand it or there was a lack of clarity. Also, make note of the points where you feel like dropping off which indicate a lack of value and may also tell you what you should avoid doing in your video.
(ii) Go through comments
One of the best places to get information on what your audience wants to know, what they agree and disagree with, and what they love and what they need in the comments section. Viewers will leave their comments, thoughts, and questions about their video. These are gateways to understanding what works and doesn’t. (iii) Talk to people
It’s important to also engage with your audience and there are many touchpoints to have these interactions. You can start a conversation in the comments section, on social media or even asking people within your circle – especially those that share similar interests.

Now that we know how to identify these gaps, let’s look at our examples from before and see how information gaps can be leveraged.
L et’s say you are looking to create videos around the best cameras for beginners. The top videos that show up on YouTube are very comprehensive (mostly Top 5 picks) but when you watch the videos and go through the comments, you realise people are looking for a lot more.
Let’s look at the example of Nyma Tang – a beauty vlogger on YouTube to understand how using the information to fill gaps in your videos can help you create unique and value-adding videos. Beauty vlogging is a crowded space on YouTube. However, Nyma Tang realised that almost all of the makeup content on YouTube was for a fair-skin audience. There was a wider audience of dark-skinned makeup enthusiasts which was entirely untapped. She also realised a similar disparity in makeup products. Marrying these two insights, she created a series called #TheDarkestShade , which reviewed the darkest foundation shade of top brands and helped her tap into an interested audience base.

B. Plan your Production
Once you know what you want your video to be about, it’s time to put the ideas on paper. It is essential that you cover all bases during the production phase so that you’re well prepared for everything on shoot days.
Here’s a list of things you can do before you start shooting your video:
1. Turn the idea into a script
You must turn your thoughts into a well-written script that will allow you to perfectly execute and communicate your ideas to the viewers. After you have locked on an idea, start with creating an idea map – in which you will mention all the elements you want to get into and what details you would like to add in the video. Researching on the topic by watching related videos, reading articles and blogs, and speaking with people who can add more information will help you dive deeper and add more layers to your video. Using this idea map, you can build on a script.
Once you’re happy with scripting the idea, add as many important details to the script as what location do you want to shoot at, what time of the day, what will the person in the frame be wearing. This will ensure that you have all the information you need about the scene right in front of you.

If you’re shooting a scripted video, like the example above, here’s a template you can start using right away. However, if you plan to create videos where you’re directly addressing your audience, choose this template .
Pro Tip: Once you have your script ready, you can bring it to life by creating a stunning video using InVideo’s templates and the intuitive online video editor
2. Create a Storyboard
While creating a storyboard can be optional, it will really help you visualise and plan the narrative. You will be able to visually track how the imagery in your video will look even before you start shooting it, allowing you to have more control over how you want to shoot. You don’t have to be a professional artist or hire someone to create a storyboard – simply use stick figures and rough sketches. You can also add notes to cover any other specifications. You can also plan your shots by simply writing them in a sequence and mentioning the most essential details.

Here’s a StoryBoard template we created for you to get started.
3. Planning your shoot schedule

Here’s a template you can use to make your shoot schedule.
It’s always a good idea to visit the place you’re planning to shoot to understand its limitations and the on-ground problems you may face on shoot days. Make a note of this and come prepared with solutions to preempt being in an unfavourable situation on the day of the shoot.
To make it simpler, here are 3 things you must check during a recce:
This is especially essential if you’re relying on natural light for your shoot – make sure that you’re getting the light you need to make your shot and also note the timings during the day when the light is the best and worst so you can schedule your shoots accordingly.
ii) Potential frames
One of the most important things to do while on recce is to find frames – this will not only allow you to visualise the video better but also figure out if you will need any extra equipment or tools to get the shot.
iii) Obstacles
Obstacles can range from permissions, traffic, and noise. Knowing your obstacles allows you to come better prepared with solutions to tackle them and also plan your shoot schedule accordingly.
C. Shooting the Video
After you’re done with the planning and production phase, let’s take a look at how you will execute the video. The three things you need to shoot your video are camera, lighting, and audio. Choosing the right equipment is quintessential to creating gold-standard videos. You don’t need the most expensive camera and light setup or a studio to record audio. Getting your hands on the right kind of equipment can make all the difference, and what combination of these three do you use goes hand-in-hand with the video type. Hence, we’ve put together this ready reckoner that will enable you to pick the right equipment for your video type.
Snapshots: Equipment list for different types of videos
(1) first-person videos.

First-person videos are where you set up the camera on your desk and just talk into it, so it appears like you are having a direct conversation with your audience. These are simple to shoot and you don’t require a lot of equipment.
Here’s all the gear you’ll need with our recommended best buy for each piece of equipment.
Camera : Webcam if you have a PC and want to record your videos from there itself, camcorder , or smartphone if you will be changing your set up or moving around in your videos.
Stabilizer : Manfrotto PIXI or any simple 3-legged tripod that will support your camcorder or smartphone.
Light : Ring light s are the best option for lighting up a single person in the video.
Audio : Opt for the Takstar SGC-598 Shotgun microphone that will connect to your compact camera or choose the Deity V Lav Lavalier Lapel Mic if you’re recording your videos from your smartphone. Blue Snowball mic is a great option if you will be recording your videos directly on your PC.
Softwares : InVideo for editing videos (lets you also add stock footage and animation, if needed), Premiere Pro for advanced editing (in case you’re making long videos), StreamYard, or Switcher Studio for live streaming, and OBS for screen recording.
(2) Product showcases like phone, unboxing, etc.

Creating unboxing videos, tests, and doing reviews are also simple set-up YouTube videos. However, you will need equipment that can easily move around so that you can show your audience different angles.
Here’s all the gear you’ll need with our recommended best buy for each piece of equipment
Camera : If you’re just starting, you can use a camcorder or a smartphone (minimum 12MP camera) to record your video but if you want to upgrade, you can choose between a compact camera like the Canon G7X Mark III or a DSLR – Canon 70D .
Stabilizer : You’ll need a stabilizer with a fluid head for easy pan and tilt movements to show your audience the unboxing and products, like the Manfrotto Compact Action tripod . You can also upgrade to the Vanguard Alta Pro .
Light : You can choose between an 18” Ring light , LED panels , or a softbox depending on how big your set-up is.
Audio : You can use a shotgun mic – RODE Video or even a lapel – RODE Go Compact Wireless to record your audio. Some YouTubers also prefer a podcast mic like the Maona USB Podcast Mic .
Softwares : InVideo for editing videos (lets you also add stock footage and animation, if needed), Premiere Pro for advanced editing (in case you’re making long videos), StreamYard, or Switcher Studio for live streaming, and OBS for screen recording.
Create professional product videos
With ready-to-use templates on InVideo

(3) Performance art

Whether you’re shooting a dance performance or a band – having the right equipment will allow you to capture the movement and emotion of it.
Camera: Based on your budget, you can choose to shoot with a smartphone , compact camera , or DSLR . If you wish to upgrade, you must go for a mirrorless camera, like the Canon EOS R that records on a 35mm sensor – giving you more vivid colors
Stabilizer: To capture smooth and fluid movements you must use a gimbal. If you’re shooting with a smartphone, the DJI Osmo Mobile 2 and the Moza Mini MI are both great options. If you’re using a DSLR – go for the DJI Ronin-S or the Zhiyun Weebal Lab .
Light: If you’re going to be moving with the subject and want the light to follow that movement, you can use an on-camera LED light panel . However, you can also use this LED panel kit by Fovitech if you want to light up a small room or stage. This stick light by Godox can be used to add colors, drama, or a cinematic feel to the performance.
Audio: Use a shotgun mic like the RODE Video with a dead cat to capture the audio (to match it to the original during edit) but you should put in the original track during the edit of the video.
Softwares: You should use Premiere Pro for editing the video and you can use InVideo to create an animated intro-text, StreamYard or Switcher Studio for live streaming, and OBS for screen recording.
(4) Vlogs and outdoor videos

If you’re going to be shooting outdoors, you want to have steady but portable equipment. More importantly, you want to make sure that all of your footage is recorded smoothly, with no audio or visual disturbances.
Camera: You can shoot vlogs and outdoor videos on your smartphone or you can use the Canon G7X Mark III which is known as the vloggers’ camera. You can also choose to upgrade to a DSLR like the Canon 70D or a mirrorless camera like the Sony A7 RIV .
Stabilizer: For ultimate stabilization, especially because you will always be on the go – choose the Moza Mini-MI or the DJI Osmo Mobile 2 for your smartphone or you can use the DJI Ronin-S or the Ikan MS Pro Beholder .
Light: You will mostly choose to shoot when there is good natural light outdoors. However, this portable ring light , on-camera LED panel , or Godox stick light should do the trick, if you happen to need external lights.
Audio: You will want a portable mic set up that should easily sit on your camera. Go for the RODE Video with a dead cat or the RODE Go Compact Wireless to record your audio.
Softwares: InVideo for editing videos (lets you also add stock footage and animation, if needed), Premiere Pro for advanced editing (in case you’re making long videos), StreamYard, or Switcher Studio for live streaming, and OBS for screen recording.
(5) Live streaming

Live streaming on YouTube needs some extra equipment – like a live stream encoder and podcast mic. Don’t worry, we’ve got you covered.
Camera: If you’re live streaming from your desk, the best option for you is the Logitech Brio webcam but if you’re travelling or are outdoors – you can also go live from your smartphone . Many YouTubers also use a DSLR and convert the footage using live stream software – especially for interviews and podcasts.
Stabilizer: If you’re not moving around during your live stream, you can set up a simple 3-legged tripod . However, if you are walking around with your equipment to show your audience where you are and what you’re up to – we’d suggest either an advanced monopod like this one by Manfrotto or a basic gimbal – like the Moza Mini-MI or DJI Ronin-S .
Light: You will need a light that can sit on your desk while you comfortably go live like this 18” ring light or something that moves around with you – like an on-camera LED panel .
Audio: The best audio option to go for during your live stream is a podcast mic like the RODE NT-USB or Maono USB Podcast mic AU-A04, however, if you’re going live outdoors, you must choose the RODE GO compact wireless microphone .
Softwares: Use InVideo to create the promo and intro of your live stream. You can then choose between StreamYard , vMix , and Streamlabs OBS to go live. If you are using your smartphone – go for Switcher Studio .
(6) Screen-recording tutorials

Want to show your audience how you get something done – like how you play a game or create something on Adobe Illustrator? You’ll need a screen recorder to capture all your activity which will help you guide your audience through a step-by-step tutorial.
Here’s all the gear you’ll need with our recommended best buy for each piece of equipment:
Camera: You must use a webcam to record yourself doing the activity – like creating a graphic on Illustrator so that the audience can understand your thought process too. You could also use your smartphone or a compact camera to shoot it.
Stabilizer: You’ll need a simple tripod like the Manfrotto PIXI to mount the compact camera or smartphone.
Light: You don’t need a fancy light for a screen-recording tutorial. A simple ring light will do the trick.
Audio: You can choose between a podcast mic , a lavalier , or even a shotgun mic depending on your budget.
Softwares: You should use Premiere Pro for editing your tutorial and create a stunning intro on InVideo . You can choose between OBS , DU screen recorder , and Camtasia for screen recording.
(7) Animation / stock footage based videos

Got a great idea but don’t have the budget to shoot it? That shouldn’t stop you from creating a great YouTube video.
PC: Any PC with a minimum of 12GB RAM if you plan to edit your videos on Premiere Pro or FCP. If you don’t want to upgrade your PC yet, choose to edit online with InVideo .
Softwares: InVideo lets you add stock footage and animation from Shutterstock and you can edit your YouTube video on the online editor itself. If you have bought or sourced stock footage from elsewhere, you can edit it in Premiere Pro and FCP.
We’ve also made an exhaustive list of video equipment keeping every budget and use case in mind – read it here .
Here are some tips that will help you get the most out of your shoot day:
Tip #1 - Charge all equipment batteries and carry extra
You don’t want to miss out on a great shot because your equipment battery ran out. Ensure all your batteries are charged and that you have spares for both lights and camera equipment.
Tip #2 - Keep permission slips for equipment handy
Heavy equipment like lights on stand, medium format video cameras, etc. require special permission slips – whether you’re working on private or public property. Keep these slips handy to avoid any delays during the shoot. It is also a good idea to understand the rules and restrictions of the space before you start shooting.
Tip #3 - Ensure all your cameras are shooting in the delivery format
If you want your videos to be in a certain format like 4K or square (for Instagram feed) or 16:9 (for IGTV) – it is imperative that you shoot it in that format and avoid cropping in post. Cropping during post production may take from the quality of the footage and you may also have to let go of parts that don’t fit in the format.
Tip #4 - Don’t underestimate the need for a sound and light test
Do a mic check, light test, and rehearsal to avoid multiple retakes. It is also important that you have backups handy for light and sound – in case they malfunction or don’t work properly.
Tip #5 - Check your final shot to avoid reshooting
Before you move on to the next shot, check your final shot again – you can also get a fresh pair of eyes to see it. This is to confirm that you haven’t missed something in the frame or left something out.

D. How to make Video Edits?
Once you’re done shooting for the video, you will need to edit the best parts and fit them together so they flow as a narrative. Video editing can be extremely tedious with professional softwares like Premiere Pro, First Cut Pro (FCP), After Effects, and Cinema 4D – all of which are used to create movies and cinematic videos. However, there are simpler editing tools out there that can transform your footage into professional videos hassle-free. We’ve listed them based on how simple it is to use and what kind of editing they are best suited for. Let’s jump right in.
1. InVideo ($10/month)
If you’re just starting and don’t know much about editing videos or you don’t have the budget to shoot, InVideo is your best bet to create scroll-stopping videos. It comes with:
– 5000+ pre-built templates that you can readily use or you can start with a blank canvas. – An in-built media library of 8M+ royalty-free video clips , images, and music from premium sources like iStock and Shutterstock. – A super intuitive and easy to use video editor that’ll allow you to edit your videos in mins even if you’ve never edited a video before – 24*7 live chat support so you can always ask for help
The best part- it’s completely free for you to start with and you can create as many videos as you’d like with your own brand logo/watermark and export them in 720p. And If you’d like to get your videos out in 1080p, as well as get access to the premium media library, it’ll just set you back by $20/month or $120/year.
If you want to know more about how to use InVideo and get started today, check out this tutorial.
2. Adobe Premiere Pro & Final Cut Pro (FCP) ($19.99/month onwards)
A popular choice amongst filmmakers and content creators, both of these softwares are used for editing videos. If you have a basic understanding of filmmaking and editing, and you want to create videos using your own unique style, they’ll make for great options. Both of these softwares edit and render in HD and 4K, and you can choose different formats to export your video (like 1080p HD for YouTube and BlueRay for films).
Unlike InVideo, Premiere Pro and FCB require you to start at ground zero and edit your video from scratch. You will have access to tools that let you do more than just basic video editing and you can adjust sound, colour, and a lot more. You will have a lot of functions, creative tools, and presets to aid you but you need to have a working technical knowledge of transitions, colours, and design for you to make the best editing choices. This can be very intimidating for someone who is just starting out but you can find tonnes of tutorials on YouTube to help you understand the softwares better.
Check out this Final Cut Pro Vs Premiere Pro video by Tyler Stalman where he discussed how professionals choose the software they want to edit on.
3. Adobe After Effects ($20.99/month onwards)
If you’re already creating videos and want to level up by creating digital effects and stunning graphics (like this video by Roy Aldin ) After Effects is the best option for you. After Effects can be used for keying, tracking, transitions, and adding motion graphics and animation to your videos. Unlike Invideo, you will have to create these on your own using the many functions of the editing tool. However, if you are familiar with Premiere Pro, this software will be easier for you to understand. If you’re creatively inclined to try new things and create new visuals for your videos, there is no better playground than After Effects.

E. Adding Sound Effects and Music
Sound effects and background scores are the silent stars of videos. One of the biggest mistakes amateurs make is to not pay attention to the sound effects and scores in their videos, which makes the video sound flat. These simple additions go a long way in getting your audience’s attention and creating recall value. You can find many sound effects and tracks on the internet but it’s important to ensure that you can use them in your video or that you purchase it and credit the artist.
If you’re editing your videos on InVideo – you’ve got plenty of sound effects and royalty-free music , segregated by mood, to choose from. The audio timeline on InVideo allows you to do super critical changes that can help you selectively trim your audio, add voice over and add sound effects.
Add high-quality music to your videos

Follow these steps to add a background music track for your video:
Step 1: select an audio track.
You can either upload an audio track of your choice or choose one from InVideo’s audio library. The tracks are segregated by mood and you can listen to the track before making your final selection. When you select the audio track of your choice, it will show on the audio timeline.

Step 2: Selectively trim it to fit your scene
Click on the track that has now been added to your audio timeline and then click on the ‘Edit’ option. Then click on the ‘Trim’ option. This will open a wave timeline which will allow you selectively trim the part of the audio track that you want to add to your scene. Simply move the selection cursor on the timeline to choose the in and out the time of the track. When you’re happy with your selection, click on the done button and it will reflect on your audio timeline.

Follow these steps to add a voice-over to your video:
With InVideo, you have the option to record a voice-over for each scene or to record a single file for the entire video.
Step 1: Record your voice over
To record your voice-over on InVideo, simply click the ‘Voice over’ button above the video timeline. You can choose between an automated text-to-speech voice over or you can record your own. For the purpose of this example, we will record our own voice-over. Click on the record button and it will give you a 3-second head start before it starts recording and you can do multiple takes.

Step 2: Add your voice over
Once you’re done recording, click on the ‘Add’ option. Your voice-over will get added to a separate timeline. You can then move it around to perfectly position it for your video or scene.
Add Sound Effects to your Videos
Step 1: choose the sound effect.
You can either upload a sound effect to InVideo or choose from a variety of sound effects from our audio library. Select the one that best suits your video and it will get added to the timeline below (same timeline as the voice-over, if you’re adding one).

Step 2: Position your sound effect
Use the cursor to move around the sound effect to position it perfectly for your scene.
Once you’re happy with the video you have created, you can go ahead and export the file. If you’re editing your videos on InVideo, you can simply share the link with your colleagues who can share their feedback before finally exporting the file – saving you both, time and memory space.
2. How to make a YouTube Video?
Creating a video for YouTube is technically no different from creating a regular video. You can follow steps A-E (like finding topics, identifying information gaps, etc.) which will more or less stay the same, except when you’re creating videos for YouTube, your topics will be powered by keyword research. We’ll also be covering how you can do SEO for your YouTube videos to make them easily discoverable.
A. Keyword research for creating YouTube videos
The first place to start keyword research is right here on YouTube. Use the search bar and see what ideas you get for your search. You must also browse through the top-ranking videos to find patterns of keywords they have used.
A more precise way to do keyword research is to use tools like Ahrefs and VIDIQ. You can use the keywords you identified using YouTube’s auto-recommend on the search bar as a starting point and check their search volume and related keywords using these online tools. It is a great way to really dig deep into what people are searching for and what are the kinds of videos that show up in the top results on YouTube.
Here’s a step by step guide to keyword research on Ahrefs:
Start by typing in the keyword you identified by browsing Youtube’s recommendations. You must change the preference to YouTube as a platform to get specific data and then hit search.

Ahrefs Keyword Explorer will list for you the global and country-wise search volume for the keyword and it will also suggest some other popular keyword ideas that you can analyse before zeroing down on the final topic for your video.

Don’t stop here – you can dig deeper into hundreds of keyword ideas around your main search term by toggling to ‘All Keyword Ideas’.

If you are specifically looking for recommendations on keywords that include your main search term then click on ‘Phrase Match’/ ‘Having Same Terms’.

Check for keywords that have a high search volume every month and create videos on that to get the attention of your audience. After this, follow the rest of the steps listed in the section above to create your YouTube video.
Watch this video to understand how you can use VIDIQ for keyword research and create top ranking videos for YouTube.
We’ve also made an exhaustive list of time-tested ideas that work on YouTube and how you can leverage them to create top-ranking videos.
B. YouTube SEO
If this is your first time uploading a video on YouTube, you can follow this step-by-step guide to take your videos live. However, before you do that, you want to make sure you take care of the following YouTube SEO tenets to maximise the discoverability of your videos:
Once you have identified the topic you want to create a YouTube video on (after doing keyword research) all you need to then understand is what your audience will be typing into the search bar to get your video as a result – this is called search intent. By marrying the search intent with your the most relevant keyword and ensuring that the syntax of your headline is based on the videos that are already trending – you’re title is SEO ready.
Here are some best practices for titling your YouTube video:
– Use the most relevant target keyword in your title – Always keep your titles under 60 characters, with the most important information up front, like your target keyword.

– Write catchy titles that highlight a benefit and separates it from other competing videos. For example, instead of ‘Pad Thai Recipe,’ make your title more interesting – ‘The best Pad Thai recipe’.

Watch this video by Think Media to further understand how to title your videos to get more views on YouTube.
2) Description
One of the biggest mistakes video creators make on YouTube is underestimate the potential of a good description but honestly, it can be a gamechanger for your YouTube videos. A good description will give out the necessary information and further optimize your video for SEO.
Here are some best practices to make your description engaging:
– Write searchable descriptions: Using your target keyword and other related keywords (by checking descriptions of top-ranking videos) in your description will help your video show up in search results. While YouTube allows a maximum of 5000 characters, but ideal description size is around 200 words.
You have the be very smart in utilizing the first 30 to 50 words of your video description because, after the title and thumbnail, that’s the most noticed portion. Telling all in 30 to 50 words compellingly is challenging but made easy by a smart AI summarizer . Summarize the long description and use it as the first visible portion of the YouTube video description.
– Add timestamps to the description: When you add timestamps to your description, you make the video more discoverable and accessible to a wider audience. Not only this, your video may be featured for a particular section highlighted by a timestamp, especially on Google search.

Search Engine Journal
Want to dig deeper into crafting the perfect descriptions? Check out this tutorial by YouTube expert Nick Nimmin on how to write searchable descriptions for your YouTube video.
3) Thumbnail
Thumbnails are the first thing that catches your attention when you’re searching for a video on YouTube – and so it is absolutely essential that it gets your audience to click. That’s why 90% of popular videos use custom thumbnails .
Here are some best practices to help you create click-worthy thumbnails:
– Use hi-resolution images for creating eye-catching thumbnails. Avoid using screenshots or images with distractions or text on them – you want your thumbnail to grab your audience’s attention.

– Use bright colours like blue, pink, green, yellow and orange for your thumbnails. These colours not only attract attention when someone is browsing but also stand out from YouTube’s brand colours which are red, black and white.

– Having a human element in your thumbnails, mostly faces get a higher click-through rate than those that don’t. Make sure that the face on your thumbnail is interacting and engaging with your viewer, encouraging him to click on the video.

– Don’t make your thumbnails text-heavy (limit it to 3-4 words) and always use a font that is clear and visible even on smaller screens.

To deep-dive into custom thumbnails and how to create click worthy thumbnails, watch this tutorial by Video Influencers.
Another way to get your YouTube video easily discovered is tags . Since you have already done your keyword research, adding related tags will not be difficult. Youtube will also suggest keywords and phrases that best fit your video or you can use online tools like VIDIQ and TubeBuddy. You can also do your own research by checking the tags on top-ranking and competing videos. Watch this video by VIDIQ to understand how to use ranked video tags for YouTube.
5) Cards and End screens
YouTube cards and end screens are interactive features on the platform that allow you to keep your audience engaged by redirecting them to more content and your website or other important links.
Cards on YouTube can be set at certain time codes – allowing you to add relevant links – for another video you created or the link to your website. It is important to not stuff your video with cards but instead use them at perfectly timed spaces like when you feel a user may take action or when they are most likely to drop off.
YouTube cards lets your audience take 5 actions: – Watch another playlist or video – Discover another YouTube channel – Donate to a nonprofit – Answer a poll – Visit an external link like your website or blog
End screens on the other hand can only be added to the end of your YouTube videos. In an end screen, elements, like subscribe buttons, links to other videos, and playlist pop up, allowing your audience to engage with more content. This feature helps you keep your audience on the platform and most importantly consume content created by you.

Want to dig deeper into YouTube SEO and how you can get your videos to rank? Check out this guide we put together with one of the world’s best YouTube experts- Nick Nimmin. If you want to dig deeper on how to make YouTube videos, you’d definitely want to check out this one-stop-shop guide we’ve put together that covers everything from start to finish.
3. How to make an instructional video?
Instructional videos are exactly what the name suggests – they explain a concept or show you how to do something. It’s simple – what do you do when you want to fix something or learn something new? You look for a video that will teach you how-to. Statistics show that people prefer watching videos about a product instead of reading about it when they’re making purchase decisions.
These informative videos are the best way to build an audience pool, grow your business and support your customers. They allow you to connect with your audience by giving them the information they’re looking for – which creates a bond of trust.
Unfortunately, many businesses are still not creating instructional videos because of three bottlenecks – time, cost, and effort. That’s why we have not only listed the kinds of videos you can create for your use-case but we have also linked templates that you can start using right away, for free – and all of them take less than 15 minutes to create.
A. What are the different formats/types of instructional videos?
1) micro videos.
Micro videos are usually less than a minute long and focus on teaching or highlighting a simple concept or explain a topic in brief. These videos are great to get your audience’s attention because they’re quick to consume and best-made for social media platforms where the attention span of the viewer is always low. Here’s an example of a micro video.
Use this free template to create your own micro-video now .
2) How-to videos
Unlike micro-videos, tutorial videos are longer and usually explain a process or demonstrate how to do something in guided steps. These can be between 2-10 minutes long and work both on social media and video platforms like YouTube. These are perfect for tutoring your viewer on how to do something – like how to create shoppable posts on Instagram. Here’s an example of a how-to video.
Create your own how-to videos using these free templates.
3) Explainer videos
Make your own explainer video using these free templates.
4) Presentation videos
5) Screencast videos
B. Equipment and tools to create instructional videos
You don’t need expensive equipment to create instructional videos for your business. Instead, it is important to invest in trustworthy tools that can get the job done. That’s why we have listed these quintessential tools that you need in your kit to start creating gold-standard video content.
1) InVideo – Video creation software
This online editing tool allows you to create your video from scratch using pre-made templates, stock footage from Shutterstock, royalty-free music, animations, and graphics. You can also record and add a voiceover on InVideo itself – making it a one-stop solution for video creation. Check out this tutorial to learn how you can leverage InVideo to bring your ideas to life in mins.
2) Loom – Screen Recording software
If you plan on creating screencast videos or you would want to include screen recordings to help your audience understand better – you will need software like Loom. It is compatible with Chrome, Mac, Windows, and iOS, it is easy to use and free. Check out this tutorial to help you understand how you use Loom to create screencast videos.
A webcam is essential if you’re planning to record yourself at your desk or if you’re screencasting tutorials. This allows your user to see you at work, guiding them through the process. Your computer webcam may not give you the best quality and so you should invest in an external webcam. If you’re on a budget, go for the Logitech C920S and you can later upgrade to the latest Logitech Brio – both of which shoot in high definition.
4) Microphone
You’ll need to record a voice-over for a tutorial, explainer, and screencast videos. The in-build microphone on your system is not designed to give a clear, noise-free output and so it is best to record with an external microphone. You can choose between a podcast mic , shotgun mic , and USB microphones that plug right into your system.
C. 5 steps to creating super-effective instructional videos with InVideo

1) Identifying the right format
Before you start creating your instructional video, it is important to answer a few questions that will help you focus your video on the right audience.
– What is the purpose of this video?
Do you need to explain a concept to your audience or do you want to teach them how to do something? There is an instructional video for each use case so choose the one that best allows you to disseminate your information.
– What platform is the video going to be published on?
Each platform has its own limitation in terms of what your audience is there for. For example, a micro video will work best on Instagram but not on YouTube because people come to YouTube to get more information as compared to Instagram where they are just leisurely scrolling. Longer videos will work best on YouTube and Facebook Watch.
On the other hand, corporate videos will work best on your website as opposed to any social platform. Your audience on social platforms wants to engage with you so be sure to post videos that add value to them.
Another technical but important thing to keep in mind is the aspect ratio that best suits each platform. Videos created for Facebook Watch, YouTube and your website should be in a 16:9 ratio, whereas on Instagram 1:1 works best (even though it is now compatible for landscape videos). On the other hand, IGTV and Instagram stories require a 9:16 ratio.
– What is your end goal?
What action do you want your audience to take after they have watched your video? If you want them to buy your product by clicking on a link, Facebook and YouTube allow you to redirect them, however, Instagram may not be a great choice for that. On the other hand, all of these platforms are a great choice to engage and build connections with your audience.
2) Storyboard/script
Once you have locked on the video format, you can start breaking down the content into scenes and turning it into a script. This will make it easier for you to shoot and edit the video.
If you’re using InVideo , you can directly transform your script into a storyboard. Click on the option to convert an article to a video. The online editor will then create scenes from your script and you build on it from there.
Here’s how you can create a storyboard from your script on InVideo in 4 easy steps:
Step 1: Log on to InVideo.io and click on the section ‘ Text To Video ’ on the homepage.

Browse through stories and listicle templates on InVideo and choose the one that is best suited for your video. These are compatible with landscape (16:9), portrait (9:16) and square (1:1) ratio.

Step 2: If you already have your script ready, go ahead and copy-paste the text lines into the editor. You can also paste your blog article’s URL if that is what needs to be converted into a video, and InVideo will pull up the text from there.

Note: Enter each sentence in a new line to add it as a separate scene. Step 3: The next step is digital storyboarding. You can add, duplicate and delete scenes here. While InVideo will auto-recommend footage for the scenes, you can go in and choose footage from their stock library that is best for your brand. You can also upload your own footage to add to the video. You have to simply drag and drop the selected footage to the matched scene. Use the preview button to play each scene and check if you want to add or edit anything before finally exporting your video.

Once you’re satisfied with your edit, preview your video and then click on export. You’ve created an instructional video in less than 15 minutes!
3) Putting together scenes
With the framework in place, you can start building each scene from your storyboard. Whether you’re shooting the scenes or using stock footage, this is where you start adding them to your edit table and filing in the gaps.
On InVideo, you can choose stock footage and images from premium sources like Shutterstock and iStock or you can also upload your own footage and screen recordings.

4) Add text & record VO
Once you have added the visuals to complete the scenes, you may want to add text to highlight important points in the video. You can also use icons and graphics to make the video more visually satisfying.
If your video is a tutorial, you may want to add a voice-over (especially if you are using only a screen recording and no video footage with sound). Record your voice-over and match it to your video timeline for a seamless audio-visual experience.
InVideo has premade graphics that you can use by simply editing the text and they also have icons and symbols as stickers to creatively add to your video. These come with their own animation and you won’t have to separately add it in.

You can also record and add a voiceover on InVideo itself – either for each scene or for the entire video. If you have a pre-recorded VO, you can upload the file and add it to your video’s timeline. Simply follow the step-by-step guide to adding music and voiceover on InVideo in Section E .
5) Add music
With your timeline almost ready, all you need to do is add good music to keep the pace of the video naturally flowing. If you’re talking for most of the video, you may want to choose a soft track or not add one at all. In this case, you can add sound effects for your visuals, elements, and an important point. However, if your video does not have a voice-over or anyone speaking, you must have a soundtrack to keep the visuals flowing. Think about the mood and emotions you want to convey to your audience while choosing the music for your video.
If you’re editing your video on InVideo, you can choose from a list of royalty-free music and sound effects that are segregated based on mood. If you already have a track selected, simply upload it to the platform and add it to your timeline.

When you’re satisfied with your video, you can export it in the format suited for the platform it will be uploaded to. If you’re working with a team, InVideo allows you to share the link of the video to get feedback from your colleagues, saving you from multiple exports and downloaded files.
Summing it up
We hope this guide has answered all your questions on how to make a video. We’ve not only given you specific steps to follow but we’ve also directed you to information if you want to deep dive into bigger concepts of how to do video. All you need to do now is a start and you’ll be creating scroll-stopping videos in no time.
Found this article helpful? Please do share it with your friends and peers looking to get started with YouTube.
Want to be a part of a community of creators, just like yourself, and discuss video tips, video guides, strategies, and of course, inspire each other? Join the InVideo community – a place for you to connect and learn from 25,000+ other video creators like yourself.
Let’s create superb videos
- Help Center
- Get started with Google Meet
- Start or join a video meeting
- Gemini in Meet
- During the meeting
- After the meeting
- Feature availability
- Settings in Google Meet
- Calling in Google Meet (formerly Duo)
- Troubleshooting
- Google Meet
- Privacy Policy
- Terms of Service
- Submit feedback
- Learn about the new Meet app
- Get started with Google Meet What's new in Google Meet Set up Google Meet Learn how to use Google Meet Meet tutorials Use Meet on third party products and devices Use Meet on other Google products and devices
- Start or join a video meeting Create a video meeting Join a video meeting Livestream a meeting
- During the meeting Activities in Google Meet Change how you view yourself and others Present in a meeting Background and reactions Host controls Accessibility
- Feature availability Basic features in Google Meet Premium features in Google Meet
- Settings in Google Meet Audio and video settings Notification settings
- Calling in Google Meet (formerly Duo) Get Started with calling in Google Meet Calling features Troubleshoot calling Set up calling on your TV
- Get Started with calling in Google Meet
Make video or voice calls with Google Meet
Calling is available in the new Meet app. Get started with calling in Google Meet to stay connected with friends and family .
Important: This article is about legacy calling in Google Meet (previously known as Duo.) You can use legacy calling to make:
- 1:1 video calls
- Group calls
- Voice calls
Learn more about Meet calling and meeting offerings .
- For Enterprise & EDU: Learn how to make Meet calls .
- For meetings: Learn how to start or schedule a Google Meet video meeting .
- You need a mobile data plan or a Wi-Fi connection.
- Calls made through mobile data plans don't use mobile minutes. Charges may apply.
Before you begin
Learn how to get started with legacy calling in Google Meet .
Important: You can use Google Meet to make calls on your computer without your phone turned on or nearby.
Start a video or voice call
- On your computer, sign in to meet.google.com/calling/ .
- Tip: If the "Calls” tab doesn’t appear, you’re not registered with a calling account. Learn how to get started with calling in Google Meet .
- Select the contact.
- Enter a phone number or email.
Start a group video call
You can have up to 32 participants in a group video call.
Important: You can only create group calls on Google Chrome M86+ and Microsoft Edge v79+.
Start a video call with multiple contacts
- Enter a name.
- Click Save .
Share a link to start a group call
Leave a group
- Under "Recent activity," click the group.
- Under "Groups," click a group.
- Click the group member you want to remove.
Meet Calls from Messages for web
- Go to messages.google.com .
- On the left, select a conversation or click Start chat .
Related resources
- Get started with calling in Google Meet
- Make Duo calls with your speakers or displays
- Use Google Meet features in the new Meet app
Need more help?
Try these next steps:.

Google Meet is your one app for video calling and meetings across all devices. Use video calling features like fun filters and effects or schedule time to connect when everyone can join.
How to do a voiceover on TikTok to narrate your video
- To add a voiceover on TikTok, tap the microphone icon on the video editing screen.
- You can also review and re-record your voiceover before adding it to your video.
- Voiceovers can be used to add explanations or jokes to personalize your TikTok videos.
When making a video on TikTok, you have access to a variety of tools to make it your own. Adding text, stickers, filters, captions, andmore can help you personalize your TikTok video.
Voiceovers can also be a great way to help enhance and narrate your TikTok: a fun self-explanatory tool that allows you to add audio over (or replace the audio) of the original video.
You can use a voiceover to explain what's happening (which can be helpful if, for example, you're posting a cooking video) or to add a joke to a video clip.
Here's what you need to know.
Where do I find the voiceover tool?
The voiceover tool can be found on the video editing screen when you're creating a TikTok.
Specifically, it's the Microphone Icon on the right side of the screen, underneath tools like Text , Stickers , and Effects .
To find it, you'll need to tap the down arrow under Privacy settings and scroll down. It's the second to last option, underneath Voice effects .
How to do a voiceover on TikTok
1. Open the TikTok app (on iOS or Android ) and log into your account if you aren't already. 2. Tap the Post tab to create a new TikTok.
3. Record a video or upload an existing one, as you would normally.
4. Once you've reached the video editing screen, tap the Voiceover icon .
5. Tap or long-press the record button to begin recording your voiceover.
6. At this stage, you can remove the video's original sound by tapping Keep original sound so the check mark disappears.
7. Once you've finished recording, review your voiceover by tapping the play button on the video preview.
8. If you want to re-record the voiceover, tap the back button . Once you're satisfied with your voiceover, tap Save .
9. Add any other effects you'd like to include, then tap Next .
10. Add a description for your video and choose its other settings as you normally would. Finally, tap Post to publish your TikTok.
- Main content
Best video chat apps in 2024
These are the best video chat apps to stay in touch — on mobile and desktop

The best video chat apps are a great way to get some face to face time with people who can't always be in the room with you. Because, if the pandemic has shown us anything, it's that we can maintain meaningful relationships over long distances. And that hasn't changed just because the lockdowns are long over.
Video chat apps can offer a virtual presence at physical events, or help you stay in touch with friends and family who live too far away to meet in person on a regular basis. The magic we call the internet means those physical gaps have a bridge, and it's as easy to do as picking up the phone.
But which of these apps is right for you? There are plenty of options out there, and choosing the right one might be a bit tricky. Lucky for you we've rounded up all the best video chat apps around, and you can use them all without paying a penny.
The best video chat apps you can download today
Why you can trust Tom's Guide Our writers and editors spend hours analyzing and reviewing products, services, and apps to help find what's best for you. Find out more about how we test, analyze, and rate.

1. Zoom Meeting
Specifications, reasons to buy, reasons to avoid.
The pandemic proved to be a big deal for Zoom, cementing its position as the de facto video chat app for a lot of people and businesses — and with good reason. Zoom's extensive feature set and extensive platform support has made it a popular choice across the world. Whether you're on desktop, mobile, or prefer a web client, Zoom offers something for you.
Screen sharing, encryption, and live annotations all come a standard with Zoom, regardless of whether you pay or not. But while a simple one-on-one chat doesn't have any restrictions, having more than three people in a meeting restricts free users to a 40-minute time limit. If you want un restricted access for up to 100 people, you'll need to pay $16 a month for the Pro tier, while the pricier Business tier raises that cap even higher.
Zoom suffered from a number of high-profile security issues in the early days of the pandemic, but things have since changed for the better. Calls are protected by end-to-end encryption, there are new privacy-focussed notifications, and an updated privacy policy makes it clear who can save and share meetings recordings. You can read more about the app's issues, and how much the company did to fix the problems, on our Zoom security issues page

Skype has been in the video chat business for a very long time, and still offers a robust set of features for up to 50 people at a time. It also costs absolutely nothing to use, and is available on just about every device you might need to use.
What's more Skype is well known for being able to connect to landlines and basic cell phones, and supports both international calling and texting. You do have to pay for this, but it's especially useful for keeping in touch with friends and family several countries away.
Skype offers a lot of common features too, including screen sharing, live transcription, and in some cases real-time translation of in-chat audio.

3. Google Duo
While Apple has had Facetime for years, Google's Android operating system lacked its own native equivalent. Instead people had to rely on third party apps that were downloaded from the Play Store, and hope their friends were willing to sign up as well.
Thankfully Duo came along to address that problem, with a video chat app that is remarkably easy to use and accessible within Android's native phone app. What's more, Duo supports a lot of fun features, including the ability to record and send video messages that let you connect with friends and family — even if they're not available at that exact moment.
Duo is even available on iOS, so you can keep in touch with your iPhone-toting friends without having to buy an Apple device for Facetime access. And it even has the same 32 person limit as Facetime, so they don't have much of an excuse to stay away.

Gamers already know Discord as a great resource for connecting with their friends over text, but did you know Discord supports video chat, too? Additionally, because it allows for streaming in the app itself, it's a great way to play some games with friends, by streaming one user's screen content to the rest of the group.
In fact, the Tom's Guide staff did exactly that multiple times during the COVID lockdowns, with one user sharing Quiplash from their PC's display to the rest of us playing along by phone. Thankfully, Discord has even gone so far as to raise its Go Live built-in streaming service from a maximum of 10 people to 50 people temporarily.
If you upgrade to Nitro, which costs $10 per month, you can raise the streaming quality to 1080p/60 fps, up from a max of 720p/30 fps for the free tier. Nitro Basic offers some perks for $3 a month, but streaming quality is not among them.

5. FaceTime
It's no surprise that FaceTime should appear on this list of the best video chat apps. Apple's software wasn't the first in video chatting, but it was the one that started it all for mobile users, and led the industry toward making video chat easier and more accessible.
Today, FaceTime is preinstalled on all Apple hardware and supports a number of really fun and useful features, from cute Animojis, Memojis and stickers to allowing up to 32 people on a single call. And because FaceTime also has a voice call component — FaceTime Audio — you can easily route calls over data or Wi-Fi whenever you like, where your conversations will sound infinitely better than they do over your cellular provider's voice network.
The only downside to FaceTime is of course that you'll only get the full experience on Apple hardware, including iPhones and Macs. Android and Windows users can join in calls from a web browser, but they can't actually host them. Still it's better than being completely locked out, as was the case before.

6. Facebook Messenger
The beauty of using Facebook Messenger for video chat is that you're probably already signed up to use it. As long as you have a Facebook account and the Facebook Messenger mobile or web app, you can start video chatting with your Facebook friends right now. Even if you had a Facebook account at one time and have since deactivated it, you can still use Messenger.
Just tap the little video camera icon in the upper-right corner of the screen, and you can start a call with an individual or chat group. And just like Skype, up to 50 people can be present on a Facebook Messenger video call at the same time — a good sight greater than the maximum 32 video chatters supported by Apple's FaceTime and Google Duo.
Plus, even while you video chat, you can still use Facebook Messenger's myriad other functions, like sending chat messages, stickers and so on.

7. WhatsApp
WhatsApp is one of the most popular messaging alternatives on smartphones today, both because you can join with only a phone number and because many of your friends and family are probably already using it.
Up until recently, WhatsApp's video calling feature wasn't the most robust out there. But that changed once the max participant limit was raised to 50, thanks to an integration with Facebook Messenger's new Rooms feature.
WhatsApp video calls are also end-to-end encrypted, just like chat messages. In other words, you'll never have to worry about any of your conversations being intercepted by nefarious interlopers.
Previously video calling was also only available on mobile devices, but recently that changed. It is possible to make and receive video calls through WhatsApp's desktop client. Everything works exactly the same way, the only difference if you're using a desktop instead of a mobile device.

8. Microsoft Teams
While primarily aimed at businesses and professionals, there's still a Microsoft Teams can offer. Especially if you ever plan on getting together in particularly large groups. The free tier lets you have up to 100 people in a call, which should be more than enough for even the largest of family reunions.
Unlike Microsoft-owned Skype, Teams also comes with some professional tools that you may still find useful talking with other. Tools like screensharing, background blur, and noise-suppression software powered by Teams' own AI. It even connects to Office, and is included in an Office 365 plan, in case that's ever relevant outside of the office.
While Teams does have a reputation for being a bit messy, it's usually the professional tier that comes out worse for wear. But if you plan on just using Teams as a video chat app, then you don't need to worry about that too much.
How to choose the best video chat app for you
Because all of the best video chat apps have free tiers, you shouldn't be worried about trying different ones to find something you like. After all the riskiest thing you might have to do is install the software and make a new account.
But if you want to know where to start, the best advice is to take stock of what you need this app for. If you're just looking to chat on your phone alone, Duo, FaceTime or one of Facebook's offerings will suffice.
However, if you and your friends use a number of devices to connect — phones, tablets, computers and so on — or your need is more professional or collaborative, we recommend leaning toward Teams, Zoom, Skype or Discord. These apps are available on every platform, and even though some of them offer paid tiers, you likely won't need to use them. Especially if your head count is small enough, or the length of time you plan to chat is relatively short.
The paid tiers will come with fancier features in many cases, but the free versions are already pretty feature-rich. At the very least you'll have access to all the basic features you need to chat with other people.
Ultimately, you'll probably end up on whatever video chat app your friends and family already prefer using — that's the way these things tend to go. But if you're all in the mood for a replacement, one of the options in this list will hopefully suffice.
More from Tom's Guide
- Best Zoom alternatives for video calling
- How to receive FaceTime calls on Android
- The best WhatsApp alternatives you can use right now
Sign up to get the BEST of Tom’s Guide direct to your inbox.
Upgrade your life with a daily dose of the biggest tech news, lifestyle hacks and our curated analysis. Be the first to know about cutting-edge gadgets and the hottest deals.
Tom is the Tom's Guide's UK Phones Editor, tackling the latest smartphone news and vocally expressing his opinions about upcoming features or changes. It's long way from his days as editor of Gizmodo UK, when pretty much everything was on the table. He’s usually found trying to squeeze another giant Lego set onto the shelf, draining very large cups of coffee, or complaining about how terrible his Smart TV is.
Cheaper Apple Vision could pack weaker panels
The LG G4 OLED just aced our TV lab tests— is it the best OLED TV of 2024?
I asked 5 AI image generators to create 'the perfect meal' — here's what happened
- luccascomvoce Telegram was not even mentioned, even though it has video calls with screen broadcast capability, video chats with no time limit and no participant limit. Why ignore an app that's just joined the app club with over 1 billion downloads? Reply
- jamess109 This article forgot to mention one of biggest negatives of Skype is its lack of native support to Apple's M1 & M2 silicon architecture mostly due to how slow at loads. Not only that Microsoft isn't putting much effort into the app as it is with Teams, they are only considering businesses but for the consumer at home, family friendly requirement its due a massive overhaul. Ever since M$ bought Skype its never been the same and MSN Messenger though it wasn't a big hit for video calling unlike Skype, it did have that consumer, friend and family fun feel which you could use add-ons and plug-ins with. Zoom is another great app best for business though - too much functionality for office collaboration - only if they had a family mode and business mode where it hides all the clutter of business tools despite having better webcam picture and sound quality. Reply
- View All 2 Comments
Most Popular
- 2 I asked 5 AI image generators to create 'the perfect meal' — here's what happened
- 3 I review gaming PCs for a living, and I wish they all came with this one thing
- 4 New on Peacock in July 2024 — all the movies and shows to watch
- 5 Build full-body strength and improve balance with this fitness instructor’s 30-minute no-equipment workout
- 2 The LG G4 OLED just aced our TV lab tests— is it the best OLED TV of 2024?
- 3 I asked 5 AI image generators to create 'the perfect meal' — here's what happened
- 4 I review gaming PCs for a living, and I wish they all came with this one thing
- 5 New on Peacock in July 2024 — all the movies and shows to watch
How-To Geek
The best ways to video chat from windows, mac, iphone, or android.

Your changes have been saved
Email Is sent
Please verify your email address.
You’ve reached your account maximum for followed topics.
I Paid for Google's Drive Storage. Here's Why I Don't Regret It
After trying countless ipad mini keyboard cover cases, here’s my favorite, how-to get more free chatgpt 4o access, quick links, our real recommendation: just use facebook messenger, windows to windows: skype, chats between two apple products (mac, iphone, and ipad): facetime, android to android: google duo, across other platforms: skype or hangouts, probably.
If you live far away from the people you care about, video chatting is the best way to feel more like you're there with them in person. But there are so many video chat apps out there, many of which only work on certain platforms. How do you know which one to use?
If you've tried to set up an initial video chat with someone, you know the problem here. My parents are both iPhone users, but I'm an Android guy. All they know is FaceTime, but I don't have access to that. Trying to get them to understand what they need to do to chat with me can be...less than fun.
(But seriously, how about cross-platform FaceTime, Apple? We'd all use it.)
Thankfully, we're here to help. We tested a number of apps on Android, iPhone, Windows, and macOS to find the best one for any given situation. Let's do this thing.

Look, I'll cut the chase here: Facebook Messenger is a great way to video chat with pretty much everyone you know. You might not have realized Facebook has video chat, but it does---and it's surprisingly good.
And, since nearly everyone is on Facebook, they probably already have the requisite app, which is available pretty much any platform--- Android and iOS have dedicated mobile apps for Messenger, and computer users can just leverage the web version of Messenger .
If you and the person you want to chat with both have Facebook, it's really a no brainer. Skip the headache and just use that.
If you don't have Facebook (or are trying to chat with someone who doesn't), no worries! Continue on for the various platform-based tools.

If you're a Windows user, Skype is the obvious choice here: it comes bundled with Windows now that Microsoft owns it, and it's become synonomous enough with video chat that basically everyone has a Skype account. Even if you don't, you can sign in with Facebook if you want...but if you have Facebook, please just refer back to the previous section of this guide.

Apple users! FaceTime is where it's at for you guys, but I'll be honest: I didn't have to tell you that. You're probably already on the FaceTime train. If not, aboard. Toot toot!
Seriously, though, it comes on all Macs, iPhones, and iPads, it works great, and everyone knows about it. Why would you use anything else?

Android is a bit more of a convoluted mess than iOS or Mac, because there are a ton of different apps. Skype is available on Android, Facebook Messenger is available on Android, and Google's older video chat offering, Hangouts , is still quite good on Android. However, when it comes to Android-to-Android chats, there's a new choice that's better than all the rest: Google Duo .
This has, at least in theory, become the de facto standard for video chats on Android. It's honestly the best video chat platform I've personally used on Android, as it just seem to work. As much as I hate to admit it, that's something Android could use more of.

Okay, so now for the real head scratcher: video chatting people who don't have Facebook and use a different platform than you. Ugh.
The obvious choices here are going to be Skype and Hangouts. They're both available for pretty much every major platform out there---Skype is on Windows , Android , Mac , and iOS ; while Hangouts is available on Android , iOS , and the web . You'll only need an applicable account to use either of them.
It's also worth mentioning that if you're trying to chat Android to iOS , Google Duo is available on both platforms as well. That would be my recommendation in that situation, though the other options mentioned here would also work.
- iPhone & iPad
Ready to join a video chat?
Talky is truly simple video chat and screen sharing for groups. Learn more about talky .
Play lander while you wait!
- ⬅ ⬆ ⬇ ⬅ fly the ship
- x blows up your ship
- m toggles sound effects
Learn more »
Truly simple video chat and screen sharing for groups up to 6 people
Start Chatting Now
Enter a name or click “Start a Chat” to create your room

Send your room link to the people you wanna Talky with

Start Talkying together!

Talky is the easy way to connect with friends and family. Rather than using a personal account, Talky uses unique URLs that you can share with those you’re meeting with. Just create a room and share the URL with your chat partners. All they need to do is navigate to your link with a supported browser to start the chat!
Your browser may ask for permission to use your camera and microphone. You’ll need to click “allow” on these prompts to use Talky.
22 Tips to Make Small Talk (If You Don’t Know What to Say)

The phrase “small talk” sounds like it doesn’t mean much, so it can’t be hard. The truth is, it’s a skill, and it takes practice to be good at it. Once you do, it will make your social life MUCH BETTER. Why? Because every meaningful relationship in life starts with small talk.
In the following steps, we’ll teach you how to talk to anyone, what to talk about, and why small talk is necessary.
So settle in, and let’s dissect small talk and why it’s worthwhile.
Why small talk is necessary
- It shows you want to talk to them. When you make some seemingly meaningless conversation, what you’re really saying is, “Hey, you look interesting. Wanna figure out if we can be friends?” Ice broken. Mildly flattering. Clearly, you don’t think they’re an ogre.
- It shows you’re friendly or at least, you probably won’t hurt them, physically or otherwise.
- It’s a low-risk way of saying you’re interested in getting to know them for a short time at first. Most people are good with this low level of commitment.
- It helps you find out if you have things in common. It’s when we find those things that we might realize that we want to be friends.
- It covers our social needs. Most people prefer to have some interaction with other people, rather than none at all.
- Self-confidence makes you more attractive. Talking to someone first says I’m confident enough to think you’ll probably like me.
- Taking the initiative makes it easier for the other person. You took all the risk. You’ve taken all the fear out of talking to a stranger for the other person. As a result, you have more power to create your social life.
Part 1. Finding things to talk about
1. try these 7 conversation openers.
Use your surroundings or situation to come up with things to say. You can start with something simple, like this:
- Ask a simple question: “Do you know where the closest Starbucks is?”
- Talk about a shared experience: “That meeting/seminar went into overtime.”
- Talk about why you’re there (at the party, at school, the social context): “Who do you know here?”
- Talk about where you are and what’s happening: “I love the decor in this cafe. It makes me want to hang out in those overstuffed chairs for hours.”
- Give a sincere compliment: “Those shoes are awesome. Where did you get them?”
- Ask for their opinion: “ How’s the house red wine here?”
- Talk about possible common interests (sports, movies, books, social media) “Do you think the [insert NHL/NBA/NFL team] will get into the playoffs this season?”
Read more here on how to start a conversation .
2. Listen 2/3 of the time – Talk 1/3 of the time
When you’ve just met someone, you can ask them open-ended questions and wait for their answers, roughly 2/3 of the time. The other 1/3 of the time, you respond to their questions and add comments or stories from your life that are relevant to their answers.
Good, engaging conversations go back and forth where both parties take turns sharing and listening to each other.
Here’s an example:
You: “How long does it take you to commute to work?”
Them: “About an hour. I take the train and then walk up from the station.”
You: “I live in the suburbs too. My commute is 45 minutes or 75, depending on train delays.”
Them: “Those delays are killer, right?! It took me an hour and a half both ways most of last week.”
You: “Ya, it’s brutal. I’d drive, but that would take just as long, plus parking.”
Them: “I just got a new car, and I love it, but I wouldn’t drive it every day. I want to keep the mileage down.”
You: “Cool, what kind of car is it?”
In that example, notice the balance between sharing and talking. You’re leading with questions and then adding responses of your own that tell them about you.
A common mistake is to ask questions you’re supposed to ask, and then not be very interested in the answer. Instead, ask questions to truly learn about someone and pay close attention to their answers.
3. Ask open-ended questions
Conversations get more enjoyable when you ask open-ended questions. Anything that can be answered with more than yes/no is a good start.
Here’s an example, “What were you up to this weekend?” can inspire a more interesting conversation than “Was your weekend good?” .
All your questions shouldn’t be open-ended. They take more energy to answer. Use them occasionally when you want more elaborate answers.
More in this article to find out how to keep a conversation going .
4. Be curious
Be genuinely willing to listen and learn. Let your curiosity guide you. If they say they went skiing on the weekend, you could ask, where do they ski? Have they ever taken a skiing trip outside the state or country? Add whether you ski or not. Perhaps you do other winter sports that you could mention?
Here’s where it gets interesting. Now ask them for the emotional layer. What do they like the most about skiing? Do they ever find it scary? Why did they pick that specific resort?
5. Ask for their opinion
It’s nice when someone wants to know what you think. It’s also interesting to learn more about what people think and why. So ask them! Believe me, they will remember that you cared to ask.
Something as simple as this can make people feel important: “I’m thinking of getting a pair of boots. What do you think I should go for Blundstones or Doc Martens?”
It’s an emotional memory, and that is more powerful than a fact-related one. And, you now know them on a deeper level than most work acquaintances.
6. Find common ground
Part of building rapport with someone means finding out where you have similar opinions. It could be with any of the following:
- Agreement on an issue
- The same interest [hobby / career / movies / goals]
- Knowing the same person
- Enjoying a similar background
As you talk, elaborate on your common interest rather than your differences.
7. Approach the common interest from a unique angle
To make the conversation interesting and memorable for you both, you could try adding a bit of emotion and quirk to your common interest questions.
Say you both love cars and new innovation. You could say, “What do you think is the future of cars?” Or “How long do you think it’ll be before they fly?”
8. Share your opinion and be respectful of others
Some opinions are less divisive than others. When meet new people, avoid bringing up politics, religion, and sex. If you jump in and disagree, it could damage your opinion of one another. It can, however, make for interesting conversations after you’ve gotten to know each other.
You can share your opinion on most other topics. Favorite foods, favorite hobbies, your opinion of the decor, music, great places to eat. The key is to keep it positive and share your likes far more than your dislikes. At least at the first meeting.
9. Move on from the current subject by zooming in/out
If you feel like the person you’re talking to is similar to you, or is reasonably open, use your imagination to take the conversation to some less direct places.
You could dig into the details of what you’re talking about. Things like, “What is it about cars that inspires you?” “You’ve mentioned going to Mexico a few times. Where would you go if you went somewhere you’ve never been to before?”
Or you could move the conversation side-ways like this, “Cars are hugely convenient, but what can we do to move to electric faster and affect the environment less?”
Or you could mention related subjects, i.e.: Cars → Road trips. Skiing → All outdoor sports.
10. Use what if-scenarios to get people thinking & talking
This is great if you are sitting beside someone new and have a bit of time to chat, like at a dinner party or a pub get-together.
You can make this as serious or as silly as you like. Here are a few possibilities:
- “What if mobile phones were forbidden?”
- “What if you were given 3 wishes – what would they be?”
- “What if you were a hotdog and you were starving. Would you eat yourself?”
- “What if animals could talk. Which one would be the rudest?”
- “If you could spend eternity alone with one person, who would it be?”
If ‘what if’s’ aren’t your thing, here’s an article on 222 questions to get to know someone .
11. Prep a few safe subjects
A little preparation goes a long way. It could be things you’ve done recently or highlights of current events, the latest memes or videos. Something like, “Did you see porch pirate video on YouTube?” or the TryGuys or YesTheory’s post this week?
Another good tactic is to prep a few stories to tell. Things like, “ I went to the basketball game last night.”, “We went sledding on this hill near our house Saturday.” or “ I was driving home and…”
Or you can share interesting facts you know about the events, people, places. Comments like, “I hear the speaker at this event is really good. She sells out every year.” Then there is the eternal source of all better conversation starters. F.O.R.D. topics. Family, Occupation, Relaxation, and Dreams.
Remember, talk about what they might be interested in. Not just what you are interested in.
12. Make it rewarding to talk to you by showing that you listen
Listening isn’t enough – you need to communicate that you hear them. This is called active listening . If you subtly check your phone while someone’s talking or scan the room, that will make it less rewarding to speak to you.
Here’s how to show that you listen:
- Listen with intent and sincere interest. Give your partner your undivided attention and listen to understand. This is your only job. If other thoughts jump into your head, like a story you want to tell, shelf it for a minute. Prioritize letting them finish and then ask any relevant questions that came to mind while they were talking.
- Use verbal acknowledgment to show that you are listening while they talk. This could be things like “Interesting,” “Sounds cool!” or “No way!”.
- Use nonverbal acknowledgment that you listen. For example, nodding or saying “ Mmmmm” or “uhuh.”
- Ask follow-up questions to keep people talking. “How did that make you feel?” “And then what happened?” “What did you think when that happened?”
- Ask about what you have been told. “So, does that mean he was stuck in the bathroom this whole time?”
- Paraphrase what people said to show you heard them and understand. They: “I lived in Denver all my life and wanted to discover something new.” You: “So you felt like you were kinda done with Denver.” They: “Yes, exactly! “
13. Mention something you’re about to do to end a conversation naturally
If the discussion seems to be going nowhere, there’s no shame in ending it gracefully.
Here are a few pre-canned exits for those times when you can’t get a rhythm going with someone.
- “(Excuse me) I have to go find a seat/say hi to X/get ready to do X.Y.Z…”
- “It was nice talking to you, but I have to [see above].”
- “Great to see you, I’m gonna [something], but we’ll catch up again later.”
Part 2. Becoming better at talking to anyone
Let’s go through some mindsets that can make you a better conversationalist.
Small talk is a means to an end. We are testing the communication waters and opening the door to others to see if they want to connect with us.
Just like you don’t get married on the first date, small talk is your first attempt at friendship. You both need to figure out if there’s enough there to keep the connection up long term.
1. Think about how you want to come across
In your pre-game warm-up, take 15 minutes to think about and visualize (if that helps you – it helps me) how you want to approach the people you meet today and how you are going to feel while you do it.
Be empathetic
Listen with compassion and be emotionally available. If they tell you they’re fighting a head cold at the moment. Say, “That’s too bad, I had a cold 2 weeks ago. I had to take a few days off work just to recover.”
Be open to sharing your thoughts and opinions
Say what you think and feel, as long as it’s appropriate to the situation. Something as simple as, “I love the new furniture in the office kitchen. The chairs are so comfy.” helps others paint a picture of you and can serve as inspiration for new topics.
Assume that people are trustworthy
Show that you trust people by assuming they have the best intentions and that anyone can be a potential friend. Let this be your default view of people unless proven otherwise.
Be enthusiastic and positive
We all have ups and downs, but when we meet someone for the first time or have a casual conversation, they don’t really want to know your cat died. Keep it upbeat. Things like, “I can hardly wait for the weekend. I’m going skiing on Saturday.”
Ask for their opinion on something or what they are up to on the weekend. Give them a chance to think and speak their minds.
Don’t take it too seriously
It’s just a bit of conversation. It isn’t a job interview or an oral exam. It either works, or it doesn’t. There are lots of other people or times to keep practicing your social skills.
2. Know that you need practice to improve
Making small talk gets easier the more you practice it.
You have to do it to get better at it. It will not come overnight, but you will see gradual progress over the next few weeks and months.
When you’re better at small talk, social events will not be excruciating, and talking to people becomes enjoyable. Also, the positive response you get from others will make you feel good.
3. Look for connection and social experience
Small talk is kind of like speed dating for friends. You invest a minimal amount of time. You test for common interests, a similar sense of humor, mutual life experiences. If you get a jackpot on any of those items, you can probe deeper to see if this person is worth getting to know long term. By the way, they are thinking the same thing. It’s a two-way street that you’re taking together.
4. See friendship as the result of several positive shared experiences
Every interaction is a shared experience. Learning about someone else is meaningful, and the same applies if they learn something about you. When you have enough positive shared experiences, you become comfortable around that person. And once you have comfort, you can build trust and friendship.
Make sure people enjoy being around you; after that, friendships will follow.
5. Don’t look for approval
When you start talking to someone, try not to think, “How do I make this person like me?” . Instead, think, “I’m going to get to know this person so I can figure out if it’s someone I like.”
When you reframe your interactions like this, you don’t end up in the trap of looking for approval.
It also helps you feel less self-conscious. When you first meet someone, you can make it your mission to learn one unique thing about that person. You don’t only want to ask them questions but share a bit about yourself, too. Later in this guide, I’ll give you some practical advice on how to do this.
6. Use friendly body language
When people start talking to you, they don’t know anything about you. If you’re nervous, it might make you look tense and angry, even if that’s not your intention.
Here are some body language tips before you say “Hi” :
- A relaxed smile
- Easy going eye contact
- Jaw slightly open and unclenched
- Arms at your side rather than crossed
- Face your feet in their direction
- Your voice is warm and strong, and your words are clear (More on how to speak louder )
7. Look at people’s body language to know if they want to talk
It can be hard to tell if someone wants to start talking to you. People can look tense and unapproachable just because they’re nervous or in their head. As long as they aren’t obviously preoccupied with something or someone else, you can try saying something and see how they react.
When you’re making conversation, here are some pointers to know if they might want to end the conversation:
- Their feet are pointing away from you
- They are looking at the things they would rather do (their screen if they want to get back to work, the door if they need to get going, etc.)
- They don’t add to the conversation
- They mention something they’re about to do
They may have other things on their mind and just can’t get into chatting right now. Don’t take it personally or get angry. Excuse yourself politely and move on to something else.
On the other hand, if they are directed toward you and add to the conversation, that’s a good sign that they enjoy talking to you.
Here’s more on how to know if someone wants to talk to you .
8. Think about how you see yourself
Make a conscious decision to work on your social skills and get better at small talk. To do that, it helps to have a certain mindset to ensure success. Here are a few things to adopt before you head out:
- I am in charge of my social life, and I can change it for the better.
- I am the star of my life. I’m not a victim.
- I am sincerely interested in other people.
- I am an interesting and likable person.
- Everyone likes me unless proven otherwise.
9. Make others comfortable first
The easiest way to improve our social skills is to remove the fear and uncertainty in others. I know it seems ironic, we’re the nervous ones. However, most people find meeting people nerve-wracking and stressful .
Have the mindset that you are talking to people to help them out and make them comfortable.
Here’s how you can make people feel comfortable:
- Ask how they are doing
- Be curious and show genuine interest in them
- Show empathy
- Make easy eye contact and smile to assure them that they are accepted
- Ask and use their name
- Remember, and bring up personal details: “How is your wife/dog/boat doing?”
- Paraphrase what people said to show you listened
- Show trust and some vulnerability
- Say what you think and feel
- One interaction won’t make or break your social life. If you mess up, great – you’ve learned something for tomorrow.
Use some strategies to overcome nervousness when you talk to someone
- Use the 3-second rule – Approach the person you want to talk to before you can think. Why 3 seconds? Left to our own devices, we will find a reason not to do it (a.k.a. we’ll allow fear to stop us).
- Focus all your attention on the other person. It helps keep your self-critical thoughts away.
- Know that it’s okay to talk to someone despite being nervous . “Courage is being afraid and doing it anyway.”
- Take deep, calming breaths. It helps your body calm down before you approach someone.
- Remind yourself of your strengths. Boost your confidence before going out to a social activity . Remind yourself of the things you do well. Do a few things do what makes you feel good: work out/puzzles/cold shower/read/game.
- Remind yourself that no one cares about your social mistakes as much as you do.
- Share how you’re feeling when you start talking to someone. Nothing earth-shattering, just something honest and open. “I usually don’t step up to people, but you looked pretty interesting.”
- Practice. You won’t be perfect the first or the fifth time, but you will get incrementally better every time. Say to yourself: “The outcome of this interaction isn’t important. What’s important is that I practice”. That can take some of the pressure off you to succeed.

Carrie Ashfield worked as a real estate executive for 20+ years. As a Manager, she mentored 50+ employees, graduated from countless leadership and communications courses, and has served on the Board of Directors for TCREW - Toronto Commercial Real Estate Women. She holds a Bachelor of Arts degree in History & Business from Wilfrid Laurier University and a Bachelor of Applied Arts degree from Ryerson University in Radio and Television Arts. She’s raising two teenage boys, two Huskies, and has acknowledged addictions to movies, books, and being outside.

How to see if someone wants to talk to you – 12 ways to tell

How To Talk To Strangers (Without Being Awkward)

152 Great Small Talk Questions (For Every Situation)
Now that I feel freer, I want to make lots of new acquaintances and a handful of true friends.
Excerpt from this article: “Small talk is kind of like speed dating for friends. You invest a minimal amount of time. You test for common interests, a similar sense of humor, mutual life experiences. If you get a jackpot on any of those items, you can probe deeper to see if this person is worth getting to know long term.” Interesting and spot-on way to look at it.
Thanks very much for these conversation tips. It’s helpful.
Leave a Comment Cancel reply
Notify me when someone responds to my comment.
What statement best describes you?
How motivated are you to find like-minded friends, do you agree with this statement “i want to be more likable”, do you agree with this statement “i want to be more interesting to talk to”, do you agree with this statement “i want to be less awkward”, what best describes you, responses successfully analyzed, where should we send your personalized tips.
AI talking head video generator
Generate talking head videos with no cameras, microphones, or lighting equipment. All you need is an internet connection and 5 minutes.
- 160+ AI talking heads
- Talking head videos from text
- Text-to-speech in 120+ languages
No credit card required
Trusted by over 50,000 companies of all sizes
Create a free AI video
Select a template.

Edit your video script in any language
Political, inappropriate and discriminatory content will not be approved.
You'll get your video via email in minutes
We are processing your video.

Talking head video production, simplified
Make engaging talking head videos in 5 minutes using these 6 unique features
Choose from 160+ realistic AI avatars

Camera shy? Shoot a talking-head video using our pre-built realistic AI avatars , or create a talking head of yourself.
- 140+ AI talking heads
- Photo-realistic and diverse
- Custom AI avatars available
Communicate in 120+ languages
Make talking-head videos with audio in multiple languages without speaking them. No need to record separate voiceovers.
- 120+ languages and 400+ voices
- Closed captions included
- Consistent audio quality
Create and edit videos in one place
Shoot, record, edit, update and watch your videos in all in one tool - Synthesia. No need for post-production tools or crew.
- 60+ pre-designed templates
- Screen recording functionality
- Professional video tips
Generate video from text
No need for a camera, external microphone, natural light, or a studio. Make talking head videos by simply typing in text.
Scale your talking head video production
Instead of filming a few videos a month using traditional video production, create a few talking head videos a day using Synthesia.
Increase learner engagement
Talking head videos are simply better at engaging learners and crafting an emotional connection than text or PowerPoint presentations.
160+ realistic talking heads
Below you can demo some of the talking heads currently available at Synthesia.

How to make talking head videos in 5 easy steps
Step 1. write a video script.
When writing a talking head video script, include only the most important information, and limit the text to 3-4 sentences per slide.
Step 2. Choose a talking head
Synthesia has over 160 diverse avatars to choose from, so pick one that fits the topic and design of your video.
Step 3. Paste text and choose voice
Take your video script and paste it into the script box slide by slide. The script is going to be narrated by the AI talking head using text-to-speech.
Step 4. Edit your talking head video
Add additional elements to your talking head video to personalize it. You can add text on screen, shapes, colors, images, videos, backgrounds, and screen recordings to accompany the talking head.
Step 5. Generate
Your talking head video is complete! All there is left to do is generate the video and wait for it to process.
.jpg "how to make a video and talk over it")
See talking head video examples generated with Synthesia
Replace boring text, powerpoints and pdfs with engaging videos..
"Usually, our colleagues don't jump in the air when they hear e-learning, but the AI videos created with Synthesia have sparked motivation that we haven't seen before."

Create high-quality sales enablement videos your team won't skip
"Sales people require engaging training content. With Synthesia's AI avatars and voiceovers, we can now facilitate quicker knowledge transfer."

Create engaging information security training videos, without relying on 3rd parties
"The avatars look real and I can choose from many different languages. Synthesia is solving 2 key problems for me: I can use the in-built AI to generate my script and then make an AI avatar speak it."

Create your professional-looking product explainers in minutes, not months
"Thanks to the role-specific product explainer videos made with Synthesia we booked 35% more meetings compared to previous trade shows."

Transform your help articles into short videos and improve your customer experience
"Using Synthesia, we effectively transformed dense help articles into user-friendly videos, significantly enhancing our customer support experience."

See why people like you choose Synthesia
Faster video creation.
"Synthesia’s AI voiceovers sold me instantly. They give us the ability to pivot and create video content much faster than before"

No actors - no costs
"Relying on external agencies and hiring voiceover actors in multiple language was extremely costly. So it would either mean stretching the budget or no video at all."

Speed, simplicity and ease
"We can record anytime and anywhere with greater speed, simplicity, and ease. It not only optimizes work schedules but also increases productivity and benefits the quality of our educational materials."

Find answers to your questions about talking head videos here
What is a talking head in a video.
A talking head in a video is a single person, usually a subject matter expert (SME) speaking directly into the camera.
What is a talking head-style video?
A talking head video is any video where a person is shot close up (usually from the shoulders up) talking either directly to the viewers through the camera lens, or with an interviewer off-screen.
The person in focus doesn't always have to look at the camera, though. Including b-roll footage of different angles is quite common, and makes watching the video more interesting and engaging for the audience.
How do you make a talking-head video?
There are two ways of making a talking-head video: the traditional one, with a professional camera and microphone, and the modern one, by using an AI video maker.
With the traditional method, you have to create a video script, shoot your talking head video and any b-roll footage, record your audio, and edit the video in a video editor.
This seems pretty straightforward, but it can take quite some time and skills to master, especially if you want the video to be high-quality.
The modern method simplifies the process significantly and doesn't take years to master. With a tool like Synthesia, you can create a talking-head video by simply typing in text. The tool generates life-like AI avatars that narrate your talking head videos in over 70 languages.
You can also create a custom avatar of yourself so you never have to speak into a camera yourself.
How much does a talking-head video cost?
The answer is... it depends.
If you're creating a talking-head video yourself, you have to factor in the cost of your video and audio equipment, your editing software, and additional production costs, like internet, props, distribution, and more. So the answer quite literally depends on how expensive your camera and software are, whether you're using a built-in microphone or a more expensive one, and so on.
If you're making talking head videos for microlearning or employee training, the cost of outsourcing this can start at $300 and go up to $5000 and more, depending on the quality.
If you're making a talking-head video with an online video maker like Synthesia, the cost starts at $29/month. All you need is a computer, internet connection, and Synthesia account to make a successful talking head video from text.
How do you add an automated voice to a video?
If you're looking to add an automated voice to your video, you can do so by using text to speech. This is a great way to have your video say what you want it to without having to record your own voice.
To do this, simply type out the text that you want to be spoken in the video.
Then, select a text to speech voice that you like and hit play. The voice will then read out the text in the video.
Text to speech is a great way to add an automated voice to your video without having to do any extra work.
You can also generate closed captions if you need to create a transcribed video easily.
Ready to make your own talking head video?
Click on the link below and get started using Synthesia with full access to all 140+ avatars and 120+ languages.

Make your own talking picture!
It's Free! Quick! And Easy!
Make a Blabber!
--> Using Blabberize for your class? Use Blabberize Edu!
Join our discord channel we're always here to help, use any picture.
Give a voice to anything!
Record your audio live!
Or upload a mp3 or wav file!
Export to Video!
Share and use it as you please!
Lend your voice to any image! Say what you want!
Create impactful talking pictures easily.
Watch this video to see a blabber being made!
Make Your Own!
Best chat apps: the top ways to video call your friends and family
Six great options

A great way of staying connected is with chat apps so you can video call or participate in group chats. They're useful platforms to replicate the feeling of seeing your friends and family face-to-face.
There are plenty of video calling and apps on computers, smartphones and computers - perhaps too much, as it can be hard to make sure all your friends are on the same one, and not using a dodgy app.
To solve that, we've compiled this list of some of the best chat apps, that work for both text conversations and video or audio calls. The ones we've highlighted are ones we use, both when we're testing gadgets and for personal use, so we can recommend them as safe and easy-to-use.
This way you can share a cozy Sunday, an intimate conversation or a massive group hangout, even if you can't physically see the person or people you want to.
Why you can trust TechRadar We spend hours testing every product or service we review, so you can be sure you’re buying the best. Find out more about how we test.

Download: iOS / Android / Desktop
Skype is one of the most obvious video calling options and also one of the ones that has been around the longest. It runs on pretty much every platform under the sun, including Android and iPhone handsets, tablets, Windows and Mac PCs, and even Xbox One , so just about everyone you want to talk to should have access one way or another.
It also supports up to 24 video call participants at once, which is more people than you could comfortably get in an average-sized living room, and voice calls and text chats are supported too, for when you’re rocking quarantine hair and don’t quite feel camera-ready.
- Here’s how to use Skype

Houseparty is a relatively recent addition to the video chat brigade, but it has quickly become very popular, and with good reason. For one thing, it tries to make video calls as slick and seamless as possible, by alerting you as soon as a friend launches the app, so you know they’re ready to talk. It will do the same for them when you launch the app, and even turns your camera on.
There are also built-in games that you can play with your friends, so it goes beyond conversation. Though video calls on Houseparty only support up to eight participants, so it’s not ideal for big groups.
- New to the app? Here’s how to use Houseparty

Download: iOS
If you have an iPhone, iPad or Mac then you’re probably already familiar with FaceTime – and if you don’t then you can’t use it, which is its greatest weakness. Still, assuming you and your friends and family are ensconced in Apple ’s ecosystem, it’s a great video calling choice.
The FaceTime app will already be on your iDevice, meaning you – and anyone else able to use FaceTime – has very little barrier to entry. You can have group video calls with up to 32 people at once, start calls direct from the Messages app, and add effects – including Animoji and Memoji. If you and those you’re communicating with are Apple users, then FaceTime is arguably the slickest, simplest option.
- Get started with our guide to using FaceTime

Google Duo is almost as slick as FaceTime – it launches the camera as soon as you open the app, ensures video calls never take more than a few taps, and has handy features like ‘Knock Knock’, which lets you see the video stream of the person calling before you choose whether to answer.
Unlike FaceTime, this isn’t exclusive to certain hardware either. Google Duo works on Android of course, but it also works on iOS. However, you can only have up to 12 participants in a call, so it’s more restrictive than the likes of FaceTime and Skype on that front.
- Here’s how to use Google Duo

You’re probably already using WhatsApp for text chats and maybe even for voice calls, but it’s also a great video chat platform, as long you only want to talk to up to three people at once, as four people per video call is the limit.
But WhatsApp excels in other areas, with a low data use mode (ideal if you’re eating up your allowance during lockdown), plus encrypted calls, making it more secure than some options, and desktop and web versions for when you don’t want to stare at your phone.
- Learn how to use WhatsApp
Facebook Messenger

Facebook Messenger is another app that probably won’t need any introduction for most people, and while it puts text chat front and center, it also supports video chat. Calls can have up to eight people, and support face filters and other interactive features, and you can use Facebook Messenger across a range of platforms, including Android, iOS, and via a browser.
And because it’s tied to your Facebook account, if you have one of those you already have a Facebook Messenger account – but if you don’t and would rather not sign up for one, you can also sign up for Messenger separately on mobile.
- How to use Facebook messenger
Other options
One of the options above should suit your video calling needs, but if not there are plenty of other possible apps too.
Other strong options include Zoom , which supports up to 100 participants, though limits calls on free plans to 40 minutes. Then there’s Google Hangouts , which is Google’s business-focused alternative to Duo, but still very viable for friends and family.
There’s also Line , which is a lot like WhatsApp – putting a big focus on text and voice conversations but also allowing video calls. You can have up to 200 people on a call, though only four will be displayed on your screen at any given time.
- Need an app for work? Here's the best video conferencing software
Get daily insight, inspiration and deals in your inbox
Sign up for breaking news, reviews, opinion, top tech deals, and more.
James is a freelance phones, tablets and wearables writer and sub-editor at TechRadar. He has a love for everything ‘smart’, from watches to lights, and can often be found arguing with AI assistants or drowning in the latest apps. James also contributes to 3G.co.uk, 4G.co.uk and 5G.co.uk and has written for T3, Digital Camera World, Clarity Media and others, with work on the web, in print and on TV.
Quordle today – hints and answers for Friday, June 28 (game #886)
NYT Strands today — hints, answers and spangram for Friday, June 28 (game #117)
New Marvel trailer for Deadpool and Wolverine teases an X-Men movie rematch that fans have waited 24 years for
Most Popular
- 2 YouTube on Google TV and Android TV is about to get a great free update we’ve been hoping for
- 3 Microsoft has pulled a miracle: its Surface Copilot PCs are now the most repairable in the market
- 4 Not masking your email could put you at risk – here's how to fix it
- 5 Meta Quest 3's next update steals the Vision Pro's best productivity feature... kinda
- 2 No, you can’t run a PC emulator on your iPhone or iPad, Apple says
- 3 Discover the ultimate power-up for your iPhone
- 5 Don't use these VPNs – 5 apps that aren't all they seem to be
Democrats are talking about replacing Joe Biden. That wouldn't be so easy.
President Joe Biden's performance in the first debate Thursday has sparked a new round of criticism from Democrats , as well as public and private musing about whether he should remain at the top of the ticket.
In the modern era, a national party has never tried to adversarially replace its nominee, in part, because knows it would most likely fail. The issue came before both parties in 2016, but neither took action.
Party rules make it almost impossible to replace nominees without their consent, let alone smoothly replace them with someone else. And doing so would amount to party insiders’ overturning the results of primaries when Democratic voters overwhelmingly to nominate Biden. He won almost 99% of all delegates.
And at the moment, there’s no known, serious effort to push him off the top of the ticket.
Still, the Democratic National Committee's charter does make some provisions in case the party’s nominee is incapacitated or opts to step aside, and an anti-Biden coup at the convention is theoretically possible, if highly unlikely. So how would it work?
What happens if Biden drops out before the convention?
The only plausible scenario for Democrats to get a new nominee would be for Biden to decide to withdraw, which he has sworn off repeatedly during other bumpy stretches of his campaign.
He could do so while serving out the rest of his term in the White House, as Lyndon Johnson did in 1968.
If Biden were to drop out before he is scheduled to be formally nominated in August, it would create a free-for-all among Democrats, because there’s no mechanism for him or anyone else to anoint a chosen successor.
It takes a majority of the roughly 4,000 pledged delegates to win the party’s nomination. Biden’s won 3,900 of them. Under recent reforms, the party’s more than 700 superdelegates — Democratic lawmakers and dignitaries — are allowed to vote only if no one wins a majority of pledged delegates on the first ballot, so their votes could be crucial in a contested convention.
Because Biden's opponents all won effectively no delegates throughout the Democratic nominating process, there'd be a virtual clean slate heading into the convention, and the decision would most likely come down to the convention delegates who were initially pledged to Biden.
Biden would have some influence over his pledged delegates, but ultimately, they can vote as they please, so candidates would most likely campaign aggressively to win over each individual delegate.
However, there's a potentially important wrinkle: Democrats plan to formally nominate Biden virtually ahead of the late-August convention to sidestep any potential concerns about ballo t access in Ohio, where a technical quirk has complicated things
Democrats decided to plan a virtual nomination for Biden after Ohio Republicans balked at passing pro forma legislation that would allow Biden to be on the ballot, even though the convention falls after a state deadline. But while Republicans passed a law to shift the deadline, Democrats decided to move forward with a virtual nomination nonetheless.
Could Democrats replace Biden against his will?
There’s no evidence the party would entertain a change without Biden’s consent. But even if it did, there’s no mechanism for it to replace a candidate before the convention, and certainly no way for it to anoint a chosen successor.
If large swaths of the Democratic Party lost faith in Biden, delegates to the national convention could theoretically defect en masse. Of course, they were chosen to be delegates because of their loyalty to Biden and have pledged to support him at the convention.
But, unlike many Republican delegates, Democratic delegates aren’t technically bound to their candidate. DNC rules allow delegates to “in all good conscience reflect the sentiments of those who elected them,” providing some wiggle room.
The party’s charter does include provisions to replace the nominee in the event of a vacancy. The measure is intended to be used in case of death, resignation or incapacitation, not to replace someone who has no desire to step down.
That was the measure that Donna Brazile, then the interim DNC chair, considered invoking after Hillary Clinton collapsed two months before the 2016 election, she wrote in her memoir .
In her memoir, released a year later, Brazile wrote that she was worried “not just about Hillary’s health but about her anemic campaign ... so lacking in the spirit of fight.”
“Perhaps changing the candidate was a chance to win this thing, to change the playing field in a way that would send Donald Trump scrambling and unable to catch up,” she wrote, adding that aides to other would-be candidates contacted her, including then-Vice President Biden’s chief of staff.
But after less than 24 hours of consideration, Brazile realized the idea was untenable without Clinton’s cooperation and likely to only divide her party further. “I could not make good on my threat to replace her," she wrote.
Current DNC Chair Jaime Harrison is a longtime Biden ally who serves, essentially, at the pleasure of the president. And the national party has certainly given no indication it’s anything but fully behind his re-election.
What happens if Biden withdraws after the convention?
To fill a vacancy on the national ticket, the chair can call a “special meeting” of the full DNC, which includes about 500 members. On paper, at least, all it takes is a majority vote of those present to pick new presidential and vice presidential nominees. But that process would most likely be anything but smooth and be filled with behind-the-scenes jockeying and public pressure campaigns.
If a vacancy were to occur close to the November election, however, it could raise constitutional, legal and practical concerns. Among other issues, ballots have to be printed well in advance of the election, and it might not be possible to change them in time.
Would Kamala Harris replace Biden?
If Biden were to relinquish the presidency, Vice President Kamala Harris would automatically become president — but not the Democratic Party’s nominee. Nor would she necessarily be the nominee if Biden withdrew from his re-election bid while he remained in the White House.
She might be politically favored, but party rules give the vice president no major mechanical benefit over other candidates.
Biden’s delegates wouldn’t automatically transfer to Harris, and the convention holds separate votes on nominees for president and vice president. So she would still need to win a majority of delegates at the convention.
If the top of the ticket were vacated after the convention, she would still need to win a majority of votes at the special meeting of the DNC.
That is all, at least, under current party rules. But a vacancy at the top of the ticket is the kind of dramatic moment that might lead party leaders to revisit them in the name of easing the transition. Harris has some close allies in key places at the DNC, including a co-chair of the party’s Rules and Bylaws Committee. But nothing would be likely to happen without a fight.
Ben Kamisar is a national political reporter for NBC News.
Alex Seitz-Wald is a senior politics reporter for NBC News.
More From Forbes
How to make your presentation sound more like a conversation.
- Share to Facebook
- Share to Twitter
- Share to Linkedin
The main difference between strong, confident speakers and speakers who seem nervous in front of the room is in how relaxed and conversational they appear. Here are some basic pointers that will help you create a conversational tone when speaking, regardless of the size of your audience.
1. Avoid using the word, “presentation.” Every time you say, “I’m here to give you a presentation on X,” or, “In this presentation, you’ll see…,” you are emphasizing the formal, structured, sometimes artificial nature of the interaction. No one wants to be “presented” to. Instead, use language that emphasizes a natural, conversational exchange. “We’re here today to talk about X,” or “Today I’ll be sharing some ideas regarding Y.” You can even go so far as to say, “I’m glad we have time together today to discuss Z.” Even if your talk is not going to truly be a dialogue, you can use language that suggests engagement with the audience.
2. If you are using PowerPoint, avoid using the word “slide.” Instead of talking about the medium, talk about the concepts. Swap out, “This slide shows you…,” for, “Here we see….” Instead of saying, “On that slide I showed you a moment ago,” say, “A moment ago we were discussing X. Here’s how that issue will impact Y and Z.” Casual conversations don’t usually involve slide decks. Just because your complicated presentation on tax exposure, supply chain issues, or new health care regulations requires you to use slides, doesn’t mean you have to draw attention to that fact that the setting is formal and structured.
3. For many large-group events, speakers are provided with what’s called a “confidence monitor,” a computer screen that sits on the floor at the speaker’s feet showing the slide that appears on the large screen above the speaker’s head. Avoid using confidence monitors. Our natural inclination when using a confidence monitor is to gesture at the bullet point we’re discussing at the moment. However, we are pointing to a bullet point on the screen at our feet, which the audience can’t see, so it creates a disconnect between us and the audience. Instead, stand to the side of the large screen and gesture at the bullet point you’re talking about so that the audience knows which point you are discussing at the moment.
4. Don’t tell your audience, “I want this to be interactive.” It’s your job to make it interactive. If you are delivering the type of presentation where your audience size allows you to create true engagement with your listeners, create that connecting in stages to “warm up” the audience. Stage One engagement is to ask the audience a question relevant to your topic that you know most of the audience members can respond to affirmatively. “Who here has ever bought a new car?” or, “How many of you have ever waited more than 5 minutes on hold on a customer service line?” Raise your hand as you ask the question to indicate to the audience how to respond. Whoever has raised their hand has now participated in the discussion. They have indicated a willingness to engage. Stage Two engagement is calling on one of the people who raised their hand and asking a specific, perfunctory question. Again, it needs to be a question they can answer easily. If your first questions is, “Who here has bought a new car?” you can then call on someone and ask, “How long ago,” or “What kind of car did you buy most recently?” If your first question was, “Have you ever waited on hold for more than 5 minutes,” you can’t ask, “What company were you calling at the time?” The people who raised their hands weren’t thinking of a specific instance; they were just thinking broadly about that type of experience. You could, however, call on someone and ask, “Do you prefer when they play music or ads for the company’s products?” Anyone can answer that question. At that point, you are in an actual dialogue with that person. Stage Three engagement is asking them a question where they need to reveal something more personal. “How does that make you feel when you hear those ads?” You’ve warmed up your audience and drawn them in with baby steps. Now you have actual, meaningful audience participation.
5. Use gestures. When we’re speaking in an informal setting, we all use hand gestures; some people use more than others, but we all use them. When we try to rein in our gestures, two things happen that diminish our speaking style. First, we look stiff and unnatural. We look like we are presenting a guarded or cautious version of ourselves; we look less genuine. Second, hand gestures burn up the nervous energy we all have when speaking in front of a large group. That’s good. When we try to minimize our hand gestures, we tie up that nervous energy and it starts to leak out on odd ways, where we start to tap our foot, fidget with our notes or microphone, or tilt our head side to side to emphasize key points. Just let the gestures fly. It’s unlikely they will be too large or distracting. I have coached people on their presentation skills for 26 years. In that time, I have met three people who gestured too much. Everyone else would benefit from using their gestures more freely.
The impact we have as communicators is based on the cumulative effect of many different elements of our delivery. These suggestions alone won’t make you a terrific presenter. They will, however, add to the overall package your present of yourself when speaking to large audiences.

- Editorial Standards
- Reprints & Permissions
Join The Conversation
One Community. Many Voices. Create a free account to share your thoughts.
Forbes Community Guidelines
Our community is about connecting people through open and thoughtful conversations. We want our readers to share their views and exchange ideas and facts in a safe space.
In order to do so, please follow the posting rules in our site's Terms of Service. We've summarized some of those key rules below. Simply put, keep it civil.
Your post will be rejected if we notice that it seems to contain:
- False or intentionally out-of-context or misleading information
- Insults, profanity, incoherent, obscene or inflammatory language or threats of any kind
- Attacks on the identity of other commenters or the article's author
- Content that otherwise violates our site's terms.
User accounts will be blocked if we notice or believe that users are engaged in:
- Continuous attempts to re-post comments that have been previously moderated/rejected
- Racist, sexist, homophobic or other discriminatory comments
- Attempts or tactics that put the site security at risk
- Actions that otherwise violate our site's terms.
So, how can you be a power user?
- Stay on topic and share your insights
- Feel free to be clear and thoughtful to get your point across
- ‘Like’ or ‘Dislike’ to show your point of view.
- Protect your community.
- Use the report tool to alert us when someone breaks the rules.
Thanks for reading our community guidelines. Please read the full list of posting rules found in our site's Terms of Service.
We've detected unusual activity from your computer network
To continue, please click the box below to let us know you're not a robot.
Why did this happen?
Please make sure your browser supports JavaScript and cookies and that you are not blocking them from loading. For more information you can review our Terms of Service and Cookie Policy .
For inquiries related to this message please contact our support team and provide the reference ID below.
Joe Biden is too impaired to lead. Remove him from power, now.
Biden must be removed from power, now.
After Thursday’s presidential debate, Joe Biden’s psychiatric and cognitive conditions are no longer merely a political issue. They are a national security issue. America’s enemies now know the president is too impaired to lead.
Who is making the decisions when the president can’t?
Why have they told us that accurate videos of his garbled speech, confusion in leaving podiums, hand raised to shake the hand of an invisible entity, and his catatonic unblinking state at the Juneteenth celebration were “cheap fakes”?
I cared for my own mother while she was afflicted with Alzheimer’s. Another relative died with Parkinson’s-related dementia. These conditions do not get better. They only get worse.
Afflicted persons adopt rigid, even bizarre, beliefs. Wasn’t Biden warned, during his weeklong debate preparation, to not repeat the lie that Trump said the neo-Nazis at Charlottesville were “fine people” when Trump actually condemned them? Does he really believe that abortion is needed because “a lot of young women … are being raped by their … brothers and sisters”? Their sisters? How did “we finally beat Medicare”?
If Biden were your parent, would you take away the car keys?
The vice president and Cabinet must act under the 25th Amendment to declare to Congress “that the President is unable to discharge the powers and duties of his office” and place the government in the hands of the vice President, an action which has its risks, but which is the only lawful alternative left.
Donald W. Bohlken, Indianola
More: Biden-Trump debate goes to who looked good, just as with Nixon-JFK
Both ‘men’ acted like junior high boys
I was truly looking forward to Thursday night’s presidential debate. Unfortunately, I could not watch even a half-hour of it before I turned it off in disgust. Such juvenile displays of testosterone and braggadocio are usually reserved for when two junior high boys are trying to impress the popular girl. It was as far away from acting presidential as one could get.
In order to forestall another such exhibition of immature behavior, I have two suggestions.
The first would be that the candidates may only talk about themselves – what they have done and what they will do, if elected. Character assassination only rebounds back to the speaker’s integrity. The second suggestion would be to bring back the note cards. When I was in debate in high school, we all used notecards because if we stated something as a fact, we had to prove that statement’s validity. This should eliminate the accusations of lying. It would be fairly simple to enforce these reasonable recommendations; if the speaker goes outside these parameters, their mic would be cut off and their time for that question would be considered over.
It is sad that the two people who would like to preside over one of the world’s most powerful countries need to have such directives; one would hope that they would try to impress us with their civility, compassion, and competence. Junior high girls may like such shows of adolescent machismo and bluster; hopefully the voters have outgrown such prepubescent attractions and would prefer a more statesmanlike exchange.
Barbara Persoon, Pleasantville
More: Republicans deserve the version of Trump we saw during the debate. Too bad it won't last.
This debate didn’t reveal anything
My observation after having watched the debate between Donald Trump and Joe Biden: Americans should not have learned anything they did not already know about either of the two of them.
Joe Biden has always struggled with speaking, but he is a thoughtful person who will work within the democratic system that we have in the United States to move our country forward to being as good as we can be within those parameters.
Donald Trump has always spewed lies and worked outside the system to assuage his narcissism, his money and his ego and continues to do so with better theatrical display than Biden. Biden’s worst day speaking will always be better for America than Donald Trump’s best vitriolic attempt to become an autocrat that will do the United States and its democracy nothing but harm.
Phillip Thien, Des Moines
More: Biden and Trump's debate on abortion is the most depressing thing I heard this week
Give me ‘mumbling honest Joe Biden over a manic dishonest Donald Trump’
Perpetual liars don’t rely on reality. They bend their views and decisions on untruths that cannot hold up under pressure. At this point in its history, our country needs truth seekers and truth tellers more than ever. When the storm hits, liars have set a foundation on sand, which will crumble. Honest leaders make decisions based upon the rock foundation, which stays firm.
That’s why I will vote for a mumbling honest Joe Biden over a manic dishonest Donald Trump.
The Rev. Denny Coon, Ankeny
Biden was bad, but did you listen to Trump?
Of course I am concerned about President Joe Biden's performance in Thursday night's debate. I am also concerned by Donald Trump's inability or unwillingness to answer directly many of the questions, his meandering and perseverative responses, and his outright lies which he seems to think will be accepted as the truth if he repeats them often enough.
For example, Trump insisted that he's been judged one of the best presidents ever and Biden is the worst. In fact, 154 presidential specialists ranked Trump the worst president ever, and Biden the 14th best. He also repeatedly criticized Biden on immigration; in fact, it was at Trump's urging that Republicans in Congress scuttled a bipartisan immigration bill that would have resulted in significant progress on this issue. Reasonable concerns about Biden's performance shouldn't blind us to Trump's obvious shortcomings.
Dorothy Lifka, Des Moines
Examining their records, Joe Biden is the clear choice over Donald Trump
At the presidential debate, Donald Trump consistently told lies. He vilified immigrants, had no planned action on the climate crisis, and ignored improvements to his handling of COVID. If Trump is re-elected, no progress will be made on advancing reproductive health care, the climate crisis, challenging the role of money in politics, and making college more affordable, promoting LGBTQ+ rights, and other important issues.
President Joe Biden mitigated the health effects from COVID, helped the economic recovery, and acted on the climate crisis and immigration reform. In foreign policy, Biden talked about standing with US allies. When asked about his age, Biden humorously pointed out that he spent the first part of his career being told he was too young.
Biden talked facts, reason, and promoted democracy. While Trump talked lies, dogma, and refused to unconditionally accept the results of this November’s election.
Frank Bowers, Des Moines
Biden struggles, Trump lies: See 'The View', 'GMA' reactions to the debate

In the minutes and hours following the first debate of 2024 between President Joe Biden and former President Donald Trump , late night hosts and morning show anchors had a variety of reactions to what happened on stage.
For 90 minutes on Thursday without a studio audience, Biden and Trump attacked each other's records on the issues facing the nation, including abortion, childcare costs, the spread of opioids and other challenges. Moderators and CNN anchors Dana Bash and Jake Tapper also pressed the candidates on the Israel-Hamas war and Russia's invasion of Ukraine.
Biden struggled on the debate stage with a raspy voice attributed to a cold , and froze at one point while talking about Medicare, causing worry among Democrats over the president's performance and candidacy as he runs for a second term in office.
Here's how TV show hosts and political pundits reacted to the debate.
Finally, MSNBC and Fox News agree: The CNN Presidential Debate was a grisly mess
'The View' hosts spar over pressure for Biden to step down
On Friday afternoon, hosts of "The View" passionately discussed whether or not it's time for Biden − or Trump − to step back from pursuing the presidency.
“While Biden raised concerns with a hoarse, occasionally weak delivery, Trump lied dozens of times in nice, clear voice," co-host Joy Behar started off the conversation.
Co-host Sara Haines said it was a "hard watch," and "it pains me to say this today, but I think President Biden needs to step down and be replaced." She theorized that Biden's team saw it coming and pushed for an earlier debate for that reason.
"I think that what we saw was that Biden lost the debate," co-host Sunny Hostin said, but later asserted the Democrats shouldn't be the only party talking about replacing their nominee.
"I think it's really ironic that the party that should be pressuring their candidate to step aside is the Republican party," Hostin said, while running through Trump's record of bad behavior.
REACTION TO FIRST PRESIDENTIAL DEBATE: @JoyVBehar , @sarahaines , @ananavarro , @Sunny and @Alyssafarah weigh in on how Pres. Biden and former Pres. Trump performed. https://t.co/cVclFZQmjA pic.twitter.com/UgBL9kL1P0 — The View (@TheView) June 28, 2024
'Good Morning America' hosts recap 'disaster'
"The president struggled with answers...Trump struggled with the truth," "Good Morning America" host George Stephanopoulos said Friday morning at the of the show.
"This was a disaster for Joe Biden," Jonathan Karl, chief White House correspondent for ABC News said.
"The President did make a late night stop at a Waffle House and was asked directly about his debate performance," Rachel Scott said during "Good Morning America." "He said he had no concerns but that is not what we are hearing from Democrats this morning."
Pres. Biden and former Pres. Trump go head-to-head and trade personal attacks in first debate. @rachelvscott reports. https://t.co/ld2zv1VO9B pic.twitter.com/USbMbiObPu — Good Morning America (@GMA) June 28, 2024
'CBS Mornings' focuses on Biden's debate struggles
"Both presumptive nominees were hoping to shake off concerns about their age and their fitness for office, but President Biden failed to land any knockout blows, and his stumbling performance is raising a lot of alarm bells for many Democrats this morning," "CBS Mornings" host Gayle King said.
"His struggles drew attention away from a blizzard of false claims from Donald Trump," "CBS News" Chief White House Correspondent Nancy Cordes said in the post-debate report.
Both candidates are facing criticism after last night’s presidential debate, with Democratic lawmakers using words like “disappointing” and “painful” to describe President Biden’s performance. Some are now openly questioning whether it’s too late to replace him. pic.twitter.com/GgUkKtLAnM — CBS Mornings (@CBSMornings) June 28, 2024
'Today' show highlights Biden's struggles, Trump's misinformation
"Today" kicked off their Friday morning show with reactions and analysis to the debate with anchors from "NBC Nightly News" and "Meet the Press."
"President Biden's struggles in some ways overshadowing the multiple lies and grievances from former President Trump as both candidates now look ahead to rallies today in states they hope to win," "Sunday NBC Nightly News" anchor Hallie Jackson told hosts Hoda Kotb and Savannah Guthrie.
The first debate of the 2024 election cycle between President Biden and former President Trump took place last night with Biden stumbling repeatedly and Trump delivering many falsehoods. @HallieJackson and @meetthepress ’ @kwelkernbc report on the details and provide analysis. pic.twitter.com/SGNsEUyxsf — TODAY (@TODAYshow) June 28, 2024
Jon Stewart on 'The Daily Show': 'We just watched...what you watched'
In a live post-debate analysis for 'The Daily Show' following the debate, host Jon Stewart ripped into Biden's stumbles and on-screen gaffs and Trump's attacks on Biden, his attacks on the economy under Biden and his continual denial of the affair with adult film actress Stormy Daniels that led to his recent criminal conviction.
"We just watched...what you watched," Stewart said while opening the show after the debate.
"Let me just say after watching tonight's debate," Stewart said before a long pause, "both of these men should be using performance-enhancing drugs. I'm sorry. Both. As much of it as they can get, as many times a day as their bodies will allow."
"If performance-enhancing drugs will improve their lucidity, their ability to solve problems, and in one of the candidate's cases, improve their truthfulness, morality and malignant narcissism, then suppository away."
Contributing: Gabe Hauari, USA TODAY.
IMAGES
VIDEO
COMMENTS
Sign up to find voice over to your video: https://go.voices.com/getstartedAdding voice over to your video can bring your story to life. It can be as simple a...
Here's how you can add an automated VO to your videos: Step 1: Click on the Voice Over button in the bottom dashboard and select Automated Text to Speech. Step 2: Next, you will see the Automated Text to Speech menu open on the dashboard to the left. Here, you can select a language of your choice.
A voiceover video is simple. Record the sound in your own time. Textural A voiceover is a great way to add another textural layer to your video. Add a soundtrack, sound effects, text, logo, and more, to your video. Powerful A video shows us, but the narrator tells us the story. A voiceover video does both, and it's a powerful and persuasive combo
Learn how to add a voice over to your YouTube videos in this tutorial. I'll teach you how to record a voice over for FREE using Audacity and do some easy aud...
Keep subtitles in-sync with voice over videos. Adding a voice over to a video is already time-consuming, let alone typing out subtitles line-by-line for enhanced visuals. Get to your final version faster by making both automatic subtitles and a voice over video in under 5 minutes. Generate subtitles. "Kapwing is incredibly intuitive.
Featured In. Table of Contents. Step 1: Set Up Your Video Project. Step 2: Record Your Voice Over. Step 3: Add the Voice Over to Your Video. Step 4: Enhance Your Voice Over. Step 5: Finalize and Save Your Video. Bonus Tips: Try Speechify Voiceover for your voiceovers.
Fortunately, adding a voice-over to an iPhone video is a relatively simple process. First, open the Settings app and tap on "Accessibility.". Next, tap on "VoiceOver" and toggle it On. Once VoiceOver is enabled, open the Camera app and select the video file you want to edit. Tap on the screen with two fingers to bring up the editing ...
Create a video to add your voiceover to. Once you've followed these two steps, click 'Record your own voiceover' on the upper left of your video creation screen. This will open up a box where you can record your voiceover by clicking the red button underneath your video. Learn how to voiceover a video like a professional.
The indicator shows that the audio peaked at just under -6db and is well within the acceptable levels. 4. Record your voice over. Once you're satisfied with your microphone placement and audio levels, you're ready to record your voice over! With Audiate, it's as simple as clicking the record button and speaking.
Step 2. Open the video in the program. Launch Movavi Video Editor, click the Add Files button and select the video you want to add a voice-over to. The selected file will appear in the Media Bin. Drag and drop your file into the Timeline at the bottom of the program window. Step 3.
Step 1: Open the Text tool. In the right-side tool menu of the TikTok editor, look for the Text tool. It should be the one with an uppercase and lowercase 'A' icon. Click on it to open the text editor. Add your voice over text to the screen and set your text's timing and placement.
Go to Apowersoft official site and click "Start recording" on this page. 2. Click "Audio input" and select "Microphone". 3. Tap "Record" and choose your preferred option. 4. Click "Start" to start recording your screen and your voice. Before doing your voice over, make sure you're in a quite environment.
In this vlog, we're going to talk about how to record sound and add a voice to your video clip. We'll also share tips on how to choose and set up your microp...
Click on the option to convert an article to a video. The online editor will then create scenes from your script and you build on it from there. Here's how you can create a storyboard from your script on InVideo in 4 easy steps: Step 1: Log on to InVideo.io and click on the section ' Text To Video ' on the homepage.
Meet Calls from Messages for web. Go to messages.google.com. On the left, select a conversation or click Start chat. In the top right, click Video or Voice call . In the new tab that opens, click Voice call or Video call . Tip: If you don't have the video call icon , video calls aren't available for that conversation.
1. Open the TikTok app (on iOS or Android) and log into your account if you aren't already. 2. Tap the Post tab to create a new TikTok. 3. Record a video or upload an existing one, as you would ...
Previously video calling was also only available on mobile devices, but recently that changed. It is possible to make and receive video calls through WhatsApp's desktop client. Everything works ...
Quick Links. Our Real Recommendation: Just Use Facebook Messenger. Windows to Windows: Skype. Chats Between Two Apple Products (Mac, iPhone, and iPad): FaceTime. Android to Android: Google Duo. Across Other Platforms: Skype or Hangouts, Probably. If you live far away from the people you care about, video chatting is the best way to feel more ...
Start Talkying together! Talky is the easy way to connect with friends and family. Rather than using a personal account, Talky uses unique URLs that you can share with those you're meeting with. Just create a room and share the URL with your chat partners. All they need to do is navigate to your link with a supported browser to start the chat!
2. Listen 2/3 of the time - Talk 1/3 of the time. When you've just met someone, you can ask them open-ended questions and wait for their answers, roughly 2/3 of the time. The other 1/3 of the time, you respond to their questions and add comments or stories from your life that are relevant to their answers.
Step 1. Write a video script. When writing a talking head video script, include only the most important information, and limit the text to 3-4 sentences per slide. Step 2. Choose a talking head. Synthesia has over 160 diverse avatars to choose from, so pick one that fits the topic and design of your video. Step 3.
Export to Video! Share and use it as you please! Lend your voice to any image! Say what you want! Create impactful talking pictures easily. Make a Blabber! Chinchilla Wins. Blabberize.
Houseparty. Houseparty is a relatively recent addition to the video chat brigade, but it has quickly become very popular, and with good reason. For one thing, it tries to make video calls as slick ...
CNN's Anderson Cooper talks to Vice President Kamala Harris about President Biden's performance in CNN's presidential debate - and how other democrats are reacting.
President Joe Biden's performance in the first debate Thursday has sparked a new round of criticism from Democrats, as well as public and private musing about whether he should remain at the top ...
2. If you are using PowerPoint, avoid using the word "slide." Instead of talking about the medium, talk about the concepts. Swap out, "This slide shows you…," for, "Here we see…."
Connecting decision makers to a dynamic network of information, people and ideas, Bloomberg quickly and accurately delivers business and financial information, news and insight around the world
Biden ended the night with the Democratic Party in crisis with serious conversations taking place behind the scenes among senior figures over whether his candidacy is now sustainable, two months ...
Honest leaders make decisions based upon the rock foundation, which stays firm. That's why I will vote for a mumbling honest Joe Biden over a manic dishonest Donald Trump. The Rev. Denny Coon ...
Biden struggled on the debate stage with a raspy voice attributed to a cold, and froze at one point while talking about Medicare, causing worry among Democrats over the president's performance and ...