How-To Geek
How to make windows troubleshoot your pc's problems for you.
Windows includes a variety of "troubleshooters" designed to quickly diagnose and automatically solve various computer problems.

Quick Links
Windows 7 and 8.
Windows includes a variety of "troubleshooters" designed to quickly diagnose and automatically solve various computer problems. Troubleshooters can't fix everything, but they're a great place to start if you encounter a problem with your computer.
Troubleshooters are built into the Control Panel on Windows 10, 8, and 7, so practically all Windows users can take advantage of them. On Windows 10's Creators Update , most troubleshooters are now available through the Settings app.
If you've installed Windows 10's Creators Update, you'll find these in Settings. Navigate to Settings > Update & Security > Troubleshoot.
Related: Everything You Need to Know About the Blue Screen of Death
As of the Creators Update, the following troubleshooters are available here: Blue Screen , Bluetooth, Hardware and Devices, HomeGroup, Incoming Connections, Internet Connections, Keyboard, Network Adapter, Printer, Playing Audio, Power, Program Compatibility Troubleshooter, Recording Audio, Search and Indexing, Shared Folders, Speech, Video Playback, Windows Store Apps, and Windows Update.
If something isn't working properly on your PC, the associated troubleshooter may find and fix the problem for you.
Select the troubleshooter you want to run and click "Run Troubleshooter". Many troubleshooters will run automatically and fix problems they find, while some troubleshooters will suggest various fixes you can choose whether to apply.
The Settings interface doesn't list every available troubleshooter. For example, it omits the Background Intelligent Transfer service, Windows Media Player DVD, Windows Media Player Library, and Windows Media Player Settings troubleshooters.
These are still available if you need them---they're just buried in the Control Panel. To find them, open the Control Panel, type "Troubleshoot" into its search box, and click the "Troubleshooting" icon.
Click "View all" at the left side of the Troubleshooting pane and you'll see a full list of available troubleshooters.
You'll find these tools in the Control Panel on Windows 7 and 8. You'll also need to use the Control Panel if you're using Windows 10's Anniversary Update or an earlier version of Windows 10.
Navigate to Control Panel > System and Security > Troubleshoot Common Computer Problems. On Windows 7, click "Find and Fix Problems" instead.
You'll see a list of the most common troubleshooters you might need.
These aren't the only available troubleshooters. Click "View All" in the sidebar to view a full list of troubleshooters. Here's a list of the troubleshooters you might find, although not all versions of Windows include the same troubleshooters:
- Background Intelligent Transfer Service : Finds and fixes problems with the Background Intelligent Transfer Service, which Windows Update and some other services use for background downloads.
- Hardware and Devices : Checks your computer for issues with hardware devices. If a hardware device--particularly a recently installed one--isn't working properly, this troubleshooter can find and fix problems with hardware detection and drivers.
- HomeGroup : Looks for problems with your HomeGroup network and file-sharing settings.
- Incoming Connections : Checks if the Windows Firewall is blocking incoming connections you need and help you unblock them.
- Internet Connections : Detects and fixes problems with your Internet connection and loading websites.
- Internet Explorer Performance : Identifies problems that can slow down Internet Explorer and fixes them.
- Internet Explorer Safety : Identifies settings that can cause security and privacy problems in Internet Explorer and fixes them.
- Network Adapter : Finds and fixes issues with your Wi-Fi adapter or other network adapters.
- Playing Audio : Scans for problems that can prevent sound from playing properly.
- Power : Identifies and fixes problems with power settings to increase your computer's battery life.
- Printer : Checks for and fixes problems with printers and printing.
Related: How to Make Old Programs Work on Windows 10
- Program Compatability Troubleshooter : Helps you choose the best compatibility settings for running programs designed for older versions of Windows.
- Recording Audio : Scans for problems that can prevent microphone audio recording from working.
- Search and Indexing : Fixes problems with Windows Search and the indexer.
- Shared Folders : Identifies issues that can prevent shared network folders from functioning.
- System Maintenance : Finds and fixes broken shortcuts and performs and system maintenance tasks, including checking if your clock is the correct time.
- Video Playback : Detects problems that can prevent videos from playing back properly and fixes them.
- Windows Media Player DVD : Fixes issues that can prevent DVDs from playing in Windows Media Player.
- Windows Media Player Library : Fixes issues with Windows Media Player's media library.
- Windows Media Player Settings : Fixes issues with Windows Media Player's settings.
- Windows Store Apps : Repairs problems that can prevent Windows Store apps--in other words, Windows 10's new Universal Windows Platform apps--from working properly.
- Windows Update : Identifies and fixes issues that can cause Windows Update to not work at all, or fail to install some updates.
To run a troubleshooter, just click it in the Troubleshooting pane. To quickly find a relevant troubleshooter, you can perform a search from the Troubleshooting window.
The troubleshooter will launch after you click it. Just click "Next" to begin troubleshooting.
Most troubleshooters will run automatically, looking for problems and fixing any issues they find. To prevent the troubleshooter from automatically making changes to your system, click the "Advanced" link at the bottom left corner of the troubleshooter window and uncheck the "Apply Repairs Automatically" option. You'll be prompted with more information before the troubleshooter makes any changes to your system.
While most troubleshooters run automatically, some troubleshooters will give you options you need to click. For example, the Program Compatibility troubleshooter will walk you through choosing a program that isn't working properly and changing its compatibility settings. The Incoming Connections troubleshooter will ask you what you're trying to do so it know what type of incoming connection to troubleshoot.
That's about it. There isn't a troubleshooter for every issue you'll encounter, and the troubleshooters that do exist won't be able to fix every problem. But troubleshooters are a good place to start when you encounter a problem with something.
- Services & Software
Windows 10 Troubleshooting: The Most Common Problems and How to Fix Them
We've got solutions for your Windows 10 problems, whether you're suffering from uncontrollable scrolling, update issues or your cursor moving on its own.

- National Silver Azbee Award for Impact/Investigative Journalism; National Gold Azbee Award for Online Single Topic Coverage by a Team; National Bronze Azbee Award for Web Feature Series

Got Windows 10 problems? We've got answers.
If you're running into problems on your Windows 10 machine, we promise you're not alone. Microsoft does release monthly security patches and larger feature updates twice a year for the more than 1.3 billion devices worldwide running on its software, but annoying problems still pop up. (And with support for the Windows 10 OS ending in a few years, now is a good time to consider upgrading to Windows 11 , which is free for all Windows 10 users.)
Don't worry, though -- we've got you covered. Here are instructions for how to troubleshoot 10 common Windows 10 problems, collected from CNET's forums and other sites and message boards. One thing to note: There are often multiple ways to fix a Windows 10 issue, and what works for you may depend on your device's make and model and several other factors. (If you're still on Windows 7, you can still download Windows 10 for free with this trick . Just make sure to check out our guide to everything to know before moving from Windows 7 to Windows 10 .)
Read more : Windows 10 tips: Secret Start menu, taking screenshots and more
Issues updating to the latest version of Windows 10
Microsoft's major feature updates arrive twice a year, the most recent being the May 2021 update , which included changes like multicamera support for Windows Hello and improvements to Windows Defender Application Guard. (The Windows 11 launch replaced what would have been the second major update this year.) Normally, though, you should get a notification when an update rolls out to your device. (Here's why you might still be waiting for the Windows 11 notification .) Or you can go to Settings > Update & Security > Windows Update and click Check for Updates . If available, you'll see Feature update to Windows 10, version 21H1 . Click Download and install .
If you're running into a problem or error updating, you can try the following, according to Microsoft:
- Make sure your device is connected to the internet (you'll need an internet connection to update).
- Try to install the update manually, by following the instructions above.
- Run the Windows Update Troubleshooter: Select Start > Settings > Update & Security > Troubleshoot . Under Get up and running , select Windows Update .
If the Troubleshooter doesn't fix the problem, check out Microsoft's guide for dealing with update issues .
Not enough storage space to complete an update

Updating Windows 10 does require storage space, so you may need to free some up.
Windows 10 updates can require a good amount of drive space. If you run into an error due to a lack of drive space, here's what Microsoft suggests you do:
- Save files you don't need on your desktop on an external hard drive or thumb drive, or in a cloud account like Google Drive or OneDrive.
- Consider turning on the Storage Sense feature, with which Windows will automatically free up space by getting rid of files you don't need, like temporary files and items in the Recycle Bin whenever you're low on disk space or at certain intervals. To turn on Storage Sense, go to Start > Settings > System > Storage , open Storage settings and turn on Storage Sense. Select Configure , or run it now.
- If your device doesn't have Storage Sense, you can use the Disk Cleanup tool to delete temporary and system files. In the Taskbar search box, type disk cleanup , and select it from the results. Check the boxes next to the type of files you want to delete -- by default, Downloaded Program Files, Temporary Internet Files and Thumbnails are selected.
Read more : The best antivirus protection for Windows 10
Mouse cursor starts moving on its own
Sometimes your Windows 10 laptop or desktop cursor will start moving on its own, disrupting your work or browsing. Here are a couple of potential ways to fix it from Microsoft .
Run hardware troubleshooter . Press Windows + X , and select Control Panel . Go to Troubleshooting , and on the left panel click View all items . Select Hardware and devices troubleshooter and follow the instructions.
Update the mouse and other pointing device drivers . Press Windows + R , type devmgmt.msc and hit Enter . Expand Mice and other pointing device drivers . Right-click on the driver of your mouse, and click update .

Uncontrollable scrolling... and scrolling...
Your device keeps scrolling to the bottom of every menu and page even when you aren't moving the mouse. There are a few different ways to troubleshoot this. First, try unplugging the mouse or turning off its Bluetooth connection, and plugging it back in.
You can also see if it's an issue with your browser. For example, in Chrome, you can try going to Preferences > Advanced > Accessibility , and turn on Navigate pages with text cursor .
You may also need to update your mouse or touchpad driver. Go to Device Manager , and see if there are any warnings next to the names of your mice. If so, you'll be able to repair them there.
Another potential fix: Try creating a new local user. This comes up often on message boards as a fix for a number of problems. You don't have to move all of your items over to a new account, but the act of creating a new user (or logging into another local account that already exists), logging into that account and then logging back into your account seems to help. To create a new user, go to Settings > Accounts > Family & other users . Click Add someone else to this PC , and click the "I don't have this person's sign-in information" link. Click Add user without a Microsoft account and enter a new username.
Files opening in the wrong apps

If your Windows 10 files start opening in different apps, there are a couple of fixes to try.
When you update Windows 10 your apps and files might go back to their default settings or switch settings. One way to change this is to go to Start > Settings > Apps > Default apps . Select which default you want to set, and then choose the app.
When you go to open a file, you can also right-click it to see your options. You can choose Open with and then Choose another app , and find which one you want. You'll see an option asking if you always want to use that app when opening that type of file.
Trouble setting up 3 monitors
After upgrading from Windows 7 or 8 to Windows 10, many users have reported that they are no longer able to connect three monitors. A user on CNET's forums recommended this fix: Plug in all monitors, and go to Control panel > Display > Change display settings . You should see all three screens displayed there. If one shows as disconnected (the screen is a darker color than the others), click that screen and choose Extend desktop to this display . (You might need to restart your machine once you plug all three monitors in, and then try this.)
Bluetooth not working
If you suddenly can't connect your Bluetooth headphones, mouse or keyboard, there are a few things you can try :
Make sure Bluetooth is turned on . You can do this by going to the taskbar and selecting Action Center (it looks like a message square). If you don't see Bluetooth, select Expand . You should then see Bluetooth, and be able to select it to turn it on. If your device isn't paired with any Bluetooth accessories, it will say "Not connected." Your other option is to go to Start > Settings > Devices > Bluetooth and turn it on there.
Check your Bluetooth device . Make sure your accessory is turned on, is charged or has fresh batteries and is close to your Windows 10 device. You can then try turning off the Bluetooth device and turning it back on after a few seconds. If it's still not working, make sure it's not too close to any other USB device plugged into a USB 3.0 port, since those can interfere.
Check your Windows 10 device . Make sure airplane mode is turned off ( Start > Settings > Network & Internet > Airplane mode ). Try turning Bluetooth on and off (see above). Finally, try removing the device and adding it again ( Start > Settings > Devices > Bluetooth & other devices . Select the device you're having trouble connecting, and choose Remove device > Yes ).
If none of this works, Microsoft has some other tips for troubleshooting Bluetooth problems .
Read more : How to pair Apple AirPods with your Windows 10 PC in less than a minute

Make sure you can connect your Bluetooth mouse and other devices.
Printer connection issues
Windows 10 supports most printers, but connection issues happen. To install or add a printer (whether it's networked, wireless or Bluetooth), go to Start > Settings > Devices > Printers & scanners . Select Add a printer or scanner . Your device should find the printer (assuming it's on and connected to Wi-Fi or the network) and let you select Add device .
If your printer isn't in the list, select "The printer that I want isn't listed," and then follow the instructions to add it manually using one of the options.
If you're trying to install a local printer, you can typically just plug it into your USB port and follow the same instructions. If your printer stops working, you can try doing the process again.

Too many notifications
Windows 10 can be a little notification-heavy at times. If these pop-ups are interrupting your workflow, you can adjust them by going to Start > Settings > System > Notifications & actions . There, you can decide which notifications you want on or off.
Cortana stops working
Is Microsoft's virtual assistant Cortana not assisting you? A bunch of different things could be going wrong. Start by going to Start > Cortana > Settings and turning it off and on again. Then, check your microphone under Settings > Sound -- if you aren't using the default computer one, it may have been disconnected.
You can also try restarting your device and checking for updates that may be in place to fix the issue.
When you're ready to upgrade, check out the our favorite new features in Windows 11 . Until then, don't miss these six simple security changes all Windows 10 users need to make .
Services and Software Guides
- Best iPhone VPN
- Best Free VPN
- Best Android VPN
- Best Mac VPN
- Best Mobile VPN
- Best VPN for Firestick
- Best VPN for Windows
- Fastest VPN
- Best Cheap VPN
- Best Password Manager
- Best Antivirus
- Best Identity Theft Protection
- Best LastPass Alternative
- Best Live TV Streaming Service
- Best Streaming Service
- Best Free TV Streaming Service
- Best Music Streaming Services
- Best Web Hosting
- Best Minecraft Server Hosting
- Best Website Builder
- Best Dating Sites
- Best Language Learning Apps
- Best Weather App
- Best Stargazing Apps
- Best Cloud Storage
- Best Resume Writing Services
- New Coverage on Operating Systems
Sign up for our daily newsletter
- Privacy Policy
- Advertise with Us
14 Most Common Windows Problems and How to Solve Them

This tutorial includes a list of the most common problems in Windows 10 and 11 and basic tips to solve them. Nearly any Windows problem can be fixed using its own tools: system utilities and troubleshooters, advanced booting, Command Prompt, Control Panel, and the latest hardware drivers. Are you experiencing any of the issues below? There is a solution for each one.
1. Unresponsive Applications
3. blue screen errors, 4. hard disk/ssd failure, 5. mouse and touchpad issues, 6. registry errors, 7. audio not working, 8. windows login problems, 9. bios issues, 10. usb ports not working, 11. monitor/display problems, 12. bluetooth not working.
- 13. Windows Won't Download or Install Updates
14. Wi-Fi Disabled Suddenly
Frequently asked questions.
When a Windows application freezes, nothing moves on the screen, and even other programs feel unresponsive. Apps mostly behave like this because of overheating in the cabinet/laptop bottom and memory issues.
- To unfreeze the stuck applications, open the Task Manager using Ctrl + Alt + Del or from Run command Win + R followed by taskmgr .
- Right-click to end those tasks in “Processes.” If you managed to save your work, perform a clean reboot.

To determine an external cause of overheating, verify there aren’t any power supply issues. Check your laptop’s battery and AC adapter for any signs of trouble: if they have swollen in size, it’s time to replace the hardware.
Cleaning up the cooling fan may be required for a very old computer. If you have insufficient RAM, consider adding more of it .
Close on the heels of applications freezing, a slow PC is the bane of every Windows user. It can make completing the most basic tasks torture.
You can speed up your Windows 11 or 10 device even if you aren’t planning to upgrade the RAM anytime soon.
- Replace any antivirus with Windows Defender, the only antivirus you’ll ever need .
- Open the Windows tool, Disk Cleanup, in the search bar, which frees up space on your computer by erasing Windows updates, Windows upgrade log files, temporary files, Recycle Bin, and memory dump files.

- Disable startup apps from “Settings -> Apps -> Startup.” The only startup tasks you really need are services, such as Intel Graphics Command Center and Realtek Audio driver. Everything else is optional.

- Consider a cloud download of your Windows operating system. It downloads the latest system files from Microsoft’s servers to give you a fresh Windows installation. Once you click “Reset PC” in “Settings -> System -> Recovery options,” the option is displayed in a key step as shown.

- Periodically clearing the browser cache for Google Chrome or Microsoft Edge can also give you a slight boost in performance. If you’re using an older PC, consider uninstalling any RAM-intensive software and games.
There is no simple explanation for blue screen errors, but they do cause annoyance. Also known as bug check or stop code errors, they expose the fault lines of third-party software, hardware, Microsoft code, or some corrupted memory.
Each blue screen error has its own stop code that is displayed on the screen, such as “0x000000xyz.” They can be viewed in Event Viewer, which opens from Win + R by typing eventvwr.exe or eventvwr.msc .

After you see a blue screen, analyze dump files generated by the crash using Debug with Windbg . The best way to fix these errors is using Windows advanced startup menu (aka boot menu). To launch this, go to “Settings -> System -> Recovery -> Advanced Startup -> Restart.”
Use one of these options in the advanced startup menu:
- Uninstall Updates : usually, the blue screen is caused by incompatible drivers or third-party software.
- System Restore : reverting the operating system to an earlier date and time when the problem wasn’t there.
- Startup Repair : use if you havea blue screen due to boot issues.
- Factory Image Restore: reverting the PC back to the condition in which it was shipped (to be used only in extreme cases).

Outlined below are many other ways to deal with blue screen problems, depending on the stop code error source:
- Kernel data in page error
- Critical process died error
- WDF_violation error
In rare cases, the blue screen crashes may be caused by hardware. Look under the hood in motherboard and the power supply for the exact reason.
Whether you use a hard disk drive (HDD) or solid state drive (SSD), they can fail due to short circuits, data corruption, physical damage – or could just wear out.
To get a hardware health report for your HDD/SSD, run the following code in Command Prompt (Admin mode). If the answer is “OK,” the hard disk failure is down to software errors that can be easily fixed.

For any hard disk errors you’re facing, employ the following holy trinity of Command Prompt fixes (Admin mode).
This command does a complete health check of the hard disk. For more specific disk drive checks, modify it as chkdsk C:/f/x/r or chkdsk D:/f/x/r .
You should see a message similar to “Windows has scanned the file system and found no problems. No further action is required.” If not, move on to the next tool.

System File Checker
You can use sfc/scannow , which repairs the Windows-protected files and replaces corrupted drivers.

Next up, execute the Deployment Image Servicing and Management (DISM) commands in the order below:

SSD users should set their Power mode for “Best performance” in “Settings -> System -> Power & battery.” You don’t want your laptop to power off every time, as frequent discharging is not healthy for your SSD.

Moreover, defragment your hard drive disk (HDD) if you use one. This will eliminate any problems due to bad sectors in your disk drive. For SSD users, there are comparable disk optimization tools.
Another annoying issue is the mouse lagging behind in receiving inputs, or the touchpad freezing for no reason.
If you’re using a touchpad on a laptop, go to “Settings -> Bluetooth & devices -> Touchpad.” Leave the Touchpad toggle on when a mouse is connected. Enable all default touchpad sensitivity options.

You can correct your mouse settings from “Settings -> Bluetooth & devices -> Mouse.” Make sure “Left” is the primary mouse button and that the mouse pointer speed is at a comfortable level. Keep all the default options enabled.

After clicking on additional mouse settings, select a desirable pointer speed from the “Pointer Options” tab.

If the mouse or touchpad just aren’t working properly, they can be fixed via Device Manager. Open it by typing Win + R followed by devmgmt.msc . Select the desired mouse or touchpad hardware drivers. Right-click it to view its “Properties” and update or reinstall the drivers.
A corrupt registry in Windows 11 or 10 is a den of future troubles, as it spells DLL errors and crashes. It may occur in the course of using a computer frequently.
The best way to keep the Windows registry healthy is to clean boot your Windows device.
- Open the “System Configuration” app from the search bar or by typing msconfig in the Run menu.
- Head to “Services” and check “Hide all Microsoft services.”

- Click all third-party services, such as Google and other apps. They will need to be disabled. After a restart, Windows will offer a clean boot environment.

- The DLL errors in the registry can be traced to one of the key classes in the Registry Editor. Open it from Run command by typing regedit .
- Navigate to the exact path of any software causing trouble and create new keys or DWORD (32-bit) values by following troubleshooting requirements.

- The issues due to a corrupt registry are generally resolved after a simple Windows update. You can also use the sfc/scannow and DISM.exe commands in Command Prompt for additional protection.
If a laptop or desktop PC fails to produce any sound, you can no longer listen to music, movies, and YouTube or attend videoconferencing calls. Follow the steps below to troubleshoot.
- Go to “Control Panel -> Hardware and Sound -> Sound.”
- This will open a pop-up where you can see a checkmark next to the playback device you’re using. If it’s headphones, you will not receive any audio on the laptop speakers and vice versa. Do check for issues with wireless headphones .

- Windows 11 and 10 offer a default troubleshooter for each error source. Search for the “Find and fix problems with playing sound” troubleshooter option and enable it to apply repairs automatically.

- After running this troubleshooter, the audio problems should disappear. You can fix audio driver issues by restarting audio services from services.msc in Run.
- Turn off the option for sound effects and enhancements by going to “Settings -> System -> Sound -> Speakers.”
The most probable causes for sign-in problems in Windows are forgotten passwords or PINs. Therefore, it’s essential to store them safely. (Consider using a password manager for web, desktop, and mobile .)
If you still can’t log in, you might have multiple accounts on your Windows device. You can access them using netplwiz in the Run menu. Removing unnecessary accounts can fix login problems immediately. Restart the computer to ensure the problem is fixed.

To avoid login problems in the future, instead of shutting down from the Lockscreen window, go back inside the logged-in desktop for a proper shutdown.
For repeat troubles with login, sign in using Safe mode and run the Startup Repair tool as covered above. You can also “Disable fast startup” from “Power Options” in the Control Panel.
While a corrupt BIOS is enough cause to replace your computer or hard disk, in most cases, it’s a simple maintenance issue. You can access the BIOS menu by pressing the boot keys repeatedly after a Windows reboot. Depending on your PC manufacturer, the boot keys could be F2 , F6 , F12 , or Esc .
Once inside the BIOS Settings menu, look for an option that says “Load defaults” (ours is at the bottom under “Maintenance”), as it will load the BIOS defaults specific to your computer.

Once you set Factory or the current BIOS defaults, your Windows device will restore its settings after a quick restart.
Note : you will never face any BIOS issues if you have enabled UEFI mode .
When you notice errors such as “This PC can’t run the current version of Windows,” or the computer is stuck in the BIOS boot screen forever, you have to check and update the BIOS information. Otherwise, you shouldn’t handle BIOS settings.
Sometimes your PC or laptop won’t respond well to inserting or removing a USB device. If there is nothing wrong with the USB drive, it would indicate the USB ports may have malfunctioned.
- If there is no physical damage to the USB port, but it isn’t working properly, go to the necessary driver in Device Manager and check its “Properties.”
- The status may show “This device is working properly.” If it doesn’t, restart your computer and check it one more time.

- Right-clicking the USB driver in Device Manager leads to other options that let you install and update the drivers.
Are you facing issues in your monitor or display such as black screens, blank screens, haziness, or a distorted view? Just as with mice, keyboards, and other peripherals, these issues can be resolved from Device Manager.
Go to the monitor you use and right-click it to view the driver properties. If it shows a status such as “This device is working properly,” you’re good to go. However, if the drivers are shown as outdated, you need to update and reinstall those as in the previous example.

Here’s a simple trick to ensure there is no conflict with the monitor display. As it depends on the Power supply, you can accelerate it to ensure a timely display of graphics. Go to “Shutdown settings” from “Control Panel -> Hardware and Sound -> Power Options -> System Settings.” Check “Turn on fast startup.”

If you’re using multiple monitors on Windows , ensure that the primary and secondary monitors are properly marked. The scale of display resolution should be according to computer screen size recommendations.
Bluetooth is an integral part of the Windows experience. Whether it is mice, touchpads, headphones, USB devices, and smart gadgets, things don’t feel the same when Bluetooth stops working.
- Go to “Settings -> Bluetooth & Devices” and ensure your target Bluetooth hardware is paired successfully . Keep the Bluetooth toggle on for your device.

- If there is continued trouble with Bluetooth pairing, run a troubleshooter for Bluetooth. In Windows, this option is available by going to “Settings -> System -> Troubleshoot -> Other troubleshooters -> Bluetooth.”

- After running the Bluetooth troubleshooter, you may notice a few changes to your system. It will fix small issues, such as troubles with Bluetooth radio.

Following a simple restart, the Bluetooth pairing will be successful. If you continue to face problems, uninstall and reinstall the secondary Bluetooth device. You may additionally have to fix a few drivers from the Device Manager.
13. Windows Won’t Download or Install Updates
This problem can surface when you’re upgrading from a current version of Windows to something higher. You may find that Windows is taking way longer to download or install the updates.
- In most cases, the problem can be fixed with a simple PC restart and by refreshing the update screen. Go to “Check for Updates” and see whether the glitch is gone.
- If you still can’t pursue the necessary updates, run a troubleshooter for Windows Update from “Settings -> System -> Troubleshoot -> Other troubleshooters.”

- Running the Windows Troubleshooter can help you fix any security settings, missing files, or service registration problems. The same results can be achieved using SFC, DISM, and other file path correction tools.

Your computer Wi-Fi is what makes everything come together. If the Wi-Fi stops working suddenly, you can’t connect to the Internet. To fix Wi-Fi issues in Windows, follow the steps below.
- Go to “Control Panel -> Network and Internet -> Network and Sharing Center.” This will open a Network Connections window.
- Choose your desired Wi-Fi connection to disable and enable it.

- Ensure that the Wi-Fi router has not been giving you any trouble recently.
- Make sure you didn’t turn the Airplane mode on by mistake. You can disable it from “Settings -> Network & Internet.”
- If your Wi-Fi fails to show up altogether, try enabling SSID broadcast and a few other things.
What are the most common Windows error messages?
The most common error messages in Windows 11 and 10 are:
- Boot device not found
- Update errors
- Security certificate errors
- Blue screen of death (BSoD) errors
- Access denied
- Slow or no Internet connection
Why does Windows 10 sometimes become unstable?
Windows 10 is unstable because it lacks support for cutting-edge features, such as Trusted Platform Module (TPM), Virtualization-based Security (VBS), and UEFI Secure boot. While Microsoft intends to support Windows 10 until the end of 2025, you should consider migrating to Windows 11 , as it offers more stability thanks to an error-free user interface and several advanced functionalities.
How do I know if my Windows apps are faulty?
If you keep the SmartScreen filter on in Windows Security, it will alert you whenever downloaded apps cause trouble. It will also prevent you from installing such apps.
Image credit: Pixabay . All screenshots by Sayak Boral.
Our latest tutorials delivered straight to your inbox

Sayak Boral is a technology writer with over eleven years of experience working in different industries including semiconductors, IoT, enterprise IT, telecommunications OSS/BSS, and network security. He has been writing for MakeTechEasier on a wide range of technical topics including Windows, Android, Internet, Hardware Guides, Browsers, Software Tools, and Product Reviews.

- Generative AI
- Office Suites
- Collaboration Software
- Productivity Software
- Augmented Reality
- Emerging Technology
- Remote Work
- Artificial Intelligence
- Operating Systems
- IT Leadership
- IT Management
- IT Operations
- Cloud Computing
- Computers and Peripherals
- Data Center
- Enterprise Applications
- Vendors and Providers
- Enterprise Buyer’s Guides
- United States
- Netherlands
- United Kingdom
- New Zealand
- Newsletters
- Foundry Careers
- Terms of Service
- Privacy Policy
- Cookie Policy
- Copyright Notice
- Member Preferences
- About AdChoices
- E-commerce Affiliate Relationships
- Your California Privacy Rights
Our Network
- Network World

How to repair Windows 10 (and 11) in 4 steps
When windows 10 gets wonky, try this series of repair techniques — in this order — to attempt to set things right..

Sometimes a Windows 10 system starts misbehaving to the point where repair is needed. This often takes the form of worsening performance or stability, and can originate from damage to, loss of, or corruption of Windows system files typically found in the C:Windows folder hierarchy. When that happens, users would be well advised to break out the following routine to help them set things back to rights.
I initially wrote this story in 2016, but as Windows 10 has evolved over time, some of the steps have changed a bit. I’ve now updated it for the latest versions of Windows 10. That said, most of these approaches also work with Windows 7 and 8 (with slight variations), and the advice here applies almost identically to Windows 11 , which Microsoft is gradually rolling out to Windows 10 users whose hardware can support the new OS via Windows Update from October 2021 into early 2022.
The Windows 10 (or 11) repair drill
The idea is to first try the initial step in the sequence. If that doesn’t fix what’s broken, advance to the next step. Keep working through the steps in order until you reach the end, and you are bound to fix the vast majority of problems. (The only remaining step at that point would be to replace the system on which the software is running, and that’s outside the scope of this story.)
The amount of time and effort required for each step goes up incrementally. Some steps involve additional work to restore the prior state of your PC more or less back to where it was prior to taking that step. Thus, the most important bit of advice I can dispense for those who must venture beyond Step 1 is this: make a complete backup of your system to provide a source for files and information that might otherwise go missing. Ignore this advice at your own risk.
But first: back it up before you lose it!
Any time you make major changes to a Windows system, such as installing a major application suite like Microsoft Office or performing an OS upgrade or repair, it’s a good idea to begin that process with a complete backup. The important thing is to use a backup tool that creates an image backup of your boot/system drive. That will allow you to rewrite that drive and restore your system to normal operation should anything go wrong with your changes or repairs. See my article “ How to make a Windows 10 or 11 image backup ” for instructions.
Step 1: Using DISM and SFC for system repair
Since I wrote the original version of this story, I’ve obtained direct advice from Microsoft that it’s best to run DISM before running the System File Checker, a.k.a. SFC. Hence, I am reversing the order of events for this step. I’ll echo Microsoft and say “Always run DISM first, then SFC second, not vice versa.”
DISM is the Deployment Image Servicing and Management tool. It’s a kind of Swiss Army knife for working with Windows operating system images, both offline and online. DISM can often fix things that SFC can detect but that it cannot itself fix. DISM supports a raft of capabilities with switches and parameters to match, but basic system file repair syntax is reasonably easy (though it often requires multiple passes before it can set things straight).
You must run DISM in an Administrator: Command Prompt window (press the Windows key + X combination and select Command Prompt (Admin) from the resulting pop-up menu) or in an Administrative PowerShell or Windows Terminal session. Here’s some sample syntax (consult the TechNet DISM Technical Reference for all the gory details):
dism /online /cleanup-image /checkhealth
Most of the time when you run this command, the output will find nothing amiss, as shown in Figure 1:

Figure 1: DISM can check the health of any Windows image. Here, it reports all is well on a production PC.
The /checkhealth command simply checks the running image (that’s what /online tells it to do) to see if it can detect any damage or corruption. Because it’s only checking file hashes and signatures, this command completes in under one minute on most machines. The good thing about /checkhealth is that it not only tells you if it finds damage but if that damage is repairable or non-repairable. If it’s repairable, you can proceed to the /restorehealth option (covered in the following paragraphs); if it’s non-repairable, jump to Step 2.
If DISM reports that component store corruption is found and is repairable, you should attempt repairs. That syntax reads:
dism /online /cleanup-image /restorehealth
Even if errors were detected in the preceding step, this command should complete successfully. It replaces corrupt or questionable elements in the Windows Side-by-Side (WinSxS) store, reading from a local copy of your Windows image files.
The /restorehealth command can be tricky to use. Because it can actually repair a Windows image, it needs a source from which to attempt such repairs. You can omit the /source option, but if you do, the command will try to grab its files from Windows Update over the internet. This may or may not work, depending on firewall settings on your network.
A safer bet is to point DISM at a known good source for Windows image components on the local machine (or on your local network). This can be a Windows image ( .wim ) file or a compressed Windows image ( .esd , which is used for electronic software downloads of Windows installations, as the file extension is meant to communicate). You can also point to a separate copy of a WinSXS folder (the usual directory path is C:WindowsWinSXS ) taken from another PC with similar or identical hardware for which dism ... /checkhealth returns a clean bill of health.
The syntax for image files is where things can get interesting. To point to the install.wim file that shows up in ISO downloads for the Windows 10 installer on a USB flash drive designated L: , for example, you must use the following source specification (which uses the first image it finds inside the .wim file, designated :1 ):
/source:WIM:L:sourcesinstall.wim:1
To use an ESD file, change the wim items to esd, as shown here:
/source:ESD:L:sourcesinstall.esd:1
If you run into difficulties getting this to work, try adding the /limitaccess switch to your command strings. This stops DISM from attempting to grab source files from Windows Update, which it will sometimes do even if pointed at a local source. If you just can’t get either of these to work, try a WinSXS folder instead.
Note: the version and language for the /source image must be identical to that for the image to be repaired. This may mean using HeiDoc.net , UUP Dump , or Microsoft’s Media Creation Tool to grab the correct Windows 10 or 11 version/build (see my article “ The best places to find Windows 10 ISOs ” for details on how to use these sources) and creating media or mounting the ISO file to give DISM the right /source from which to work. For Windows 11, check the Windows Insider Preview Downloads page to grab the proper ISO.
Figure 2 shows typical DISM output using /restorehealth :

Figure 2: Even when DISM /checkhealth finds errors, the /restorehealth option is usually successful.
Next, it’s time to run SFC, Microsoft’s System File Checker. To quote TechNet , the system file checker “scans and verifies versions of all protected system files.” It can tell you if it finds anything amiss if you enter SFC /scannow at the command line.
As with DISM, you must run SFC from an Administrator: Command Prompt or an Administrative PowerShell or Windows Terminal session. This command takes 5 to 10 minutes to complete, depending on your PC hardware. Unlike DISM, SFC scans and initiates repairs within a single command.
Figure 3 shows sample output when SFC finds files in need of repair. If this occurs on your PC, repeat the /scannow command until it gives the clear bill of health shown in Figure 4.

Figure 3: If SFC finds questionable files, it will repair them if it can. Here, it succeeds.

Figure 4: Eventually, SFC will report finding no “integrity violations.” You’re done!
In my experience, 80% of all problems will be solved at this point, so the odds are in your favor that you won’t have to keep going. But if DISM can’t fix your Windows image, or SFC can’t or won’t make repairs to your system files, proceed to Step 2.
Step 2: Try a recent restore point or image backup
A restore point is a snapshot of a Windows PC’s OS state from a specific point in time. If enabled, the Windows System Restore capability can create and maintain restore points on your behalf. To see if this is an option on your target machine, type restore point into the Windows 10 search box. The System Properties window should open to the System Protection tab, shown in Figure 5.

Figure 5: Access available restore points using the “System Restore…” button.
To look at restore points, you must work through the System Restore wizard. Click the System Restore… button to launch the wizard, then click the Next button on the first pane of the wizard to see a list of restore points available to you. (If you don’t like what you see, or you don’t see something from before your troubles started on this machine, click the Show more restore points checkbox for a complete list of what’s available to you.) Click the restore point to which you would like to revert.
Figure 6 shows the lone restore point available on my test PC.

Figure 6: For this story, I created a restore point named “Test restore point.”
Because I have only one restore point — I don’t use them much any more, for reasons I’ll explain coming up — I picked that item to show you what appears when you select a restore point in this utility. If you click the Scan for affected programs button it will tell you if any programs or drivers will be affected by rolling back to the restore point you’ve selected. In this case, there’s no impact, as shown in Figure 7. If something were to be affected, it would show up in either the top or bottom list in that results pane.

Figure 7: The current restore point has no impact. But older restore points will provide a list of drivers and programs that need to be reinstalled if you revert to that restore point.
It usually takes between 5 and 15 minutes to revert to a restore point. The amount of additional effort to catch back up to where you left off depends on the number of items that need to be installed or updated, as shown in Figure 7. This can take from minutes to an hour or more depending on size and scope.
All this said, I don’t use Restore Points anymore. I’ve run into occasional issues with failed restores, and I’ve seen plenty of discussion in Microsoft Community and TenForums among other users who’ve had similar problems. My preference is to restore an image built using Macrium Reflect (free or commercial; I use both). It’s faster than System Restore, and I’ve never been unable to restore a valid, integrity-checked Reflect backup. You decide what’s best for you; I use Reflect.
Restoring an image backup is much like reverting to a restore point: choose the image (usually by date and time) to which you’d like to roll back, then initiate the restore procedure. For example, Macrium Reflect offers a “Restore” menu, then allows you to browse stored backup files to pick the one you want in an Explorer-based Open window.
If reverting to a restore point or image backup doesn’t work (or you don’t have either of these), it’s time to move on to Step 3.
Step 3: In-place upgrade to current Windows 10 version
This technique essentially involves overwriting the current OS installation with a fresh new copy while leaving your data files, settings, and preferences alone. It means running the Windows 10 installer for the same version/build that is currently running on the machine from inside Windows 10 itself.
To accomplish this, you’ll need installation media for the same edition (Home, Pro, Enterprise, or Education), language (en-US for American English, for example), and build as the currently installed edition. Bittedness must also be identical: 32-bit media for a 32-bit install, 64-bit media for a 64-bit install. (See “ The best places to find Windows 10 ISOs ” for info on obtaining the correct Windows 10 version/build from HeiDoc.net, UUP Dump, or the Media Creation tool, and use the Windows Insider Preview Downloads page for Windows 11 builds.) I recommend building an installable and bootable USB flash drive for this purpose; you may need it again sometime. (There’s a great TenForums tutorial on how to do this.)
Before launching into this process, make sure to log in to Windows 10 with an administrative account. Most experts recommend that you disable or uninstall any third-party antivirus or security software (anything other than Windows Defender, in other words) and turn off Fast Boot and Secure Boot in your UEFI firmware settings (if turned on). You can reinstate these items when the install is complete.
Performing an in-place upgrade is easy. Run setup.exe from the USB flash drive, or from the mounted ISO, which should reside on some drive other than the system/boot device. The Windows installer will do the rest and will guide you through the installation process. On the “Ready to install” screen, be sure both “Install Windows 10” and “Keep personal files and apps” are checked. The second checkmark is particularly important because that tells you it’s indeed an upgrade install, which leaves non-OS files and settings (mostly) alone.
The whole process takes 10 to 30 minutes, depending on your PC’s hardware. You’ll need to reestablish your network connection and set your time zone (unless you live in the Pacific time zone where Microsoft has its HQ). For more detailed instructions, including a list of cleanup tasks to perform after the in-place install, see my article “ How to fix Windows 10 with an in-place upgrade install .”
Step 4: Completely reinstall Windows 10
If none of the previous steps has fixed Windows, it’s time for a do-over. In this step, you can choose one of two different options for completely reinstalling Windows on your machine — a more draconian approach to restoring operations than any of the previous steps. Whichever method you choose, you’re going to have to reinstall all apps and applications.
Option A: Reset this PC
This repair method rolls your PC back to its built-in recovery image (usually established when the unit gets its initial Windows image and the original system/boot disk layout is established) or a fresh, clean Windows image downloaded from Microsoft’s servers. For something with the ability to change your PC so thoroughly and completely, it’s surprisingly easy to do from an administrative account. Go to Settings > Update & Security > Recovery , and then click the Get started button under “Reset this PC.”

Figure 8: Don’t click the Get started button unless you’re ready, willing, and able to rebuild the PC from the ground up.
The next screen to appear lets you know exactly what you’re in for, and why a reset is properly described as “major” or “draconian” in scope, impact, and effort involved.

Figure 9: This is your last chance to bail out on a long process. If you decide to proceed, you can keep personal files, or get rid of everything.
Understand what this means: if you reset, you lose all applications and apps installed after the OS made its initial appearance. You can decide whether or not to keep what Microsoft calls your “personal files” (everything in Documents, Downloads, Pictures, Music, and Videos), but everything else will go.
If you proceed with the reset, you’re presented with two options: “Cloud download” grabs fresh, new Windows installation files from Microsoft’s servers, while “Local reinstall” uses your PC’s built-in recovery image. Unless you have connectivity restraints, I recommend the cloud download option to ensure that any issues with your PC’s recovery image won’t carry through to the new installation.
For more details about using Restore this PC, see my article “ Windows 10 recovery, revisited: The new way to perform a clean install .”
Reset this PC is convenient and requires no supplementary media, but I prefer the traditional approach of performing a clean Windows 10 installation from a bootable USB drive or mounted ISO, covered next.
Option B: Clean install of Windows 10 from installation media or mounted ISO
This option means starting over with a completely new OS installation. Why might this be necessary? Aside from reasons such as incurable system instability, malware infestation, or problems that take longer to fix than the time is worth, it may be desirable to switch from legacy BIOS emulation to using available UEFI. It might also be desirable to wipe the boot/system drive clean to remove leftover items (recovery partitions, OEM partitions, and so forth) from older Windows versions and let Windows 10 start over with a clean slate.
The good news is that as long as you’ve got a valid Windows 10 key or you’ve upgraded from Windows 7 or 8.1, Microsoft will recognize your PC and permit it to activate itself without requiring you to supply that key again. Nevertheless, if you’ve got access to the key, it’s a good idea to put that file on a USB drive or some other storage media just in case it’s requested. This seldom happens, but should it be needed, it’s good to have. (There’s a great tutorial at TenForums about how to find and record your Windows 10 key and digital entitlements.)
The process for performing a clean install is 99% the same as that for the in-place upgrade from step 3. Just boot from your installation USB flash drive, select Install Now , accept the license terms, and pick the Custom: Install Windows only (advanced) option when it’s presented to you. The rest of the details — and there are many — are all nicely covered in the TenForums tutorial on this subject.
After the installation
Once you complete either the Reset this PC or the “clean install from installation media or mounted ISO” process, you’ll be starting over from scratch. For me, that means reinstalling Office plus all the apps and utilities that I customarily use on a production machine. It usually takes me 8 to 12 hours to work all the way through this process when manually setting up a new production PC, so that’s the worst-case scenario.
Be sure to check out the great Ninite utility, which lets you create a custom menu of common applications and tools that it will then automatically install on your behalf. Ninite covers about half of what I normally outfit my production PCs with, so I still have to download another dozen programs or so to finish up after that. The Ninite selection screen appears in Figure 10.

Figure 10: At last count, Ninite provides auto-install for 90+ commonly-used programs.
Picking up the pieces after the repair
Hopefully, you’ll never have to venture further than Step 2 in this list. But if you must dig deeper than that, remember to clean up after it’s all over. That means running Disk Cleanup (or some third-party alternative) and making sure all your applications are installed and working. It also means making another backup when you’ve got things the way you want them, so you’ll have it at your disposal should things go south again.
In the meantime, enjoy your repaired and rejuvenated Windows 10 system!
The Windows 11 situation
Pretty much everything I’ve reported here about Windows 10 also applies to Windows 11 , which I’ve been testing as part of the Insider Preview program. If you have a Windows Insider account, you can use an ISO from the Windows Insider Preview Downloads page, and you should be able to perform DISM repairs or an in-place upgrade repair install.
In most ways, and all the important ones, repairing Windows 11 is the same as repairing Windows 10. Good luck, and have fun!
This article was originally published in June 2016 and updated in November 2021.
Related content
Once again, ai industry employees warn the tech could lead to ‘human extinction', the pc industry has a lot to thank apple for, how visual collaboration supercharges devops: from ideation to it stack optimization, seeing is believing, openai fixes issues with chatgpt after an outage affected some users, from our editors straight to your inbox.

Ed Tittel has been working in and around IT for over 30 years and has been a Windows Insider MVP since 2018. The author of more than 100 computing books, Ed is perhaps best known for his Exam Cram series of certification prep books. These days, Ed blogs weekly for GoCertify.com and more often than that at Win10.Guru . To learn more about Ed, visit his website at edtittel.com .
More from this author
A new windows 11 backup and recovery paradigm, windows 11’s new approach to troubleshooting, how to make a windows 10 or 11 image backup, key features of windows 11 enterprise, most popular authors.

Show me more
Amd and intel take on nvidia with new ai chips and pricing strategies.

How AI will kill the smartphone

Robotics makers embrace Nvidia digital twins to create autonomous AI-run factories

Podcast: Google's AI problems go beyond the 'glue on pizza' error

Podcast: Why computing now feels like ‘disposable technology’

Podcast: The AI hype squad hits some major bumps

Google has more problems than it’s ‘glue on pizza’ error

Why computing now feels like ‘disposable technology’

The AI hype squad hits some major bumps

100 common Windows 10 problems and how to solve them
Easy fixes for widespread issues

- Getting started with Windows 10
- Edge issues
- Improving Windows 10
- Speed up Windows 10
- Hardware and software issues
- Protecting your PC
Now that Windows 10 has overtaken Windows 7 as the most popular operating system , it’s bigger than ever. The sequel to Windows 8.1 has been out for more than three years now, and has given users plenty of time to figure it out.
Luckily, most Windows 10 problems have been patched out by Microsoft over the last few years. There are still some security exploits and other bugbears that have either lingered or have been caused by recent Windows updates. This is in part because Windows 10 updates are still kind of a mess , the most recent of which, the October 2018 Update, caused all kinds of issues , including Blue Screen errors on Microsoft’s own Surface devices.
That could be why the adoption of that update is only now starting to take off, just in time for the next one.
If all of these problems are any indication, Microsoft has a lot of work to do. Plus, there are still a lot of Windows 10 problems that are still around, like printer connectivity issues. But, who knows, maybe Microsoft will actually fix some of these problems in the Windows 10 May 2019 Update , which should be out soon .
Still, if you’re having a hard time with the operating system , we’ve compiled a guide to 100 of the most common Windows 10 problems, and how to fix them – whether it’s a Windows 10 problem with a printer or connectivity issues. So, if you’re trying to troubleshoot your device, keep reading.
1. Having enough space to install Windows 10

If you're planning to move to Windows 10, actually installing the OS is the first area you could potentially run into problems with. Installing a new operating system requires a certain amount of free space on your drive so that it can be downloaded and certain elements can be run successfully.
For Windows 10, the space requirement is 16GB, which should be kept free on the main system drive the computer uses. This is actually the same as previous versions of Windows, so if you've upgraded before you can most likely do it again.
Get daily insight, inspiration and deals in your inbox
Sign up for breaking news, reviews, opinion, top tech deals, and more.
If you want to check how much space is left on your PC, go to My Computer (or This PC, depending on which version of Windows you’re running) where any drives you have will be listed. You can see the remaining space indicated beneath each drive, or you can right click and select Properties for a better overview (your system drive is usually C:)
2. Checking you have a powerful enough PC

Just as with space requirements, your PC will also have to be capable of running Windows 10. This means that it must reach certain minimum system requirements.
The requirements for running Windows 10 are relatively low: A processor of 1GHz or faster; 1GB (32-bit) or 2GB (64-bit) of RAM; 16GB of free drive space; Microsoft DirectX 9 graphic device; and a Microsoft account combined with internet access.
To find out your PC's spec, go to Control Panel and select System and Security, then System.
However, keep in mind that these are the minimum requirements, and you should shoot for higher specs to have a smooth and enjoyable experience.
3. Activating Windows 10

Some users have reported issues with activating their copies of Windows 10, which could have been down to a number of different reasons. In some cases, the easiest way to get around the problem is to purchase a legitimate copy of Windows 10.
Unlike previous versions of Windows, the latest one is almost exclusively available online, which means that official Microsoft websites are the best bet for your purchase. The company was giving the OS away for free, but that promotion ended quite a while ago.
Microsoft has a helpful website that provides a downloadable copy in either 32-bit or 64-bit versions.
If you do find that you're unable to activate Windows 10 successfully, handily Microsoft introduced a new activation troubleshooter feature way back in the Anniversary Update. You'll find this in Settings, then click Update & Security, go to Activation and select Troubleshoot (you won't see this option if the OS has been activated).
4. Avoiding inconvenient software update reboots

Windows 10 is, in many ways, a truly internet-based operating system. Mostly, this is a bonus but there are times when it isn't – and Microsoft's attitude towards operating system updates is one such time.
The most annoying part of automatic updates is the restarting, which can seemingly come at random (and inconvenient times). The simplest way to counteract this is to head to Windows Update (in Settings > Update & Security), click on Advanced Options and then Notify to Schedule Restart, which means the OS will request a reboot instead of interrupting everything you’re working on.
5. Updating old software to work with Windows 10

Each version of a new operating system comes with its own set of backwards compatibility issues and Windows 10 is no exception.
The transition from Windows 8 .1 to 10 is far less jarring than the move from Windows 7 to 8 was, but there are still certain applications that can become broken and, in some cases, cease to work at all.
If a program isn't working with Windows 10, try looking in the Windows Store for an update and, if that doesn't work, delete and reinstall it.
Now that Windows 10 has been out for a few years, most programs should be compatible with the operating system. If they aren't, then they likely never will be.
Consider moving to a newer version of the software, or if it's stopped being developed, it may be time to look for alternatives.
6. Changing privacy and Wi-Fi Sense settings

Data security is incredibly important, especially as hackers become increasingly sophisticated and the number of cyber-attacks is on the up.
Windows 10 comes with a decent set of built-in protection measures, but you can never be too careful. One such feature that should be disabled by privacy-minded individuals is Wi-Fi Sense, which automatically shares the Wi-Fi password across Windows 10 devices on the same account.
Microsoft updated Wi-Fi Sense to share less data, but switching it off is the ideal way of preventing anything you don't want happening. To turn it off, go to the Start Menu, select Settings and click on Network & Internet, then Wi-Fi, and head to Manage Wi-Fi Settings – turn off all the options in here.
Also in Settings, it's possible to get an overview of everything else happening on Windows 10 in terms of privacy – unsurprisingly, under the Privacy section. In here, you'll be presented with a bunch of toggles that adjust some privacy options to help keep everything under control.
7. Printer compatibility

If you have an older device, printer compatibility can turn into a real problem. If you’re upgrading from Windows 7 (or earlier) to Windows 10, you need to update all available printer drives, which will prevent them from not working post-upgrade.
Luckily, this couldn’t be easier. Just search for the name of your printer in the search engine of your choice, and download the latest Windows 10 compatible drivers – make sure you’re downloading them from the actual manufacturers website, though. Follow the manufacturer's instructions to install them, and you’re good to go.
8. Grappling with the touchscreen

Microsoft ships Windows 10 with Edge, the successor to its Internet Explorer browser (although IE is still present in the OS). For many people, however, using Chrome or Firefox is the norm, no matter what Microsoft wants.
To install Chrome or Firefox – and get back to normality – open Edge, search for either, and find a Windows 10 version. Download it, install it, and make sure it's set as the default browser option so that Edge doesn't keep reappearing. To do this, head to Settings, System, and click on Default Apps – click under Web Browser and you can then select your preferred default browser.
But, now that Microsoft Edge is moving to Chromium , you may have less of a reason to switch over.
9. Grappling with the touchpad

Having a touchpad-enabled laptop is also good for Windows 10, but some users have reported that the upgrade from Windows 7 (and sometimes Windows 8) breaks it.
One of the ways to solve this is by first checking to see if your keyboard has a key that turns the touchpad off. If it doesn't – or the right setting is toggled – then head to Devices > Mouse & Touchpad > Additional mouse options.
A new window will appear. From here, select the tab that says Device Settings, then Devices, and then make sure the touchpad is enabled.
If none of these options work, press Windows Key + X, select Device Manager, then the option for Mice and other pointing devices, and update the driver. This should fix things.
10. Finding Safe Mode

Safe Mode is just what you'd expect – a safe way of booting up a PC and running the system with no startup apps and only essential drivers, which should hopefully allow the computer to boot successfully when it won't otherwise due to some issue or other.
With Windows 10, to access Safe Mode, hold down the Shift key during boot-up (or select Restart from the desktop while holding down Shift).
11. Making sure Windows 10 knows where you are

Location-based apps are fairly prominent in Windows 10 which makes it a good idea to let your PC know (roughly) where you are. Cortana, for example, can give far more information if it can accurately pinpoint where in the world it's being used.
To update your computer's location settings, head to the Start menu, click Settings, Time & Language, and click Region & Language – then make sure the correct country is selected. To turn on Location services, go to Settings > Privacy > Location, and flick the Location switch on.

12. Setting up Windows Hello
Windows Hello is one of the most innovative features that Microsoft has built into Windows 10. Essentially, it lets a user login just by using facial recognition (or a fingerprint) virtually instantly.
The software, which is available to all Windows 10 users, does require special hardware (and most likely won't work on older computers). Assuming you have the necessary hardware, how do you set up Windows Hello?
You need to go to the Start menu, click on Account, and select Change Account Settings. Select Sign-in Options and set a PIN. Once you've done this, there will be an option to Setup under Face. Select this and follow the instructions.
13. Finding files with tags

If you’re forever having trouble finding files on your PC, one way to keep track of them is to use ‘tags’ in Windows 10.
To tag a file, right click it, select Properties, go to the Details tab, and if you click on the Tags section (under Description) you can add a tag from there – simply type it in. You can then use those tags when searching – for example, you could tag a few files as a specific work project, all of which would come up when you searched for that term at a later date.
14. Installing apps you’ve downloaded from the web

The move from distributing apps via the web to the Windows Store means that unfortunately it’s sometimes not such a straightforward matter to install software grabbed from the former. Programs like Windows Defender and Firewall, which we’ve talked about earlier, can try to combat potential malware by only allowing certain apps to install.
If you’re having trouble, to get around this and install an app from the web, you may have to fine-tune Defender’s settings.
To do this, go to the Cortana/search box (bottom-left, next to the Start menu), search for Windows Defender and you’ll need to access its Settings menu. You’ll be presented with a home page of sorts, so click on Settings. Once you’re in Settings, you’ll see a list of options related to various functions Defender performs.
Tweaking these options is easy, and the one that will yield results for our purposes is Exclusions, which dictates the areas of the system that are left unchecked by Defender. You can click ‘Add an exclusion’ to add the file you’re installing and make sure that Defender doesn’t interfere with the installation.
15. Using Windows 10 gestures to work quickly

Is working with the keyboard and mouse too sluggish for your liking at times? Well, Windows 10 is a touchscreen-optimised operating system (just as Windows 8 was), and that means it can do a lot of cool stuff rather swiftly with just a finger prod.
For example, swiping in from the left will bring you to Task View, an overview of all the apps running currently. Swiping in from the right brings up Action Center, where notifications are displayed and settings can be changed. Swiping down from the top produces a title bar complete with minimisation tools.
To see the full range of gestures available, go to the Cortana/search box, and search for ‘touch’.
16. The power of virtual desktops

One desktop not enough for you? Well, handily enough, Windows 10 lets you run multiple virtual desktops so you can work across different projects on just the one monitor screen.
To fire up a fresh virtual desktop in Windows 10, click Task View (on the right of the Cortana/search box on the taskbar) and select the New Desktop option in the bottom-right corner of the screen. It’s as easy as that – and moving apps across virtual desktops is equally simple: just access Task View again and drag the app from one desktop to another.
To close these desktops, go back to Task View and hit the cross. There is no limit on how many virtual desktops you can create, incidentally.
17. Work faster by ‘peeking’ at desktops

Productivity tips don’t just extend to keyboard shortcuts, especially in Windows 10 – there are other ways of accomplishing things more swiftly for those frustrated at their inability to get around the OS fast. One of the niftiest tools in this respect is ‘peeking’ at desktops, which can save time if you’re working across many virtual desktops (which we just discussed above).
To do this, right-click on the thin button at the far right end of the taskbar and choose ‘Peek at desktop’. Now when you roll the pointer over it, it’ll show you a quick preview of the desktop and revert back when you move away.
18. Hover don’t click

Here’s another time-saving little trick that Windows 10 is capable of in order to smooth the path of those who get frustrated with sluggishness and want to speed up and streamline their usage of the operating system.
Say you have the Settings app and an Edge window open side-by-side. Settings is in the foreground but you want to scroll the Edge window. In Windows 8.1, you’d need to click on the window to do it. Not anymore. Microsoft changed how Windows 10 works so that just having the mouse pointer over Edge is enough. Pretty neat.
19. Use Cortana to the max

Cortana is a virtual assistant of many talents, and can help Windows 10 users out in many different ways. However, you may not be aware of the full range of functionality Cortana offers – but there’s an easy way to find out.
Simply go to the Cortana box in the taskbar and type in:
Cortana help
This will list all of the commands and functions Cortana can take care of, which includes setting reminders or calendar alerts, creating lists, getting directions, working out sums and calculations, checking the weather, or your stocks, flight times and so on.
You might also want to check out how to fix a stuck Windows update .
Current page: Getting started with Windows 10
Max Slater-Robins has been writing about technology for nearly a decade at various outlets, covering the rise of the technology giants, trends in enterprise and SaaS companies, and much more besides. Originally from Suffolk, he currently lives in London and likes a good night out and walks in the countryside.
New Windows 10 update gives it Windows 11’s photo-sharing capabilities with Android devices – but you might want to hang on
Want to install Windows 11 without linking it to a Microsoft account? It just got harder to do this, sadly, but it’s still possible
World's first wireless CPU prototype breaks cover and could pave the way for a world of seamless modular computing — but it will still require a physical power connection for now
Most Popular
- 2 5 phones with the very best screens
- 3 I tried Hugh Jackman’s 7-minute workout which 'uses every single muscle' and it’s one of the hardest things I’ve ever done
- 4 The Northern Lights could return this week – 5 ways to plan your photo shoot
- 5 Nvidia Computex 2024 keynote liveblog: Nvidia's data center presentation as it happened
- 2 Santander hit by massive hack — "all staff" and 30 million customers affected
- 3 I watched Nvidia's Computex 2024 keynote and it made my blood run cold
- 4 How to use Surfshark on Apple TV
- 5 Microsoft’s full-screen reminders to upgrade to Windows 11 are back for Windows 10 users, and they might be here to stay
How to Repair Windows 11 to Fix Problems
Step thru this guide in order
Windows 11, the new Windows version, was made available by Microsoft to Windows 10 users back in October. Most users with PCs that aren’t ancient can run Windows 11, so many PCs run Windows 11 at this point. It’s a fairly stable operating system, but like with all versions of Windows, you might face an occasional problem or two.
This guide will help you repair Windows 11 problems using built-in tools. If you already know what caused your Windows 11 problem, you might be able to skip jumping through hoops and choose the best solution. However, even if you’re not sure about the reason, just step through this guide in order.

Start by Entering Safe Mode
Most fixes require you to boot into your operating system. If you can’t boot into Windows, you’ll need to boot into Safe Mode. If it’s your first time, we have a quick guide on starting Windows 11 in Safe Mode . Ideally, you should boot into Safe Mode with Networking to use tools like DISM.
Use Built-In Windows Troubleshooters
Newer versions of Windows come armed with a line-up of built-in troubleshooters for various problems. Troubleshooting that would have required using the Command Prompt in earlier versions of Windows can now be done with a user-friendly GUI.
Troubleshooters are a great way to fix Windows 11 problems when you don’t know the cause. For instance, if your camera isn’t functioning correctly and you don’t know why, you can use the Camera troubleshooter to see if Windows can automatically identify and fix the problem.
- Start by pressing Win + I and navigate to System > Troubleshoot > Other troubleshooters .
- You’ll see all built-in troubleshooters listed here. Select a relevant troubleshooter based on your problem by selecting the Run button next to it.

- Follow the prompts and let the troubleshooter complete the process.

If the troubleshooter identifies the issue, it will try to fix the problem automatically. However, if it can’t identify the problem or is unable to fix a problem that it was able to identify, it will simply notify you, and you’ll need to try a different fix.
Uninstall Windows Update
Windows frequently updates drivers and installs other security updates to keep your computer safe and up-to-date. However, updates can sometimes cause problems. If your Windows started glitching after a recent update, you can try uninstalling recently installed updates.
- Press Win + I and navigate to Windows Update > Update history .
- Select Uninstall updates to launch the Control Panel.

- Sort the updates by install date by clicking on the Installed On column label. Select the recently installed updates and select the Uninstall button from the top. Alternatively, you can right-click on an update and select Uninstall .
If you don’t see the Uninstall option for a certain update, it’s because Windows deems it important for security or running Windows properly.

When prompted, confirm the uninstallation. Once you’ve uninstalled all recently installed updates, try to reboot Windows and see if everything works as it should.
System File Checker (SFC) Scan
System File Checker (SFC) is a Windows utility that helps find and restore corrupted system files. System files are core files that Windows requires for operating correctly.
If you’re experiencing unexpected errors with your Windows operating system, and can’t think of any particular reason that could have caused it, a missing or corrupted file could be the problem.
- Press Win + R , type cmd , and press Ctrl + Shift + Enter to launch the Command Prompt with administrative privileges.

- Execute the following command:
sfc /scannow
- Let the scan complete.
Once the scan completes, you’ll see a message in the Command Prompt window that will tell you if the scan found any file integrity violations. SFC will also fix those violations by restoring the relevant files automatically.
Check Disk (CHKDSK) Scan
Chkdsk is a built-in utility that checks and fixes file system errors by scanning the file system metadata. It looks for both logical and physical problems on your hard drive and tries to fix them automatically.
- Start by launching an elevated Command Prompt. Open the Start menu from the taskbar, type cmd , and select Run as administrator from the right pane.

- Type the following command into the Command Prompt and press Enter :
chkdsk e: /f /r /x
- When asked the question Would you like to force a dismount on the volume> (Y/N) , type Y and press Enter .
Let the scan finish. Once done, restart your PC to check if everything is back to normal.
Deployment Image Servicing and Management (DISM) Scan
DISM is another built-in command-line utility that can help you repair Windows 11. It’s more powerful than the SFC and CHKDSK, and should be used only if you couldn’t fix your problem using the SFC or CHKDSK tools, or couldn’t run SFC at all.
DISM helps you fix corrupted system components by downloading a Windows image from the internet and deploying it on your PC, without having to install Windows from scratch.
If you use DISM in Safe Mode, make sure you’ve booted into Safe Mode with networking enabled and have a working internet connection. DISM needs internet access because it will pull files from Windows Update to fix errors.
- Press Ctrl + R , type cmd , and press Ctrl + Shift + Enter to launch an elevated Command Prompt.

- Execute the following command to scan your component store’s health without changing anything:
Dism /Online /Cleanup-Image /ScanHealth

- If DISM finds issues with the system image, run the following command to repair them:
Dism /Online /Cleanup-Image /RestoreHealth

The process can take a while. Let the process complete and then restart your PC to see if everything works as it should.
Use System Restore
System Restore is a time travel machine for Windows. You can use System Restore to bring your PC back into a previous working state—a point in time when you created the restore point.
However, you’ll first need to check if you have any restore points on your PC because Windows doesn’t create them by default. You’ll either need to create a restore point manually or enable System Restore if you want Windows to create one automatically every once in a while.
- Open the Start menu from your taskbar and search for recovery . Select Recovery from the results.

- Select Open System Restore .

- A System Restore window should pop up. If you see a recommended restore point, it means your PC does have a restore point, and you’ll be able to restore your PC to its previous working condition.
Select the Recommended restore point or Choose a different restore point if you’d like to select a different restore point, and select Next . Note that any apps you installed after the date of creation of the restore point will be removed.

- Select Finish to start the restore process.
Windows will restart at this point and begin restoring your PC. Once the process is complete, check if everything works fine.
Windows 11 Startup Repair
If you couldn’t repair Windows 11 with the previous methods, try using Windows 11 startup repair. Startup repair specifically looks for startup problems only, so skip this method if your problem isn’t related to startup.
- Open the Start menu from the taskbar and select the power button. Press-hold the Shift key and select the Restart option. The computer will restart and enter Windows Recovery Environment (RE).
- Navigate to Troubleshoot > Advanced options > Startup Repair .

- You might be asked to select an account and enter the password. Enter them and Windows should start the process.
If Windows finds a problem, it will try to fix the problem automatically. However, if Windows doesn’t identify a problem, or can’t fix a problem it has identified, you’ll see a message that reads Startup Repair couldn’t repair your PC . In that case, you’ll need to try a different method.
Fix Boot Loader with Bootrec
If your problem is that you cannot boot into Windows, you can use the Bootrec utility. Bootrec is a repair tool that fixes the master boot record and boot configuration data (BCD).
- Open the Start menu and select the power button. Press-hold the Shift key and select Restart . Upon reboot, you’ll enter the Windows RE.
If you can’t boot into Safe Mode either, hold-press the power button on your PC while the PC is on for a hard reboot. Do this twice, and the third time, you’ll automatically enter the Windows RE.
- Navigate to Troubleshoot > Advanced options > Command Prompt .

- Run each of the following commands one-by-one (i.e., type a command, press Enter, and repeat):
- bootrec /fixmbr
- bootrec /fixboot
- bcdedit /export c:bcdbackup
- attrib c:bootbcd -h -r -s
- ren c:bootbcd bcd.old
- bootrec /rebuildbcd
At this point, you’ll see a question that asks Add installation to boot list? Type Y and press Enter . Also, if you get an Access is denied error after the bootrec /fixboot command, execute this command and then execute bootrec /fixboot again:
bootsect /nt60 sys
Once done, exit the Command Prompt and restart your PC.
Reset Windows 11
Reset your PC only after you’ve tried the previous methods because you’ll need to reinstall all programs on your PC after the reset. You will have the option to preserve personal files, though. If none of the other fixes worked or if you want your Windows 11 good as new, you should consider a reset.
- Exit all open windows, press Win + I , and navigate to System > Recovery .

- Select the Reset PC button.

- Select the Keep my files option if you’d like to keep any personal data or files intact. Alternatively, choose Remove everything if you want to erase everything on your hard disk. Note that with both options, you’ll lose all installed apps and settings, so you’ll need to reinstall them after the reset.

Follow the prompts and let the reset process complete. In most cases, resetting Windows 11 should fix all your software-related problems. If it doesn’t, it’s likely a hardware problem that might require a technician’s help.
Reinstall Windows 11
A clean install of Windows 11 will take care of pretty much any problem you’re facing unless it’s a hardware issue. However, you’ll lose all installed programs. You’ll also lose your files stored on the drive on which you’re installing Windows, if the setup requires you to format it.
Unlike resetting, a clean install requires you to use a bootable USB or the Windows media creation tool. You can download Windows (as an ISO file) or the media creation tool (as an EXE file) and create a bootable USB drive . Once you’ve created a bootable USB, install the new copy of Windows 11 on your PC.
Windows 11 Problems Fixed
You should be able to resolve most non-hardware issues specific to your Windows 11 operating system with the methods discussed above. However, if you’re not too excited about the idea of troubleshooting and fixing problems yourself, you should try free third-party tools for repairing Windows 11.

Arjun is a freelance writer based in India. After working as an equity research analyst, Arjun decided to do something that he has been passionate about – tech. He gets excited talking about and explaining how to solve everyday tech problems. His area of expertise is Windows and is a go-to for all things Excel. Read Arjun's Full Bio
Read More Posts:
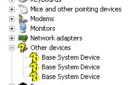
- PRO Courses Guides New Tech Help Pro Expert Videos About wikiHow Pro Upgrade Sign In
- EDIT Edit this Article
- EXPLORE Tech Help Pro About Us Random Article Quizzes Request a New Article Community Dashboard This Or That Game Popular Categories Arts and Entertainment Artwork Books Movies Computers and Electronics Computers Phone Skills Technology Hacks Health Men's Health Mental Health Women's Health Relationships Dating Love Relationship Issues Hobbies and Crafts Crafts Drawing Games Education & Communication Communication Skills Personal Development Studying Personal Care and Style Fashion Hair Care Personal Hygiene Youth Personal Care School Stuff Dating All Categories Arts and Entertainment Finance and Business Home and Garden Relationship Quizzes Cars & Other Vehicles Food and Entertaining Personal Care and Style Sports and Fitness Computers and Electronics Health Pets and Animals Travel Education & Communication Hobbies and Crafts Philosophy and Religion Work World Family Life Holidays and Traditions Relationships Youth
- Browse Articles
- Learn Something New
- Quizzes Hot
- This Or That Game
- Train Your Brain
- Explore More
- Support wikiHow
- About wikiHow
- Log in / Sign up
- Computers and Electronics
- Operating Systems
How to Stop Windows from Freezing: Easy Troubleshooting Guide
Last Updated: December 5, 2022 Fact Checked
This article was written by Garnik Ovsepyan and by wikiHow staff writer, Nicole Levine, MFA . Garnik Ovsepyan is a Computer Specialist and the Owner of HeliX PC based in Burbank, California. With over 25 years of experience, Garnik specializes in custom computer builds, computer repairs, virus removal, computer tune-ups, hardware and software troubleshooting and installations, diagnostics, and data backup and recovery. There are 9 references cited in this article, which can be found at the bottom of the page. This article has been fact-checked, ensuring the accuracy of any cited facts and confirming the authority of its sources. This article has been viewed 408,471 times.
Does your Windows PC keep freezing or locking up? Whether your computer is frozen right now, hangs at startup or shutdown, or freezes at random, there are easy ways to narrow down the cause and fix the problem permanently. This wikiHow article will cover several simple troubleshooting tricks that are sure to help you resolve issues with freezing and hanging on Windows 10, 11, and 8.1.
Things You Should Know
- If a particular app has locked up Windows, press Ctrl + Shift + Esc to open Task Manager, select the app, and then click End Task.
- Malware and viruses can cause your PC to freeze, so make sure to run a full or offline scan with Windows Defender.
- You can check your RAM, scan your hard drive(s) for errors, and repair corrupted system files using simple built-in tools.
- Windows Update can check for and install updated drivers that may resolve issues. But if an update caused your PC to freeze, you can always roll it back.
If Your PC is Frozen Right Now

- If the screen went black when your computer froze, try pressing Windows key + Ctrl + Shift + B to reset your video card drivers. [1] X Trustworthy Source Microsoft Support Technical support and product information from Microsoft. Go to source

- If you can't open Task Manager this way, try pressing Ctrl + Alt + Del and then clicking Task Manager . You can also right-click the Start menu and select Task Manager .
- Once Task Manager opens, look for the app using the most CPU, Memory, Disk, or GPU resources.
- To stop the problem app, click its name and select End Task . It may take a few moments for the app to close.

- If your PC's screen turned blue before it froze (an error known as the Blue Screen of Death ), you can analyze the crash dump files to see which software, hardware, or drivers lead to the crash.
Disconnect Devices at Startup & Shutdown

Run a Malware & Virus Scan

- Press Windows key + S and type security .
- Click Windows Security .

- Full scan: This does a deep scan of all files on your PC and can take up to an hour.
- Microsoft Defender Antivirus (offline scan): This scan reboots your PC into safe mode without internet support to remove more difficult malware. The scan shouldn't take more than 15 minutes.

Check for Software and Driver Updates

- Click the Windows Start menu and select Settings .
- For Windows 10, click Update & Security > Windows Update . On Windows 11, just click Windows Update .

- Sometimes BIOS/UEFI updates , third-party hardware, and other manufacturer updates won't be available through Windows Update. You can check your manufacturer's support website to find out if any updates are available directly through them.
- If a BIOS update is available, make sure your PC is plugged in to a reliable power source before flashing the BIOS. Otherwise, if your PC loses power during the update, you could render your computer unbootable.
Try a Simplified Startup

- Press Windows key + S .
- Type msconfig and press Enter .

- Press Windows key + S and type startup apps .
- Click Startup Apps in the search results. [3] X Research source

- You can always launch these apps from the Start menu as needed even if they don't start automatically.

Scan the File System

- If you're using Windows 11, you may see Windows Terminal (Admin) . This will work, too.

- This command connects to Windows Update to get the necessary files required to fix corruption. It can take up to 30 minutes to complete, but typically won't take that long.
- After a few moments, you'll see "The operation completed successfully." At that point, you can continue to the next step.

- If corrupted files are detected, they'll be replaced with repaired versions.
- If the scan does not find corruption, you'll see the message "Windows Resource Protection did not find any integrity violations."
- If you see a message that says, "Windows Resource Protection could not perform the requested operation," try running the scan again in Safe Mode .
Check Your Hard Drive

- If you have multiple hard drives, remember to check them all.

- Repeat for all drives connected to your PC.
Run a RAM Test

- First, save any work you have open, as your PC will reboot to use the tool.
- Type mdsched.exe and press Enter .

- The scan may take a while, so feel free to get up and come back later.
- Because this tool won't always show the test results, we'll show you how to find them once Windows boots back up.

- If no errors are found, the issue is not likely related to RAM.
Disable Link State Power Management

Clear Cached and Unneeded Files

- Type disk cleanup .
- Click Disk Cleanup . [8] X Trustworthy Source Microsoft Support Technical support and product information from Microsoft. Go to source

- If you're still low on hard drive space, your PC may continue to freeze and crash. Check out these tricks for freeing up hard drive space.
Roll Back the Latest Update

- If you're unable to use Windows at all because it keeps freezing, try booting into Safe Mode before you perform these steps.

- Most updates will attempt to reinstall automatically, so you might want to pause updates to see if uninstalling this latest update fixes your problem. To pause updates, return to Windows Updates and select a time period on "Pause Updates."
Run a System Restore

- If you don't have any restore points, you'll need to try another method.

- System Restore will not affect your personal files.

Disable Fast Startup (Windows 8.1)

Reset Your PC

- If the freezing does not continue, reinstall your apps one by one to narrow down the problem. If a particular app brings back the symptoms, the issue is related to that app or a device driver it uses to run.
- If the freezing continues after resetting your PC and doesn't correlate with an app or device you've installed, the issue is likely hardware related.
Expert Q&A

You Might Also Like

- ↑ https://support.microsoft.com/en-us/windows/troubleshooting-black-or-blank-screens-in-windows-51ef7b96-47cb-b454-fcab-fac643784457
- ↑ https://support.microsoft.com/en-us/topic/troubleshoot-windows-8-1-windows-8-or-windows-7-hangs-or-freezes-752adf9f-d1c4-e766-a9d5-6081b88de359
- ↑ https://www.asus.com/us/support/FAQ/1044726
- ↑ https://www.dell.com/support/kbdoc/en-us/000126064/how-do-i-run-the-system-file-checker-in-microsoft-windows
- ↑ https://support.microsoft.com/en-us/windows/using-system-file-checker-in-windows-365e0031-36b1-6031-f804-8fd86e0ef4ca
- ↑ https://social.technet.microsoft.com/wiki/contents/articles/53235.windows-10-built-in-tools-for-hard-disk-health-check.aspx
- ↑ https://answers.microsoft.com/en-us/windows/forum/all/how-do-i-see-the-results-of-memory-diagnostic-i/36f9d014-256a-4757-927a-d85ade3b0c09
- ↑ https://support.microsoft.com/en-us/windows/disk-cleanup-in-windows-8a96ff42-5751-39ad-23d6-434b4d5b9a68
- ↑ https://support.microsoft.com/en-us/windows/use-system-restore-a5ae3ed9-07c4-fd56-45ee-096777ecd14e
About This Article

- Send fan mail to authors
Is this article up to date?

Featured Articles

Trending Articles

Watch Articles

- Terms of Use
- Privacy Policy
- Do Not Sell or Share My Info
- Not Selling Info
wikiHow Tech Help:
Tech troubles got you down? We've got the tips you need
- Meta Quest 4
- Google Pixel 9
- Google Pixel 8a
- Apple Vision Pro 2
- Nintendo Switch 2
- Samsung Galaxy Ring
- Yellowstone Season 6
- Recall an Email in Outlook
- Stranger Things Season 5
Digital Trends may earn a commission when you buy through links on our site. Why trust us?
Is your PC acting up? Here’s how to fix it
Whether you have one of the best desktop computers or a 10-year-old PC, things can go wrong sometimes. Freezes, crashes, overheating, or even the dreaded Blue Screen of Death (BSOD) — there are plenty of issues that sometimes plague PC users, and when it happens to you, you might feel at a loss as to what to do.
PC issues? Start here
Freezes and poor performance, overheating, storage and ram problems, gaming problems, blue screens.
Good news — not every malfunction requires taking the PC to a professional repair service (although some of them definitely do). If you’re unhappy with the way your PC performs, start by checking out our comprehensive guide to troubleshooting a PC, because it might turn out to be the only thing you need to get it all fixed. On the other hand, if your computer won’t turn on at all, we have a separate guide for you .
There are a few things that can be helpful in the majority of scenarios, so let’s start with them. Freezes and performance drops might be the result of a bogged-down system, a background process that didn’t shut down correctly, or having too many programs open at once. In those instances, there are a few safe bets to try out.
- Nvidia might power your next handheld gaming PC
- A friendly reminder that your PC power supply will eventually destroy itself
- Gaming laptops vs. desktops: here’s how to decide which to buy in 2024
Restart the PC
“Have you tried turning it off and on again?” You might be surprised to find out that it’s a legitimate problem-solver. If your PC is misbehaving, make it a habit to restart it.
Your microphone doesn’t work? Your frames per second (fps) dropped? Your Task Manager won’t load? Just restart and see if that helps.
If your PC is entirely frozen and you can’t restart it the proper way, simply press down the power button and hold it until the PC turns itself off. Keep in mind that doing this will not let your PC save any of your previous work, so beware of potential data loss.
Update your drivers
When is the last time you’ve updated your drivers? Admittedly, it’s easy to forget, but it’s better to remember.
In theory, if you’re running a modern PC with Windows 10 or Windows 11 , your computer will check for drivers every so often and update them automatically. This has made life a lot easier, but sometimes, a driver might slip through the cracks and not be updated.
Start by checking Windows Update -> Optional Updates . Windows will show you a list of possible drivers. Other than that, you might need to search for the manufacturer of a certain part and look up the drivers yourself. The most common drivers to search for include the graphics card, the chipset ( motherboard ), and audio drivers.
Stay away from programs that promise to update your drivers for you. There are some decent ones, but more often than not, you’ll run into trouble — either through bad driver updates or straight-up malware .
Sometimes, you may need to roll back a driver or uninstall it and install it all over again. In those cases, type Device Manager into the Windows search bar and pick the hardware you want to do this for (for example, the display adapter, also known as the graphics card ).
Next, navigate to the Drivers tab and either roll back or uninstall the driver. Keep in mind that this could have adverse effects on your PC, so be ready to perform a clean driver install right away.
Use the Task Manager
The Task Manager in Windows keeps tabs on a lot of different things, from CPU, GPU, and RAM usage to all the processes and applications that are currently running. Sometimes, all you need to do to fix your PC is to kill a couple of particularly heavy processes.
Enter the Task Manager by pressing Ctrl + Alt + Delete on your keyboard. In the Processes tab, look through everything and see if any are marked as Not Responding — those should be the first to go. Next, you can sort by either CPU or Memory and see which ones are hogging most of your PC’s resources. Click on the ones you want to shut down and then press End task in the bottom right corner.
Be mindful, however. Some of these processes will be necessary for your PC to run and shutting them down might make it completely unusable — at least until after you restart it. Moreover, you will lose data when closing programs like this. If you’re not sure what to close, it’s better not to close anything.
Common culprits behind bad performance here will include all kinds of browsers, games, and programs. Those are usually safe to close, too, but you may lose your progress if you haven’t saved.
If none of this helped, no worries — it’s time to get down to the nitty-gritty and try to fix your PC based on the issue.
System Restore
Perhaps you’ve recently installed a new app and all of your problems can be traced back to that moment. If that’s the case, using Windows System Restore might be a good option for you, provided that you’ve got any restore points to go back to. Remember that going back in time may also revert any and all changes you’ve made since that point, meaning that you might lose some files.
Here’s how to perform a system restore in Windows 10 and 11:
- Type Control Panel into the Windows Search bar.
- Once in the Control Panel, type Recovery into the search bar at the top right.
- Select Recovery and then Open System Restore .
- In the pop-up window, click Next and then pick a restore point that you want to go back to, and then click on Scan for affected programs .
- Windows will tell you which items and programs will be removed if you use a particular restore point.
- If you still want to proceed, click Close -> Next -> Finish to restore your system.
Your PC could be freezing or performing poorly for any number of reasons. Hardware problems, software issues, having too many programs open all at once, or driver conflicts are just some of the possible causes. Diagnosing the problem will lead you to a fix, but you can start by trying some of the most common solutions first.
If you’ve already restarted your PC, updated your drivers, and shut down the processes that might have caused this, here’s what you can do.
When running certain apps
If opening a certain program or game always ends in your PC (or the app itself) freezing up, or your PC simply becomes really slow, here are a few steps to try:
- Restart the program by killing it in Task Manager ( Ctrl + Alt + Delete ) and opening it again.
- Reinstall the program. The best way to do this is to do a clean install, meaning remove all related files (usually found in C:Program Files or on another drive) and then install it again from scratch.
- Make sure that you have the correct version of the program. Windows users can type System information into the Search bar to check which version of the operating system they’re running, then compare it to the program in question.
- Close background processes and apps and let the program run without any issues. Browsers with many tabs open are common culprits.
- Check whether the program is compatible with your system — for instance, older computers use an old Microsoft .NET Framework, and that can cause issues.
Random freezes or bad performance
If your PC freezes or underperforms seemingly for no reason, you’ll probably need to dig deeper to find the cause. However, you can try the steps outlined above and see if any of them help, and here are a few more that could work.
Reset this PC
This is a functionality in Windows 10 and 11 that lets you start fresh without losing all your files, or even format your PC and lose everything, but hopefully, also be rid of any potential software-related issues.
If you’re able to, back up your data to an external drive. Remember that some versions of Reset this PC will also uninstall all of your programs, so you may lose app settings and other files, too.
We don’t recommend doing a full format unless it’s necessary. Go through the options in Windows and see what works best for you.
Unplug external drives and peripherals
Something as simple as a conflict between your PC and an external drive or even a mouse can make it freeze. This can especially happen if you’re installing a new device and it’s adding its own drivers. Try to unplug these devices one by one and see if you can find the cause. A good idea is to first shut down your PC, unplug any external drives and things you don’t need to keep it running, and then turn it on again.
Change your power plan in Windows
If you feel like your PC is underperforming but it shouldn’t be, the power plan might be the cause. If you’ve got your PC in power saver mode (especially common for laptops), it might be throttling itself to save energy and/or battery, but at the cost of performance.
To navigate to the power settings easily, simply type in Power into the Windows Search bar and then navigate to the Power & Sleep Settings . You can adjust if and when your PC will go to sleep when inactive here, but the more important parts are hidden under Additional power settings on the right side of the window.
Here, you can pick the power plan. If you’re in power-saver mode, you should probably swap to a balanced plan. However, if you’re already running that, it’s usually safe to try the high-performance plan. Be mindful that it might put more of a strain on your PC and will use more energy.
Once you’ve picked out your power plan, you can fiddle with it a little bit more by clicking on Change plan settings -> Change advanced power settings . If you have an HDD, you can adjust it here to make it always stay on, potentially improving performance.
Overheating is a computer’s greatest enemy. If the components inside your PC don’t get enough air, they may deteriorate faster, perform poorly, or even break down entirely. If you suspect your PC might be heating up a bit too much, you should first check whether that is true.
To check the temperatures of certain components, such as the GPU or the CPU, it’s best to download a utility tool like HWiNFO or NZXT Cam . While the latter was made by a manufacturer of various PC parts, you don’t need to have any NZXT products to use it.
Both programs are fairly straightforward — just install them and let them run for a bit when your PC is idle, and then when you’re doing something resource-heavy, such as playing a game.
CPU and GPU temperatures are the ones you want to pay the most attention to. An idle temperature of 30 to 50 degrees Celsius for both of those components is usually okay, and this applies to both high-end CPUs or GPUs and budget options. When your PC is working hard, you might see temps reaching 80 degrees Celsius or above — but anything beyond that is a worrying sign that could be impacting the performance of your PC.
If you feel like the temperatures are beyond what’s reasonable, and, most importantly, your PC is struggling while those high temps are happening, you’re in luck — we have a comprehensive guide to addressing overheating problems in your PC .
While the CPU is the heart of your computer, your storage drives can wreak havoc on the performance of your PC if they’re not doing well. This is especially true in the case of the SSD or the HDD that your system is installed on.
Fortunately, there are a few things you can do to check the health of your SSD/HDD. We also have a dedicated guide on how to test RAM , so you might want to start there, and then circle back here for some tips on testing your storage drives.
Check your PC health
While Windows has its own, fairly limited PC health checker, it’s best to use a program like CrystalDiskInfo to diagnose any possible issues with your storage drive. Run it and scan your PC, then keep an eye out for any errors or warnings about drive failure.
If anything is amiss, it might be time to replace your SSD but feel free to consult a professional first if you’d rather salvage the drive. In any case, backups are more necessary than ever now as your drive may be headed toward failure.
Use Chkdsk and SFC
Chkdsk, or Check Disk, is a utility that you can use within the Windows Command Prompt . It can scan and repair your drives for you, and while it might seem a little barebones compared to some software (such as the aforementioned CrystalDiskInfo), it’s easy to use and can help in diagnosing and fixing common issues. It’s among the most useful commands to learn and keep in mind in case of PC problems. Use it in the event of system crashes, shutdowns, file corruption or loss, and similar issues.
Before we begin, a word of warning — running Check Disk on a failing drive and attempting to fix it could potentially result in data loss. If you’d rather be safe than sorry, we recommend backing up before doing this.
Here’s what to do:
- Type in Command Prompt into the Windows Search bar.
- Right-click it and then select Run as administrator .
- In the Command Prompt, type in chkdsk followed by the drive you want to check (usually C: for system drives). Example command: chkdsk C:
If Windows doesn’t find any problems, you’re in the clear. If it does, you can try to use chkdsk [drive letter] /f to have it fix errors on the disk or chkdsk [drive letter] /r for it to locate bad sectors and repair them. The /r command also performs the same tasks as the /f command, so you don’t need to run them one after another.
There’s also one more command that could prove to be helpful, so try it while you’re already here. Type in SFC /scannow for your PC to scan through all of your Windows system files and attempt to repair potential errors.
Other solutions
If you still suspect that your SSD or HDD may be the root of the problem, here are a few other things worth looking into:
- Defragment your HDD , which could help optimize file storage and improve your PC’s performance. If you have an SSD, this doesn’t apply.
- Free up some storage space. A drive that barely has any space left will begin to perform poorly over time. Consider buying an external drive for backup and storage purposes.
- Format your SSD as a last resort, hopefully restoring it to its former glory. This will delete all of the data on the drive.
Playing games is only as immersive as your PC allows it to be. If you’re experiencing frame rate drops, screen tearing, or crashes, the whole experience goes down the drain. Running games at 60 fps is often considered to be the sweet spot, if only because many people use standard 60Hz monitors. However, the better your PC build , the higher the expectations, and if your computer can only output 60 fps on a 144Hz monitor, you might want to improve its performance.
Troubleshooting gaming-related issues is often easier to fix with a simple Google search, as people on various forums and communities often come up with ideas to fix game-specific problems. However, here are a few things to try that can be done in most games.
Tweak the settings
Some of the most demanding games require a beastly PC to run. Adjusting the settings might, therefore, be your best bet to win back some performance — provided you’re not on a $3,500 PC equipped with an RTX 4090 , in which case you should be able to play everything at maximum for the years to come.
Here are some of the settings that might give you the best fps boost if turned down or disabled:
- Texture Quality and Projected Textures
- Water Effects
- Lighting effects
- Anti-Aliasing
- Ambient Occlusion
- View Distance
In addition, if you’re playing with ray tracing enabled, disabling it should drastically improve performance in most games.
If you’re experiencing screen tearing, enabling V-Sync or Adaptive Sync should help, but it will also take its toll on overall performance and frame rates. It’s also worth checking whether your monitor’s refresh rates align with those in the game because if there’s a discrepancy there, screen tearing is likely to happen.
You might also consider lowering the resolution, but in all honesty, this should be an absolute last resort. In fact, running the game at a different resolution than your monitor’s native resolution might make screen tearing even worse. If you’re currently playing at 4K or 1440p, dropping down to 1080p might improve performance, but the game will look considerably worse. In all fairness, if you already have a 4K monitor , there’s no reason to play at a lower resolution — it’s more likely that hardware upgrades are in order instead.
Update your GPU drivers
We’ve already covered updating your drivers in general, but graphics drivers are especially crucial to gaming performance. Nvidia, AMD, and Intel all have tools that make updating your graphics drivers easier.
If you’re using an Nvidia GPU, we recommend downloading GeForce Experience to manage your driver installs. In addition, you can record your gameplay and track performance with this tool. Those with AMD cards can check out AMD Software: Adrenalin Edition , while Intel owners can turn to Intel Arc Control .
Other things to try
The truth is that the majority of this guide can also apply to gaming issues, so there’s no use in me repeating these things in this section. If you’re experiencing frame rate drops, overall low fps, or crashes, try the following (most of which I’ve covered above):
- Check temperatures of your CPU and GPU while gaming and see if temp spikes coincide with times of poor performance in the game.
- Perform a clean install of the game.
- Buy an SSD (if you don’t have one) and install your games on it instead of an HDD.
- Make sure that your PC is powerful enough to handle the title. Most computers without discrete graphics may struggle with AAA games.
- Close all background processes and programs that aren’t necessary. Watching movies or browsing the internet at the same time as gaming is quite taxing on your PC.
- Make sure that you have enough RAM — monitor RAM usage with the Task Manager while gaming and buy some extra memory if your PC is struggling.
While the actual Blue Screen of Death (BSOD) is a lot less intimidating now than it used to be, the sad smiley leaves no room for doubt — if your PC gets hit by a BSOD, that often means trouble. When you get a BSOD, your entire operating system crashes, and you lose everything you’ve been working on after the last time you saved. It’s sort of a cry for help from your PC, but on the surface, it might seem like nothing much has happened to cause this problem.
Microsoft itself refers to blue screens as stop code errors sometimes. They’re essentially a preventative measure that is meant to keep your PC from being damaged even more. In short, something bad enough has happened to your PC that made it think that it’s time to call it quits and restart before things get even worse. Both hardware and software problems can be the culprit here, and sometimes, there’ll be no rhyme or reason as to why you’re hit by a BSOD at that particular time. However, it’s crucial to investigate these errors.
In modern PCs (Windows 10 and 11), BSOD simply lets you know that your PC ran into a problem and needs to restart. Before it does, it’ll investigate the issue and will usually leave a crash dump file (.dmp) in a designated folder. Looking through this later can help point you in the right direction, although it can be pretty confusing. It’s usually easier to search for the stop code assigned to your particular BSOD, which you’ll find at the bottom of the screen. Newer PCs may also get a QR code that you can scan with your smartphone to look up the problem immediately.
Troubleshooting a BSOD
Don’t panic — the majority of BSODs can be fixed without any professional help, and for the rest of them, you might need to swap some hardware or dig deeper into troubleshooting. Start by writing down the stop code that came up with your blue screen and look it up in Microsoft’s tutorial to troubleshooting BSOD errors .
Your first step will always be trying to revert any recent changes. This can mean new hardware, be it inside the PC or external drives, but also new software. Depending on the situation, you may need to start Windows in Safe Mode and uninstall the problematic software or roll back drivers. We have handy guides for entering Safe Mode for both Windows 10 and Windows 11 .
Assuming you’ve gone through Microsoft’s guide and haven’t found a solution, there’s one more thing you can safely try: Windows Event Viewer. You can access it by typing Event Viewer into the search bar. Event Viewer keeps track of everything that happens to your PC, including critical events such as a BSOD or a crash, errors, and warnings.
Check out the critical errors that occurred on your PC. A lot of the information that you’ll get here is quite technical, but a quick Google search with the right terms could help you find a solution. Look up the event source, such as Kernel-Power, as well as the error code, and try the solutions you’ll find.
Keep in mind that some of them could get your PC in even more trouble, though. For instance, advanced users may recommend that you alter the Windows registry, but deleting the wrong file in the registry can make your PC completely refuse to boot. Approach with caution.
PC issues are almost unavoidable. If you use a computer long enough, you’ll run into some problems with it at one point or another, be it network issues or complete crashes. However, if you take steps to protect your data and keep your PC healthy, you’ll avoid some of the most common pitfalls. Here’s what you should do on a fairly regular basis to keep your PC in shape.
Scan for viruses and malware
Cybersecurity threats are more common than ever in this day and age, but our PCs are also a lot better equipped to handle a lot of them. Windows 10 and Windows 11 come with their own Windows Defender, and it’s decent enough to the point that many people stopped using antivirus software altogether.
With that said, it’s still safer to use one of the best antivirus programs to protect yourself. More advanced users might also want to use a malware scanner, such as Malwarebytes , or programs like Spybot Anti-Malware to add an extra layer of protection.
Stay up to date
Keep your drivers up to date, but also run regular Windows Updates, as they often come with new security measures that could prove to be helpful. They also offer fixes to known problems. However, fresh updates can sometimes impact your PC’s performance , so that’s yet another thing for you to check if you’re not happy with the way your computer performs. (On another note, if your PC is currently downloading a Windows Update in the background, that’s probably why it’s suddenly super slow.)
Back up your data
You’ve probably heard this a hundred times before, but it’s always worth repeating — regular backups are crucial. If you’ve got all your data safely stored on an external HDD or in the cloud, even a worst-case scenario is not so bad. For example, a full format can sometimes help tremendously, but it’s out of the question if your data isn’t backed up.
Similarly, don’t forget to set up system restore points. That way, if you need to use System Restore, you’ll have a safe point to go back to. Check out our guide if you’re not sure how to set it up.
Editors' Recommendations
- Best Antivirus Deals: Protect your PC or Mac from just $25
- Air cooling vs. liquid cooling: Which is best for your PC in 2024?
- A new standard is raising the bar for HDR on PC
- How to choose the best RAM for your PC in 2024
- How hot is too hot for your CPU?

Microsoft Teams was introduced in 2017 as a unified communication and collaboration platform aimed at helping businesses and organizations get things done. Microsoft leveraged the company's existing Office software experience and created a unified experience between Teams, Office 365, and Skype for Business. However, as with all software, things don't always go according to plan. Sometimes you can run into Teams problems.
We're big Teams users here at Digital Trends -- it's our go-to communication and meeting tool -- and we've come across a few issues ourselves over the years. In the event you're having Microsoft Teams issues, here's how to fix some of the most common problems.
There's no question that consoles are increasingly becoming more like PCs, but thanks to Nvidia, it appears that the opposite may be taking place too.
According to a new report by Wccftech, Nvidia is working with its partners to create a new ecosystem for gaming on small form factor (SFF) PCs. When it comes to Nvidia, many of us think of some of the best graphics cards that are as powerful as they are massive, like the RTX 4090. However, Nvidia is planning to flip that narrative and set its sights on an unexpected target.
It's tough to find the right gaming CPU for your next PC. We've benchmarked dozens of processors to find the best CPU for gaming, and there's a clear winner right now: AMD's Ryzen 7 7800X3D. Although the latest chip from Team Red claims the crown, there are still several other great options on the market.
Whatever your needs and budgets, though, we have options from AMD and Intel that will be great performers. We're focused on gaming here, but if you want a processor that can game and get work done, make sure to check out our list of the best processors.
Please enable JavaScript in your browser to enjoy a better experience.
15 Common PC Problems and How to Troubleshoot Them
There’s no need to rush off to the tech repair store for every problem your PC might have. A lot of usual computer issues can be solved quite easily on your own , allowing you to handle them with a few straightforward steps .
This guide is here to help you fix common PC issues by yourself. Below, you’ll find a rundown of the top 15 hardware problems that PC users encounter and how you can deal with them without outside help.
How to Fix Corrupted Windows System with System File Checker
There comes a time in every Windows user's life when their precious machine gets corrupted for whatever reason.... Read more
1. PC Overheating
A heating PC slows down the entire system and can lead to frequent crashes. Moreover, PC components might permanently damage due to continuous exposure to heat.
There are two primary reasons your PC might overheat: either the cooling system isn’t functioning correctly, or the PC is generating more heat than the cooling system can manage. For both scenarios, I’ve detailed a comprehensive guide on various methods to manage an overheating PC. Make sure to check it out.
2. Dysfunctional USB Port
If your USB port stops working, it might not necessarily be broken. Here are some solutions that can help resolve this issue:
Method 1: Restart the PC
Restarting your PC can solve many issues, including problems with the USB port.
Method 2: Uninstall USB Port Driver
Uninstalling the driver of the USB port will prompt Windows to reinstall it upon restarting your PC, potentially fixing the issue. Here’s how to do it:
- Press Windows + R keys and enter devmgmt.msc in the Run dialog to open the Device Manager .
- Expand the Universal Serial Bus controllers option.
- Right-click the entry USB Host Controller and then click on Uninstall .
- Repeat this for all entries with USB Host Controller to uninstall drivers for all the USB ports.
- Once deleted, restart your PC, and Windows will automatically reinstall the drivers , fixing any driver-related issues.
Method 3: Disable USB Selective Suspend
The USB Selective Suspend feature in Windows saves power by suspending idle USB ports, but sometimes it might prevent a USB port from working. Here’s how to disable it:
- Press Windows + R keys and type powercfg.cpl in the Run dialog to open Windows Power Options.
- Click on Change plan settings next to your current plan, then click on Change advanced power settings .
- Expand USB settings and disable USB selective suspend setting .
- Restart your PC to see if the issue with the USB port is resolved.
Note: Keep this option enabled to save battery power. If disabling it doesn’t resolve the USB port issue, consider enabling it again.
3. PC Keeps Disconnecting from WiFi
If your Wi-Fi is functioning properly but your PC keeps disconnecting from it, the issue may be due to your PC’s network card not receiving full power. Windows features a built-in power saver option that reduces power to the network card. You’ll need to disable this feature by following these steps:
- Navigate to Advanced settings in the Power Options .
- Expand Wireless Adapter Settings and then Power Saving Mode .
- Adjust this to Maximum Performance .
Alternatively, if your PC continues to disconnect from Wi-Fi and the issue persists, the problem might be a faulty wireless adapter driver. Consider using Auslogics’ Driver Updater to detect and resolve issues with device drivers by fetching and installing the latest official driver software.
4. PC Beeps
The motherboard of your PC is equipped to detect issues and uses beeps of varying rhythms to communicate problems. For an in-depth understanding of what different beep patterns mean, check out this detailed article on interpreting these signals.
If your PC fails to start after emitting these beeps, solving the problem can be challenging. Nonetheless, I’ll discuss two common issues that cause beeps and how you can resolve them yourself.
Problem 1: RAM Displacement
One common issue I encountered is the RAM becoming loose or displaced, leading to 2-3 beeps from the PC without it booting up. The solution is straightforward: open up the PC (though laptop users might prefer professional help) and reseat the RAM. Here’s how:
- Clean any dirt from the RAM slot using a cotton bud after removing the RAM completely.
- Reinsert the RAM, applying sufficient pressure on both ends to ensure it is fully seated.
- Secure the clips, ensuring they’re properly locked, as even slightly loose RAM can prevent your PC from working.
Refer to this video for guidance on installing the RAM properly:
Problem 2: Issues with Newly Added Hardware
Beeps can also result from damaged or incorrectly installed hardware components. Remove any hardware you’ve recently added to see if it addresses the issue. If your PC functions correctly afterward, ensure the component is installed correctly or consider repairing or replacing it.
5. PC Fans Not Working
If you discover that one or more fans within your PC are not functioning, it might be due to accumulated dirt. You’ll need to open your PC and clean the fans and other components using a can of compressed air or a leaf blower.
For guidance on the cleaning process, watch this helpful video:
If cleaning doesn’t solve the issue, consider using the SpeedFan app to diagnose and possibly fix the problem. This app allows you to control your PC’s fans, though your motherboard must support fan control to utilize this feature.
6. PC Not Using Full RAM Capacity
There are times when your PC might not utilize all the RAM installed. For instance, you could have 4GB of RAM, but the Task Manager only shows 2GB in use. Often, this is due to a specific Windows setting.
Note: If a small amount of RAM (200-400MB) is not being utilized, it’s likely reserved for hardware use, and there’s not much that can be done about it.
The solution is straightforward – Windows may have been set to use only a part of the available RAM. Here’s how you can adjust it:
- Press Windows + R keys and type msconfig in the Run dialog to open System Configurations .
- Navigate to the Boot tab and click on Advanced options .
- Check the box next to Maximum memory and enter the total amount of RAM installed (in MBs).
- Click OK and restart your PC to apply the changes.
Good to know: While adjusting these settings, also consider checking the Number of processors option to ensure your PC is using all available CPU cores. Set it to the maximum number to utilize full CPU power.
If the issue persists, it’s possible that one of the RAM modules may not be properly installed. Attempt reinstallation to see if it resolves the issue.
7. Overworking Fan
Your PC’s fan speeds up based on your PC’s temperature—the higher the temperature, the faster the fan runs. If your PC’s temperature is normal (you can check it using HWMonitor), but the fan is still running at full speed, you might need to manually adjust the fan speed.
The SpeedFan app can help you monitor and adjust the speed of your PC’s fans. This issue of fans overworking typically occurs only with motherboards that have fan control capabilities, so compatibility with the app shouldn’t be a concern.
8. PC Crashes Before Loading the OS
If your PC crashes immediately after showing the manufacturer logo and before loading the operating system, the issue likely lies with the RAM or the hard disk. This means the operating system can’t load because the RAM is corrupted or the hard disk is damaged.
For those with multiple RAM slots, removing each RAM module one at a time and starting the PC can help identify the faulty component. Ultimately, you’ll need to replace the corrupted RAM or hard disk.
9. PC Isn’t Powering On
If your PC isn’t powering on at all, with no lights turning on, the problem could be with the power source.
Desktop users: Ensure that the extension cord, power outlet, and all connections are functioning correctly. If they are, try swapping the power cable with another one, such as the monitor’s, to see if the PC turns on. If this resolves the issue, you’ll need a new power cable.
Laptop users: Try removing the battery and then reinserting it before starting the laptop. If that doesn’t work, remove the battery again and connect the laptop to the charger to try powering it on without the battery. If the laptop powers on, the battery may need to be replaced.
Note: It’s also wise to disconnect any external devices from your PC when attempting these solutions, as a malfunctioning device could be the cause of the power issue.
10. Noisy PC
A noisy PC often signals the need for a thorough cleaning. You can clean it yourself using a can of compressed air or a leaf blower. Overclocking your PC’s GPU and CPU might also contribute to the noise.
Here’s a video demonstrating simple methods to clean your PC:
Sometimes, the noise could be coming from a disc in the DVD ROM. For more details on PC components that can cause noise, check out this informative article.
11. Noisy Hard Drive
Clicking or grinding noises from your hard drive are warning signs that it may be failing. Hard drives have a finite lifespan, and these sounds often indicate imminent failure. The CrystalDiskInfo hard drive monitoring tool can help assess the health of your hard drive, displaying conditions like “Good,” “Caution,” or “Bad.”
It’s crucial to back up your data immediately and consider acquiring a replacement hard drive before the current one fails.
12. Blue Screen of Death (BSOD)
The feared Blue Screen of Death (BSOD) can be triggered by both software and hardware issues, though it often points to hardware problems. It’s crucial to address BSOD promptly as it indicates significant trouble.
BlueScreenView, a helpful Nirsoft utility, provides valuable information following a BSOD event, aiding in the identification and resolution of the issue. Here are some common BSOD triggers and their fixes.
How to Fix “Apps Not Responding” in Windows 10
In my years of experience with Windows, I have faced the app not responding error as one of... Read more
Corrupted Drivers
Corrupted drivers can lead to BSOD. To diagnose and address this issue, follow these steps:
- Access Device Manager by typing devmgmt.msc in the Run dialog.
- Expand each category and look for any drivers marked with a yellow triangle icon.
- If any are found, right-click on the driver and select Update Driver Software to update it.
Alternatively, third-party apps like IObit Driver Booster can automate the process of identifying and resolving driver issues.
Excessive Load on RAM
Opening more programs than the RAM can handle might freeze the system and trigger BSOD. Limit the number of concurrent programs or consider upgrading your RAM to avoid this issue.
Faulty Hard Disk
A BSOD can also signal a failing hard disk. Refer to the guidelines in problem #11 to detect hard disk issues.
Overheating PC
An overheating PC may lead to BSOD if excessive stress is placed on the components. Follow the instructions provided in problem #1 to address this.
13. Blank Monitor
If your monitor displays nothing, it could indicate an issue with the monitor itself or the graphics card. Test the monitor with another PC to determine the source of the problem.
If the monitor doesn’t power on at all, try replacing the power cable with one that’s known to work. For more troubleshooting tips, here’s a useful article on fixing a monitor that shows nothing.
14. Monitor Goes Black After a Few Seconds
If your monitor goes black after displaying for a few seconds, it may be related to color quality or screen adjustment settings. Try pressing the auto-adjust button on your monitor. If that doesn’t resolve the issue, consider changing the display color from 32-bit to 16-bit.
Connecting your PC to a different monitor to adjust the graphics card settings could also be helpful. Using the auto-adjust feature might briefly restore the display, allowing you to tweak the color settings in that short window.
15. Keyboard Issues
If your keyboard is noisy or fails to type repeated words correctly, it’s likely not a hardware issue. Windows settings such as toggle keys and filter keys might be activated, leading to these symptoms. To disable them, follow these steps:
- Access the Control Panel and select Ease of Access .
- Click on Change how your keyboard works .
- Uncheck the boxes next to Toggle keys and Filter Keys to resolve the issue.
How to Fix Mouse Left-click Malfunction in Windows
Some of the most accepted solutions to fix left-click not working issue on your Windows. Read more
Wrapping Up
While many hardware issues can be resolved by adjusting settings or using specific software, some problems may necessitate a trip to the computer repair shop. Knowing what’s wrong with your PC enables you to take appropriate action. We’d love to hear about any PC hardware problems you’ve encountered and how you solved them, so please share your experiences in the comments.
How to use Startup Repair to fix boot problems with Windows 10
You can fix most Windows 10 boot problems using the Startup Repair feature, and here's how.

On Windows 10, when the computer isn't starting correctly, you can use the Windows Recovery Environment (WinRE) to resolve the issue quickly, and in this guide, I'll show you how.
It's just a matter of time before your device gets stuck loading or won't start. Instead of spending time trying to find out the problem, Windows 10 includes the "Startup Repair" feature (as part of the WinRE experience) designed to quickly fix the most common issues that may be preventing your computer from loading correctly.
In this how-to guide , I will walk you through the steps to use the Startup Repair tool to fix boot problems on your device.
How to quickly repair startup problems on Windows 10
To use the Startup Repair feature to fix boot issues with Windows 10, you'll need to access the Windows Recovery Environment (also known as Advanced startup settings), which you can do in at least three different ways, depending on the situation.
Open WinRE when PC isn't loading
If your computer isn't loading or is stuck during boot, use these steps to access the recovery environment:
- Start the computer.
- As soon as the Windows logo appears, press the power button to interrupt the boot sequence.

- Repeat steps 1 and 2 two more times.
After the third interruption, Windows 10 will open into the recovery environment. Then, you can continue with the steps below to use the "Startup Repair" tool to fix booting issues with Windows 10.
Open WinRE from bootable media
Alternatively, in case your device isn't booting up, use a USB installation media to access the Windows Recovery Environment with these steps:
Get the Windows Central Newsletter
All the latest news, reviews, and guides for Windows and Xbox diehards.
- Start the computer with a USB bootable media .
- Quick tip: If the device isn't starting from the USB flash drive, you must change your system's BIOS settings to ensure it can boot from USB. Usually, you can access the BIOS by powering up the computer and pressing one of the functions , "Delete" or "ESC" keys, but check your manufacturer's support website for more information.
- Click the Next button.
- Click the "Repair your computer" option in the bottom-left corner.

Once you complete the steps, use the steps below to continue to the "Startup Repair" tool.
Open WinRE when PC is loading
If you have access to the desktop, use these steps to access the recovery environment to use the Startup Repair tool on Windows 10:
- Open Settings .
- Click on Update & Security .
- Click on Recovery .
- Under the "Advanced startup" section, click the Restart now button.

After completing the steps, continue with the steps below to fix loading problems with your device using the automatic repair feature.
Use Startup Repair to fix loading problems
To use Startup Repair to resolve booting problems, use these steps:
- Click the Troubleshoot button.

- Click the Advanced options button.

- Click the Startup Repair button.

- Select your Windows 10 account.
- Confirm your account password.
- Click the Continue button.
- Quick tip: If your computer is loading correctly, using this tool, you'll get the "Start Repair couldn't repair your PC" message because nothing needs fixing.
- Click the Shutdown button.
- Start the computer again.
Once you complete the steps, the Start Repair feature will scan, detect, and fix any problems that may prevent Windows 10 from loading correctly.
Also, the repair process creates a "SrtTrail.txt" file in the "C:\Windows\System32\Logfiles\Srt" folder with log information to view and understand the diagnostics better.

Alternatively, if you've been running the same installation for a long time, you should consider nuking the old setup with a clean copy of Windows 10 . This process will take longer and erase everything on your computer, but it'll help fix the loading issues, performance, battery life, and other problems.
More resources
For more helpful articles, coverage, and answers to common questions about Windows 10 and Windows 11, visit the following resources:
- Windows 11 on Windows Central — All you need to know
- Windows 10 on Windows Central — All you need to know
Mauro Huculak is technical writer for WindowsCentral.com. His primary focus is to write comprehensive how-tos to help users get the most out of Windows 10 and its many related technologies. He has an IT background with professional certifications from Microsoft, Cisco, and CompTIA, and he's a recognized member of the Microsoft MVP community.
- 2 The enormity of Microsoft's Windows Phone shut-down mistake is becoming increasingly clear in the AI era
- 3 NVIDIA is bringing Copilot Plus to RTX-enabled devices
- 4 ROG Ally X vs ROG Ally (2023): What's the difference?
- 5 ROG Ally X preorders: Where to buy this improved gaming handheld

How to fix a Windows 11 BSOD: A complete guide
Quick links, common windows 11 bsod errors, unplug new and non-essential devices, fix windows 11 bsods by installing updates, uninstall updates, how to uninstall updates if your computer won't boot, uninstall updates using safe mode, uninstall or roll back drivers, uninstall apps, run dism and sfc scans, fix bsods during a system upgrade, reinstall windows.
As much as we'd like them to, computers don't always work as they should, and while it's uncommon, they can sometimes stop working altogether and crash. This is what's often called a Blue Screen of Death (formerly a Black Screen of Death), or BSOD, which is actually a mechanism in Windows 11 to help you diagnose problems with your system. A BSOD can also be referred to as a stop error or a bug check, which is when a critical process to the normal operation of Windows runs into a problem and forces the computer to restart.
There's a wide range of possibilities for what can cause a BSOD, but most of the fixes are along the same lines. Depending on what is causing the issue, fixes can be more or less complicated. You may have to update or uninstall some software, or you may need to replace something in your hardware. Either way, we'll dive into possible fixes here.
Windows 11: Everything you need to know
Narrow down the cause of the problem.
When you see a Blue Screen of Death on Windows 11, it's a good idea to act quickly to see the information displayed on it. On this screen, you'll see an error code that can help you narrow down the problem. If you missed it, you can also use the Windows Event Viewer to see the error code after the fact and find out what went awry.
Here are some examples of BSOD error codes you might see and what they mean:
- CRITICAL_PROCESS_DIED : This error means a critical Windows process was terminated for one reason or another. It can be self-inflicted, such as terminating an essential Windows process in Task Manager, but it can also indicate bigger problems with the system.
- SYSTEM_THREAD_EXCEPTION_NOT_HANDLED : This problem means there was an error that Windows' error handler wasn't able to catch, and it's often related to device drivers. If you think that's the issue, you may need to uninstall a recent driver update or install a newer update instead.
- IRQL_NOT_LESS_OR_EQUAL : This is a memory-related error that can occur when a driver or process requests access to a memory address it doesn't have the rights to access. Updating drivers or Windows itself is usually the fix for this issue.
- VIDEO_TDR_TIMEOUT_DETECTED or VIDEO_TDR_FAILURE : These errors can appear when the graphics driver on your PC fails to respond when it should, preventing the display of graphics. Updating the graphics driver can usually fix this issue.
- PAGE_FAULT_IN_NONPAGED_AREA : This error means a system process or driver has referred to a memory address that doesn't exist. It may be fixed with a driver or system update, or it may point to an error with your computer's memory. Some antivirus software can also cause this issue.
- SYSTEM_SERVICE_EXCEPTION : This somewhat generic error may not say much, but it often comes with a driver that can be blamed for the problem. These can be system-level drivers, which can't be updated in quite the same way as typical device drivers.
- DPC_WATCHDOG_VIOLATION : This error often appears due to incompatible hardware drivers. It was very prevalent during the early days of Windows 10, though most of these problems have been addressed. You may need to update your drivers to fix this issue.
- NTFS_FILE_SYSTEM : This means there's an error with the file system on your computer. A System File Check (SFC) can usually fix this issue.
- DATA_BUS_ERROR : This error generally refers to all kinds of hardware issues, though a common cause can be broken RAM. If you're seeing this error, you may need to replace a hardware component. If you installed a new piece of hardware on your PC, it's also a good idea to try to install the appropriate drivers for it.
As you can probably glean from the list above, many of these issues have similar steps for fixing them, so you shouldn't have to try to fix them individually. We'll review some of the most common fixes for these issues. This is also not an extensive list of all error codes, but again, many of the same fixes are likely to apply.
Find error codes with Event Viewer
If you missed the error codes on the Blue Screen of Death, you can try to find them later by using the Windows Event Viewer. This program logs all the errors on your system, and it can help you find more information about them. To find out more about what caused your PC to crash, you can follow these steps:
- Press Windows + X (or right-click the Start menu icon) and choose Event Viewer .
- In the main view, right-click the Critical option and choose View all instances of this event . Critical errors are all the errors that cause your computer to shut down.
- Look for the error that happened when you saw the BSOD and click it.
- Error information will be shown at the bottom of the Event Viewer window, and you can use that to find more information on how to fix it if needed.
How to use Event Viewer to check for errors on Windows 11
Maybe they're causing the issue.
One thing that may be causing your computer to run into a BSOD, especially if you recently changed your setup, is using a new device that isn't compatible or doesn't have proper drivers installed. Remove any non-essential devices and peripherals from your PC and try restarting it to see if it's fixed.
After this, maybe look for the appropriate drivers for those devices or install any Windows updates before plugging them back in.
Update Windows 11
A good start for fixing all kinds of Windows 11 BSODs is to update the operating system, especially if you haven't done so in a while. To update Windows 11:
- Open the Settings app.
- Go to Windows Update on the menu on the left.
- Click Check for updates and wait for them to download and install.
- You may be prompted to reboot your computer to finish installing updates.
After this, try doing what you were doing before and see if you still get the same error.
Update your drivers
If you narrowed down the issue to a specific device on your computer, try updating the drivers for that device on your computer. The best way to do this is to look for drivers on the manufacturer's website to make sure you're getting the latest and greatest. Alternatively, you can use Device Manager to look for updates:
- Press Windows + X (or right-click the Start menu icon) and choose Device Manager .
- Find the device category for what's causing the issue and expand it. Devices with errors can also be highlighted in Device Manager, so you can start there.
- Right-click the device and choose Update driver .
- Select Search automatically for drivers .
- It's possible Windows won't find any new drivers. You can click Search for updated drivers on Windows Update to see if there's anything there.
- Click Check for updates .
- If no updates install automatically, click Advanced options .
- Choose Optional updates and see if there are any driver updates in there
- Select the updates you need and click Download and install .
- You may be prompted to reboot your computer to finish installing drivers.
Update apps
If the BSOD you're facing is happening when running a specific app, it's possible that said app is the one to blame for the issue. In this case, check for updates for the app from the manufacturer's website or within the app itself. Some apps may also be updated through the Microsoft Store. To do this:
- Open the Microsoft Store .
- Click the Library button in the bottom left of the app.
- Click Get updates to install updates for all your apps.
Sometimes buggy updates can be the problem
If the BSOD you're seeing happened after a recent update, it's possible that the solution you're looking for is the opposite. Instead of installing a new update, you may need to revert to an older one that didn't have the problem. Here's what you need to do if that's the case:
- Click Windows Update on the menu on the left.
- Choose Update history .
- Click Uninstall updates .
- Find the update that you believe caused the issue (try to match the date when the issues started with the date when the update was installed).
- Click Uninstall next to it.
For more serious problems
If the BSOD problem is so bad you can't get to any part of Windows to fix it, you can use the Windows Recovery Environment (WinRE) to do it. If your computer fails to boot three times in a row, you should see WinRE automatically, but if it isn't showing up, you can force it by using these steps:
- Turn on your computer.
- When you see the Windows logo (or your PC manufacturer's logo), press and hold the power button to turn off the PC.
- Turn on the computer again and repeat step 2.
- After booting for the third time, Windows should automatically try to diagnose issues automatically. Click Advanced options .
- Choose Troubleshoot and then Advanced options .
- Choose Uninstall latest quality update to uninstall the latest cumulative update you installed. If you've tried this already, you can try to Uninstall latest feature update if you think this is the problem.
If a recent update was causing the issue, this should be able to get you back to your PC. A good idea is to temporarily pause updates using the Settings app until a fix becomes available.
How to stop receiving updates on Windows 11
If you can't get to the Settings app or don't think the update causing the issue is the latest one, you can also use Safe Mode to uninstall specific updates. To access Safe Mode:
- Open the Start menu.
- Hold the Shift key and click the Power button. Then Restart .
- This will take you to the Windows Recovery Environment.
- If you can't use the Windows desktop, follow steps 1 through 4 in the section above to get to the Windows Recovery Environment.
- Click Startup settings and then Restart .
- Upon restarting, press 4 or F4 to restart the computer in Safe Mode.
If your device or drive encryption is enabled, you'll need your BitLocker recovery key to enter Safe Mode. You can find keys linked to your Microsoft account here .
Once you're in Safe Mode, you'll need to use Command Prompt to see your list of installed updates and remove the problematic one:
- Press Windows + R to open the Run dialog.
- Type in cmd and hit Enter .
- Enter the following command and press Enter to see your list of installed updates: wmic qfe list brief /format:table
- Look for the InstalledOn and HotFixID fields to help you determine which update may be causing the problem.
- Once you know it, using the following command to uninstall the update, replacing HotFixID with the appropriate number from the table (without the KB at the start). wusa /uninstall /kb:HotFixID
- Click Yes and follow the on-screen instructions if necessary.
- Restart the computer to apply the changes; things should be back in working order.
New versions can be problematic
Sometimes, the problems you're having can be caused by a faulty driver update. If installing the latest version didn't fix the issue, or you already have the latest version, maybe you need to go back to a previous one. Here's how to do that:
- From your desktop, press Windows + X (or right-click the Start menu icon) and choose Device Manager .
- Find the device that seems to be causing the issue or the one that was most recently updated.
- Right-click the device and choose Properties .
- Switch to the Driver tab.
- Click Roll Back Driver to go back to the previous driver version. If this button is greyed out, there's no previous driver version available, which may suggest the problem isn't here.
- Choose any of the options in the dialog that appears and click Yes .
Alternatively, you can try to uninstall the driver altogether, but this may cause some devices to stop functioning, so you'll want to download a driver beforehand so you can get things working again. To do this, you'll need to use the Uninstall device option and then check the box that says Attempt to remove the driver for this device before clicking Uninstall .
If you can't reach this option, you can check out the section above on using Safe Mode and try uninstalling problematic drivers that way. Safe Mode loads Windows with only the essential drivers, so if any of your drivers are the issue, you should be able to boot into it normally and diagnose from there.
Uninstall graphics drivers with Display Driver Uninstaller
If the issue you're having is with your GPU, you might want to uninstall the driver, too. However, graphics drivers are very complex, and just uninstalling it normally may not be enough. If you want to fully clean up any files that might be causing issues, using a program called Display Driver Uninstaller, or DDU, is a good idea. This third-party program is designed to fully remove graphics drivers and any leftover files, allowing you to then install a new version without anything that might cause conflicts. Here's how to use it:
- Start by downloading the new version of the driver you want to install so you have it ready for later.
- Download DDU from the official website and install/extract the files.
- Before using DDU, enter Safe Mode using the steps in the section above.
- Run DDU and accept the default settings.
- Under Type , choose GPU , then choose the graphics card brand you have. If you've switched GPUs, it's also a good idea to first remove the driver for your old GPU, then repeat the process for the new GPU.
- Click Clean and restart .
- DDU will remove the drivers and any leftover files, then automatically restart the computer, which should boot in standard mode.
- Install the new driver you downloaded in step 1.
If you were having any issues with your graphics driver before, this should help fix them.
These can cause issues, too
If you're having problems because of a specific app, then sometimes the best thing to do may be to just uninstall that app. To uninstall an app in Windows 11, follow these steps:
- Go to the Apps section on the left.
- Click Installed apps .
- Look for the app giving you issues, click the ... (ellipsis) button, then click Uninstall .
- Follow the steps to uninstall the app.
- Repeat for any other troublesome apps.
Uninstalling apps can also be a solution if you're facing issues when installing a Windows 11 feature update, particularly when upgrading from Windows 10 to Windows 11. Some apps may cause conflicts with new versions of Windows, so it's worth a shot.
Fix system and disk errors
Another probable cause for a Blue Screen of Death on Windows 11 is that the system files themselves may be corrupted, or there may be an issue with the disk. If so, you can fix these issues with the SFC (System File Check) and DISM (Deployment Image Service and Management) tools, which are accessible through Windows Terminal or Command Prompt. It's recommended that you use DISM first and then SFC. Here's what you need to do:
Some versions may say Windows Terminal (Admin) or even Windows PowerShell (Admin) for Windows 10.
- Enter the following command: DISM.exe /Online /Cleanup-image /Restorehealth
- This process may take a while, so wait for it to finish.
- Once it's done, enter the following command to run SFC: sfc /scannow
This will also take some time, but once you're done, it will have fixed any issues with the system image, which should address your problems.
If the BSOD you're running into occurs when you're trying to update to a new feature update for Windows 11, it may be some kind of compatibility issue or a problem with the setup files. As mentioned above, you can try a few things, like uninstalling potentially troublesome apps and updating your drivers. However, there are a couple more specific steps that may also help.
Clean the Windows Update files
If the setup files are corrupted and causing issues during the upgrade, you may need to redownload them, which means deleting your existing ones first. Here's how to do it:
- Go to the System section on the left.
- Click Storage .
- Choose the Temporary files option to open the cleanup page.
- Select the Temporary Windows installation files checkbox if it appears. You may also want to select Windows Update Cleanup and Delivery Optimization Files .
- Click Remove files at the top.
This will delete temporary Windows Update files, and it should fix issues with installing a new update. If not, you can go deeper by resetting the Windows Update components.
How to troubleshoot Windows updates stuck downloading
Use the windows 11 installation assistant.
Another potential solution that may actually be easier is using the Windows 11 Installation Assistant to download the latest version of Windows 11 and upgrade to it without using Windows Update. This is a very simple tool, so all you need to do is go to the Windows 11 download page and click Download now under the Windows 11 Installation Assistant option. Just follow the steps to download and install the latest version.
Find more information with SetupDiag
If these steps haven't worked, you can try using a tool called SetupDiag to diagnose any issues with the setup process. This tool can tell you what's going wrong and provide guidance on how to fix it.
- Head to Microsoft's SetupDiag page and download the latest version.
- In File Explorer, right-click the file you downloaded and choose Run as administrator .
- It will generate a SetupDiagResults.log file so you can open it. If there's an error, the log file will tell you what it is and provide guidance on how to fix it. You can follow the steps mentioned or look up the error message to find help online.
Push comes to shove, you may have to start fresh
If none of these solutions work for you, your last-resort option is to reinstall Windows. You can do these in a couple of ways or simply reset Windows, but we won't dive into each solution since some of these are a bit convoluted. The easiest way to do this is to use the recovery options in the latest version of Windows 11. If you have an earlier version, we'll have alternate methods linked below.
How to reset Windows 11 to its factory settings
To reinstall a clean version of Windows 11, follow these steps:
- Click System in the menu on the left.
- Choose Recovery .
This option is only available in Windows 11 version 23H2 and newer. If you don't have it, check the other options below.
- (Optional) Check the Automatically restart my PC 15 minutes after installation box.
- Click OK, and your PC will download and install a new copy of Windows from Windows Update. If you don't choose to do it automatically, you'll have to restart your PC afterward.
After this, you'll have a brand-new copy of Windows 11 that should fix any issues you've been having. Since this keeps your apps and files, it may not resolve driver-related issues, so you may need a true clean install.
How to download and install Windows 11
Bsods aren't super frequent.
These days, Microsoft has made plenty of improvements to Windows 11 that make BSODs less common than they used to be, and only very specific issues usually cause them. These steps should address those issues, so you should be good to go. If the solutions here aren't enough, you may need to look up the specific error causing the BSOD to find a possible solution. On custom PCs, a change in hardware may be causing problems, so you may need to fiddle with your components to make sure they are all installed correctly.

- Security Tips
- Social Media
- Privacy Tips
Performance Tips
How to Fix the "Driver Is Unavailable" Error on Your Printer
Are you seeing a driver is unavailable error? Like all PC hardware, printers need updated drivers to function smoothly, and they won’t work until the issue is resolved. We'll take you through all the ways to fix your printer if the driver is unavailable, and show you how to easily keep your drivers updated with the help of an automated driver updater tool.

What is the "Driver is Unavailable" error?
The “Driver is Unavailable” error means Windows is unable to locate the right driver required for issuing commands to your printer. This could be due to having incorrect, corrupted, or outdated drivers installed, or due to your system not having the necessary access permissions.
For your system to interact with a printer, dedicated software known as drivers are needed to act as an intermediary between the PC and the printer. The drivers translate requests from the operating system into commands that the printer’s specific make and model can understand and execute. But if there’s a problem with the driver, communication breaks down, causing the “Driver is unavailable” error to occur.
The same is true for other hardware components, although you may not always receive a driver unavailable message. For example, faulty graphics drivers can slow down your streaming and cause your games to lag or crash. If you're experiencing slowdowns, check your computer specs and be sure to update your graphics drivers .
Common causes of driver errors
There are many reasons why you might be encountering a printer driver error, including problems with the driver itself or issues with your operating system. That’s why it’s important to learn how to hunt down drivers to boost PC performance and fix common driver problems in Windows .
Here are some common causes why your printer driver is unavailable:
Faulty drivers: Occasionally, manufacturers accidentally release driver updates containing bugs or glitches — particularly if they’re rushing to patch up a security exploit . In this case, fixing the issue simply requires rolling back your driver to the previous version.
Outdated drivers: If you don’t keep your drivers updated, as well as causing performance issues, they may eventually become incompatible with your devices. The best driver update software keeps track of driver updates for all your hardware and makes sure you never miss a new release.
Corrupted drivers: Like other files stored on your PC, drivers can become corrupted due to malware , hardware bugs, unexpected shutdowns, or interference from other software. Reinstalling the driver with AVG Driver Updater will repair the corrupted files as well as perform a malware and compatibility check.
Outdated operating system: Even if all your drivers are fully functional and updated, if you’re not running the latest version of your operating system, compatibility problems can result in a driver unavailable error.
Windows updates: Drivers are written specifically to integrate with a particular operating system, so changes to your system via Windows updates can cause compatibility issues. Until a driver update is released to fix the problem, roll back Windows by uninstalling the latest update.
Incorrect installation: If you manually update your drivers, it’s easy to install the wrong driver. Alternatively, you may have the correct driver, but failed to install it properly, resulting in the printer driver being unavailable.
How to fix the "Driver is Unavailable" error in Windows 10
If your Windows 10 printer driver is unavailable, isolate and fix the problem by working through the following steps until the “Driver is Unavailable” message stops appearing.
Roll back your printer driver
If your printer driver recently updated before the error appeared, an issue with the update is probably to blame. Here’s how to roll it back to the previous version:
Open the Control Panel via the Start menu and click View devices and printers .

Locate the affected printer, right-click it, and select Properties .

Go to the Hardware tab and click Properties .

In the new pop-up window, go to the Driver tab and click Roll Back Driver . If prompted, confirm by clicking Yes or OK .

Update your printer driver
If your printer driver wasn’t recently updated, or if rolling back to a previous version didn’t solve the issue, you should ensure you have the latest driver version installed.
Open the Device Manager via the Start menu.

Locate your printer within the list of devices, right-click it, and select Update driver .

Click Search automatically for drivers and follow the on-screen installation instructions if an update is available.

Update or roll back Windows
Compatibility issues can arise if you’re not using the latest version of Windows or your driver isn’t compatible with the version you’re running.
Here’s how to make sure your operating system is fully updated:
Open Settings through the Start menu, then click Update & Security .

Select Windows Update , then click Check for updates .

If any updates are available, follow the on-screen instructions to install them. If your Windows update gets stuck , check out how to fix Windows update errors .
You shouldn’t use an outdated version of Windows, because this leaves you exposed to potential vulnerabilities and zero-day attacks . But if a recent update coincided with the appearance of the error message, you can try rolling back Windows to see if that solves the problem.
Uninstall your printer driver
In the event that your printer driver has become corrupted, or is incorrectly installed, you’ll need to wipe the slate clean and start again.
Here’s how to uninstall your printer driver:
Open Settings via the Start menu, then click Devices .

Select Printers and Scanners .

Select Print Server Properties .

Click the Drivers tab, select the problematic printer driver in the list of installed drivers, and click Remove .

Select Remove driver and driver package , then click OK — if asked for confirmation, click Delete .

Download and install a new printer driver
After uninstalling your printer driver, it’s time to make sure you have the right one installed for your specific make and model of printer. Here’s how to download and install a new driver:
Open Settings via the Start menu and click Devices .

Select Printers & scanners , then click the name of the printer followed by Remove device .

Now click the + button next to Add a printer or scanner and select the name of the printer.

Follow the on-screen instructions to pair your PC with the printer. Windows should automatically find, download, and install the appropriate driver.
If this doesn’t work for any reason, you’ll need to manually locate the driver on the printer manufacturer’s website, download it, and follow their installation instructions.
How to fix the "Driver is Unavailable" error on HP printers
If your HP printer driver is unavailable, you can either use an HP Drivers Updater tool or do so manually. Locate your printer’s name on the outer shell of your printer, then go to the HP Printer Driver Downloads page . Enter the name of your printer in the search box and choose the appropriate driver.
Here are some other tips for fixing common printer “Driver is unavailable” HP errors:
Check your internet connection: If your HP printer is using HP+, a faulty internet connection could make your printer driver unavailable to HP servers. If you have connection problems, see why your internet is slow and how to fix it .
Use a universal driver: You can also try using one of HP’s universal drivers , which work across several models.
Use HP’s driver diagnostic tool: HP’s Print and Scan doctor can potentially diagnose your printer driver issue and offer a solution.
Roll back HP’s update: If your HP printer worked fine before updating, roll back the driver update using Windows Device Manager.
Other printer driver errors and how to fix them
Likewise, if your Canon printer driver is unavailable or your Epson printer driver is unavailable, visiting Canon’s software driver page or Epson’s printer support page lets you manually search for your specific printer model so you can download and install the right driver.
But sometimes printer driver issues are caused by something else entirely. Here are some other errors which could be causing the problem:
Print spooler needs restarting
Windows’ print spooler orders print jobs and puts them in the printing queue, so a mix-up here could cause the printer driver to show up as unavailable. Try restarting it through the built-in Services app by scrolling down to Print Spooler , right-clicking it, and selecting Restart .
Administrator access
Since drivers have privileged access to the inner workings of your hardware, they might require administrator rights for security reasons. Switch to your administrator account, then check if your printer driver is still unavailable.
Troubleshooting tips
Does your printer still say the driver is unavailable, even after you’ve updated it and tried all the other fixes? Here are a few more troubleshooting options to try:
Windows Troubleshooter: Windows 10 has a built-in printer troubleshooter to help you identify and fix problems. Type troubleshoot settings in the Windows search bar and open it. Click Additional troubleshooters , then Printer , and Run the troubleshooter .
Clean your PC: It’s possible you have a lot of junk on your computer that is getting in your driver’s way. Our ultimate guide to speeding up and cleaning your PC can help you unclog the works.
Unplug and replug the printer: Sometimes, simply unplugging your printer, waiting a minute, and then plugging it back in, can reset your driver issue.
Call support: If all else fails, contact your printer’s customer support center. They’ll be best placed to guide you through potential solutions to your problem.
Keep all your drivers updated
Drivers are crucial to your PC’s performance, but there are millions of drivers across different brands you could have on your computer. AVG Driver Updater removes the hassle and stress of keeping up with updates — it automatically manages all your drivers for improved audio and video quality, enhanced Wi-Fi connectivity, and faster browsing. Refresh your PC today by installing AVG Driver Updater and getting a free scan of your drivers.
Keep Your Drivers Updated Automatically
Get AVG Driver Updater to automatically scan, update, and fix your drivers with a single click. Enjoy optimal PC performance.
More helpful tips...
The latest performance articles.
- How to Fix the Blue Screen of Death (BSoD) in Windows
- How to Clear Cache on Your Mac
- How to Transfer Files From PC to PC
- How to Delete Your Cache in Microsoft Edge and Speed Up Your Device
- How to Clean Your Phone’s Charging Port
- How to Clear Cache on Android Phones (Including App Cache)
- How to Permanently Delete Files From Windows
- What Is a PUP... and How to Remove It
- The Best Mac Cleaning Software for 2024
- How to Delete Temporary Files From Your Windows PC
- How to Fix 100% Disk Usage in Windows 10
- How to Clear Photoshop Scratch Disk on Mac
- What Are the Best Free PC Cleaners in 2024?
- How to Find and Delete Other on Mac Storage
- How to Fix Windows Modules Installer Worker — High CPU Usage
- How to Fix High CPU Usage in Windows
- How to Clean Up Your Mac
- How to Repair Corrupted Windows System Files Using SFC or DISM
- SuperFetch: What You Need to Know
- What Are Junk Files and Is It Safe to Delete Them?
- How to Fix or Remove Broken Shortcuts in Windows
- How to Physically Clean Your Computer
- Bloatware: What It Is and How to Get Rid of It
- How to Spot & Get Rid of Unnecessary Apps on Your PC
- Freeze Frame: Take a Snapshot Backup of Your PC
- 6 Great Ways to Reduce Mobile Data Usage
- Is Disk Fragmentation Still a Thing? Everything You Need to Know
- iPhone or iPad Running Slow? 16 Ways to Speed It Up
- How to Speed Up Boot Time on Your PC or Laptop
- How to Speed Up and Clean Up Your PC
- How To Boost Your Wi-Fi Signal at Home
- How to Upgrade RAM on MacBook Pro and other Macs
- How to Speed Up Your Mac
- How Powerful a Computer Do You Really Need?
- Why Does My PC Get Slower Over Time?
- How to Test Your PC for Performance and Battery Life
- Why Is My Internet so Slow and How Do I Fix It?
- Give Your Android Device More Space, Speed & Battery Life
- Performance Shootout: Windows 8.1 Versus Windows 10
- The Ultimate GTA V Guide to Boosting Your Graphics & FPS
- Best Fortnite Settings to Boost Graphics
- How to Overclock Your Graphics Card (GPU)
- How to Optimize Your Windows PC’s Gaming Performance and Boost FPS
- Ark: Survival Evolved — How to Optimize Graphics and Boost FPS
- Overclocking Your CPU: A Step-by-step Guide
- The Ultimate Dark Souls 3 Performance & Tweak Guide
- AMD vs. Intel: Which CPU Is Right for You?
- How to Use CHKDSK Commands to Scan and Repair Hard Drives in Windows
- What to Do If Your Computer Mouse Isn’t Working
- How to Update Graphics Drivers in Windows 11, 10, 8, and 7
- Why Your Android Phone Won’t Update and How to Force It
- Why Your Phone Gets Hot and How to Fix It
- Intel i5 or Intel i7: Which Intel Processor Is Right for Your Computer?
- How to Check If Your Hard Drive Is Failing
- What Is RAM and What Does It Do?
- Ultimate Guide: How to Format a Hard Drive
- How to Stress Test Your CPU
- iPhone Getting Hot? 11 Potential Causes and Solutions
- How to Check Ram Size, Speed, and Type
- SSD or HDD: Which Is Right for You?
- Why Your PC Fan Is so Loud and How to Fix It
- How to Update Sound Drivers in Windows 10 and Earlier
- How to Find and Check Your Computer Specs in Windows 10, 8, and 7
- What Is an SSD?
- How to Upgrade and Install RAM on PC
- How to Monitor Your GPU Temperature
- How to Clone a Hard Drive
- How to Check and Monitor CPU Temperature on Windows and Mac
- An Introduction to 5G
- Why Your Wi-Fi Isn’t Working and How to Fix It
- The Smart Way to Dispose of Your Phones, Laptops, and Desktops
- Should You Shut Down, Sleep or Hibernate Your PC or Mac Laptop?
- Top 10 Apps That Kill Your Android Phone’s Battery
- How to Hunt Down Drivers to Get Your PC Up-to-Date!
- PC Resurrection: 7 Ways to Revive a Dying PC
- How to Improve Laptop Battery Life in 3 Easy Steps
- 5 Smartphone Battery Myths Put to The Test
- Why Your Android Won’t Connect to Wi-Fi and How to Fix It
- How to Update BIOS on Your Windows PC
- How to Reset Your Mac’s PRAM, NVRAM, and SMC
- CPU vs. GPU: What's the Difference?
- How to Factory Reset Your PC, Mac, or Mobile
- What Is Firmware and How Does It Work?
- How to Fix Windows 10 and 11 Black Screen Issues Before or After Logging In
- How to Change Startup Programs in Windows 11, 10, 8 & 7
- How to Troubleshoot Windows Update Errors
- How to Stop Apps From Crashing on Android
- How to Find Your Product Key on Windows 10 and Earlier
- The Best Free Driver Update Software for Windows in 2023
- Windows Registry – What Is It and How Does It Work?
- Why Your PC Is Overheating and How to Fix It
- Why Your Mac Is Overheating and How to Fix It
- What Is Background Data and How to Restrict It
- How to Recover Deleted Files in Windows
- Find Out Which of Your Favorite Apps Cache in on Your Phone — and Which Don’t
- AVG Android App Performance Report Q4 2014
- AVG Android App Performance Report Q1 2015
- App Report 2015 Q3 - AVG’s Q3 App Report Out: Latest Top 10 Draining Apps Identified
- Top Apps Draining Your Phone – AVG App Reports
- AVG Community Powered Threat Reports 2012
Why Your Android Won’t Connect to Wi-Fi and How to Fix It Why Your Android Won’t Connect to Wi-Fi and How to Fix It

How to Update BIOS on Your Windows PC How to Update BIOS on Your Windows PC

How to Reset Your Mac’s PRAM, NVRAM, and SMC How to Reset Your Mac’s PRAM, NVRAM, and SMC
You Might Also Like...

CPU vs. GPU: What's the Difference? CPU vs. GPU: What's the Difference?
Supercharge your phone with AVG Cleaner
Keep your iPhone running smoothly with AVG Mobile Security
- Media Center
Home Products
- Free Antivirus Download
- Internet Security
- Android Antivirus
- Free Mac Antivirus
- Virus Scanning & Malware Removal
- Installation Files
- Beta Downloads
- Driver Updater
Customer Area
- Register Your License
- Anti-Theft Login
- Home Product Support
- Security & Performance Tips
- Online Research
Partners & Business
- Business Antivirus Software
- Partner Support
- Business Support
Privacy | Report vulnerability | Contact security | License agreements | Modern Slavery Statement | Cookies | Accessibility Statement | Do not sell my info | | All third party trademarks are the property of their respective owners.
We use cookies and similar technologies to recognize your repeat visits and preferences, to measure the effectiveness of campaigns, and improve our websites. For settings and more information about cookies, view our Cookie Policy . By clicking “I accept” on this banner or using our site, you consent to the use of cookies.
The 7 Best AI Tools to Help Solve Math Problems
How do you make seven even? Use these tools to solve the big math problems in life.
Quick Links
The test questions, wolframalpha, microsoft mathsolver.
While OpenAI's ChatGPT is one of the most widely known AI tools, there are numerous other platforms that students can use to improve their math skills.
I tested seven AI tools on two common math problems so you know what to expect from each platform and how to use each of them.
I used two math problems to test each tool and standardize the inputs.
- Solve for b: (2 / (b - 3)) - (6 / (2b + 1)) = 4
- Simplify the expression: (4 / 12) + (9 / 8) x (15 / 3) - (26 / 10)
These two problems give each AI tool a chance to show reasoning, problem-solving, accuracy, and how it can guide a learner through the process.
Thetawise provides more than simple answers; you can also opt to have the AI model tutor you by sharing a detailed step-by-step breakdown of the solution. Using the platform is fairly straightforward, given that all you need to do is navigate to the platform and key in the math problem at hand. Alternatively, you can even upload a photo of the math problem onto the platform, and the AI will analyze the image and provide you with an answer.
The AI platform gave us a step-by-step breakdown of the problem:
It resulted in the answer:
While the answer is correct, the tool also provides further options for students to generate a more detailed breakdown of the steps or ask more specific questions.
WolframAlpha is an AI tool capable of solving advanced arithmetic, calculus, and algebra equations. While WolframAlpha's free version provides you with a direct answer, the paid version of the tool generates step-by-step solutions. If you want to make the best use of WolframAlpha's capabilities, you can sign up for the Pro version, which costs $5 per month for the annual plan if you're a student.
As expected, Wolfram Alpha solved both problems, showcasing its ability to handle different problems and provide precise answers quickly.
Julius works pretty similarly to the other AI tools on this list. That said, the highlight of this platform is that it has a built-in community forum, which users can use to discuss their prompts, results, or even issues they might be facing with the platform. Its active user base helps you quickly exchange ideas and receive feedback or advice. The platform's default version uses a combination of GPT-4 and Calude-3, based on whichever model best suits the prompt you input.
We tested the platform's accuracy by submitting the same problems that we did with the other AI tools. When submitting your prompt, you have the option of typing your question or uploading an image or a Google Sheet.
Julius provided correct solutions and offered options to help users verify the solution.
One of the oldest AI platforms, Microsoft's MathSolver is a great option if you want a tool capable of providing free step-by-step solutions to calculus, algebra, and other math problems. Here's how it fared when we submitted our math problems.
Microsoft's MathSolver provided the correct answers, and you can view the steps to the solution, take a quiz, solve similar problems, and more. This can be a great way to practice and perfect your understanding of different concepts.
Symbolab allows you to practice your math skills via quizzes, track your progress, and provide solutions to mathematical problems of different types, including calculus, fractions, trigonometry, and more. You can also use the Digital Notebook feature to keep track of any math problems you solve and share them with your friends. Another highlight of this platform is that educators can use the tool to create a virtual classroom, generate assessments, and share feedback, among other things.
The platform not only displays the answer but also lets you view a breakdown of the steps involved in solving the problem. You can also share the answers and steps via email or social media or print them for reference.
Anthropic launched its Claude 3 AI models in March 2024. Anthropic stated that Claude Opus, the most advanced Claude 3 model, outperforms comparable AI tools on most benchmarks for AI systems, including basic mathematics, undergraduate-level expert knowledge, and graduate-level expert reasoning. To test the platform's accuracy and ease of use, we submitted our two math problems. Here's how the platform performed:
While Claude initially got the answer wrong, probing it and requesting further clarification led to a correct solution.
Remember that we used the free version of Claude to solve this problem; subscribing to Opus (its more advanced model) is recommended if you want to take advantage of Claude's more advanced problem-solving capabilities.
Given that Claude got the previous problem wrong, our second, more basic fraction-based problem will indicate if the AI's performance was an anomaly or part of a consistent pattern.
As you can see, Claude correctly solved this problem and provided a detailed step-by-step breakdown of how it arrived at the answer.
GPT-4 can solve problems with far greater accuracy than its predecessor, GPT-3.5. If you're using the free version of ChatGPT, you'll likely only have access to GPT 3.5 and GPT-4o . However, for $20 per month, you can subscribe to the Plus model, which gives you access to GPT-4 and allows you to input five times the number of messages per day compared to the free version. That said, let's check how it performs with math problems.
In both cases, GPT-4o provided the correct answer with a detailed breakdown of the steps. While the platform is free, unlike other models, it does not have a quiz feature or a community forum.
These AI tools offer unique features and capabilities that make them a good option for math problems. Ultimately, the best way to pick a tool is by testing different models to determine which platform best fits your preferences and learning needs.

If you have any other Microsoft account sign in issues, use our Sign-in helper tool.
June 4, 2024
Hello! Are you trying to recover or access your Microsoft Account?
Outlook Forum Top Contributors: Don Varnau - Stefan Blom - Hal Hostetler - MVP-Outlook - NoOneCan - Ron6576 ✅
May 10, 2024
Outlook Forum Top Contributors:
Don Varnau - Stefan Blom - Hal Hostetler - MVP-Outlook - NoOneCan - Ron6576 ✅
Contribute to the Outlook forum! Click here to learn more 💡
April 9, 2024
Contribute to the Outlook forum!
Click here to learn more 💡
- Search the community and support articles
- Search Community member
Ask a new question
microsoft outlook needs to run repair as it encountered a problem. How do I run the repair
***moved from Microsoft 365 and Office / Other / For home / Other***
- Subscribe to RSS feed
Report abuse
Reported content has been submitted
Replies (0)
Question info.
- Classic Outlook for Windows
- Norsk Bokmål
- Ελληνικά
- Русский
- עברית
- العربية
- ไทย
- 한국어
- 中文(简体)
- 中文(繁體)
- 日本語
- Privacy Policy
- Corrections Policy
- Ethics Policy
- Fact-checking Policy
- Ownership Policy
- Looking for Eguides?

How to Fix the Destiny 2: The Final Shape Audio Issue on PC
Destiny 2 : The Final Shape is out now on PC and consoles, and as expected, the servers aren’t in the best shape, and you’ll want to wait an hour or two before things calm down a bit. The latest version also introduced some unexpected technical issues, and if you aren’t getting any audio while playing Destiny 2 : The Final Shape, here is how you can fix that.
Fixing the Destiny 2: The Final Shape Audio Issue on PC
To fix the audio issues in Destiny 2: The Final Shape , you need to disable any 3D audio interfaces like Dolby Atmos or Windows Sonic and relaunch the game.
The developers have confirmed that they’re currently investigating these audio issues and we should expect this to be addressed in an upcoming hotfix.

To disable Windows Sonic or Dolby Atmos in Windows, follow the steps below.
- In Windows Settings , search for Spatial Sound
- Here, under Spatial Sound , make sure the Off is selected in the dropdown option

That’s all you can do for now, and we’ll have to wait for Bungie to address the problem in a patch. We don’t expect this to be an issue for long though.
Currently, the more pressing issue is related to servers and their availability . Bungie has confirmed that they’re investigating these and we’ll likely see improvement in a few hours.
DESTINY 2 MAINTENANCE ❖ Update 8.0.0.1 As background maintenance continues, we are investigating reports of players logging into the game experiencing sign-on issues or being placed in a queue. Stay tuned for more updates. — Bungie Help (@BungieHelp) June 4, 2024
Despite these issues, it’s clear that a lot of players are hoping to get in, and the game has already surpassed 271K concurrent players on Steam as of writing. We only see this number growing in the coming hours as some of the more pressing technical issues are addressed.
If you already haven’t, here are a few tips to prepare for this massive expansion . For more things Destiny 2, make sure to check out our dedicated section .

Fix problems that block programs from being installed or removed
Note: Use these steps for Windows programs. If you're having problems with an app you got from Microsoft Store, go to Fix problems with apps from Microsoft Store .
The Program Install and Uninstall troubleshooter helps you automatically repair issues when you're blocked from installing or removing programs. It also fixes corrupted registry keys.
First, you'll need to download the troubleshooter.
Download troubleshooter
If you see the File Download box when you start downloading, select Run or Open .
The troubleshooter provides steps for you to follow. If a program isn't listed in the uninstall options, you'll be asked for that program's product code. To access the code, you'll need a tool for reading MSI files—which is typically available to IT professionals. You'll find the product code in the property table of the MSI file.
What it fixes
The troubleshooter helps fix problems that:
Corrupt registry keys on 64-bit operating systems.
Corrupt registry keys that control the update data.
Prevent new programs from being installed.
Prevent existing programs from being completely uninstalled or updated.
Block you from uninstalling a program through Add or Remove Programs (or Programs and Features) in Control Panel.
If you're trying to remove malware, you can use Windows Security (or another antivirus tool), or you can use the Windows Malicious Software Removal tool.
Windows 8.1
Related links
Make older programs compatible with this version of Windows
Get help with Windows 10 upgrade and installation errors
Tips to improve PC performance in Windows 10
Install a printer in Windows 10
Fix printer problems in Windows 7 and Windows 8.1

Need more help?
Want more options.
Explore subscription benefits, browse training courses, learn how to secure your device, and more.

Microsoft 365 subscription benefits

Microsoft 365 training

Microsoft security

Accessibility center
Communities help you ask and answer questions, give feedback, and hear from experts with rich knowledge.

Ask the Microsoft Community

Microsoft Tech Community

Windows Insiders
Microsoft 365 Insiders
Was this information helpful?
Thank you for your feedback.
- Patch Notes
- Hardware and Tech
- PC Invasion Staff
- Terms of Use
- Privacy Policy

How to fix Final Shape campaign progress not tracking in Destiny 2
While we are all eager to see how the story unfolds during The Final Shape’s events, some Guardians could end up replaying some of its missions ad infinitum. Here is how to fix The Final Shape campaign progress not tracking in Destiny 2.
Destiny 2: How to fix Final Shape campaign progress not tracking in Destiny 2
With The Final Shape already available for us to enjoy, Bungie has alerted all Guardians about several existing issues that have not been resolved as of The Final Shape’s launch for Destiny 2. One of the most important ones will hinder your campaign’s progress if you meet specific criteria during your playthrough.
This will happen if you are playing The Final Shape’s campaign in a fireteam and you choose to join any missions in progress or you choose to swap your active character during the campaign.

As you might imagine, the way you will fix this issue is by sticking to one of your characters and starting each of the campaign’s missions from the start by not using matchmaking . There is a possibility that you will join an in-progress mission if there is a fireteam that needs an extra member which will break your progress.
Unfortunately, for the time being, there is no way for players to record their campaign progress if they do end up swapping characters or joining said missions at launch , but Bungie has stated that they are fully aware of the situation and will work on a solution .

Since The Final Shape will probably have a ton of Guardians at launch, you will probably experience some other issues that might hinder your Destiny 2 experience due to some connectivity or server instability issues.
Therefore, don’t be surprised if you end up with some Cat , Currant , or other animal-named error codes appearing when trying to play The Final Shape. Keep that in mind, and good luck, Guardians!

IMAGES
VIDEO
COMMENTS
Navigate to Control Panel > System and Security > Troubleshoot Common Computer Problems. On Windows 7, click "Find and Fix Problems" instead. You'll see a list of the most common troubleshooters you might need. These aren't the only available troubleshooters. Click "View All" in the sidebar to view a full list of troubleshooters.
Press Windows + X, and select Control Panel. Go to Troubleshooting, and on the left panel click View all items. Select Hardware and devices troubleshooter and follow the instructions. Update the ...
If Alt + F4 isn't working, press Ctrl +⇧ Shift + Esc to open a list of all the running programs. Select the program you want to force to close and click End task. Mac - Press ⌘ Cmd +⌥ Opt + Esc to open a list of your open programs. Select the program you want to force-close and click Force Quit.
After running this troubleshooter, the audio problems should disappear. You can fix audio driver issues by restarting audio services from services.msc in Run. Turn off the option for sound effects and enhancements by going to "Settings -> System -> Sound -> Speakers." 8. Windows Login Problems
To fix problems using Windows Update: Select Start > Settings > System > Recovery > Fix problems using Windows Update. After you select the Reinstall now option, choose if you want to allow the PC to automatically restart 15 minutes after the installation completes. Select OK when you're ready to start the installation.
Step 1: Using DISM and SFC for system repair. Since I wrote the original version of this story, I've obtained direct advice from Microsoft that it's best to run DISM before running the System ...
Instead of fix-it tools, Windows 10 uses troubleshooters to help you solve problems with your PC. To run a troubleshooter: Select Start > Settings > Update & Security > Troubleshoot > Additional troubleshooters, or select the Find troubleshooters shortcut at the end of this topic, and then select Additional troubleshooters.
To run a troubleshooter from Windows 10 Settings, open Settings > Update & Security > Troubleshoot. Click on the item that best matches the issue and then click on the button to Run the ...
From here, select the tab that says Device Settings, then Devices, and then make sure the touchpad is enabled. If none of these options work, press Windows Key + X, select Device Manager, then the ...
How to view Troubleshoot history on Windows 11. To review previous fixes with Troubleshoot, use these steps: Open Settings. Click on System. Click the Troubleshoot page on the right side. Source ...
2. Give your computer a bit of rest. If you leave your computer on all the time, you can often fix a problem by turning shutting down the computer, then unplugging it. Then hold down the power button for 30 seconds while the computer remains unplugged. This may cause the LED lights to flash.
Download: Ultimate Windows Tweaker (Free) 4. Windows Repair. Windows Repair (All in One) is another free and useful Windows 10 repair tool you can use to repair numerous Windows 10 issues. The Windows Repair developer strongly suggests you should boot your PC in Safe Mode for maximum effect.
If Windows finds a problem, it will try to fix the problem automatically. However, if Windows doesn't identify a problem, or can't fix a problem it has identified, you'll see a message that reads Startup Repair couldn't repair your PC. In that case, you'll need to try a different method. Fix Boot Loader with Bootrec. If your problem ...
End hung tasks in the Task Manger. If your PC won't unfreeze on its own, press Control + Shift + Esc at the same time to display all open apps in Task Manager.. If you can't open Task Manager this way, try pressing Ctrl + Alt + Del and then clicking Task Manager.You can also right-click the Start menu and select Task Manager.; Once Task Manager opens, look for the app using the most CPU ...
If the Get Help app is unable to resolve your sound or audio issue, try the possible solutions listed: 1. Check your speaker output. 2. Run the audio troubleshooter. 3. Verify that all Windows Updates are installed. 4. Check your cables, plugs, jacks, volume, speaker, and headphone connections.
Type Control Panel into the Windows Search bar. Once in the Control Panel, type Recovery into the search bar at the top right. Select Recovery and then Open System Restore. In the pop-up window ...
Press Windows + R keys and type msconfig in the Run dialog to open System Configurations. Navigate to the Boot tab and click on Advanced options. Check the box next to Maximum memory and enter the total amount of RAM installed (in MBs). Click OK and restart your PC to apply the changes.
To use Startup Repair to resolve booting problems, use these steps: Click the Troubleshoot button. (Image credit: Mauro Huculak) Click the Advanced options button. (Image credit: Mauro Huculak ...
When you see the Windows logo (or your PC manufacturer's logo), press and hold the power button to turn off the PC. Turn on the computer again and repeat step 2.
The following tips can help you pinpoint the issue affecting your device. Before you begin, make sure your device is plugged into a power source and connected to the internet. Then, try the steps listed below to get your PC to update. Some updates require administrator access. If your account doesn't have administrator access, see Create a ...
After uninstalling the affected program, restart your computer, then visit its official website and download its latest version from there. Now, you can reinstall that program. 2] Repair your ...
Windows Troubleshooter: Windows 10 has a built-in printer troubleshooter to help you identify and fix problems. Type troubleshoot settings in the Windows search bar and open it. Click Additional troubleshooters , then Printer , and Run the troubleshooter .
Using the platform is fairly straightforward, given that all you need to do is navigate to the platform and key in the math problem at hand. Alternatively, you can even upload a photo of the math problem onto the platform, and the AI will analyze the image and provide you with an answer. Problem 1
Please keep in mind that the Microsoft account recovery process is automated, so neither Community users nor Microsoft moderators here in the Community will be able to assist in the process. We recommend checking out the following resources for help in regaining access to your account:
Right click the network icon in the right side of the taskbar and select Diagnose network problems or open Get Help for Network & Internet. Make sure Wi‑Fi is turned on. Select the No internet icon on the right side of the taskbar, and make sure Wi-Fi is turned on. If it isn't, select it to turn it on. Also, make sure Airplane mode is turned off.
Destiny 2: The Final Shape is out now on PC and consoles, and as expected, the servers aren't in the best shape, and you'll want to wait an hour or two before things calm down a bit.The latest version also introduced some unexpected technical issues, and if you aren't getting any audio while playing Destiny 2 : The Final Shape, here is how you can fix that.
The Program Install and Uninstall troubleshooter helps you automatically repair issues when you're blocked from installing or removing programs. It also fixes corrupted registry keys. First, you'll need to download the troubleshooter. Download troubleshooter. If you see the File Download box when you start downloading, select Run or Open.
Image: Bungie. As you might imagine, the way you will fix this issue is by sticking to one of your characters and starting each of the campaign's missions from the start by not using matchmaking ...