45 Great DIY Jewelry Display Ideas You Must Know About

Find out the most creative ways to protect and show off your jewelry items with these DIY Jewelry Display Ideas in this article!
1. rotating jewelry storage using cereal box.

This rotating jewelry holder makes it easy to store your exhaustive jewelry collection in one spot, and the best part–It is made from a cereal box. Know more about it on Hometalk .
2. Wine Cork Hooks

You can do countless things with wine corks and one of them is this DIY wine cork jewelry holder. Get the complete tutorial here .
3. DIY Jewelry Organizer

If you pride in having a vast selection of jewelry that won’t fit in tiny jewelry holders, just give them what they want–A roomy cabinet. Make it by following these steps .
4. DIY Necklace Holder

Get a piece of driftwood or any flat board and attach decorative knobs to it that suit your style. Your DIY necklace holder is ready! Head over to Visibly Moved to learn more.
5. Jewelry Tree

This DIY jewelry tree brings a touch of nature to your room. Check out this post for the DIY.
6. DIY Industrial Pipe Jewelry Organizer

For this DIY jewelry organizer project , you can also use PVC pipes and the best part it uses vertical space
7. Jewelry Display

This tiered jewelry organizer is one of the coolest DIY Jewelry Display Ideas in this list. The tutorial is here .
9. Dreamcatcher Earring Caddy

The basic concept behind this earring dreamcatcher is that it lets the best fashion ideas to seep down your dreams while ejecting out the bad ones, making it the perfect kind of gift for boho-chic DIYers. Get more details on brit .
10. Jewelry Bust

This lovely wall-mounted bust adds a classy touch to your walls and lets you showcase your exquisite neckpieces in a minimalist way. Get the tutorial at Design Sponge .
11. Jewelry Box

Soften the rustic appeal of your wooden jewelry box with a cheery flannel shirt or any fabric you may have. Visit A Beautiful Mess for the DIY.
12. DIY Jewelry Organizer with Ikea Utensil Holder

Probably one of the smartest and easiest DIY Jewelry display ideas here. Attach command hooks on the top part of a utensil holder to hold your necklaces and use the holes around it to hang necklaces. Learn more at Sister’s Suitcase !
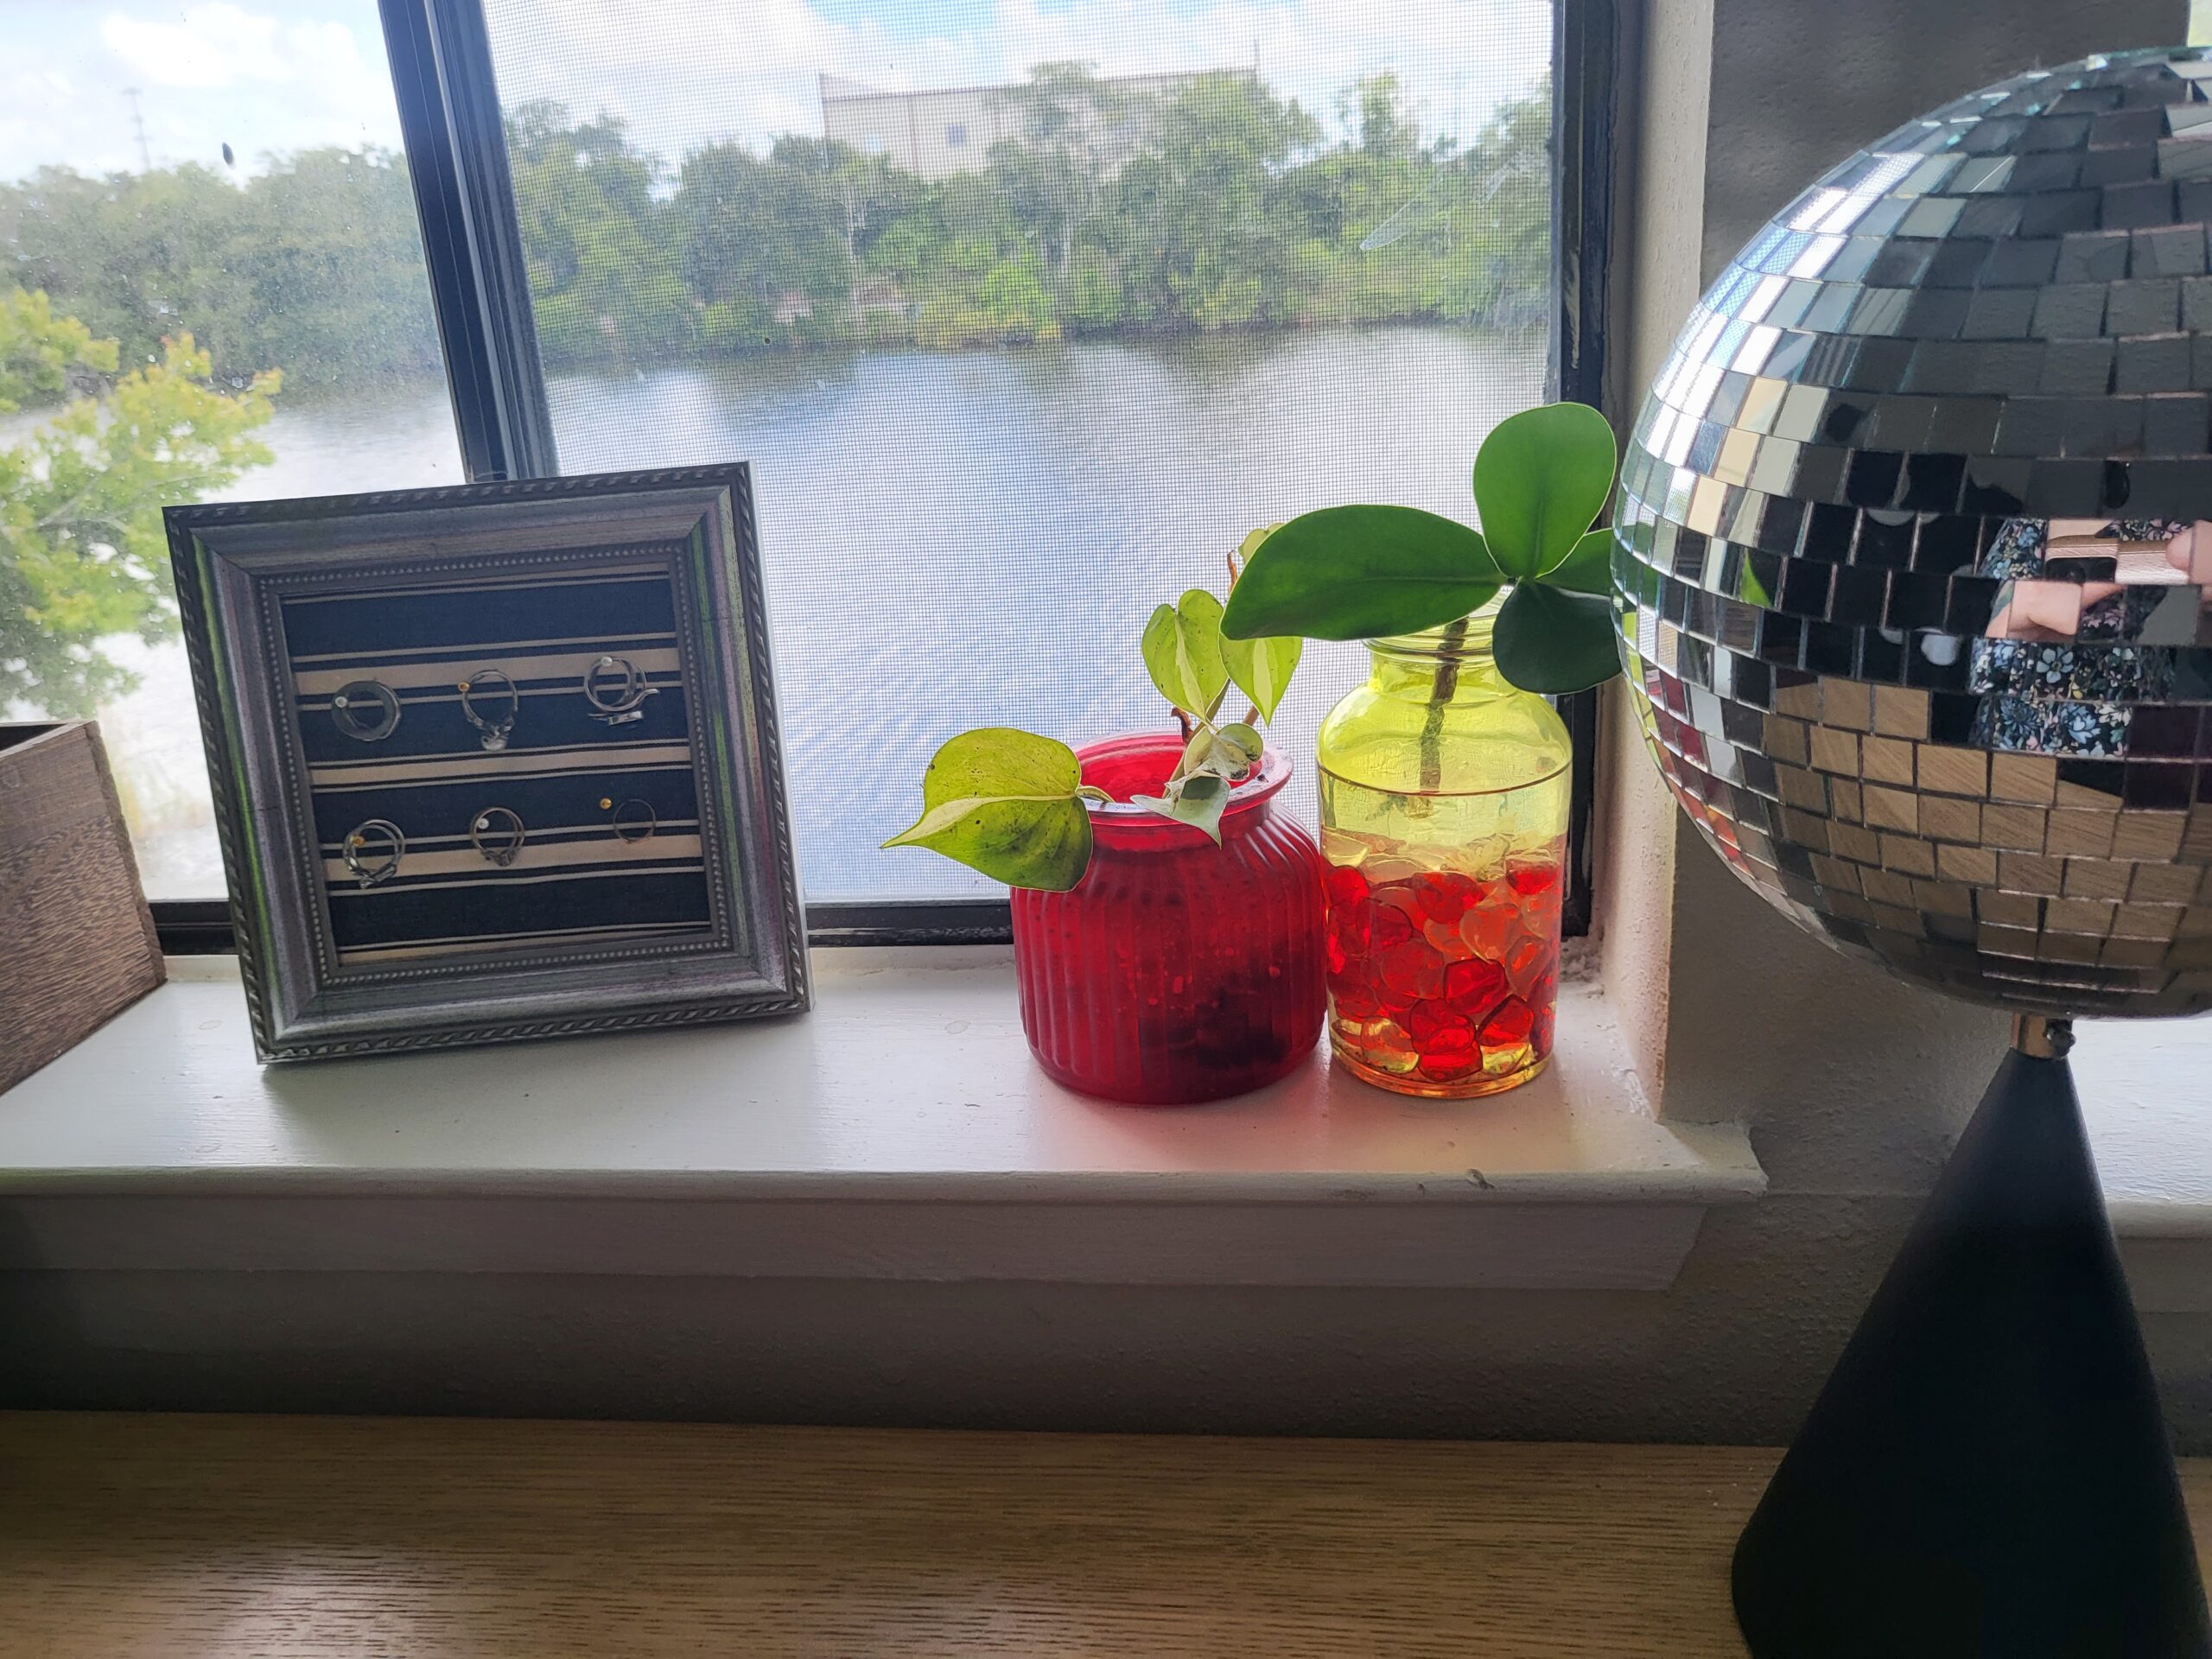
13. DIY Jewelry Storage: Frame Your Treasures

The picture frame provides a cushioned background for delicate pieces of jewelry, and the wall-mounted design puts them on display. We found the DIY here .
14. DIY Standing Necklace Display

This fabric-covered foam board doubles as an erect necklace display that lets you decide what to wear without wrecking through your collection. Here are the simple steps .
15. Shadow Box Jewelry Holder

Incorporating the functions of a display case and a storage box, this shadow box is for those rings and neckpieces that look beautiful in an open showcase. The DIY is here .
16. DIY Jewelry Display

Here ‘s an elaborate jewelry display especially for those who want to showcase their collection without boring too many holes on the walls or making a mess out of their necklace chains.
17. Handmade jewelry display

Part creepy and part quirky, this palm-style holder adds personality to your dressing table. You can make it for yourself with the help of this tutorial .
18. Brass Earring Pyramid

Made of brass tubes, this pyramid jewelry organizer gives a modern touch to your decor while solving a significant organization problem for you. The tutorial is here .
19. DIY Necklace Holder

When you’re trying to utilize limited space, this vertical necklace holder is a worthy addition to your list. Get full details here .
20. Geometric Industrial Wall Jewelry Organizer

The utilitarian style of this hanging jewelry holder with its golden accents is sure to brighten up your makeup room. Try making it by reading this post .
21. Jewelry Holder From A Cork Board

This corkboard jewelry holder with honeycomb imprints fits well in small space. The steps are here .
22. DIY Earring Holder

This DIY earring holder is easy to customize according to your personal style and decor. And what’s more, it’s just as pretty as your collection of earrings.
23. Wooden Jewelry Holder

When you’re hunting for a Mother’s Day gift that shows you really care, this DIY jewelry holder here is your answer. It’s pretty, functional and a great time-saver on weekend mornings.
24. Easy DIY Necklace Holder

How about creating this picture frame necklace holder and keep it in your bedroom? Follow these steps to make it.
25. DIY Jewelry Holder

Get some driftwood or salvage some fallen branches and make them your DIY jewelry holders .
26. Paper Towel Rolls Jewelry Organizer
Can you believe it that a throwable item like paper towel rolls could be used to make this jewelry organizer? Watch the YouTube tutorial here .
27. Easy Jewelry Display For Necklaces

If you’re looking for a quick and cheap DIY to display your jewelry items, this DIY here is for you.
28. DIY Fabric-Covered Jewelry Display Stand

Make this jewelry display stand using a fiberboard, fabric, chicken wire and a few other basic supplies. Watch the tutorial here .
29. Jewelry Display Case

Make this expensive looking jewelry display case to organize your favorite necklaces. The tutorial for this excellent project is here .
30. DIY Cactus Clay Ring Holder

This trendy succulent gimmick is an excellent way to display your finest pieces and definitely a clever nod to the succulent and cacti craze taking over the world these days. Learn more here .
31. DIY Wooden Ring Holder

Combining fashion and function in one form, this DIY wooden ring holder gives you a good view of your ring collection, so you know what to wear for the occasion.
32. DIY Concrete Ring Cones

DIY concrete cones are sturdy stands for keeping jewelry handy and well-displayed. Here are more details.
33. Wine Crate Jewelry Display Boxes

This vintage wall-mounted jewelry storage requires no more than a wine crate, some paint, and hooks. The complete tutorial is at HGTV .
34. Jewelry Display In Wooden Box

Slide your bangles and bracelets over empty wine bottles for a classy wall decor that can be swapped out any time for a season-specific look. Here is a simple tutorial to make it.
35. Hanger Jewelry Holder

A spare hanger can go a long way to decorate a bare wall and organize your jewelry collection at the same time. This post will help you through this.
36. Jewelry Wall Organizer

This fascinating jewelry storage idea lets you display your collection while organizing your clutter in a heartbeat. Get the instructions here .
37. Vintage Jewelry Storage

For vintage storage to match your style, consider using the combination of wire caging and S-shaped hooks. See the steps here .
38. Pegboard Jewelry Display Case

39. DIY Bracelet Tower

Create a beautiful bracelet holder or according to this blogger–“ A bracelet tower .”
40. Wine Bottle Jewelry Holder

Recycle an empty wine bottle into this unique jewelry holder. The tutorial is here !
41. DIY Over Door Jewelry Display & Mirror

Not just a way to keep your jewelry organized, this on the door jewelry display can beautify your interior as well. Check out how it was made here !
42. DIY Jewelry Tower

This blogger found pretty aqua dishes for cheap at a thrift store and what she made of that is above in the picture. Find out how she did it here .
43. Colorful Jewelry Trays

If you’ve some unused silverware trays, turn them into this colorful jewelry organizer. The tutorial is here .
44. DIY Pegboard Jewelry Organizer

This pegboard jewelry organizer has multiple uses. Learn everything about it in this video .
45. DIY Chicken Wire Jewelry Holder

Get a chicken wire window and paint it–It’s that simple! Check out the steps here.
34 Pretty DIY Homemade Anklet Ideas Any Girl Can Do
13 diy essential oil carrying case ideas, leave a reply cancel reply.
Your email address will not be published.
Can Farts Cause Pink Eye | Does Farting on a Pillow Cause Pink Eye

How to Get Rid of Rats With Black Pepper

Does Ammonia Repel Snakes | Does Ammonia Keep Snakes Away

Does Glycerin Clog Pores | Glycerin Benefits for Skin
- 7 DIY Shower Enclosure Ideas
- 8 Plants with Toothed Leaves
- 10 Kids Room Wall Decor Ideas
- 8 Above Refrigerator Storage Ideas
- 7 Front Door Privacy Ideas
- Skip to primary navigation
- Skip to main content
- Skip to primary sidebar
- DIY Projects
- Landscaping
- Living Room
- Home Office
- Outdoor Ideas
- Woodworking
- Fashion Trends
- Health and Wellness
- Entertainment
- Personal Finance
- Entrepreneurship
25 Homemade DIY Jewelry Display Ideas
If you love making your own jewelry, you might also enjoy displaying them in a creative and personalized way. Here are 25 homemade DIY jewelry display ideas that will inspire you to showcase your beautiful creations with style and flair. You can use various materials, such as wood, dishes, pots, boxes, and even chicken wire, to craft your own unique jewelry display.
Some of the DIY jewelry display ideas are perfect for earrings, such as the shabby chic dangly earring display that has a rustic and charming look. Another one is the rotating jewelry storage made from a cereal box that can hold different types of earrings and other accessories. You can also make a simple but elegant earring display using a picture frame and some lace.
Discover 25 creative DIY jewelry display ideas for showcasing your beautiful jewelry collection. Find unique necklace, bracelet, and ring display ideas to make your own stunning jewelry displays.

Necklace and Bracelet Display Ideas
For bracelets and necklaces, you can try the DIY wooden spool bracelet holder that can store multiple bracelets in a neat and attractive way. You can also use old dishes to make a 3-tiered jewelry display that has a vintage vibe and can hold various kinds of jewelry. Another option is to use wooden blocks to make necklace displays or jewelry holders that are easy and fun to make.
Ring Display Ideas
If you have a lot of rings, you might want to make your own ring cones using concrete or clay. They are simple to make and look very chic and modern. You can also use an old box to create a ring display that can hold many rings in one place. You can decorate the box with fabric, paint, or stickers to make it more appealing.
Homemade Jewelry Display Ideas
If you want to have a display for your entire jewelry collection, you have many options to choose from. You can build a jewelry display rack from scratch or a wooden jewelry display cabinet that can store and protect your jewelry. You can also use a gilded frame or a chicken wire frame to create a stunning wall-mounted jewelry display that can hold all kinds of jewelry.
These DIY jewelry display ideas are not only great for organizing your jewelry but also for adding some personality and creativity to your space. You can customize them according to your preferences and style. Start making your own DIY jewelry display today and show off your amazing jewelry pieces!
1. Shabby Chic Dangly Earring Display

If you have a collection of beautiful dangling earrings, then making your own, this shabby chic earring stand is perfect for you. It’s a great way to display your earrings with something you already have in your home. This project is made from an altered picture frame, so it’s a cost-effective way to organize your earrings. The things you need for this project are a picture frame, picture wire, acrylic paint, paintbrush, staple gun, and nails or tacks. Get the details here! kevinandamanda
2. Inexpensive DIY Jewelry Display Stand

This inexpensive DIY jewelry display stand is the simplest and quickest way to manage your things in minutes. This basic structure is easy to put together and turns out so beautiful. Due to being made with wood, it will cost you nothing to make. You can easily customize the size you want. The supplies list includes rectangle wood plaque, wood dowels, wood glue, cork sheet, drill with bits, longer wood screws, screwdriver, and paint or stain. happyhourproject
3. Mountain Necklace Display for Home

Are you a jewelry lover? If your answer is yes, you must have piles of jewelry spilling out in your room. But for your necklaces, this mountain necklace display idea is perfect for giving them a perfect spot for relaxing. Not only do these wood mountain pieces make great art for your desk or dresser, but they also hold up your necklaces stylishly. For this inexpensive and beginner-free tutorial to work on, you need a bunch of things. Wood board, tape measure or yard stick, a pencil, bandsaw, belt sander, drill, wood glue, and wood axle pegs. themerrythought
4. $2 Boho Dreamcatcher Jewelry Display

Few easy DIY hacks can help you to organize your jewelry in a modern way and if you are here to know about the hacks, then make yourself ready. This boho dreamcatcher jewelry display idea is perfect to nicely hand your earrings and necklaces to the catcher. Once you make you can easily grab the desired one from this dreamcatcher. If you can make a doily, this plan is not time-consuming. The supplies are an embroidery hoop, handmade or readymade doily, scissors, and some working time. deonnawade
5. Cool DIY Bracelet Display Stand

If you want to do easy and quick crafts that give you a little bit of immediate excitement, then you have come to the right place. Making your own, this cool DIY bracelet display stand doesn’t take many tools and supplies and turned out so adorable for showing your collection of bracelets. To whip up this great budget-friendly project, start picking up the things. Wooden dowel, unfinished wood plaque, scrap fabric, a paper towel roll, mod podge, wood glue, stain, drill, and a saw. Details about the project are here! iheartorganizing
6. Unique Wooden Block Necklace Display

It’s quite a daunting task to find the desired piece of jewelry from a collection. If you have always suffered from this problem, making this unique wooden block necklace display is a permanent solution. Rather than spending a huge amount of money on the store-bought holder, try something unique you can tackle in your home with just a few things. It’s a great way to display your necklaces too. The material list includes wood pieces, a miter saw, a sander, short nails, a hammer, and a few minutes. More details are here! themerrythought
7. Easy DIY Embroidery Hoop Earring Holder

Make a perfect place to display your lovely earring with this simple and quick DIY of making an embroidery hoop earring holder. With just a few simple things in hand, you can make something functional that holdup your plenty of rings without sacrificing your home decor. You can easily personalize this project to reflect your style. Stuff needed are embroidery hoops in small, large, and medium size, craft wire assortment, chromacryl washable assorted colors of acrylic paint, foam brushes, and round paint palettes. Check the details of the plan here! fun365 oriental
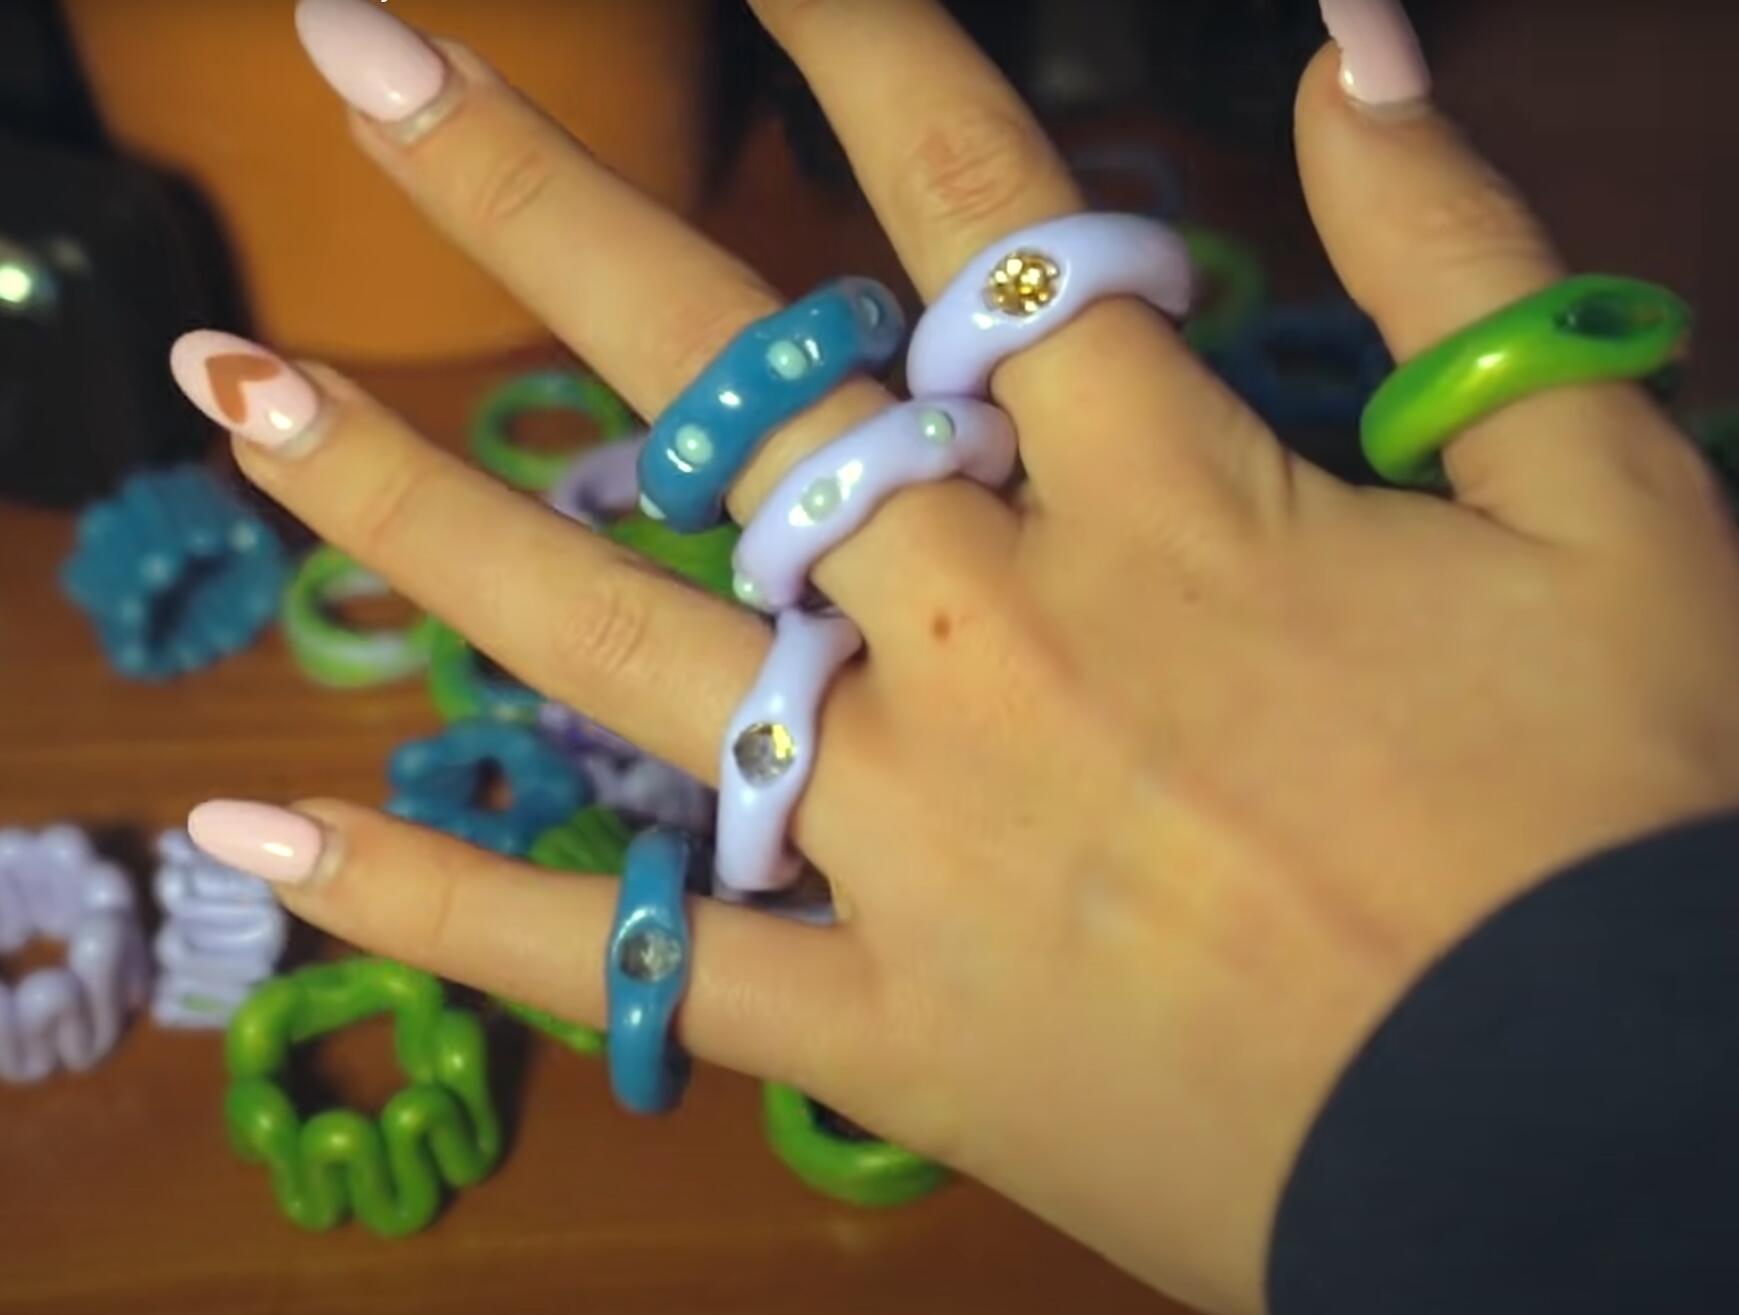
8. Creative Way to Display Rings

Get creative with your piles of rings and make them look organized with this easy-peasy idea of displaying rings. This cute little project is easy to set up and needs just a few things you already have in your home. You can paint this holder your desired color or let it remain natural for rustic decor. If you want to put your hands on this inexpensive project, get ready to gather the materials. Like pine board, table saw sandpaper and your rings collections. themerrythought
9. Rotating Jewelry Storage Using Cereal Box

A nice jewelry holder is necessary to keep track of your jewelry cluster. Not only is this a great way to keep them organized, but also to stylishly show the collections you have. Once you make this rotating jewelry storage out of a cereal box, you don’t need to find the desired one from the clutter. For this project to try, you will need to get one big cereal box, a paper towel roll, cardboard, another small or big cereal box, empty painter’s tape cardboard, stones and marbles for weight, glue, contact paper, scissors, and scrapbook paper. vikalpah
10. Turn an Old Box Into a Ring Display

If you are the one who loves to make something new from the old things you already have, this project of turning an old box into a ring display is a huge hit for you. Due to being made with a reclaimed box, it is an inexpensive way to show your treasure of rings. For working on this lovely project, get the stuff you need. Like a small wooden box, high-density foam, spray adhesive, black velvet fabric, thick birch plywood sheet, ruler, marker, scissors, serrated bread knife, and small pins or staple gun. Details are here! mycakies
11. Simple DIY Wooden Block Jewelry Holder

Are you the one who loves to stay organized with everything at home? If yes, then you can organize your jewelry with this simple DIY wooden block jewelry holder. This project is so easy to make and customize with some pretty simple things you already have in your hand. This project organizes your jewelry and makes a great wall decor. The things you need to work on are a hammer, lint-free cloth, sawtooth hangers, wood stain, gorilla glue, wood block, and brass dowels. See the directions of the project here! stylebyemilyhen
12. Make Your Own Ring Cones Out of Concrete

These DIY jewelry display ideas are practical and add a decorative element to your room or closet. Learn this easy method of making your ring cones out of concrete. These lovely cones make a long-lasting holder for your treasure of rings. With a perfect displaying spot, they also grant you easy access to your desired one when you need it. Due to being made with concrete, you can make any shape you wish. Put your hands on quick-setting concrete, clear packing tape, disposable mixing cup, mixing stick, paper plate or cardboard, cone template, and contact paper. Check out the details of the plan here! diyinpd
13. 3 Tiered Jewelry Display Out of Old Dishes

DIY jewelry display ideas are a creative way to showcase your favorite pieces and add a personal touch to your space. This three-tiered jewelry display out of old dishes is a great functional way to hold up your treasure nicely. It’s a great way to give a new life to the old dishes you want to throw in the trash. This project is easy to tackle with the given instructions and turned out great to support your jewels. The material list includes deviled egg plate, small dinner plate, cereal bowl, dinking glass, candlestick holder, glue, and spray paint of your choice. Get more information about the plan here! curbly
14. DIY Wooden Spool Bracelet Holder

Here is an impressive way to transform your old industrial wooden spool into a beautiful bracelet holder. You just need some paint of your choice to give this old wooden spool and brand new look. If you don’t have this spool, you can easily find it in any store or flea market. Get ready to display your beautiful bracelets onto your hand-created holder. You need Americana decor chalky finish paint, paint brushes, sandpaper, and a hot glue gun for this project. Get the details here! decoart
15. Homemade Jewelry Display Using Aqua Dishes

Once you have purchased your jewelry collection, it’s time to think about managing the jewelry so it can be easily found when needed. This homemade jewelry display using aqua dishes is easy to set up with some old dishes. It’s a great recycling project that can nicely show your jewelry too. If you want to work on this inexpensive project, grab the stuff. Like candle sticks, old aqua dishes, a miter saw, spray paint in the color of your choice, and glue. Check the details here! confessionsofaserial
16. How To Make Clay Cactus Ring Dish

Clay is a wonderful material to use for some easy organizing hacks. This time you need to put your hands on your favorite clay to make this amazing clay cactus ring dish. This project is cheap for organizing your jewelry and makes a beautiful decor you can put anywhere in your room. This budget-friendly and not much time, the consuming plan follows the details. The supplies are the clay you desire, a leftover dish, and mere minutes to work on. More instructions are here! lovelyindeed
17. DIY Jewelry Stand Using Terra Cotta Pots

With a little creativity and some basic materials, you can easily make your own DIY jewelry display ideas at home. A jewelry holder is a must to have for your lots of jewelry. But spending a fortune on costly store-bought holders is not a smart choice. Making your own this DIY jewelry stand using terra cotta pots is a stylish and modern way to display our jewelry in your room. Once you make you can easily access your favorite one. The things you need to make this one are standard terra cotta pots, terra cotta saucer, tacky glue, base color paint, antique color, and clear spray paint. artsyfartsymama
18. Build a Jewelry Display Rack From Scratch

Being a fan of DIY, making projects from scratch you have is the perfect way to save your precious money and get something new out of nothing. The fabulous building of a jewelry display rack from scratch is easy to follow with the given steps and turned out great as decor for your room. You can hold up all of your jewelry in this lovely rack so that you can’t get any trouble finding your favorite one. You can see the list of supplies and straightforward tutorials here! danslelakehouse
19. How to Make a Jewelry Display

From repurposed frames to driftwood, there are endless DIY jewelry display ideas to suit any style and budget. Bring a little personality to your space with this easy-peasy jewelry display idea. With everything on hand, this project easily comes together in just a few minutes. The best part about this project is that it would perfectly organize your jewels without sacrificing the style of your room. If you are a beginner, then make sure to follow the steps to get your own on the cheap. Visit the plan here to learn about the list of supplies and other useful details. busy mommy
20. Jewelry Display for Earrings on Budget

This easy-to-make jewelry display for earring ideas has a great impact on your visitors. Rather than spending your precious time and money on finding the desired one holder in the store, give it a try to make your own at a fraction. It’s a great way to organize your lots of earrings just by doing some woodworking in your spare time. Hardwood, a saw, wood glue, wood clamps, nails, sandpaper, drill with drill bits, paint of your choice, paint brush, furniture wax, and a sheet of decorative aluminum. ohmy creative
21. Build Wooden Jewelry Display Cabinet

Building a wooden jewelry display cabinet could be a great and inexpensive solution if you don’t want to spend money on store-made organizers. This project easily comes together in an afternoon and is functional to give plenty of space for holding your jewelry. You can customize this project in any way to suit your needs. The working material is pallet slats, old hinges, reciprocating saw, paint of your choice, paint brushes, sandpaper, wood glue, hooks, and measuring tape. Get the details about the project here! instructables
22. Wood and Linen Mounted Jewelry Display

Want a simple solution to hand your necklaces and earrings stylishly? If your answer is yes, you have come to the right place. Making your own wood and linen mounted jewelry display is easy, and you need just a few things you already have. This project turned out great as a piece of your room decor where you can easily organize your collection. The supplies list includes a low-temperature glue gun, binder clips, foam core board, fabric, IKEA HVOSTA frames, and T-pins. ctrlcurate
23. Homemade Chicken Wire Jewelry Holder

Get inspired by these DIY jewelry display ideas and create a unique and functional storage solution for your accessories. Use some chicken wire to organize your jewelry in a fun way. This homemade chicken wire jewelry holder is a great alternative to store-made expensive holders. When you DIY your project, you can customize then to reflect your style. Not only is this project just for holding your stuff, but also to give a stylish view of your room. If you want to work on this project to make one for yourself, you can see the list of supplies and straightforward tutorials here! consumercrafts
24. Sculptural Branch Jewelry Display Holder

It’s quite daunting to separate your desired necklace from a tangled bunch at the moment when you need it. If you need a stylish way to put all your jewelry in order without sacrificing your home decor, this sculptured branch display holder is the perfect and inexpensive option. Due to being made with wood and fresh branches, it will cost you nothing to make. The material list includes hardwood branch, freshly cut log, gorilla glue, pruners, drill with bits, wood screws, clothes pin, baby wipes, bowl for the base, screw, painter’s tape, and clamp. prettyhandygirl
25. DIY Gilded Frame Jewelry Display

If you are a jewelry addict and want to organize all your collection, then building this DIY gilded frame jewelry display holder is a huge hit for you. Not only is this a great way to support your jewelry, but it also brings some personality to your room decor. This project can quickly come together with a bunch of supplies. Like one sturdy frame, chicken wire of the same size as the frame, duct tape, and staple gun with staples. Check out the details about the complete tutorial here! kikucorner
Conclusion:


- Home →
- Blog →
- Supplies & Resources →
Do It Yourself Jewelry Displays: Photos and Instructions
by Rebecca Compton.
I recently participated in my first craft fair, and after looking for the best jewelry display ideas. . . I created my own from items I already had around, with some help from Home Depot and AC Moore.
Here’s how I created my own do-it-yourself jewelry displays – including lots of photos!

Necklace display cards
Most of my “inspiration” was born from the fact that I live in a smallish apartment with ZERO storage space and have a smallish car. Huge, wieldy displays were not an option.
I also like things to be multi-purpose. So my jewelry display comes apart and stores most of the pieces in itself.
Here are the main components I used:
Queen-Sized Black Sheet
I went to a discount store and bought a set of sheets for $30, so I didn’t have as much choice. My sheet is also silky, which was a tad irritating due to snagging issues, but didn’t attract any dust or fuzzies, which was a HUGE bonus. The other set I’d looked at was already covered in fuzzies, so I quickly turned it down.
Two Wooden Crates
After looking around my apartment for ideas, my wooden crates caught my eye. I painted them black for this display. Upon further reflection, I’d recommend sanding them quite a bit, it snagged my tablecloth/sheet.
I think it looks nice, holds up the long wooden board, and raises the display to eye level.
It also displayed my jewelry cards – I create my own jewelry cards on Photoshop and attach each pendant to the card describing it.

When folded, it hangs nicely from the slats on the crate.
Long Wooden Board
This goes across the two crates. I did not attach them in any way, because the weight on top of it keeps it secure. I chose to use Modge Podge to decoupage pages ripped out of old and ruined books. It took a VERY long time to do, but it was an easy step to do while watching TV or something else rather mindless.

Necklace Display Board
This is attached to the long wooden board. To create it, I purchased another wooden board, which I covered in batting for padding and a silk lining from an ugly skirt (cheaper to recycle than buy new stuff!). They’re just stapled onto the back. Nails or pins hold necklace chains to display some necklaces.
I then took two small boards, that were also decoupaged with old book pages, and screwed them onto both ends.

Before attaching them, I drilled in 6 small holes. Each hole held a long and skinny dowel rod. I put it so that 2 were quite close together and attached those 2 with a dowel cap/bead. This is to hold more necklace cards.

It attaches to the long wooden board with two metal shelf brackets. I have only one screw on the metal board, so I can remove it easily when I need to.

Necklace Busts
I purchased these online. I really prefered the look of the bigger two, so I had them on the top (eye level) shelf. These were purchased from Display Importer .

The ones on the bottom were cheaper and fold up, but they didn’t look quite as professional. I’d still recommend them, though! I bought these at Monster Slayer . I also bought the hand and ring container from Display Importer .

Store Signs

For the tall sign, I painted two canvases. I wanted to have height to my display, but I must admit this may have been too tall. Very eye catching, though! 😉 This sign was attached to a black wooden board, which I then attached to my necklace board.

I also made two tall signs with pictures of my jewelry on it. I originally intended to attach hooks and hang mirrors from them, but I ran out of time. I still think they looked really nice and evened out the look of my display.

Other Details
I used metal trays to highlight other items on my display. There was also a bowl and cups for people to dig through to find lower priced keychains, pendants, and rings.

A cute metal saucer was used to display my business cards.

To give some extra height, I covered a small cardboard box in fabric (also can be used to transport light items, since I left it open at the bottom). A bamboo utensil holder was used for my earrings- I turned it upside-down and put a piece of cardboard covered with matching fabric on the top.

Overall, I think it worked out very nicely. I hope you’ve found it helpful!

Author Rebecca Compton of Get Wired Designs creates original, one-of-a-kind jewelry. Each piece is made by hand wrapping wire around unusual beads, shells, sea glass, and other interesting focal points. Custom orders welcome.
FREE - Get 7 Super Jewelry Making Hacks
Get Rena's 7 Super Jewelry Making Hacks, plus the Jewelry Making Journal Newsletter - all for FREE.
We Respect Your Email Privacy
Leave a Reply:
Save my name, email, and website in this browser for the next time I comment.
- Skip to primary navigation
- Skip to main content
- Skip to primary sidebar

Diy Jewelry Projects » 31 Creative Jewelry Display Ideas You Can Try
31 Creative Jewelry Display Ideas You Can Try
Published: Dec 16, 2019 · Modified: Jul 30, 2021 by Luke Allison · This post may contain affiliate links · This blog generates income via ads
Yes, you can always put your necklaces, bracelets, and rings into a jewelry box, but sometimes, you can collect too many items there. As a result, you will get a tangled bunch at the moment you rush. Besides, you can often forget about some beautiful jewelry because it has fallen to the bottom of the box.
To avoid this inconvenience, you can use smart and practical jewelry display ideas I have listed for you, which will give us excellent visibility. Let's see how to solve the problem and add a lot of style and personality to the corner essential for every girl.
Table of Contents
1. Recycled egg box for Jewelry Display

Can you imagine that you can transform an ordinary, recycled egg box into an excellent organizer for your jewelry? Use a spray to paint the box and stow earrings, brooches, and rings inside separate sections. That way, you will know where a particular piece of your treasure is in every moment.
2. Shabby chic frame with lace for Jewelry Display

Everything you need to make this inexpensive but highly impressive jewelry display is an old frame. Paint it in shabby chic style, hook the lace straps on each side, and hang your earrings the way our grandmothers did.
It is probably one of the cheapest ways to keep your jewelry. If you prefer wearing a bijouterie, you can place this frame in your living room and use this practical display as a unique decoration.
3. Cement cones for Jewelry Display
You will need a little male help to make cement cones of different sizes. Then, paint them in different colors and use them for depositing rings and bracelets. Except it is practical, it can look charming on your nightstand.
4. Curb chain for Jewelry Display

Check the idea
5. Tree branch for Jewelry Display
I adore using a branched tree branch in many ways since it can look exquisite and sophisticated. Use the golden spray and paint the middle-sized branch you can find in the park or forest.
The great thing is that you can hang all pieces of jewelry there, depending on the thickness of particular parts of your 'tree.' Believe it or not, this type of display holder may incorporate into the modern design in an entirely unexpected way.
6. Wine corks for Jewelry Display

If you have a husband who is a fan of old wines like me, you can find a bunch of wine corks everywhere in the house. Why wouldn't you be practical and use them in an unusual but adorable way? Glue a dozen of wine corks one after another and screw small hooks on their underside for hanging rings and earrings. How lovely!
7. Wine cork frame for Jewelry Display
There is one more way to use unnecessary wine corks as a beautiful jewelry display. You will need an old frame hanged on the wall. Fill the inside of it with corks and insert the earrings into them. It is both an elegant decoration for your living room and a reliable display at the same time.
8. Nails or hooks on the back of a door for Jewelry Display

It is a quite simple option for keeping your jewelry in one place. Screw hooks or nail nails to the door and hang pieces of your jewelry there. You can also make a variation of curb chains there, by draping a chain for between hooks to impressive necklaces display.
9. Hooks on a piece of wood for Jewelry Display
If you are a nature lover, you can pick up a few interesting branches in the wood or purchase thinner slats in the local shop. If you are not skillful, you can buy a driftwood jewelry display online and use them to organize your jewelry uniquely. Regardless of your choice, you can use them, screw a few colorful hooks, and hang your preciousness there.
10. Drawer knobs for Jewelry Display
There are two options in front of you. You can use the old drawer knobs or purchase new ones in a local store. Attach them to the plywood, make a lovely frame if you wish, and use them as an attractive place to hang your jewelry.
11. Big wooden buttons for Jewelry Display

When deciding to toss an old coat, save the big wooden buttons. You can sew them on colorful material and place it into a frame. That way, you will transform something useless into an elegant display for your earrings.
12. Ring holder for Jewelry Display
Like most women on the planet, you probably like rings, but lose them around the house quite often. Therefore, you can use cardboard and make a ring holder in the form of a cactus or a female hand.
If you make a few of them, you can make a few different pieces and put them in the bathroom, next to the kitchen sink, and on a nightstand in your bedroom. It is a pretty cool solution, isn't it?
13. Metal pipe for Jewelry Display
If you are a fan of industrial decoration, you can make a jewelry display from old metal pipes. I find the combination of masculinity connected with a water system and elegant feminine jewelry pretty fascinating.
There is one more benefit of this cheap idea. Your husband or boyfriend won't mind finding your necklaces around if they hang from the pipe in the bedroom.
14. Old advertising box for Jewelry Display

If you have a small, vintage wooden cigar box, or the one of expensive wine, or children's toys, you can use it as an innovative ring display. I have an old Land O'Lakes box and use it for my collection of rings. It is a highly convenient solution, indeed.
15. Wooden clothing hanger for Jewelry Display

I adore these massive, wooden old coat hangers because I can use them for so many purposes. For example, you can add a few loop screws on its bottom and get an elegant jewelry display and unusual wall decoration, as well. Moreover, you can paint or wrap it with colorful fabric to fit it beautifully into your living room or bedroom style.
16. Old wine bottles for Jewelry Display
Believe it or not, most wine bottles are the adequate size for an impressive bracelet display. The only thing you should do is to pick out a few bottles, paint or wrap them with decorative paper and bows, and place on a shelf. What an attractive idea to recycle old glass, make a practical jewelry display, and decorate your home in an entirely different way!
17. Metal grater for Jewelry Display
Can you imagine that such an ordinary piece from your kitchen can be a perfect display for hanging your earrings? To achieve a more effective result, you can paint it in your favorite color and use it as a unique decoration.
18. Jewelry Display Tower

You will need a small bowl, two plates, and two candlesticks to make a real tower for your jewelry. Arrange these old cookware pieces one above the other and use plates and a bowl on the top as a jewelry storage container. It looks quite interesting if you ask me.
19. Staircase spindle for Jewelry Display

After replacing an old staircase spindle, you can use its parts to make a lovely jewelry holder. Use a round stand for holding the spindle up and a piece of wire for hanging your necklaces and bracelets. Don't forget to paint it in your favorite color, matching the décor in your bedroom.
20. Accordion hat stand for Jewelry Display

Maybe you can find an old wooden accordion hat stand or rack in your grandpa's house. If not, you can buy one in a local store or order it online. Paint it in some elegant color and hang your jewelry on it. You can combine a few of them if needed.
21. Wooden box
Hang a wooden box on the wall and use it as a vintage jewelry display. If you are skillful enough and have appropriate tools, you can organize a bookshelf, a flowerpot, and a jewelry hook all in one place.
After painting it in golden color, you will transform this handmade box in a top-notch piece of furniture.
22. Thread spools for Jewelry Display
If you have a grandma, who likes to sew, you can use her old thread spools as a reliable jewelry display. You will need a frame and a piece of wood covered with some elegantly designed fabric as a basis.
Attach spools on the wood and use them to hang your necklaces. If you prefer that way, you can paint every piece in a different color and bring real fireworks of colors in your home.
23. Grandpa's suitcase for Jewelry Display
Do you remember these old-fashioned suitcases our grandparents used while traveling? They are solid but often made of cardboard, wood, or stuff, which are unthinkable materials for our generation.
However, you can use one as an efficient and unconventional jewelry display. What do you think about one of my favorite ideas?
24. Antique chair top for Jewelry Display

Probably all of us have at least one old chair in the basement. Why wouldn't you use its top as an exclusive jewelry organizer? Cut a chair top, paint it in your favorite color or shabby chic style, and hang it on the wall. It is so beautiful that you can put this decorative display in your living room.
25. Small apothecary jars or glass vials for Jewelry Display
Use jars or colorful vials to make a new unique display. That way of organizing is not suitable for a bunch of jewelry but can be highly practical as a piece you can place in the bathroom . It is a quite convenient way to keep your rings and earrings safe while taking a shower.
26. Vintage glassware for Jewelry Display
If you have a lot of single cups and you don't know what to do with them, you can use them to make a tiered jewelry stand. Arrange different mugs, glasses, and cups on a big plate, and use them as a place for storing your jewelry. I find this arrangement highly elegant and unique.
27. Bust of Styrofoam for Jewelry Display
To make a unique display, you will need just a piece of Styrofoam and an appropriate template of a female bust. If you spray it in gold or red, you will get an elegant and sophisticated place for your jewelry.
It is particularly convenient for bulkier necklaces, which you can't put in an ordinary box. Not to mention that you can make a few models as a unique present for your friends or mom, as well.
28. Sexy corset for Jewelry Display

The corset is an indispensable part of women's wardrobe even in the 21st century. If you have lacy one, which doesn't fit you anymore, you can attach it on a piece of wood and use it as an impressive jewelry display, no one has. In fact, you can also use some other parts of your clothes for that purpose, such as jeans or fancy mini skirt.
29. Vintage lamp for Jewelry Display
Look in the attic for some old lamp with an old-fashioned lampshade. If you find any, clean it and use it as a fantastic display for hanging earrings and necklaces. You can find an empty corner in your living room and transform an ugly and shadowy space into a lovely and useful place.
30. Old magazines for Jewelry Display
Can you imagine that old magazines can be useful and used as a bracelet display? Roll them up, string your beautiful pieces of this jewelry around paper rolls, and let them on the table. Another option is to attach the tubes on tiny hooks hanged on the wall in your bedroom. There are a few advantages to this jewelry disposal system. It is inexpensive, decorative, and eco-friendly. WOW!
31. Repurposed vases for Jewelry Display

You can use smaller vases as an effective and practical solution for organizing a new, lovely necklace display. It is not a complicated process at all. Find a well-lit spot in the room, arrange vases of different sizes and shapes, and hang your jewelry on them. That way, you will get a beautiful space and an opportunity to find every piece of your jewelry fast when needed.
Reader Interactions
Ask Me Anything Cancel reply
Your email address will not be published.
Save my name, email, and website in this browser for the next time I comment.
- Google Plus
30 Brilliant DIY Jewelry Storage & Display Ideas
Jewelry storage and display is actually an excellent opportunity to get really creative with your accessories and bring a little personality to your space. If you have many different pieces of body jewellery, and just are looking for unique ways to store and display them. Then you are in the right place!
Here we have many different ways to organize and display your jewelry for your inspiration. All of these will look awesome and add more style and perdonality to your space.
DIY Necklace & Bracelet Holder

DIY Jewelry Tower

Accordion Hooks for Jewelry Organizing

From Thread Rack To Jewelry Organizer

DIY Wall Canvas with Hidden Jewelry Storage

Inset Jewelry Cabinet

DIY Shabby Chic Jewelry Organizer

DIY Jewelry Organizer

Photo Frame With Chicken Wire Lying Around For Jewelry Organizer

DIY Rotating Jewelry Storage Using Cereal Box

DIY Antique Frame Jewelry Holder

Decorative Wall Hooks As Jewelry Storage

DIY Jewelry Organizer with Old Rake

Jewelry Storage Drawer with Insert Boxes

Wine Cork Hooks for Jewelry Storage

Antique Chair Top Jewelry Organizer

DIY Built In Jewelry Organizer

DIY Ring Display Case

DIY Earring Framed Holder

Wall Jewelry Display Box

Shabby Chic Dangly Earring Display

Window Frame Jewelry Display

DIY Rustic Necklace Holder

DIY Jewelry Holder from a Cutlery Tray

Painted Twigs Jewelry Organizer

Dollar Store Plastic Drawers with Foam for Earrings’ Storage

DIY Jewelry Storage Case

Barn Wood Jewelry Holder

DIY Ombre Wooden Pegs

Share this:
- Click to share on Twitter (Opens in new window)
- Click to share on Facebook (Opens in new window)

About the author

What a post this is one!Very valuable for me. Shop our curated collection of Natural Hair earrings and accessories. Show pride in what grows from your crown. afrocentric earring
Leave a Reply Cancel reply
Your email address will not be published. Required fields are marked *
Notify me of follow-up comments by email.
Notify me of new posts by email.
Recent Posts

20+Elegant Heels Every Woman Wants to Know

20+ Awesome Ceiling Light Ideas for Bedroom

30+ Stylish Bridal Wedding Dresses for 2020

35+ Trendy Summer Nail Art Designs for 2020

35+ Beautiful Makeup Vanity Ideas

8 Life Changing Bra Hacks Every Girl Should Know

30+ Beautiful Farmhouse Kitchen Ideas

75+ Elegant Nail Art Ideas in 2020
JavaScript Required
We're sorry, but our website needs JavaScript enabled to help you customize and purchase the perfect frame. If you cannot enable JavaScript, we recommend using a different browser or device. If you need assistance, please contact us at (888) 983-2670.
Promo code expires June 10th, 2024.
To receive by Father's Day, please order by the following dates: – Thursday, June 6th (Standard Shipping) – Monday, June 10th (Must choose Expedited Shipping at checkout)
- Browse Topics: Art Customer Stories For Business Home Decor How-To's Inspiration Materials Matting News Occasions Photography Picture Framing 101 Resources Tips & Tricks Tutorials What to Frame
How To: DIY Picture Frame Jewelry Display
We all know someone that keeps their jewelry in a random box on the dresser, maybe YOU’RE that person? Don’t you love digging around your jewelry box or bowl only to find your favorite necklace all jumbled up in a knotted ball? Awesome, right?
Jewelry is a work of art and should be treated as such! Maybe you have some one-of-a-kind pieces that an artisan slaved over for days to make, maybe you inherited your grandmother’s vintage collection of pearls, or maybe you just love a good-n-gaudy costume piece!
Sure you can buy the stackable plastic jewelry trays or you can create a custom jewelry display to not only showcase your collection for easy outfit-pairing access and tangle-free organization! Did we mention you can make it with a ✨picture 🖼 frame✨?

Check out our picture frame jewelry display DIYs below:
- Rings, Earrings, and Brooches
- Necklaces, Bracelets, and Anklets
Picture Frame Jewelry Display : Rings, Earrings, and Brooc hes

Materials & Tools:
- Frame It Easy Custom Picture Frame (in the size and style of your choice!)
- Hanging Hardware (this comes with every frame!)
- Push Pins or Sewing Pins
- Craft Glue or Hot Glue Gun
- Craft Scissors or Fabric Scissors
Follow along with our video or view our step-by-step written directions below!
1. Design Your Custom Picture Frame
- Only have a handful of rings? Opt for a small frame but with a BIG personality! For our example, we used our Granby style frame in Silver . Our outside frame size measured 8 1/4″ x 8 1/4″ with an art size of 6″ x 6″.
- If you have a bigger collection, go for a bigger frame with a more subtle look! We recommend our Derby frame in Wheat , perfect for that boho chic or sand-washed beach house look!
- Can’t decide? Group your frames! Order different sizes and styles to create your own picture frame jewelry display gallery wall! Check out 5 Steps To Plan A Gallery Wall for inspiration on how to plan your jewelry wall!
2. Breakin’ It Down
- First, you’ll need to disassemble and take the backing off of your frame. For wooden frames, push back the flexipoint tabs and remove the contents of your frame (use pliers if needed). For metal frames, take your screwdriver and loosen the two parallel corner brackets, this will allow you to remove the frame rail along with the acrylic cover, matting, and backing of your frame.
- You won’t need the acyclic cover for this project , so go ahead and set that aside.
3. Cut & Paste
- Next, grab your fabric and frame backing. Lay your backing on top of the fabric and cut around it, leaving about a 1/2″ to 1″ extra to cover and fold over the frame backing.
- For added support, wrap and glue your fabric to your backing. We recommend gluing the extra 1/2″ fold-over fabric so the glue is only placed on the backside!
4. (Avengers) Assemble!
- Once the glue has dried and your fabric is secured to the frame backing , begin to re-assemble the frame. Be sure to secure that extra fabric down with the frame flexitabs if you choose not to glue them down.
- I f you wish to hang your display, re-attach your hanging hardware. If you want to display it on a tabletop or dresser, it’s best to remove the hanging wire and other hanging hardware. Check out our Easelmate for a stylish and sturdy tabletop display !
5. Hang & Style Your Way
- Place your push pins or sewing pins into the fabric-lined backing in whichever pattern or fashion you see fit, you can always re-arrange them!
- Find the perfect wall space to hang! We recommend placing your new picture frame jewelry display in your bedroom by the closet or in the bathroom, this way coordinating your jewelry and outfits is easy peasy!
- Grab your hanging hardware and proudly display your new DIY jewelry holder! Check out our Guide To Hanging Hardware for tips and tricks on hanging your DIY projects perfectly! Also, be sure to check out How To Hang A Frame On Any Wall for hanging on difficult walls!
6. Bragging Rights
- You did it, you made a SUPER cool and SUPER easy DIY jewelry organizer! Now it’s time to show it off and be the envy of all your friends. Snap a pic and share it with us use the hashtag #frameiteasy and tag us @frameiteasy. We can’t wait to see your DIY home decor!
Picture Frame Jewelry Holder: Necklaces, Bracelets, and Anklets

- Frame It Easy Custom Picture Frame (in the sizing and style of your choice!)
- Screwdriver
- Wood drill bits
- Hookscrews & Eyelet screws
- Rope, beading, etc.
- Ruler or Tape Measurer
- If you order a whole frame kit: you won’t need the backing or the acrylic cover for this project! We recommend ordering the frame only from our accessories page. This has all four sides of the frame, without a fame backing or cover. Assembly hardware is still included!
- Only have a few necklaces? Opt for a small frame but with a BIG personality! We love the look of our Stafford style frame , its wide metal frame and flat profile face are sure to make a bold statement!
- If you have a bigger collection, go for a bigger frame with a more subtle look! For our example, we used the Dayton frame in Whitewash . Our outside frame size measured 22 1/8″ x 17 1/8″ with an art size of 20″ x 15″.
- Can’t decide? Group your frames! Order different sizes and styles to create your own picture frame jewelry display gallery wall! Check out 5 Steps To Plan A Gallery Wall for inspiration on how to plan out your jewelry wall!
- Remember: If you order a whole frame kit, you won’t need the backing or the acrylic cover for this project!
- Go ahead and disassemble your frame if you have a whole frame kit, if you’re just working with the frame itself take off the hanging wire and any other installed hanging hardware.
- Grab your pliers and pull out the flexitabs from the frames , if you wish you can also use wire cutters to snip off the tabs and sand the rough edges down with sandpaper . You can also just bend the flexitabs to the backside of the frame to hide them.
3. Mark it up
- Now that your frame is pretty much bare bones at this point (good work!) it’s time to grab a pencil and mark where you would like to screw in your eyelet screws and hook screws . We recommend using a ruler or tape measurer to measure the spacing out evenly.
- 1/2″ or 1″ between hooks is a great place to start spacing. Keep in mind what types of pieces you’ll be hanging, bigger and bulky jewelry will need more room!
4. Twist & Shout!
- While you can place your eyelets and hooks on any side, top, or bottom of the frame , we chose to use screw hooks for the inner top edge of the frame, and the eyelets for the bottom end. You can also install hooks off the outer side of the frame for extra jewelry storage – you do what works for you! The inner top edge is perfect for displaying long necklaces, while the bottom of the frame makes for a great earring display. Side hooks can hold bangles and charm bracelets!
- After you’re happy with your marks, you can start twisting your hooks and eyelets in the frame. if this proves difficult by hand (especially if you’re using a metal frame!) try pre-drilling some starter holes. You can also add some glue to make sure your hooks are really stuck!
- Find the perfect wall space to hang! We recommend placing your new picture frame jewelry holder in your bedroom by the closet or in the bathroom, this way coordinating your jewelry and outfits is easy peasy!
- Grab your hanging hardware and proudly display your new DIY jewelry holder! Check our Guide To Hanging Hardware for tips and tricks on hanging your DIY projects perfectly! Also, be sure to check out How To Hang A Frame On Any Wall for hanging on difficult walls!
- Wanna hang bangles or pendants? Open some eyelets. Take your pliers and open the closing just a bit so you’re able to slide in your jewelry!
Get Crafty!
We hope we’ve inspired you to craft your own picture frame jewelry display! This DIY craft is not only great for personal use but makes an excellent gift for the jewelry lover in your life! Head over to our frame designer to get started and don’t forget to check out our other DIY Learning Center content like Kid’s Rotating Museum Frames and 5 Frame-Worthy DIY Wall Art Projects .

Send your DIY project photos to [email protected] with the subject line “Featured Friends” for a chance to be featured!
Or hit us up on our socials, use the hashtag #frameiteasy and tag us @frameiteasy .
Ready to get creative?
Whether you have a piece of art ready to frame, or you have something for us to print, we've got you covered. Our online custom picture framing perfectly fits not only your art, but your style and budget, too! Use our custom frame designer to create a frame, or browse our suggested frame designs . Happy designing!
Related Posts for You to Enjoy

4 Eye-Catching Wall Designs You Can Make With Frames

4 Basics For Boho Bathroom Decor

10+ Frame-Tasticly Free Picture Frame Coloring Pages

Get great tips for your style and learn how to save up to 15% on your next order!
Sign up for tips & tricks, trend alerts, future discounts, and more!
Thanks for signing up! Keep an eye on your inbox for more.
- Skip to primary navigation
- Skip to main content
- Skip to primary sidebar
- Skip to footer
Sugar Bee Crafts
Simple Crafts and DIY ideas and tutorials

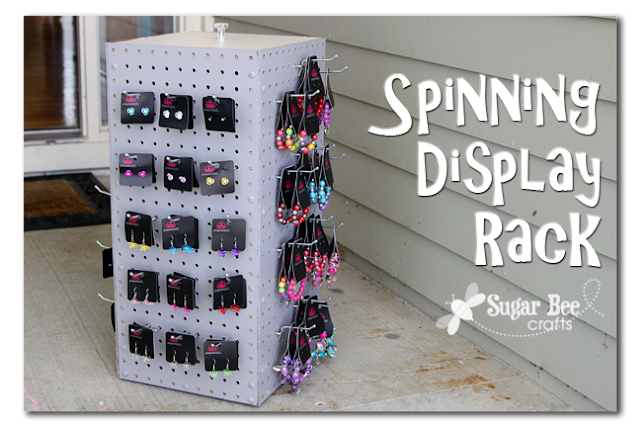
Spinning Jewelry Display Rack
October 11, 2012 By Mandy Beyeler
Sharing is caring!
I am in love with my new Spinning Jewelry Display Rack! I use it for displaying my Paparazzi Jewelry that I sell but I’m sure you could use it for lots of other things as well, so I thought I’d post a quick tutorial.
This post may contain affiliate links for products that I personally use; all opinions are my own.
The handmade spinning rack cost about $17 to make, plus a few scraps we had at home.
This one on Amazon is smaller in case you’d rather buy one.

How to Make a Jewelry Spinner

You’ll also need a square piece of scrap wood for the bottom and lid, and 1x2s or whatever for the skeleton inside.

Cut the pegboard into 4 pieces that are equal and fit the four sides of the square board. Then use wood glue and screws to attach the boards to the bottom board. Wood bar clamps help hold it together. Trevor attached 2 sides then put up the skeleton of a 1×2 in the corners to add more stability, then attached the other 2 sides to the base and corner boards.
Trevor speeds up his drilling and screw driving using this awesome drill/driver flipping bit – so fast!

Then attach the lazy susan to the bottom – just screw into the 4 corner holes:

Paint it if you’d like. Here’s the view looking down into it:

And the outside. The lid just sits on top of those corner boards. And there’s a knob on the top so it lifts off. I love that feature and store lots of headbands inside when transporting my display:

And here it is loaded with pegboard hooks and ready with the fun $1 Starlet Shimmer things – now the little girls can spin and browse to their hearts content – wahoo!!

If you need a Spinning Jewelry Display Rack for any reason, give this a try!
Jewelry Display Ideas
You might also want to check out: — Simple Jewelry organization (this is how I organize my personal stash) — Simple Earring Holder — Easy Necklace Holder
Custom Spinner
If you love DIY Projects, you also might like to learn about Customizing a Spinner.
About Mandy Beyeler
Mandy is a craft blogger who loves to blog and enjoys all things crafty, sewing, and DIY - she feels that if she can do something, you can too, and provides tutorials to help you along the way. She loves being a mom to 4 awesome kiddos and blogs from the Kansas City Area.
Reader Interactions
October 11, 2012 at 7:05 am
very cool! I like this alot, Thanks for showing us how to do it! 🙂
October 11, 2012 at 9:02 am
Thank you for the terrific tutorial! I had to pin this one to my Shona Skye Dream board (my board for my future shop). It looks great and is way more affordable than the commercially produced ones!
Kristy @ Shona Skye Creations https://shonaskye.blogspot.com
October 11, 2012 at 9:27 am
October 11, 2012 at 9:47 am
Love it and I can use it to display my Scentsy Bars! I’m going to get to work. Thank you for sharing.
Bethp.Scentsy.us
October 11, 2012 at 11:42 am
Love this. I could it used it this past weekend and for my two upcoming shows! Great tutee!
October 11, 2012 at 1:48 pm
You’ve got a great husband!
October 15, 2012 at 10:02 am
DUDE! What a fantastic idea!!
May 3, 2013 at 1:49 pm
These would be great for jewelry artists displaying their work for craft shows. You can also paint the peg board or stencil it! Thank you for posting!
xo Michelle misanthropycreation.com
June 2, 2013 at 9:18 am
So this only takes one sheet of pegboard that is 2×4 feet. I really want husband to make for me but want to make sure on how many sheets of pegboard.
June 4, 2013 at 7:44 am
yep! I used a 2×4 sheet, but if you want a bigger spinner you could use bigger sheets
October 29, 2019 at 10:50 pm
Does it change the size of the lazy Susan spinner? The biggest I could find at Home Depot was 6”
January 9, 2020 at 7:10 pm
What size square boards
July 7, 2013 at 7:30 pm
love this idea!!! Where do you get the hooks from.
July 7, 2013 at 8:55 pm
great question – – I’m a rep with Paparazzi Accessories, and they sell the hooks for an awesome price to their consultants, so that’s where I got mine
November 17, 2017 at 11:18 am
I’m brand new to Paparazzi as a consultant. where on the site can I find the hooks and displays?
May 29, 2018 at 7:20 am
Just get them at Home Depot, or Lowes.
July 23, 2013 at 12:37 pm
I bought some through amazon and some at a local hardware store.
September 10, 2013 at 11:56 pm
Thank you for the idea, I had recently became a Scentsy Rep, plan to make this for my scentsy bar display!!
September 10, 2015 at 11:47 am
Is the lazy susan sandwiched between 2 boards?
September 10, 2015 at 2:31 pm
nope, it’s just on the bottom – if you flipped the display over, you could see the lazy susan – hope that helps!
December 2, 2016 at 3:16 pm
What size are the scrap pieces of wood for the top and bottom??
September 18, 2017 at 11:14 am
I’m totally making this! Thanks for sharing!
February 1, 2020 at 7:32 am
What are the dimensions for everything I want home Depot to cut do that I just assembly.
May 13, 2021 at 12:09 pm
What size does the two pieces (top and bottom) have to be? Also what kind and length of screws are used?
November 20, 2015 at 10:44 am
Do you have any more specifics directions that include dimensions, piece sizes, etc? I don’t have the ability to cut my own materials, so will have to get everything cut at the home improvement store before coming home. Any additional information would be greatly appreciated. Thanks for sharing…
[…] Make this spinning display rack. via Sugar Bee Crafts […]
[…] Spinning Display Rack […]
[…] Peg Board Display Rack […]
Let Your Kid Rack
[…] rafty, sewing, and DIY – she feels that if she can do something, you can too, an […]
Add Some Shimmer To Your Look
[…] oo, and provides tutorials to help you along the way. She loves being a mom to 4 […]
[…] diy display rack – Source […]
[…] DIY Mission Particulars: sugarbeecrafts.com […]
Privacy Policy
Disclosure of Material Connection: I received one or more of the products or services mentioned in some of my posts for free in the hope that I would mention it on my blog. Regardless, I only recommend products or services I use personally and believe my readers will enjoy. I am disclosing this in accordance with the Federal Trade Commission’s 16 CFR, Part 255: “Guides Concerning the Use of Endorsements and Testimonials in Advertising.” View my Privacy Policy
Amazon Associates Disclosure
- Skip to primary navigation
- Skip to main content
- Skip to primary sidebar

DIY Jewelry Display Stand
Hey friends! How many of you DIY-addicts are selling crafts and jewelry at holiday events this year? I’ve got an easy and inexpensive DIY jewelry display stand idea for you today that you can make by assembling a few wood dowels together. Whether you want to show off your handmade pieces or easily browse your fashion collection at home, these jewelry booth stands come together for less than $5 each and in about 5 minutes. You can choose the length you need to show off bracelets, necklaces, hair accessories, and more. Paint them to match your style, or rock the natural look!

I shared this idea a few months back at the Consumer Crafts blog , and it’s that time of year for many of the makers to attend those holiday craft fairs, so it’s worth sharing here today with all of you!
Supplies needed to make your own DIY jewelry display stand:
Click through to purchase or learn more about the materials used from Consumer Crafts!
- 3.5 x 5.5 inch Rectangle Wood Plaque
- 7/8 inch Wood Dowel
- 1/4 inch Wood Dowel(s)
- 1/8 inch Cork Sheet (alternately, you can use adhesive-backed felt)
- Drill with 1/4 inch Bit (I used my Dremel with the compatible 1/4 inch bit )
- 2 inch or Longer Wood Screw
- Screw Driver

You will need to break out the power tools for this project (or have a kind soul drill a couple of holes for you). Begin by drilling a 1/4 inch hole close to the top of the large dowel. I placed mine about 1/2 inch from the top. Depending what you plan to display, drill additional holes down the large dowel. For bracelets, you can drill your next hole about 4.5 inches down the dowel, and you can add up to three tiers. If you’re displaying hair accessories or something else, just measure how much display space you’ll need, and leave at least 1/2 inch gap between one tier and the next.

Then, drill a pilot hole for your wood screw into the center of the bottom of the large dowel. Also drill a small hole through the rectangular plaque in the center.
Next, assembly is simple! Slide the small dowels through the holes you drilled, adding a few drops of wood glue to keep them secure. Then, screw the rectangular plaque to the bottom of the large dowel (again, adding a few drops of wood glue between the two pieces of wood).

You can stop here, but you will likely want to cover the exposed screw on the bottom of the stand. Gluing cork or felt to the bottom of the stand will ensure it doesn’t scratch your surfaces, or catch on tablecloths.
At this point, you can paint it, stain it, or leave it natural – whatever look best suits your style! It only takes a few minutes to create these sturdy yet budget-friendly stands. You can get back to accessorizing or making more inventory in no time!

Thanks for joining me for today’s quick DIY, and I’ll see you all again soon!

copyright policy and terms of use
Reader interactions.
09/10/2023 at 2:10 pm
Love this Idea. I been looking for a diy for my daughters braceletts. This one looks like something you bought in a store..Its nice and it looks easy to make. Im gonna start on mine later today. Thanks for sharing this GREAT IDEA!
07/05/2023 at 5:12 pm
Been looking for a DIY bracelet display. I priced them and decided I didn’t want to pay $25-$40 for one. Your display looks easy enough, will cost a lot less and will hold more bracelets! I might even make two! Thank you!
09/16/2022 at 12:08 pm
Thank you for this.
08/16/2018 at 3:22 am
08/16/2018 at 3:21 am
looking good
05/18/2018 at 2:45 pm
So it can be a great way to get the recycle bin that we want here.
[…] This inexpensive DIY jewelry display stand is the simplest and quickest way to manage your things in minutes. This basic structure is easy to put together and turns out so beautiful. Due to being made with wood, it will cost you nothing to make. You can easily customize the size you want. The supplies list includes rectangle wood plaque, wood dowels, wood glue, cork sheet, drill with bits, longer wood screws, screwdriver, and paint or stain. happyhourproject […]
[…] Via: happyhourprojects.com […]
Leave a Reply Cancel reply
Your email address will not be published. Required fields are marked *
Duct Tape and Denim
Thrift store makeovers~Upcycled Jewelry~Living a Repurposed Life~DIY Crafts
Frame Makeovers
How to Make a DIY Jewelry Display out of Cheap Thrift Store Frames
I’ve been waiting for this post for a long time! These frames have been collecting dust in my studio for a few months now waiting to be made into DIY jewelry display! In fact, I have a whole wall of frames in different stages of being made over.

DecoArt supplied me with the products for this project but the ideas and opinions are my own. This post also contains affiliate links. You won’t pay any more when you use these but I will earn a small commission on any purchases you make after clicking on them and I greatly appreciate it. Thanks for helping support my little blog!!!
Sign up for our thrift store makeover newsletter and get your own printable copies of “25 Things You Should ALWAYS Buy at Thrift Stores”, “Top Ten Thrift Store Tips”, + MORE bonuses, & all our upcycled projects sent straight to your inbox.
DIY Jewelry Display
Here we are, ready to paint! A few important things to notice… 1.) I’m painting on my dining table so it’s covered with my trusty old vinyl tablecloth that I only use for painting. You can see all my favorite colors there! My hubby says it looks like a sheep murder scene! (The sheep will show up on the blog soon.); and 2.) I paint with a cup of coffee. Although you may want to drink the coffee BEFORE you paint. I almost dipped my brush in the coffee at one point…lol…

Supply List for My DIY Jewelry Display Frames:
- Americana Decor Chalky Finish Paint in Primitive (gray) , Inheritance (gold) , Escape (blue) , and Carbon (black used for staining)
- DecoArt One Step Crackle
- Americana Acrylic Paint in Burnt Umber
- Americana Decor Light Satin Varnish
- paintbrush (I like the angle flat paint brush !)
- chicken wire
- metal sheet
- metal ribbon
- staple gun & staples
- needlenose pliers
- gloves (not necessary, but nice when you’re working with the metal)
I started by painting the backs. As you can see, I didn’t sand or even remove all the old paper off of them.

I also tried something new on these, the DecoArt One Step Crackle. I had heard how easy it was and couldn’t wait to try it out. So here are the steps:
- Paint: No sanding or other prep needed (unless you have a stain that needs to be covered). 1-2 coats depending on the color. I did one coat on the blue and grey and two coats on the gold. Let dry completely.
- One Step Crackle: Just brush it on and let dry. (NOTE: I was a little concerned when I didn’t see crackling but after I antiqued it they appeared.)
- Antique: I used Carbon (black) for the gray frame and Burnt Umber for the other two. I thinned the paint, brushed it on, let it settle into the cracks, then wiped it off with a rag, and let dry.
- Varnish: A thin coat applied after everything is dry.
It didn’t turn out like I thought it would. It turned out much better! The times before that I’ve used crackle mediums I got big, chunky cracks. Which are fine sometimes. But this turned out tiny, hairline crackles. Doesn’t the grey one, especially, look like it’s really old?

I also decided to finish each of these in a different way. You can see how they were attached below.

The chicken wire on the blue frame is how I’ve been finishing frames for years. One little trick to use with that is to wrap the ends of the wire around the staples. Both to keep it from slipping out and to keep it from scratching the wall (or your hand).
I’ve also used these metal sheets in a lot of the jewelry cabinet makeovers. They come in several patterns. Notice I angled the staples into the side instead of straight through the frame? This frame was very thin at that point and the staples would have gone all the way through.
The metal “ribbon” came from Hobby Lobby . It was leftover from all our DIY wedding crafts from last year. I just measured across, cut it with tin snips, marked equal distances on either side of the frame, and stapled them in. Now I have three styles of jewelry display frames!

Leave a comment and let me know which color jewelry display you like best!
‘Til the next project,
Ann @ Duct Tape and Denim
Pinterest | Instagram | Facebook | Twitter | Etsy | YouTube
Originally published on August 26, 2015. Sharing at these blog parties . Featured on the Clever Chicks Blog Hop, Anything Blue Friday #100 on the Dedicated House, Inspire Me Monday, Crafty Weekends

Angela says
September 28, 2015 at 5:19 am
These turned out great! I love the one with the metal plus sign design. All three paint jobs look awesome!
ducttapeanddenim says
September 28, 2015 at 6:06 am
Judith says
September 28, 2015 at 6:13 pm
Love this idea and can’t wait to make one for my earrings.
September 29, 2015 at 5:38 am
Thanks, Judith! I’d love to see it.
janet Trieschman says
September 29, 2015 at 7:44 pm
I love the textures you got on those frames!
September 29, 2015 at 9:46 pm
Thanks, Janet!
September 30, 2015 at 8:24 pm
This is such a neat idea! LOVE it! 🙂
Thanks for joining Cooking and Crafting with J & J!
Carole West @ Garden Up Green says
October 6, 2015 at 6:14 pm
Neat idea – I like this would also make a great handmade gift for a friend.
October 7, 2015 at 2:58 pm
Thanks, Carole!
Kathryn Griffin @TheDedicatedHouse says
October 9, 2015 at 7:53 pm
Such great makeovers! Thank you for sharing. You are one of the features at the Anything Blue Friday party at The Dedicated House. Here is the link to this week’s party. http://www.thededicatedhouse.com/2015/10/anything-blue-friday-week-100.html Hope to see you again at the little, blue soiree. Toodles, Kathryn @TheDedicatedHouse
October 10, 2015 at 7:44 pm
Thanks, Kathryn!
Deborah W. says
June 28, 2017 at 5:35 am
I love the blue color but love the earring strips and the mess backing the best. Such great ideas; can’t wait to try this!
Grammy Dee from Grammy's Grid says
July 2, 2017 at 5:31 pm
These look very nice, I really like them! So glad to “meet” another blogging grandmother 🙂 Thank you Ann for linking up at the #BloggingGrandmothersLinkParty. I shared this post.
Sue from Sizzling Towards 60 & Beyond says
July 2, 2017 at 5:57 pm
Oh these frames look great! Thanks for sharing your idea with us at #BloggingGrandmothersLinkParty.
July 2, 2017 at 6:16 pm
This is such a creative, attractive and practical idea. Thanks for sharing this at #BloggingGrandmothersLinkParty!
Fiona Cambouropoulos says
July 3, 2017 at 3:58 pm
What a clever and original idea. I love this #CreativeMondays
Jessica @ The Junk Nest says
July 5, 2017 at 10:32 am
I love these frames. So easy and yet so cute!
Charlene says
July 5, 2017 at 9:06 pm
I need to make one of these so bad. That way my jewelry stays in one place.
wendy robbins says
July 6, 2017 at 7:50 am
This is a cute idea… you’ve done a great job!
Clearissa Coward says
July 6, 2017 at 6:33 pm
Oh wow!! I love them. Happy to meet a fellow crafty blogging grandmother. Welcome. Thank you for linking up at the #BloggingGrandmothersLinkParty.
Lori Hill-Smith says
July 6, 2017 at 9:03 pm
What a fun and pretty idea! So creative! Thank you for sharing at #BloggingGrandmothersLinkParty.
July 7, 2017 at 6:21 pm
I’ve se n this before and always wanted to do it! I love your colors and th ribbon metal. Your jewelry display frames turned out so great!
Jenny@CookiesCoffeeandCrafts says
July 8, 2017 at 6:05 pm
I need to go to more thrift stores for frames. Great idea!
Carol ("Mimi") says
July 10, 2017 at 1:41 pm
Great tutorial for this project!! Thank you for linking up at #BloggingGrandmothersLinkParty. I’m sharing your link on social media. Carol (“Mimi”) from Home with Mimi
Teresa says
July 13, 2017 at 5:55 pm
I’m constantly amazed at all of the creativity I see. These are so pretty, it’s hard to choose, but I think I’m going to go with the gray! Thank you for linking up with us at the #BloggingGrandmothersLinkParty!
July 24, 2017 at 2:56 am
My jewelry is a disorganized mess! I need to do something like this – looks great!
Donna @ Modern on Monticello says
July 31, 2017 at 1:30 pm
I need at least one of these in my house so I can find my earrings. Great project. Thanks for sharing at #HomeMattersParty
Catherine says
October 14, 2018 at 6:58 am
I love your site, and your projects are exactly what I want to do for myself. Thank you!
Kathy A says
October 17, 2018 at 4:28 pm
I have to get over my fear of fighting with chicken wire and try a few of these! I know I will end up looking like I lost the cat fight even with gloves! Love the antiquey looking finish. Crackle is another thing I need to try-you do make it look easy!
Melinda Belville says
November 23, 2018 at 5:19 pm
Just a suggestion. Please use BLACK instead of grey for font color. Much easier to see and read for those of us with less than perfect vision. I wish ALL sights would take that into consideration. Thank you.
July 2, 2019 at 8:51 am
if I did, I’d do exactly what you have done. They are so fun and such a great pop of color against the white walls. And if you get bored, you can just rip it off and start over! Visiting from Redo It Yourself Inspiration party.
Laura M says
January 4, 2021 at 10:44 am
This is EXACTLY what I am looking for. Where did you get the metal sheets? Excited to get started I. This project-its been a long time coming!
January 27, 2021 at 2:03 pm
I bought them on Amazon: https://amzn.to/2Yho0Ds
Have fun with your project.
January 27, 2021 at 2:05 pm
I got it on Amazon: https://amzn.to/2Yho0Ds
Have fun with your project!
[…] Thrift Store Frames to Jewelry Displays […]
[…] ducttapeanddenim […]
[…] Frames to Jewelry Display DIY […]
[…] Thrift Store Frame Jewelry Organizers […]
[…] How to Make a DIY Jewelry Display out of Cheap Thrift … […]
[…] How to Make a DIY Jewelry Display out of Cheap Thrift Store Frames […]
Leave a Reply Cancel reply
Your email address will not be published. Required fields are marked *
Amazon Associates Disclosure
Ann Tatum is a participant in the Amazon Services LLC Associates Program, an affiliate advertising program designed to provide a means for sites to earn advertising fees by advertising and linking to Amazon.com.
5 Creative DIY Jewelry Display Stands for Craft Shows
How to make a pegboard display stand, how to create a tree branch jewelry stand, how to construct a copper pipe jewelry stand, how to craft a picture frame jewelry display, how to assemble a wire mesh jewelry stand.
Creating a unique and appealing display for your jewelry at craft shows can truly set your work apart. With some creativity—and a bit of elbow grease—you can design your own DIY jewelry display stands for craft shows. Not only will this save you money, it will also add a personal touch to your booth that customers will appreciate. In this blog, we will walk you through five different DIY jewelry display stands that you can easily make for your next craft show.
First on our list of DIY jewelry display stands for craft shows is the versatile pegboard display stand. This stand is not only easy to make but also customizable to fit your unique needs. So, let's get started!
Materials Needed
Here's what you'll need:
- Wood for the frame (two 2x4s would work great)
- Screws for assembling the frame
- Pegboard hooks
- Paint or stain (optional)
Steps to Follow
Now that you've gathered your materials, let's build your pegboard display stand:
- Build the frame: Start by cutting your 2x4s to the desired length and width of your stand.
- Attach the pegboard: Next, screw the pegboard onto the frame. Remember to make sure that the holes on the pegboard align with the frame.
- Add the hooks: Once your frame is sturdy, it's time to add the pegboard hooks. These will hold your jewelry.
- Decorate your stand: If you like, you can now paint or stain your stand to match your booth's theme or color scheme.
And there you have it—a functional and customizable pegboard display stand for your craft show jewelry!
While creating your pegboard stand, remember:
- Stability is key: Make sure your stand is stable. You don't want it toppling over during a busy craft show.
- Customize: Use different sizes and shapes of hooks for different types of jewelry. This will add a visual appeal to your stand.
With your new pegboard display stand, you'll be ready to show off your beautiful jewelry at your next craft show. But don't stop there—keep reading for more DIY jewelry display stands for craft shows ideas!
For those who love a touch of nature in their display, creating a tree branch jewelry stand could be the perfect DIY project. Not only is this stand visually appealing, but it's also incredibly eco-friendly. Ready to go green? Let's dive in!
To create this unique piece, you'll need:
- A sturdy tree branch
- A wooden base
- Screws or strong glue
- Clear varnish (optional)
Now that you're armed with your materials, let's create your tree branch jewelry stand:
- Prepare the branch: First, clean your tree branch thoroughly and let it dry.
- Secure the branch to the base: Attach the branch to the wooden base using screws or strong glue.
- Varnish your stand: If you'd like, apply a clear varnish to the branch and base to enhance the natural beauty of the wood.
Voila! You've just created a stunningly natural tree branch jewelry stand for your craft show.
Keep these tips in mind as you create your branch stand:
- Choose the right branch: Make sure the branch you choose is sturdy and has plenty of spots to hang jewelry.
- Stability: Ensure your stand is stable by choosing a heavy base or adding weight to it.
Creating a tree branch jewelry stand is a fantastic way to bring a hint of nature to your craft show booth. Next up, let's take a look at how to construct a copper pipe jewelry stand!
Looking for a sleek, modern way to showcase your jewelry at craft shows? A copper pipe jewelry stand might just be the answer! This DIY project is surprisingly easy to pull off, and it adds a touch of industrial chic to any display. Let's see how you can create one!
You'll need the following materials:
- Lengths of copper pipe
- Copper pipe fittings (elbows and tees)
- Pipe cutter
With your materials ready, let's get started:
- Cut the pipes: You'll need to cut the copper pipes into several lengths to form the structure of your stand.
- Assemble the stand: Using the copper fittings, start to assemble your stand. A simple design could be a T-shape or a multi-tiered design if you're feeling more adventurous.
- Secure the fittings: Once you're happy with the shape, secure the fittings with adhesive.
And there you have it, a stylish copper pipe jewelry stand, ready for the craft shows!
Keep these tips in mind as you construct your stand:
- Planning is key: Plan your design ahead of time, ensuring it will hold all the jewelry pieces you need.
- Patience: Allow ample time for the adhesive to dry before adding jewelry to the stand.
Building a copper pipe jewelry stand is a creative and trendy way to display your pieces at craft shows. But we're not done yet! Next, let's explore the process of crafting a picture frame jewelry display!
Ready to display your jewelry in a unique and artistic way? Transforming a picture frame into a jewelry display stand is a fantastic DIY project. It's a great way to showcase your pieces at craft shows in a creative and visually appealing manner. Let's get started!
Materials You'll Need
Here's what you'll need to gather:
- An old picture frame (the more ornate, the better!)
- Mesh or wire grid
- Small S-hooks
- Paint (optional)
Step-by-Step Guide
Got your materials ready? Here's what you'll do:
- Prep the frame: Remove any glass or backing from the frame. If you'd like, you can paint the frame to match your craft show booth's color scheme.
- Attach the mesh: Cut the mesh or wire grid to fit the frame. Attach it with a staple gun.
- Add hooks: Attach S-hooks to the mesh. This is where you'll hang your jewelry.
Voila! You've created a unique and artistic picture frame jewelry display stand for your craft show.
Here are a couple of extra tips to make your stand really stand out:
- Personalize: Don't be afraid to add a personal touch to your frame. This could be anything from a fun paint color to your logo or business name.
- Organize: Arrange your jewelry in a way that makes it easy for customers to browse. For example, you could group items by type, color, or price point.
Creating a picture frame jewelry display for craft shows is a fun way to add a touch of personality to your booth. It's a great conversation starter too! Next, we'll learn how to assemble a wire mesh jewelry stand. Are you ready?
Next on our list of DIY jewelry display stands for craft shows is the wire mesh jewelry stand. This stand is minimalist yet effective, providing ample space to display your handcrafted pieces. Let's get to it!
Before we begin, gather the following materials:
- Wire mesh panel
- Four wooden dowels or metal rods
- Cable ties or wire
With your materials at the ready, follow these steps:
- Construct the frame: Attach the four dowels or rods to the corners of the wire mesh panel using cable ties or wire. This will form a sturdy and self-standing frame.
- Secure the structure: Make sure to secure the ties or wires tightly to ensure the frame is stable and can support your jewelry.
- Hang your jewelry: Attach S-hooks to the mesh, and hang your jewelry pieces on them.
And there you have it! Your DIY wire mesh jewelry stand is ready to steal the show at your next craft fair.
Here are a few tips to make your wire mesh jewelry stand even better:
- Height Matters: Consider varying the height of your stands to create a visually engaging display.
- Be Creative: Use colored cable ties to match the theme of your booth or to add a pop of color to your display.
Wire mesh jewelry stands are a simple yet effective way to showcase your creations at craft shows. They're also quite easy to assemble, aren't they? Up next, we'll dive into constructing a copper pipe jewelry stand. Are you excited?
If you enjoyed our blog post on creative DIY jewelry display stands, you might also be interested in exploring other affordable DIY projects. Check out Rachael Mangal's workshop on ' Affordable DIY Abstract Nail Art Tutorial .' This workshop will teach you how to create beautiful and unique nail art designs without breaking the bank. And who knows, you might even get inspired to create some new jewelry designs based on your nail art!

Live classes every day
Learn from industry-leading creators
Get useful feedback from experts and peers
Best deal of the year
* billed annually after the trial ends.
*Billed monthly after the trial ends.
- EXPLORE Random Article
How to Display Jewelry
Last Updated: August 11, 2022 References
This article was co-authored by Jerry Ehrenwald . Jerry Ehrenwald, GG, ASA, is a graduate gemologist in New York City. He is the previous President of the International Gemological Institute and the inventor of U.S.-patented Laserscribe℠, a means of laser inscribing onto a diamond a unique indicia, such as a DIN (Diamond Identification Number). He is a senior member of the American Society of Appraisers (ASA) and is a member of the Twenty-Four Karat Club of the City of New York, a social club limited to 200 of the most accomplished individuals in the jewelry business. There are 8 references cited in this article, which can be found at the bottom of the page. This article has been viewed 38,587 times.
You may be wanting to display jewelry for your store, for a stand at a flea or craft market, or for your own personal collection in your home. Your jewelry should be displayed in an appealing and attractive way whether it is decoration or you are trying to sell it. You can opt for an elegant and traditional jewelry display or you can be creative with household items to create a display unlike any other.
Selecting Items to Display

- You may also want to separate vintage pieces from recently acquired pieces.

- You can purchase different colored covers for your displays. This allows you to easily change the display color with the season or for the piece of jewelry. [4] X Research source
Balancing the Display

- Diamonds, crystals, and other clear gemstones look best presented on a plain, dark background.

Making Household Objects into Displays

- If you want, you can paint the picture frame first.
- Glue wallpaper over the cork or leave it exposed.

- Put trays on small stands to add elevation to your display. [13] X Research source

Expert Q&A
You Might Also Like

- ↑ https://www.youtube.com/watch?time_continue=315&v=wnKMX7LfTj4
- ↑ ttp://smallbusiness.chron.com/advice-showing-jewelry-display-case-42000.html
- ↑ http://www.jewelrydisplay.com
- ↑ http://www.brit.co/jewelry-organizers/
- ↑ http://www.shelterness.com/50-cool-jewelry-storage-ideas/
- ↑ http://www.huffingtonpost.com/2014/09/08/jewelry-display-ideas_n_5786536.html
- ↑ Jerry Ehrenwald. Former President, International Gemological Institute & Graduate Gemologist. Expert Interview. 12 August 2019.
About this article

Reader Success Stories
Jan 31, 2017
Did this article help you?

Angie Hutsenpiller
Feb 27, 2017

- About wikiHow
- Terms of Use
- Privacy Policy
- Do Not Sell or Share My Info
- Not Selling Info
The Bead Club Lounge
Bead weaving made easy!
7 Amazing Displays For Jewelry Craft Shows
Please share this!

Need a list of displays for jewelry craft shows so you can make your fair booth stand out? Here are some popular options.

Jewelry craft shows are a great venue to sell your handmade pieces because people go there looking for unique items.
But, the fact that it’s a jewelry show means there’s a lot of competition. You need to make your booth stand out if you want to have an impact and draw customers your way.
One way to do that is by putting together an amazing jewelry display. There are so many jewelry display ideas for craft shows that you can use.
If you’re wondering how best to display jewelry in your booth, I discuss a few of the most popular options below.
7 Displays For Jewelry Craft Shows
This post contains affiliate links. If you click and make a purchase, there’s absolutely no extra cost to you. Read my full Disclosure Policy here.
1. Necklace Display Ideas
Necklaces can be the best types of jewelry to grab potential customers’ attention. They’re the most substantial pieces you can make when compared to earrings and bracelets. Use this to your advantage and show them off.
When selling handmade jewelry , I highly recommend having a statement necklace in the center of your table. This should be your most striking piece.
If you decide to use this tactic, consider placing it on a necklace bust . These look more elegant than the regular cardboard displays.
For the rest of your necklaces, easel necklace display stands are great options. They’re lightweight and fold flat which means you can easily carry a lot of them.
2. Bracelet Displays
When displaying jewelry at craft shows, adding various heights to your table(s) helps to create an interesting look. It prevents your jewelry from getting lost in a sea of other pieces on one plane.
Bracelet display stands e.g. single T-bar stands or a tiered bracelet display can elevate your jewelry and make it easier for customers to see what you have on offer.
Another bonus of using these kinds of jewelry displays is that they help to secure your jewelry. Protecting your jewelry from theft is crucial so you don’t lose money to sticky fingers.
If you hook the clasps and place several bracelets on a bar, a thief may only grab the ones along the ends, unless they’re bold enough or you’re not paying attention and they have time to slide all the jewelry off and run.
Half moon bracelet displays don’t offer this same element of protection as the jewelry is usually just laid across the top.

3. Earring Display Stands
There are so many kinds of earring stands and displays ranging from a simple T-shape style to display racks that hold several pairs simultaneously.
The style you choose depends on how many earrings you have to sell and, of course, personal preference.
If you like using earring cards as part of your jewelry packing, you can select earring card display stands made specifically for this purpose.
4. Ring Display Ideas
If you love making and selling rings, there’s no shortage of display options. You can purchase tapered stands or organizers with slots so you can arrange multiple rings.
5. Shelving Units
One simple way to maximize the space in your booth is to use shelving units. Doing this utilizes the vertical space so you can store more jewelry.

6. Tray Organizers
If you have lots of smaller jewelry pieces like earrings, rings and pendants, you can sort them into tray organizers . Don’t just use these in your closet at home.
Tray organizers are stackable making them a great space-saver in a small booth. The downside to this is customers won’t be able to see what’s in the tray underneath.
However, if you have several of the same item just in different colors or sizes, this could be a good option. Just make sure one of each item is in the tray on top.
Select tray organizers with transparent lids as these offer more security for your smaller items while still allowing customers to view the contents.
7. Glass Display Cabinet
You may consider using a free standing glass case to display your jewelry. This is a good option for several reasons:
- Better security – If your jewelry is behind a glass case, thieves won’t have easy access to your stuff.
- Elegant look – High end jewelry stores display items in glass cases so people are accustomed to this and it could elevate the look of your booth.
- Customers can see everything – A glass case with glass shelves allows customers to see exactly what you have.
Of course, there are some cons to using a glass display case as well:
- Customers may think your jewelry is expensive because your booth looks high end
- These types of display cases are not cheap.
- These are not a portable option and you’ll need help setting them up.
If you’re planning to sell jewelry or are already doing so, these displays for jewelry craft shows should give you some good ideas for how to attract more customers and protect your merchandise.
Here are some tips for successful jewelry displays .
Related Posts
6th January 2022 at 1:30 am
[email protected] Thank you for all the material, It was very much appreciated, Thanks You
6th January 2022 at 10:00 am
You’re welcome!
Leave a Reply Cancel reply
Your email address will not be published. Required fields are marked *
Notify me of follow-up comments by email.
Notify me of new posts by email.
This site uses Akismet to reduce spam. Learn how your comment data is processed .
7 Best Home Decor Finds at Trader Joe’s
1. olive wood cutting boards: unique, versatile decor; doubles as serving platters or jewelry display., 2. waffle weave kitchen towels: rustic-cute, durable towels for a charming kitchen., 3. petite bouquet: affordable day-brightener, customizable with mix-and-match blooms., 4. red tart cherry juice: cute glass bottles make perfect vases for petite bouquets., 5. dripless candles : budget-friendly, stylish taper candles for cozy ambiance., 6. crackling scented candles: affordable, cozy ambiance with soothing crackling sound., 7. blank greeting cards: versatile decor, frame-worthy designs for any occasion., discover more stories.
Popular Searches
SUBARU STARLINK In-Vehicle Technology
Eyesight Driver Assist Technology
Parts and Accessories
Helpful Links
Customer Service
Vehicle Recalls
All Vehicles
Special Offers
Local Inventory
Our Company
Meet the Subaru Family
Love begins with trust..
2025 Forester
Equipped with standard Symmetrical AWD
Choose From 5 Forester Trims
The 2024 Forester Wilderness
Featuring extensive off-road upgrades and tough, practical style, the Forester Wilderness is built to explore rugged terrain. The 2024 model year is the most current edition of this trail-ready trim, and it's waiting to take you to amazing new places.
Reasons to Love Forester
Advanced Subaru Safety
EyeSight is a driver-assist system that may not operate optimally under all driving conditions. The driver is always responsible for safe and attentive driving. System effectiveness depends on many factors, such as vehicle maintenance, weather, and road conditions. See Owner’s Manual for complete details on system operation and limitations.
Automatic Emergency Steering is a system designed to assist the driver. It is not a substitute for safe and attentive driving. Automatic Emergency Steering works in conjunction with and after Pre-Collision Braking has been activated by providing steering support at speeds lower than 50 mph to try and help avoid a collision. See Owner’s Manual for complete details, including important system limitations. Availability varies by trim level.
Versatile Capability
Based on competitor information from manufacturer websites as of January, 2024.
A Trusted Investment
MOTORTREND Buyer's Guide Ultimate Car Rankings Fall-Winter 2024 © 2024 MOTOR TREND GROUP, LLC.
Long-Lasting Quality
Based on Experian Automotive vehicles in operation vs. total new registrations for MY2014-2023 as of December 2023.
Explore Subaru
Our vehicles will inspire drivers like you to become a Subaru owner for life. Find out what makes us more than a car company.
Connect with Us
About Subaru
Other Subaru Sites
© Subaru of America, Inc. Use of this site signifies your acceptance of the Terms & Conditions .
- Privacy Policies
- California Privacy
- Cookie and Ad Preferences
* MSRP does not include destination and delivery charges, tax, title, and registration fees. Destination and delivery includes handling and inland freight fees and may vary in some states. Prices, specifications, options, features, and models subject to change without notice. Select colors may be subject to an additional charge. See your retailer for more information.
** EPA-estimated fuel economy. Actual mileage may vary. For Crosstrek Hybrid and Solterra, EPA-estimated MPG equivalent on a full battery charge. Actual mileage will vary.
*** Limited warranties are contingent on age and mileage. Whatever comes first concludes the warranty.
† Connected Services depend on factors outside Toyota's control, including an operative telematics device, a cellular connection, GPS signal and the availability of a compatible wireless network, without which system functionality and availability may be limited or precluded, including access to response center and emergency support. Service may vary by vehicle and region. Apps and services subject to change at any time without notice. Requires app download/registration and subscription after trial (if applicable). Terms of Use apply. Data usage and charges may apply. To learn about Toyota’s connected services data collection, use, sharing and retention practices, please visit toyota.com/privacyvts
‡ Offer available on Premium trim (code RED-11).
Safety Connect: Stolen vehicle police report required to use Stolen Vehicle Locator. Automatic Collision Notification activates only in limited circumstances.
Remote Connect: Use only if aware of circumstances surrounding vehicle and it is legal and safe to do so (e.g., do not remotely start engine if vehicle is in an enclosed space or vehicle is occupied by a child). Remote start/stop not available on manual transmission-equipped vehicles.
Drive Connect: Services not available in every city or roadway.
Service Connect: Information provided is based on the last time data was collected from the vehicle and is not real time data. Service Connect is not renewable as a stand-alone service and requires a subscription to any of Safety Connect, Remote Connect or Drive Connect upon trial expiration.
Wi-Fi Connect: Eligible vehicle and wireless service required. Wi-Fi Connect coverage and service not available everywhere. Valid in the contiguous U.S. and Alaska. Do not drive distracted. Go to att.com/solterra for terms and conditions. Up to 5 devices can be supported using in-vehicle connectivity. The Wi-Fi Connect trial begins at the time of enrollment activation and expires when 30 days or the earlier of 3GB of data is used or the 1-month period ends. Subscription required after trial. Integrated Streaming requires subscription for third-party provider services.
Subaru has the utmost respect for the environment and is a proud partner of Leave No Trace. Care was taken not to harm the environment when taking this photo.
The materials displayed on this website, including but not limited to all text, audio, video, images, photographs, illustrations, artwork, animation files and other graphics, names, logos, trademarks, and service marks, are property of Subaru or its parent or affiliated companies or its licensors and are protected by copyright, trademark, and other intellectual property laws. This site may be displayed, downloaded, and/or printed solely for your personal, non-commercial home use, provided that you do not delete or modify any copyright, trademark, or other proprietary notices. Any other use of the material on this site without the prior written consent of Subaru is strictly prohibited.
iPod and iPad are registered trademarks of Apple Inc.; Brembo is a registered trademark of Freni Brembo S.p.A.; Alcantara is a registered trademark of Alcantara S.p.A and Alcantara is produced by Toray Group.; Ultrasuede® is a registered trademark of Toray Industries, Inc.; TORSEN LSD® is a registered trademark of JTEKT TORSEN North America, Inc BBS is a registered trademark of BBS Kraftfahrzeugtechnik AG.; Bluetooth is a registered trademark of Bluetooth SIG, Inc.; HomeLink® and the HomeLink® house icon are registered trademarks of Gentex Corporation.; Tom Tom is a registered trademark of TomTom International BV; Aha and Harman Kardon are a registered trademarks of Harman International Industries, Inc.; Android is a trademark of Google Inc.; HD Radio is a registered trademark of iBiquity Digital Corporation.; SiriusXM and SiriusXM NavTraffic are registered trademarks of SiriusXM Satellite Radio, Inc.; iHeart is a registered trademark of Clear Channel.
PLEASE REVIEW THESE IMPORTANT DISCLOSURES.
Subaru of America, Inc. reserves the right to make changes at any time without notice or obligation to the information contained on this Internet site, prices, incentive programs, specifications, equipment, colors, materials, product illustrations and to change or discontinue models. All prices are based upon Manufacturer's Suggested Retail Prices ('MSRP') in U.S. dollars (unless otherwise indicated) and exclude taxes, title fees, licensing, options and destination charges unless specifically included. Retailers are independent businesses and are free to set their own retail prices. All information contained at this Internet site is intended for the USA market only.
Some vehicles shown with accessory or aftermarket equipment.
** EPA-estimated fuel economy. Actual mileage may vary. For Crosstrek Hybrid and Solterra, EPA-estimated MPG equivalent on a full battery charge. Actual mileage will vary.
- Newsletters
- Account Activating this button will toggle the display of additional content Account Sign out
It’s True: Democrats Who Covered Up Campaign Payments to a Pornographic Actress Should Also Go to Jail
The right is making a fair point..
One of the right’s most common rhetorical responses to the prosecutions of Donald Trump has been to say something like if they can do it to him, they’ll do it to you ! (Trump just said it himself at a Friday morning Trump Tower press conference at which he also brought up, for some reason, an accusation that “Congo” is releasing prisoners into the United States. ) The idea is to remind conservative voters about the threat of Liberal Big Government Tyranny, and it’s probably an effective way to activate the Republican base even if, as this tweet points out, it doesn’t quite make sense:
A related idea that has exploded into increased circulation since Thursday’s jury verdict is that Republicans should take revenge for Trump’s conviction by putting Democrats in jail too. Heavily bearded right-wing media star Matt Walsh was one of the first to call for this kind of retaliation, demanding a Biblical 10-to-1 imprisonment ratio of high-ranking Dems, although his brain seems to have been too clouded by red mist to actually name any high-ranking Democrats besides the president. (Hunter Biden is not active in Democratic politics.)
Kamala Harris! Kamala Harris is the vice president, Matt! Nancy Pelosi, Alexandria Ocasio-Cortez … I could probably think of at least two or three others.
Bush administration lawyer John Yoo is calling for retaliatory prosecutions too, although, as Jonathan Chait points out, Yoo’s argument manages to get the golden rule wrong , which is a bit embarrassing for someone whose job is supposed to be knowing what laws say. So is Sean Davis , the head of the right-wing Federalist website, and that’s ironic, because a top-down system of prosecution-demanding is not federalism. Every state’s voters should be able to make their own decisions about putting One to 10 Democrats to Be Named Later in the pen.
But let’s take these calls with the seriousness they deserve for a minute—i.e., a Friday-afternoon blog post level of seriousness. While it doesn’t seem like it would be fair to put Democrats in jail for literally nothing, perhaps a compromise could be reached of putting any Democrat who’s done what Trump did in jail. (Note that Trump will not be sentenced until July, might not be sentenced to any imprisonment at all, and could delay house arrest or going to jail by appealing his conviction.)
Namely, Democrats should face retaliatory imprisonment if they made nondisclosure payments to a pornographic actress to prevent her from sharing an allegation of an extramarital affair at a time when such allegations could have been politically damaging, then created fictitious transaction records to hide evidence of the payment.
It seems like a fair trade. If they could do it to him, they should be able to do it to you—that’s what justice being blind really means.
IMAGES
VIDEO
COMMENTS
Display your jewelry and fashion accessories with these DIY accessory stands. @HandmadeHappyHour with Cathie and Steve are recycling cardboard and paper into...
Head over to Visibly Moved to learn more. 5. Jewelry Tree. This DIY jewelry tree brings a touch of nature to your room. Check out this post for the DIY. 6. DIY Industrial Pipe Jewelry Organizer. For this DIY jewelry organizer project , you can also use PVC pipes and the best part it uses vertical space. 7.
Here are 25 homemade DIY jewelry display ideas that will inspire you to showcase your beautiful creations with style and flair. You can use various materials, such as wood, dishes, pots, boxes, and even chicken wire, to craft your own unique jewelry display. Some of the DIY jewelry display ideas are perfect for earrings, such as the shabby chic ...
Here's how I created my own do-it-yourself jewelry displays - including lots of photos! Necklace display cards. Most of my "inspiration" was born from the fact that I live in a smallish apartment with ZERO storage space and have a smallish car. Huge, wieldy displays were not an option. I also like things to be multi-purpose.
Learn how to make a wooden DIY jewelry display stand and organizer with this quick step-by-step tutorial. It is very easy to customize it for your needs. Thi...
A surgical glove. Empty plastic water bottle of about 3 inches in diameter. Plaster of Paris. Screw, Jar lid. Glue. Piece of cork slightly bigger than the lid. High gloss white spray paint. Handmade Jewelry Display.
3. Cement cones for Jewelry Display. You will need a little male help to make cement cones of different sizes. Then, paint them in different colors and use them for depositing rings and bracelets. Except it is practical, it can look charming on your nightstand. 4. Curb chain for Jewelry Display.
Very easy to make this necklace stand from cardboard. Make your own Necklace/Jewelry Display Stand, to display your creations! Reuse/Recycle cardboard, Best ...
DIY Ombre Wooden Pegs. Drill a dowel into segments, paint each a shade of the same hue, then glue to a black backboard for an elegant jewelry hanger with a pop of color. DIY tutorial via well its okay.
Make the Jewelry Display. Make the base by running the board through the table saw to create two grooves for the display cards. Build the bracelet holder by joining the 5/16" and 3/4" dowel. Make shallow holes in the base and attach the bracelet holder and ring holders using wood glue. Make earring and necklace display.
Lay your backing on top of the fabric and cut around it, leaving about a 1/2″ to 1″ extra to cover and fold over the frame backing. For added support, wrap and glue your fabric to your backing. We recommend gluing the extra 1/2″ fold-over fabric so the glue is only placed on the backside! 4. (Avengers) Assemble!
Cut the pegboard into 4 pieces that are equal and fit the four sides of the square board. Then use wood glue and screws to attach the boards to the bottom board. Wood bar clamps help hold it together. Trevor attached 2 sides then put up the skeleton of a 1×2 in the corners to add more stability, then attached the other 2 sides to the base and ...
I glued a fancy trim across the top but you really don't need to if you follow the instructions in the video you will end up with a clean edge. I used recycled cardboard for this DIY jewelry display. Old shipping boxes are perfect. You will need a 12″ x 12″ piece for each jewelry neck form. Watch and Learn!
This modern easy DIY wood jewelry organizer can be made for just $20! It features a modern natural wood look with necklace, bracelet, and ring storage. The best part is the mirror! The mirror is great for putting on earrings and checking that your necklace is sitting just right. Make your own! 16.
Supplies needed to make your own DIY jewelry display stand: Click through to purchase or learn more about the materials used from Consumer Crafts! 3.5 x 5.5 inch Rectangle Wood Plaque. 7/8 inch Wood Dowel. 1/4 inch Wood Dowel (s) Wood Glue. 1/8 inch Cork Sheet (alternately, you can use adhesive-backed felt)
Paint: No sanding or other prep needed (unless you have a stain that needs to be covered). 1-2 coats depending on the color. I did one coat on the blue and grey and two coats on the gold. Let dry completely. One Step Crackle: Just brush it on and let dry.
Now that you've gathered your materials, let's build your pegboard display stand: Build the frame: Start by cutting your 2x4s to the desired length and width of your stand. Attach the pegboard: Next, screw the pegboard onto the frame. Remember to make sure that the holes on the pegboard align with the frame.
1. Choose the appropriate jewelry for each display. Don't hang a small necklace on a large bust or small earrings on a tall earring stand because it draws attention away from the jewelry. Match the sizes of the display pieces with the sizes of the jewelry pieces. [5] 2. Choose a simple background for your jewelry.
2. Bracelet Displays. When displaying jewelry at craft shows, adding various heights to your table (s) helps to create an interesting look. It prevents your jewelry from getting lost in a sea of other pieces on one plane. Bracelet display stands e.g. single T-bar stands or a tiered bracelet display can elevate your jewelry and make it easier ...
Work quickly and hold each section of trim to the pegboard for 30 seconds to ensure your project's longevity. When lining up your corners, fill in any gaps between the wall trim sections with a little extra hot glue. Once everything has dried, simply sand the corners smooth and touch up with a bit more acrylic paint. Megan Graney.
We recommend using a 1/16th-gauge hole punch to make your own custom earring cards and enamel pin cards. A sharp pushpin will also work but don't use the jewelry to poke the holes as it might damage your product. Place your earrings or pins on your finished display card and lightly mark with a pencil where to punch your holes.
Tips for Investing in Gold. 1. Stick to standardized investments. You can buy gold coins, jewelry and other collectibles in many ways. But as a pure investment, it is best to stick to standardized ...
Step #3: Use a Style Guide. As you begin to develop ideas on how you'd like to design your ebook, you should have a style guide or brand kit on hand. Using a style guide applies to you whether you're creating ebooks for yourself or for a client.
Olive Wood Cutting Boards: Unique, versatile decor; doubles as serving platters or jewelry display. 2. Waffle Weave Kitchen Towels: Rustic-cute, durable towels for a charming kitchen. 3. Petite Bouquet: Affordable day-brightener, customizable with mix-and-match blooms. 4. Red Tart Cherry Juice: Cute glass bottles make perfect vases for petite ...
Guidecentral is a fun and visual way to discover DIY ideas, learn new skills, meet amazing people who share your passions and even upload your own DIY guides...
You wanted more quizzes, and we've delivered! Now you can test your wits every day of the week. Each weekday, your host, Ray Hamel, concocts a challenging set of unique questions on a specific ...
Reasons to Love Forester. Advanced Subaru Safety. The 2025 Forester AWD compact SUV is safer than ever thanks to newly upgraded standard EyeSight ® Driver Assist Technology with available Automatic Emergency Steering.Get extra awareness about your surroundings when parking with the newly available 360-degree Surround View Monitor.
The right is making a fair point. By Ben Mathis-Lilley. May 31, 2024 2:56 PM. Donald Trump at a press conference on Friday morning. Reuters. Tweet Share Share Comment
Making AI easier with AI & Networking. Cisco Nexus HyperFabric AI clusters: This breakthrough AI cluster solution with NVIDIA features a single place to design, deploy, monitor and assure AI pods and data center workloads. It guides users from design, to validated deployment, to monitoring and assurance for enterprise-ready AI infrastructure.
The New York Stock Exchange said Monday that a technical issue that halted trading for some major stocks and caused Berkshire Hathaway to be down 99.97% has been resolved. In an update, NYSE said ...