DNS Server Not Responding – How to Fix the Error in Windows 10

I think it's safe to say that the vast majority of professionals depend on the internet these days.
So being denied access to the internet when you are trying to mine nuggets of valuable information from your go-to web sites can be quite an ordeal. Especially when you are under pressure to complete a piece of urgently required work.
One particularly unwelcome cause of being denied access to the internet is the “DNS Server Not Responding” error. It’s like that old fable where a troll sits under a bridge and says “You shall not pass!”, or something about gobbling up those that wish to cross the bridge.
I’m happy to tell you that you should be able to defeat the troll and cross the bridge to internet access joy by following the simple trouble shooting steps discussed in this article.

What is the "DNS Server Not Responding" Error?
The “DNS Server Not Responding” error is a fairly common issue and is generally easy to fix. There are many reasons why this issue may occur. But fundamentally it is caused because the DNS server that is contacted during the processes of loading a web page is unable to find the site that contains the web page that you have requested.
This article explores what may have triggered this issue to occur and how you may go about fixing the issue.
Firstly, I think it is a good idea to gain at least a basic understanding of the “DNS Server Not Responding” error. To do this, let’s first understand DNS.
DNS stands for Domain Name System. A simple explanation of DNS is that it is a decentralised storage of human readable internet addresses, like the ones with which you will almost certainly be familiar (for example www.amazon.com or www.netlix.com).
The DNS maps these human readable URLs to their appropriate IP (Internet Protocol) addresses.
IP addresses are much less human readable, but are essential for the inner workings of the internet. IP addresses uniquely identify computers on the internet. The IP address associated with the URL, www.netflix.com, might for example, look like this, 69.53.224.255.
It is clearly easier for you to remember “ www.netflix.com ", rather than a string of numbers delimited by full stops, when you wish to access your favourite content on Netflix. So the DNS facilitates this for you, so that you don’t have to remember or manually lookup unfriendly strings of numeric data every time you wish to access a web site.
The common analogy to explain DSN is a telephone directory. Basically, as you would look up a telephone number using the name of the person you wish to call in a telephone directory, a similar look up is performed when you type in the URL (like www.amazon.com) of the web site you wish to view within your browser.
Thankfully you don’t have to manually look up the corresponding IP address for www.amazon.com, as this is performed behind the scenes for you automatically.
So the appropriate IP address is retrieved automatically every time you type in a URL into your browser. This IP address is then used to contact the appropriate server that hosts the relevant web site associated with the URL you have entered into your browser.
When the “DNS Server Not Responding” error occurs, this means that the decentralised naming systems responsible for automatically looking up the appropriate IP address based on the relevant hostname that you entered into you browser fails to respond.
There are many reasons why this error occurs, but fortunately there are also many solutions available to you to fix the issue.
An easy solution may be to simply change the web browser you are using or even simpler still, simply restart your computer. Yup, simply turning it off and then turning it on again could fix the issue.
However, if you are not so lucky and the problem still persists, don’t despair – there are many steps that you can take to find out the cause of the issue and subsequently fix it.
In this article you will learn a number of possible solutions to the “DNS Server Not Responding” error.
How to Fix "DNS Serger Not Responding"
Below, I've listed out the ways that you can try using to fix the “DNS Server Not Responding” error. The subsequent sections of this article provide details on each of these methods:
Use a Different Web Browser
- Try Accessing a Web Site with a Different Device
- Restart your Router
Investigate Possible Network Issues
- Manually Set your DNS Server
Clear the DNS Cache
Disable internet protocol version 6.
- Temporarily Deactivate your Firewall and Disable your Antivirus Software
- Reset your DNS Settings
Update the Network Adapter Driver
- Disable all Network Connections Except the Connection you are Using to Access the Internet
Restart your Computer in Safe Mode
A potential solution to the “DNS Server not Responding” issue that's really simple is to try accessing the relevant website using a different browser.
If, for example, you are using Microsoft Edge or Mozilla Firefox as your browser at the time that the issue occurs, try using a different browser like Google Chrome to access the relevant website.
If using a different browser solves the problem, then make the browser that works your default browser. But if the issue still persists, then we at least know that the browser you have been using is not the source of the issue and our investigation into finding a solution to the DNS Server not Responding” issue must continue…
Try Accessing a Website With a Different Device
Try to use a different device connected to your home network to access the website you were trying to access when you received the error.
For example, use Wi-Fi from your mobile phone to access the relevant web site. If the issue persists, you know that the issue isn’t just with your primary device and the problem may have something to do with your router.
Restart Your Router
The “DNS Server not Responding” issue may occur simply due to data traffic. It may be that simply restarting your router can fix this issue.
You can restart your router by pressing the power button on your router. You can then unplug your router's power cable. Wait for about 30 seconds then plug your router into the power outlet again and press the power button to restart it.
Running network diagnostics may point to network issues as the root cause of the issue.
Running Network Diagnostic is very simple on a Windows 10 OS. You can do this by following these steps:
- Open Control Panel. One way to do this is press the Windows Key + R to activate the “Run” box, then type “control” in the text box presented in the “Run” box and hit the enter key.

- Select the Network and Internet option presented within the Control Panel window.
- Click the Network and Sharing Center option from within the “Network and Internet” window.
- Click the Troubleshoot problems option presented under the "Change your network settings” heading within the “Network and Sharing Center” window.
- Click Additional troubleshooters -> Internet Connections -> Run the troubleshooter

The next step is to wait for the troubleshooter task to finish. If you are presented with any error messages, simply follow the steps on how to fix the relevant network issue.
Manually Set Your DNS Server
The source of your issue may be that your DNS server is down. In this case you’ll be pleased to know that you are able to manually change your DNS server.
You can change your DNS server to, for example, Googles Public DNS or CloudFlare’s public DNS. To change your DNS server, follow these steps:
- Invoke your Control Panel. One way to invoke your Control Panel is to activate your Start Menu and search for the Control Panel.
- In the Control Panel window click the Network and Internet option.
- In the Network and Internet window, click the Network and Sharing Center option.
- On the Network and Sharing Center window click on your active connection. For example, click the “ethernet” option if this is the connection currently being used or click the “Wi-Fi” option if it is clear that this is your active connection.
- In the dialog box that is presented to you, click the “Properties” button.
- In the dialog presented to you, you’ll see a list is presented under the “The connection uses the following items” heading.
- In this list, select the list item labelled “Internet protocol version 4 (TCP/IPv4)” then click the “Properties” button.

- You will be presented with another dialog box where you’ll see two fields. One will be labelled “Preferred DNS Server”, and the other which is directly under this field will be labelled “Alternate DNS Server”.
- First click the Use the following DNS server addresses radio button.
- To use Googles Public DNS server, enter 8.8.8.8 in the field labelled “Preferred DNS Server” and enter 8.8.4.4 into the field labelled “Alternate DNS Server”.

- You are also able to use CloudFlare’s DNS server for the same purpose. CloudFlare’s DNS address is simply 1.1.1.1
- Once you have entered your desired DNS server settings, ensure that the “Validate settings upon exit” checkbox is checked.
- Click the “OK” button to save your new DNS server settings.
- Restart your computer.
You are able to flush the DNS cache which may resolve the “DNS Server not Responding” issue. This action will clear IP addresses and other DNS related data from your cache.
You can clear the DNS cache by running a command using your command prompt.
One way to invoke the command prompt is to press Window Key + R to invoke the “Run” box. Type “cmd” within the “Run” box and press shift+ctrl+enter to run the command prompt as an administrator.

At the command prompt, type in the following command: “ipconfig /flushdns” and them press the enter key. If the command has executed successfully, you'll see the appropriate message in the command window.
At the time of writing this article, Internet Protocol Version 6 is the latest version of the internet protocol. Disabling the Internet Protocol Version 6 will not have detrimental effects on your computer’s operations, but it's been known to fix the “DNS Server not Responding” issue.
To disable the Internet Protocol version 6 on a Windows 10 operating system, just follow these steps:
- Go to Control Panel -> Network and Internet -> Network and Sharing Center
- Click on the relevant connection, for example “Wi-Fi”
- Click the “Properties” button on the dialog that is presented to you.
- In the list presented under the “This connection uses the following items” heading, uncheck the item labelled “Internet Protocol Version 6 (TCP/IPv6)”.

- Press the “OK button”
Temporarily Deactivate your Firewall and Disable Antivirus
If your firewall is Defender, you can follow these steps to disable it:
- To open control panel, press Windows Key + R to activate the “Run” box, then type “control” in the text box presented in the “Run” box and hit the enter key.
- In the top right hand text box, type in “win”

- An option labelled "Windows Defender Firewall” should appear in the search results. Click the “Windows Defender Firewall” option.
- Click the “Allow an app or feature through Windows Defender Firewall” option.

- Click the “Change settings” button.

- From the list presented to you within the dialog box that has just been invoked, find the browser that you are using, for example Google Chrome. Then make sure that both the private and public checkboxes next to the relevant item are checked.

- Once you've done this, try to access the relevant website using the relevant browser and see if the issue has been fixed.
There is a chance that your firewall was preventing you from accessing external data through your browser.
Note that it is not recommended to leave your operating system unprotected by reliable antivirus software indefinitely. Disabling your antivirus software in this instance is only recommended for testing if the relevant antivirus software is the cause of the “DNS Server not Responding” issue.
To temporarily turn off Microsoft Defender antivirus protection, follow these steps:
- Select Start and then type in "Windows Security” in order to search for the relevant application.
- Select Windows Security App from the search results.
- Go to Virus & Threat Protection .
- Under Virus & threat protection settings select Manage settings.
- Switch Real-time protection off.

Attempt to access the relevant website through the relevant browser to test if the “DNS Server not Responding” issue still occurs.
Reset DNS Settings
To reset your DNS Settings, follow these steps:
- Run the command prompt as an administrator. To do this activate the “Run” box by pressing Windows key + R .
- In the run box type “cmd” and press shift + ctrl + enter
- Type the following commands in the command prompt. After entering each command press the enter key, so that each command is run individually.
ipconfig /registerdns
ipconfig /release
Ipconfig /renew
netsh winsock reset

Once you have run these commands, close the command prompt and restart your computer.
You can manually update your network adapter driver, but it is much easier to automate this task.
You can automate this through the use of free software like “Driver Easy” (https://www.drivereasy.com/download-free-version/). Simply download the free version of this software.
Make sure that before you run the free version of the Driver Easy software that you create a system restore point. This provides you with insurance, so in the unlikely event that you encounter a nasty surprise that adversely effects your computer, that you are able to return your Windows OS back to the state that it was in before you ran the Driver Easy software and encountered an unexpected issue.
To use the Driver Easy software, follow these steps:
- Run the software
- Click the “Scan Now” button
- Press the “Update” button next to any outdated drivers.

Disable all Network Connections Except for the Connection that you are Using
Disabling the additional network connections you may have setup on your computer (other than, for example, the Wi-Fi connection that you are using to access the internet) might fix the “DNS Server not Responding” issue.
To disable the relevant network connection, follow these steps:
- Firstly you must access your Network Connections. To access your Network Connections, press Windows Key + R to invoke the “Run” box
- In the “Run” box type in “ncpa.cpl” and press enter.
- Right click the relevant network connection and select “Disable” from the relevant context menu. Repeat this action until all connections except for the Wi-Fi connection you are using are disabled.

When you start your computer in Safe Mode, this means the Windows operating system loads with a limited set of drivers and files. This can help you diagnose what is causing your “DNS Server not Responding” issue through a process of illumination (as it were).
So to start your PC in Safe Mode, follow these steps:
- Press the Windows Key + I to open Settings.
- Select Update & Security -> Recovery
- Under Advanced startup , select Restart Now
- Once your PC has startup to the “Choose an option” screen, select Troubleshoot -> Advanced options -> Startup Settings -> Restart
- Once your PC has restarted you’ll see a list of options
- Select 5 or press F5 for Safe Mode with Networking.
Try to access the web site that resulted in you getting the “DNS Server not Responding” issue. If the problem does not occur in safe mode this means that additional software may be the cause of the issue.
You can uninstall any additional software from your PC, one by one, and then test to see if the issue still occurs. If the issue does not occur after uninstalling particular software, this means that it is likely that this software was interfering with your internet access.
The “DNS Server not Responding” issue is relatively common and thankfully it is also relatively easy to fix.
It can be incredibly inconvenient to be denied access to the internet but hopefully the potential solutions outlined in this article will help you to once again have access to your favorite web sites.
Read more posts .
If this article was helpful, share it .
Learn to code for free. freeCodeCamp's open source curriculum has helped more than 40,000 people get jobs as developers. Get started
Try using another web browser or device
Restart your devices, change your dns settings, flush your dns cache, update your network drivers, router, and modem, turn off your vpn and firewall, contact your isp, 8 ways to fix 'dns server not responding' errors on a mac or pc.
- You can fix a "DNS Server Not Responding" error by resetting your internet connection and computer.
- If the error keeps appearing, you can also flush your DNS cache and change the DNS settings.
- DNS errors might also come up if your ISP is having an outage.
DNS servers are like phonebooks – they help your computer find websites and load them properly. This means that if the DNS server stops responding, you won't be able to access any website or app.
Luckily, both Macs and PCs offer a few ways to fix "DNS Server Not Responding" issues. Here are eight ways to do it.
First, we need to figure out what's causing the issue: Is it your web browser, your computer, or your internet connection?
Using the same internet connection, try browsing the web using another browser. In other words, if you're using Google Chrome right now, try Microsoft Edge or Firefox instead. If the internet suddenly starts working, it means there's an issue with your original browser. Try clearing the cache , or uninstalling and reinstalling the app.
If it still doesn't work, try using another device. If the internet works on that device, the issue is coming from your computer. If you still run into internet problems, the issue is your connection.
Alternatively, try connecting to another internet signal on your computer. If the internet starts working, the issue is your connection; if it doesn't work, the issue is your computer.
Get closer to your internet router
It might seem too simple to be true, but a lot of DNS server issues are caused by weak internet signals. If you're too far away from the source of your internet connection – usually the router – your computer will have trouble reaching the DNS server.
Getting a stronger internet connection, either by moving closer to your internet router or removing obstructions, can solve this. You should also make sure that you're not taking up all your bandwidth by running too many websites or apps at once.
And if it's possible, consider connecting with an ethernet cable instead of Wi-Fi. Ethernet connections are way more stable than wireless ones , meaning you're much less likely to have DNS issues.
Before we delve into the more complicated troubleshooting steps, try restarting all your devices: Your computer, your router, and your modem. You'd be surprised by how many issues this can fix.
You can restart most routers and modems by unplugging them for about ten seconds, then plugging back in.
Once everything is running again, open a web browser and head to a website. There's a good chance that things will work now.
A lot of internet issues can be fixed by changing the DNS settings on your computer. These settings control how your computer interacts with the internet connection, and if they're not set up correctly, it can cause problems.
Specifically, you'll want to make sure that the DNS server is being obtained automatically. Or if it's already automatic and you're having trouble, you'll want to set one manually.
In Windows 10 and 11
1. Open the Control Panel and click Network and Internet , then Network and Sharing Center , and then Change adapter settings .
2. Right-click on your Wi-Fi network and select Properties .
3. In the list that appears, double-click on the Internet Protocol Version 4 (TCP/IPv4) option.
You'll be given a menu that lets you set your DNS server. There are two options that let you obtain the DNS server either automatically or manually.
4. Click whatever option isn't already selected. If you're switching from automatic to manual, you'll also need to enter two DNS servers.
5. Click OK to save the changes.
See if the internet works now. If it doesn't, go back to the Properties menu and do the same steps for the Internet Protocol Version 6 (TCP/IPv6) option.
1. Open the System Preferences app and select Network .
2. Select the connection that you're trying to fix from the left sidebar, then click Advanced… in the bottom-right corner.
3. Select DNS from the tabs at the top.
4. Select the DNS Servers box and click the plus sign at the bottom, then enter a new DNS server you want to connect with.
5. Click OK to save your changes.
Most people know that every program and app has a cache, a small storage space for data that the app has loaded recently. Your DNS server has a cache too, which it uses to collect IP addresses and DNS records that you've connected with recently.
And just like other caches, letting the DNS cache get too full can cause problems. You can clear the DNS and refresh your IP address through the Command Prompt and Terminal apps.
1. Search your computer for "Command Prompt." When it appears in the results, right-click it and select Run as administrator .
2. In the Command Prompt window, type and submit these five commands in order. Type one of them, press Enter , and then wait a few moments before typing the next.
- netsh winsock reset
- netsh int ip reset
- ipconfig /release
- ipconfig /renew
- ipconfig /flushdns
3. Restart your computer.
1. Search your computer for "Terminal" and open the app when it appears.
2. Type and submit the following code, without quotes: "sudo dscacheutil -flushcache; sudo killall -HUP mDNSResponder"
3. When prompted, enter your Mac's password. It won't look like you're typing anything, but don't worry, it's just hiding your password.
4. If you don't see any sort of response — Terminal just takes the command and gives you another blank entry line — it means it worked.
Even if you've just bought all your hardware, it's a good idea to check that everything is updated. There's a chance you might be using outdated software, which can lead to bugs.
First, your drivers. These are small pieces of software that tell the computer how to function . If you're using a Mac, all your drivers will update whenever you install a full computer update . But on a Windows PC, you'll likely need to update them separately.
You can do this by opening the Device Manager app, clicking the Network adapters tab, and right-clicking on your main internet driver. You'll likely have two of them, one for Wi-Fi and one for Ethernet (usually called the "Family Controller"). When you're asked how you want to search for drivers, pick the automatic option.
If that doesn't work, check your computer manufacturer's website to see if they offer drivers of their own. These might work better than the ones that come pre-installed.
Finally, you can also try uninstalling the driver and restarting your computer. This will force the driver to restart, which can clear away some issues.
When it comes to your router and modem, every model and brand has a different updating process. But in general, you'll probably need to log into your devices' settings pages using a web browser and update from there. Check the manual or call your ISP for exact steps.
This isn't as common, but if there's something standing between your computer and the open internet — say, a VPN or firewall — you can run into DNS issues.
Every VPN has a different method for turning it off, but look for a Disconnect option in the settings. You can also open the Network settings on your computer and disable all VPNs from there.
In Windows, you can disable the default firewall by searching for Windows Defender Firewall, then selecting Turn Windows Defender Firewall on or off .
On a Mac, open the System Preferences app and select Security & Privacy . Click Firewall at the top, then select Turn Off Firewall . You might need to click the lock icon in the bottom-left corner first.
If you're using a third-party antivirus program, you might need to disable that app's firewall too.
Finally, you can pick up the phone and call your internet service provider. At the end of the day, they're the ones with total control over your internet service.
If none of these steps have worked, it might mean that your ISP is having an outage. Alternatively, they might have shut off your service due to unpaid bills, or might be throttling your connection because you hit a data cap. If you rent your internet equipment from the ISP, they can even send someone out to troubleshoot in person.
- Main content
- iPhone Apps
- Fix iPhone Errors
- iPhone Tutorials
- Apple Watch
- Google Docs
- Google Drive
- Google Account
- Fix Windows 10 Errors
- Windows 10 Tutorials
- Creative Courses
- Technical Courses
- Windows 7 Themes
- Online Services
Learn How To Fix The Most Common DNS Issues In Windows 10
An issue with the DNS server can interrupt your internet service. You are probably here because of DNS issues . It could be the message “DNS_PROBE_FINISHED_NO_INTERNET” while using the internet or “The DNS server isn’t responding” shown by Windows Network Diagnostics while troubleshooting.
Both the error messages related to Windows 10 DNS issues and the solution is within reach. The DNS error messages are not limited to these two messages; there are many other error messages like “DNS_PROBE_FINISHED_NXDOMAIN,” ”DNS_PROBE_FINISHED_BAD_CONFIG,” “Your DNS server might be unavailable” and many more.
What is DNS Server and Why Internet Services are affected by it?
DNS is an acronym of Domain Name System. It is used to translate the domain names of websites to IP address because the internet only understands IP addresses and not the alphabetic name of websites. The IP address of a particular website is difficult to remember for a human being. For example, the website has the domain name technorms.com is having IP address 13.126.192.45.
Such lengthy IP addresses are difficult to remember for us but essential for internal communication between browser and web server. DNS is a middle man who does the translation for the smooth functioning of the internet. Therefore, an issue with the DNS server halts the internet service.
Solutions to Fix DNS issues in Windows 10
Whatever the DNS issues, there are various ways you can handle and learn how to fix the DNS server. Let’s check the various issues that you may face and the solutions related to it.
1. Check your DNS Server settings
Change in DNS server settings can be the main cause of your DNS issues. You can have a quick look at that before proceeding with other solutions.
To check whether your DNS server settings are proper, press Windows key + I to open Settings.
Next, click on Network and Internet.

Scroll down and click on Network and Sharing Center.

In the left pane of Network and Sharing Center, click on Change adapter settings.

Now, right-click on the connected network. Then select Properties from the context menu.

When a new window appears on the screen, select Internet Protocol Version 4 (IPv4) and then click on Properties.

Check whether the radio buttons for Obtain an IP address automatically and Obtain DNS server address automatically are selected.
If it is not selected, then make the required changes and click on OK.

Now check the same thing for Internet Protocol Version 6 (IPv6).
Click on Properties after selecting Internet Protocol Version 6.

Select the same radio buttons selected as in IPv4, that is, Obtain an IP address automatically and Obtain DNS server address automatically respectively.
Click on OK.

If you are still facing the DNS error, or if you have the same DNS settings, then you can try from the different solutions listed below.
2. Use other DNS servers
If your DNS server’s setting matches the above-shown settings, then there might be an issue with your ISP’s DNS server. Try shifting to another one temporarily.
You can use Google’s public DNS server or Cloudfare’s DNS server.
To manually configure the DNS server, navigate to Settings ➞ Network and Internet ➞ Network and Sharing Center ➞ Change adapter settings.
Right-click on the network connection and then click on Properties.
When network properties open, select Internet Protocol Version 4 and then click on Properties.
When the Internet Protocol Version 4 Properties window appears on the screen, choose to Use the following DNS server addresses and manually enter 8.8.8.8 for the Preferred DNS server and 8.8.4.4 for Alternate DNS server.
Click on OK to save the changes.

Reconnect your internet and check if the DNS server error resolves after manually changing the DNS server.
The address used above is Google’s public DNS server. If you wish to use Cloudflare’s DNS, then add 1.1.1.1 for preferred DNS address and 1.0.0.1 for alternate DNS addresses.
3. Configure the MAC (Media Access Control) Address
If you still have DNS failure, you can try changing the MAC address of your PC manually. This solution has helped many users to solve DNS issues. MAC address or physical address is uniquely assigned to every network adapter.
To manually configure the MAC address, you need to know the physical address of the network adapter.
Follow the steps to get the physical address.
Open the command prompt, type command ipconfig /all and hit Enter.

After executing the command, you get the long list of details, find out the connected network, and note down the physical address.

Once you know the physical address, you can configure it.
Open Settings ➞ Network and Internet ➞ Network and Sharing Center ➞ Change adapter settings, right-click on the connected network and select Properties.
The following procedure is for Windows Professional users.
However, if you are a Windows home version users follow the procedure written separately for Home users.
When the properties window opens, click on Configure.

Next, go to the Advanced tab, select Network Address and write down the noted physical address in the textbox below Value.

Click on OK to save the changes.
Windows Home Users
Type device manager in the start menu, and open Device Manager, search for Network adapters and right-click on the appropriate option below it and choose Properties from the context menu.
Next, go to the Advanced tab and add noted physical address to the Value of Network Address. If you get stuck somewhere or need any assistance, you can check the details on how to find and change MAC address in Windows 10
4. Clear DNS cache
Sometimes just clearing the cache may help you get rid of DNS error. To flush the DNS cache in Windows 10, there are some commands to execute.
Open the command prompt, and execute the following commands listed below.
ipconfig /flushdns
ipconfig /registerdns

ipconfig /release
ipconfig /renew

You can visit some websites to check if ipconfig command in Windows 10 resolves your DNS server unavailable problem
5. Update your Network Drivers
The outdated network drivers can be a reason for your no DNS server error. You can update them manually or use a third-party tool to do it for you.
To manually update your network drivers , press Windows key + X and open Device Manager.
Now, search for Network adapters, right-click on the related driver and click on Update driver.

Restart the computer and check if you can browse the web pages.
6. Work on Winsock keys from Registry
You can follow the below steps to work on Winsock keys. It may help you to resolve DNS issues, as it did work for many users. However, before you begin, you can backup the registry in Windows 10.
Open Registry Editor by typing registry in the start menu and navigate
HKEY_LOCAL_MACHINESYSTEMCurrentControlSetServices from the left pane of the registry editor.
Search for Winsock and WinsSock2.
Right-click on it and click on Export from the context menu.

Save them as Winsock and WinSock2 respectively in any location you wish.
Then, delete both the Winsock registry keys from the registry editor.

Restart your PC and head back to the Registry Editor.
Click on File from the menu bar of the registry editor and then click on Import.

Import the Winsock keys exported in the steps before.
Again restart your PC, open the browser to check if DNS error resolved.
7. Restart Modem and Router
If none of the solutions mentioned above work for you, then you can try restarting your Modem or Router, as that can be helpful in some cases.
Simply power off your router or unplug the power cord from the router. Leave it for one to two minutes and then power on your router. If you have unplugged the router plug it again.
Restarting your router may help you solve DNS failure.
8. Restart PC in Safe Mode
Safe mode has limited software and drivers, so if some third-party software like antivirus is troublemakers, your issue can be solved in safe mode.
To enable safe mode, keep pressing the Shift key while clicking on the Restart option.
When the blue screen appears with three options, click on Troubleshoot ➞ Advanced Options ➞ Startup Settings and then click on Restart.
Now use the function key (F1-F12) to Enable safe mode.
Check your internet connectivity once the PC starts.
However, if the DNS error resolves, it was some third-party application or some other driver/software which is enabled in normal mode.
9. Disable Microsoft Virtual WiFi Miniport Adapter
You can try to disable the Microsoft Virtual WiFi Miniport Adapter if it is present in your Network Adapters list.
To disable it, go to the Device Manager and click on View in the menu bar.
Choose Show hidden devices from the list.

Once all the devices are visible, search for Virtual WiFi Miniport Adapter in Network adapters.
If found right-click on it and disable it. Check out if the DNS problems resolve.
10. Reinstall Network Adapter Drivers
If you still have a DNS probe finished no internet or no DNS server type error, then uninstall your Network adapter drivers and reinstall them.
To uninstall the network drivers, press Windows key + X and click on Device Manager.
Search for Network adapters and Uninstall the relevant network driver.

Restart the PC and reinstall the network driver again.
11. Enable Microsoft LLDP Protocol Driver
If your LLDP Protocol driver is not enabled, then you can run into DNS failure issues. Check if it is enabled, if not, enable it using the following procedure.
Go to Settings ➞ Network and Internet ➞ Network and Sharing Center ➞ Change adapter settings, right-click on the connected network and click on Properties.
When Properties open and check if there is a tick besides Microsoft LLDP Protocol Driver.

If it is disabled, enable it by clicking on the checkbox.
12. Update the firmware in the router
Note: Update your router’s firmware only if you are well aware of it, as a failure in the upgrade can cause permanent damage to the router.
Updates are always a vital part of any device, so an outdated firmware of router can also give you errors like “DNS server unavailable.” Update your router’s firmware using the instruction manual as every router has different procedure to do it
After upgrading firmware, reconnect to the internet and check if there is no DNS failure anymore.
13. Disable Antivirus and Firewall
An antivirus is a much-needed software with an increase in the number of viruses and malware. However, sometimes, this antivirus can affect DNS servers, giving you different DNS related problems.
Uninstall your antivirus, restart your PC and check if you can connect to the internet.
If you are again connected to the internet after uninstallation finds a replacement for your antivirus or contact the customer support reporting the issue.
14. Disable Downloads from other PC’s
Windows has this amazing feature in which you are allowed to download the updates from other users in the same network. This is a good option if you have an unreliable internet connection.
However, this can also cause DNS issues.
To disable it, press Windows key + I to open Settings, navigate to Update & Security ➞ Advanced Options ➞ Delivery Optimization.
In Delivery Optimization window, slide the trigger below Allow downloads from other PC’s

Check if this resolves no DNS server error.
15. Disable Internet Protocol Version 6 (IPv6)
Disabling IPv6 wouldn’t cause any other trouble and may also help you solve DNS error.
To disable IPv6 service, navigate to Settings ➞ Network and Internet ➞ Network and Sharing Center ➞ Change adapter settings.
Right-click on the connected network and select Properties.
Once the Properties window.

Open search for Internet Protocol Version 6 and untick the checkbox next to it.
16. Disable all other Network Connections
There might be multiple network connections on your PC which might be the reason for your unavailable DNS server.
You can disable all other active connections by going to
Settings ➞ Network and Internet ➞ Network and Sharing Center ➞ Change adapter settings.
Right-click on other connections besides the internet and click on Disable from the context menu.

Check out if you still see any DNS server not available error on your PC
17. Check newly installed extension and third-party applications
If you have recently installed some networking related applications or extensions and later faced DNS issue, then these applications/extensions may be the culprit.
Try uninstalling those applications and check your DNS settings in Windows 10 to ensure if the application did not change them. Restart your PC and check if internet connectivity is normal.
If removing the third-party applications does not solve the error, then you can later disable extensions from the Chrome browser and check if that works for you.
18. Perform Clean Boot
Sometimes the DNS issues are easily solved by performing a clean boot. To perform a clean boot type msconfig in the start menu and open System Configuration.
When System Configuration’s window opens, click on Hide all Microsoft services.
Once the Microsoft services are hidden, click on Disable all to disable the third party services.
Now, click on Apply and OK

Restart your PC and check if the issue is resolved. Enable third-party services one by one to find the culprit.
19. Use NETSH commands
You can also try using the list of netsh commands mentioned below. It works for many users who face DNS issues. These commands will reset your IP and then even flush the DNS cache for you in Windows 10.
Open the command prompt and execute the following commands one after the other.
netsh int ip reset
netsh winsock reset
Restart your PC and check if this solution fixes DNS failure.
20. Change Power Settings for Network Adapters
Your DNS server unavailable issue can be solved by keeping the maximum performance parameter for the wireless adapter. To change this setting, you need to go to power settings and change the plan.
Type power in the start menu and open Power & sleep settings.
Once the setting window opens, click on Additional power settings.

Now, click on Change plan settings.

To edit the settings for the wireless adapter, click on Change advanced power settings.

When the power options window appears, search for Wireless Adapter Settings and click on the plus sign(+) next to it.
Next, click on + sign next to Power Saving Mode.
The drop-down menu has different options select Maximum Power Saving, even if the default one says Medium Power Savings.
Apply the changes by clicking on Apply

Restart the PC, and check your internet connectivity. You will be able to see if this change in power settings worked for you and solved your DNS issues.
21. Check out with your ISP for the issue
If the above solutions are not solving the DNS problem, then for once try contacting your ISP and ask if the issue is from their side. Sometimes, the DNS issues are from the ISP itself, which in turn gives problems at our end.
22. Use another Router
The last solution to your DNS failure is to change your router. A faulty router can also cause DNS issues. Connect different router and check if you can connect to the internet.
DNS_PROBE_FINISHED_NO_INTERNET Solutions
Note: The below-mentioned solution may also work for your other DNS issues.
23. Clear DNS cache in Google Chrome
If you see DNS_PROBE_FINISHED_NO_INTERNET error on the Google Chrome browser, then you can specifically jump to simple solutions like just clearing cache.
First, you need to clear browsing history and then move to DNS cache
To clear browsing history press Ctrl + H in your Chrome browser.
Once the history page opens, click on Clear browsing history.
To clear DNS cache, type “chrome://net-internals/#dns” in your Chrome browser and click on the Clear host cache button.

Check if the error resolves.
24. Disable Preload pages in Chrome
Disabling preload pages can also solve your DNS_PROBE_FINISHED_NO_INTERNET error.
To disable preload pages in Chrome, click on the 3 dots in the right corner of the Chrome browser and click on Settings.
Scroll down to the end of the page and click on Advanced and toggle the switch next to Preload pages for faster browsing and searching to disable it.

Close your Chrome browser and reopen it to check if this solution resolved your error.
The above solutions will undoubtedly help you to get your DNS issues solved. If there is a minor error in settings of DNS server then simply changing the settings as mentioned in the first solution would have you get rid of DNS failures. However, if the issue is with the router, then you need to change it completely or even reinstall your browser. The solution depends on the complexity of the issue. Do let us know the solution which worked for you.
Also, check:
- How to Use OpenDNS to Improve Internet Speed & Get Phishing Protection
- NameBench identifies the fastest DNS Server and improves Internet Browsing Speed
Latest Articles
25 best chatgpt plugins to install and use in 2023, how to fix local security authority protection is off on windows 11, how to use windows 11 snap layouts, how to enable hyper-v on windows 11, how to factory reset windows 11, how to fix snap layouts not working in windows 11.

How to diagnose and fix DNS problems
Dead websites, page loading issues, web not working as it should? Here's what to do next.

Browsing the web is so easy, simple and straightforward that it feels almost automatic. Sure, you know there's a lot of low-level tech making this happen, but who cares when it just works?
That only makes it more frustrating when you suddenly get major page loading issues, though, dead websites everywhere, and all kinds of other web-based complications.
Internet connectivity problems across multiple websites can look like something you'll never fix yourself, but that's not always true – they're often related to DNS (Domain Name System) problems. In this article we'll look at how to identify these, and then get your system working again.
- Get security, streaming and more with today's best VPNs
What is DNS?
Accessing a new website looks simple, at least from user's point of view. Enter the URL in a browser, wait a few seconds, website appears, that's about it. Peek under the hood, though, and there's a lot more going on.
Your browser can't access a web server from a domain name like techradar.com, for instance. It can only find and download websites when it has a server IP address , such as 199.232.198.114.
A device normally handles this by asking your ISP's DNS server to translate the domain name into an IP address. Easy.
But what if DNS fails, and the server doesn't always return the IP address you need? Then you'll see major web problems.

What does a DNS issue look like?
If your DNS fails entirely then it's likely you'll see timeouts, DNS or other errors with all your internet apps. It might look like your entire internet is dead.
Other DNS failures are partial, though, affecting some websites only. Maybe you'll access sites a, b and c as usual, but x, y and z all seem to be down.
Partial failures can also cause odd-looking page loading issues. What if DNS allows you to access bigsite.com, but not the domain where it hosts its images, scripts or contact forms?
You might see image placeholders, empty spaces where content used to be, or buttons and other site features not working as they should. It's this mix of problems across multiple sites that's one of the tell-tale signs of a DNS problem.
Diagnosing a DNS issue
The simplest DNS problem to diagnose is an issue with your current server. Try the same websites on a connection using another DNS server, and if they're now accessible and work correctly, it looks like you have a DNS issue.
If you've problems on a mobile device connected to your home Wi-Fi, for example, switching to your mobile network allows you to test a site with new DNS servers.
Or if you're on the move and already using your mobile network, look for a free hotspot you can try. (Just for a quick connectivity test, though – free Wi-Fi can be a security risk causing more problems than it solves, and you should always use at least a cheap VPN to stay safe on these networks.)
No other connections available? Try the virtual online browser Browserling . If you can reach it, choose Chrome as your preferred browser, enter the URL in the address box and click Test Now! Browserling uses its own DNS to connect to the site, so if it gets you access and your own connection doesn't, it could be a DNS issue.

Test your DNS server
A more advanced test is to manually ask your DNS server for the IP address of the domain you're trying to access. If the server can't find the IP or displays an error, that points to a DNS difficulty.
To try this on Windows, click Start , type CMD and open Command Prompt , then type NSLOOKUP and press Enter. ( NSLOOKUP is often available on Macs and Linux – try opening it from your terminal window.)
NSLOOKUP launches and displays the name and IP address of your current DNS server (or 192.168.* if devices get their DNS via your router's connection.)
Now type the name of any domain you can't currently access, press Enter, and NSLOOKUP queries your DNS server.
If NSLOOKUP displays the site IP address, it looks like DNS is working correctly.
But if NSLOOKUP displays an error like ' can't find Google .com: Non-existent domain ', that's pretty conclusive evidence that something is screwed up at the DNS level. Although there is one more quick trick you should try.
Try another DNS server
You've proved that your DNS server can't find an IP address for a domain, but will other DNS servers do any better? NSLOOKUP makes it really, really easy to find out.
Type SERVER 1.1.1.1 , press Enter , and NSLOOKUP changes its default DNS server to the IP address 1.1.1.1. (That's Cloudflare. If you know you were using Cloudflare before and that's the DNS with the problem, switch to Google's 8.8.8.8 , instead.)
Now enter whatever domain you couldn't reach earlier, and NSLOOKUP sends its DNS query to Cloudflare (or Google), instead.
If NSLOOKUP failed earlier but successfully gets an IP with Cloudflare, that looks like a problem affecting your DNS server only.
Test this by entering the IP address in your browser, instead of the regular domain. Use 142.250.179.238 for Google, for instance. If you can't access the website when you enter a domain, but it at least begins to load with the IP address, that confirms your DNS issues.

How to fix DNS problems
If it looks like your ISP's DNS isn't working, the quickest and most effective solution is to switch to a free public DNS server . Google and Cloudflare offer fast and reliable services which anyone can use, no registration required.
Changing DNS servers normally involves tweaking your device network settings. The Cloudflare support site has guides on setting up Cloudflare DNS for Windows, Mac, Android, iOS, routers, gaming consoles, Linux and more. These are sometimes very basic ('install app X to do it for you'), but Google's equivalent page has more detailed advice if you need it.
Whatever changes you make, be sure to note down your original settings first, just in case you need to switch them back later.
Reboot your device when you're done, and it should now be using your (hopefully) problem-free new DNS server.
If you still have internet connectivity problems, though, it's time to ask your ISPs support team for help. Tell them what you've tried, and that should help them diagnose the issue and get your connection running smoothly again.
- Get protected online for less with a great cheap VPN
- Stop logging of your PC activities with our Windows 10 privacy guide
- These streaming VPNs will help you get around geo-restrictions
Are you a pro? Subscribe to our newsletter
Sign up to the TechRadar Pro newsletter to get all the top news, opinion, features and guidance your business needs to succeed!

Mike is a lead security reviewer at Future, where he stress-tests VPNs , antivirus and more to find out which services are sure to keep you safe, and which are best avoided. Mike began his career as a lead software developer in the engineering world, where his creations were used by big-name companies from Rolls Royce to British Nuclear Fuels and British Aerospace. The early PC viruses caught Mike's attention, and he developed an interest in analyzing malware, and learning the low-level technical details of how Windows and network security work under the hood.
Namecheap's Spaceship celebrates one year
Unstoppable Domains joins GlobalBlock
OWC Jupiter Mini review
Most Popular
- 2 VPNs aren't invincible—5 things a VPN can't protect you from
- 3 4 movies leaving Netflix in May 2024 with over 90% on Rotten Tomatoes – catch them before they go for good
- 4 7 new horror movies in May 2024, on Prime Video, Paramount Plus, Shudder and more
- 5 I went looking for the inventors building real Star Wars lightsabers and was surprised at what I found
- 2 I tried this Iron Man-style exoskeleton for a day, and it's so good I'll keep using it
- 3 A big Google Maps redesign is now being tested on Android
- 4 A US supercomputer with 8,000 Intel Xeon CPUs and 300TB of RAM is being auctioned — 160th most powerful computer in the world has some maintenance issues though and will cost thousands per day to run
- 5 Best Buy launches big-screen TV sale - 8 best deals from $369.99
How to change DNS settings on your PC running Windows 10
Yes, you can change the Windows 10 DNS settings for more private and reliable services, and in this guide, I'll show you how.

- Control Panel
- Settings app
- Command Prompt
As part of your internet plan, the Internet Service Provider (ISP) also provides the local network with the necessary settings, including the Domain Name System (DNS) addresses, which allows you to access your favorite websites and online services and download files.
The only caveat is that the ISP's DNS servers are usually not very private, are slower than other services, and are sometimes unreliable. However, you can always use different resolvers from third-party companies to improve your internet experience on Windows 10 .
What's DNS?
A Domain Name System is an internet service (usually at no cost to you) that allows you to type a friendly domain name in the web browser's address bar to load a website. And without it, it'd be a nightmare to surf the web.
The issue is that every device requires an IP address (for example, 104.18.189.55) to communicate with other devices. However, these addresses are not easy for humans to remember, and DNS servers are the ones that provide the mechanism to translate friendly domain names (for example, WindowsCentral.com) into an IP address that computers can understand.
Although you can type "https://windowscentral.com" to get to this website, in the background, the browser first sends a request to the DNS servers to resolve the IP address from the website name. Only when the address is found does the browser connect to the site and download the page's contents.
Usually, you won't notice this process because it's automatic, and everything happens quickly (in milliseconds). However, if your resolvers are unreliable, they slow down your internet, or you want to use faster and more private servers, Windows 10 allows you to change these settings using Control Panel, Command Prompt, and Settings app.
In this how-to guide , I'll walk you through the steps to change the DNS settings on Windows 10.
Get the Windows Central Newsletter
All the latest news, reviews, and guides for Windows and Xbox diehards.
How to change DNS settings using Control Panel on Windows 11
To change the DNS settings with Control Panel, use these steps:
- Open Control Panel .
- Click on Network and Internet .
- Click on Network and Sharing Center .
- Click the "Change adapter settings" option in the left pane.

- Right-click the active network interface and select the Properties option.

- Quick tip: You'll know which adapter is connected to the network because it won't have a "Disabled" or "Network cable unplugged" label.
- Select and check the "Internet Protocol Version 4 (TCP/IPv4)" option.

- Click the Properties button.
- Select the "Use the following DNS server addresses" option.
- Quick note: When you select the option to specify the DNS settings manually, the computer will continue to receive the TCP/IP address from the DHCP server (router).
- Confirm the primary DNS address under the "Preferred DNS server" section. If you want to use Cloudflare, Google Public DNS, or Cisco OpenDNS, you can use these settings:
- Cloudflare: 1.1.1.1
- Google Public DNS: 8.8.8.8
- OpenDNS: 208.67.222.222

- Confirm the secondary DNS address the system will use if the primary is not reachable under the "Alternate DNS server" section. You can use one of the secondary addresses from these companies:
- Cloudflare: 1.0.0.1
- Google Public DNS: 8.8.4.4
- OpenDNS: 208.67.220.220
- (Optional) Click the Advanced button.
- Click the DNS tab.
- Click the Add button.
- Specify additional alternate DNS server addresses.

- Quick tip: In addition to adding more addresses, you can edit and remove resolvers, and you have an option on the side to change their priority.
- Click the OK button.
- Click the Close button.
Once you complete the steps, the computer will immediately start using the specified DNS settings.
How to change DNS settings using Settings on Windows 10
To change the DNS addresses through the Settings app, use these steps:
- Open Settings .
- Click on Network & Internet .
- Click on Ethernet or Wi-Fi .
- Select the connection that connects Windows 10 to the network.

- Click the Edit button under the "IP settings" section

- Use the "Edit IP settings" drop-down menu and select the Manual option.
- Turn on the IPv4 toggle switch.
- Confirm the primary DNS address under the "Preferred DNS server" section. To use Cloudflare, Google Public DNS, or Cisco OpenDNS, use these settings:

- Confirm the secondary DNS address under the "Alternate DNS server" section. You can use one of the secondary addresses from these companies:
- Click the Save button.
- Restart the device.
After you complete the steps, you should now be able to connect to the internet using the new resolvers. The restart may be necessary to regain an IP address configuration for the device.
Although the Settings app should be the recommended option to change the DNS settings on your computer, I"m not listing this option first because it can be confusing for some people.
How to change DNS settings using Command Prompt on Windows 10
Alternatively, it's also possible to change the DNS configuration using Command Prompt on Windows 10.
To use Command Prompt to change the computer's DNS settings, use these steps:
- Open Start .
- Search for Command Prompt , right-click the top result, and select the Run as administrator option.
- Type the following command to launch the tool to change the networking settings and press Enter : netsh
- Type the following command to identify the names of the network adapters and press Enter : interface show interface
- Type the following command to set the primary DNS IP address and press Enter : interface ip set dns name="ADAPTER-NAME" source="static" address="X.X.X.X"
In the command, change "ADAPTER-NAME" with the name of the network adapter you identified in step 4 , and change "X.X.X.X" with the IP address you want to use. To use Cloudflare, Google Public DNS, or Cisco OpenDNS, you can use these settings:
- Cloudflare: 1.1.1.1 and 1.0.0.1
- Google Public DNS: 8.8.8.8 and 8.8.4.4
- OpenDNS: 208.67.222.222 and 208.67.220.220
This example sets the primary DNS address to 1.1.1.1: interface ip set dns name="Ethernet1" source="static" address="1.1.1.1"

- Type the following command to add an alternative DNS IP address and press Enter : interface ip add dns name="ADAPTER-NAME" addr="X.X.X.X" index=2
In the command, change "ADAPTER-NAME" with the name of the network adapter you queried in step 4 , and change "X.X.X.X" with the secondary address. This example sets the secondary DNS address to 1.0.0.1: interface ip add dns name="Ethernet1" addr="1.0.0.1" index=2
- Quick tip: You can repeat the above steps to add more addresses if necessary. However, in the command, you must increase the number of the index option by "1." For instance, interface ip add dns name="Ethernet1" addr="8.8.8.8" index=3
Once you complete the steps, Windows 10 will start using the new DNS server addresses to resolve domain names to numeric addresses that your device can understand.
More resources
For more helpful articles, coverage, and answers to common questions about Windows 10 and Windows 11, visit the following resources:
- Windows 11 on Windows Central — All you need to know
- Windows 10 on Windows Central — All you need to know

Mauro Huculak is technical writer for WindowsCentral.com. His primary focus is to write comprehensive how-tos to help users get the most out of Windows 10 and its many related technologies. He has an IT background with professional certifications from Microsoft, Cisco, and CompTIA, and he's a recognized member of the Microsoft MVP community.
- 2 Clippy, the infamous paperclip, is here to debloat Windows 11 and save you from ads
- 3 Microsoft says most company execs won't hire anyone without an AI aptitude, prompting "a 142x increase in LinkedIn members adding AI skills like Copilot and ChatGPT to their profiles"
- 4 World of Warcraft Dragonflight's final major update, Patch 10.2.7 "Dark Heart", is now available
- 5 Best gaming laptop accessories in 2024
- 24/7 Live Chat
+1 877 315 1713
Find anything you need
You have %itemCount% in your cart. Total being %total%
How To Fix the “DNS Server Isn’t Responding” Error on Windows 10
The DNS server is one of the necessary parts of getting a stable, working connection to the internet. Unfortunately, many Windows 10 users have been running into errors regarding this. Some reports say that Windows 10 displays the error message “DNS server isn’t responding” causing websites to stop loading.

This error can set you back tremendously, especially if you work from home or attend online classes. Don’t worry — we’ve compiled the fastest, working methods to troubleshoot the DNS server and restore it to working order. Let’s get started!
Table of Contents
What is a dns server, what happens when dns servers fail, what does “dns server not responding“ mean, what causes the “dns server not responding” error, solved: “dns server isn’t responding” error on windows 10, quick fix: switch to a different browser, method 1. restart your router, method 2. change your dns server, method 3. update your network adapter drivers, method 4. flush your dns and clear dns cache, method 5. manually enter your mac address, method 6. temporarily disable your antivirus, method 7. disable peer-to-peer windows 10 updates, method 8. disable internet protocol version 6 (ipv6).
- Method 9. Disable the Microsoft Virtual WiFi Miniport Adapter
- Method 10. Reset your IP address and network protocols (TCP/IP)
- Final thoughts
Short Answer: DNS servers translate domain names into IP addresses, allowing DNS clients to reach the origin server. When users type domain names into the URL bar in their browser, DNS servers are responsible for translating those domain names to numeric IP addresses, leading them to the correct website.
The Domain Name System (DNS) is the phonebook of the Internet. When users type domain names such as ‘softwarekeep.com’ or ‘google.com’ into web browsers, DNS is responsible for finding the correct IP address for those sites. Browsers then use those addresses to communicate with origin servers or CDN edge servers to access website information. This all happens thanks to DNS servers: machines dedicated to answering DNS queries.
A server is a program or device providing services to other programs, referred to as ‘clients’. DNS clients, built into most modern desktop and mobile operating systems, enable web browsers to interact with DNS servers. Here's more .
Short answer: It results to DNS Server Not Responding.
DNS servers can fail for multiple reasons - power outages, cyberattacks, or hardware malfunctions. In the case of a major DNS server outage, some users may experience delays due to the amount of requests being handled by backup servers, resulting in the common phrase: DNS Server Not Responding . But it would take a DNS outage of very large proportions to make a significant portion of the Internet unavailable.
DNS Server Not Responding error means that your browser was unable to connect to the internet or the DNS of the domain you're trying to reach are unavailable. In order to resolve it, restart your router or modem, check for network issues and update your browser.
A Domain Name System (DNS) is a directory that translates domain names or hostnames into Internet Protocol (IP) addresses. Due to this process, users can easily access websites on the internet through web browsers.
Sometimes, users encounter DNS error messages when accessing a website, such as the “DNS server not responding” message. This means the web browser can’t connect to the site because the DNS server fails to map hostnames to IP addresses correctly.
There are many causes for the “DNS server not responding” error, from misconfigured network adapters to incorrect DNS server addresses. Fortunately, most of these problems lie on the user’s end and can be solved without much effort.
The DNS server failed issues is often caused by improperly configured DNS records. This might happen when users don’t use the correct values or IP address during the recording process.
Other possible causes of the “DNS server not responding” error are:
- Unavailable DNS provider. Your DNS service might stop working because of DNS errors on its network, such as heavy traffic and server outage.
- Malfunctioning router or modem. A faulty router or modem can also trigger DNS errors. Try switching the ethernet ports or using different ethernet cables to determine whether your router is causing the DNS problem.
- Hardware or network issues. Some hardware or network failures can also cause the “DNS server not responding” error. For example, a single server fails to relay the information to the next server correctly.
- Antivirus software. Problems can occur when the software vendor updates an antivirus program, making the program believe your computer is infected and suddenly block your internet access. When this happens, your browser might show the “DNS server not responding” message.
We’ll be using both standard Windows 10 troubleshooting methods as well as some specific procedures that aim to fix this error message. Our guides are step-by-step, allowing you to restore your internet connection efficiently.
Here are how you can fix the “DNS server not responding” issue:
- Switch to a different browser
- Troubleshoot network problems in network diagnostics.
- Update or reinstall Network adapter drivers.
- Restart your router or modem.
- Temporarily Deactivate antivirus and firewall.
- Flush DNS cache and clear DNS cache
- Change the DNS server address. Replace your ISP’s address with a different DNS address.
- Manually enter your MAC address.
- Disable peer-to-peer Windows 10 updates.
- Disable Internet Protocol version 6 (IPv6).
- Disable the Microsoft Virtual WiFi Miniport Adapter.
- Reset your IP address and network protocols (TCP/IP)
Tip : If you’re unfamiliar with the Windows 10 interface, we recommend reading our How to Get Started with Windows 10 article before troubleshooting.
It’s a possibility that the DNS server error only shows up in one specific browser. An outdated client could cause this, security exploits, missing or damaged files, or misconfigured settings.
The easiest way to potentially fix the “DNS server isn’t responding” error would be simply switching to a different browser. For example, try switching to Microsoft Edge if you’re currently using Google Chrome. Edge comes pre-installed on all Windows 10 systems, making it easy to access in situations like this.
Want a new forever browser? Check out our Which Web Browser Should You Be Using in 2021 article and find your new perfect match.
You can restart your router in 3 easy steps:
- Locate the power button on your router and turn the device off.
- Wait for a few minutes. We recommend waiting 5 minutes to allow your router and network to shut down properly.
- Turn your router back on .
Test if you still experience DNS server issues after giving your router a restart. If necessary, continue reading and try our other methods to solve the error.
Another easy solution to this error is manually changing your DNS server. By doing so, you can go around limitations and might even get a better internet speed on your device. Here are the steps to quickly change your DNS server to a well-known, fast, and public DNS.
- Press the Windows + R keys on your keyboard. This is going to bring up the Run utility.

- Click OK to apply your changes. Now, you can see if the DNS server is still having issues.
Regularly updating your driver software is something you should do all the time. Outdated network drivers can cause more trouble than you’d think.
In this solution, we will be using the integrated Device Manager to update the drivers for your network adapters.

- Wait for the driver installation to complete. Once the driver is installed, restart your computer and check if the DNS server is working.
If your DNS is outdated, you can manually clear its cache to potentially fix the issues this causes. The method is simple and involves using the Command Prompt.
Keep in mind that you might be required to use an administrator account to perform this method. Need help? Check out our How to make a local user an administrator in Windows 10 guide.
- Open the Search function in your taskbar, or alternatively use the Ctrl + S keyboard shortcut to bring up the search bar.

- When prompted by the User Account Control (UAC), click Yes to allow the app to launch with administrative permissions.
- Paste in the following command and press the Enter key to execute it: ipconfig /flushdns
- Close the Command Prompt and check if Google Chrome still shows you the “ DNS_PROBE_FINISHED_NO_INTERNET ” error.
Every network adapter installed on your device, be it your PC, laptop or tablet has a physical address called MAC. Your MAC address, or “Media Access Control”, is assigned to the device’s network.
Sometimes, manually finding and then inputting this address to your network properties will fix DNS server-related errors. Let’s see how you can get this done.

Antivirus applications are known to cause issues on computers by interfering with your internet connection or blocking apps and services from running properly. You can test if the antivirus you’re using at the moment is causing the “DNS server isn’t responding” error by temporarily disabling it.
Note : This method is not recommended as it is unsafe to use your computer without protection. Only proceed if you’re aware of the possible risks and have a backup of your system to revert any damage that may happen.

- Find your antivirus application from the list and select it by clicking on it once.
- Click on the Disable button now visible in the bottom-right of the window. This will disable the application from launching when you start your device.
- Restart your computer.
The Peer to Peer (P2P) update feature is quite controversial amongst Windows 10 users. While it aims to make updating your computer easier, it often hogs a large amount of bandwidth and slows down your internet.
This feature has been reported to cause issues with internet speed, DNS server, and more. Luckily, you can disable it.

- After turning this feature off, you’ll no longer use your internet to send and receive updates from other computers. Try and see if the DNS server error still happens after completing the steps above.
Internet Protocol version 6 (IPv6) is currently the most recent version of the Internet Protocol (IP). If your network is configured for the earlier IPv4, disabling IPv6 may be able to fix the “DNS server is not responding” error.

1591 McKenzie Way, Point Roberts, WA 98281, United Sates
- Terms & Conditions
- Privacy & Cookies
© SoftwareKeep 2023 | All right reserved
- American Express
- Diners Club
Hand-Picked Top-Read Stories

6 Best Ways to Fix CAA30194 Error Code on Microsoft Teams
8 Best Ways to Fix Arrow Keys Not Working on Microsoft Teams

5 Best Ways to Fix Microsoft Teams Stuck on Offline Status
Trending tags, how to fix dns issues on windows 10.
Are you looking for a quick fix to DNS issues on Windows 10?
To access the internet on Windows 10 , your computer first has to go through what is known as a Domain Access Server (DNS). Your DNS needs to function without any hiccups for you to access the internet in the first place.
However, you may sometimes find that you cannot access the internet due to a DNS error. There are many DNS issues, one of them being the “ DNS Server Not Responding ”, and this is what most users encounter when faced with a DNS issue.
Fortunately, there are many solutions to your DNS server problems. So, in this article, we’ll show you how to fix these DNS issues so that you can access the internet once again.
Let’s dive right in!
1. Flush Your DNS Cache and Reset Winsock .
Your DNS cache stores information about your visits to other websites or anything else on the internet. At the same time, your Winsock (Windows Sockets API) stores information regarding your internet settings. Accordingly, they are essential when accessing the internet.
When having DNS errors, flushing your DNS cache and resetting your Winsock may help repair your DNS and restore your internet. Both can be done within the same window and only involve typing in commands in the Command Prompt.
Here’s how:
- Press the Windows and X keys at the same time to open the Power User menu.
- Once opened, select the Command Prompt (Admin) / Windows PowerShell (Admin) .

- Inside the command window, press the Enter key after typing in each command:
- ipconfig /flushdns
- ipconfig /registerdns
- ipconfig /release
- ipconfig /renew
- NETSH winsock reset catalog
- NETSH int ipv4 reset reset.log
- NETSH int ipv6 reset reset.log
Once done, check if you’re still encountering DNS errors on Windows 10. If it does not work, please continue reading to the next solution found below.
2. Change your Power Option Settings .
Your power option settings control your battery usage. It controls and manages the order in which your PC’s processes and programs are prioritized. Individual components can be configured, allowing you to control how much power they consume based on the power plan you’ve chosen.
If you’re experiencing DNS errors while on Wi-Fi, then your power settings may be slowing down your wireless adapter. Your settings may have been configured in a way that slows down your adapter if your system is not plugged in.
Here’s how to configure your power settings:
- First, right-click on the battery icon at the lower right side of your screen.
- Once opened, click Power Options .
- Look for your current power plan and select Change Plan Settings .

- Next, open Change Advanced Power Settings by clicking it.
- Once opened, expand Wireless Adapter Settings by selecting it.
- Expand Power Saving Mode .
- Afterwards, set On battery and Plugged In to Maximum Performance by clicking on them.

- Finally, click Apply , then the OK button.
Once finished, your power options settings should allow your wireless adapter to function at maximum performance, regardless of your system’s battery capacity.
3. Switch to Google’s DNS Server .
Google launched its Public DNS server way back in 2009. They featured it as a more secure and reliable DNS server that consumers can freely use. Google’s DNS server is readily available worldwide, and anyone can use it.
Your ISP (internet service provider) connects you to their DNS server. However, if you are having errors related to DNS, a possible solution is to use Google’s DNS server instead of your ISP.
Here’s how to switch to Google’s DNS server:
- Press the Windows and R key at the same time to open the Run window.
- Now, type ‘ Control ‘ to open your Control Panel .

- Once the Control Panel is opened, click View Network Status and Tasks under Network and Internet or Network and Sharing Center. .
- Select Change Adapter Settings found on the right panel.

- Next, right-click on your network and select Properties .
- Once a window opens, select Internet Protocol Version 4 (TCP/IPv4) , then select Properties .

- Mark the Use the following DNS server address box.
- After that, type in 8.8.8.8 for Preferred DNS server , and 8.8.4.4 for Alternate DNS server .

- Finally, click OK to save the changes.
You are now connected to Google’s public DNS server. If your ISP’s DNS server is causing the errors, they should now be fixed.
Proceed to the following solution below if you’re still experiencing DNS issues on Windows 10.
4. Disable Windows Update P2P .
A feature of Windows 10 is its peer-to-peer networking. This allows a system to receive and share resources with all the computers connected within the same local network. This allows a single computer to update once and easily share it with every computer that’s connected.
However, this feature may sometimes interrupt your DNS connection and cause errors in your internet connectivity. Therefore, a good solution is to disable this feature entirely to prevent any more DNS errors.
The steps in disabling peer-to-peer are found below:
- Press the Windows and I key s at the same time to open Settings .
- Once opened, click the Update & Security category.

- Scroll down and select Advanced options .

- After, select Choose How Updates are Delivered .
- Now, click on the PCs on My Local Network option.
- Lastly, disable the Updates from More than One Place option.
You have now disabled peer-to-peer updating on your computer. This should stop peer-to-peer interference with your DNS connection. If the problem persists, move on to the next solution found below.
5. Reinstall and Update Your Network Driver
A network adapter is a component found inside your computer that allows it to communicate with other computers over a network. And just like any other part on your computer, your network adapter has a driver that contains resources that allow the network adapter to work as intended.
Your network adapter may be the reason for DNS issues on Windows 10. There are two ways to fix this: to reinstall your network adapter driver and to update it. An outdated driver will cause bugs and errors, and reinstalling and updating them may fix the issue.
Here’s how to reinstall your network adapter driver:
- Right click on the Start button found on the lower-left corner of your screen.
- Select Device Manager from the menu.
- Once opened, expand the Network Adapters list by double-clicking.
- Next, right-click on your wireless adapter and select Uninstall Device .

- A prompt will appear. Tick the Delete the Driver Software for this Device and confirm by clicking Uninstall .
- Now, choose Network adapters , then click Action found on the toolbar.
- After that, click on Scan for Hardware Changes . Your system should automatically detect your missing driver and reinstall for you.
- Finally, check again under Network Adapter to see if your wireless adapter is back.
Here’s how to update your network adapter driver:
- Right the wireless adapter you previously reinstalled.
- Select Update Driver .
- A prompt will pop up. Please select Search Automatically for Drivers .

- Wait for the progress bar to load and finish your update.
- Lastly, restart your computer and recheck to see if your DNS error is gone.
You have successfully reinstalled and updated your network adapter. Your driver-related DNS issues should now go away, and you should be able to connect to the internet again.
That wraps it up for our guide on how to fix DNS issues in Windows 10. We hope you’ve successfully fixed this problem. If you have any comments, suggestions, or other inquiries, please don’t hesitate to leave a comment down below.
If this guide helped you, please share it. 🙂

Mako is a staff writer at Saint. He's been writing about tech for more than a decade. When he isn't reading about the latest news on Apple, he's busy studying cybersecurity, cryptocurrency, cloud computing, and other IT-related sectors. His exceptional work graces technology and Apple-related blogs like How-To Geek, VEED.io, Macgasm, onMac, PhotoWorkout, GameRant, and many more. He also has a Bachelors in Computer Science and has been writing since 2018, with over 400 posts published. LinkedIn X (Twitter)
View all posts
Leave a Reply Cancel reply
Your email address will not be published. Required fields are marked *
Techs & Gizmos
Hands On Review For Latest Gadgets & Gizmos
How to resolve DNS issues Windows 10 [Easy Guide]
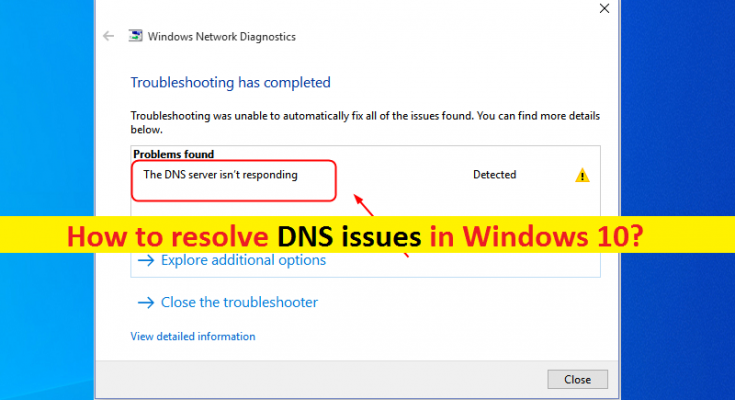
Tips to fix DNS server issue in Windows 10
In this post, we are going to discuss on “ How to resolve DNS issues Windows 10 ”. You will be guided here with easy steps/methods to resolve the issue. Let’s starts the discussion.
‘DNS (Domain Name System)’: DNS is hierarchal and decentralized naming systems for computers, services and other resources connected to the internet or private network. DNS translates more readily memorized domain names to the numerical IP addresses needed for locating and identifying computer services and devices with underlying network protocols. DNS delegates the responsibility of assigning domain names and mapping those names to internet resources by designating authoritative name servers for each domain.
DNS plays important role in world of internet and if you want to access internet in your Windows 10 computer then make sure DNS/DNS server is working properly and there is no issue with DNS server at all. DNS issues in Windows 10 can cause No Internet problem or internet related issues. Several users reported about DNS server issues/errors that restrict them from using internet.
Some common DNS Server issues/errors on Windows 10:
- DNS server not responding
- DNS_PROBE_FINISHED_NXDOMAIN
- DNS_PROBE_FINISHED_NO_INTERNET
- DNS_PROBE_FINISHED_BAD_CONFIG
- Your DNS server might be unavailable
These DNS server issues/errors usually occurred on Windows 10 computer while trying to access internet. The possible reason behind this issue can be corrupted DNS cache in your computer, outdated/corrupted network adapter driver, outdated Windows OS, issue with Power Options settings in your computer, and other reasons. Let’s go for the solution.
How to resolve DNS issues Windows 10?
Method 1: fix dns issues with ‘pc repair tool’.
‘PC Repair Tool’ is easy & quick way to find and fix BSOD errors, DLL errors, problems with programs/applications, malware or viruses issues, system files or registry issues, and other system issues with just few clicks. You can get this tool through button/link below.
Method 2: Flush DNS Cache and Reset Winsock in Windows 10
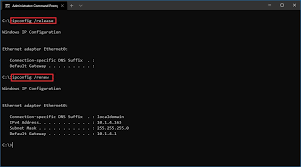
One possible way to fix the issue is to flush DNS cache and reset Winsock using command prompt.
Step 1: Press ‘Windows + X’ keys on keyboard and select ‘Command Prompt as Administrator’
Step 2: Type the following commands one-by-one and hit ‘Enter’ key to execute
ipconfig /flushdns ipconfig /registerdns ipconfig /release ipconfig /renew NETSH winsock reset catalog NETSH int ipv4 reset reset.log NETSH int ipv6 reset reset.log Exit
Step 3: Once executed, restart your computer and check if DNS server issues/errors resolved.
Method 3: Modify Power Options Settings in Windows 10
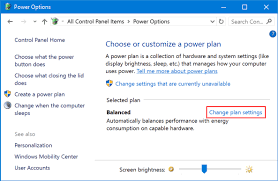
Step 1: Open ‘Control Panel’ in Windows 10 via Windows Search and go to ‘System and Security > Power Options > Go to your current power plan > Change Plan Settings > Change Advanced Power Settings’
Step 2: In the opened window, click on ‘Wireless Adapter Settings’ to expand the section and click ‘Power Saving Mode’
Step 3: Now, set ‘Maximum performance’ on both ‘On Battery’ and ‘Plug-in’ and then hit ‘Apply’ and ‘Ok’ button to save the changes. Check if it works for you.
Method 4: Try Google Public DNS server
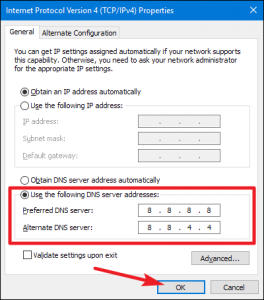
You can modify DNS server in Windows 10 to Google Public DNS server in order to fix the issue.
Step 1: Open ‘Control Panel’ in Windows 10 and go to ‘Network and Internet Connections > Change Adapter Settings’, right-click on your network (active network) and select ‘Properties’
Step 2: In ‘Properties’ window, select ‘Internet Protocol Version 4 (TCP/IPv4)’ and click ‘Properties’
Step 3: In ‘Properties’ window of TCP/IPv4, select ‘Use the following DNS server addresses’ option, enter ‘8.8.8.8’ and ‘8.8.4.4’ in Preferred DNS server and Alternate DNS server field
Step 4: Finally, click ‘OK’, ‘Apply’ and ‘OK’ button to save the changes
Method 5: Disable P2P (Peer-to-Peer) feature of Windows Update
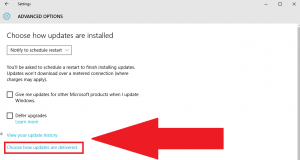
P2P (Peer-to-Peer) is new feature of Windows 10 update offers to download Windows update just once and share this update with all computers connected to local network You can disable this feature in order to fix DNS server issues/errors.
Step 1: Open ‘Settings’ App in Windows 10 via Windows Search and go to ‘Update & Security > Windows Update > Advanced Options > Choose who updates are delivered’
Step 2: Select ‘PCs on my local network’ option and disable ‘Updates from more than one place’ option. Once done, close ‘Settings’ app and check if the DNS issue is resolved.
Method 6: Update or reinstall Network Adapter driver in Windows 10
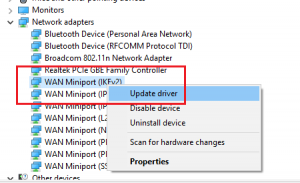
This issue can be occurred due to corrupted/outdated Network Adapter Driver in your computer. You can uninstall and then reinstall network driver, or perform network driver update in order to fix the issue.
Reinstall Network Driver in Windows 10:
Step 1: Open ‘Device Manager’ in Windows 10 via Windows Search and expand ‘Network Adapters’ category
Step 2: Right-click on your network adapter, and select ‘Uninstall’. Follow on-screen instructions to finish uninstall and after that, restart your computer
Step 3: Restarting computer will automatically reinstall the missing driver in computer.
Update Network Adapter Driver in Windows 10:
Step 1: Open ‘Device Manager’ and expand ‘Network Adapters’ category
Step 2: Right-click on network adapter, and select ‘Update Driver’ and follow on-screen instructions to finish update. Or you can also download and install the latest network driver according to your network adapter model and operating system version like Windows 32-bit or 64-bit from your network adapter manufacturer official site.
Download or reinstall network adapter driver update in Windows 10 [Automatically]
You can also try to update all Windows drivers including network drivers with ‘Automatic Driver Update Tool’. You can get this tool through button/link below.
Method 7: Enable Microsoft LLDP Protocol Driver in Windows 10
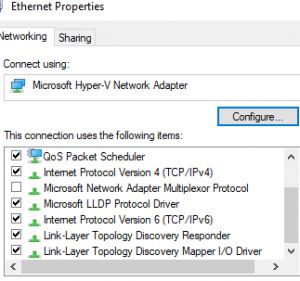
In Windows 10, you should make sure Microsoft LLDP Protocol Driver is activated/enabled for connection if you don’t want DNS server issues.
Step 1: Open ‘Control Panel’ and go to ‘System and Security > Network Connections’, right-click on your network connection and select ‘Properties’
Step 2: In ‘Properties’ window, find and check ‘Microsoft LLDP Protocol Driver’ checkbox if is not checked to enable it and then hit ‘OK’ button
Method 8: Perform Clean Boot in Windows 10
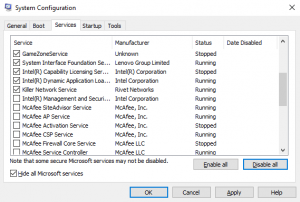
This issue can be resolved by performing Clean Boot in computer. This way, you can start Windows computer with limited services/software and startup items.
Step 1: Press ‘Windows + R’ keys on keyboard, type ‘msconfig’ in the opened ‘Run’ window and hit ‘OK’ button to open ‘System Configuration’ window
Step 2: In the opened window, click on ‘Services’ tab, select ‘Hide all Microsoft Services’ checkbox and hit ‘Disable All’ button, and then hit ‘Apply’ button
Step 3: Now, click on ‘Startup’ tab, click ‘Open Task Manager’. In Task Manager, select each application one-by-one and hit ‘Disable’ to disable them and then close Task Manager
Step 4: Once done, back to ‘System Configuration’ window, and click ‘Apply’ and ‘Ok’ button to save the changes and restart your computer and check if it works for you.
I am sure this post helped you on How to resolve DNS issues Windows 10 with several easy steps/methods. You can read & follow our instructions to do so. That’s all. For any suggestions or queries, please write on comment box below.
Related Posts

How to Fix VirtualBox FATAL: INT18: BOOT FAILURE Error [Steps]
September 27, 2023 September 8, 2023
What is IP Spoofing? How to protect against IP Spoofing?
September 2, 2023 September 8, 2023
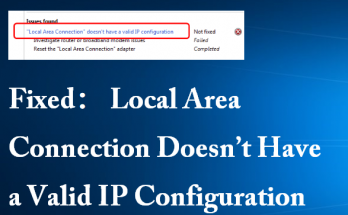
How to fix Local Area Connection doesn’t have a valid IP configuration issue?

About Sachin Prakash
Privacy overview.
Before you go...
Check out today's top deals.
Plus, get free shipping and easy returns.
HP TECH TAKES /...

How to Resolve DNS Issues
What is DNS?
Signs of a dns error.
- Type the numerical IP address directly into your browser. If the webpage loads, then your problem is DNS related. You can try with Google’s IP address: “ 172.217.4.46 ”.
- Perform a ping test by typing “ cmd ” into your Windows Start Menu search bar. Select Open Command Prompt . When the black box comes up, type in “ ping 172.217.4.46 ” then wait to see the results. If all four pings come back successful, it may be a DNS problem.
- ping Amazon.com
- ping Google.com
- Or the site you want to test
How to resolve DNS issues
- Right-click on the internet icon in your task tray.
- Select Troubleshoot problems .
- Let the wizard go through all the steps. This may take a few minutes.
- If it doesn’t fix your problem, move on to the solutions below, which are designed for Windows 10 users.
1. Rule out ISP issues
- Look for the WAN or internet port label on the back of your wireless router, and disconnect the cable going into that port.
- Take the free end of this same cable and plug it directly into the Ethernet port on your computer.
- Turn off the wireless router, so you don’t accidentally connect to it.
- Give your computer a minute or two to recognize the new connection. Be sure you are using an Ethernet or LAN connection, and not your WiFi. You may have to restart your computer for the new settings to take effect.
2. Restart your networking equipment
3. Flush DNS cache and reset winsock
- Type “cmd” in the Windows Start Search bar, and select Open Command Prompt.
- Type the following exactly as written, and hit enter after each line is typed out
4. Perform a clean reboot
- Push the Win + R keys at the same time.
- In the Run dialog box that comes up, type “ msconfig ”. Alternately, you can type “ msconfig ” in the search bar at the bottom of the Windows Start Menu, and select Open for the System Configuration app.
- Click on the Services tab within the System Configuration app.
- Check Hide all Microsoft services .
- Select the Disable all option.
- Click the Apply button, then the OK button to save your preferences.
- Click on the Startup tab .
- Click Open Task Manager .
- Start with the first application, and click on the Disable option next to it. Continue doing this for all applications until they are all disabled.
- Close the application window.
- Restart your computer.
- Go back into the System Configuration App .
- Click on the Services tab.
- One by one, select an application and click to enable it. After you enable each app, see if you can connect to the internet.
5. Run the Microsoft LLDP Protocol Driver
- Press Windows + X keys to open the Quick Link Menu . Select Network Connections . Alternatively, you can click on the internet icon in your task tray to bring up your available networks. Click on Network and Internet Setting link .
- Click Change Connection Properties or Change Adapter Settings .
- In the new window that pops up, right-click on the connect you are using. Select Properties .
- Check the list for Microsoft LLDP Protocol Driver . Make sure the box next to it is checked.
- Click OK to exit.
6. Update network adapter driver and reinstall if needed
- Type devmgmt into the Windows Start Menu search bar and open the Device Manager app.
- Go to the Network adapters section in the list, and click to expand it.
- Find your network device, and right-click to choose Update driver .
- When prompted, choose Search automatically for updated driver software . This may take a few moments to complete.
- If a driver is available, Windows will install it.
- Restart your computer, and check to see if the DNS error still exists.
- Repeat steps 1 and 2 above.
- Find your driver, and right-click Uninstall .
- Use the driver software downloaded from the manufacturer’s website for your driver to reinstall the driver.
- Restart your computer and check the DNS again.
7. Change to public Google DNS servers
- Click on the internet icon in your task tray to bring up your available networks. Click on Network and Internet Setting link .
- In the new window, right-click on the connection you are using. Select Properties .
- Choose Internet Protocol Version 4 (TCP/IPv4) from the list, and click the Properties button.
- Choose Use the following DNS server address option.
- Type 8.8.8.8 into the Preferred DNS server fields.
- Type 8.8.4.4 into the Alternate DNS Server fields.
- Click OK to save and exit the TCP/IPv4 window. Click OK to save again to exit the Properties window.
8. Check power settings
- Type Control Panel into the Search box from the Start Menu .
- Click to open the Control Panel .
- Select Hardware & Sound .
- Look for the Power Options category, and then Choose or customize a power plan .
- Click the Change Plan Settings link.
- Click the Change Advanced Power settings link.
- In the new window, find Wireless Adapter Settings . Click to expand.
- Click the Power Saving Mode option to expand.
- Change both On battery and Plugged in to Maximum Performance .
- Click OK to save and exit.
What to do if your DNS issues aren’t resolved
About the author.
Linsey Knerl is a contributing writer for HP® Tech Takes. Linsey is a Midwest-based author, public speaker, and member of the ASJA. She has a passion for helping consumers and small business owners do more with their resources via the latest tech solutions.
Popular articles
- 10 Best Minecraft Seeds for 2024
- How to Screenshot on HP Laptop or Desktop Computers
- How to Enter BIOS Setup on Windows PCs
- How Do I Fix a Laptop that Won’t Turn On?
- 3 Different Ways to Charge a Laptop without a Charger
- How to Boot from a USB Drive on Windows 10 PCs
- 7 Ways to Improve Your Computer Performance
- 10 Best Minecraft Shaders for 2024
- How to Turn Keyboard Lighting On / Off
- Lag! Top 5 Reasons your Ping is so High
Related tags
- business software
- computer processors
Article archives
- 2023 Articles
- 2022 Articles
- 2021 Articles
- 2020 Articles
- 2019 Articles
- 2018 Articles
Recommended articles

What is the HP OMEN Command Center?

What You Should Know About the Intel Core i9 Processor

How to Uninstall Programs on Windows 10

Best Screencasting Software for Teachers 2024

Why Should I Upgrade to an Intel Xeon Processor?

What is Processor Speed and Why Does It Matter?

How to Transfer Files from PC to PC

How to Upgrade Your Laptop

GPU vs CPU: What Matters Most for PC Gaming?

How to Overclock Your PC’s CPU

PC Upgrade Guide: Which Components to Upgrade and When

Hyper-Threading and Everything You Need to Know

How to Build a Really Fast Desktop Computer
Best Computer Processor (CPU) for Business
- HP Fraud Alert
- HP Spectre Laptops
- HP Employee Store
- HP Education Store
- Best Processor for Laptop
- Gaming PC 1080Ti
- Laptop 10 Inch
- Spectre 11 Inch
- 13 Inch 2-in-1
- 13 Inch Detachable Laptop
- 13 Inch Laptops
- 14 Inch 2-in-1 Laptop
- 14 Inch Convertible Laptop
- 14 Inch Gaming Laptop
- 14 Inch Workstation Laptop
- 15.6 Ultrabook
- 15 Inch Detachable Laptop
- 15 Inch Ultrabook
Disclosure: Our site may get a share of revenue from the sale of the products featured on this page.

FREE shipping & Easy returns

Order by Phone 877-203-4758

Student discounts

HP for Business
Offers subject to change, not combinable with all other offers, and exclusions may apply, while supplies last. HP may impose a purchase quantity limit (for example, 3 units per order). Taxes, shipping, and other fees may apply as applicable. HP reserves the right to cancel orders arising from pricing or other errors. Prices, specifications, availability, and terms of offers may change without notice. Price protection, price matching or price guarantees do not apply to Intra-day, Daily Deals or limited-time promotions. These terms apply only to products sold by HP.com; reseller offers may vary. Items sold by HP.com are not for immediate resale. Orders that do not comply with HP.com terms, conditions, and limitations may be cancelled. Contract and volume customers not eligible.
HP’s MSRP is subject to discount. HP’s MSRP price is shown as either a stand-alone price or as a strike-through price with a discounted or promotional price also listed. Discounted or promotional pricing is indicated by the presence of an additional higher MSRP strike-through price.
Microsoft and Windows are US registered of Microsoft Corporation. Ultrabook, Celeron, Celeron Inside, Core Inside, Intel, Intel Logo, Intel Atom, Intel Atom Inside, Intel Core, Intel Inside, Intel Inside Logo, Intel vPro, Itanium, Itanium Inside, Intel Evo, Intel Optane, Iris, Itanium, MAX, Pentium, Pentium Inside, vPro Inside, Xeon, Xeon Phi and Xeon Inside are trademarks of Intel Corporation or its subsidiaries in the U.S. and/or other countries.
Not all features are available in all editions or versions of Windows. Systems may require upgraded and/or separately purchased hardware, drivers, software or BIOS update to take full advantage of Windows functionality. Windows is automatically updated and enabled. High speed internet and Microsoft account required. ISP fees may apply and additional requirements may apply over time for updates. See http://www.windows.com.
Earn HP Rewards on select products from the following categories: Laptops, Desktops, Printers, Business PC’s, select Accessories, and select Ink, Toner & Paper. Exclusions apply, and program membership required. See details HP Rewards
The personal information you provide will be used according to the HP Privacy Statement
*America’s most trusted printer brand: Based on 2022 semi-annual internal brand surveys commissioned by HP.
*2 years of ink included with the best print quality every time: Based upon 150 and 200 pages per month of HP Smart Tank customers’ usage. Actual yield varies considerably based on content of printed pages and other factors. Average yield based on ISO/IEC 24711 or HP testing methodology and continuous printing. Some ink from included bottles is used to start up the printer. For details, see: www.hp.com/go/learnaboutsupplies. Print quality tested on everyday paper. Compared to the majority of in-class, 3:1 and 4:1 duplex, wireless A4 ink tank printers under $552 USD. Printers selected by market share as reported by IDC Quarterly Hardcopy Peripherals Tracker – Final Historical CYQ2 2023. Claim based on publicly available information as of September 2023 and Keypoint Intelligence hands-on testing and study in September 2023 commissioned by HP. Details: www.keypointintelligence.com/hpbesteverydayprintquality.
**Copilot in Windows (in preview) is available in select global markets and will be rolled out to additional markets over time. See microsoft.com/en-us/windows/windows-10-specifications for more information.
This browser is no longer supported.
Upgrade to Microsoft Edge to take advantage of the latest features, security updates, and technical support.
Troubleshooting Domain Name System (DNS) issues
- 2 contributors
Try our Virtual Agent - It can help you quickly identify and fix common DNS issues.
Domain Name resolution issues can be broken down into client-side and server-side issues. In general, you should start with client-side troubleshooting unless you determine during the scoping phase that the issue is definitely occurring on the server side.
Troubleshooting DNS clients
Troubleshooting DNS Servers
Data Collection
We recommend that you simultaneously collect data on both the client and server sides when the issue occurs. However, depending on the actual issue, you can start your collection at a single data set on either the DNS client or DNS server.
To collect a Windows Networking Diagnostic from an affected client and its configured DNS server, follow these steps:
Start network captures on the client and server:
Clear the DNS cache on the DNS client by running the following command:
Reproduce the issue.
Stop and save traces:
Save the Nettrace.cab files from each computer. This information will be helpful when you contact Microsoft Support.
Coming soon: Throughout 2024 we will be phasing out GitHub Issues as the feedback mechanism for content and replacing it with a new feedback system. For more information see: https://aka.ms/ContentUserFeedback .
Submit and view feedback for
Additional resources

Contribute to the Windows forum! Click here to learn more 💡
April 9, 2024
Contribute to the Windows forum!
Click here to learn more 💡
- Search the community and support articles
- Search Community member
Ask a new question
DNS not working on my windows 10
I am having an issue about the DNS I try to use the most command DNS as opendns and google DNS both is not even working and my web browser keeps showing me this error pageThis site can’t be reached (refuse to connect. I just format my windows 10 laptop and it used to work just fine. After just used the 208.67.222.222/208.67.220.220. Before I have formatted my laptop it works just fine after the format it seems to not working anymore. :(
I try to fix this problem for a few days now and I cannot find any solution. I hope that if you can show me how and give me some options to fix it. Thank you
**Modified title from: PLEASE HELP !! DNS not working on my windows 10***
Report abuse
Reported content has been submitted
- Microsoft Agent |
Hi JayCleve,
Thank you for writing to Microsoft Community Forums.
Does this happen for all websites of any particular website?
Are you connected to the Wireless network or a wired network?
This issue may occur due to incorrect network settings.
I suggest you to try the following methods and check:
Method 1: Perform Network troubleshooter
Select Start > Settings > Network & Internet > Status . Under Change your network settings , select Network troubleshooter .
Method 2: Reinstall Network adapter.
- In the search box on the Taskbar, type Device Manager , and then select Device Manager from the list of results.
- In Device Manager, select Network adapters > the network adapter name.
- Press and hold (or right-click) the network adapter, and then select Uninstall device > Delete the driver software for this device check box > Uninstall .
- After uninstalling the driver, select the Start button > Power > Restart .
After your PC restarts, Windows will automatically look for and install the network adapter driver. Check to see if that fixes your connection problem.
You can refer this Microsoft article to Fix network connection issues in Windows .
Method 3: Boot the PC in Safe Mode with networking.
- Press Windows logo key Windows logo key + I on your keyboard to open Settings. If that doesn't work, select the Start button in the lower-left corner of your screen, then select Settings.
- Select Update & security > Recovery.
- Under Advanced Startup , select Restart now .
- After your PC restarts to the Choose an option screen, select Troubleshoot > Advanced Options > Startup Settings > Restart .
- After your PC restarts, you'll see a list of options. Select 4 or F4 to start your PC in Safe Mode . Or if you'll need to use the Internet, select 5 or F5 for Safe Mode with Networking .
Run the following commands in an elevated prompt;
- Type netsh winsock reset and press Enter.
- Type netsh int ip reset and press Enter.
- Type ipconfig /release and press Enter.
- Type ipconfig /renew and press Enter.
- Type ipconfig /flushdns and press Enter.
You may refer this article to Start your PC in safe mode in Windows 10
Restart your Computer in normal mode and check if it works.
Hope it helps.
Let us know if you got the help you needed by clicking Yes or No.
Thanks, Suman.B Microsoft Community – Moderator
7 people found this reply helpful
Was this reply helpful? Yes No
Sorry this didn't help.
Great! Thanks for your feedback.
How satisfied are you with this reply?
Thanks for your feedback, it helps us improve the site.
Thanks for your feedback.
Replies (1)
Question info.
- Internet and connectivity
- Norsk Bokmål
- Ελληνικά
- Русский
- עברית
- العربية
- ไทย
- 한국어
- 中文(简体)
- 中文(繁體)
- 日本語
IMAGES
VIDEO
COMMENTS
Open Control Panel and head to Network and Internet > Network and Sharing Center > Change adapter settings. Right-click your network adapter and choose Properties. Select Internet Protocol Version 4 (TCP/IPv4) and choose Properties. Enable the Use the following DNS server addresses option.
Perform Clean boot to fix DNS issues on Windows 10. Press Windows key + R to open the Run utility. Type msconfig in the run box and click the OK button. Click the Services tab at the top. Check Hide all Microsoft services and click Disable all button. Click Apply and OK to save changes. Restart your PC.
On the open page, next to "Internet Connections," click "Run." If you're on Windows 10, head into Settings > Update & Security > Troubleshoot > Additional Troubleshooters. Click "Internet Connections" and choose "Run the Troubleshooter." Follow the troubleshooter's instructions to detect and resolve your DNS issues.
You can do this by following these steps: Open Control Panel. One way to do this is press the Windows Key + R to activate the "Run" box, then type "control" in the text box presented in the "Run" box and hit the enter key. Select the Network and Internet option presented within the Control Panel window.
Press Win+R to open the Run window and type the command ncpa.cpl. Hit Enter to open the Network Connections window. Right-click on the active network and select Properties. Double-click on ...
Select the connection that you're trying to fix from the left sidebar, then click Advanced… in the bottom-right corner. 3. Select DNS from the tabs at the top. 4. Select the DNS Servers box and ...
To perform a clean boot, type "system configuration" in Search and click on the "System Configuration" result. In the System Configuration window, click on the "Services" tab and mark the "Hide all Microsoft services" checkbox. Then, click on "Disable all". Click the "Startup" tab and click "Open Task Manager".
1. Check your DNS Server settings. Change in DNS server settings can be the main cause of your DNS issues. You can have a quick look at that before proceeding with other solutions. To check whether your DNS server settings are proper, press Windows key + I to open Settings. Next, click on Network and Internet.
If you're not sure whether or not your computer is reporting DNS Server Not Responding errors, follow these steps: Select Start and then choose Settings . Select Network & Internet. The Network Status window will open. Select Network Troubleshooter under Change Your Network Settings. Windows Network Diagnostics will open.
Test your DNS server. A more advanced test is to manually ask your DNS server for the IP address of the domain you're trying to access. If the server can't find the IP or displays an error, that ...
To change the DNS settings with Control Panel, use these steps: Open Control Panel. Click on Network and Internet. Click on Network and Sharing Center. Click the "Change adapter settings" option ...
Method 7. Disable peer-to-peer Windows 10 updates. The Peer to Peer (P2P) update feature is quite controversial amongst Windows 10 users. While it aims to make updating your computer easier, it often hogs a large amount of bandwidth and slows down your internet. This feature has been reported to cause issues with internet speed, DNS server, and ...
Then disable your firewall, reset your router and test the connection again. 1. Change the DNS server manually. Press Windows key + R, type ncpa.cpl, and click the OK button. Right-click your network and choose Properties. Select Internet Protocol Version 4 (TCP/IPv4) and click the Properties button. Now, select the Use the following DNS server ...
Here's how: Press the Windows and X keys at the same time to open the Power User menu. Once opened, select the Command Prompt (Admin) / Windows PowerShell (Admin). Inside the command window, press the Enter key after typing in each command: ipconfig /flushdns. ipconfig /registerdns.
You can modify DNS server in Windows 10 to Google Public DNS server in order to fix the issue. Step 1: Open 'Control Panel' in Windows 10 and go to 'Network and Internet Connections > Change Adapter Settings', right-click on your network (active network) and select 'Properties'
Check whether the DNS server is authoritative for the name that is being looked up. If so, see Checking for problems with authoritative data. Run the following command: Windows Command Prompt. Copy. nslookup <name> <IP address of the DNS server>. For example: Windows Command Prompt. Copy.
Write down the name of the driver just to be sure, and then do the following: Repeat steps 1 and 2 above. Find your driver, and right-click Uninstall. Use the driver software downloaded from the manufacturer's website for your driver to reinstall the driver. Restart your computer and check the DNS again.
Run the following command: Windows Command Prompt. Copy. ipconfig /all. Verify that the client has a valid IP address, subnet mask, and default gateway for the network to which it is attached and being used. Check the DNS servers that are listed in the output, and verify that the IP addresses listed are correct.
Exit the prompt then restart. Open Start > Settings > Update & security > Troubleshoot. Scroll down. Click Network adapters. Click Run the Troubleshooter. When complete, restart to see if the problem is resolved. If not, press Windows key + X. Click Device Manager. Expand Network adapters.
Hit the plus button to add a new DNS server. Hit OK and then Apply.; Reset your internet connection and see if "the DNS server isn't responding" problem is resolved. 9. Flush DNS Cache. Another solution in order to fix DNS servers connection issues is to flush the DNS cache. Clearing the router cache might help make the DNS work properly.. Here are the steps to flush DNS cache files on ...
In general, you should start with client-side troubleshooting unless you determine during the scoping phase that the issue is definitely occurring on the server side. Troubleshooting DNS clients. Troubleshooting DNS Servers. Data Collection. We recommend that you simultaneously collect data on both the client and server sides when the issue occurs.
Method 3: Boot the PC in Safe Mode with networking. Press Windows logo key Windows logo key + I on your keyboard to open Settings. If that doesn't work, select the Start button in the lower-left corner of your screen, then select Settings. Select Update & security > Recovery. Under Advanced Startup, select Restart now.
ZTDNS aims to solve this decades-old problem by integrating the Windows DNS engine with the Windows Filtering Platform—the core component of the Windows Firewall—directly into client devices ...
Microsoft has revealed a comprehensive new security system, called Zero Trust DNS (ZTDNS for short), aimed at significantly bolstering the security of the Domain Name System (DNS) within Windows networks. DNS, essential for translating human-friendly website names into numerical IP addresses, has long been plagued by security risks. ZTDNS ...
Matthew is a freelancer who has produced a variety of articles for various publications and websites such as Swing Golf Magazine, TripAdvisor, Naval History, Artilleryman, dotTech, Bright Hub, Coed Magazine the Washington Post and Vagabundo Travel.