

Reduce the file size of your PowerPoint presentations
If the file size of your presentation is too large, try the following tips to make it more manageable.
Compress pictures in your presentation
Select a picture in your document. The Picture Format tab appears.
On the Picture Format tab, in the Adjust group, select Compress Pictures .
Under Compression options , do any of the following:
Make sure that Apply only to this picture is not selected so that the changes you make here will apply to all pictures in the document.
Select Delete cropped areas of pictures . This option removes the cropped picture data but note that if you delete the cropped picture data, you won't be able to restore it.
Under Resolution , select Use default resolution .

Under Compression options , do either of the following:
Select Delete cropped areas of pictures . This option removes the cropped picture data but note that if you delete the cropped picture data, you won't be able to restore it.

Delete image editing data and lower default resolution
By default, when you edit an image, the data from the original is retained (to ensure the image can be restored). Discarding it means that you can't restore the changes you make, but it will reduce your file size. Lowering the default resolution for images also reduces your overall file size.
Go to File > Options > Advanced .
Under Image Size and Quality , do the following:
Select Discard editing data . This option removes stored data that's used to restore the image to its original state after it's been edited. Note that if you discard editing data, you won't be able to restore the image after you edit it.
Make sure that Do not compress images in file is not selected.

Reduce the character set of embedded fonts
To make your presentation more sharable with others who don't have the same fonts in their system, it's typical to embed the fonts you use. However, embedded fonts will increase your file size. To minimize the file increase, embed only those characters used in the presentation.
Go to File > Options > Save .

Note: If you've used custom fonts and want others to edit the presentation, select Embed all characters .
Reduce the file size of your Excel spreadsheets
Reduce the file size of your Word documents

Need more help?
Want more options.
Explore subscription benefits, browse training courses, learn how to secure your device, and more.

Microsoft 365 subscription benefits

Microsoft 365 training

Microsoft security

Accessibility center
Communities help you ask and answer questions, give feedback, and hear from experts with rich knowledge.

Ask the Microsoft Community

Microsoft Tech Community

Windows Insiders
Microsoft 365 Insiders
Was this information helpful?
Thank you for your feedback.
How to compress a PowerPoint file so that it loads faster and doesn't take up as much space
- You can easily compress a PowerPoint file's size, which makes it easier to share and save.
- When you compress your PowerPoint, you'll have to reduce the quality of any music, videos, or pictures you have in your slideshow.
- Once you've compressed your PowerPoint, it will load faster, but the media in it may not look as good.
- Visit Business Insider's Tech Reference library for more stories .
At some point in your slideshow-creating life, you've probably saved a PowerPoint presentation and realized that the file size is entirely too large.
Larger file sizes make PowerPoints more difficult to send and save, and they also make each slide take longer to load.
One of the easiest ways to quickly reduce a PowerPoint presentation's file size is to compress it. When you compress a PowerPoint, you'll reduce the quality and size of every media file in the presentation. This includes videos, audio clips, animations, and photos.
If you compress them down to an appropriate size, your file size will be much smaller. However, your photos, videos, and other media probably won't look or sound as sharp.
Here's how to compress your media files in PowerPoint on a Mac or PC.
Check out the products mentioned in this article:
Apple macbook pro (from $1,299.00 at apple), acer chromebook 15 (from $179.99 at walmart), how to compress a powerpoint file on a pc.
1. In the ribbon or menu bar at the top of the screen, click "File." Make sure that "Info" is selected in the left sidebar.
2. Click "Compress Media." Depending on whether your version of PowerPoint was made before or after 2016, this button will either be next to the label "Multimedia" or "Media Size and Performance."
3. Choose one of the three options for media quality from the dropdown menu. These will differ based on which version you have as well, but they boil down to:
- Select the highest quality option if you want to maintain high quality media for in-person presentations.
- Select the middle option for quality akin to media found on the internet.
- Select the lowest quality option if your file needs to be as compressed as much as possible — for example, if you need to send it via email.
How to compress a PowerPoint file on a Mac
In the Mac version of PowerPoint, you can only reduce the file size of images, not videos or music.
To do this:
1. Open your PowerPoint slideshow and click "File" in the menu bar at the top of the screen. If you only want to compress specific images, select them before clicking "File."
2. In the dropdown menu, click "Compress Pictures..."
3. You'll be shown a "Compression Table," which lists all the different ways you can compress the file. You'll have three main options:
- "Printing" will keep your pictures at the highest quality possible.
- "Viewing on screen" will reduce the quality of your pictures by about 30 percent.
- "Sending in an e-mail message" will compress them by another 30 percent or so.
You can also pick the fourth and last option, which will keep each picture's current resolution, but try to reduce the file size in other areas.
4. Select whether you'd like to delete parts of your pictures that have been cropped out — doing so will help reduce the file size.
5. Choose whether you'd like to compress every picture in the slideshow, or just the ones that you selected beforehand. Once you've decided, click "OK."
Related coverage from Tech Reference :
How to add a border to slides in powerpoint, and give your slideshow a sleek design, how to embed a youtube video into your microsoft powerpoint presentations using a mac or pc, how to convert google slides to a powerpoint presentation in 4 easy steps, how to convert a powerpoint to google slides in 2 different ways, how to copy or duplicate a powerpoint slide and put it anywhere in your slideshow.
Insider Inc. receives a commission when you buy through our links.
Watch: The coolest gadgets we saw at CES 2018
- Main content
Free All-in-One Office Suite with PDF Editor
Edit Word, Excel, and PPT for FREE.
Read, edit, and convert PDFs with the powerful PDF toolkit.
Microsoft-like interface, easy to use.
Windows • MacOS • Linux • iOS • Android

- Articles of PPT
How to Compress a Powerpoint on Mac A Comprehensive Guide
If you're using a Mac and facing challenges with large PowerPoint files, this article is for you. Compressing a PowerPoint presentation can significantly reduce the file size, making it easier to share and store. In this comprehensive guide, we'll walk you through the process of compressing a PowerPoint on Mac and introduce you to the perfect software for all your office needs.
Part 1. Why Should Compress a PowerPoint
Compressing a PowerPoint presentation offers numerous benefits that enhance your experience with the file. Let's explore some of the key advantages of compressing PowerPoint presentations:
To make it easier to share. If you need to send your presentation to someone via email or another file-sharing service, a smaller file size will make it easier to send and download.
To improve performance. A smaller file size can also improve the performance of your presentation, especially if it contains a lot of images or videos.
To save space on your computer. If you have a lot of PowerPoint presentations, compressing them can help you save space on your computer's hard drive.
To make it easier to edit. If you need to make changes to your presentation, a smaller file size will make it easier to open and save the file.
Part 2. Compress a PowerPoint on Mac.
Welcome to Part 2 of our tutorial on how to compress a PowerPoint on Mac! In this section, we'll show you the straightforward steps to reduce the file size of your PowerPoint presentations without compromising their quality. Let's get started and make your PowerPoint files smaller and easier to share!
#1.Using the Built-in PowerPoint Tool
If you're using a Mac and have Microsoft PowerPoint installed, you can easily compress your presentations using the built-in compression feature. Follow these steps to get started:
Step 1. Open your PowerPoint presentation.
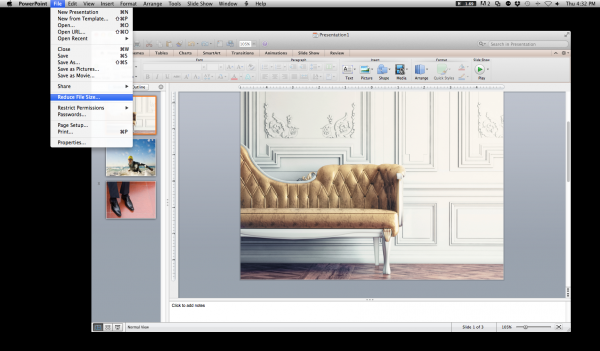
Step 2. Click on the "File" menu in the top-left corner.
Step 3. Choose "Reduce File Size" from the menu.
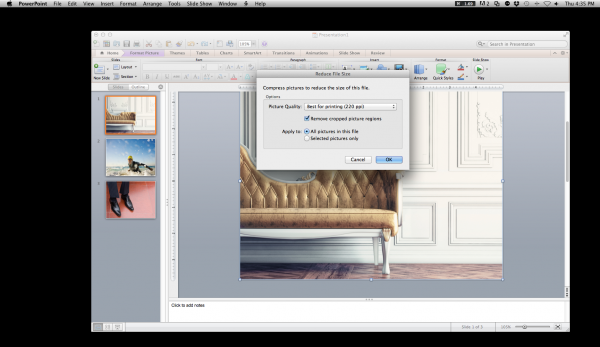
Step 4. Select the desired compression option (e.g., "Best for Sending in Email" or "Best for Viewing on Screen").
Step 5. Click "OK" to compress the pictures and reduce the file size.
Step 6. Save the compressed presentation.
#2.Using a Third-Party Compression App
If you prefer using third-party applications to compress your PowerPoint presentations on Mac, there are various options available. Here, we'll guide you through using two popular compression apps: Smallpdf and Zamzar.
1. smallpdf
Smallpdf, a user-friendly third-party compression app, allows you to quickly compress PowerPoint presentations on Mac. Just upload your file, let Smallpdf work its magic, and download the optimized presentation, ready for easy sharing and viewing.
Step 1. Go to Smallpdf's website: https://smallpdf.com/compress-pdf .
Step 2. Drag and drop your PowerPoint file onto the web page.
Step 3. Wait for the compression to finish.
Step 4. Click "Download" to save the compressed presentation.
2. zamzar
Zamzar is another easy-to-use option for compressing PowerPoint presentations on Mac. Upload your file, select the desired output format, and let Zamzar handle the compression process, resulting in a smaller file size for effortless sharing and management.
Step 1. Visit Zamzar's compression page: https://www.zamzar.com/compress-ppt/ .
Step 2. Upload your PowerPoint file.
Step 3. Select the output format (PPT or PPTX).
Step 4. Click "Convert Now" to compress the presentation.
Step 5. Download the compressed file.
With these two methods at your disposal, you can easily compress your PowerPoint presentations on your Mac and enjoy smaller file sizes without compromising on content quality. Choose the method that best suits your needs and get ready to share your presentations effortlessly!
Use Word, Excel, and PPT for FREE, No Ads.
Edit PDF files with the powerful PDF toolkit.
Microsoft-like interface. Easy to learn. 100% Compatibility.
Boost your productivity with WPS's abundant free Word, Excel, PPT, and CV templates.
Part 3: How to Edit Microsoft Office Word, Excel, Powerpoint for Free?
Looking for a free alternative to edit Microsoft Office files? WPS Office is your solution! It's a powerful office suite that allows you to open, create, edit, and save Word, Excel, and PowerPoint files without any cost. Plus, it's fully compatible with both Windows and Mac systems, providing a seamless experience for users.
Here are the key features of WPS Office in a simple list:
Word Processing (WPS Writer)
Spreadsheet Management (WPS Spreadsheets)
Presentation Creation (WPS Presentation)
Cloud Support and Sync
PDF Editing and Conversion
Cross-platform Compatibility
Collaboration and Sharing
Free Version with No Subscription Fees
User-friendly Interface
Extensive File Format Support
Steps to Edit Word/Excel/PowerPoint in WPS Office:
Step 1. Download and Install WPS Office for your system.
Step 2. Open WPS Office and create a new document or open an existing Microsoft Office file.
Step 3. Edit the document using WPS Office's intuitive tools.
Step 4. Save your changes in the desired format (e.g., .docx, .xlsx, .pptx).
Step 5. Export or share the edited document easily.
With WPS Office, you can unleash your creativity and productivity without any cost. Its seamless compatibility with Microsoft Office files makes it a perfect choice for hassle-free editing on both Windows and Mac platforms.
Downloading WPS Office is quick and easy. Follow these simple steps:
Step 1: Go to the official WPS Office website at [ https://www.wps.com/ ].
Step 2: Look for the "Download" or "Get WPS Office" button on the website's homepage.
Step 3: To start the download, click on the button.
Step 4: Choose the appropriate version for your device (Windows, macOS, Android, or iOS).
Step 5: Wait for the download to complete. The time may vary based on your internet connection speed.
Step 6: Once the download is finished, open the installation file.
Step 7: Follow the on-screen instructions to install WPS Office on your device.
Step 8 : Launch WPS Office after installation.
Congratulations! WPS Office has been successfully downloaded and installed.. Start enjoying the convenience and power of this modern office suite for all your document needs.
1. Does compressing a file save space?
Yes, compressing a file saves space. When you compress a file, it becomes smaller in size, which means it takes up less storage space on your device or computer. This is useful for managing large files and freeing up storage capacity.
2. Can I compress pictures in PowerPoint on iPad?
Yes, you can compress pictures in PowerPoint on an iPad. Microsoft PowerPoint for iPad offers a built-in feature that allows you to compress pictures within your presentation to reduce the file size. This is helpful when you want to share the presentation via email or other means where file size matters.
3. Is WPS Office compatible with Windows and Mac?
Yes, WPS Office is compatible with both Windows and Mac operating systems. WPS Office offers versions for Windows and macOS, allowing users to seamlessly use the software on either platform. Whether you are using a Windows PC or a Mac computer, you can download and install WPS Office to create, edit, and save Word, Excel, and PowerPoint files.
4. Can I compress a PowerPoint presentation without losing image quality?
Yes, you can compress a PowerPoint presentation without losing image quality. Choose compression settings that strike a balance between reducing file size and maintaining clear images. This way, you can have a smaller file size without compromising the visual quality of your presentation.
In conclusion, compressing a PowerPoint on Mac is essential for optimizing file size, improving performance, and ensuring compatibility. We've covered two methods to achieve this: using the built-in tool and third-party apps. Additionally, WPS Office offers a powerful, free solution for editing Word, Excel, and PowerPoint files on both Mac and Windows platforms. Enjoy the benefits of WPS Office for all your office needs.
- 1. Smaller PDFs Size with Adobe Compress PDF Free and Pro: The Ultimate Guide
- 2. How To Narrate a PowerPoint on Mac – A Comprehensive Guide
- 3. How to Compress Pictures in Powerpoint Without Losing Quality
- 4. How to Compress a Powerpoint Presentation for Email (Step-by-Step)
- 5. How to Compress Excel Files Online: A Guide for Free and Large Files
- 6. The Right Way to Compress PDF on Mac

15 years of office industry experience, tech lover and copywriter. Follow me for product reviews, comparisons, and recommendations for new apps and software.
- PRO Courses Guides New Tech Help Pro Expert Videos About wikiHow Pro Upgrade Sign In
- EDIT Edit this Article
- EXPLORE Tech Help Pro About Us Random Article Quizzes Request a New Article Community Dashboard This Or That Game Popular Categories Arts and Entertainment Artwork Books Movies Computers and Electronics Computers Phone Skills Technology Hacks Health Men's Health Mental Health Women's Health Relationships Dating Love Relationship Issues Hobbies and Crafts Crafts Drawing Games Education & Communication Communication Skills Personal Development Studying Personal Care and Style Fashion Hair Care Personal Hygiene Youth Personal Care School Stuff Dating All Categories Arts and Entertainment Finance and Business Home and Garden Relationship Quizzes Cars & Other Vehicles Food and Entertaining Personal Care and Style Sports and Fitness Computers and Electronics Health Pets and Animals Travel Education & Communication Hobbies and Crafts Philosophy and Religion Work World Family Life Holidays and Traditions Relationships Youth
- Browse Articles
- Learn Something New
- Quizzes Hot
- This Or That Game
- Train Your Brain
- Explore More
- Support wikiHow
- About wikiHow
- Log in / Sign up
- Computers and Electronics
- Presentation Software
How to Reduce Powerpoint File Size
Last Updated: March 29, 2022
This article was co-authored by wikiHow staff writer, Jack Lloyd . Jack Lloyd is a Technology Writer and Editor for wikiHow. He has over two years of experience writing and editing technology-related articles. He is technology enthusiast and an English teacher. This article has been viewed 978,342 times. Learn more...
This wikiHow teaches you how to lower a PowerPoint presentation file's size by compressing its images on a Windows or Mac computer, or by clearing the editing data on a Windows computer. There is currently no option to delete the editing data of PowerPoint presentations on a Mac.
Compressing Images on Windows

- If your PowerPoint file isn't yet open, first open it by double-clicking it.
- It doesn't matter which picture you double-click, since all of them will open the appropriate tab.

Compressing Images on Mac

Removing Edit Data on Windows

Expert Q&A
- Using JPEG files rather than other file formats will cut down on your presentation's overall size. Thanks Helpful 0 Not Helpful 0
- When formulating a presentation, using the default plain backgrounds in your slides will make your file smaller than if you upload detailed backgrounds. Thanks Helpful 0 Not Helpful 0
- If you can't get your PowerPoint file to shrink down enough to send it via email, you can upload it to a cloud service (e.g., Google Drive) and send an email with a link to the file instead. Your recipient will be able to download the file from Google Drive. Thanks Helpful 0 Not Helpful 0

- Reducing your images' quality will make a noticeable difference in your PowerPoint's overall quality. Thanks Helpful 1 Not Helpful 1
You Might Also Like

- ↑ https://support.office.com/en-us/article/Reduce-your-file-size-631d1d48-a56b-4fd4-ad66-091dd201db10?ui=en-US&rs=en-US&ad=US&fromAR=1#bmpp
- ↑ http://www.isumsoft.com/it/reduce-powerpoint-file-size-in-office-2016/
About This Article
1. Double-click an image. 2. Click Compress Pictures . 3. Remove the check mark from “Apply only to this picture.” 4. Select a lower DPI. 5. Click OK . 6. Click File . 7. Click Options . 8. Click Advanced . 9. Click Discard editing data . 10. Click OK and save the file. Did this summary help you? Yes No
- Send fan mail to authors
Is this article up to date?

Featured Articles

Trending Articles

Watch Articles

- Terms of Use
- Privacy Policy
- Do Not Sell or Share My Info
- Not Selling Info
wikiHow Tech Help:
Tech troubles got you down? We've got the tips you need
How to Reduce Your PowerPoint (PPT) File Size Way Down (+ Video)
Are you wondering, "Why is my PowerPoint file so large?"

PowerPoint presentations can easily increase in size over time. As you’re adding more video, images, audio, and slides, the file size will increase as well.
This might make it challenging for the recipient to open or work with. Luckily, there are some good techniques to help you reduce the size of your PPT files. I’ll walk you through several tips and tricks to reduce your PowerPoint file size.
Quick Ways to Reduce Your PowerPoint File Size ( Watch & Learn)
In this quick video, I’ll teach you my techniques to reduce PowerPoint file sizes. I’ll walk you through several ways to help compress your PowerPoint presentations.
These tips will help you trim a file before you share it with others. If you’re asking, “Why is my PPT file so large?” this video is for you. Watch to learn all about reducing the size of a PowerPoint file!
Miss any of the tips in the video, or prefer a written version of these steps? Check out the instructions below to find out more about how to reduce your PowerPoint file size.
Need More Help? Download Our eBook on Making Great Presentations (Free)

We also have a helpful complement to this tutorial. Quickly grab it before you read on. Download our FREE eBook: The Complete Guide to Making Great Presentations . In it you’ll learn how to you write, design, and deliver the perfect presentation.
How to Reduce Your PowerPoint File Size
Wondering “Why is my PPT file so large?” The answers lie below.
Often, I find myself hitting my email attachment limit when sending slides to others. Of course, I could put it in a Dropbox share or upload it online. But the real problem is that the presentation should be downsized first. When you reduce file size in PPT, your presentations will be more shareable.
In our tutorial, we’ll work with the Agio PowerPoint Presentation from Envato Elements. It’s a premium template with some great features and expertly crafted styles. Download it today to follow along with our tutorial.

Now, let’s learn how to reduce your PowerPoint file size. We’ll learn all about compression and other ways to shrink your PowerPoint PPT file size down. These are quick and easy tips and tricks for PowerPoint reducing file size.
Note: This tutorial was created using Windows and Office 365. If you’re using a different operating system or a different version of Windows, your steps may be slightly different.
1. Compress Selected Pictures in PPT File
Images are easily one of the largest parts of most PowerPoint presentations. Compressing them can decrease the size of your PowerPoint file.
Often, I find myself using many images in my presentations. This is a great design technique – after all, photos make any slide much more interesting!
But as I do this, I’m often using large image files, without thinking of how the file size affects my PowerPoint file. That can make for a quick and fluid design process. But it can leave you with some cleanup needed.

To get started with image compression, select an image in your PowerPoint PPT file. On the ribbon, you’ll see a Picture Format tab. Click on this tab, and then find the Compress Pictures option.
Click on Compress Pictures in PowerPoint, and the Compress Pictures menu will launch.

On this menu, there are two key settings to check:
- Ensure that Delete Cropped Areas of Pictures is checked. This removes any pixels that we’ve already cropped out of an image. Keep in mind that this prevents you from re-cropping the picture to include those pixels later.
- Set a Resolution on the lower end of the options, such as 96 ppi. This reduces the fidelity of images and thus decreases the PowerPoint PPT file’s size.
If you’ve got several large images that you want to compress, use this feature as a starting point. It’s a great way of reducing the PowerPoint file size quickly.
2. Compress All Pictures in Your PowerPoint
Let’s learn how to batch compress every image in a presentation. This is a streamlined way to reduce the file size in PowerPoint. You can apply the same reduced-size settings to every image in the deck, all at once.
Once again, we’ll be working on the Compress Pictures menu. With an image selected, go to Picture Format > Compress Pictures.

With the menu opened, ensure that the Apply Only to This Picture box is unchecked. Select your other settings, then click OK .
Caution: Be careful when using this feature! It’ll certainly reduce the size of the images in your PowerPoint PPT file. Make sure that you aren’t permanently removing any cropped areas of images that you’ll want to reuse.
3. Save Your PowerPoint in a .zip File
Once you’ve saved your PowerPoint slides, it helps to compress them into .zip files. This is a great way of reducing the size of PowerPoint files. Plus, it’s very easy. Compressing into .zip format is a built-in feature on both Windows and Mac. It’s a powerful way to reduce the PPT size quickly.
Navigate to where you have your PPT slides stored. Then, right-click on the name of your file. On the list of options, choose Compress to ZIP File. You’ll see a new .zip file created, right below your existing slide deck.

That’s it! You’ve learned how to make PowerPoint files smaller by compressing them. When you reduce the file size in PowerPoint like this, you have a slide deck that’s much easier to share.
4. Link to Videos in Your Presentation
Videos are a compelling way to share content in PowerPoint. But if you’re trying to reduce the file size in PowerPoint, they can become a real challenge! Fortunately, you have options to share videos, even as you reduce PowerPoint file size.
One option is to link to multimedia objects, instead of embedding them in the file. This way, you can include videos while still working to reduce the file size.
In PowerPoint, there are two ways to include video files in your presentation:
- Insert the video directly into the PowerPoint file itself.
- Link to the video file.
Both of these options will place a video on the PowerPoint canvas, but in very different ways. Inserting the video will include it as a part of the PowerPoint file, so you can send it to anyone and the video will play.
But if you’re in PowerPoint reducing file size, this isn’t the best option. Video files are often very large. Linking to videos is a better way of reducing the size of a PowerPoint file.
To get started, find the Insert tab on PowerPoint’s ribbon. In the Media group on the right, click on the Video dropdown arrow. From the list of options, choose This Device.
The Insert Video file browser will launch. Here, navigate to a video file that you have stored on your computer. Then, click on it to select it.
Next, find the Insert dropdown in the Tools section. This is in the lower right corner of the Insert Video browser. On the dropdown, click Link to File.

Linking to the video references the original file and simply links to it. You’re creating a reference to the video file instead of adding it to your presentation file.

Tip : There’s a key downside to this PowerPoint reduce file size technique. If you link to your video and send the presentation to others, the video won’t play correctly. PowerPoint looks for the video on the local device instead of inside the PowerPoint file.
Ideally, your video is hosted somewhere online, like YouTube. So, you neither have to embed the video in your PowerPoint file, or link to it on your computer.
5. Use the Insert Tab to Add Photos
Photos are the best way to bring your PowerPoint slides to life. But if you need to reduce the PPT file size, sometimes they can cause you trouble.
But that doesn’t mean you should leave photos out of your slide decks. You can use a different technique to add them to your slides and enjoy smaller file sizes.
When you use a PPT template, you may find that you can drag and drop images right onto your slides. This is the easiest – and fastest – way to add photos to your slides. But it also has a cost in file size.
Images that you drag and drop onto slides aren’t compressed at all. For one or two images, this doesn’t matter. But if you’ve got a fully illustrated deck, your file size can quickly get out of control.

To help with this, try using PowerPoint’s Insert tab to add photos.
Working on a slide, go to Insert up on the ribbon. Then, choose Pictures > This Device . Browse to a photo that you’ve saved. Click Insert to add it to your slide.
This way, PowerPoint compresses and reduces the size of any photos that you add to your slide deck.
6. Share PPT Slides in PDF Format
Let’s face it. PowerPoint slides are built for sharing. That means that you need to know how to reduce PowerPoint file size at every opportunity.
At the same time, you need those who you share slides with to be able to read and view them on any device. Fortunately, these two goals can be easily accomplished at the same time.
By saving a PPT deck as a PDF file, you can see how to compress PowerPoint file size fast. Plus, PDF files can be read on almost any device. They also take up less file space than a .ppt or .pptx file. They display your slides without the format settings that PowerPoint adds.

When you click Save As to save your slide deck, choose PDF from the Save As Type dropdown. In moments, your slide deck will be in a versatile, minimally sized format that you can share far and wide.
7. Reduce Embedded Characters
When you think about how to compress PowerPoint file size, fonts are a big part of it. You may use custom fonts in your work, and you need to be sure that other users can see them. That’s true even if they don’t have the fonts installed on their computer.
Fortunately, there’s an easy fix. This helps you reduce the PPT file size quickly. Working in PowerPoint, go to the File > Options menu. You’ll see a list of option tabs on the left. From this, click on Save .

Check the box next to Embed Fonts in the File. Then, check Embed Only the Characters Used in the Presentation. If PPT embeds fonts, they’re always visible. But using this feature can make your PowerPoint files larger.
Now, by default, when you save PPT decks with custom fonts, they won’t take up much extra file space. This is how to reduce PowerPoint file size quickly.
8. Use Charts and Embedded Objects as Images
PowerPoint offers a variety of ways to pull in extra data on your spreadsheets. These can include Excel charts, graphs, and much more. But by linking data in this way, you may find yourself working with very large files.

Remember, illustrations like this display data. Their ability to update from the source is useful, but it increases PowerPoint file size. Instead of adding live-updating charts, try adding screenshots or image versions instead. By changing charts and objects to images, you can save file space immediately.
Once you’ve got the images saved, add them to your slides with the Insert menu. This saves space over dragging and dropping.
Best PowerPoint (PPT) Presentation Designs on Envato Elements (Unlimited Downloads)
Envato Elements has thousands of the very best PowerPoint presentation designs for you. It’s a compelling offer. Unlock unlimited downloads with a flat-rate monthly membership.

Reduce PowerPoint file size in style with these powerful premium templates from Envato Elements.
Think that trying to reduce PowerPoint file size means cutting your style? Think again. Thanks to versatile Envato Elements templates, you capture the best of both worlds. Reduce the PPT file size while you build stunning stylish slides for every occasion.
Elements offers stylish PowerPoint templates featuring:
- infographics
Simply drop in your content, and you’re on the way to the most impact at minimal size. Join Elements now .
5 Top Templates to Reduce PPT File Size (From Envato Elements – For 2023)
These stunning templates from Envato Elements make it easy to reduce PowerPoint file size:
1. Librario | PowerPoint Template

Never give up on style when you try to reduce PPT size. Librario is a spectacular PowerPoint template for any project. Inside, you’ll find over 150 slides in every layout imaginable. These are spread over five beautiful color themes. Master slide layouts make bulk edits simple. Plus, that helps reduce the file size.
2. SENSASIONAL PPT

When you think about how to reduce PowerPoint file size, consider what you’re trying to do. Likely, you want to share your slides with an audience virtually. That means giving them slide layouts they’ll be thrilled with. SENSASIONAL delivers, with 30 dark and stylish slides inside. Every element is fully customizable, with drag-and-drop graphics.
3. Visualizm – Pop Art & Graffiti PowerPoint Template

Thanks to Elements, you can add images and still reduce PowerPoint file size! Visualizm is a sleek, modern template to help you do exactly that. With cool, grungy vibes, it’s easy to adapt to your next project. Custom placeholders let you add content with just a few clicks. There are even vector icons included for quick style changes.
4. Station PowerPoint Presentation

Station is another premium PPT template to reduce size and boost design. It’s illustrated in memorable shades of pink and purple. They’re sure to grab audience attention. Each slide is completely customizable, with some featuring world maps and unique icons. A handy reference guide is included if you need help getting started.
5. Defender – PowerPoint Template

Imagine how to compress PowerPoint file size while still sharing plenty of content. One way is to embrace minimalism. Trendy and modern, this design focuses on sharp contrasts and open spaces. Defender is a prime example, featuring 30 handcrafted slides. Master slides and image placeholders make it easy for you to build amazing slide decks.
More Top PowerPoint Templates
At Envato Tuts+, we’re passionate about PowerPoint templates. They help our readers save time and give great presentations without learning how to do everything on their own.
We keep the best PowerPoint templates listed in our guide, Microsoft PowerPoint Templates (Ultimate Guide to the Best PPT.)
Common PowerPoint Questions Answered (FAQ)
In this tutorial, you’ve learned how to reduce PowerPoint file size. This is an important skill to save disk space and make it easier to share with your collaborators. Reduce PowerPoint file size to be a considerate presenter and content creator.
It’s okay if you still have questions. Let’s tackle five of the most popular PowerPoint questions:
1. What Are PowerPoint Layouts?
One way to reduce the PPT file size is to reuse similar designs with only minor modifications. PowerPoint layouts give you pre-built sets of slide designs that save you time.
2. What Dimensions Should You Use For PowerPoint?
Dimensions describe the shape and size of your PowerPoint template. Your settings matter because they’ll help you cover the screen completely. Choosing lower dimensions can also help you reduce the PPT file size.
3. How Do I Work With Images in Microsoft PowerPoint?
Images are one type of content that can really increase your PowerPoint file size. It’s important to work with them carefully so that your PowerPoint doesn’t explode in file size.
Pairing this tutorial with what you’ve already learned helps you master how to reduce PowerPoint file size. You’ll see options that show you how to compress PowerPoint file size by modifying images.
4. How Should You Show Data in PowerPoint?
Never create a slide that’s chock full of data and statistics in pure text format. Instead, lean on graphs and charts to display the data in an intuitive way. PowerPoint makes this easy, and we’ll show you how.
By the way, mastering charts and graphs can also help you reduce the PPT file size. When you use well-crafted visuals instead of embedding data, your file size will really benefit.
5. Can You Export?
Have you had issues reducing PPT file size to the point you can email it? Here’s an idea: export it as a video, then upload it to a service like YouTube .
Learning how to reduce PowerPoint file size is sometimes a matter of working around the app. You can export your PowerPoint presentation as a video , then use an online platform to overcome large files.
Learn More About How to Use Microsoft PowerPoint
Pro presenters know that the work of learning is never done. PowerPoint has so many features that it’s impossible to know them all. Now, you’ll be reducing the size of PowerPoint files even as you craft amazing designs!
You know how to reduce PowerPoint file size to accommodate more options. Keep learning by checking out our resource, How to Use PowerPoint (Ultimate Tutorial Guide.)
Make Great Presentations (Free PDF eBook Download)
We’ve got a helpful compliment to this tutorial, which will walk you through the complete presentation process. Learn how to write your presentation, design it like a pro, and prepare it to present powerfully.
Download our eBook: The Complete Guide to Making Great Presentations . It’s available for free with a subscription to the Tuts+ Business Newsletter.

Reducing the Size of a PowerPoint File (In 2023)
In this tutorial, I showed you some quick steps to reduce the size of your PowerPoint files. Following these simple tips will optimize your presentations and reduce their file size.
What are you waiting for? Embrace these techniques for PowerPoint reducing file size today! In moments, you’ll have shareable slide decks that are easy to send across the world. Audiences will thank you for freeing up space on their devices. And you’ll work in more agile and creative ways as you optimize your designs.
Get started on your journey towards reducing the size of PowerPoint files. Now that you’ve learned how to make PowerPoint files smaller, it’s time to get to work. So join Envato Elements today and find your favorite PPT templates!
Related Articles

How to Compress a PowerPoint Presentation

PowerPoint is an amazing audiovisual tool for presentations. It allows you to add images, graphs, videos, and pretty much everything you might need in order to craft the perfect complement. But precisely because of this, sometimes PowerPoint documents can end up taking a lot of space. So, how do you share your presentation when it’s just too big? Here you’ll learn how to easily compress a PowerPoint presentation to share it with whomever you want.

How to compress a PowerPoint presentation directly
Thankfully, PowerPoint has some compress options built into it, so learning how to compress a PowerPoint presentation is a very straightforward business. You have 2 main options.
1- How to compress images in a PowerPoint presentation
a. Select the image you want to compress. Once you do this, the Picture Format tab will appear at the end of your tools ribbon.

b. Select Compress Pictures

c. A new window will pop up. Now you just need to choose how much you want to compress your PowerPoint images accordingly to your needs:

Take into consideration that if you untick the Apply only for this picture option, all of the PowerPoint presentations images will be compressed. If you’re looking for how to compress a presentation will a lot of images, then this one is a great option for you.
2- How to compress a PowerPoint with a video
If your presentation has a video in it, chances are it’s a pretty big file! To compress your PowerPoint document just follow these steps:
a. Go to File > Info
b. Choose the Compress Media option. Just like with images, it will give you quality options, and pick the one that fits better your needs.

c. A new window will pop up to show you the compressing progress. Once it’s completed, it will also tell you how much space are you saving by compressing your PowerPoint media. Just click Close when the process is completed, and you can go back to work on your presentation.

Other options for sharing your presentations
However, if you compress a PowerPoint presentation you’ll probably lose some quality. The more you compress an image, the more quality it will lose. This is especially important to take into consideration if you’re planning to use a big projector, as it will make bad quality images pretty noticeable.
If compressing your PowerPoint presentation it’s just not doing it for you, of you don’t want to sacrifice some of its quality, here are some alternative options for sharing your files:
1- ZIP Files
A pretty straightforward way on how to compress a PowerPoint presentation is simply to use a ZIP File. ZIP files allow you to compress many documents into one directory. Windows 10 has built-in an option for file compressing. You just need to go to your File Explorer and right-click the PowerPoint presentation to compress. Select Send to > Compressed (zipped) folder . And that’s all!
If you’re not working with Windows 10, you can download a file archiver and compressor software, like WinZip or WinRAR (for earlier Windows versions). These will allow you to easily compress PowerPoint presentations, and pretty much everything else. There are many free compressors available, so it’s just a matter of finding the one that suits you the best.
Take into consideration that, when sending a compressed PowerPoint presentation in this way, the receiver must also have a compressor software, like the ones mentioned above. This will allow them to decompress the document and get access to it. It’s also important to know that ZIP Files might not compress a PowerPoint presentation enough for it to be sent by e-mail. It depends mainly on the size of the original file. Thankfully, there are other options for sharing your presentations!

2- Cloud Sharing
Cloud sharing is an excellent way to share files that are otherwise too big to send by e-mail. You don’t even need to know how to compress a PowerPoint to use this method. You just need to register in a cloud storage service, like Google Drive or Dropbox , and upload your presentation. Once it’s uploaded, you can send the link to whoever you want, and they will instantly gain access to it.
If it’s a particularly big document, you can even mix this option with the previous one. You can compress your PowerPoint presentation in a ZIP file, and upload the compressed version. This will make it easier and quicker for you to upload it, and for your receivers to download it.
3- PDF format
Converting your presentation to a PDF document is one of the easiest ways to compress your PowerPoint presentation in order to share it. It will immediately lower your file size and allow you to share it through all kinds of means, including e-mails.
However, one very important thing to take into account when using this method to compress a PowerPoint presentation is that you’re changing the file’s format. And this had both its ups and downs. For starters, this means that whoever receives it will not be able to access it as a PowerPoint presentation. Your slides will be converted to PDF pages, and while images and graphs will likely remain, any videos or voice notes in your presentation will not be added in the converted document.
But this also has an ad additional advantage. This means the receiver will not be able to edit it. If you’re sending a PowerPoint presentation and you don’t want it altered or copied in any way, sending it as a PDF file is a good option. It all depends on what you’re looking for!

Hopefully, you have now learned how to compress your PowerPoint presentations. Now you can share them with whomever you like, whether it is team members, coworkers, or your audience. Good luck!
Create professional presentations online
Other people also read

Tutorial: Save your PowerPoint as a Video
How To Convert Google Slides To PowerPoint and Vice Versa

How To Add Animations To PowerPoint
- INSIDER REVIEWS
- TECH BUYING GUIDES
How to compress a PowerPoint file so that it loads faster and doesn't take up as much space
Melanie weir .

- You can easily compress a PowerPoint file's size, which makes it easier to share and save.
- When you compress your PowerPoint, you'll have to reduce the quality of any music, videos, or pictures you have in your slideshow .
- Once you've compressed your PowerPoint, it will load faster, but the media in it may not look as good.
At some point in your slideshow-creating life, you've probably saved a PowerPoint presentation and realized that the file size is entirely too large.
Larger file sizes make PowerPoints more difficult to send and save, and they also make each slide take longer to load.
One of the easiest ways to quickly reduce a PowerPoint presentation's file size is to compress it. When you compress a PowerPoint, you'll reduce the quality and size of every media file in the presentation. This includes videos, audio clips, animations, and photos.
If you compress them down to an appropriate size, your file size will be much smaller. However, your photos, videos, and other media probably won't look or sound as sharp.
Here's how to compress your media files in PowerPoint on a Mac or PC.
Check out the products mentioned in this article:
Apple macbook pro (from $1,299.00 at apple), acer chromebook 15 (from $179.99 at walmart), how to compress a powerpoint file on a pc.
1. In the ribbon or menu bar at the top of the screen, click "File." Make sure that "Info" is selected in the left sidebar.
2. Click "Compress Media." Depending on whether your version of PowerPoint was made before or after 2016, this button will either be next to the label "Multimedia" or "Media Size and Performance."
3. Choose one of the three options for media quality from the dropdown menu. These will differ based on which version you have as well, but they boil down to:
- Select the highest quality option if you want to maintain high quality media for in-person presentations.
- Select the middle option for quality akin to media found on the internet.
- Select the lowest quality option if your file needs to be as compressed as much as possible — for example, if you need to send it via email.
How to compress a PowerPoint file on a Mac
In the Mac version of PowerPoint, you can only reduce the file size of images, not videos or music.
To do this:
1. Open your PowerPoint slideshow and click "File" in the menu bar at the top of the screen. If you only want to compress specific images, select them before clicking "File."
2. In the dropdown menu, click "Compress Pictures..."
3. You'll be shown a " Compression Table," which lists all the different ways you can compress the file. You'll have three main options:
- "Printing" will keep your pictures at the highest quality possible.
- "Viewing on screen" will reduce the quality of your pictures by about 30 percent.
- "Sending in an e-mail message" will compress them by another 30 percent or so.
You can also pick the fourth and last option, which will keep each picture's current resolution, but try to reduce the file size in other areas.
4. Select whether you'd like to delete parts of your pictures that have been cropped out — doing so will help reduce the file size.
5. Choose whether you'd like to compress every picture in the slideshow, or just the ones that you selected beforehand. Once you've decided, click "OK."
Related coverage from Tech Reference :
How to add a border to slides in powerpoint, and give your slideshow a sleek design, how to embed a youtube video into your microsoft powerpoint presentations using a mac or pc, how to convert google slides to a powerpoint presentation in 4 easy steps, how to convert a powerpoint to google slides in 2 different ways, how to copy or duplicate a powerpoint slide and put it anywhere in your slideshow, read more articles on.
- Tech Insider
- Tech Reference
- Software Apps Reference
- Tech How To
- Compression
- Laptops Tablets Reference
- Microsoft Powerpoint
- File Sharing
Advertisement
Find anything you need
You have %itemCount% in your cart. Total being %total%
5 Methods to Reduce the File Size of a PowerPoint Presentation
In some cases, especially when creating large presentations, the file size of your project may go up to a rather large number. This can make it difficult to share your finished presentation, especially if you’re using email services or a USB to store it on.
To help combat this issue, PowerPoint comes with options to compress various elements and reduce the file size or projects. You can compress images, videos, convert 3D objects to static images or even use the PPTX or ZIP formats to further optimize file size.
Our article focuses on all the methods to help you compress PowerPoint files and create more shareable presentations.
Jump to Solution
Method 1: compress images in powerpoint, method 2: compress videos in powerpoint, method 3: swap 3d models with static images, method 4: convert your presentation to pptx format, method 5: compress powerpoint presentations as a zip file.

The first way to reduce the file size of your presentations is definitely compressing the images used in your slides. Images with large resolution can quickly start generating large file sizes.
Oftentimes when making a presentation, there’s no need for large images to be displayed on the screen, so compressing your images won’t harm the final outcome. According to our tests, correctly compressed images can help you reduce the file size of your presentation by 17 times.
- Select the picture you want to compress. This will open up the Pictures Tools Format tab in the ribbon on top of your screen.
- Click on the Compress Pictures button.
- Select the desired picture quality and options. The lower the PPI number, the more compressed your image will be.
- Make sure to check “ Delete cropped areas of pictures ” and choose whether you want to apply the compression to all pictures in your presentation, or selected pictures only.
- Click the OK button. You should immediately see the changes in quality and notice the reduced file size.
It’s not a secret that video files can be huge. If you have videos embedded into your presentations, it’s not uncommon that you’ll end up with a large file size that’s hard to transfer between devices, USB’s and email. To make sure your presentation doesn’t exceed file size limits, you can try to compress the videos in it.
- Open your presentation in PowerPoint, then navigate to the File tab and go to the Info page within the backstage view.
- When video files are detected in your presentation, you'll be able to see the Compress Media button. Simply click on it, then choose the desired quality. In most cases, compressing to 1080p or 720p will significantly reduce the file size of your presentation.
- A new window will open up showing the progress of the compression and determining how much space was saved. Wait for the process to finish.
- Check your video and make sure you’re happy with the quality. If you want to undo the compression, navigate back to File > Info > Compress Media , and choose to Undo the last compression.

(Source: Nuts & Bolts)
While 3D models are definitely useful and give your presentations more visual interest, they definitely increase the file size of the finished product. If you’re working with a limited amount of space, we recommend swapping 3D models with static images. You can use images from the internet, or even take a screenshot of the model and insert it manually.
- If you want to replace the 3D model entirely, simply select it and press the Delete button on your keyboard. This will remove all traces of the model from your presentation as soon as you save it, and significantly reduce the file size.
- Insert an image in place of the 3D model by using the Insert > Image menu. You may choose one from your computer, or look for one online within PowerPoint.
If you want to replace the 3D model with a static image of the model itself, follow these steps.
- Create a new, blank slide with a white background.
- Insert the 3D model you want to use and position it in any way you want to.
- Take a screenshot using the Windows + Shift + S keyboard shortcut. This shortcut allows you to select a region of the screen instead of screenshotting the entire desktop. Select your 3D model on a white background.
- On Mac, you can use the Command + Shift + 4 shortcut to do the same.
- Delete the 3D model and the blank slide, then insert the screenshot of your model in place of the original.
- If needed, select the screenshot and click on Picture Format > Remove Background . This will get rid of the white background, creating a transparent static image of your 3D model.

Your presentation might be saved in the PPT format. This format is quite large compared to PPTX, which is the format used in files created post-2007, alongside the release of PowerPoint 2007. The optimized format aims to reduce the file size of presentations, making transfer much less of a hassle.
If you saved your presentation in the PPT format, don’t worry. There are plenty of free, online tools you can use to convert a PowerPoint presentation into the PPTX format. Here’s how.
- Open the Convertio PPT Converter in your web browser. This is an entirely free-to-use website that allows you to convert a PPT file into PPTX online.
- If your file is over 100 MB, click on the Sign Up button and create a free account. Otherwise, proceed to the next step.
- Click on the Choose Files button and select your PPT presentation.
- Make sure to select PPT to PPTX using the drop-down menus for file types.
- Follow on-screen instructions and convert your presentation into the PPTX format. You should immediately see a decrease in file size.

As a last resort, you can save some space by sharing your presentation as a ZIP file. These compressed files are handy if you want to keep all of your original images, videos, models, and other elements, but still need to reduce the file size.
Here’s how you can convert a PowerPoint presentation into a ZIP on Windows 10 . Make sure to scroll to the next section if you’re on a Mac system!
- Open the File Explorer and navigate to the location of your saved presentation.
- Right-click on the presentation file and hover over the Send to option.
- Choose the Compressed (zipped) folder option.
- Wait for Windows to finish compressing your file. When finished, you’ll be left with a ZIP file that has a reduced file size and provides better shareability.
The instructions for Mac systems are as follows.
- Open the Finder and navigate to the location of your presentation.
- Right-click on the presentation and select Compress “(Presentation name)”
- Wait for the process to finish. You should see a smaller ZIP file with the same name as your original presentation created.
We hope that this article helped you compress PowerPoint presentations and reduce the file size for easier sharing. Show your world the hard work you put into your presentations without having to sacrifice quality!
Keep Learning
» What Is PowerPoint Viewer? How Can I Use It? (Part 1) » What Is PowerPoint Viewer? How Can I Use It? (Part 2) » What Is PowerPoint Viewer? How Can I Use It? (Part 3) » How To Use PowerPoint Design Ideas: A Complete Guide » 7 Useful Tips to Build More Creative MS PowerPoint Templates
1591 McKenzie Way, Point Roberts, WA 98281, United Sates
+1 877 315 1713
- Terms & Conditions
- Privacy & Cookies
© SoftwareKeep 2023 | All right reserved
- American Express
- Diners Club
- Compress PDF
- PDF Converter
- PDF Scanner
- Delete PDF Pages
- Extract PDF Pages
- PDF Annotator
- Number Pages
- Watermark PDF
- Chat with PDF
- AI PDF Summarizer
- Translate PDF
- PDF to Word
- PDF to Excel
- Word to PDF
- Excel to PDF
- Protect PDF
- Flatten PDF
- How To Compress PDF
Compress PPT Presentations Online

May 8, 2023 by Hung Nguyen
Learn how to reduce the size of your PPT files significantly, at no cost, using Smallpdf. No watermark, no registration, and no installation.
We’ve come across many large PPT files in our years of compressing digital documents, from sales pitches to lecture material and business proposals. Usually, the need to reduce the size of these files comes from having to share them via email, where the file size cap is around 20 MB. Compressing PowerPoint files also comes in handy to save storage space, be it on your local computer or an otherwise pricey cloud service such as Dropbox. You can use our online compress tool to shrink your PPT down significantly and thus make your life easier and save some money.
How to Compress a PPT File for Free
Upload your ppt to the compress tool ., choose “basic compression.”, click on “export as” and choose powerpoint..

Convert, compress, and download your PPT using Smallpdf
You can get started with compressing your PowerPoint presentation for free right away. You don’t need a Smallpdf account—just go to the tool and drop your file in!
Will the Document’s Formatting Remain the Same?
We aim to maintain the layout and quality of your document as close to the original PPT as possible. We actually first turn your PowerPoint into a PDF document; then, our compressor looks for repeating patterns in the data and replaces them with unique identifiers. This is actually what makes your file smaller. This process doesn’t touch attributes like fonts and the layout of your PPT, so they should stay just as they are.
Smallpdf caters to millions of users every month and uses the most reliable software on the internet to convert, edit, and compress files. So, you can trust that we’ll produce only the absolute best conversion quality.
There are extra measures that you can take to be absolutely sure that the final content resembles its original form. You can “embed” the fonts of the text in your PowerPoint presentation. You’ll find this option under “Preferences” in PowerPoint. Doing this will ensure that the fonts remain the same, even when we don’t have the same ones on our servers.
You can repeat the above process for each file if you need to compress multiple PowerPoint files or want to compress images and other formats. Smallpdf accepts all Microsoft Office files and JPG images. If you go Pro, you can also compress files in batches, and we’ll conveniently store them in a zip file for you. Why not sign up for a 7-day free Pro trial before fully committing?
And that’s all there is to it! Enjoy compressing your PPT and be sure to explore the many other tools we offer.
Hurray for smaller presentations!

Related articles

How To Convert a Picture to PDF on an iPhone
Want to convert a picture on your iPhone to a PDF file? Here we show you three easy ways to do it—all free.

Compress JPEG to 50KB Online
Are you looking for a convenient JPEG compressor? Smallpdf’s tools can help you compress JPEG file sizes to less than 50KB for free online.

How to Highlight in PDF Documents Online
Use our online PDF Annotator to highlight text in a PDF and add annotations for free. Access and use the tool online, anytime—no registration needed.
- Pitch Decks & Investor Materials
- B2B Graphic Design
- Startup Consulting
- Trainings & Workshops
- Case studies
- Downloadable resources
Presentation Tips: How To Compress Your PowerPoint Presentation
- Presentation design

Welcome to a new series here on our blog, where we’ll be sharing practical tips to help you create better presentations. If there’s a specific tip you want to know, drop us a comment below and we’ll make sure to write about it.
One of the most commonly asked questions both online and offline is how to compress a PowerPoint presentation. Here’s how:
Compress your images
Applies to: powerpoint for office 365, powerpoint 2016.
Select the image you want to compress. If you want to compress all images, click on any image.Go to the “Format” menu displayed.Select the “Compress” button under “Picture Tools”.

Pro Tip 1: Resize the image before you insert it into your presentation. If you’re downloading it from a free stock photo website, don’t automatically download the highest resolution. Choose the size you need – for example, if you want to use the image for the full slide, you need to download the 2000×1300 px version, or something close to that. The goal is to get it at the smallest resolution while still retaining a qualitative aspect. If you have a very large image, use an imaging editing tool like Adobe Photoshop to resize it.
Pro Tip 2: If you’ve used the “Crop” function for any of your images, you can further reduce the file size by checking the “Delete cropped areas of pictures” box.
Pro Tip 3: You can also have PowerPoint automatically compress images within any future presentation. Go to File -> Options -> Advanced. Scroll to “Image Size and Quality” and check “Discard editing data”. Choose an appropriate target PPI value, which will be used to downsample any images you add thereafter.
Pro Tip 4: Un-check “Apply only to this image” to speed up the process.
#section-58e7a51204c6b.separator-border { border-color:#f4f4f4; }
Featured Download: An Easy Guide To Repurposing Content
Get your free copy
Compress media (video and audio files)
This is a particularly tricky option because you can only see it if you’ve inserted a large video or audio file, otherwise, the menu does not display it.
To compress large media files, video or audio, follow these steps:

Select the quality you want for your media:Full HD (1080 p)HD (720 p)Standard (482 p)Watch the progress bar as PowerPoint compresses your files.
Pro Tip: For videos, you can also choose to upload them online, for example on your YouTube account, and choose the “Online video” option.
Compress the presentation file on your computer
If you’ve already created your presentation and you’re in a hurry, you can compress the presentation file directly.
Compress the PowerPoint file on Mac OS
Select the presentation.Right-click to open the menu.Select “Compress”.

Compress the PowerPoint file on Windows OS
Open the folder where you’ve saved the presentation.Right-click on the file and select “Compress” or “Zip”.

Use other compression programs/apps
There are many programs and apps that can help reduce the size of presentation files, videos, audio files or images. Here are some options:
Neuxpower ZipArchiver WinZip PeaZip 7Zip Wecompress
Need help designing or structuring your next presentation?
Our team can help with everything from research, to creating your presentation flow, writing the content, designing and building your slides.
Get in touch
Top articles
- Infographics
- Personal branding
- Pitch deck design
- PowerPoint tutorial
- Public speaking
- Visual communication
Sign up for our monthly newsletter
Leave a reply cancel reply.
Save my name, email, and website in this browser for the next time I comment.
This site uses Akismet to reduce spam. Learn how your comment data is processed .
How-To Geek
How to compress images in microsoft powerpoint.

Your changes have been saved
Email Is sent
Please verify your email address.
You’ve reached your account maximum for followed topics.
How to Use Rainmeter to Make a Stunning Windows Desktop
How-to get more free chatgpt 4o access, only 4–8gb of ram these local llms can work directly on your pc, quick links, compress images in powerpoint for windows, compress images in powerpoint for mac.
Compressing images in your Microsoft PowerPoint presentation can help reduce the overall file size of the presentation and save disk space on the device it’s stored on. Here’s how to compress images in Microsoft PowerPoint.
Note that this feature is only available for desktop versions of Office and not Office for the web.
Open the PowerPoint presentation that contains the images you’d like to compress and then select a photo.

Once selected, you’ll automatically be in the “Picture Format” tab. Here, click the “Compress Pictures” button in the “Adjust” group.

The “Compress Pictures” window will appear. In the “Compression Options” group, you can choose if the compression applies only to the selected picture. If you uncheck this option, PowerPoint will compress all of the images in the presentation, which overrides any changes you may have made to those images.
Related: How to Reduce the Size of a Microsoft Word Document
In the “Resolution” group, choose which resolution you would like to use. Once ready, click “OK.”

The image or images will now be compressed.
Open the PowerPoint presentation that contains the images you’d like to compress and then select a photo. Once selected, click “Compress Pictures” in the “Picture Format” tab.

The “Compress Pictures” window will appear. Select the picture quality you’d like to use, then select if you’d like to apply the compression to all images in the presentation or only the selected image. Also, if you want to delete the cropped areas of the pictures, check the box next to that option.
When ready, click “OK.”
- Microsoft Office
- Microsoft PowerPoint
How to Compress a PowerPoint File on a PC or Mac
Large PowerPoint files can be difficult to share and email due to their file size. Compressing your PowerPoint presentations reduces file size while maintaining quality. This allows for easier sharing across devices and networks. Follow this simple guide to learn how to easily compress PowerPoint files on both Windows PCs and Macs.
Steps to Compress a PowerPoint File on a PC
1. open the powerpoint file.
Launch PowerPoint and open the presentation file you want to compress.
2. Navigate to Compress Pictures
3. choose compression options, 4. apply changes.
Click “Apply to all pictures in this file” if you want to compress all images. Click OK to compress.
Steps to Compress a PowerPoint File on a Mac
2. go to compress pictures, 3. select compression options, 4. click ok to compress.
Check “Apply to all pictures in this file” if desired. Click OK to compress images.
Additional Tips for PowerPoint Compression
Here are some extra tips for further file size reductions:
About The Author
Vegaslide staff, related posts, how to dim the appearance of text in powerpoint, how to apply a gradient background in powerpoint using wps office, how to insert a pdf into microsoft powerpoint, how to use ‘presenter view’ in powerpoint.
How to Compress a PowerPoint on a Mac
- By: Scott Schwertly
Looking to make your presentation file size smaller on a Mac? Ethos3 is here to show you the way! All you have to do is follow these easy steps:
1. Scroll up to “File”
2. Scroll down to “Reduce File Size”
3. Select your compression size (220ppi is standard, as seen in the Screenshot 2)
That’s all there is to it! Your presentation has been compressed like a PB&J squished in a backpack!

Scott Schwertly
Join our newsletter today.
© 2006-2024 Ethos3 – An Award Winning Presentation Design and Training Company ALL RIGHTS RESERVED
- Terms & Conditions
- Privacy Policy
- Diversity and Inclusion
Tutorial | Pitch Decks | Public Speaking | Resources
How to compress powerpoint presentations in 2023 : complete guide for mac and windows.

Written by Eugene Cheng

Imagine this – it’s late at night and you’re finishing up your last few slides for your big presentation tomorrow. You’ve done your final check and your pitch deck is all ready to be sent out. You are finally satisfied with how it looks and click the send button.
To your horror, the email bounces back.
Why? Large attachments are one of the most common causes for bounced emails that never reach their intended recipient. These huge files can cause difficulties in sending out emails or even online uploading in a tense, urgent situation. Especially in corporate organizations, email filters tend to block large attachments for security’s sake. More than 80% of the time, the cause of the file-bulk are the large images that you insert in PowerPoint or your export format of choice.
“But… if I don’t include images, my presentation is going to look boring and ugly”
Fear not, here’s how you can reduce the size of your PowerPoint file and save space.
This also ensures that your presentation/PowerPoint files reach their intended recipient.
How to Compress PowerPoint (.PPT) Files On Apple OSX Machines
How to compress powerpoint on mac osx, method one : compressing all photos on powerpoint.
More often than not, PowerPoint balloons in size because of the high-resolution stock photography that you might include in your presentation. Thankfully, there’s an easy way to quickly compress these files across the whole file or singular files in PowerPoint.
How To Compress All Photos/Images On PowerPoint
Step 1: on the file menu, click “reduce compress pictures”.

6. Choose “all pictures in this file”

Method Three : Compressing Images Before Inserting into PowerPoint To Preserve Small Size
Image compression method 1: reduce the size of images losslessly using browser applications.
Tools like Tinyjpeg, Tinypng and Smallpdf are great to reduce the size of your files without installing any additional applications on your machine.
Image Compression Method 2: Optimize the dimensions of your presentation images before inserting into PowerPoint
This step is most commonly overlooked by most executives simply because it’s pretty tedious. It involves ‘pre-cropping’ the images you plan to insert into your presentation even before you try any of the methods before this. a) The first step is to determine the max dimensions of your slide. You can do this by accessing the ‘slide size’ in the ‘design’ tab.

b) Enter ‘Page Setup’ when navigating into ‘Slide Size’ to identify the dimensions of each slide. If you’re using any of the typical slide dimensions like Standard (4:3) or Widescreen (16:9), typically the safe dimension is 1024px x 768px and 1280px 720px respectively. c) The very next step is to start cropping the images to fit within the slide dimensions. For example, if your image is 3000px x 2000px, cropping it down to size will save you a lot of space. Using sites like https://imageresize.org/ , you can quickly resize images to fit your slide canvas. At the same time, if you’re using raster editing programs like Adobe Photoshop, you can easily reduce the dimensions of your images before saving. Otherwise, site-based tools work too.
Method Four : Zipping Up Files To Compress Size Of PowerPoint
This method is best performed at the end and works regardless of whether you actually compressed the images prior or not. It doesn’t do much other than reduce the size of the single file or a combination of files in a .zip package to send via email.
How To Compress PowerPoint by zipping the file
Step 1: right-click on selected powerpoint file and select ‘compress’.

3. Next, select the Format tab
4. Under the adjust segment, click on the Compress icon
5. Select your preferred compression size

6. Select “delete cropped area”
7. Choose “all pictures in this file”
8. Click “Ok”
That’s it! Notice the big difference in size? Now, you’ll be able to send out the emails without worrying about large attachments bogging you down. These handy ways to cut down on file size have been a lifesaver for us at work, and we surely hope they’ll be helpful for you as well. Let us know if you have discovered other methods in the comments section below!
Article Written By: Eugene Cheng
You may also like….

Zia Zaman: How a World-Class Speaker brings Storytelling, Experimentation & Empathy into Business
by Kai Xin Koh
Any businessperson understands the value of selling and the art of storytelling. They are indispensable and inevitable, yet only a few have truly...

Infographic Template Editor Site Review: Venngage
Introduction If you’re...

Stock Photo Site Review: Jumpstory
INTRODUCTION Jumpstory is a site providing a source of inspiration and help when you need it to better the outlook of your piece. Not only do they...
Sign Up for Winning With Stories!
- First Name *
- Phone This field is for validation purposes and should be left unchanged.
Compress the size of your PDF for easier shareability without compromising quality in seconds.
Select converter:, how to compress a pdf online free.
- Select the PDF file that you would like to compress, then upload it to the PDF size converter for compression.
- Wait a few moments for your file to completely compress.
- After the process has completed, download and save your new, compressed PDF to your computer. After your files have successfully compressed, all remaining files will be deleted from our servers automatically.
The Best PDF Compressor
If you need to send a PDF to yourself or someone else but it’s too large to attach to an email, you can reduce PDF file size for free using our online PDF compressor without sacrificing the quality of your PDF files. No one else provides online PDF converter and PDF file compressor tools like ours, at no charge at all. Our software is a superior choice thanks to its ease of use, fast PDF document compression, and suite of useful tools to work with your PDF files with ease.
Permanent file deletion
After using our free PDF resizer, any remaining data will be permanently deleted from our servers with no residual copies retained, allowing you ample time to download your files before they are no longer accessible through our servers.
Encrypted files
We encrypt all PDF documents and other files uploaded to our servers using 256-bit encryption technology. We understand the importance of privacy and security, so we safeguard your sensitive PDFs and other file types using secure encryption technology. By using this encryption cipher, even the most powerful supercomputers, like Summit or Sierra, will have a tough time trying to brute-force their way through this cipher.
Easy to access from anywhere
As long as you have an Internet connection, you can access our PDF conversion tools and compress a PDF online free. Also, because our PDF size converter and tools are universal, you can upload and convert or compress PDF files from any device and operating system you might be using, from anywhere you happen to be.
Test out our PDF file compressor free
You can use our PDF file size reducer and other tools for free, or you may want to purchase a membership if you find yourself using our software frequently. By getting a membership, you immediately gain access to our PDF file compressor without wait time and can even download as many files as you want at one time.
Tons of PDF tools
We have plenty of tools for whatever your PDF editing needs might be. We have your bases covered from merging and splitting, to rotation and conversion. With all of our PDF conversion tools, we provide the go-to solution for all your PDF editing needs.
PDF conversion guides
When your pdf attachment is too big to send: a free simple solution.
Sometimes you spend multiple hours creating a nice PDF file. Then, after all that work, you probably want to share it, send it over email to colleagues or friends and then get an error message that the file size is too big. Don’t worry; we have a free and easy solution!
How to Compress a PDF
If you’ve ever dealt with trying to send a large file via email, you know how frustrating it can be. Many email servers flat out refuse to accept email attachments of a certain size. To help save you time and hassle, try compressing your PDF file before you send it.
How to compress PDF for emailing?
How to compress pdf on mac or pc, how to compress pdf without losing quality.
- Faster conversions
- Unlimited conversions
- Unlimited file size
- Advanced features
Please wait or sign up to convert the next file.
You need the PRO version to use the full functionality of the PDF Converter.
IMAGES
VIDEO
COMMENTS
Discarding it means that you can't restore the changes you make, but it will reduce your file size. Lowering the default resolution for images also reduces your overall file size. Go to File > Options > Advanced. Under Image Size and Quality, do the following: Select Discard editing data . This option removes stored data that's used to restore ...
To do this: 1. Open your PowerPoint slideshow and click "File" in the menu bar at the top of the screen. If you only want to compress specific images, select them before clicking "File." 2. In the ...
To compress images in a PowerPoint on Mac: Open the PowerPoint file. Select the images to compress. Go to the Picture Format tab. Click Compress Pictures. Choose compression quality option. Click Apply to All Pictures. Benefits: Quick, easy, maintains high image quality. Drawbacks: Only compresses images, not other media.
Converting the file is as simple as pressing a button and choosing the file type. Go ahead and open your PPT file, head over to the "File" tab, and then click "Convert.". Windows File Explorer will appear. You'll notice the Save As type is set as "PowerPoint Presentation." This is the PPTX file type. Click "Save.".
Click on the "File" menu in the top-left corner. Step 3. Choose "Reduce File Size" from the menu. Step 4. Select the desired compression option (e.g., "Best for Sending in Email" or "Best for Viewing on Screen"). Step 5. Click "OK" to compress the pictures and reduce the file size. Step 6.
If this short tutorial, you'll learn how to reduce the size of your PowerPoint presentations through compression, resulting in smaller file sizes without a n...
2. Click Reduce File Size. It's toward the bottom of the drop-down menu. 3. Click Picture Quality. Doing so will invoke a drop-down menu. 4. Click Best for sending in e-mail. This option will reduce the quality of all images in your PowerPoint file to 96 ppi, which is a generally lower resolution than most images' defaults.
Then, click on it to select it. Next, find the Insert dropdown in the Tools section. This is in the lower right corner of the Insert Video browser. On the dropdown, click Link to File. Choose Link to File to link to a video file, instead of embedding it directly inside the PPT deck.
To compress your PowerPoint document just follow these steps: a. Go to File > Info. b. Choose the Compress Media option. Just like with images, it will give you quality options, and pick the one that fits better your needs. c. A new window will pop up to show you the compressing progress.
Here's how to compress your media files in PowerPoint on a Mac or PC. Check out the products mentioned in this article: Apple Macbook Pro (From $1,299.00 at Apple)
Click on the Choose Files button and select your PPT presentation. Make sure to select PPT to PPTX using the drop-down menus for file types. Follow on-screen instructions and convert your presentation into the PPTX format. You should immediately see a decrease in file size. Method 5: Compress PowerPoint presentations as a ZIP file
Here are the steps to compress your PowerPoint on a Mac: In PowerPoint, click File. If you only want to compress certain images, select them before you click File. From the dropdown menu, click Compress Pictures. A Compression Table will display your compression options. The options include: Printing — highest quality.
How to Compress a PPT File for Free. Upload your PPT to the compress tool. Choose "Basic Compression.". Click on "Export As" and choose PowerPoint. All done! You can get started with compressing your PowerPoint presentation for free right away. You don't need a Smallpdf account—just go to the tool and drop your file in!
Instructions for Mac users on how to reduce the file size of your presentations for faster uploading and downloading from BlackboardProduced and edited by Sa...
Compress the PowerPoint file on Mac OS. Select the presentation.Right-click to open the menu.Select "Compress". Compress the PowerPoint file on Windows OS. Open the folder where you've saved the presentation.Right-click on the file and select "Compress" or "Zip". Use other compression programs/apps
Compress Images in PowerPoint for Windows. Open the PowerPoint presentation that contains the images you'd like to compress and then select a photo. Once selected, you'll automatically be in the "Picture Format" tab. Here, click the "Compress Pictures" button in the "Adjust" group. The "Compress Pictures" window will appear.
You can also delete cropped image areas or compress videos for further file size reductions. Steps to Compress a PowerPoint File on a Mac. Compressing presentations in PowerPoint for Mac also only takes a few quick steps: 1. Open the PowerPoint File. Launch PowerPoint and open the presentation file you want to compress.
Office for Mac 2011's PowerPoint has a built-in tool that can compress your embedded images and shrink your PowerPoint file: 1. With PowerPoint open, click File on the menu bar at the top of the screen and choose Reduce File Size. 2. Choose the most appropriate option from the Picture Quality drop down and click OK.
Looking to make your presentation file size smaller on a Mac? Ethos3 is here to show you the way! All you have to do is follow these easy steps: 1. Scroll up to "File" 2. Scroll down to "Reduce File Size" 3. Select your compression size (220ppi is standard, as…
How To Compress PowerPoint using picture format. 1. Select the "Picture Format" tab when selecting one or a few images. 2. Click on the Adjust button. 3. Select Compress Pictures. 4. Select your compression size according to the table.
Hi Many Rains, Thanks for your posting in Microsoft Community. Currently, It's not feasible for the PowerPoint for Mac to compress the video as it doesn't conclude such an out of box feature like Office for Windows version. Using the online video is a good idea here, but unfortunately your colleague can't open those videos.
With our Compress tool, you can make your files smaller either on Mac or PC - it works online on all modern browsers like Chrome, Firefox, Edge, or Firefox. It means you don't need to have anything installed on your Windows or Apple computer. You can compress PDF on iOS or Android devices as well.
1. With PowerPoint open, click PowerPoint on the menu bar at the top of the screen and choose Preferences... 2. Choose the Save tab. 3. At the bottom of the window, check the box for "Compress graphics files". This will automatically compress all graphics in your PPT files. Instead of telling our young people to plan ahead, we should tell them ...
Using Insert>Picture>Picture from file or pasting the picture brings it in at the normal resolution. In PowerPoint for Mac, you can choose File>Compress Pictures and set Picture Quality to High Fidelity (Maximum ppi). This has exactly the same effect as setting the analogous option in PowerPoint for Windows.