- PRO Courses Guides New Tech Help Pro Expert Videos About wikiHow Pro Upgrade Sign In
- EDIT Edit this Article
- EXPLORE Tech Help Pro About Us Random Article Quizzes Request a New Article Community Dashboard This Or That Game Popular Categories Arts and Entertainment Artwork Books Movies Computers and Electronics Computers Phone Skills Technology Hacks Health Men's Health Mental Health Women's Health Relationships Dating Love Relationship Issues Hobbies and Crafts Crafts Drawing Games Education & Communication Communication Skills Personal Development Studying Personal Care and Style Fashion Hair Care Personal Hygiene Youth Personal Care School Stuff Dating All Categories Arts and Entertainment Finance and Business Home and Garden Relationship Quizzes Cars & Other Vehicles Food and Entertaining Personal Care and Style Sports and Fitness Computers and Electronics Health Pets and Animals Travel Education & Communication Hobbies and Crafts Philosophy and Religion Work World Family Life Holidays and Traditions Relationships Youth
- Browse Articles
- Learn Something New
- Quizzes Hot
- This Or That Game
- Train Your Brain
- Explore More
- Support wikiHow
- About wikiHow
- Log in / Sign up
- Hobbies and Crafts
- Paper Craft
- Papier Mache

How to Create Papier Mâché
Last Updated: March 2, 2024 Approved
This article was co-authored by Amy Guerrero . Amy Guerrero is an Arts and Crafts Specialist and the Owner of Sunshine Craft Co., a crafting studio based in Phoenix, Arizona. Amy specializes in macrame, DIY crafting, and teaching fiber arts. She offers monthly in-person and online workshops along with having developed a range of DIY craft kits for at-home projects. Amy holds a BS in Industrial Design from Philadelphia University. She worked as a graphic designer before starting her own business. Sunshine Craft Co. is a creative hub that offers a wide range of workshops, tools, and resources for any craft project to inspire creativity and community engagement. There are 8 references cited in this article, which can be found at the bottom of the page. wikiHow marks an article as reader-approved once it receives enough positive feedback. This article received 74 testimonials and 87% of readers who voted found it helpful, earning it our reader-approved status. This article has been viewed 3,239,943 times.
Looking to make your own paper mâché craft? Papier-mâché (pap-yay mash-ay) or paper mâché (paper mash-ay) is an easy to make, hard material that can be used to cover various surfaces. You can use it in arts and crafts to make various sculptures, fruit bowls, puppets, dolls, and much more. The surface is easy to paint, allowing you to add patterns, bright colors, and interesting designs to your finished product. We've put together a tutorial on how to make paper mâché that can be used for any project that you have in mind.
Making Papier Mâché

- A bowl or large container
- Flour, wallpaper powder/ paste , or white glue [1] X Research source
- Your base structure
- Newspaper (for your project -- not for clean-up duty)
- There is no wrong size your strips could be. In fact, if you want to add volume to your structure by molding the strips, you will need different sizes. So tear away freely.
- Glue mixture: Pour 2 parts white glue and one part water into a mixing bowl. These quantities can be changed to suit the size of your project. Or, if you have a stronger bonding glue, 1 part white glue and 1 part water will do the trick. [3] X Research source
- For super large and intense projects , you may want to substitute white glue for the water.
- Wallpaper powder : Pour 2 parts wallpaper powder and one part water into a mixing bowl. This method is good if you're thinking seriously long-term -- it can last years. [5] X Research source
- If it's too thin or thick, adjust accordingly. Add more adhesive base if it's too thin, water if it's too thick.

- If you're using a balloon, consider painting it with cooking oil beforehand -- that way, when it's dry, you can slide it out easily.
Creating Papier Mâché Crafts
- If you'd like to create a shape (a face, say), bunch the strip into the form you want, place it on your surface, and then layer another strip on top to smooth it out. This can create volume, texture, and detail quite easily.
- Put your first layer on horizontally, the second vertically, and so forth. It will help show you where you have been before and strengthen the piece. [10] X Research source

- Some schools of thought say to start with a white primer. If you're using a light color on the piece, you may want to use this method (otherwise some print may stick out). Make sure not to cover to top part in order to take the balloon out.
Community Q&A
Reader Videos
Share a quick video tip and help bring articles to life with your friendly advice. Your insights could make a real difference and help millions of people!
- It will take more than 40 minutes to dry. Thanks Helpful 38 Not Helpful 5
- The flour mixture is better for piñatas, as it breaks easier. If you're looking for a stronger hold (like for cosplay) use the glue one. Thanks Helpful 48 Not Helpful 9
- In addition, tearing the paper roughly, as opposed to cutting with scissors, will result in a smoother final appearance. Thanks Helpful 56 Not Helpful 13
Tips from our Readers
- Leave the paper mâché to dry overnight. Check on it in the morning to see if it's completely dry. Drying time depends on the size of your project, so just make sure it's dry before you paint or decorate it.
- Gather your materials before you start working, like newspaper, glue, paste, water, a paintbrush, and a structure as your base. Then, cover your work area with scrap paper.
- There are lots of adhesives to choose from, like flour paste, white glue, or wallpaper paste. Just mix either adhesive with water until it has a smooth consistency.
- Dip the strips into the adhesive mixture and smooth them onto your structure in layers. Aim for 3 layers of strips.
- Tear newspaper into long, 1 inch wide strips. Tearing creates a better edge than cutting.
- Use a hairdryer to speed up drying time. Just don't hold it too close or use high heat.
- Smooth any rough parts with sandpaper when the paper mâché is completely dry.

- The glue mixture may be hard to clean off your work surface once it is set. If you are worried about getting glue on your work surface, put some newspaper down before you get started. Thanks Helpful 96 Not Helpful 39
- If you're making a piñata using a balloon, make sure you use enough layers (at least 3 or more) or replace the newspaper with thicker paper (like normal white paper) and be sure to let it dry completely before removing the balloon. If not, the balloon may drag the paper inward and create dents when it's popped. Thanks Helpful 84 Not Helpful 37
Things You'll Need
- Glue/flour/wallpaper powder
- Mixing spoon/stick
- Newspaper (for surface and structure)
- Base structure
- Cooking oil (optional)
You Might Also Like

- ↑ https://medium.com/prikabylove/beginners-guide-to-paper-make-84ece70b6fce
- ↑ https://www.dltk-kids.com/type/how_to_paper_mache.htm
- ↑ https://www.papiermache.co.uk/tutorials/getting-started-with-papier-mache/
- ↑ https://www.kidspot.com.au/parenting/things-to-do/make-paper-mache-glue/news-story/ceb59e78216f566a15b75932462f274c
- ↑ https://blog.treasurie.com/paper-mache-balloon/
- ↑ https://www.goodtoknow.co.uk/family/things-to-do/how-to-make-paper-mache-288662
- ↑ https://www.ponderosahomes.com/2014/11/getting-crafty-thanksgiving/
About This Article

To make papier mâché, first add 2 cups (240 grams) of flour and 1 cup (240 milliliters) of water to a large bowl. Stir the flour and water together until a paste forms, then set the paste aside. Next, tear or cut enough 1-inch wide strips of newspaper to cover the object you’re papier mâchéing 3 times. When you’re done, dip the strips into the papier mâché paste, and press them onto your object. Continue dipping and pasting the strips until your object is completely covered. Then, let the first layer dry, which should take about 2 to 3 hours. Place a fan next to the object to help the papier mâché dry faster. Repeat the process 2 more times so you have 3 layers in total. Then, paint and decorate your papier mâché object. For other ways to papier mâché, including how to use a glue mixture or a wallpaper mixture as your base, read on! Did this summary help you? Yes No
- Send fan mail to authors
Reader Success Stories
Halha Begum
Aug 21, 2019
Did this article help you?
Dec 8, 2018
Alex Finlayson
Apr 5, 2016
Trudy Stevenson
Sep 29, 2016
Pam Cockrum
Nov 14, 2016

Featured Articles

Trending Articles

Watch Articles

- Terms of Use
- Privacy Policy
- Do Not Sell or Share My Info
- Not Selling Info
Get all the best how-tos!
Sign up for wikiHow's weekly email newsletter
The Graphics Fairy
Vintage Images, DIY Tutorials & Craft Projects

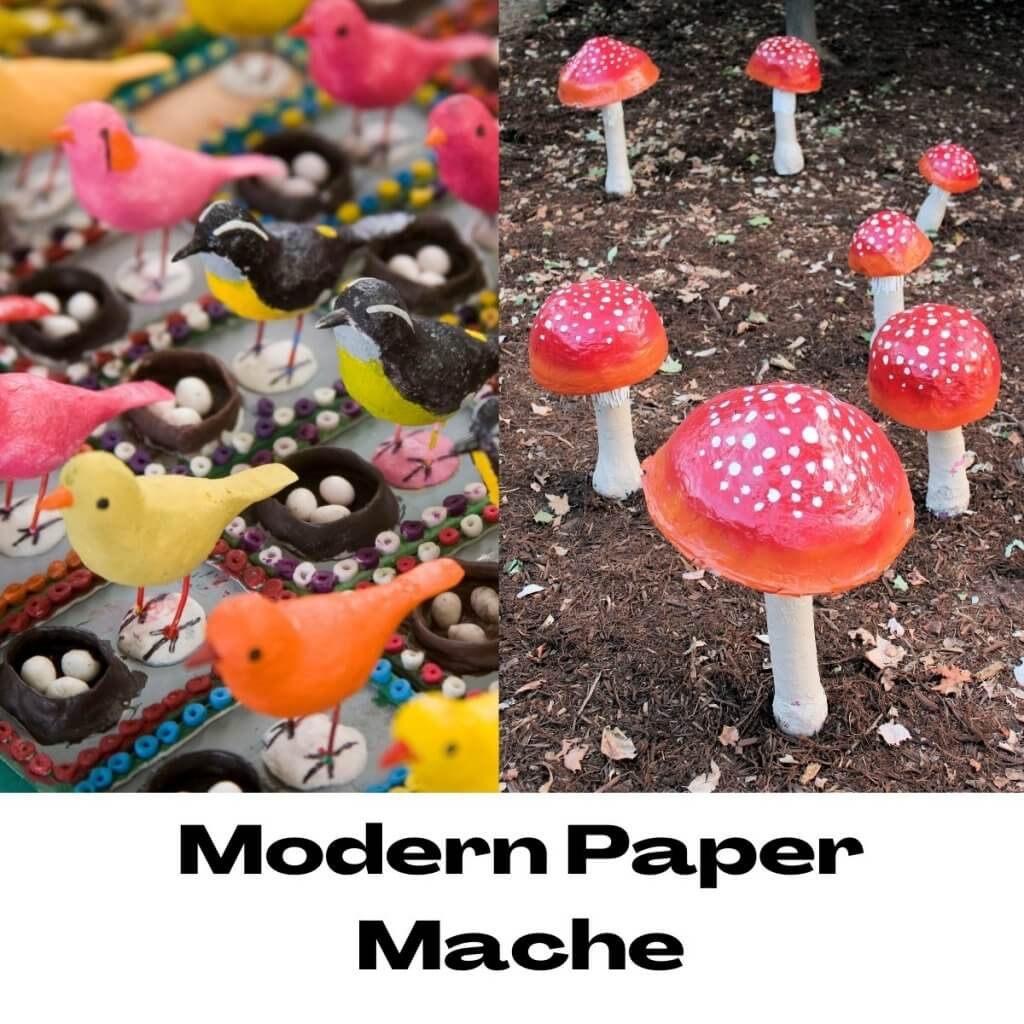
Paper Mache Beginner’s Guide (Easy!)
Written by Rebecca E. Parsons
This post may contain affiliate links which won’t change your price but will share some commission, you can find our privacy policy here.
Paper Mache Beginner’s Guide
Hello my sweet Graphics Fairy friends! It’s Rebecca E. Parsons here, back today with a fun tutorial for a Paper Mache Beginner’s Guide! Paper Mache is a marvelous art form for beginners because people of all age groups can enjoy the simple applications of this technique without any prior experience. In this tutorial, we will make a nifty little Paper Mache Bowl using an inflated balloon as a mold. I’ll even included 2 recipes for the mixture you will need, one is a flour paste recipe and one for water and glue paper mache. Easy peasy! Plus we will decorate the inside of our bowl with a beautiful Graphics Fairy bird!

What is Paper Mache?
In simple terms, paper mache refers to the layering of paste moistened paper onto a blank surface. The paper then dries into the shape of that blank surface. Cool! The term paper mache is derived from the French words Papier-mâché, meaning of all things “chewed paper.” Paper mache is a method of crafting in which paper is combined with a ‘paste’ to create a wide variety of objects.
Don’t forget to Pin and save this post for later!

You can create something as simple a little bowl to something as grand as a Mardi Gras float and even a useable canoe! This age old craft dates back thousands of years to Egypt and China.

Materials Needed
The basic materials needed for paper mache crafting include:
- Newsprint Paper (I prefer blank newsprint, but you can use old printed newspapers as well)
- An Adhesive (see options below)
- Vaseline (for highly detailed molds)
How to Make Paper Mache
There are two options for preparing your paper for paper mache. One method uses paper pulp created by placing paper scraps into boiling water or soaking the paper in water overnight, then mixing in an adhesive. This is best for sculpting and intricate designs. The most commonly used method requires tearing strips of paper, soaking them in paste or adhesive, then laying them on a shape. The adhesive used to moisten the paper acts as the binding agent. The outer shell hardens as the paper dries. After drying, your paper mache creation can be painted and decorated. We will be using the ‘strips of paper’ method in our crafting.
A soft paper that is easy to mold is the best option for paper mache. Although different types of paper can be applied, torn strips of newspaper is the definitive choice for most crafters. It is inexpensive; free if you use old newspapers! It is very absorbent and thin. I actually buy unprinted newsprint that is used as packing paper when moving. TIP : Make sure that it is uncoated. I prefer this because newspaper ink stains the piece. That is fine however if you plan to paint it.
As always, I encourage you to experiment. You can use lightweight papers like 20-24 lb. printer paper. Just make sure that you soak them a little longer so they absorb the glue. I have heard of people using cotton or rag papers with success as well. Those would be pricey though. NOTE : Coated and glossy papers like magazine pages will not work!

The Adhesive
Crafters have two choices for the adhesive:
- Homemade Flour Paste : A part water, part flour mix. There isn’t really an exact flour to water ratio, but 1 cup flour to 1 cup water is a good reference point. It is best to use a whisk and bowl to create the flour based paste.
- Ready-made Glue Mix : Plain white school glue (PVA glue like Elmer’s) mixed with water is very popular. Wood glue can also be used. White PVA school glue should be mixed 2 parts glue to 1 part water. A 4 ounce bottle is mixed with 1/4 cup of water.
The use of glue is similar to using flour, but glue produces a stronger structure and is less likely to deteriorate over time.
Salt : I recommend use of salt for preventing future mold on your paper mache project. It also speeds up the drying process by removing excess moisture from the paper more quickly. It is optional, of course.
Advanced Paper Mache
Three-dimensional paper mache sculptures can be created by starting with foam core board that you can cut to form whatever your imagination leads you to. Whether it be a face, birds, flowers, etc., the options here are virtually limitless. Wire can also be utilized as a reinforcement tool or by itself to actually build the ‘skeleton’ for a sculpture. The paper mache that covers the skeleton can be viewed as the ‘flesh’ of the sculpture.
Another optional material is vaseline. This is utilized if you decide to create a paper mache piece by covering your paper over a mold of some sort by rubbing vaseline over the mold first to prevent the paper from sticking to the mold.

How to Seal Paper Mache
You generally do not have to seal paper mache items. YAY! However, sealing can be beneficial if you want the paper mache surface to be very smooth. Prior to sealing, you can use sandpaper to smooth out rough areas. If any gaps or wrinkling remains after sanding, a sealant can fill in the uneven parts. TIP : Sealers should be applied after your paper mache item has dried completely. Overnight is best for smaller pieces. Thicker pieces can take several days.
Gesso is highly recommended for use as the sealant since it dries very hard and provides an excellent finish that is ideal for applying acrylic paints. The best way to apply gesso is with a sponge or brush in multiple thin layers. Gesso is available in clear, white, and black. It dries in just a few minutes. People have had success with Mod Podge as a sealer as well.
How to Paint Paper Mache
Make certain that the surface is dust free and completely dry before you paint. Also be sure that the paper mache layers are not loose or uneven before painting. If there are loose pieces, just put a dab of white glue to hold it down. Painting with acrylic paint and a paintbrush is the preferred method of painting on paper mache. Acrylic paint is ideal because it is waterproof and has many color options. NOTE : The paint needs to be thoroughly dry between applications.
Acrylic markers sometimes are used instead of acrylic paint, and are a viable option. Watercolors are not ideal because they aren’t waterproof and tend to dry somewhat soft and dull. Additionally, watercolors and other paints can actually damage the unsealed paper itself. If you wish to apply your own personal touches to your project after painting, colored pencils or waterproof marker pens are a splendid choice. There are of course many other ways to embellish your work of art with your own, unique ideas!
Sealing After Painting
Your new paper mache creation can be sealed. This is an option that will protect the paint from sunlight and help to maintain vibrancy. The two practical materials for this final stage are gloss varnish or Gloss Mod Podge. Applied with a brush or sprayed, both will dry transparent and leave a hard shiny finish. Acrylic sealing spray is an alternative option and is considerably easier to apply evenly. PLEASE NOTE : The items you create are not food safe!!! They are for decorative use only!!!
How to Make a Paper Mache Bowl
Now that you know everything about creating with paper mache, let’s make a bowl! This is a fun and messy project, so protect your surface well. Kids absolutely love to do this. I find it very satisfying and almost meditative to make these small bowls. I used a small, round balloon for this project.

Small Balloon blown up and tied shut Permanent Marker Paper torn into 1/2″ wide strips about 3-6″ long White School Glue 4 oz. mixed 2 parts glue to 1 part water Salt (maybe 1/2 teaspoon) Foam Plate Whisk Gesso Acrylic Paint in color of choice (I used aqua) Blue Jay Print Here from The Graphics Fairy
Step-by-Step Directions
Step 1 – Prepare the Balloon: Blow up the balloon. Lightly draw a line around the balloon with a permanent marker. This will give you a guide to the edge area. However, the uneven edges of a Paper Mache bowl are what gives it the carefree look you want.
A Word About Balloons : I prefer to work with a colorful balloon. You can see any thin or gap areas more easily. I learned a lot about balloons while making this tutorial. I first bought a bag of small balloons (2-3″ round) at the grocery store. They were very small and so thin that some of them broke while being blown. I did like the small size bowl I made with them (see below). Then I went to my neighborhood dollar store that only had 6″ balloons. They were sturdy when blown, but larger than I had hoped. I would say that a 4″ balloon would be perfect for what I wanted. Just be aware that inexpensive balloons might frustrate you!

Step 2 – Tear the Newspaper: Tear the newsprint paper into strips about 1/2″ wide strips about 3-6″ long.The edges of the ripped paper will have fibers that grasp and grab hold of other pieces easily. (see the strips in the above photo) HINT : Do not cut the strips (tear them) as the crisp edges will be harder to work with . Trust me on this !! NOTE : The bigger the balloon, the longer the strips can be. I used 3″ strips for my 6″ balloon. The edges of wider strips will pucker when laid on the balloon.
Step 3 – Prepare the Paste: Thoroughly mix 2 parts white glue to 1 part water in a foam plate Sprinkle in a little salt; maybe 1/4 teaspoon. I use a wire whisk for this. The mix should be thin but not runny!!! (see photo below)

Step 4 – Dip and Place Newspaper: Place your balloon on top of a glass or jar with the tie inside. This will help to stabilize it while you work and dry the bowl. (see photo below) TIP : I added water to my jars to make them less apt to fall over while working!! WINK

Lay it over the balloon and smooth it down with your fingers. (see photo below)

Lay the strips randomly in all directions (see photo below). Repeat this process until you have three or 4 layers over the entire balloon.

You can hold the balloon up to a light source to see any thin areas. Leave it to dry overnight. The more layers of paper, the longer it will take to dry. If the bowl feels cold to the touch, it is still wet. Allow it to dry completely before removing balloon and decorating !
Step 5 – Remove the Balloon : There are a few ways to remove the bowl from the balloon. I will share my favorite. PLEASE NOTE : If the paper is not completely dry, it will be a struggle to remove the balloon . I found this out the hard way!!! Methis 1 worked like a charm on my second bowl. Method 1– Begin at the edges of the bowl where it touches the balloon. There will probably be a few gaps where the paper has started to pull away from the balloon. Start on one of these. Gently press the balloon in, away from the bowl. The paper should pop off fairly easily. Slowly and carefully work your way around the bowl, pressing and releasing the paper. If it is really stuck, allow the bowl to dry more. Method 2– Pop the balloon. Then gently pull the balloon out of the bowl. (ph0to below shows balloon sticking to the bowl) TIP : If it sticks to the bowl … STOP, it is still too wet. Allow to dry longer. Then gently remove the balloon.

Finished Bowl and Bowl Edges
Here is a look at the yummy, uneven edges of a paper mache bowl. The top photo is my test bowl. I did not have enough layers of paper at the edge. The front edge is torn a bit and you can see how translucent it is. But it still works, I think!

In this image, you can see the wavy and wispy edges of my finished bowl. Most of the edges have three or four layers of paper in my second try. You can also see the beautiful outside of the bowl, which is unsealed. Using plain newsprint dries to this rustic, almost rough plaster like look and feel. Printed newspaper with have dark areas where the ink was.

Step 6 – Decorate : There are several options for decorating your bowl. We will be painting ours and doing a transfer to the inside. But you can stain it, glitter it, gild it, etc.
- Sand the bowl if necessary according to the directions in the “How to Seal Paper Mache” section above.

- Paint the inside of the bowl with your color of choice. I used Golden’s Acrylic in Cobalt Teal. Allow to dry at least 1 hour. HINT : You want the paint to form a strong bond to the Paper Mache bowl for the transfer to work well. So don’t rush it!
- Transfer the Bird Image . Photocopy or Laser Image to transfer – I used this Blue Jay . I am using my Acrylic Paint Transfer Technique to transfer the little bird onto my bowl bottom. Again, I used Golden’s Acrylic in Cobalt Teal spread liberally in th area where the transfer will be. You can find the instructions for this technique HERE ! NOTE : It is a little trickier to transfer an image to a soft and bumpy surface.
- Take your time; don’t rush.
- Fussy cut the image leaving just a tiny white edge around it.
- Apply plenty of paint; more than you may think is necessary. If it dries before you get the image burnished down, those areas will not transfer.
- Burnish, then burnish more. I used my fingers first and them my bone folder. I worked on this for several minutes to make sure every single part of the image was embedded in the paint.
- Allow the image to dry at least 3-4 hours before wetting and removing the backing paper. It would be better overnight!
- Use very little water to remove backing paper. The water necessary to remove the backing paper can soften sealed and unsealed Paper Mache.
- Rub the paper backing very gently and stop if any of the image begins to come off!!

- Seal the transfer inside of the bowl with a glossy medium or spray. This will help make the image pop and look clear. I used Mod Podge Gloss Spray! Use the steps in the “Sealing After Painting” section above.
- Enjoy your bowl!!

That was a bunch of messy, creative FUN!!! I hope that you enjoyed The Paper Mache Beginner’s Guide and learning How to Make Your Own Paper Mache Bowl with me!! When I am not exploring with new and old Techniques for Mixed Media in my Graphics Fairy sandbox, I also create Photoshop Elements tutorials and craft project tutorial videos over on The Graphics Fairy Premium Membership site . You can find even more of my books, junk journals, mixed media art, classes, and whimsical shenanigans on Rebecca E Parsons Dot Com .
May joy be with you all,

You May Also Like These

November 21, 2021 at 8:34 am
Rebecca, you make this sound so easy! I once made a hot air balloon with my daughter for her bedroom (long, long ago) Tonight my grandboys are spending the night and I am thinking we will use your directions and make a Christmas bowl for their mother! Thank you so much. I also thought with them making the bowl maybe a photo transfer of the two of them might be fun. Have you tried that? Anything I need to be cautious of doing or not doing. I would hate to ruin their bowl. They loved making paper together so I am thinking they will love this. Again thank you for the very clear instructions.
Karen Watson says
November 21, 2021 at 4:12 pm
Hi Sandy, I’m so glad you liked Rebecca’s project! What a great idea to make a Christmas bowl with your grandkids! If you are going to do the photo transfer, I would definitely create a little scrap paper mache piece that you can experiment on before doing it on the actual bowl. Since we all have different types printers, ink, and use different brands of paint, it’s best to try it for yourself on a practice piece so that you know exactly how it will turn out, with your supplies I hope that helps!
Giuseppa says
November 8, 2021 at 8:30 am
Grazie. La spiegazione è chiarissima.
November 8, 2021 at 6:07 pm
November 4, 2021 at 6:25 pm
Thanks so much Rebecca, I remember doing this at school. What a fun project!❤️
November 5, 2021 at 10:18 am
I’m so glad you enjoyed Rebecca’s post Sue! 😊

The Ultimate Guide to Paper Mache for Beginners
Are you interested in learning how to make paper mache? Paper mache is a craft that you may think of in a time of creative inspiration.
The concept of paper mache has been around for longer than paper creation. Despite its age, it has stayed strong in the crafting world throughout history. Paper mache has since been established as effective but easy to utilize.
This craft may seem overwhelming to those who have not had any experience with paper mache before.
Thankfully, everything down to the mixture you will use is things found in everyday life. Let’s get to everything that you need to know about paper mache.
What is Paper Mache?
The history of paper mache, paper mache in modern times, what supplies do i need for paper mache, how to create paper mache art, tips for paper mache art, paper mache video tutorials.
Paper mache, or papier mâché (“chewed paper” in French), is a method of art that involves paper and a paste that the artist creates.

This paste is made of easy-to-find ingredients that you may already have in your house, saving you a trip to the craft store!
The paper you have will be torn into strips and then coated in the mixture you make before being put onto a surface of your choice. Surfaces can consist of things such as balloons, bowls, or vases.
The paper you use that is saturated in the paste will harden as it dries, becoming a light but durable material.
Once it has dried, the paper mache will be strong enough to hold what it needs to hold but will break if put under enough pressure.
Paper mache as we know it today is thought to have originated from China, where paper itself was first invented.

These first instances of paper mache were likely for helmets. While paper mache is not strong enough to save you from any of today’s weapons, it does show how highly they valued this material.
While China has the first known instance of paper mache as we know it today, if you look further back in history, you will see a close relative that can be found dating back to Ancient Egypt.
Ancient Egyptians would coat pieces of papyrus or linen into the plaster to create objects for funerals. Coffins and Egyptian death masks would be crafted from this paper mache version.
Perfect Hobby For You:
- Polymer Clay
- Needle Felting
- Wood Burning
- Collage Art
Paper mache is a popular crafting method even in the modern era, but it has also been known to be used for practical uses.
It was not that far back in history that paper mache was being used for fuel tanks and canoes.
While this practice has not necessarily continued into modern day as we know it, it was less than 100 years ago that the craft was being utilized for these items.
Today, it is much more common to see paper mache used to make objects such as pinatas and parade floats. You also may see artists using paper mache to create figures, jewelry, and more.
Paper mache can be incorporated into whatever craft you are interested in.
If you are into fairy gardens , you can make a paper mache piece for an indoor terrarium.
Artists globally produce their own impressive works of art with paper mache, with a portion of these artists making their profession solely in paper mache.
If you are a crafter who would prefer a more hands-on method with your craft, consider paper mache a great candidate.

Flour or Glue
Base of choice.
When you are gathering materials for your paper mache project, paper will be the absolute necessity.
Feel free to upcycle any old newspaper or magazines and use their pages as the strips of paper for your paper mache project.
This is a great way to be more environmentally friendly while also saving yourself money.
If you did not have anything spare lying around, Amazon offers over five pounds of blank newspaper for your crafting needs.
Water is one of the next priority materials for paper mache. Water will be your friend, as it is a significant ingredient in your paste.
Without any moisture, there wouldn’t be a paste after all. It does not have to be any particular kind of water; simple tap water would be sufficient.
While there is a way to also do paper mache using glue as the base, flour is a more available product for this craft.
Just as water was a significant ingredient for the paste, flour is the next ingredient.
The dry powder of the flour will mix with the water to slowly create a paste with a consistency based on your personal preference.
If you are using glue, the glue will mix with the water just as the flour does.
Your paste will need something to be mixed in. You will need a container that will be large enough for you to easily coat strips of paper in, as well as holding the paste mixture itself.
Salt is recommended by some paper mache artists to be added to your paste for its antifungal elements.
However, it isn’t a miracle worker, and you will still want to take extra precautions to prevent mold.
While the whisk is not a necessity in your paper mache experience, it will certainly ease the way.
The whisk will help to mix your paste together, breaking away any dry clumps to give you a smooth mix.
The bases you can use are endless, but one great beginner’s item is balloons.
You can apply your moist strips to the balloon to form your project’s shape. When it is dried, you can pop the balloon to remove it easily.
Another option is to use these masks to create paper mache masks that can be used as decorative items.

- Gather your materials and prepare your crafting area. Make sure all your materials are within reach. You also want to be sure to protect your environment, so prepare your crafting area ahead of time.
- Combine flour/glue and water into the bowl and mix until desired consistency. When you begin to make your paper mache mixture, you will combine your two ingredients in a bowl until it reaches the desired consistency. If the mixture is thick, you add water. If the mixture is thin, you add flour or glue.
- Add some salt if you want. While not a necessary step in this procedure, if you add salt to your mixture, you will help keep your work free of any potential mold while it is drying.
- Whisk until smooth. When you combine these elements together, you will want to mix it until there are no dry lumps. This is a very similar situation to stirring some batter.
- Cover your paper in the mixture of flour and water. When your mix is to your liking, this is when you will begin creating with it. You will grab strips of paper one at a time and saturate them with your mixture.
- Ensure no excess mixture is on the paper by using your fingers to wipe the strip. While you want your strip of paper to be saturated enough to stick to your project, you do not want it to be so soaked that it dries slower. Because of this, you can take off any excess by brushing down with the paper strip in between two of your fingers.
- Place the paper over whatever base you have chosen. If you have selected a balloon, this is where you will keep your balloon steady and begin applying the strips. However, if you’re using a bowl or something else, you will want to apply a nonstick element to your bowl before adding the paper mache.
- Cover the surface as much as you wish. Whether you are creating a bowl and thus only utilizing half of the balloon or if you’re making something different that requires the whole balloon, it is entirely up to you.
- Let dry before beginning a second layer, or you may risk mold. If you are going to apply more than one layer of paper mache, waiting for the previous layer to dry before adding another is the best idea. Even with the salt element, you do not want to risk mold from over-saturation.
- Apply as many layers as you wish. While you have to wait for each layer to dry, apply as many layers as you want if you have the patience!
- Allow it to dry. Finally, when you have added all the layers your heart desired, it is time for you to wait for it to dry completely.
- Remove your base. If you were using a balloon, this is where you can simply pop the balloon. If you were using the bowl, this is where you will be thankful that you used a nonstick agent, as the bowl will be much easier to remove than if you hadn’t.
- Decorate as you please! If you plan on coloring your paper mache masterpiece, it is best to use acrylic paints ! There are also many more decorating ideas to truly customize your project.
Place the Paper Mache Strips In As Many Ways As Possible
If you place every paper mache strip in the same direction, you will have a fragile piece when your project dries. Instead, try to apply your strips of paper to create a strong base in as many directions as possible.
Do Not Paint Until Project is Dry
In the same light as not applying another layer of paper mache until the first layer is dry.
You will not want to paint before your project is completely dried. This increases the chances of mold, which can entirely ruin your work.
You Can Add Aromatherapy Scents
If you do not like the smell of your flour and water mixture, you can also feel free to add aromatherapy scents to your mix.
Be Prepared to Be Patient
When you are doing paper mache, you need to be patient. With how much dry time is involved and how crucial dry time is, you will be spending a lot of time waiting to move onto the next step in your project.
You may want to consider a different craft if you are all for instant gratification.
Paper mache is a craft that has grown with humanity, from its ancestry in Egypt to its origination in China.
The materials you need to craft with paper mache are accessible and may already be things you have in your home.
There are so many potential projects for you to test your new crafting skill and a world full of information waiting to be learned. Whatever your reason for learning paper mache may be, the path ahead will be adventurous.
Leave a Comment Cancel reply
Save my name, email, and website in this browser for the next time I comment.
Privacy Policy
- Skip to primary navigation
- Skip to main content
- Skip to primary sidebar
How to Make Paper Mache, Made Easy for Beginners
Modified: Feb 25, 2024 by Treasurie
Learning the basics of how to make paper mache will ensure you can accomplish multiple projects with ease and confidence. This tutorial will give you the basics of paper mache using paper strips.

How to Make Paper Mache, Step by Step Instructions
The general steps that you need to take when making paper mache crafts using paper strips are as follows:
Table of Contents
The things you would need for this method on how to make paper mache are as follows:
- Container or Large Bowl: This item should be large and deep enough to hold the other materials and more. It will ensure you won’t make too much mess.
- Adhesive: Whatever type of adhesive you choose, ensure that you prepare the amount that suits the size of your project. 1 cup flour.
- Cold Water: For how to make paper mache methods, you will use water to dilute your adhesive, giving it a smoother consistency and making it more convenient to use.
- Molds: This item will help you achieve the shape and design you’re going for, so first-timers should choose the most basic ones. The mold can be a balloon, clay or plastic.
- Paintbrush (Optional): Choose a soft-bristled, fine paintbrush. You can have two, one for smoothening out the adhesive and prevent air bubbles, and another for painting your project.
- Paper: Aptly named, paper will be the main material for this project.
Best Paper for Paper Mache
Some of the best types of craft paper that you can use are:
- Strips of Newspaper: Used newspaper is the most common and affordable paper that you can utilize. It also holds well, so it’s the perfect base.
- Kraft Paper or Brown Paper Bag: Similar to the newsprint, this is an affordable option, especially for practicing how to make paper mache. However, it’s a little thicker.
- Construction Paper: You can choose from light to medium thickness, depending on your project. The problem is that it won’t work for most projects because it has a rough texture.
- Printer Paper: Like the construction paper, you can choose from several thickness levels. This type of paper also has a smooth surface, unlike the newsprint.
- Crepe Paper: Yes, this is very thin paper, so it’s best used for creating the finer details of your paper mache project. The best thing about it is it comes in various colors, so you can skip the painting step. Plus, it’s rough or wrinkled, adding texture to your finished design.
- Tissue Paper or Paper Towel: An alternative to crepe paper, this is more readily available at your home.
Types of Glue for Paper Mache
The best adhesive is PVA glue because it’s safe, durable, free of mold and rot, dries quickly, clearly, and evenly, and has excellent strength and smoother texture. Nonetheless, you can opt for the following:
- Regular Wood Glue: Being water-soluble, non-toxic, and strong, this is a good alternative. However, once it dries, it’s no longer flexible. You can also opt for type 1 yellow or carpenter glue.
- Mod Podge: This easy-to-clean, toxic-free, and water-soluble option is perfect for the finishing stage of the how to make paper mache process. Just note that it dries quickly.
- School Glue or Elmer Glue: This adhesive is the most affordable and easily accessible commercially available glue that is versatile and strong. The issue you’ll encounter is that it softens when exposed to water. You also won’t be able to sand it.
- Wallpaper Paste: The last adhesive you should opt for is wallpaper paste because it has toxic ingredients. You also need to experiment with the ratio when diluting it. But if you have this at home already or use it in your other craftworks, then go for it, making the process more cost-effective.
- Homemade Flour Mixture: Making your own simple recipe for adhesive using 1 cup of plain flour is the most affordable, best for kids and it also works great!
Step 1 - Prepare Your Working Area
Having your own crafting table would be great, but you can choose to work on any table in your home or a workbench in your garage. Either way, it’s best to protect it from any drip and mess that usually happens while accomplishing your paper mache project.
First, ensure that the surface is clear of any other objects and clean. Then, place a cover. You can use an old table cloth or fabric, a plastic cover, newspaper, or any scrap pieces of paper.
Step 2 - Make Paper Strips
Create plenty of long paper strips using your hands or scissors. The ideal thickness for a newspaper strip is 2.5 centimeters or one inch, but feel free to choose the strips’ size. They don’t need to be perfect; in fact, you can even create strips of different widths to add more volume to your mache project.
Step 3 - Make a Paper Mache Paste
Choose an easy paper mache recipe. Simple paper mache is made just with flour and water.
For this paper mache recipe , place the adhesive and water in your container, following these recommended adhesive to water ratios:
- PVA, Modge Podge, School Glue: 2:1 or 1:1 (Using the 1:1 ratio will give a stronger glue but you may need to experiment to get the right consistency.)
- Homemade: 1:1 (1 cup of flour to 1 cup water, or 1 part flour to 1 part water)
- Wallpaper: 1:1 (1 part wallpaper glue to 1 part water)
Next, whisk the mache paste recipe using your paintbrush or a spoon until you reach a smooth consistency.
Adjust the quantities if needed. You can add a little water if it’s too thick or adhesive if it’s too thin. You don't want any bumps in your mixture, so stir well.
Adding 1 or 2 tablespoons of salt to the paper mache glue will make your mixture last longer in high humidity if you plan on storing excess paste for later.
Step 4 - Dip the Strips in the Solution
Place a few strips of paper in the bowl or container with your glue paste. Ensure you don’t put a lot to cover both sides of the paper strips. That said, you must also ensure that you don't saturate them too much.
If you don't want to use strips, a paper mache pulp can be made by blending the paper and glue strips.
Step 5 - Layer Your Soaked Strips
Take one of the soaked paper strips, and carefully slide from top to bottom two of your fingers to help remove any excess adhesive. Hold it for a while and let the adhesive drip in the container. Slowly lay it on the surface of your mold, and then smooth it out. You can do so with your paintbrush or fingers.
Repeat the process, but make sure you achieve the shape and design you want while laying the rest of the strips. Make sure you also achieve your desired texture, volume, and details.
If you run out of strips, repeat steps five to six of the paper strip procedure.

Step 6 - Let It Dry
Leave your project to dry for at least 24 hours. Once dry, you can start painting it or add any details or embellishments that you want.
Once you’re done, you can slowly start removing the dried design from its base model.
Step 7 - The Finishing Touches
Paint the paper mache project using acrylic paints. Apply a clear coat, such as varnish, all over the project to seal it properly, And you’re done!
How to Make Paper Mache - Ideas & Projects
If you’re unsure what kind of project to accomplish, below are some great paper mache ideas that you can start with, from the most basic to the most complicated.
Paper Mache Balloon
The process of making a paper mache balloon is simple. All you have to do is inflate the balloon, and follow the instructions above. The demolding part involves popping the balloon.

Paper Mache Globe
The how to make paper mache globe procedure is almost the same as the balloon’s, except for the finishing part. Paint it blue, create outlines to paint with green, and create smaller details or outlines with brown.

Paper Mache Pumpkin
Perfect for Halloween, a paper mache pumpkin uses a balloon inside. All you need to add to the steps is to wrap twine around the inflated balloon to create the pumpkin’s lines, leaving some excess for the stalk.

Paper Mache Pinata
In making a pinata paper mache , your mold will depend on the design that you want to achieve. You can use a balloon for a round animal, or a box for a traditional pinata. Decorate it with tissue paper. Don’t forget the candies, coins, and more!

Paper Mache Volcano
A more complicated project that you can jump into after a few practices is how to make paper mache volcano . For this, you need an empty bottle instead of a balloon. You will also need a cardboard box to create a base for your volcano.

Paper Mache Bowl
You can make a paper mache bowl by using either paper strips or paper pulp. Just use any sized bowl as your mold and follow the standard steps we discussed.

Paper Mache Mask
There are three different ways how to make paper mache mask s: using a mesh wire, a balloon, and paper pulp. The most challenging part is adding the details, such as the eyes, and ensuring the final product has the shape of a face.

How to Make Paper Mache - In Conclusion
Making paper mache involves simple steps. It's the design you choose that will make it complicated. Thus, it’s best to start from the simple ones and then progress as you practice. Also, make sure you choose the adhesive and paper you’re comfortable working with. Have fun!
More Paper Crafts

Reader Interactions
Leave a reply.
Your email address will not be published. Required fields are marked *

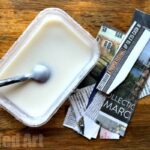
How to make Paper Mache Paste from Flour
Easy paper mache recipe that is strong, durable and made from every day ingredients. You can make your own Papier Mache Paste quickly and easily – and a cheap recipe that is also eco friendly and for working in large groups or in the classroom.
How to make paper mache glue – quickly & easily

Perfect for anyone that loves to craft with newspapers ! Our simple paper mache recipe only requires two ingredients – yes that is correct – flour and water. I have used this paper mache recipe at summer camp many times before, as well as used it at home. Things I have made with it have lasted for years (I still have a paper mache piggy bank that I made 20 years ago at summer camp!! In that instance, I made the paper mache paste in the microwave too).
It is the most traditional method for how to make paper mache paste and gives you a strong, durable papier mache glue. With the added bonus that this papier mache glue is cheap, can be made from household items, is not as messy as PVA Papier Mache paste AND is good for the environment.
So without further ado.. here is our very easy paper mache paste made from flour and water:
Ingredients for papier mache paste:
So, how do you make paper mache at home?

- 1 cup plain flour (all purpose flour)
- 2 cups tap water
- OPTIONAL: some people like to add a tablespoon of salt to help preserve the paper mache glue – but we have never needed to do this. If you live in an area with high humidity you may wish to add some
Yes. That is literally it!
Though we do heat it, so you will need a microwave or cooker too – as this helps release the starch in the flour which is your acting agent! It is possible to just use flour and water, with no heating, but the resulting paste won’t be as strong -if you have no accesses to bring your flour water mixture to the boil, do try and pour on boiling water instead and be sure to give it a good whisk – I encourage you to experiment with this first, before using it in a group setting and making sure YOU are happy with the result. This paper mache paste won’t be as strong, but the diy glue will work.
Next you will need is strips of newspaper/ any paper strips (we have used tissue paper before too) and you are ready to go!
(If you love how amazing flour is, you may also adore our 3 ingredient salt dough recipe !!)
You will also need
- A disposable container/ old pan if using a cooker (though you can use a normal bowl, as this washes up nicely and won’t get ruined!)
- Measuring cup (it really doesn’t matter what size, it is the relative quantities that matter)
- Spoon for stirring
- Microwave or cooker
If you don’t have a microwave, you can do this on the stove top – just heat the mixture in a pan gradually, bring to the boil and keep stirring!
Is PVA glue or flour better for paper mache?
Form our years of making paper mache at summer camp and in the classroom, we find that flour is strong and durable. PVA glue, like elmer’s glue, of course is also strong and durable, but as flour is so cheap and also eco friendly, I would always put the flour paper mache recipe first. The only “upside” of a paper mache glue recipe, is that it is “whiter”. A flour recipe will be slightly off white. So if you are using white tissue paper in your craft, you may like a glue recipe instead. Most people however, tend to paint their finished projects, so the colour of the paste really shouldn’t make a difference!
Go with flour!
How long does Paper Mache paste from flour KEEP FOR?!
I usually keep my homemade paper mache glue, in a covered bowl or sealed container or jar and it should last in the fridge for about a week. The water and flour mixture may separate out a little, just give it a good stir and you will be ready to use it again. Personally, I like using it straight away (once it has been cooled down) or with in a day or two. I wouldn’t keep it too long, but it CAN be made ahead of time.
As mentioned you can add a tablespoon of salt or two and that can help preserve it for longer. Having said that, (and as mentioned earlier), I still have a paper mache piggy bank, that I made well over 20years ago at summer camp. And no salt was added to that!
How to make Paper Mache Paste (Recipe with Flour)
This short video shows you how very quick and easy it is to make your Paper Mache Paste! Or follow the step by step instructions below!
How to make paper mache paste from flour and water – step by step instructions
This really is one of the easiest and least messy DIY Paper Mache Recipes!
- Mix one part flour, with two parts water. Pour the water in gradually and keep stirring.
- Try and remove as many lumps as possible.
- Pop into the microwave at full blast for 30-40 seconds (remember microwaves do vary, so add it for less if need be). Remove, give it a good stir.
- Pop back into the microwave for another 30-40 seconds etc. You will see some air bubbles forming, that is fine. You can “stir them out later”.
- NOTE: Some people prefer it more paste like.. but I like it a little “runnier” (not too runny mind you). It really is a question of preference.
- Remove the flour mixture and give it a good stir. Try and “squish out” any lumps against the side of the container. They are not a “disaster”, but your work will look neater and smoother, if there are no lumps.
- Let cool a little and you are ready to use your mixture.
I do think that this is stronger than bonding glue or modpodge and I love that this recipe is natural and biodegradable. The natural starch in the flour simply is amazing! And it is fantastic how it results in qiute a hard material!
Stove Top Paper Mache Paste DIY
You can achieve the same result on the stove top. As you are only working with flour and water, this will papier mache recipe will not ruin any of your saucepan or pots!
- As before, add your mixture to a pan and stir to make as smooth as possible.
- Place on the cooker, on low heat and slowly heat it up.
- Stir continuously until you have a thick soup like constitency.
- Remove from stove and let cool!
Your Papier Mache Mixture is ready for us! As mentioned, it should last in your fridge for up to around a week.. but I prefer to use it with in 2-3 days.
Papier Mache Paste
- 1 Cup of flour
- 2 Cups of water
- Microwavable container (can also be made on the stove top)
Instructions
- Note: this can also be made on the stove, by lightly heating the mixtue and stirring continuously
- Mix one part flour, with two parts water. Pour the water in gradually and keep stirring. Try and remove as many lumps as possible
- Microwave at full blast for 30-40 seconds (remember microwaves do vary, so add it for less if need be). Remove, stir
- Repeat the step above 2-4 until you have a consistency you like (some like it runnier, some like it thicker)
- Let cool and use
- Store in an air tight container in the fridge for up to a week
Once you have your basic paper mache glue ready (no white glue in sight!), you can get started on your paper mache projects. You will of course need strips of newspaper, though you can use other paper too – having said that, the more absorbant the paper, the better. Simply dip your paper in the paper mache paste and start working on your projects. I tend to get very messy and “hands all in” when using paper mache, but you can keep things a little less messy and use a paint brush too. Be sure you have a nice clear work area before you get started!
Most paper mâché projects also like to work with a balloon – you get the fabulous shapes that way! And you can really vary the size of your project depending on how big your balloon is! We LOVED making a Death Star pinata that way! But you can also make small piggy banks or papier-mâché fruit bowls using smaller balloons.
You can also use your papier-mâché recipe to make pulp clay or paper mache clay recipe. I have a post on paper mache clay recipe here. This is great for small projects requiring different shapes.
Some of our favourite Papier Mache Projects to day include the following:
For any paper mahce project, you will need your paper mache paste, layers of newspaper strips and some paints (we love acrylic paints.. and for some projects you can use white acrylic paint to create a “white canvas” and then draw on it with pens and create interesting designs and details -a great little trick!). Sometimes you will need scissors or a craft knife to finishing this off.

Stunning Papier Mache Garden Bird Ornaments

Papier Mache Dino Banks (again, we still have these years and years later! The paper mache paste recipe really is the best!)

Papier Mache Solar System

Papier Mache Melon Bowls – love these fruit bowls! They are so cute and full of bright colors!

Layers of the Earth Bowls – a lovely educational craft

Stone Age Axe – another great project for KS2 Primary school. So many great things to make from old newspaper!

Sheep Sculpture – an example where white acrylic paint makes a great “canvas” for kids to paint! You could also add coats of emulsion paint!

Hen Basket here we used tissue paper instead of strips of old newspaper. It work just as well. You could even use patterned floral tissue paper. How cute would that be?

Papier Mache Volcano – probably one of our most popular paper mache projects! Great for science fair projects both in school and the homeschooling community!

Papier Mache Pirate Ship
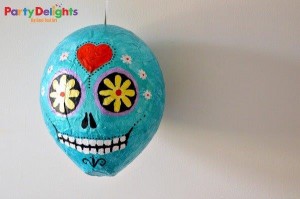
A fab Day of the Dead Pinata – a real balloon paper mache project classic! As a top tip, some people like to add a light layer of vaseline to the ballon, to prevent it from accidentally popping and “imploding” your work whilst it dries. Alternatively, some people like to add a later of plastic wrap. But I don’t think it is strictly speaking necessary!
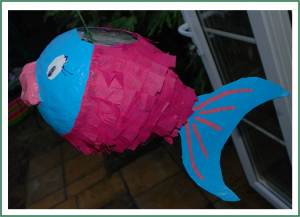
Fish Pinata – one of the first paper mache projects I made for Red Ted Art. The dried paper mache really made a strong hard material and it lasted us for years (we used it as a decoration!). I love the tissue paper scales.
Get Access to the FREE DIY & Craft Hub & discover something new to explore!

FREE RECIPE EBOOK! Get your copy! >
A Beginner’s Guide to Papier Mache
Papier Mache is a really fun craft to learn and do. Here you will find out everything you need to know about how to create papier mache objects!
Papier Mache always reminds me of my school days when art lessons would involve quite a bit of papier mache!
I very vividly remember once creating a papier mache ball – we pasted the special mixture over a regular balloon and then once it was dry we popped the balloon – and lo and behold we had a papier mache ball!
It was a great craft to do at school – it was somewhat messy (kids love that!), you didn’t feel like you were actually doing ‘school work’, and you could create some amazing things!
Papier Mache is a really really fun craft to try and do. You can really use your hands and imagination to create some amazing things with paper and a gluey mixture! You don’t need to be a kid to appreciate the fun creativity of papier mache.
What is Papier Mache?
Papier mache, (pronounced “pap-ee-ay mash-ay,”) is a crafting technique involving paper and a paste-like mixture to create a wide variety of objects.
The name itself comes from the French words “papier” meaning paper and “mache” meaning mashed or mashed-up. That is exactly what papier mache is all about – mashing up paper to form unique creations!
Where Did Papier Mache Originate?
The origins of papier mache can actually be traced all the way back to ancient Egypt and Persia.
These ancient civilizations this method to create masks and coffins. However, it was during the Renaissance period in Europe that papier mache started to flourish and gain popularity.
In the 17th and 18th centuries, papier mache became a fashionable and affordable alternative to expensive woodwork and decorative items.
Papier mache was extensively used to create ornate furniture, intricate boxes, and even musical instruments.
The technique then spread to other parts of the world, with each culture adding its own unique touch and designs to the craft.
How Do You Make Papier Mache?
Making your own papier mache is incredibly easy and fun! Here is a simple step-by-step guide to start your own:
1. Gather your materials: You will need torn or shredded newspaper, a paste mixture, a bowl, and a mold (if desired).
2. Prepare the paste: There are various paste recipes that you can use, but a basic one involves mixing equal parts of flour and water until the mixture is a smooth consistency. You can also add some salt to the mixture to prevent the growth of mold.
4. Let it dry: Allow your creation to dry completely. This may take a few hours or even a couple of days, depending on the size and thickness of your project.
5. Decorate and finish: Once your papier mache is fully dry, you can paint, varnish, or decorate it as you wish. Get creative and let your imagination run wild!
Papier Mache is a really versatile crafting technique that can create so many different objects and designs.
You can create practical items, decorative pieces, and also fun pieces such as party supplies with Papier Mache.
Here are a few ideas of Papier Mache crafts that you may want to create:
Pinatas You can create your own pinatas for birthday parties and other fun gatherings. Making a pinata is also really fun and rewarding. You can choose your own shapes and colors for your creations, and fill it with whatever you want to!
Decorative Bowls You can make some amazing decorative or functional bowls with Papier Mache. To make a bowl you will need a mold, either a balloon or a bowl.
To this mold you add strips of newspaper that are dipped in the special paste. You will layer the strips over the mold and then let it dry. Once the bowl is dry you need to gently remove the mold and then paint the bowl in the colors you choose.
To make a mask you will shape a mask base over a face mold or your own face. Once this base is dry you can paint it and decorate it as you want.
Sculptures Papier Mache can also be used to create some amazing sculptures. This requires a bit more creativity and more work and time, but it is well worth it.
You can create abstract shape sculptures, animals, and all kinds of things! To make a papier mache sculpture you will need to start with a wire armature in the shape that you desire.
You then cove the armature with the papier mache mixture to build up the form. Once the form is dry you can color, paint and embellish it.
Papier Mache is also a really great craft project to do because you can just experiment and try all kinds of different shapes and objects!
Papier Mache is a really fun craft to learn and do. Here you will find out everything you need to know about how to create papier mache!
Make Calm Lovely is about creating calm and lovely in your life: through organization, productivity and exploring your creative side. I have great DIY & craft tips & ideas (including great IKEA hacks!) Plus lots of organization and productivity tips and advice, so you can create more time for the lovely in your life!
Leave a Reply Cancel reply
Your email address will not be published. Required fields are marked *
How to Make Paper Mache
Home » DIY » How to Make Paper Mache

Make paper mache with kids with all-natural ingredients. You can then use it to create all sorts of cute projects for kids and teens.

Doesn’t paper mache just take you right back to your childhood? I remember long summer afternoons when my mother and I would get our hands all messy and squishy making our very own paper mache dough from scratch!

Just making the dough—we called the lumpy paper that and the name stuck—was super fun, but why stop there? You can make a ton of craft items with it, like little trinket bowls, ornaments, and even paper mache alphabets.

Watch Full Tutorial: How to Make Paper Mache
Supplies and Tools You’ll Need for Paper Mache
Here’s a list of supplies and tools you need to make your paper mache dough:
- 1/2 toilet paper roll
- Cheesecloth
- 1/2 glass of water
- 1/2 glass of wheat flour

You should definitely consider laying out plenty—and I mean plenty —of paper towels or newspapers around you while you work on this DIY project . It’s going to be messy right from the get-go.
If you’ve laid out newspapers over your work surface, you can get right down to the fun and therapeutic part of this project: shredding paper!
Go ahead and start ripping your paper into smaller pieces before putting them in a bowl.

You can definitely use newspapers, as well. Just remember to tear the newspaper into really small pieces as the dough will end up thicker and harder if you don’t.

While you’re shredding the paper, put a kettle on. It’s not just to make yourself a cup of tea, although you definitely should. You’re going to pour boiling water over your shredded paper and let it sit for a couple of hours.

The hot water helps with breaking down the cellulose, and your paper will get all soft and squishy. Don’t skip this step, though. When you let the paper sit in the boiling water, your dough will end up more pliant.
Also, if you use newspaper, then you will have to let it sit in the water overnight. Newspaper is much thicker and needs more time to soften and for the cellulose to break down.

Next, when you’re sure your paper has been sitting in the water long enough, grab a hand blender and mush everything into pulp. You will either love the squelching sounds you’ll hear, or you won’t.
Me? I get a kick out of it!

Stop pulping the paper when it looks something like this.

It’s time to strain your pulp and drain all that water. Place a cheesecloth over a big bowl and carefully pour your paper pulp into the cloth.

Gather the ends and squeeze the excess water out of the pulp into the bowl below. If you think you’ve squeezed enough, just do it again, just to be extra sure!

When you take the pulp out of the cheesecloth, it should look something like this. Break the pulp into little pieces and put them into a bowl.

If I didn’t know better, I’d say it looks an awful lot like ricotta or cottage cheese.

Now, you’re going to prepare the binding paste to turn that pulp into your paper mache dough. Grab another bowl and add your white flour to it. You can just as easily use cornstarch which will be just as effective, if not more so.

Stir your water in—not all at once, but in parts so that the flour doesn’t turn lumpy. Your paste should be smooth and sticky but not runny. You will need to cook this paste, so to speak. Place the contents in a saucepan with the heat on low.

The mixture needs to be heated for around five minutes, or until the water evaporates and you have a thick and creamy paste. You have to keep stirring the paste constantly, or it will burn.
Alternatively, you can pop it into a microwave. Heat the paste for 15-20 seconds, take it out, stir vigorously, and then it goes in there again for another round. Repeat this a few times till the paste thickens.

Spoon the paste onto the pulp.

This part is my absolute favorite: rolling and kneading the dough. But first, roll up your sleeves; it’s going to get messy.

If your dough is wet, just sprinkle a little flour over, and keep rolling. If it’s too dry, just a few drops of water should help soften it. Kids, in particular, will love this part of the activity!

When you’re all done, your paper mache dough will look like this—good enough to eat and even better to start making your paper mache craft items.

What Can I Make from Paper Mache?
There’s absolutely no limit to what you can do with paper mache. Just making the dough can be a great activity, but when you do have the dough ready, you can make a ton of things.
If you have a chocolate or candy molk just press the dough into it and flatten it out. When it’s dry, you can pop it out, paint it, and use it as ornaments and baubles.

If you want to make lesson time more fun and creative for your little ones, then make a set of paper mache alphabets and use them to teach toddlers their ABCs.

You can also make trinket trays, bowls, and small dishes, and use it to store, well, trinkets! Just cover the outside of a plastic or glass bowls with clear wrap or cling film, spread a drop of oil around it, turn it around, and stick paper mache dough around it, just so.

Can You Use Hairdryer to Dry Paper Mache?
Yes you can use a hairdryer to dry your paper mache. However, you should turn the heat setting down to low, or your mache will scorch. Remember, paper mache is pretty flammable! Besides, using a hairdryer might not dry the paper mache evenly, either.
Smaller pieces will dry up faster, while bigger ones will definitely take longer. Just allow whatever you end up making to air dry for at least 2-3 days—longer if the item in question is thicker. Once dry, you can go ahead and paint it.
Here’s a tip: if you want your paper mache to last longer, add a teaspoon of salt to the dough just before you start kneading. You can store the dough in the fridge for up to a week, as well!

Other Crafts You Might Want to Make
- 41 Cardboard Crafts
- How to Make Paper Tissue Paper Flowers
- How to Make Paper Lanterns
- 27 Classroom Crafts
- How to Make Paper Squishies
- DIY Paper Flowers
- DIY Paper Rings
- 31 Summer Crafts for Kids
- 31 Paper Crafts for Kids
- 37 Tissue Paper Crafts

How to Make Paper Mache (Step-by-Step)

Love crafting? Learn how to make paper mache and make a bunch of fun crafts out of it!
Instructions
- Gather all the materials listed out to begin.
- First, lay out plenty of paper towels over your work surface to control messes and spills.
- Now, tear paper or newspaper into tiny pieces and put them in a big bowl. You can also use a pair of scissors. Newspaper is thicker and so, tear it into much smaller pieces.
- Next, pour boiling water over the paper and let it sit for at least 2 hours(overnight if you used newspaper). The hot water will break down cellulose and turn your paper into pliable pulp.
- Drain the pulp into a cheesecloth and squeeze the excess water out. Squeeze until you’re sure you managed to get all the moisture out of the pulp.
- Remove the pulp from the cheesecloth and break it into tiny pieces and put everything in a bowl.
- To make the flour paste, add flour(or cornstarch) to another bowl and mix in some water. Then, place this paste over low heat and stir continuously as it ‘cooks’ for 4-5 minutes. When the excess water evaporates, your paste should be smooth and sticky.
- Alternatively, pop the paste into a microwave for 15-20 seconds, take it out, stir it, and pop it back in for another round. Repeat this 4-5 times and you’ll have your paste.
- Pour the paste onto the pulp and knead them into a pliant dough. You can store this dough for up to a week in the refrigerator.
- Go ahead and make a ton of paper mache craft items with your dough. Once you allow everything to air dry for a couple of days, you’re all done!

15% OFF PATTERN ORDERS OF $30 OR MORE – USE CODE: 15%OffOver30
Paper Mache Paste Recipes – Including No-Flour, Mold-Free Options

Paper mache (or papier-mâché, if you prefer) can be made with many different paste recipes.
To go straight to your favorite recipe , click on one of the links below.
Fast and Easy Raw Flour and Water Paste
- Cooked Flour and Water Paste
- Elmer’s Art Paste (Gluten-free).
- How to use Wood Glue for a Fast-Drying and Strong Mask or Sculpture.
- More Gluten-Free Alternatives.
The recipes listed on this page are for use with paper strips and paste . You’ll find my paper mache clay recipe on a separate page.

Note: If you’re looking for a faster, easier project, be sure to check out my new mask and sculpture patterns . They create all the shapes for you, so they’re lots of fun to make but take much less time.
This has been my favorite paper mache paste for years. It’s also the paste our friend Dan Reeder uses to make his wonderful dragons and monsters. However, keep reading to see when it might not be the best option for your next project.
Paper mache paste is easy to make, and it doesn’t really need a recipe. The most important tip is to use hot water (from the tap, not boiling) to make a nice smooth paste.
Ingredients for easy paper mache paste:
- Hot Water from the Tap
To make the paste , just pour some white flour in a bowl. Add hot water gradually until you have a consistency that will work well. Mix with a spoon or whisk. If you have one, an immersion blender works great).
Watch this video to see how to apply paper strips and paste to an armature .
How thick should you make your paste? You want it thin enough so it looks more like white glue than pancake batter – although thicker paste will work OK, too, if that’s the way you like it. You really can’t make it wrong.
What kind of flour will work? You’ll need to use all-purpose white flour. Whole-wheat flour makes healthier bread, but it isn’t sticky enough to make good paste.
Make up just enough for one sculpting session. This is good advice for any paste made with wheat flour. Wild yeast is attracted to flour (that’s how sourdough bread is made.)
If the paste is kept over from one session to the next, the yeast will break down the flour and make the paste less sticky (and slightly stinky). It’s best to whip up as much as you need today, throw out any paste that’s left over, and make a new batch tomorrow – or whenever you need some more. (If you need a paste that can be kept for longer periods of time, see the Elmer’s Art Paste, below.)
Be sure to clean the bowl and utensils before the paste has time to dry – it will dry very hard. That’s good for paper mache, but not so good for the person washing the dishes.
Tips: This paste is easy and strong, but it will leave a floury residue on the outside of your sculpture. If you want the last layer of paper to be seen on the finished sculpture, you’ll need one of the clear paste alternatives below.
And if you have a gluten allergy , you’ll want to use one of the gluten-free alternatives.
See my patterns for paper mache wall sculptures and masks:
Cooked flour and water paste:.
Cooked paper mache paste will dry almost clear, unlike the raw paste, and the surface of your paper mache sculpture will be slightly smoother.
Ingredients:
- 2 Tablespoons of white flour
- 1 cup of cold water
Mix the white flour and water in a small saucepan. Stir until there are no lumps. A whisk works really well for this.
Put the pan on the stove at medium heat and slowly bring it to a boil, stirring constantly.
When it begins to thicken, be sure to watch carefully and keep stirring, to make sure it doesn’t burn. Stir with a silicone spatula if you have one. As soon as it starts to bubble, remove the pan from the heat and allow the paste to cool.
The paste will be somewhat runny when it’s hot, but it will gel slightly as it cools. You’ll obviously want to keep your hands out of it while it’s still hot enough to burn.
Tips: This is an excellent choice if you need a paste that dries clear . However, if you have a gluten allergy, you’ll need one of the options below.
Keep these recipes handy for your next project. Download my free recipe guide, The 5 Best Recipes for Paper Mache . It includes the recipe for my famous paper mache clay. To get your copy, click here.
Elmer’s Glue-All (Methylcellulose)
Methylcellulose paste – In the past I often recommend Elmer’s Art Paste for school classes, because you can make up a gallon of the paste in advance, and it never gets moldy. It’s also gluten-free, so you don’t have to worry about your students’ allergies.
Unfortunately, they don’t sell it anymore. However, you can easily make your own with food-grade methylcellulose. It’s really the same thing as the Elmer’s product, and you can easily buy it online. Watch this video to see how to make it .

Looking for an easy way to make headdress-style masks for your school’s production of The Lion King Jr? I have patterns for all the major characters – the patterns create the shapes, and you bring them to life with acrylic paint. See the Lion King Jr mask patterns here .
Gluten-Free Options
If you need a paste that dries perfectly clear, you can use Elmer’s Glue-All (or any white PVA glue) mixed with just enough water to make the glue thinner and easier to spread.
I often use Titebond III wood glue with masks that need to be light and strong. You can see a video about that here.
Acrylic Gel can be used as paste. This is the product that I use when I add colored tissue paper as a final layer over a paper mache sculpture. You do need to make sure the paper mache underneath is completely dry, because the acrylic medium could dry first and seal moisture inside.
I use the gel medium with tissue paper for two reasons: It dries perfectly clear, and it doesn’t cause the fragile tissue paper to fall apart quite as fast as water-based paste does.

You do still need to handle the paper carefully, of course. You can see how the gel medium worked with tissue paper on a bullfrog sculpture here .
Wood Glue for Paper Mache
I use Titebond II wood glue for all of my Lion King masks, because it’s strong enough that you can use just one layer over the cardboard patterns. ( Click here to see a video that shows how I use it.) It’s also what I use when I use paper mache inside a silicone mold.
You can find the wood glue online or in any hardware store or Walmart. It isn’t cheap, but you don’t need many layers and it dries much faster than any water-based paste.
Related Posts:

Make a Mask with Paper Mache over Wet Clay

Make a Portrait Mask

Lion King Headress Mask Patterns

2,390 thoughts on “Paper Mache Paste Recipes – Including No-Flour, Mold-Free Options”
I have an antique mold to make small Easter eggs. Can I use your Paper Mache clay recipe to fill the mold and then go from to finish them when they dry?
The paper mache clay has a slight texture, and I haven’t had good luck with it in molds. However, the air dry clay works, in small candy-sized silicone molds. If your mold is plastic or silicone, the air dry clay should work. If it’s plaster, the air dry clay might stick to it, even with a release, and it could destroy the mold.
Leave a Comment Cancel reply
Save my name, email, and website in this browser for the next time I comment.
Don't subscribe All new comments Replies to my comments Notify me of followup comments via e-mail. You can also subscribe without commenting. Manage your subscriptions
Affiliate Disclosure – Privacy Policy – Cookie Policy – Shipping and Terms of Service

FREE PRINTABLE DOWNLOAD:
"5 best recipes for paper mache".
Includes Jonni’s famous Paper Mache Clay recipe, and tips on choosing the right recipe for your next project.
- 800-733-6883
- My Account
- Sign in or Create an account
Currency Displayed in
- Party Supplies
- Cake Decorations
- Terms and Conditions
- Ordering and Returns
- Privacy Policy
- Shipping Info
Party Articles
how to make paper mache like a pro.
- 4th of July
- Cinco de Mayo
- New Year's
- St. Patrick's Day
- Super Mario Brothers
- Mario Kart Wii
- The Octonauts
- Disney Frozen
- Paris Damask
- Two-Two Train 2nd Birthday
- Avengers Assemble
- Ninja Warrior Party
- Barnyard 2nd Birthday
- Owl Blossom
- Monster High
- Pink Mod Monkey
- Ballerina Tutu
- Carnival Games
- Candy Shoppe
- 1st Birthday Diva
- 70's Disco
- A New Little Prince
- A Nightmare on Elm Street
- Adventure Time
- Airplane Adventure
- Alice in Wonderland
- Aloha Birthday
- Anchors Aweigh
- Anchors Aweigh 1st Birthday
- Angry Birds
- Animal Print Leopard
- Another Year of Fabulous
- Arizona Diamondbacks
- Atlanta Hawks
- Austin Powers
- Bachelorette Party
- Baking Bash
- Baltimore Orioles
- Bamboo Weave Luau
- Barbie All Doll'd Up
- Baseball Birthday
- Baseball Fan Birthday
- Baseball Time
- Basketball Birthday
- Basketball Fan
- Batman Dark Knight
- Batman Heroes and Villains
- Beauty and the Beast
- Beetlejuice
- Birthday Jamboree
- Black and White Check
- Birthday Princess
- Black and White Check Birthday
- Black and White Dots
- Blue and White Dots
- Blue Elephants 1st Birthday
- Blue Polka Dot
- Bob the Builder
- Born to Rock
- Boston Red Sox
- Boy's Lil' Cupcake 1st Birthday
- Boy's Little 1
- Bubble Guppies
- Captain America
- Chevron Black
- Chevron Blue
- Chevron Green
- Chevron Pink
- Chevron Red
- Chevron Yellow
- Chic Wedding Cake
- Chloe's Closet
- Chuggington
- Cincinnati Reds
- Circus & Carnival
- Cleveland Indians
- Colorado Rockies
- Colorful Commencement Graduation
- Congrats Grad White Graduation
- Construction Pals
- Construction Pals 1st Birthday
- Construction Pals 2nd Birthday
- Cops and Robbers Party
- Cowboy 2nd Birthday
- Curious George
- Cut the Rope
- Dallas Cowboys
- Dallas Mavericks
- Despicable Me 2
- Detroit Pistons
- Dinosaur Roarrrrrr
- Dinosaur Train
- Director's Cut Hollywood
- Disney 1st Birthday Cars
- Disney 1st Birthday Princess
- Disney Brave
- Disney Cars Dream Party
- Disney Cinderella Sparkle
- Disney Fanciful Princess
- Disney Junior Doc McStuffins
- Disney Junior Sofia the First
- Disney Mickey Fun and Friends
- Disney Mickey Playtime
- Disney Minnie Dream Party
- Disney Monsters U
- Disney Nemo's Coral Reef
- Disney Planes
- Disney Pooh and Pals
- Disney Princess
- Disney Princess Dreams
- Disney Princess Fairytale Friends
- Disney The Little Mermaid Sparkle
- Disney Very Important Princess Dream Party
- Disney's Cars 2
- Disney's Tangled
- Diva Zebra 1st
- Donkey Kong
- Dora and Friends
- Dora's Flower Adventure
- Dr. Seuss ABC
- Easter Tulips
- Edward Scissorhands
- Elegant Prince Damask
- Elegant Princess Damask
- Elegant Princess Damask 1st Birthday
- Elegant Wedding
- Elmo's 1st
- Elvis Presley
- Enchanted Unicorn
- Enchanted Unicorn 2nd Birthday
- Everything One Boy
- Everything One Girl
- Faithful Dove Pink Christening
- Falling Flakes
- Farm Animals
- Fashionista
- Fiesta Grande
- Fire Trucks
- Fisher Price Baby Shower
- Florida Marlins
- Flutterby Butterflies
- Football Frenzy
- Football Game Time
- Franklin and Friends
- Friday the 13th
- Frightfully Fancy Halloween
- Froggie Fun
- Froggie Fun 2nd Birthday
- Fun in the Sun
- Garden Fairy
- Georgia Bulldogs
- Get Wicked Cocktail
- Giddy Up Cowboy
- Giraffe 1st Birthday
- Girl's Lil' Cupcake 1st Birthday
- Girl's Lil' Cupcake 2nd Birthday
- Girl's Little 1
- Girl's Night Out Bachelorette Party
- Grad Celebration Graduation
- Grad Spirit Graduation 2012
- Grad Stars Graduation
- Green and White Dots
- Grill Master BBQ
- Halloween Party
- Harry Potter
- Hawaiian Girl
- Hello Kitty Balloon Dreams
- Hippie Chick
- Hippity Hop
- Hooray for Elmo
- Horse Power
- Houston Astros
- How to Train Your Dragon 2
- Hugs & Stitches
- I Love Lucy
- I Love Puppies 1st Birthday
- Ice Cream Sprinkles
- In The Garden
- Indiana Jones
- Indianapolis Colts
- Itzza Pizza Party
- Jacksonville Jaguars
- Jake and the Neverland Pirates
- Johnny Test
- Johnny Tractor 1st
- Joyful Snowman
- Just Ducky 1st Birthday
- Kansas City Royals
- LadyBug Fancy
- LadyBugs: Oh So Sweet
- LadyBugs: Oh So Sweet 2nd Birthday
- Let Them Eat Cake
- Let's Go Camping
- Lil' Prince 1st
- Lil' Princess 1st Birthday
- Lil' Quarterback 1st Birthday
- Lil' Slugger 1st Birthday
- Little Buccaneer
- Little Dino
- Little Dino 1st Birthday
- Little Man Mustache
- Little Man Mustache 1st Birthday
- Little Mermaid
- Little Spa Party
- Little Sunshine Party
- Littlest Pet Shop
- Look Whoo's 1 Blue
- Look Whoo's 1 Pink
- Los Angeles Angels
- Los Angeles Dodgers
- Madagascar 3
- Martial Arts
- Marvel Super Hero Squad
- Mermaids Under the Sea
- Michael Jackson
- Michigan State Spartans
- Mickey Mouse Clubhouse
- Mickey's 1st Birthday
- Milwaukee Bucks
- Minnesota Timberwolves
- Minnie Mouse
- Minnie's 1st Birthday
- Missouri Tigers
- Monster Jam
- Monster Jam 3D
- Monster Mania
- Monster Truck
- Mustache Man
- My Little Pony
- My Little Pony Friendship Magic
- Nascar Full Throttle
- Nebraska Cornhuskers
- New York Giants
- Ni Hao, Kai-Lan
- Nickelodeon Teenage Mutant Ninja Turtles
- Nightmare On Elm Street
- Nighty Night BaZooples
- Oakland Athletics
- Ocean Preppy Girl
- Oktoberfest
- Orlando Magic
- PAC-MAN and the Ghostly Adventures
- Penguins of Madagascar
- Philadelphia Phillies
- Phineas and Ferb
- Phoenix Suns
- Pink and White Dots
- Pink Cowgirl
- Pink Elephants 1st Birthday
- Pink Mustache
- Pink Poodle in Paris
- Pink Poodle in Paris 1st Birthday
- Pink Zebra Boutique
- Pinkalicious
- Pirate Party
- Pirates of the Caribbean
- Pittsburgh Panthers
- Playful Puppy Blue
- Playful Puppy Blue 1st
- Playful Puppy Pink
- Polka Dot Garden
- Pooh and Friends
- Pooh's 1st Balloon
- Power Rangers Samurai
- Pretty Pirates Party
- Prima Ballerina
- Princess Amira
- Princess and the Frog
- rachaelhale Glamour Cats
- rachaelhale Glamour Dogs
- Rainbow Wishes
- Red and White Dots
- Robots 2nd Birthday
- Rock Star 2nd Birthday
- Rubber Ducky Birthday
- Safari Adventure Party
- Safari Friends 1st
- Safari Party
- San Diego Padres
- Scooby-Doo Mod Mystery
- Seattle Mariners
- Secret Agent
- Sesame Street
- Sesame Street 1st
- Sesame Street Beginnings 1st Birthday
- Sesame Street Elmo Party
- Sesame Street Party
- Sesame Street Sunny Days
- Shrek Forever After
- Silver Wedding
- Sleeping Beauty
- Soccer Birthday
- Soccer Fan Birthday
- Sock Monkey Blue
- Sock Monkey Pink
- Sock Monkey Red
- Sonic the Hedgehog
- Space Mission
- Special Forces
- Spider Hero Dream Party
- Spider-Man Spider Sense
- Splashin' Pool Party
- St Patrick's Day
- St. Louis Cardinals
- St. Pat Argyle
- Strawberry Shortcake
- Sucker Punch
- Summer Splash Luau
- Summer Time Fun
- Sunny Stripe Pink
- Super Stylish
- Super Stylish 16
- Superhero Comics
- Superman: Man of Steel
- Sweet Blessing Blue Baptism & Christening
- Sweet Pea 1st Birthday
- Sweet Safari Blue 1st Birthday
- Sweet Safari Pink 1st Birthday
- Sweet Treats
- Sweet Tweet Bird Blue
- Sweet Tweet Bird Pink
- Sweet-As-Can-Bee
- Sweet-As-Can-Bee 1st Birthday
- Tampa Bay Buccaneers
- Tampa Bay Rays
- Tea For You
- Teenage Mutant Ninja Turtles
- Texas Chainsaw Massacre
- Texas Longhorns
- Thanksgiving Blessing
- The Addams Family
- The Amazing Spider-Man
- The Jungle Book
- The Legend of Zelda
- The Lion King
- The Lord of the Rings
- The Twilight Saga: Breaking Dawn
- The Twilight Saga: Eclipse
- Thomas the Tank Engine
- Thor: The Mighty Avenger
- Tickety Toc
- Tie Dye Fun
- Tim Burton's The Nightmare Before Christmas
- Tinker Bell
- Tiny Toes Blue Baby Shower
- Tiny Toes Pink Baby Shower
- Tony Hawk's New Boom Boom HuckJam
- Topsy Turvy Tea Party
- Toronto Blue Jays
- Totally 80's
- Totally Fabulous Baby Shower
- Toy Story 3
- Transformers
- Transformers Revenge of the Fallen
- Tropical Breeze
- Tropical Vacation
- Truck Party
- Two Peas in a Pod Baby Shower
- Umbrellaphants Blue Baby Shower
- Umbrellaphants Pink Baby Shower
- Under Construction
- Under the Big Top
- USC Trojans
- V for Vendetta
- Video Games
- Washington Huskies
- Washington Nationals
- Washington Redskins
- Washington Wizards
- Watercolor Leaves
- West Virginia Mountaineers
- Western Bandanarama
- Western Bandanarama Birthday
- Western Lasso Cowgirl
- Whale of Fun
- Whale of Fun 1st Birthday
- White Winter Christmas
- Wild Horses
- Wild Isle Luau
- Willy Wonka
- Winter Friends
- Wisconsin Badgers
- Wizard of Oz
- Wizard of Oz Party
- Wizards of Waverly Place
- Wonder Pets
- Wonder Woman
- Wonderful Wizard of Oz
- Woodland Gnome
- Wow Wow Wubbzy
- Yellow and White Dots
- Yo Gabba Gabba
- Yo Gabba Gabba! 1st Birthday
- Yo Gabba Gabba! 2nd Birthday
- Yo Gabba Gabba! Party
- Zebra Graduation
- Bags & Purses
- Balloon Accessories
- Blowouts & Noisemakers
- Books, Notepads & Pens
- Cake & Cupcake Stands
- Cake Candles
- Cake Toppers
- Candy Party Favors
- Candy Supplies
- Centerpieces
- Classic Pinatas
- Cookie Supplies
- Crepe Paper
- Cupcake Liners & Cupcake Wrappers
- Cupcake Picks & Cupcake Rings
- Cupcake Stands
- Curling Ribbon
- Decorating Kits
- Decorations
- Dessert Plates
- Dinner Plates
- Empty Favor Boxes
- Face & Body Parts
- Facial Hair
- Fangs & Teeth
- Filled Favor Boxes
- Gloves & Armbands
- Hats, Headbands & Masks
- Headbands & Tiaras
- Invitations
- Invitations & Thank Yous
- Jewelry & Accessories
- Latex Balloons
- Mylar Balloons
- Other Cake & Cupcake
- Other Decorations
- Other Favors & Toys
- Other Tableware
- Pantyhose & Garters
- Pantyhose & Tights
- Pinata Accessories
- Pull-String Pinatas
- Servingware & Trays
- Shoe Covers
- Signs & Standups
- Solid Color Bowls
- Solid Color Cups
- Solid Color Cutlery
- Solid Color Dessert Plates
- Solid Color Dinner Plates
- Solid Color Forks & Spoons
- Solid Color Napkins
- Solid Color Placemats
- Solid Color Servingware & Trays
- Solid Color Tablecovers
- Souvenir Cups & Bottles
- Sprinkles, Jimmies & Edible Toppings
- Stickers & Tattoos
- Swords & Shields
- T-Shirts & Clothing
- T-Shirts and Clothing
- Tablecovers
- Tiaras & Crowns
- Ties & Scarves
- Tutus & Petticoats
- Undergarments
- Wall, Ceiling & Door Decorations
- 1st Birthday
- 21st Birthday
- 2nd Birthday
- 30th Birthday
- 40th Birthday
- 50th Birthday
- 60th Birthday
- Baby Shower
- Baptism/Christening
- Bar Mitzvah/Bat Mitzvah
- Bridal Shower
- Communion/Confirmation
- Football / Superbowl
- Mother's / Father's Day
- Thanksgiving
- Valentine's Day
- Welcome Home
- Angels & Devils
- Animals & Insects
- Bunny Suits
- Cars & Trucks
- Cowboys & Indians
- Fairytale & Storybook
- Food & Beverage
- Grecian & Roman
- Halloween Movies
- Irish & Scottish
- Kings & Queens
- Luau & Fiesta
- Occupations
- Prehistoric
- Renaissance & Medieval
- Santa Suits & Elves
- Space & Aliens
- Superheroes
- TV & Movies
- Cake Boards
- Cake Decorating Kits & Cupcake Decorating Kits
- Cookie Cutters
- Edible Cake Images
- Fondant, Gumpaste & Fondant Tools
- Food Colors
- Food Flavors
- Ingredients
- Royal Icing Flowers
- Sugar Cake Decorations (Dec-ons)
- Utensils & Smallwares
- Sports Party
- 1 Love Puppies 1st Birthday
- Abby Cadabby
- American Idol
- Ben 10 Alien Force
- Butterflies and Dragonflies
- Cats & Kittens
- Cinderella Dreamland
- Congrats Grad Blue Graduation
- Congrats Grad Green Graduation
- Congrats Grad Orange Graduation
- Congrats Grad Purple Graduation
- Congrats Grad Red Graduation
- Congrats Grad Yellow Graduation
- Disney's World of Cars
- Dots and Stripes Birthday
- Fairy Princess 1st Birthday
- Faithful Dove Blue
- Faithful Dove Pink
- Football Birthday
- Garden Party
- Gingham Check
- Go, Diego, Go!
- Handy Manny
- Hannah Montana Rock the Stage
- Hanukkah Fun
- Harley Davidson
- Harry Potter Deathly Hallows
- High School Musical
- Hot Wheels Speed City
- I Do Bridal Shower
- I Do Wedding
- John Deere Pink 1st Birthday
- King of the Jungle Baby Shower
- Kung Fu Panda 2
- Lil' Angel 1st Birthday
- Lil' Rebel 1st Birthday
- Midnight Dreary
- Pink Ribbon
- Pooh's Happy Day
- Power Rangers Jungle Fury
- Queen of the Jungle
- Star Wars Clone Wars
- Stripe Style
- Sweet Pea Baby Shower
- Tinker Bell and the Fairies
- Tom and Jerry
- Valentine Cupcake
- Pet Costumes
- Animal Planet
- Despicable Me
- Ghostbusters
- How to Train Your Dragon
- Little Red Riding Hood
- Looney Tunes
- M&M's
- Marilyn Monroe
- Monsters Inc.
- Power Rangers
- The Flintstones
- The Incredibles
- The Munsters
- The Nightmare Before Christmas
- The Pirates of the Caribbean
- Universal Studios Monsters
Posted by Brian Lindsay on Dec 2nd 2016
- Birthday Themes »
- 1st Birthday Themes »
- Baby Shower Themes »

With the popularity of DIY party decorating on the rise, it’s handy to know how to make paper mache like a boss. When we speak of paper mache and parties, the project that comes to mind is the ever-popular pinata. While a candy filled orb floating in the sky is exciting enough, the uses of paper mache reach much further.

Paper mache is much bigger than you may realize

You might be tempted to think that this economical craft is just a trendy way to create a death star pinata for your son’s birthday party. As useful as it is to us modern folk, mache has a lot more history than one might think.
Paper mache is French for “chewed paper”. I suppose this is what my bored Labrador was up to when he found several hundred dollar bills in my pants pocket while I slept in one Saturday morning.
In antiquity, mache was used to make Egyptian coffins, death masks and even a modern canoe, which was used to paddle from New York to Florida in 1874.
This paper and glue concoction has even seen combat in WW2. The British would employ paper mache figures made to look like soldiers to draw sniper fire. The bullet holes in these unwilling decoys were analyzed to zero in on the position of enemy snipers.
On the lighter side of things, most of us know that mache finds its way into our celebrations in the form of carnival floats and pinatas.
Making mache
Let’s dive right into the fine art of making paper mache by first dividing it into two broad categories: The paper strip method and paper pulp method. Everything else is a variation of the two.
The paper strip method

It is safe to say that using paper strips is often better for children who are making mache. Using paper strips is pretty simple:
- Make your paste of choice (more on that in a minute).
- Cut or tear paper into strips.
- Soak them in your paste until they are saturated.
- Place the strips on your backing structure.
- Allow it to dry thoroughly.
The paper pulp method
For a little more effort and time invested, the paper pulp method brings your mache creations to a whole new level:
- Soak your paper in water overnight or boil it in plenty of water until it dissolves into a pulp.
- Drain the excess water.
- Add your adhesive paste and mix it all together.
- Apply the pulp mache to your backing structure or form and sculpt to your liking.
Making standard paste

Of course, paper mache without the gooey paste that binds it together is not paper mache at all; That’s just called confetti or spit-wads. There are quite a few different methods for making this paste. Let’s look at a few different handy recipes.
- Use one part flour to five parts water. Boil this mixture for three minutes. This method is pretty inexpensive.
- For a no-boil paste, use one part flour and one part water stirred together until the consistency is smooth.
- Take it up a notch by using three parts white glue to one part water. This is a bit more expensive but pretty simple.
- Topping the list in the “Easy like Sunday morning” department: Run down to your local department store and buy a tub of liquid starch. It doesn’t get much easier than that.
Make fast setting mache paste

If the idea of being standard or typical does not sit well with you, then good for you. Roll up your sleeves and mix up this mache paste that is perfect for the impatient at heart.
- ¼ cup of Elmer’s Glue-All
- 1 tablespoon of cold water
- 1 teaspoon of vinegar to give you a bit more working time before the plaster hardens.
- ¼ cup of Plaster of Paris
Mix these ingredients and then get to crafting. You won’t have much time to wait before this mache paste hardens.
Show your skills with paper mache clay
This recipe comes from the paper mache guru at ultimatepapermache.com. This stuff is for making masterpieces at a whole new level.
- Begin with a large bowl with warm water for mixing in.
- Place 1 ¼ cups of cheap toilet paper into the warm water. Saturate the toilet paper and then remove it and squeeze the water out. At first, you will need to do an experiment to see if one standard roll is equal to 1 ¼ cups when it is wet. When performing this test, measure the toilet paper wet but squeezed out.
- Discard the water from the bowl.
- Place the wet paper back into the mixing bowl.
- In a separate bowl, prepare your paste with the following ingredients: 1 cup of drywall joint compound (Do not use the DAP brand), ¾ cup of Elmer’s Glue-All, ½ cup of white flour and 2 tablespoons of mineral oil (baby oil).
- After mixing the paste thoroughly with an electric mixer, combine it with the wet toilet paper and continue to mix it enthusiastically until it has the consistency of cookie dough.
This will make one quart of paper mache clay. You will find this recipe suitable for serious craft work. Get down with your bad self!
What to use for base materials

Since no awards are given for the heaviest craft creations, you will need to find a structure that is roughly the shape of your desired craft and add layers of paper mache on top of this base material. With a little creativity, nearly anything can be used as a base material:
- Plastic soda bottles (2 liter, 1 liter etc.)
- Crumpled aluminum foil
- Chicken wire
- Crumpled newspaper
- Small boxes
- A cheap, inflatable bouncy ball
Get creative with these base shapes before moving to the mache application phase. Plastic soda bottles can be cut and taped into a number of different shapes that will already resemble your craft. Crumple aluminum foil and apply it to the pop bottles to perfect the shape of your base. A little effort here will significantly reduce the amount of paper mache that you will need to use.
Tips and tricks of the pros
Once you have a firm grasp on the recipe and method that you would like to make your mache with, dive into these tips to save you time, money and frustration:
- Sometimes mache can have an odd smell to it. Add a bit of cinnamon to your mix to ensure that it does not smell bad.
- Adding tea tree oil, salt or oil of cloves may help fight off mold formation.
- Be certain that each layer of mache is allowed to dry thoroughly before applying the next one.
- Keep in mind that new layers will slightly wet previous layers. Factor this into drying time as the combined skin gets progressively thicker.
- As soon as the mache is completely dry, seal it with acrylic varnish.
- If you live in a humid climate, consider adding less water to your paste mix.
- Go to the trouble of preparing your work space with drop cloths and plastic sheeting on your craft table. Paper mache is a messy endeavor. Good preparation will make cleanup easier.
- Tear your paper rather than cutting it. Torn edges will lie down and blend better.
- For a stronger completed project, apply your paper strips in all directions.
- If you boiled newspaper strips to prepare them and wound up with newspaper ink stuck to the inside of your pot, use vegetable oil to easily remove the ink.
- Although whole wheat flour may be healthier when your Doberman eats your crafts, be sure to use white flour for mache paste. The resulting paste is much stickier.
- Apply a maximum of four layers of mache paper at a time and let these layers dry completely before the next one is added.

- Rather than using newspaper, use white paper on the last layer of mache. This will aid in achieving a smooth looking color when you paint.
- Paint in light coats so that the mache is not over saturated with moisture.
- Use “crackle medium” to achieve an aged, distressed look on your crafts.
- Why not add some tempera paint powder in with the paste intended for the last layer of mache? You will find the painting stage to be much easier.
- Paper mache is sometimes reinforced with textiles. If the Egyptians did it, why can’t you?
- If a rough texture is needed on your craft, mix in some sand with the paste.
- Although more expensive, Elmer’s wood glue is better for paper mache than standard white glue. Mix standard and wood glue on larger projects to find a balance between better glue and lower cost.
- Don’t add too many layers of paper mache to your pinata. Too many layers will certainly make for a durable pinata, but I doubt that a pinata really needs to be bulletproof.

Now that you have been schooled in the ancient art of paper mache. Create something that is original, daring and fun! Express yourself in paper and goo and see if your audience agrees with your creative side!

- Paper mache
- Party decorating
Recent Posts
- » Great Glue Gun Tips And Tricks
- » How To Wrap Gifts Like A Pro
- » How To Make Paper Mache Like A pro
- » 24 ideas to add some WOW factor to your party balloon decorating
- » The Top Ten Paris Damask Birthday Party Ideas
Products On Sale

Quick Links
Great glue gun tips and tricks.
Ask any serious crafter what tool he or she can’t live without and you are …
How To Wrap Gifts Like A Pro
When I was younger, I could get away with terrible gift wrapping skills because …
With the popularity of DIY party decorating on the rise, it’s handy to know …
Follow us on
Copyright 2024 ThePartyWorks . All Rights Reserved. Sitemap
All prices are in USD .
Selected For Comparision
Compare Now
Go Big Before Going Home: Finish the Year with a Collaborative Paper Mache Sculpture

Note: Be sure to review all resources and preview all artists before determining if they are appropriate to share with your students.
As the school year winds down, keeping students engaged can be a challenge. The natural instinct is to keep things simple with one-day “make and take” projects for those shorter attention spans. However, consider going the other way! A collaborative, large-scale paper mache project could be the perfect way to close out your year. Keep reading to see how you can clean out your closet, use up leftover art supplies, and create a school community installation that will last for years to come!

Take on a big project to make your job easier.
It may seem counterintuitive, but one big project can be easier than several smaller projects. Plus, working collaboratively helps everyone achieve something great with less work and more fun.
Let’s look at the benefits of doing a large, collaborative project at the end of the school year:
- Strengthens your community of artists.
- Demonstrates to administrators and students that you remain engaged.
- Uses up scrap cardboard and miscellaneous materials.
- Gets students excited to come to art class and see the latest developments in the project.
- Saves time on prep and planning so you can tackle grading, generate next year’s supply order , and catch your breath!
- Sets you up for success in the fall with classroom or school decor made and ready to hang.

Break down a big project into small, manageable pieces.
At first, building a giant sculpture or collection of sculptures can feel overwhelming. As with all projects, the first step of choosing what to make can often be the hardest. Consider making a representation of your school’s mascot or pull subjects from major units throughout the year to activate prior learning. If you need more grand ideas to inspire your students and proactively decorate your room for the fall, construct giant art supplies and introduce Andy Warhol or Claes Oldenburg .
Regardless of the subject, follow these steps for success with your paper mache project:
- Brainstorm as a class to determine your subject matter.
- Gather materials such as scraps of cardboard, paper, newspaper, tape, and glue. Your students may surprise you with what they decide to upcycle !
- Sketch the final sculpture so everyone can work toward the same goal.
- Build an armature out of cardboard, wire, or thin scrap wood.
- Cover the form in paper mache .
- Paint and/or glue found objects, fabric, and collage materials to add more details.
- Display the finished work for students to enjoy now and see when they come back in the fall!

Try these tips to get maximum results with minimal work.
One way to streamline the process is to have all of your classes work on the same project. Every class can simply build off the work of the class before them—like an art relay. This will speed up production and save you the hassle of clean-up and storage between classes. If one gigantic project seems unwieldy, try making a Pop Art collection. Show students works by Andy Warhol or Claes Oldenburg for inspiration and make one sculpture per table. Save yourself time and prep work by using the Exploring Pop Art Collection in FLEX Curriculum . It has lesson plans and student-friendly artist bios, videos, and assessments ready to go.
Try these tips to smooth out the paper mache process:
- Dump the glue from old clogged and nearly empty glue bottles into a bucket and then add water for a 50/50 mix.
- Crumple and twist your school’s butcher/bulletin board paper as an alternative to cardboard for an armature.
- Use different colors for each layer of paper mache so you can easily see what areas still need covering.
- Rip smaller pieces to wrap curvy, organic forms.
- Dip, then wipe using the classic “scissor fingers” technique (below) to remove excess glue.
- Allow students to choose tasks according to their preferences, if possible. For instance, some students love the sensory experience of glue-covered hands.
- Place paper as a drop cloth to protect the table or floor from inevitable glue drips.
- Recycle paper drop cloths at the end of the day as more paper mache paper!
- Consider opportunities for students to have meaningful input. For example, each student can decorate a scale on a large dragon or design a custom brick for a huge castle.
A collaborative paper mache sculpture is a rewarding way to use up leftover materials, strengthen student bonds, and create a lasting installation to promote school spirit. Transform your classroom into a fun collaborative art studio and end the year on a high note. Just because a project is large-scale, does not mean it needs to be cumbersome to manage. Break the project down into smaller steps and use the pro tips above to streamline the process. Your next massive paper mache installation will provide you and your artists with smooth sailing to summer break!
What huge paper mache installation would transform your space?
How do you keep your students inspired during the final weeks of school?
Magazine articles and podcasts are opinions of professional education contributors and do not necessarily represent the position of the Art of Education University (AOEU) or its academic offerings. Contributors use terms in the way they are most often talked about in the scope of their educational experiences.

Kyle Wood, an elementary school art educator, is a current AOEU Writer. He strives to make the art classroom fun through gamification and enjoys creating art history podcasts.

5 Art Activities to Unwind After Testing and Portfolio Submissions

3 Contemporary Artists Making Amazing Work from Materials Found in Every Art Room

Drawing from a Fresh Perspective: 8 Strategies to Encourage Drawing Epiphanies!

From Text to Powerful Art: How to Explore Blackout Poetry in Your Art Room
- Share full article
For more audio journalism and storytelling, download New York Times Audio , a new iOS app available for news subscribers.

- May 13, 2024 • 27:46 How Biden Adopted Trump’s Trade War With China
- May 10, 2024 • 27:42 Stormy Daniels Takes the Stand
- May 9, 2024 • 34:42 One Strongman, One Billion Voters, and the Future of India
- May 8, 2024 • 28:28 A Plan to Remake the Middle East
- May 7, 2024 • 27:43 How Changing Ocean Temperatures Could Upend Life on Earth
- May 6, 2024 • 29:23 R.F.K. Jr.’s Battle to Get on the Ballot
- May 3, 2024 • 25:33 The Protesters and the President
- May 2, 2024 • 29:13 Biden Loosens Up on Weed
- May 1, 2024 • 35:16 The New Abortion Fight Before the Supreme Court
- April 30, 2024 • 27:40 The Secret Push That Could Ban TikTok
- April 29, 2024 • 47:53 Trump 2.0: What a Second Trump Presidency Would Bring
- April 26, 2024 • 21:50 Harvey Weinstein Conviction Thrown Out
Stormy Daniels Takes the Stand
The porn star testified for eight hours at donald trump’s hush-money trial. this is how it went..
Hosted by Michael Barbaro
Featuring Jonah E. Bromwich
Produced by Olivia Natt and Michael Simon Johnson
Edited by Lexie Diao
With Paige Cowett
Original music by Will Reid and Marion Lozano
Engineered by Alyssa Moxley
Listen and follow The Daily Apple Podcasts | Spotify | Amazon Music | YouTube
This episode contains descriptions of an alleged sexual liaison.
What happened when Stormy Daniels took the stand for eight hours in the first criminal trial of former President Donald J. Trump?
Jonah Bromwich, one of the lead reporters covering the trial for The Times, was in the room.
On today’s episode

Jonah E. Bromwich , who covers criminal justice in New York for The New York Times.

Background reading
In a second day of cross-examination, Stormy Daniels resisted the implication she had tried to shake down Donald J. Trump by selling her story of a sexual liaison.
Here are six takeaways from Ms. Daniels’s earlier testimony.
There are a lot of ways to listen to The Daily. Here’s how.
We aim to make transcripts available the next workday after an episode’s publication. You can find them at the top of the page.
The Daily is made by Rachel Quester, Lynsea Garrison, Clare Toeniskoetter, Paige Cowett, Michael Simon Johnson, Brad Fisher, Chris Wood, Jessica Cheung, Stella Tan, Alexandra Leigh Young, Lisa Chow, Eric Krupke, Marc Georges, Luke Vander Ploeg, M.J. Davis Lin, Dan Powell, Sydney Harper, Mike Benoist, Liz O. Baylen, Asthaa Chaturvedi, Rachelle Bonja, Diana Nguyen, Marion Lozano, Corey Schreppel, Rob Szypko, Elisheba Ittoop, Mooj Zadie, Patricia Willens, Rowan Niemisto, Jody Becker, Rikki Novetsky, John Ketchum, Nina Feldman, Will Reid, Carlos Prieto, Ben Calhoun, Susan Lee, Lexie Diao, Mary Wilson, Alex Stern, Dan Farrell, Sophia Lanman, Shannon Lin, Diane Wong, Devon Taylor, Alyssa Moxley, Summer Thomad, Olivia Natt, Daniel Ramirez and Brendan Klinkenberg.
Our theme music is by Jim Brunberg and Ben Landsverk of Wonderly. Special thanks to Sam Dolnick, Paula Szuchman, Lisa Tobin, Larissa Anderson, Julia Simon, Sofia Milan, Mahima Chablani, Elizabeth Davis-Moorer, Jeffrey Miranda, Renan Borelli, Maddy Masiello, Isabella Anderson and Nina Lassam.
Jonah E. Bromwich covers criminal justice in New York, with a focus on the Manhattan district attorney’s office and state criminal courts in Manhattan. More about Jonah E. Bromwich
Advertisement
Paper Mache Paste Recipes
Classic Recipes, Alternative Recipes, and Paper Mache Pulp
Papier-mache is a French term meaning "chewed up paper." It is also a term used to describe a crafting material made up of paper pulp or strips and paste. Often called paper mache in the United States, it is a versatile material that can be used by children or adults to create simple or complex items. To create a paper mache object, you can either cover a form with sticky strips or pasty pulp. Once the paper mache dries, it can be painted or decorated.
Historic Art Form
This art form has been used for thousands of years. Ancient Egyptians created paper mache masks , while Persians created bowls and trays and Europeans used decorative paper mache in place of painted wood or plaster.
Watch Now: How to Make Paper Mache
Recipes for paper mache paste.
While it is certainly possible to purchase paper mache paste, many people prefer to make their own. By making your own paste, you can control the quantity, quality, and effect you create. You can also have a lot of fun with your kids as you experiment with different recipes for making this gluey glop.
Try these recipes or experiment with a variety of materials to create your own paste. Consider the no-cook recipe if you are working with young children, as they can get hands-on in the process. If you're working with older, craftier, children, you may want to try the resin paper option as it will allow your children to create a permanent piece of artwork that they can keep for a long time.
- No-Cook Paste Recipe : This simple recipe is made entirely with ingredients and tools you likely already have in your kitchen cupboard. Flour, water, a bowl, and a whisk are all you need.
- Cooked Paste Recipe : This paste recipe is very similar to the no-cook but it is supposed to be a little stronger and is usually a little smoother. Of course, it takes a little more time to cook—and your little ones will have to wait for the paste to cool.
- Resin Paper Mache Paste Recipe : You will have to go shopping to buy resin powder to make this paste. It will give your finished paper mache project a hard finish and will also make your finished projects more durable.
Paste Alternatives
You can deviate from recipes and create your own paste from known paste-like ingredients. You can experiment with materials and see what works best for you.
- Liquid starch (undiluted): Although primarily for ironing clothes, this thickened, sticky liquid is perfect for paper mache projects.
- Wallpaper paste: Follow the directions from the manufacturer to mix this paste.
- White glue: White glue mixed with about one part water with two to three parts glue. You can use this mixture for a small project.
Paper Mache Pulp
If you are making large paper mache items, you will likely want to use strips of newspaper to create the general form. But, if you plan to give the form details, for example, facial features or ornamentation, then you will need a clay-like pulp in order to sculpt those intricacies. Paper mache pulp is what you use. This pulp is more like a thin clay and should be used as a final layer simply by spreading in on your project. This pulp is used instead of paste.
- Newspaper pulp : This is a simple recipe of only four ingredients: newspaper, water, salt, and glue. For the ingredients to set, you will need at least a few hours.
- Egg Carton pulp : This recipe is similar to newspaper pulp, but instead of newspaper, you will need paper egg cartons.
- Dryer lint: Your clothing dryer catch collects lint most every time you do laundry. Upcycle your clothing lint into a beautiful creation. Use the same ingredients as the newspaper/egg carton pulp recipes. Mix the lint with just enough water to make a sludgy oatmeal consistency.
More from The Spruce Crafts
- How to Make Paper Mache
- Learn How to Paper Mache
- 12 Free Printable Recipe Card Sets
- How to Make Resin Paper Mache Paste
- How to Make Cooked Paper Mache Paste
- How to Make Papier-Mache Pulp
- How to Make No-Cook Paper-Mache
- How to Make a Paper Mache Globe
- How to Make a Paper Mache Pinata
- Egg Carton Paper Mache Pulp Recipe
- 9 Easy Fake Blood Recipes
- How to Make a Paper-Mache Volcano That Erupts
- Paper Mache Tips and Hints
- What Is Papier Mâché?
- The Best Paper Mache Recipes and Projects
- DIY Lip Balm in Three Scents
IMAGES
VIDEO
COMMENTS
Glue mixture: Pour 2 parts white glue and one part water into a mixing bowl. These quantities can be changed to suit the size of your project. Or, if you have a stronger bonding glue, 1 part white glue and 1 part water will do the trick. [3] X Research source. Flour mixture: Combine 1 part flour with 1 part water.
Step 4: Add a layer of paper mache to the bowl. Dip a strip of newspaper into the paper mache mixture, saturating it completely. Slide the paper through your fingers to remove the excess paste. Place the paper strip on the covered bowl, smoothing it down with your fingers. Continue adding coated strips of newspaper to the bowl, overlapping them ...
Step 2: Make Your Paper Mache. Paper mache clay: Paper mache paste: Paste with no flour (and no mold!): Make paper mache with glue: Step 3: Apply the paste or paper mache clay to your form. Applying paper mache clay: Applying paper strips and paste: Step 4: Let your paper mache get dry all the way through.
Stick the newspaper strip over your form and smooth it down with your fingers. Completely cover your form with a layer of the saturated newspaper strips. They should all be over-lapping and running in different directions. After one layer is applied, let it dry completely. This can take up to 24 hours.
Dip a strip of paper into the paste, allowing it to soak up the liquid until it is completely saturated. Place the paper onto the balloon and smooth out any bumps or lumps using either your hand or a paintbrush. Repeat until the balloon is covered in two to three layers of paper. Let the sculpture dry for a day or two.
Use very little water to remove backing paper. The water necessary to remove the backing paper can soften sealed and unsealed Paper Mache. Rub the paper backing very gently and stop if any of the image begins to come off!! If you rub off spots of the image: I did this in both of my bowls even though I was very careful.
For the full instructions visit: https://onelittleproject.com/how-to-make-paper-mache/Learn how to make paper mache by following our step by step photo and v...
Combine flour/glue and water into the bowl and mix until desired consistency. When you begin to make your paper mache mixture, you will combine your two ingredients in a bowl until it reaches the desired consistency. If the mixture is thick, you add water. If the mixture is thin, you add flour or glue.
Homemade: 1:1 (1 cup of flour to 1 cup water, or 1 part flour to 1 part water) Wallpaper: 1:1 (1 part wallpaper glue to 1 part water) Next, whisk the mache paste recipe using your paintbrush or a spoon until you reach a smooth consistency. Adjust the quantities if needed.
Create realistic paper mache sculptures and masks, even if you've never sculpted anything before, by using my sculpture and mask patterns. They create all the shapes for you. Just cut them out, tape them together, add a layer or two of paper mache, and paint. Have fun!
This really is one of the easiest and least messy DIY Paper Mache Recipes! Mix one part flour, with two parts water. Pour the water in gradually and keep stirring. Try and remove as many lumps as possible. Pop into the microwave at full blast for 30-40 seconds (remember microwaves do vary, so add it for less if need be).
4. Let it dry: Allow your creation to dry completely. This may take a few hours or even a couple of days, depending on the size and thickness of your project. 5. Decorate and finish: Once your papier mache is fully dry, you can paint, varnish, or decorate it as you wish. Get creative and let your imagination run wild!
Papier Mache Hot Air Balloons. Martha Stewart (marthastewart.com) These cute hot air balloons are surprisingly simple to make, using just a balloon, paper mache, and a few embellishments. They would make a great way to add some decoration to a party or celebration. Go to Project Page.
The "recipe" is just flour and water. The video shows the quick way I mix the paste to make it nice and smooth - it takes just a few seconds, much less time than it takes to actually watch the video. I hadn't made any paper mache paste for several years, because most of the sculptures I'd been making used the paper mache clay, the ...
Newspaper is thicker and so, tear it into much smaller pieces. Next, pour boiling water over the paper and let it sit for at least 2 hours (overnight if you used newspaper). The hot water will break down cellulose and turn your paper into pliable pulp. Drain the pulp into a cheesecloth and squeeze the excess water out.
Make a Base Form. For your paper mache project, make a base form using flour, water, and recyclable items found around your house. You can also use supplies as simple as cardboard and masking tape to design almost anything. For rounder or hollow shapes, try using those old balloons that are stashed away from the last birthday party.
This is the best and most effective way to make paper mache. Always start by gathering materials first Cut newspaper into strips And then begin mixing the pa...
In this tutorial video, Learn how to make paper mache in a simple way. Paper mache is easy to make and fun to sculpt with. A great way to recycle tissue pape...
Flour. Hot Water from the Tap. To make the paste, just pour some white flour in a bowl. Add hot water gradually until you have a consistency that will work well. Mix with a spoon or whisk. If you have one, an immersion blender works great). Watch this video to see how to apply paper strips and paste to an armature.
Begin with a large bowl with warm water for mixing in. Place 1 ¼ cups of cheap toilet paper into the warm water. Saturate the toilet paper and then remove it and squeeze the water out. At first, you will need to do an experiment to see if one standard roll is equal to 1 ¼ cups when it is wet.
Paper Mache: Quick, Easy, Less Mess! Tutorial demonstrating how to paper mache a form using only newspaper, water, and glue. Become a sculptor with these eas...
Adhere Newspaper Strips to Bowls With Paste. Dip one strip of newspaper at a time into the flour mixture. Remove the excess glue by sliding the strip of paper between your fingers, then paste it on the foil-covered bowl. Criss-cross the strips until most of the bowl is covered. Then reinforce the strips by encircling the bowl with horizontal ...
Place paper as a drop cloth to protect the table or floor from inevitable glue drips. Recycle paper drop cloths at the end of the day as more paper mache paper! Consider opportunities for students to have meaningful input. For example, each student can decorate a scale on a large dragon or design a custom brick for a huge castle.
On today's episode. Jonah E. Bromwich, who covers criminal justice in New York for The New York Times. Stormy Daniels leaving court on Thursday, after a second day of cross-examination in the ...
This pulp is used instead of paste. Newspaper pulp: This is a simple recipe of only four ingredients: newspaper, water, salt, and glue. For the ingredients to set, you will need at least a few hours. Egg Carton pulp: This recipe is similar to newspaper pulp, but instead of newspaper, you will need paper egg cartons.