
How to Make a PowerPoint on Mac? (A Step-by-Step Guide)
If you’ve ever wanted to create a professional-level PowerPoint on your Mac, you’re in luck! In this step-by-step guide, we’ll walk you through the entire process from start to finish.
You’ll learn what Keynote is and how to open it on your Mac, how to create a PowerPoint, customize the slides, add text, images, and media, utilize themes and animations, and finally, save and share your PowerPoint.
By the end of this guide, you’ll be a PowerPoint pro on your Mac!
Table of Contents
Short Answer
Making a PowerPoint on a Mac is easy.
First, open up the Pages application on your Mac.
Then, select the File menu and choose New from Template.
From there, you can select a PowerPoint template and customize it to fit your needs.
When you are finished, you can save your presentation and share it with others.
What is Keynote?
Keynote is a presentation software program developed by Apple Inc.
and is available on all Mac computers.
It is a powerful program that allows users to easily create engaging and professional presentations.
Keynote provides users with a wide range of tools and features, including customizable slides, themes, animations, and more.
With Keynote, users can create stunning presentations in minutes.
It is a great tool for creating presentations for business, education, and personal projects.
Keynote is easy to use and is a great choice for anyone who wants to make a professional-looking PowerPoint on a Mac computer.
How to Open Keynote on Mac
Opening the Keynote app on a Mac computer is quite simple.
To open the app, you can either use the “Finder” app in your Applications folder, or you can use the “Spotlight Search” tool to quickly find the Keynote app.
If you choose to use the Finder, simply open the Finder app and navigate to the Applications folder.
From there, you will find the Keynote app.
You can then double-click on the Keynote icon to open the app.
Alternatively, you can use the Spotlight Search tool to quickly locate the Keynote app.
To do this, click on the magnifying glass icon in the top-right corner of your screen.
You can then type in “Keynote” in the search bar and hit the “Enter” key.
The Keynote app should appear in the search results.
You can then click on the Keynote icon to open the app.
Once the Keynote app is open, you can begin creating your PowerPoint presentation.
You can customize your slides by adding text, images, and other media.
You can further customize your slides by using various themes and animations.
Once you have created your presentation, you can save it as a .pptx file and share it with others.
With the Keynote app, you can easily create a professional-looking PowerPoint on a Mac computer.
Creating a PowerPoint on a Mac
Creating a PowerPoint presentation on a Mac computer is a straightforward process, whether youre creating a presentation for work or school.
The first step is to open the Keynote app on the computer.
Keynote is the presentation software for Mac computers, and it makes creating a presentation simple and easy.
Once you have opened the Keynote app, you can begin customizing your presentation.
You can add text, images, and other media to your slides, as well as utilize various themes and animations to make your presentation look professional and eye-catching.
You can also customize the layout of your slides, allowing you to add different elements and adjust their placement.
When your presentation is complete, you can save it as a .pptx file and share it with your colleagues, classmates, or anyone else who needs to view it.
You can also export your presentation as a PDF, a movie file, an HTML file, or a JPG file, depending on your needs.
With the Keynote app, creating a professional-looking PowerPoint on a Mac computer is easy and stress-free.
All you need to do is open the app, customize your slides, and then save your presentation in the desired format.
Whether youre creating a presentation for work or school, the Keynote app will help you get the job done quickly and efficiently.
Customizing the Slides
Customizing the slides is an important part of creating a stunning PowerPoint presentation on a Mac.
The Keynote app provides a variety of tools and features to help you design your slides.
You can easily add text, images, and other media to customize your slides.
To add text to your slides, simply select the text box and type in your desired text.
To add images, you can either drag and drop them into the slide or use the Insert Image button.
You can also insert shapes, charts, and other media to customize your slides.
Additionally, Keynote offers a range of themes and animations to help you further customize your presentation.
Themes allow you to quickly change the overall look and feel of your slides.
Animations can be used to add a touch of flair to your slides, such as transitions between slides and animated text.
To access the themes and animations, simply click on the Themes or Animations tabs in the upper right-hand corner of the app.
By taking advantage of the Keynote apps customization features, you can easily create a professional-looking PowerPoint on a Mac computer.
With just a few clicks, you can customize your slides and make them look stunning.
So, if youre looking to create an impressive presentation, the Keynote app is the perfect tool for the job.
Adding Text, Images, and Media
When it comes to creating a professional-looking PowerPoint on a Mac computer, adding text, images, and other media is key.
With the Keynote app, you can easily customize your slides by adding text, images, and other media elements.
To add text, select the text box icon from the top menu, and then type in the text you want to include in the text box.
You can also adjust the font type, font size, font color, and other text properties.
Once you have finished editing the text, click the Done button to save your changes.
To add images, click the Add Image icon from the top menu, and then select an image from your computer, or add an image from the web.
You can also adjust the size, position, and transparency of the image to make it look more professional.
Finally, you can add other media elements such as audio and video to your slides.
To do this, click the Add Audio or Add Video icon from the top menu, and then select the audio or video file you want to include.
You can also adjust the size, position, and playback settings of the media element to make it look more professional.
By using these methods, you can easily add text, images, and other media elements to your PowerPoint slides on a Mac computer.
Once you have added all the elements, you can save your presentation as a .pptx file and share it with others.
Utilizing Themes and Animations
Creating a PowerPoint presentation on a Mac computer is made easier with the help of the Keynote app.
Not only can you easily create a professional-looking presentation, but you can also customize your slides with various themes and animations.
With the help of themes and animations, you can create a presentation that is visually appealing and engaging.
When creating a presentation, you can choose from a wide variety of themes and animations.
You can choose from a variety of colors, fonts, and designs to give your presentation a unique look.
You can also choose from several animation styles to give your presentation a more dynamic feel.
For example, you can choose to have your slides transition in with a fade or a slide, or you can animate specific objects within your slides.
Themes and animations can also help to emphasize certain points in your presentation.
For instance, you can use animations to draw attention to a particular slide or element in your presentation.
Additionally, you can use themes to create a professional and consistent look throughout your presentation.
Creating a presentation with themes and animations is easy.
In the Keynote app, simply select the themes tab to access the available themes and animations.
From there, you can customize your slides with the desired theme and animations.
You can also preview your slides and animations before you save them.
Creating a professional-looking and engaging presentation on a Mac computer is easy with the help of the Keynote app.
With the help of themes and animations, you can create a presentation that is visually appealing and will help to emphasize certain points you want to make.
With a few clicks, you can quickly create a presentation that will be sure to impress.
Saving and Sharing Your PowerPoint
Once you have finished creating your PowerPoint presentation, you can save it as a .pptx file and share it with others.
To save your PowerPoint, click the File menu at the top of the Keynote window and then click Save.
You will be given the option to save your file to your Macs hard drive or to the cloud.
If you wish to share your presentation with others, you can do so by exporting it as a PDF file or by sharing it directly with other users.
To export your presentation to a PDF file, click the File menu and then select Export.
You will be given the option to export your PowerPoint as a PDF file.
If you would like to share your presentation directly with other users, you can do so by clicking the Share menu at the top of the Keynote window and selecting Share with Others.
Here, you can enter the email addresses of the people you would like to share your presentation with.
You can also set a password for your shared presentation if you wish.
Once you have saved and/or shared your presentation, you can open it up again at any time by double-clicking on the .pptx file.
This will open up the presentation in the Keynote app and you can make any changes that you wish.
With the Keynote app, creating a professional-looking PowerPoint on a Mac computer is easy and convenient.
The steps outlined above will help you create a great presentation and save/share it with others in no time.
Final Thoughts
Creating a professional-looking PowerPoint on a Mac computer doesn’t have to be difficult.
With the help of the Keynote app, you can easily create slides with text, images, and other media, and customize your slides with themes and animations.
Now that you know how to make a PowerPoint on Mac, you’re ready to create your own presentations and share them with others.
So get to it and start making your own PowerPoint today!
James Wilson
James Wilson has extensive knowledge in the information technology industry.His second love, besides dealing with computers, is smart home technology. He is continually updating information to better comprehend this problem and has a deep understanding of the apartment’s support system.
Recent Posts
Is Airtable a Public Company? Unveiling the Truth
No, Airtable is not a public company. As of now, Airtable is a private company that has raised funds from various investors but has not gone through an initial public offering (IPO) to be listed on...
How to Make Money with Airtable: Top Strategies and Success Stories
To make money with Airtable, you can offer consulting services to businesses looking to optimize their workflows through the platform. You can also create and sell templates or automation scripts...
How to Use a Mac With PowerPoint: A Step-by-Step Guide
Using a Mac with PowerPoint is simple. First, make sure you have PowerPoint installed on your Mac. You can find it at the App Store or through a Microsoft 365 subscription. Open PowerPoint, and you’ll be greeted with a range of templates to start your presentation. From here, you can add text, images, and animations to create an engaging slideshow. Once done, you can present directly from your Mac or save your presentation to share with others.
After you’ve completed your PowerPoint presentation on your Mac, you’ll have a professional and compelling visual aid to support your speech or lecture. You can also share it with others or export it into different formats such as PDF, video, or even a web page.
Introduction
Are you ready to impress your audience with a stunning presentation? If you’re a Mac user, fear not – using PowerPoint on your macOS is as smooth as on any Windows PC. Let’s be honest, presentations are a part of life: whether you’re a student, a professional, or just someone with a story to tell, at some point, you’re going to need to put some slides together. PowerPoint for Mac has all the tools you need to create a presentation that’s both visually captivating and content-rich.
Why is this important? Well, PowerPoint presentations are a staple in the professional world. They’re used for everything from business pitches to academic lectures. Knowing how to create an effective PowerPoint presentation on your Mac could be the difference between persuading your audience or leaving them unimpressed. And who is this relevant to? Everyone! Whether you’re a newbie to presentations or a seasoned speaker looking to refine your skills, this guide will help you master PowerPoint on your Mac.
Step-by-Step Tutorial: Using PowerPoint on a Mac
Before jumping in, let’s clarify what you’ll achieve by following these steps. By the end, you’ll be able to create, edit, and present a PowerPoint slideshow on your Mac.
Step 1: Install PowerPoint
Install PowerPoint on your Mac from the App Store or through a Microsoft 365 subscription.
After installing PowerPoint, you’ll need to sign in with your Microsoft account to activate the software, then you’ll be ready to start creating your presentation.
Step 2: Open PowerPoint
Open PowerPoint and choose a template or open a blank presentation.
PowerPoint offers a variety of templates to suit different presentation styles. If you choose to start with a blank slate, you’ll have complete creative freedom.
Step 3: Add Content
Add slides and content such as text, images, and shapes to your presentation.
Remember to keep your slides simple and not clutter them with too much content. Visual aids should support your speech, not replace it.
Step 4: Customize Your Slides
Customize your slides’ design with themes, colors, and animations.
This step is where you can get creative with your presentation’s look and feel. Just be sure not to go overboard with animations – they should enhance your presentation, not distract from it.
Step 5: Present Your Slideshow
Present your slideshow directly from your Mac or save it to share with others.
You can start your presentation by clicking the ‘Slide Show’ tab and then ‘Play from Start’. Make sure you practice your presentation beforehand to ensure everything runs smoothly.
Additional Information
Now, let’s sprinkle in some extra tidbits that could elevate your PowerPoint game on a Mac. First off, did you know that PowerPoint for Mac supports real-time collaboration? Yup, you can work with your teammates on the same presentation at the same time, no matter where you are. And if you’re all about shortcuts, PowerPoint for Mac has plenty. For instance, pressing Command + Shift + N instantly creates a new slide.
Another neat feature is the Presenter View, which lets you see your notes, the upcoming slide, and a timer, all while the audience only sees the current slide. And for those who value accessibility, PowerPoint for Mac has tools to make presentations more accessible, including options for larger text and high contrast. Just remember, when using PowerPoint on a Mac, you have all the essentials at your fingertips to create presentations that are not just informational, but also memorable.
- Install PowerPoint on your Mac from the App Store or Microsoft 365.
- Open PowerPoint and select a template or start with a blank presentation.
- Add and customize your slides with text, images, and animations.
- Present directly from your Mac or save your presentation for later use.
Frequently Asked Questions
Can i use powerpoint on a mac.
Yes, PowerPoint is available for Mac users and can be downloaded from the App Store or included in a Microsoft 365 subscription.
Is PowerPoint for Mac different from Windows?
While there are some differences in design and available features, PowerPoint for Mac offers a comparable experience to the Windows version.
Can I collaborate with others using PowerPoint for Mac?
Absolutely! PowerPoint for Mac supports real-time collaboration, allowing multiple users to work on the same presentation simultaneously.
Can I open a PowerPoint presentation made on a Mac on a Windows PC?
Yes, presentations made in PowerPoint for Mac are compatible with PowerPoint for Windows, ensuring easy file sharing and collaboration.
Does PowerPoint for Mac support Presenter View?
Yes, Presenter View is available in PowerPoint for Mac, providing speakers with a private view of their notes and upcoming slides while presenting.
In conclusion, mastering the use of PowerPoint on a Mac can be a game-changer for anyone looking to create impactful and persuasive presentations. Whether you’re a student, educator, entrepreneur, or professional, the ability to present your ideas clearly and attractively is invaluable.
So, dive in, explore the features, and harness the power of PowerPoint on your Mac to captivate your audience. Remember, a well-crafted presentation can be the key to success. Happy presenting!

Matthew Burleigh has been writing tech tutorials since 2008. His writing has appeared on dozens of different websites and been read over 50 million times.
After receiving his Bachelor’s and Master’s degrees in Computer Science he spent several years working in IT management for small businesses. However, he now works full time writing content online and creating websites.
His main writing topics include iPhones, Microsoft Office, Google Apps, Android, and Photoshop, but he has also written about many other tech topics as well.
Read his full bio here.
Share this:
Join our free newsletter.
Featured guides and deals
You may opt out at any time. Read our Privacy Policy
Related posts:
- Can I Convert My Powerpoint to Google Slides?
- How to Save Powerpoint as PDF with Notes
- How to Drag Slides From One PowerPoint to Another: A Step-by-Step Guide
- How to Make a Powerpoint Slide Vertical in Powerpoint 2013
- How to Set Time for Slides in Powerpoint
- What Are Benefits of PowerPoint? A Comprehensive Guide
- How to Combine PowerPoint Presentations With Different Orientations
- How to Check Word Count on Powerpoint 2010
- How to Insert Slides from Another Presentation in Powerpoint 2010
- How to Change Hyperlink Color in Powerpoint 2010 (An Easy 5 Step Guide)
- How Is Microsoft PowerPoint Used in Business: A Comprehensive Guide
- How to Unhide a Slide in Powerpoint 2013
- How to Convert a PowerPoint to Word and Edit with Ease
- How to Loop a Slideshow on Powerpoint 2013
- How to: Effortlessly Create PowerPoint Looping Presentations
- How to Change the Font on All Slides in Google Slides
- How to Change Line Spacing in Powerpoint for Every Slide at Once
- How to Insert Check Mark in Powerpoint for Office 365
- How to Start PowerPoint: A Step-by-Step Guide for Beginners
- How to Email a PowerPoint Slideshow: A Step-by-Step Guide
Microsoft PowerPoint 4+
Create impactful presentations, microsoft corporation.
- 4.7 • 396.9K Ratings
- Offers In-App Purchases
Screenshots
Description.
This application requires a qualifying Microsoft 365 subscription. Microsoft 365 includes premium Word, Excel, and PowerPoint apps, 1 TB cloud storage in OneDrive, advanced security, and more, all in one convenient subscription. With Microsoft 365, you get features as soon as they are released ensuring you’re always working with the latest. Create, edit, collaborate, and share presentations using PowerPoint for Mac. Now it’s easier than ever to create, edit, and share presentations seamlessly across your devices and with others. Share your files and collaborate in real time within a document or edit Office docs attached to emails. Get smart assistance features as soon as they are released in Word, Excel, and PowerPoint so you’re always working with the latest. Whether you need to show off your school project, business plan, or family vacation photos, PowerPoint is your go-to app for presentations. Kickstart your creativity • Achieve more and enhance your documents with access to a growing catalog of premium templates for Word, Excel, and PowerPoint. • Advanced formatting and layout options produce beautifully pristine documents on any device including laptops, iPads, and iPhones. Present with confidence • Get your ideas across with beautiful design, rich animation, cinematic motion, 3D models, and icons. • Save documents right to Microsoft OneDrive or another cloud provider to access them on any device and at any time you have internet access. • Dark Mode allows you to focus on creating presentations in low-light environments. Accomplish more together • Whether it’s a school project, sales pitch, or family slideshow, seamlessly work with others with real-time co-authoring to bring your ideas and plans together faster. • Share your documents with the click of a button to invite others to edit in real time. Easily manage permissions and see who’s currently working in a document. • Add comments or assign tasks to people in your group for clean editing and organization. Learn more about Microsoft 365 Microsoft 365 is a cloud-based subscription service that brings together premium versions of Word, Excel, PowerPoint, Outlook and OneDrive, with the best tools for the way people work today. Please visit: http://go.microsoft.com/fwlink/?linkid=2015120 for information on Licensing Terms. Unlock the full Microsoft Office experience with a qualifying Microsoft 365 subscription for your phone, tablet, PC, and Mac. Microsoft 365 annual subscriptions purchased from the app will be charged to your App Store account and will automatically renew within 24 hours prior to the end of the current subscription period unless auto-renewal is disabled beforehand. You can manage your subscriptions in your App Store account settings. This app is provided by either Microsoft or a third-party app publisher and is subject to a separate privacy statement and terms and conditions. Data provided through the use of this store and this app may be accessible to Microsoft or the third-party app publisher, as applicable, and transferred to, stored, and processed in the United States or any other country where Microsoft or the app publisher and their affiliates or service providers maintain facilities. Please refer to the Microsoft Software License Terms for Microsoft Office. See “License Agreement” link under Information. By installing the app, you agree to these terms and conditions.
Version 16.85
• Bug fixes
Ratings and Reviews
396.9K Ratings
Canvas Rearranges Design Elements when Uploading
If you are a college student and you create a PPT on Mac and you save and then upload itt as an assignment on Canvas, a lot tof tthe design elements get moved around and it makes a mess of the presentaion. pics and texts boxes are no longer where you placed hem, so your design looks bad. What I have to do no is export the presentation to a PDF an dupload that as the assignment, and then email the instructor to tell them that Canvas is wrecking my presentaion so I sent a pdf instead. My college moved from Moodle to Canvas last year and I have had this trouble ever since. When the PPT presentation is saved as a PDF, you lose all the extras you added like voice narration and sound effects, music, notes, etc.
You're getting better but the product still has many frustrating parts. For instance the open folder is now gone on this version and on other versions I use with different customers, it's there and useful. The library of icons and art that you can use is also lacking. Why don't you allow all the types of icons that Visio uses? It would make it usable. Also, the section part is great but it's clumbsy and when you open you always have to collapse. Why can't you select a flag that lets you open collapsed. that would make the tool much more usable. Integration with teams is still terrible and with email if the product is open, you can't send the file. Why? just version it and send. Theres' much more but it's useful but not a product that has the power of things like Lucid, or visio, but it could be much more usable, so you get a three for teasing me with function and ideas, then falling short when I try to use it my way as the main unit. It's keeping this type of work, design and developent documentation, a dark art...who knows maybe AI might help you.
Printing Slides is a Joke
To my knowledge, this is mainly an issue with PowerPoint for Mac as my colleagues who use PCs don't have this issue. When you go to print the slides, they look fine if there are multiple on a page or if you print the notes version, but if you try to print 1 slide per page the images blur when printing! And not just a little fuzzy, they turn out with lines going through them and just look like they never completed loading. This also happens when exporting to a PDF. The PDF looks fine on the screen, and then as soon as you go to print it, a random image will blur out like that. Is it the same image everytime? NOPE! It picks and chooses which image it wants to blur out each time it prints. There is no rhyme or reason to this issue. I exported to PDF, Exported each slide to jpeg, even took screen shots as a last resort and had to just deal with the fact that the color was completely different on the printed screen shot slides. This has been an issue for MONTHS and is all over every forum - the fact that this hasn't been addressed by the MS team is unacceptable! If I'm printing client copies of proposal presentations it shouldn't take me all day due to troubleshooting!
App Privacy
The developer, Microsoft Corporation , indicated that the app’s privacy practices may include handling of data as described below. For more information, see the developer’s privacy policy .
Data Linked to You
The following data may be collected and linked to your identity:
- Contact Info
- User Content
- Identifiers
- Diagnostics
Privacy practices may vary, for example, based on the features you use or your age. Learn More
Information
English, Arabic, Czech, Danish, Dutch, Finnish, French, German, Greek, Hebrew, Hungarian, Indonesian, Italian, Japanese, Korean, Norwegian Bokmål, Polish, Portuguese, Russian, Simplified Chinese, Slovak, Spanish, Swedish, Thai, Traditional Chinese, Turkish
- Microsoft 365 Personal $69.99
- Microsoft 365 Personal Monthly $6.99
- Microsoft 365 Family $99.99
- Microsoft 365 Family $9.99
- Microsoft Copilot Pro $20.00
- Microsoft 365 Personal $119.99
- Developer Website
- App Support
- Privacy Policy
Featured In
More by this developer.
Microsoft Outlook
Microsoft Teams
Microsoft Authenticator
Microsoft Word
Microsoft Excel

PowerPoint for Mac Help
Looking for something that’s not listed here? Use the Search box in the upper-right corner of this window.
Activate Office for Mac
Check for Office updates automatically
PowerPoint Essentials
Help articles, additional resources.

Need more help?
Want more options.
Explore subscription benefits, browse training courses, learn how to secure your device, and more.

Microsoft 365 subscription benefits

Microsoft 365 training

Microsoft security

Accessibility center
Communities help you ask and answer questions, give feedback, and hear from experts with rich knowledge.

Ask the Microsoft Community

Microsoft Tech Community

Windows Insiders
Microsoft 365 Insiders
Was this information helpful?
Thank you for your feedback.

Cloud Storage

Custom Business Email

Video and voice conferencing

Shared Calendars

Word Processing

Spreadsheets
Presentation Builder

Survey builder

Google Workspace
An integrated suit of secure, cloud-native collaboration and productivity apps powered by Google AI.
Tell impactful stories, with Google Slides
Create, present, and collaborate on online presentations in real-time and from any device.
- For my personal use
- For work or my business

Jeffery Clark
T h i s c h a r t h e l p s b r i d g i n g t h e s t o r y !

E s t i m a t e d b u d g e t

Make beautiful presentations, together
Stay in sync in your slides, with easy sharing and real-time editing. Use comments and assign action items to build your ideas together.

Present slideshows with confidence
With easy-to-use presenter view, speaker notes, and live captions, Slides makes presenting your ideas a breeze. You can even present to Google Meet video calls directly from Slides.

Seamlessly connect to your other Google apps
Slides is thoughtfully connected to other Google apps you love, saving you time. Embed charts from Google Sheets or reply to comments directly from Gmail. You can even search the web and Google Drive for relevant content and images directly from Slides.

Extend collaboration and intelligence to PowerPoint files
Easily edit Microsoft PowerPoint presentations online without converting them, and layer on Slides’ enhanced collaborative and assistive features like comments, action items, and Smart Compose.

Work on fresh content
With Slides, everyone’s working on the latest version of a presentation. And with edits automatically saved in version history, it’s easy to track or undo changes.

Make slides faster, with built-in intelligence
Assistive features like Smart Compose and autocorrect help you build slides faster with fewer errors.

Stay productive, even offline
You can access, create, and edit Slides even without an internet connection, helping you stay productive from anywhere.
Security, compliance, and privacy

Secure by default
We use industry-leading security measures to keep your data safe, including advanced malware protections. Slides is also cloud-native, eliminating the need for local files and minimizing risk to your devices.
Encryption in transit and at rest
All files uploaded to Google Drive or created in Slides are encrypted in transit and at rest.
Compliance to support regulatory requirements
Our products, including Slides, regularly undergo independent verification of their security, privacy, and compliance controls .
Private by design
Slides adheres to the same robust privacy commitments and data protections as the rest of Google Cloud’s enterprise services .

You control your data.
We never use your slides content for ad purposes., we never sell your personal information to third parties., find the plan that’s right for you, google slides is a part of google workspace.
Every plan includes

Collaborate from anywhere, on any device
Access, create, and edit your presentations wherever you are — from any mobile device, tablet, or computer — even when offline.

Get a head start with templates
Choose from a variety of presentations, reports, and other professionally-designed templates to kick things off quickly..

Photo Album

Book Report

Visit the Slides Template Gallery for more.
Ready to get started?
Get Started: Make Powerful Presentations on Mac and iPad
Learn how to create beautiful, memorable presentations using Keynote on Mac and iPad. We’ll explore Apple-designed templates and introduce you to the app’s powerful features. Make your ideas stand out with live video, animation, and more. We’ll also share tips for real-time collaboration and presenting effectively. Bring your device or try the latest. A limited number will be available.
For sessions with amplified sound, hearing loop technology is available on request.
Get directions
Your Privacy
Only parents and legal guardians of minors, and those 18 years and over, should register. By registering, you consent to the processing of your personal data by Apple and third parties involved in providing the session for reserving your spot, communicating reminders, and facilitating your participation in this session in accordance with Apple’s Privacy Policy.
To learn more, visit Apple’s Privacy Policy.
More about Get Started & Workshops
Whether you’re new to Apple or need a refresher on the latest products and features, these sessions will get you up and running.
Bring a guest. Or come solo.
Are you sure you want to cancel.
- PDFelement for Windows
- PDFelement for Mac
- PDFelement on Mac App Store
- PDF Reader for Windows
- PDFelement for iPhone/iPad
- Get from App Store
- PDFelement for Android
- Get from App Google Play
- PDF Scanner for iPhone
Cloud & SDK
- Document Cloud
- PDFelement Pro DC
- PDFelement SDK
Online PDF Tools
- PDF to Word
- Compress PDF
- Word to PDF
Educational Users
- Annotate PDF
- Combine PDF
Personal Users
- Convert PDF
- Organize PDF
Professional Users
- eSign PDFs Legally
- Extract Data from PDF
- Password Protect PDF
PDF Solutions for
- Chat with PDF
- AI PDF Summarizer
- AI PDF Translator
- AI Content Detector
- AI Rewrite PDF
- Proofread PDF
- Add Bookmarks to PDF
- Explain PDF
- Mac Software
- OCR PDF Tips
- Online PDF Tips
- Edit PDF like Word
- PDF Converter Tips
- PDF Compressor Tips
Why PDFelement
- Customer Stories
- PDF Software Comparison
- Contact Support
- PDFelement for iOS
- InstaScan for iPhone
Explore More
- Reviews See what our users say.
- Free PDF Templates Edit, print, and customize free templates.
- PDF Knowledge PDF-related information you need.
- Download Center Download the most powerful and simple PDF tools.
- Download Download Pricing Pricing
How to Make a PowerPoint on Mac OS 10.15 Catalina

Elise Williams
2024-05-22 13:36:15 • Filed to: PowerPoint Tips • Proven solutions
The software that can be used to create a presentation on Mac includes, PowerPoint and keynote among others. In this case, we are going to learn how to make a PowerPoint on mac . There are a number of ways to go by on making a presentation on Mac which includes using Microsoft PowerPoint for Mac, creating a presentation using keynote, or Google docs and export as PowerPoint file (ppt or .pptx).
How to Make a PowerPoint on Mac
In this article, we will use Keynote on Mac to make a presentation and then export it to PowerPoint.
Step 1. Launch Keynote
Click on the “Keynote icon in the Launchpad to open it. A window displaying various theme templates “Theme chooser” will appear. In the case it does not appear, click the option key and on the “File” menu select “new” to open a new presentation template.
Step 2. Choose the Theme of the Presentation
Scroll to navigate in the theme chooser and choose the type of presentation you want to make then double click on it to open.

Step 3. Change the Layout
To change to a different layout, you can click on the “Layout” button, and then select your desired layout.

Step 4. Add Content
There are a number of activities you might need to perfume on the presentation which involves adding your content.
- To add a slide, click on "Add Slide" in the toolbar and then select a layout.
- To add text, there is a placeholder text on the slide which you should double click and type to replace it with your own.
- To add an image, drag and drop or copy and paste an image to the slide from your computer or webpage.
Step 5. Save the File
After you are done with adding your content to the slide and your presentation is ready, you can click on "Save" and enter the file name. Meanwhile, you need to choose the location to save your file, and finally click “Save”.
Step 6. Export to PowerPoint
It is always important to try playing your presentation by yourself before you present it to other people to familiarize with it and make any necessary changes.
- Step 1. To export the file, you can click on “Share” on the menu, and then select “export”.
- Step 2. Click on "PPT" from the menu and then click “Next”.
- Step 3. Navigate to the location you want to save your file and change name if necessary.
- Step 4. Click on “export”. Last but not least, you can open the exported PowerPoint file to confirm the content.

The Best PDF Software for Mac
Wondershare PDFelement - PDF Editor is the best PDF editor which can be described as an All-in-One PDF Editor. It is attributed to powerful features that can edit PDF text and images, convert documents to various formats, and also create fillable forms, protect and share documents. It has become one of the commonly used and preferred document software owing to its advanced features, flexible prices, and perfect performance. PDFelement offers full control of your work on editing and modifying with its custom tools without forgetting its easy-to-use interface. The following are some popular features of PDFelement.
Launch PDFelement on your Mac computer, and click "Open File" and search for the file you want to open. Then you can choose the "Edit" option, and then you can add text, crop, watermark, change font or background, add page numbers among others.

• Convert PDF
Launch PDFelement on your Mac computer and import the PDF document to this program. And you can click the "File" > "Export To" option, then you select the format in which you want to convert the file like excel, word, and image, and finally click "Save".

• Create PDF Forms
Open your PDFlelement program and click on "File" > "Create", and then choose the "Blank Document" option.

Now click on "Form" on the left column, and pick one of the displayed elements and move the cursor to the blank area of the document to execute it.

After that, you can set the properties of the form by double-clicking on it to either align, modify, adjust size or delete. Once you have drawn your forms, you can type in your text content. To open the created fields, you can double click on it, and then you can also open the properties window to set either calculation, options, or appearances. Finally, you can click “Save” when you are done.

Free Download or Buy PDFelement right now!
Buy PDFelement right now!
chief Editor
Speak Your Mind
Related articles.
- How to Add Border in PowerPoint
- How to Add Page Numbers in PowerPoint
- Quicktime Not Available in PowerPoint? Solve It.
- How to Create Video from PowerPoint
- How to Change Background in PowerPoint
Mac Version of PowerPoint: Everything You Need to Know
- Recent Posts
- How to Color Code Folders in Outlook 365: A Step-by-Step Guide - May 23, 2024
- Tech Tips: How to Quickly Locate Folders for Emails in Outlook - May 23, 2024
- How to Easily Delete Templates in Outlook - May 23, 2024
PowerPoint is a popular presentation software that allows users to create and share engaging slideshows. It is widely used in both personal and professional settings, and is available on a variety of platforms. However, those who use Mac computers may wonder what the Mac version of PowerPoint is and how it differs from the Windows version.

As a Mac user, I have often wondered about the differences between the Mac and Windows versions of PowerPoint. After conducting some research, I have found that the Mac version of PowerPoint is called Keynote. Keynote is a presentation software application created by Apple Inc. as part of the iWork productivity suite. It was launched in 2003 and has since undergone several major updates, offering powerful features for creating and delivering presentations.
While PowerPoint may be the most well-known program for making slides and creating presentations, it’s far from the only one. Keynote is a popular alternative that offers many of the same features as PowerPoint, with some unique additions. For Mac users, Keynote may be a more intuitive and user-friendly option than PowerPoint, making it a great choice for those who want to create professional-looking presentations without a steep learning curve.
JUMP TO TOPIC
Leveraging Microsoft 365 Subscription
Utilizing cloud storage and real-time co-authoring, design and animation tools, advanced formatting and templates, seamless integration with office suite, expert tips for co-authoring and editing, navigating the user interface and shortcuts, accessibility options and support, maximizing productivity with powerpoint for mac.

As someone who relies heavily on PowerPoint for presentations, I’ve found that using the Mac version of the software has been a game-changer for me. Not only does it offer a range of powerful features, but it’s also incredibly user-friendly and intuitive.
One of the biggest advantages of using PowerPoint for Mac is that it’s part of the Microsoft 365 suite. This means that if you have a subscription, you’ll not only have access to PowerPoint but also to other essential productivity tools like Word, Excel, and Outlook.
Having access to all these tools in one place can be incredibly convenient and can save you a lot of time and effort. For example, you can easily switch between PowerPoint and Word to copy and paste text or images, or you can use Excel to create charts and graphs to include in your presentation.
Another great feature of PowerPoint for Mac is that it integrates seamlessly with OneDrive, Microsoft’s cloud storage service. This means that you can save your PowerPoint files to the cloud and access them from anywhere, on any device.
What’s more, if you’re working on a presentation with colleagues or clients, you can use OneDrive to collaborate in real-time. This means that everyone can work on the same presentation at the same time, making it much easier to coordinate and ensure that everyone is on the same page.
Overall, I’ve found that using PowerPoint for Mac has helped me to be much more productive and efficient when it comes to creating and delivering presentations. Whether you’re a student, a business professional, or anyone in between, I highly recommend giving it a try.
Creating Impactful Presentations
When it comes to creating impactful presentations, the design and animation tools available in the Mac version of PowerPoint can make all the difference. With a wide range of design options, including the ability to add cinematic motion, you can create presentations that are both visually stunning and engaging for your audience.
One of the standout features of the Mac version of PowerPoint is the range of design and animation tools available. With a variety of themes and templates to choose from, you can easily create a professional-looking presentation that fits your specific needs. Additionally, the software offers a range of advanced formatting options, allowing you to customize your presentation to your exact specifications.
Another key feature of the Mac version of PowerPoint is the ability to use premium templates to create a truly unique and engaging presentation. These templates offer a range of advanced formatting options, including the ability to add cinematic motion to your slides. With these tools at your fingertips, you can create presentations that are not only informative but also visually stunning.
Overall, the Mac version of PowerPoint offers a range of tools and features that can help you create impactful presentations that engage your audience and leave a lasting impression. Whether you’re looking to create a professional presentation for work or a visually stunning slideshow for a personal project, the Mac version of PowerPoint has everything you need to get the job done.
Efficient Editing and Collaboration Features
When it comes to creating presentations, PowerPoint is a go-to tool for many users. The Mac version of PowerPoint, also known as Keynote, offers several features that make editing and collaboration a breeze.
Keynote integrates seamlessly with other Office Suite applications like Word, Excel, and Outlook. This integration makes it easy to import data from these applications into your presentation. For example, you can easily import Excel data into a chart in your presentation. You can also copy and paste text from Word into your presentation without losing formatting.
Co-authoring and editing are essential features that make it easy to collaborate with others on a presentation. Keynote offers several tools and shortcuts to make co-authoring and editing more efficient.
One of the best tools for co-authoring is the “Track Changes” feature. This feature allows you to see all changes made to the presentation, who made them, and when they were made. You can also accept or reject changes made by others.
Another useful tool is the “Collaborate” feature. This feature allows you to collaborate with others in real-time. You can see who is working on the presentation, and you can chat with them in real-time.
Shortcuts are also essential for efficient editing. One of the best shortcuts is the “Command + Z” shortcut, which allows you to undo the last action. This shortcut can be a real time-saver when you make a mistake.
In conclusion, Keynote offers several features that make editing and collaboration more efficient. With seamless integration with other Office Suite applications and expert tips for co-authoring and editing, Keynote is a great choice for creating presentations on a Mac.
Understanding PowerPoint for Mac Accessibility
As someone who has used PowerPoint for Mac extensively, I can attest to the fact that it is a powerful tool for creating visually appealing presentations. However, it is important to ensure that the presentations we create are accessible to everyone, including those with disabilities. In this section, I will discuss the accessibility options and support available in PowerPoint for Mac.
One of the first things you will notice when using PowerPoint for Mac is the user interface. It is similar to the Windows version, but with some differences. For example, the ribbon is replaced with a toolbar, and some of the shortcuts are different. However, the basic functionality remains the same, and you can still create and edit presentations with ease.
To navigate the user interface quickly, you can use keyboard shortcuts. For example, to create a new slide, you can press Command+Shift+N. To save your presentation, you can press Command+S. There are many other shortcuts available, and you can find a comprehensive list by going to Help > Keyboard Shortcuts.
PowerPoint for Mac has several accessibility options that make it easier to create presentations that are accessible to everyone. For example, you can use the Accessibility Checker to identify and fix accessibility issues in your presentation. To launch the Accessibility Checker, go to Review > Check Accessibility.
Another useful feature is the ability to add alt text to images, charts, and other visual elements in your presentation. Alt text is a brief description of the visual element that is read aloud by screen readers. To add alt text to an element, right-click on it and select Format Picture > Alt Text.
If you need technical support for PowerPoint for Mac, you can contact Microsoft Support. They offer several support options, including phone, chat, and email support. You can also find answers to common questions and issues by going to Help > PowerPoint Help.
In conclusion, PowerPoint for Mac is a powerful tool for creating presentations, but it is important to ensure that they are accessible to everyone. By using the accessibility options and support available in PowerPoint for Mac, you can create presentations that are inclusive and accessible to everyone.
Related posts:
- How to Easily Insert a YouTube Video into PowerPoint
- How to Change Which Screen PowerPoint Presenter On
- Vielen Dank für Ihre Aufmerksamkeit PowerPoint: Tips for a Professional Presentation
- Free Online Solution to Repair Damaged PowerPoint Files
- Bullet Pointing in PowerPoint: A Simple Guide
- Inserting Captions in PowerPoint: A Step-by-Step Guide
- Mastering Uniformity: How to Make All Text Boxes the Same Size in PowerPoint
- Insert Picture as Background in PowerPoint: A Step-by-Step Guide
- How to Copy a Shape in PowerPoint: A Step-by-Step Guide
- How to Give a Powerful PowerPoint Presentation: Tips and Tricks
- What Users Can’t Do in PowerPoint 2016 User Interface: A Comprehensive Guide
- Change a Shape in PowerPoint: A Quick and Easy Guide
Leave a Comment Cancel reply
Save my name, email, and website in this browser for the next time I comment.
Use iMac as monitor: How to create a Mac to Mac, PC to Mac, or iPad to Mac setup
Want to find a way to use iMac as a monitor? While Apple’s target display mode is limited to 2009 to 2014 iMacs, fortunately, there are several other options to make use of that nice big screen on your old or new iMac as a monitor.
Target display mode is an Apple solution to use iMac as a monitor with another Mac in a wired setup. It was a very popular feature for years, but when Apple launched its Retina iMacs starting in late 2014, support was dropped.
The good news is even if you have a modern Apple all-in-one (even the new M3 iMac) that does not support target display mode, you can still use iMac as a monitor with a variety of options. Let’s dig into the 5 best solutions…
Use iMac as monitor: 5 solutions
Table of contents, luna display or duet display, use imac as a monitor with sidecar, pair imac with an external monitor, airplay to mac, target display mode.

To get the same functionality that target display mode offers with Mac to Mac (and even get PC to Mac and iPad to Mac) support, Luna Display and Duet Display are two of the top options.
- Luna Display does require a $79 Luna Display USB-C dongle but has no subscription cost.
- Duet Display doesn’t require any hardware but goes from $25/year for Duet Air (to get Mac to Mac, PC to Mac, and iPad to Mac support). Duet Display offers a free trial .
We’ve used both here at 9to5Mac and have found them to be great products that see regular updates.

This, of course, doesn’t offer Mac to Mac support, but if you want to use a newer iMac as a monitor with an iPad, Sidecar is a great free solution. And it works wired or wirelessly.
- Once connected, under System Preferences/Settings you can choose whether the Mac or iPad is the primary display
Sidecar is built into Mac and iPad since macOS Catalina and iPadOS 13. If you haven’t tried Sidecar before, check out our full guide here:
- macOS: How to turn your iPad into a second display with Sidecar

This might seem obvious but another choice is to pair your iMac with an external monitor and choose which one you want to be the primary display and secondary display.
For a closer look at some of the best monitors on the market, check out our guides:
- Best USB-C monitors for Mac
- Best Thunderbolt monitors for Mac
And one affordable 32-inch 4K monitor that matches the M1 iMac aesthetic is Samsung’s M8 Smart Monitor .
This feature doesn’t work if you want to extend your iMac or iPad desktop space, but you can mirror from iPhone, iPad, or iPod touch directly to a newer iMac or any other compatible Mac.
However, this does require a more recent Mac. Learn more in our full guide:
How to AirPlay content to your Mac
If you happen to have an old iMac, you may be able to use target display mode but it will also need to be running macOS High Sierra or earlier – same for the secondary Mac. Here’s what you’ll need to use iMac as monitor with the original solution.
Requirements per Apple for 2011-mid 2014 iMacs:
- iMac used as a display must have macOS High Sierra or earlier installed.
- The other Mac that you’re connecting it to must have been introduced in 2019 or earlier and have macOS Catalina or earlier installed.
Requirements for 2009-2010 models to use iMac as monitor:
- The other Mac that you’re connecting it to must have been introduced in 2019 or earlier and have macOS Catalina or earlier installed.
If you have two Macs that meet those requirements, Apple says:
- Make sure that your iMac is on.
- Make sure that the other Mac is started up and logged in to a macOS user account.
- Connect the two computers using the appropriate Mini DisplayPort or Thunderbolt cable. You can use more than one iMac as a display, if each iMac is using a Thunderbolt cable to connect directly to a Thunderbolt port on the other Mac (not the other iMac).
- Press Command-F2 on the keyboard of the iMac. You should now see the desktop of the other Mac.
- To exit target display mode, press Command-F2 again. Or disconnect the cable, or restart either Mac.
Thanks for reading our guide on how to use iMac as a monitor!
Read more 9to5Mac tutorials:
- 5 tips and tricks to free up disk space and hidden storage on your Mac
- How to reset your MacBook or Mac desktop before selling or giving it away
- 5 tips and tricks to fix Bluetooth connection issues on Mac
Top image via AstroPad
FTC: We use income earning auto affiliate links. More.
Check out 9to5Mac on YouTube for more Apple news:

Apple’s Mac lineup consists of MacBook, MacBoo…
A collection of tutorials, tips, and tricks from…

Michael is an editor for 9to5Mac. Since joining in 2016 he has written more than 3,000 articles including breaking news, reviews, and detailed comparisons and tutorials.
Michael Potuck's favorite gear

Satechi USB-C Charger (4 ports)
Really useful USB-C + USB-A charger for home/work and travel.

Apple Leather MagSafe Wallet
My slim wallet of choice for iPhone 12

Manage push notifications
Photos User Guide
- Get started
- Overview of importing
- Use iCloud Photos
- From a camera or phone
- From storage devices, DVDs, and more
- From Mail, Safari, and other apps
- From another Photos library
- Where are the photos I imported?
- Browse your photos
- View individual photos
- Play video clips
- Play Live Photos
- View memories
- Personalize memories
- View photo bursts
- View photos others have shared with you
- Interact with text in a photo using Live Text
- Use Visual Look Up to learn about a photo
- Isolate and copy a photo’s subject
- Add titles, captions, and more
- Add keywords
- Show specific types of items
- Find photos by text, content, or date
- Find photos of a person or pet
- Find photos by location
- Create and work with albums
- Group albums in folders
- Create Smart Albums
- Delete photos or recover deleted ones
- Remove duplicates
- Hide photos from view
- Photo editing overview
- Editing basics
- Crop and straighten photos
- Use a filter to change a photo
- Adjust a photo’s light, exposure, and more
- Retouch photos
- Remove red-eye
- Adjust a photo’s white balance
- Apply curves adjustments
- Apply levels adjustments
- Adjust definition
- Apply changes to specific colors
- Reduce noise
- Sharpen a photo
- Change a Portrait mode photo
- Apply a vignette
- Write or draw on a photo
- Use other apps when editing in Photos
- Change a Live Photo
- Change a video
- Edit a Cinematic mode video
- What is iCloud Shared Photo Library?
- Set up or join a Shared Library
- View a Shared Library
- Add photos to a Shared Library
- Remove photos from a Shared Library
- What are shared albums?
- Turn on Shared Albums
- Create shared albums
- Add, remove, and edit photos in a shared album
- Add or remove subscribers
- Subscribe to shared albums
- Use Messages and Mail to share photos
- Use AirDrop to share photos
- Share photos using other apps and websites
- Export photos, videos, slideshows, and memories
- Export a Live Photo as an animated GIF
- Export a still photo from a video
- Create slideshows
- Create projects using third-party apps
- Order professional prints
- Print your own photos
- System Photo Library overview
- Create additional libraries
- Back up the Photos library
- Restore from Time Machine
- Repair the library
- Change where photos and videos are stored
- Photos settings
- Keyboard shortcuts and gestures
Create slideshows in Photos on Mac
In Photos, there are two ways to create slideshows:
Quickly play an instant slideshow of the photos from a day, complete with a theme and music.
Create and save a slideshow project. You select a group of photos, then add text, choose a theme, add music, and set how long each slide appears. You can export a slideshow project to play it on a Mac, iPhone, iPad, or Apple TV.

Open Photos for me
Play an instant slideshow
When you play an instant slideshow, you can select a theme and music for the slideshow, but you can’t customize the slideshow further.
Select some photos in a day, then choose File > Play Slideshow.
Click Themes, then select a theme.
A preview of the theme appears in the pane.
Click Music and select the song you want.
To turn off or select different music, click the song again to deselect it, then select a different song.
Click Play Slideshow.
To stop playing the slideshow, press the Escape key. Press the arrow keys to skip forward or back through the slides, and press the Space bar to pause the slideshow.
Create a slideshow project
Choose File > Create > Slideshow > Photos.
Click the Slideshow pop-up menu and choose New Slideshow.
Type a slideshow name in the Slideshow Name field, then click OK.
To reorder photos, drag photos into the order you want them in the bottom of the window.
You can change the theme at any time. The theme you choose determines text position, fonts, and the transitions that appear between slides.
Choose Theme Songs from the pop-up menu to see music included with Photos, or choose Music to see music from your Music library. Drag the songs you selected to change the order they play in. To delete a song, select it and press Delete.
Set the slideshow to match the length of the selected music: Select Fit to Music.
Set a specific display time for the slideshow: Select Custom, then drag the slider to specify how long the slideshow should play.
Set a transition for the entire slideshow: Select the Transition checkbox, then choose a transition type from the pop-up menu.
Set slides to fit the screen: Select the “Scale photos to fit screen” checkbox.
To see a preview of the slideshow, click the Preview button.
To stop playing a slideshow, press the Escape key. Press the arrow keys to skip forward or back through the slides, and press the Space bar to pause the slideshow.
Note: Slideshows appear in the My Projects folder in the sidebar. If you use iCloud Shared Photo Library , you must choose Both Libraries from the Library pop-up menu in the toolbar to see projects you’ve created.
To share a slideshow, see Export photos, videos, and slideshows .
Add or remove photos and text in a slideshow project
Note: If you use iCloud Shared Photo Library , you must choose Both Libraries from the Library pop-up menu in the toolbar to see projects you’ve created.
Do any of the following:
Delete text from a photo: Select the text in the photo or select the T frame before the photo in the row of thumbnails, then press Delete.
Delete a photo from the slideshow: Select the photo you want to delete, then press Delete.
Introducing Copilot+ PCs
May 20, 2024 | Yusuf Mehdi - Executive Vice President, Consumer Chief Marketing Officer
- Share on Facebook (opens new window)
- Share on Twitter (opens new window)
- Share on LinkedIn (opens new window)

An on-demand recording of our May 20 event is available .
Today, at a special event on our new Microsoft campus, we introduced the world to a new category of Windows PCs designed for AI, Copilot+ PCs.
Copilot+ PCs are the fastest, most intelligent Windows PCs ever built. With powerful new silicon capable of an incredible 40+ TOPS (trillion operations per second), all – day battery life and access to the most advanced AI models, Copilot+ PCs will enable you to do things you can’t on any other PC. Easily find and remember what you have seen in your PC with Recall, generate and refine AI images in near real-time directly on the device using Cocreator, and bridge language barriers with Live Captions, translating audio from 40+ languages into English .
These experiences come to life on a set of thin, light and beautiful devices from Microsoft Surface and our OEM partners Acer, ASUS, Dell, HP, Lenovo and Samsung, with pre-orders beginning today and availability starting on June 18. Starting at $999, Copilot+ PCs offer incredible value.
This first wave of Copilot+ PCs is just the beginning. Over the past year, we have seen an incredible pace of innovation of AI in the cloud with Copilot allowing us to do things that we never dreamed possible. Now, we begin a new chapter with AI innovation on the device. We have completely reimagined the entirety of the PC – from silicon to the operating system, the application layer to the cloud – with AI at the center, marking the most significant change to the Windows platform in decades.
YouTube Video
The fastest, most secure Windows PCs ever built
We introduced an all-new system architecture to bring the power of the CPU, GPU, and now a new high performance Neural Processing Unit (NPU) together. Connected to and enhanced by the large language models (LLMs) running in our Azure Cloud in concert with small language models (SLMs), Copilot+ PCs can now achieve a level of performance never seen before. They are up to 20x more powerful [1] and up to 100x as efficient [2] for running AI workloads and deliver industry-leading AI acceleration. They outperform Apple’s MacBook Air 15” by up to 58% in sustained multithreaded performance [3] , all while delivering all-day battery life. With incredible efficiency, Copilot+ PCs can deliver up to 22 hours of local video playback or 15 hours of web browsing on a single charge. [4] That is up to 20% more battery in local video playback than the MacBook Air 15”. [5]
Windows now has the best implementation of apps on the fastest chip, starting with Qualcomm. We now offer more native Arm64 experiences than ever before, including our fastest implementation of Microsoft 365 apps like Teams, PowerPoint, Outlook, Word, Excel, OneDrive and OneNote. Chrome, Spotify, Zoom, WhatsApp, Adobe Photoshop, Adobe Lightroom, Blender, Affinity Suite, DaVinci Resolve and many more now run natively on Arm to give you great performance with additional apps, like Slack, releasing later this year. In fact, 87% of the total app minutes people spend in apps today have native Arm versions. [6] With a powerful new emulator, Prism, your apps run great, whether native or emulated.
Every Copilot+ PC comes secured out of the box. The Microsoft Pluton Security processor will be enabled by default on all Copilot+ PCs and we have introduced a number of new features, updates and defaults to Windows 11 that make it easy for users to stay secure. And, we’ve built in personalized privacy controls to help you protect what’s important to you. You can read more about how we are making Windows more secure here .
Entirely new, powerful AI experiences
Copilot+ PCs leverage powerful processors and multiple state-of-the-art AI models, including several of Microsoft’s world-class SLMs, to unlock a new set of experiences you can run locally, directly on the device. This removes previous limitations on things like latency, cost and even privacy to help you be more productive, creative and communicate more effectively.
Recall instantly
We set out to solve one of the most frustrating problems we encounter daily – finding something we know we have seen before on our PC. Today, we must remember what file folder it was stored in, what website it was on, or scroll through hundreds of emails trying to find it.
Now with Recall, you can access virtually what you have seen or done on your PC in a way that feels like having photographic memory. Copilot+ PCs organize information like we do – based on relationships and associations unique to each of our individual experiences. This helps you remember things you may have forgotten so you can find what you’re looking for quickly and intuitively by simply using the cues you remember. [7]
You can scroll across time to find the content you need in your timeline across any application, website, document, or more. Interact intuitively using snapshots with screenray to help you take the next step using suggested actions based on object recognition. And get back to where you were, whether to a specific email in Outlook or the right chat in Teams.
Recall leverages your personal semantic index, built and stored entirely on your device. Your snapshots are yours; they stay locally on your PC. You can delete individual snapshots, adjust and delete ranges of time in Settings, or pause at any point right from the icon in the System Tray on your Taskbar. You can also filter apps and websites from ever being saved. You are always in control with privacy you can trust.
Cocreate with AI-powered image creation and editing, built into Windows
Since the launch of Image Creator, almost 10 billion images have been generated, helping more people bring their ideas to life easily by using natural language to describe what they want to create. Yet, today’s cloud offerings may limit the number of images you can create, keep you waiting while the artwork processes or even present privacy concerns. By using the Neural Processing Units (NPUs) and powerful local small language models, we are bringing innovative new experiences to your favorite creative applications like Paint and Photos.
Combine your ink strokes with text prompts to generate new images in nearly real time with Cocreator. As you iterate, so does the artwork, helping you more easily refine, edit and evolve your ideas. Powerful diffusion-based algorithms optimize for the highest quality output over minimum steps to make it feel like you are creating alongside AI. Use the creativity slider to choose from a range of artwork from more literal to more expressive. Once you select your artwork, you can continue iterating on top of it, helping you express your ideas, regardless of your creative skills.

Take photo editing and image creation to the next level. With Restyle Image, you can reimagine your personal photos with a new style combining image generation and photo editing in Photos. Use a pre-set style like Cyberpunk or Claymation to change the background, foreground or full picture to create an entirely new image. Or jumpstart your next creative project and get visual inspiration with Image Creator in Photos. On Copilot+ PCs you can generate endless images for free, fast, with the ability to fine tune images to your liking and to save your favorites to collections.
Innovative AI experiences from the creative apps you love
We are also partnering with some of the biggest and most-loved applications on the planet to leverage the power of the NPU to deliver new innovative AI experiences.
Together with Adobe, we are thrilled to announce Adobe’s flagship apps are coming to Copilot+ PCs, including Photoshop, Lightroom and Express – available today. Illustrator, Premiere Pro and more are coming this summer. And we’re continuing to partner to optimize AI in these apps for the NPU. For Adobe Creative Cloud customers, they will benefit from the full performance advantages of Copilot+ PCs to express their creativity faster than ever before.

DaVinci Resolve Studio
Effortlessly apply visual effects to objects and people using NPU-accelerated Magic Mask in DaVinci Resolve Studio.

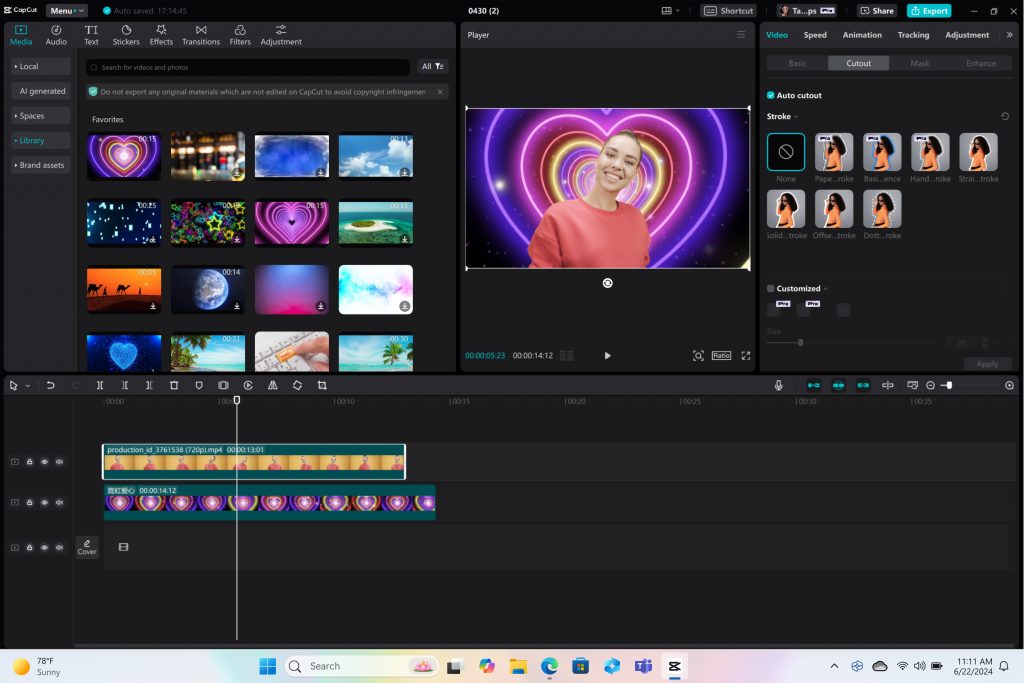
Remove the background from any video clip in a snap using Auto Cutout running on the NPU in CapCut.
Stay in your flow with faster, more responsive adaptive input controls, like head movement or facial expressions via the new NPU-powered camera pipeline in Cephable.

LiquidText
Make quicker and smarter annotations to documents, using AI features that run entirely on-device via NPU, so data stays private in LiquidText.

Have fun breaking down and remixing any music track, with a new, higher-quality version of NeuralMix™ that’s exclusive to NPU in Algoriddim’s djay Pro.

Connect and communicate effortlessly with live captions
In an increasingly connected and global world, Windows wants to bring people closer together. Whether catching up on your favorite podcast from a different country, or watching your favorite international sports team, or even collaborating with friends and colleagues across the world, we want to make more content accessible to more people.
Live Captions now has live translations and will turn any audio that passes through your PC into a single, English-language caption experience, in real time on your screen across all your apps consistently. You can translate any live or pre-recorded audio in any app or video platform from over 40 languages into English subtitles instantly, automatically and even while you’re offline. Powered by the NPU and available across all Copilot+ PCs, now you can have confidence your words are understood as intended.
New and enhanced Windows Studio Effects
Look and sound your best automatically with easily accessible controls at your fingertips in Quick Settings. Portrait light automatically adjusts the image to improve your perceived illumination in a dark environment or brighten the foreground pixels when in a low-light environment. Three new creative filters (illustrated, animated or watercolor) add an artistic flare. Eye contact teleprompter helps you maintain eye contact while reading your screen. New improvements to voice focus and portrait blur help ensure you’re always in focus.
Copilot, your everyday AI companion

Every Copilot+ PC comes with your personal powerful AI agent that is just a single tap away on keyboards with the new Copilot key. [8] Copilot will now have the full application experience customers have been asking for in a streamlined, simple yet powerful and personal design. Copilot puts the most advanced AI models at your fingertips. In the coming weeks, get access to the latest models including GPT-4o from our partners at OpenAI, so you can have voice conversations that feel more natural.
Advancing AI responsibly
At Microsoft, we have a company-wide commitment to develop ethical, safe and secure AI. Our responsible AI principles guided the development of these new experiences, and all AI features are aligned with our standards. Learn more here .
New Copilot+ PCs from Microsoft Surface and our partners
We have worked with each of the top OEMs — Acer, ASUS, Dell, HP, Lenovo, Samsung — and of course Surface, to bring exciting new Copilot+ PCs that will begin to launch on June 18. Starting at $999, these devices are up to $200 less than similar spec’d devices [9] .
Surface plays a key role in the Windows ecosystem, as we design software and hardware together to deliver innovative designs and meaningful experiences to our customers and fans. We are introducing the first-ever Copilot+ PCs from Surface: The all-new Surface Pro and Surface Laptop.

The new Surface Laptop is a powerhouse in an updated, modern laptop design with razor-thin bezels, a brilliant touchscreen display, AI-enhanced camera, premium audio, and now with a haptic touchpad.
Choose between a 13.8” and 15” display and four stunning colors. Enjoy up to 22 hours of local video playback on Surface Laptop 15” or up to 20 hours on Surface Laptop13.8” on top of incredible performance and all-new AI experiences.
The new Surface Pro is the most flexible 2-in-1 laptop, now reimagined with more speed and battery life to power all-new AI experiences. It introduces a new, optional OLED with HDR display, and ultrawide field of view camera perfect for Windows Studio Effects. The new Surface Pro Flex Keyboard is the first 2-in-1 keyboard designed to be used both attached or detached. It delivers enhanced stability, with Surface Slim Pen storage and charging integrated seamlessly, as well as a quiet, haptic touchpad. Learn more here.
New Copilot+ PCs from the biggest brands available starting June 18:
- Acer : Acer’s Swift 14 AI 2.5K touchscreen enables you to draw and edit your vision with greater accuracy and with color-accurate imagery. Launch and discover AI-enhanced features, like Acer PurifiedVoice 2.0 and Purified View, with a touch of the dedicated AcerSense button.
- ASUS : The ASUS Vivobook S 15 is a powerful device that brings AI experiences to life with its Snapdragon X Elite Platform and built-in Qualcomm® AI. It boasts 40+ NPU TOPS, a dual-fan cooling system, and up to 1 TB of storage. Next-gen AI enhancements include Windows Studio effects v2 and ASUS AiSense camera, with presence-detection capabilities for Adaptive Dimming and Lock. Built for portability, it has an ultra-slim and light all-metal design, a high-capacity battery, and premium styling with a single-zone RGB backlit keyboard.
- Dell : Dell is launching five new Copilot+ PCs, including the XPS 13, Inspiron 14 Plus, Inspiron 14, Latitude 7455, and Latitude 5455, offering a range of consumer and commercial options that deliver groundbreaking battery life and unique AI experiences. The XPS 13 is powered by Snapdragon X Elite processors and features a premium, futuristic design, while the Latitude 7455 boasts a stunning QHD+ display and quad speakers with AI noise reduction. The Inspiron14 and Inspiron 14 Plus feature a Snapdragon X Plus 1and are crafted with lightweight, low carbon aluminum and are energy efficient with EPEAT Gold rating.
- HP : HP’s OmniBook X AI PC and HP EliteBook Ultra G1q AI PC with Snapdragon X Elite are slim and sleek designs, delivering advanced performance and mobility for a more personalized computing experience. Features include long-lasting battery life and AI-powered productivity tools, such as real-time transcription and meeting summaries. A 5MP camera with automatic framing and eye focus is supported by Poly Studio’s crystal-clear audio for enhanced virtual interactions.
- Lenovo : Lenovo is launching two AI PCs: one built for consumers, Yoga Slim 7x, and one for commercial, ThinkPad T14s Gen 6. The Yoga Slim 7x brings efficiency for creatives, featuring a 14.5” touchscreen with 3K Dolby Vision and optimized power for 3D rendering and video editing. The T14s Gen 6 brings enterprise-level experiences and AI performance to your work tasks, with features including a webcam privacy shutter, Wi-Fi 7 connectivity and up to 64GB RAM.
- Samsung : Samsung’s new Galaxy Book4 Edge is ultra-thin and light, with a 3K resolution 2x AMOLED display and Wi-Fi 7 connectivity. It has a long-lasting battery that provides up to 22 hours of video playback, making it perfect for work or entertainment on the go.
Learn more about new Copilot+ PCs and pre-order today at Microsoft.com and from major PC manufacturers, as well as other leading global retailers.
Start testing for commercial deployment today
Copilot+ PCs offer businesses the most performant Windows 11 devices with unique AI capabilities to unlock productivity, improve collaboration and drive efficiency. As a Windows PC, businesses can deploy and manage a Copilot+ PC with the same tools and processes used today including IT controls for new features and AppAssure support. We recommend IT admins begin testing and readying for deployment to start empowering your workforce with access to powerful AI features on these high-performance devices. You can read more about our commercial experiences here .

AI innovation across the Windows ecosystem
Like we’ve always done with Windows, we have built a platform for our ecosystem partners to build on.
The first Copilot+ PCs will launch with both the Snapdragon® X Elite and Snapdragon® X Plus processors and feature leading performance per watt thanks to the custom Qualcomm Oryon™ CPU, which delivers unrivaled performance and battery efficiency. Snapdragon X Series delivers 45 NPU TOPS all-in-one system on a chip (SoC). The premium integrated Qualcomm® Adreno ™ GPU delivers stunning graphics for immersive entertainment. We look forward to expanding through deep partnerships with Intel and AMD, starting with Lunar Lake and Strix Point. We will bring new Copilot+ PC experiences at a later date. In the future we expect to see devices with this silicon paired with powerful graphics cards like NVIDIA GeForce RTX and AMD Radeon™, bringing Copilot+ PC experiences to reach even broader audiences like advanced gamers and creators.
We are at an inflection point where the PC will accelerate AI innovation. We believe the richest AI experiences will only be possible when the cloud and device work together in concert. Together with our partners, we’re setting the frame for the next decade of Windows innovation.
[1] Based on snapshot of aggregated, non-gaming app usage data as of April 2024 for iGPU-based laptops and 2-in-1 devices running Windows 10 and Windows 11 in US, UK, CA, FR, AU, DE, JP.
[2] Tested April 2024 using Phi SLM workload running 512-token prompt processing in a loop with default settings comparing pre-release Copilot+ PC builds with Snapdragon Elite X 12 Core and Snapdragon X Plus 10 core configurations (QNN build) to Windows 11 PC with NVIDIA 4080 GPU configuration (CUDA build).
[3] Tested May 2024 using Cinebench 2024 Multi-Core benchmark comparing Copilot+ PCs with Snapdragon X Elite 12 core and Snapdragon X Plus 10 core configurations to MacBook Air 15” with M3 8 core CPU / 10 Core GPU configuration. Performance will vary significantly between device configuration and usage.
[4] *Battery life varies significantly by device and with settings, usage and other factors. See aka.ms/cpclaims*
[5] *Battery life varies significantly based on device configuration, usage, network and feature configuration, signal strength, settings and other factors. Testing conducted May 2024 using the prelease Windows ADK full screen local video playback assessment under standard testing conditions, with the device connected to Wi-Fi and screen brightness set to 150 nits, comparing Copilot+ PCs with Snapdragon X Elite 12 core and Snapdragon X Plus 10 core configurations running Windows Version 26097.5003 (24H2) to MacBook Air 15” M3 8-Core CPU/ 10 Core GPU running macOS 14.4 with similar device configurations and testing scenario.
[6] Based on snapshot of aggregated, non-gaming app usage data as of April 2024 for iGPU-based laptops and 2-in-1 devices running Windows 10 and Windows 11 in US, UK, CA, FR, AU, DE, JP.
[7] Recall is optimized for select languages (English, Chinese (simplified), French, German, Japanese, and Spanish.) Content-based and storage limitations apply. Learn more here .
[8] Copilot key functionality may vary. See aka.ms/keysupport
[9] Based on MSRPs; actual savings may vary
Tags: AI , Copilot+ PC
- Check us out on RSS

How to Zoom In and Out on a Mac: 4 Methods
Quick links, zoom in or out on your mac using keyboard shortcuts, zoom in and out in various apps on macos, zoom in and out using trackpad gestures on a mac, use your mac's built-in magnifier to zoom in.
Having difficulties viewing what's on your Mac? Zooming in will make everything a bit easier for you to see. macOS has several built-in methods to help you zoom in and out on your content. Let's look at them below.
The easiest way to zoom in and out is to use a keyboard shortcut on your Mac . There are three main keyboard shortcuts that will trigger the zoom feature in the vast majority of Mac apps:
- Cmd + Plus (+): Zoom in on your Mac.
- Cmd + Minus (-): Zoom out on your Mac.
- Cmd + Zero (0): Return to the default zoom level.
If you don't like using keyboard shortcuts, you can still access these common zoom options from the menu bar. Once you have the relevant app open, click the View tab and choose from Zoom In , Zoom Out , or Actual Size , depending on your needs.
Many built-in and third-party apps for macOS also have their own zoom features. You can use these options instead of the generic keyboard shortcuts mentioned earlier. Here are some examples of how to use the zoom feature in various popular apps for Mac:
- Safari: Go to Safari > Settings > Websites > Page Zoom from the menu bard. From the When visiting other websites dropdown menu, select your preferred zoom percentage.
- Google Chrome: Click the three-dot menu at the top-right corner and select the Plus ( +) or Minus (-) icons from the Zoom option.
- Preview: Click the plus (+) or minus (-) magnifier icon to zoom in and out on an image you opened.
- Photos: Press Z on your keyboard to zoom in or out on your photo by 100 percent, or use the zoom slider at the top to zoom in to a maximum of 400 percent.
There's also a way to zoom in and out using your Mac's trackpad gestures . You'll like this method if you're used to using the trackpad for all your tasks.
Click the Apple logo in the menu bar and go to System Settings > Trackpad . Select the Scroll & Zoom tab and ensure that Zoom in or out and Smart zoom are toggled on. This way, you can pinch or double-tap with two fingers on the trackpad to zoom in and out on your Mac.
In most cases, the general keyboard shortcuts and trackpad gestures mentioned above should be sufficient. However, you can't use them to zoom in on, say, the macOS menu bar or your Google Chrome tabs. If you need to zoom in on these parts of the macOS user interface, you can enable the built-in magnifier on your Mac.
Head to System Settings > Accessibility > Zoom and toggle on Use scroll gesture with modifier keys to zoom . For the Modifier key for scroll gesture option, choose Control from the dropdown menu. For Zoom style , choose Picture-in-Picture .
Now, to zoom in, press and hold the Control button on your keyboard. At the same time, use two fingers to swipe upwards on your trackpad for the magnifier window to appear. Swiping upwards multiple times will increase the zoom level.
To zoom out and exit the magnifier, swipe downwards with two fingers until the zoom level returns to default. The magnifier window will then disappear on its own.
You can customize this zoom setting in several ways. For instance, you can choose Full Screen or Split Screen to change how the zoomed-in parts of your Mac screen will appear. Instead of a small magnifier window, Split Screen will use a quarter of your Mac screen to display the zoomed section.
As another example, if you don't like swiping on your trackpad and using the modifier key to zoom, you can opt to enable Use Keyboard shortcuts to zoom . When this setting is enabled, you'll have three additional keyboard shortcuts that you can use to zoom in and out on your Mac:
- Option + Cmd + 8: Press this once to activate zoom. Press it again to deactivate.
- Option + Cmd + Equals(=): Press these keys to zoom in on your screen.
- Option + Cmd + Minus(-): Press these buttons to zoom out from your screen.
Overall, if you want to zoom in or out on your Mac, the easiest way is to use the three main keyboard shortcuts or the zoom options in the View tab. Popular apps such as Photos and Google Chrome also have their own zoom buttons that you can use.
If the generic options are not what you're looking for, there's still a built-in magnifier available. It's one of your Mac's Accessibility features for people with visual impairments . This function will allow you to zoom in anywhere on the user interface.

COMMENTS
To play the presentation, click in the toolbar, then press the arrow keys to advance through the slides. To end the presentation, press the Esc (Escape) key. For more ways to show a presentation, see Play a presentation on your Mac. To close the presentation, click the red close button in the top-left corner of the window.
Short Answer. Making a PowerPoint on a Mac is easy. First, open up the Pages application on your Mac. Then, select the File menu and choose New from Template. From there, you can select a PowerPoint template and customize it to fit your needs. When you are finished, you can save your presentation and share it with others.
Step 2: Open PowerPoint. Open PowerPoint and choose a template or open a blank presentation. PowerPoint offers a variety of templates to suit different presentation styles. If you choose to start with a blank slate, you'll have complete creative freedom.
Here are four steps you can take to learn how to use Keynote to make a presentation. 1. Explore the Keynote App Interface. If you're switching to the Keynote app from another piece of presentation software, my favorite tip is to spend time familiarizing yourself with the interface.
Learn the basics of using Apple's great presentation software, Keynote! Apple Keynote empowers you to create stunning presentations with dramatic transition...
It's built into Mac computers, making it a great choice for Mac users. Also, Keynote files can easily be converted to Microsoft's PowerPoint if necessary. How to Use Keynote to Make Powerful Presentations. One of the best ways to create a powerful presentation with Keynote is to download and use a template.
Keynote for Mac, iOS, and iCloud lets you make dazzling presentations. Anyone can collaborate — even on a PC. And it's compatible with Apple Pencil. Products, services, and OS functions ... Add drama to your presentation with more than 30 cinematic transitions and effects. Make your words pop by adding textures, color gradients, and even ...
Make your presentation stand out by adding stunning color and visual interest to your slides. Create motion on a title or closing slide for a bold statement, and keep viewers engaged with subtle movement throughout the presentation. ... Pages for Mac, Numbers for Mac, and Keynote for Mac are available on the Mac App Store. macOS 12 or later ...
How to create a keynote presentationStep 1 : To open Keynote, click the Keynote icon in the Dock, Launchpad or the Applications folder.If the theme chooser (...
Zoho Show is a presentation software that brings together distributed teams that loves to collaborate on their project. It allows you to create, edit, and share professional slides online for free on both Mac and Windows OS. You'll get so many templates to cover all your professional necessities.
4. Prezi. Prezi Classic Desktop for Mac can be a good Mac presentation software alternative. Or, choose Prezi Next, which includes analytic tools to help you measure your presentation's reach. Download the Prezi mobile app to take your presentation with you on your iPad or other mobile device.
Whether you need to show off your school project, business plan, or family vacation photos, PowerPoint is your go-to app for presentations. Kickstart your creativity. • Achieve more and enhance your documents with access to a growing catalog of premium templates for Word, Excel, and PowerPoint. • Advanced formatting and layout options ...
Record a presentation. Open the presentation, then click to select the first slide in the slide navigator. Choose Play > Record Slideshow (from the Play menu at the top of your screen). The presenter display appears with recording controls visible at the bottom of your screen. To customise the presenter display before you start recording, move ...
How to Make a PowerPoint Presentation on a Mac. Part of the series: Using Apple Computers. Making a PowerPoint presentation on a Mac computer can be done usi...
Apply or change slide layouts. Customize a slide master. Change the page orientation of your PowerPoint presentation. Create and use your own presentation template. Create your own theme in PowerPoint. Learn about SmartArt graphics. Compress the picture size. Crop a picture. Add a transparent picture (watermark) to your slides.
Present slideshows with confidence. With easy-to-use presenter view, speaker notes, and live captions, Slides makes presenting your ideas a breeze. You can even present to Google Meet video calls ...
Learn how to create beautiful, memorable presentations using Keynote on Mac and iPad. We'll explore Apple-designed templates and introduce you to the app's powerful features. Make your ideas stand out with live video, animation, and more. We'll also share tips for real-time collaboration and presenting effectively.
Step 2. Choose the Theme of the Presentation. Scroll to navigate in the theme chooser and choose the type of presentation you want to make then double click on it to open. Step 3. Change the Layout. To change to a different layout, you can click on the "Layout" button, and then select your desired layout. Step 4.
The Best Slideshow Creation Apps. The slideshow format is the classic presentation option, and the best two apps in this category are Microsoft PowerPoint and Apple Keynote, which is a part of the ...
1. Visme. Let's start with the best app for presentations you can use to design your presentation. Visme is a cloud-based graphic design software that allows designers and non-designers alike to create beautiful and professional presentations, infographics, social media graphics and more.
How to create a powerpoint on Apple products of iMac or MacBook or MacBookAir
Design and Animation Tools. One of the standout features of the Mac version of PowerPoint is the range of design and animation tools available. With a variety of themes and templates to choose from, you can easily create a professional-looking presentation that fits your specific needs. Additionally, the software offers a range of advanced ...
Press Command-F2 on the keyboard of the iMac. You should now see the desktop of the other Mac. To exit target display mode, press Command-F2 again. Or disconnect the cable, or restart either Mac ...
Create a slideshow project. In the Photos app on your Mac, select the photos you want in your slideshow. Choose File > Create > Slideshow > Photos. Click the Slideshow pop-up menu and choose New Slideshow. Type a slideshow name in the Slideshow Name field, then click OK. To reorder photos, drag photos into the order you want them in the bottom ...
New Copilot+ PCs from Microsoft Surface and our partners. We have worked with each of the top OEMs — Acer, ASUS, Dell, HP, Lenovo, Samsung — and of course Surface, to bring exciting new Copilot+ PCs that will begin to launch on June 18. Starting at $999, these devices are up to $200 less than similar spec'd devices [9].
We are beginning to roll out GPT-4o to ChatGPT Plus and Team users, with availability for Enterprise users coming soon. We are also starting to roll out to ChatGPT Free with usage limits today. Plus users will have a message limit that is up to 5x greater than free users, and Team and Enterprise users will have even higher limits.
Use Keyboard shortcuts to zoom. When this setting is enabled, you'll have three additional keyboard shortcuts that you can use to zoom in and out on your Mac: Option + Cmd + 8: Press this once to ...