How to Put YouTube Videos in PowerPoint: A Step-by-Step Guide
Want to make your PowerPoint presentation a bit more engaging with a cool YouTube video? It’s actually pretty simple to do. By following a few easy steps, you can embed a YouTube video directly into your PowerPoint slide. This way, you won’t have to switch between applications during your presentation – it’ll all be right there in your slide show!

Step by Step Tutorial on How to Put YouTube Videos in PowerPoint
Before we dive into the steps, know that adding a YouTube video to your PowerPoint will enhance your presentation and keep your audience interested. No more boring bullet points, just a captivating video to emphasize your point!
Step 1: Find the YouTube video you want to embed
Locate the YouTube video that you want to add to your PowerPoint presentation.
Finding the right YouTube video is the first step. Make sure it’s relevant to your presentation’s content and will add value for your audience. Once you’ve found it, copy the URL from the address bar.
Step 2: Open your PowerPoint presentation
Open the PowerPoint presentation where you want to insert the YouTube video.
Make sure you’re on the slide where you want the video to appear before you move on to the next step. This will save you the hassle of moving it later on.
Step 3: Click on the ‘Insert’ tab
In PowerPoint, go to the ‘Insert’ tab on the menu bar.
The ‘Insert’ tab is where all the magic happens – from adding pictures and shapes to videos, it’s your go-to for jazzing up your slides.
Step 4: Select ‘Video’ and then ‘Online Video’
Within the ‘Insert’ tab, click on ‘Video’ and then select ‘Online Video’.
By selecting ‘Online Video’, you’re telling PowerPoint that you’re looking to add a video from the web, not one that’s saved on your computer.
Step 5: Paste the YouTube video URL
In the dialog box that appears, paste the YouTube video URL that you copied earlier.
After you paste the URL, PowerPoint will do a quick check to make sure it’s a valid link. If all is well, you’ll be able to move on to the next step.
Step 6: Resize and position the video on your slide
Once the video is embedded, you can resize and position it on your slide to fit your design.
Click and drag the corners of the video to resize it, and click and drag the video itself to move it around the slide. You can also use the format options to add effects like borders or shadows.
After you complete these steps, you’ll have a YouTube video embedded directly into your PowerPoint slide. No more awkward pauses while you exit the presentation to open up a browser. Your video will play seamlessly within your slide when you’re presenting, making for a smooth and professional presentation.
Tips for Putting YouTube Videos in PowerPoint
- Make sure you have a stable internet connection during your presentation, as the video will need to buffer.
- Test the video before your presentation to ensure it plays correctly.
- Keep the video short and to the point – you don’t want to lose your audience’s attention.
- Consider the volume of the video – ensure it’s audible for your audience but not overwhelming.
- If the video is long, use the ‘Trim Video’ feature in PowerPoint to show only the relevant part.
Frequently Asked Questions
Can i put a youtube video in powerpoint if i don’t have an internet connection.
No, you need an internet connection to play a YouTube video in PowerPoint as it streams directly from the website.
Will the video play automatically when I get to that slide?
You can set the video to play automatically or when clicked – it’s up to you. You’ll find these options in the ‘Playback’ tab once the video is inserted.
Can I put a YouTube video in any version of PowerPoint?
You can embed YouTube videos in PowerPoint 2010 and later versions. Earlier versions do not support this feature.
What if the YouTube video is removed or the link changes?
If the YouTube video is removed or the link changes after you have embedded it, the video will not play in your PowerPoint. Always check the video link before presenting.
Can I embed a video that is not from YouTube?
Yes, as long as it’s an online video, you can embed it by following the same steps and using the video’s direct link.
- Find the YouTube video you want to embed.
- Open your PowerPoint presentation.
- Click on the ‘Insert’ tab.
- Select ‘Video’ and then ‘Online Video’.
- Paste the YouTube video URL.
- Resize and position the video on your slide.
There you have it – putting YouTube videos in PowerPoint is a piece of cake! With this handy skill, you can now make your presentations more dynamic and engaging for your audience. Just remember to choose videos that complement your content and resonate with your listeners. And don’t forget to test everything beforehand to ensure a smooth-running presentation. Happy presenting, and may your slides be ever compelling!

Matthew Burleigh has been writing tech tutorials since 2008. His writing has appeared on dozens of different websites and been read over 50 million times.
After receiving his Bachelor’s and Master’s degrees in Computer Science he spent several years working in IT management for small businesses. However, he now works full time writing content online and creating websites.
His main writing topics include iPhones, Microsoft Office, Google Apps, Android, and Photoshop, but he has also written about many other tech topics as well.
Read his full bio here.
Share this:
Join our free newsletter.
Featured guides and deals
You may opt out at any time. Read our Privacy Policy
Related posts:
- How to Put Embedded Youtube Video in Powerpoint 2010
- How to Set Time for Slides in Powerpoint
- How to Add Page Numbers in Powerpoint 2010
- How to Save Powerpoint as PDF with Notes
- How to Loop a Slideshow on Powerpoint 2013
- How to Delete a Slide in Powerpoint 2010
- How to Unhide a Slide in Powerpoint 2013
- How to End Powerpoint on Last Slide in Powerpoint 2010
- How to Make a Powerpoint Slide Vertical in Powerpoint 2013
- How to Hide a Slide in Powerpoint 2010
- Can You Save a Powerpoint as a Video in Powerpoint 2013?
- How to Embed a YouTube Video in Powerpoint 2013
- How to Create a PowerPoint Presentation Step by Step: 2024 Guide
- How to Embed a Video in PowerPoint: The 2024 Guide
- How to Rotate a Slide in PowerPoint: A Step-by-Step Guide
- How to Insert Slide Number PowerPoint: The Ultimate 2024 Guide
- How to Add a YouTube Video in Powerpoint Online
- How to Change Hyperlink Color in Powerpoint 2010 (An Easy 5 Step Guide)
- How to Copy a PDF File Into PowerPoint: A Step-by-Step Guide
- How to Embed a Word Document Into PowerPoint 2000: A Step-by-Step Guide

- Certifications

Inserting YouTube Videos into PowerPoint: A Step-by-Step Guide
- December 27, 2022
As you know, YouTube is one of the most popular video sites in the world. Millions of people watch videos on YouTube every day. And with so many people watching videos on YouTube, it’s no surprise that now you can also easily insert a YouTube video into PowerPoint presentations. By incorporating YouTube into your presentations , you can give your audience something new and exciting to look at while they listen to what you have to say.
Videos are also great for illustrating key points and providing visual examples. So how can you incorporate a YouTube video in your PowerPoint presentation? Let’s take a look…
Create a new presentation in PowerPoint
Before you start editing your PowerPoint presentation to include a YouTube video, make sure you have a new presentation created.
You can create a new presentation from within PowerPoint by going to File > New > Presentation, or you can create a new presentation by using the charting tool. If you are using the charting tool to create a new presentation, ensure you select Standard chart type. You should also ensure that the charting tool is set to Excel data. Now that you have a new presentation created, you are ready to add a YouTube video.
Add a YouTube video to your presentation
To add a YouTube video to your PowerPoint presentation , you will first have to find the video you want to include. You can easily find the right video by using the YouTube search bar and entering the name of the video you are looking for.
For example, to find the best videos for learning about taxes, you would enter tax videos in the YouTube search bar. Once you find the video you want to include in your PowerPoint presentation, simply drag and drop it into your presentation. You can also copy and paste the video link into your presentation.
Next, you will have to add the YouTube video to the presentation. To do this, select the presentation’s tab on the left and then click on the down arrow located next to the Start button. You will now see the Library button appear. Click on the Library button and then select the Media button. You will now see all your PowerPoint presentations in the Media library.
Select the presentation you want to add the video in and click on the arrow located next to the Library button. Now click on the arrow located next to the Media button and select the Media button. You will now see all the videos in your PowerPoint presentations , select your video and click on the arrow located next to the Insert button. You will now see a dropdown menu, select PowerPoint.
Choose which YouTube video to include
With a YouTube video inserted into your PowerPoint presentation, it is time to choose which video to include. There are many ways you can choose which YouTube video you will include in your PowerPoint presentation, such as: – Pick the best video from the list of available videos. – Pick a video that matches the topic of your presentation, such as a video that relates to your presentation’s main topic. – Pick a video that is relevant to your audience, such as a video that is related to your target audience.
For example, if you have a presentation on marketing, you can choose a video on marketing that will interest your audience. Or, if you are planning a presentation on health and wellness and choose a video on travel, you might be missing out on the big picture. You can also choose a video about a specific topic, such as taxes. This way, your PowerPoint presentation becomes more relevant to your audience.
Change the appearance of your video
With your YouTube video in your PowerPoint presentation, you can change the appearance of your video. Changing the appearance of your YouTube video will help you to personalize your YouTube video and make it more relevant to your audience. You can change the appearance of your YouTube video by going to the YouTube video you added to your PowerPoint presentation and then going to the Video Settings menu.
With the YouTube video in the YouTube video settings menu, you can change the appearance of your video, such as the size, colour, and transparency. You can also change your video’s title and description so that your audience knows more about the video.
Combine HTML and JavaScript
If you have a PowerPoint presentation that you created with a YouTube video and you want to make the experience even more engaging, you can add HTML and JavaScript to your PowerPoint presentation. With HTML and JavaScript, you can make your video more engaging and interactive.
You can add HTML and JavaScript to the YouTube video you added to your PowerPoint presentation by going to the YouTube video settings menu, and then doing the following: – Click on the Advanced Option. – Now select the Enable HTML5 Video and JavaScript options.
Add a YouTube Player Button
If you want your PowerPoint presentation to feel more engaging and interactive, you can add a YouTube player button to your PowerPoint presentation. With a YouTube player button, your PowerPoint presentation will feel more engaging and interactive. You can add a YouTube player button to your PowerPoint presentation by going to the YouTube settings menu, and then selecting the Add a YouTube player button option.
With a YouTube player button, your PowerPoint presentation will feel more engaging and interactive. With a YouTube player button, the video play button will turn into a full-screen button, so your audience will have to click on it to exit full-screen mode. Now that your PowerPoint presentation is more engaging and interactive, you can now engage your audience with your video.
How to Customize the YouTube Video in PowerPoint?
With your YouTube video in your PowerPoint presentation, you can customize the video in a number of different ways. By customizing your video you can change the play button color, change the color of the play button, and change the way the video plays. To customize the video in your PowerPoint presentation , go to your YouTube video settings menu, and then do the following: – Click on the Customize button. – Select the color, size, and placement options for your play button. – Click Save and then click Close.
Bottom line
With a YouTube video added to your PowerPoint presentation, you can now easily communicate your message to your audience and help them learn new things. You can also add a YouTube video to your PowerPoint presentation to create a more engaging experience for your audience and make your presentation more engaging and interactive.
Now that you know how to incorporate a YouTube video into your PowerPoint presentation, you can easily use it to help educate your audience while they are listening to what you have to say.
Share This Post:
3 thoughts on “inserting youtube videos into powerpoint: a step-by-step guide”.
Wow, amazing blog layout! How long have you ever been blogging for? you made running a blog glance easy. The total glance of your site is magnificent, let alone the content! You can see similar here ecommerce
Wow, awesome weblog layout! How long have you been blogging for? you made running a blog glance easy. The overall glance of your web site is great, as neatly as the content! You can see similar here e-commerce
Very informative article.Really looking forward to read more. Really Cool.
Add a Comment Cancel reply
Save my name, email, and website in this browser for the next time I comment.
Get A 5X Raise In Salary
Reset Password
Insert/edit link.
Enter the destination URL
Or link to existing content
Critical PowerPoint Shortcuts – Claim Your FREE Training Module and Get Your Time Back!

How to Make a PowerPoint Presentation (Step-by-Step)
- PowerPoint Tutorials
- Presentation Design
- January 22, 2024
In this beginner’s guide, you will learn step-by-step how to make a PowerPoint presentation from scratch.
While PowerPoint is designed to be intuitive and accessible, it can be overwhelming if you’ve never gotten any training on it before. As you progress through this guide, you’ll will learn how to move from blank slides to PowerPoint slides that look like these.

Table of Contents
Additionally, as you create your presentation, you’ll also learn tricks for working more efficiently in PowerPoint, including how to:
- Change the slide order
- Reset your layout
- Change the slide dimensions
- Use PowerPoint Designer
- Format text
- Format objects
- Play a presentation (slide show)
With this knowledge under your belt, you’ll be ready to start creating PowerPoint presentations. Moreover, you’ll have taken your skills from beginner to proficient in no time at all. I will also include links to more advanced PowerPoint topics.
Ready to start learning how to make a PowerPoint presentation?
Take your PPT skills to the next level
Start with a blank presentation.
Note: Before you open PowerPoint and start creating your presentation, make sure you’ve collected your thoughts. If you’re going to make your slides compelling, you need to spend some time brainstorming.
For help with this, see our article with tips for nailing your business presentation here .
The first thing you’ll need to do is to open PowerPoint. When you do, you are shown the Start Menu , with the Home tab open.
This is where you can choose either a blank theme (1) or a pre-built theme (2). You can also choose to open an existing presentation (3).
For now, go ahead and click on the Blank Presentation (1) thumbnail.

Doing so launches a brand new and blank presentation for you to work with. Before you start adding content to your presentation, let’s first familiarize ourselves with the PowerPoint interface.
The PowerPoint interface

Here is how the program is laid out:
- The Application Header
- The Ribbon (including the Ribbon tabs)
- The Quick Access Toolbar (either above or below the Ribbon)
- The Slides Pane (slide thumbnails)
The Slide Area
The notes pane.
- The Status Bar (including the View Buttons)
Each one of these areas has options for viewing certain parts of the PowerPoint environment and formatting your presentation.
Below are the important things to know about certain elements of the PowerPoint interface.
The PowerPoint Ribbon

The Ribbon is contextual. That means that it will adapt to what you’re doing in the program.
For example, the Font, Paragraph and Drawing options are greyed out until you select something that has text in it, as in the example below (A).

Furthermore, if you start manipulating certain objects, the Ribbon will display additional tabs, as seen above (B), with more commands and features to help you work with those objects. The following objects have their own additional tabs in the Ribbon which are hidden until you select them:
- Online Pictures
- Screenshots
- Screen Recording
The Slides Pane

This is where you can preview and rearrange all the slides in your presentation.
Right-clicking on a slide in the pane gives you additional options on the slide level that you won’t find on the Ribbon, such as Duplicate Slide , Delete Slide , and Hide Slide .

In addition, you can add sections to your presentation by right-clicking anywhere in this Pane and selecting Add Section . Sections are extremely helpful in large presentations, as they allow you to organize your slides into chunks that you can then rearrange, print or display differently from other slides.

The Slide Area (A) is where you will build out your slides. Anything within the bounds of this area will be visible when you present or print your presentation.
Anything outside of this area (B) will be hidden from view. This means that you can place things here, such as instructions for each slide, without worrying about them being shown to your audience.

The Notes Pane is the space beneath the Slide Area where you can type in the speaker notes for each slide. It’s designed as a fast way to add and edit your slides’ talking points.
To expand your knowledge and learn more about adding, printing, and exporting your PowerPoint speaker notes, read our guide here .
Your speaker notes are visible when you print your slides using the Notes Pages option and when you use the Presenter View . To expand your knowledge and learn the ins and outs of using the Presenter View , read our guide here .

You can resize the Notes Pane by clicking on its edge and dragging it up or down (A). You can also minimize or reopen it by clicking on the Notes button in the Status Bar (B).
Note: Not all text formatting displays in the Notes Pane, even though it will show up when printing your speaker notes. To learn more about printing PowerPoint with notes, read our guide here .
Now that you have a basic grasp of the PowerPoint interface at your disposal, it’s time to make your presentation.
Adding Content to Your PowerPoint Presentation
Notice that in the Slide Area , there are two rectangles with dotted outlines. These are called Placeholders and they’re set on the template in the Slide Master View .
To expand your knowledge and learn how to create a PowerPoint template of your own (which is no small task), read our guide here .

As the prompt text suggests, you can click into each placeholder and start typing text. These types of placeholder prompts are customizable too. That means that if you are using a company template, it might say something different, but the functionality is the same.

Note: For the purposes of this example, I will create a presentation based on the content in the Starbucks 2018 Global Social Impact Report, which is available to the public on their website.
If you type in more text than there is room for, PowerPoint will automatically reduce its font size. You can stop this behavior by clicking on the Autofit Options icon to the left of the placeholder and selecting Stop Fitting Text to this Placeholder .
Next, you can make formatting adjustments to your text by selecting the commands in the Font area and the Paragraph area of the Home tab of the Ribbon.

The Reset Command: If you make any changes to your title and decide you want to go back to how it was originally, you can use the Reset button up in the Home tab .

Insert More Slides into Your Presentation
Now that you have your title slide filled in, it’s time to add more slides. To do that, simply go up to the Home tab and click on New Slide . This inserts a new slide in your presentation right after the one you were on.

You can alternatively hit Ctrl+M on your keyboard to insert a new blank slide in PowerPoint. To learn more about this shortcut, see my guide on using Ctrl+M in PowerPoint .
Instead of clicking the New Slide command, you can also open the New Slide dropdown to see all the slide layouts in your PowerPoint template. Depending on who created your template, your layouts in this dropdown can be radically different.

If you insert a layout and later want to change it to a different layout, you can use the Layout dropdown instead of the New Slide dropdown.
After inserting a few different slide layouts, your presentation might look like the following picture. Don’t worry that it looks blank, next we will start adding content to your presentation.

If you want to follow along exactly with me, your five slides should be as follows:
- Title Slide
- Title and Content
- Section Header
- Two Content
- Picture with Caption
Adding Content to Your Slides
Now let’s go into each slide and start adding our content. You’ll notice some new types of placeholders.

On slide 2 we have a Content Placeholder , which allows you to add any kind of content. That includes:
- A SmartArt graphic,
- A 3D object,
- A picture from the web,
- Or an icon.
To insert text, simply type it in or hit Ctrl+C to Copy and Ctrl+V to Paste from elsewhere. To insert any of the other objects, click on the appropriate icon and follow the steps to insert it.
For my example, I’ll simply type in some text as you can see in the picture below.

Slides 3 and 4 only have text placeholders, so I’ll go ahead and add in my text into each one.

On slide 5 we have a Picture Placeholder . That means that the only elements that can go into it are:
- A picture from the web

To insert a picture into the picture placeholder, simply:
- Click on the Picture icon
- Find a picture on your computer and select it
- Click on Insert
Alternatively, if you already have a picture open somewhere else, you can select the placeholder and paste in (shortcut: Ctrl+V ) the picture. You can also drag the picture in from a file explorer window.

If you do not like the background of the picture you inserted onto your slide, you can remove the background here in PowerPoint. To see how to do this, read my guide here .
Placeholders aren’t the only way to add content to your slides. At any point, you can use the Insert tab to add elements to your slides.
You can use either the Title Only or the Blank slide layout to create slides for content that’s different. For example, a three-layout content slide, or a single picture divider slide, as shown below.

In the first example above, I’ve inserted 6 text boxes, 3 icons, and 3 circles to create this layout. In the second example, I’ve inserted a full-sized picture and then 2 shapes and 2 text boxes.
The Reset Command: Because these slides are built with shapes and text boxes (and not placeholders), hitting the Reset button up in the Home tab won’t do anything.
That is a good thing if you don’t want your layouts to adjust. However, it does mean that it falls on you to make sure everything is aligned and positioned correctly.
For more on how to add and manipulate the different objects in PowerPoint, check out our step-by-step articles here:
- Using graphics in PowerPoint
- Inserting icons onto slides
- Adding pictures to your PowerPoint
- How to embed a video in PowerPoint
- How to add music to your presentation
Using Designer to generate more layouts ideas
If you have Office 365, your version of PowerPoint comes with a new feature called Designer (or Design Ideas). This is a feature that generates slide layout ideas for you. The coolest thing about this feature is that it uses the content you already have.
To use Designer , simply navigate to the Design tab in your Ribbon, and click on Design Ideas .

NOTE: If the PowerPoint Designer is not working for you (it is grey out), see my troubleshooting guide for Designer .
Change the Overall Design (optional)
When you make a PowerPoint presentation, you’ll want to think about the overall design. Now that you have some content in your presentation, you can use the Design tab to change the look and feel of your slides.
For additional help thinking through the design of your presentation, read my guide here .
A. Picking your PowerPoint slide size
If you have PowerPoint 2013 or later, when you create a blank document in PowerPoint, you automatically start with a widescreen layout with a 16:9 ratio. These dimensions are suitable for most presentations as they match the screens of most computers and projectors.
However, you do have the option to change the dimensions.
For example, your presentation might not be presented, but instead converted into a PDF or printed and distributed. In that case, you can easily switch to the standard dimensions with a 4:3 ratio by selecting from the dropdown (A).
You can also choose a custom slide size or change the slide orientation from landscape to portrait in the Custom Slide Size dialog box (B).

To learn all about the different PowerPoint slide sizes, and some of the issues you will face when changing the slide size of a non-blank presentation, read my guide here .
B. Selecting a PowerPoint theme
The next thing you can do is change the theme of your presentation to a pre-built one. For a detailed explanation of what a PowerPoint theme is, and how to best use it, read my article here .
In the beginning of this tutorial, we started with a blank presentation, which uses the default Office theme as you can see in the picture below.

That gives you the most flexibility because it has a blank background and quite simple layouts that work for most presentations. However, it also means that it’s your responsibility to enhance the design.
If you’re comfortable with this, you can stay with the default theme or create your own custom theme ( read my guide here ). But if you would rather not have to think about design, then you can choose a pre-designed theme.
Microsoft provides 46 other pre-built themes, which include slide layouts, color variants and palettes, and fonts. Each one varies quite significantly, so make sure you look through them carefully.
To select a different theme, go to the Design tab in the Ribbon, and click on the dropdown arrow in the Themes section .

For this tutorial, let’s select the Frame theme and then choose the third Variant in the theme. Doing so changes the layout, colors, and fonts of your presentation.

Note: The theme dropdown area is also where you can import or save custom themes. To see my favorite places to find professional PowerPoint templates and themes (and recommendations for why I like them), read my guide here .
C. How to change a slide background in PowerPoint
The next thing to decide is how you want your background to look for the entire presentation. In the Variants area, you can see four background options.

For this example, we want our presentation to have a dark background, so let’s select Style 3. When you do so, you’ll notice that:
- The background color automatically changes across all slides
- The color of the text on most of the slides automatically changes to white so that it’s visible on the dark background
- The colors of the objects on slides #6 and #7 also adjust, in a way we may not want (we’ll likely have to make some manual adjustments to these slides)

Note: If you want to change the slide background for just that one slide, don’t left-click the style. Instead, right-click it and select Apply to Selected Slides .
After you change the background for your entire presentation, you can easily adjust the background for an individual slide.

Inside the Format Background pane, you can see you have the following options:
- Gradient fill
- Picture or texture fill
- Pattern fill
- Hide background
You can explore these options to find the PowerPoint background that best fits your presentation.
D. How to change your color palette in PowerPoint
Another thing you may want to adjust in your presentation, is the color scheme. In the picture below you can see the Theme Colors we are currently using for this presentation.

Each PowerPoint theme comes with its own color palette. By default, the Office theme includes the Office color palette. This affects the colors you are presented with when you format any element within your presentation (text, shapes, SmartArt, etc.).

The good news is that the colors here are easy to change. To switch color palettes, simply:
- Go to the Design tab in the Ribbon
- In the Variants area, click on the dropdown arrow and select Colors
- Select the color palette (or theme colors) you want
You can choose among the pre-built color palettes from Office, or you can customize them to create your own.
As you build your presentation, make sure you use the colors from your theme to format objects. That way, changing the color palette adjusts all the colors in your presentation automatically.
E. How to change your fonts in PowerPoint
Just as we changed the color palette, you can do the same for the fonts.

Each PowerPoint theme comes with its own font combination. By default, the Office theme includes the Office font pairing. This affects the fonts that are automatically assigned to all text in your presentation.

The good news is that the font pairings are easy to change. To switch your Theme Fonts, simply:
- Go to the Design tab in the Ribbon
- Click on the dropdown arrow in the Variants area
- Select Fonts
- Select the font pairing you want
You can choose among the pre-built fonts from Office, or you can customize them to create your own.
If you are working with PowerPoint presentations on both Mac and PC computers, make sure you choose a safe PowerPoint font. To see a list of the safest PowerPoint fonts, read our guide here .
If you receive a PowerPoint presentation and the wrong fonts were used, you can use the Replace Fonts dialog box to change the fonts across your entire presentation. For details, read our guide here .
Adding Animations & Transitions (optional)
The final step to make a PowerPoint presentation compelling, is to consider using animations and transitions. These are by no means necessary to a good presentation, but they may be helpful in your situation.
A. Adding PowerPoint animations
PowerPoint has an incredibly robust animations engine designed to power your creativity. That being said, it’s also easy to get started with basic animations.
Animations are movements that you can apply to individual objects on your slide.

To add a PowerPoint animation to an element of your slide, simply:
- Select the element
- Go to the Animations tab in the Ribbon
- Click on the dropdown arrow to view your options
- Select the animation you want
You can add animations to multiple objects at one time by selecting them all first and then applying the animation.
B. How to preview a PowerPoint animation

There are three ways to preview a PowerPoint animation:
- Click on the Preview button in the Animations tab
- Click on the little star next to the slide
- Play the slide in Slide Show Mode
To learn other ways to run your slide show, see our guide on presenting a PowerPoint slide show with shortcuts .
To adjust the settings of your animations, explore the options in the Effect Options , Advanced Animation and the Timing areas of the Animation tab .

Note: To see how to make objects appear and disappear in your slides by clicking a button, read our guide here .
C. How to manage your animations in PowerPoint

The best way to manage lots of animations on your slide is with the Animation Pane . To open it, simply:
- Navigate to the Animations tab
- Select the Animation Pane
Inside the Animation Pane, you’ll see all of the different animations that have been applied to objects on your slide, with their numbers marked as pictured above.
Note: To see examples of PowerPoint animations that can use in PowerPoint, see our list of PowerPoint animation tutorials here .
D. How to add transitions to your PowerPoint presentation
PowerPoint has an incredibly robust transition engine so that you can dictate how your slides change from one to the other. It is also extremely easy to add transitions to your slides.
In PowerPoint, transitions are the movements (or effects) you see as you move between two slides.

To add a transition to a PowerPoint slide, simply:
- Select the slide
- Go to the Transitions tab in the Ribbon
- In the Transitions to This Slide area, click on the dropdown arrow to view your options
- Select the transition you want
To adjust the settings of the transition, explore the options in the Timing area of the Transitions tab.
You can also add the same transition to multiple slides. To do that, select them in the Slides Pane and apply the transition.
E. How to preview a transition in PowerPoint

There are three ways to preview your PowerPoint transitions (just like your animations):
- Click on the Preview button in the Transitions tab
- Click on the little star beneath the slide number in the thumbnail view
Note: In 2016, PowerPoint added a cool new transition, called Morph. It operates a bit differently from other transitions. For a detailed tutorial on how to use the cool Morph transition, see our step-by-step article here .
Save Your PowerPoint Presentation
After you’ve built your presentation and made all the adjustments to your slides, you’ll want to save your presentation. YOu can do this several different ways.

To save a PowerPoint presentation using your Ribbon, simply:
- Navigate to the File tab
- Select Save As on the left
- Choose where you want to save your presentation
- Name your presentation and/or adjust your file type settings
- Click Save
You can alternatively use the Ctrl+S keyboard shortcut to save your presentation. I recommend using this shortcut frequently as you build your presentation to make sure you don’t lose any of your work.

This is the standard way to save a presentation. However, there may be a situation where you want to save your presentation as a different file type.
To learn how to save your presentation as a PDF, see our guide on converting PowerPoint to a PDF .
How to save your PowerPoint presentation as a template
Once you’ve created a presentation that you like, you may want to turn it into a template. The easiest – but not technically correct – way, is to simply create a copy of your current presentation and then change the content.
But be careful! A PowerPoint template is a special type of document and it has its own parameters and behaviors.
If you’re interested in learning about how to create your own PowerPoint template from scratch, see our guide on how to create a PowerPoint template .
Printing Your PowerPoint Presentation
After finishing your PowerPoint presentation, you may want to print it out on paper. Printing your slides is relatively easy.

To open the Print dialog box, you can either:
- Hit Ctrl+P on your keyboard
- Or go to the Ribbon and click on File and then Print

Inside the Print dialog box, you can choose from the various printing settings:
- Printer: Select a printer to use (or print to PDF or OneNote)
- Slides: Choose which slides you want to print
- Layout: Determine how many slides you want per page (this is where you can print the notes, outline, and handouts)
- Collated or uncollated (learn what collated printing means here )
- Color: Choose to print in color, grayscale or black & white
There are many more options for printing your PowerPoint presentations. Here are links to more in-depth articles:
- How to print multiple slides per page
- How to print your speaker notes in PowerPoint
- How to save PowerPoint as a picture presentation
So that’s how to create a PowerPoint presentation if you are brand new to it. We’ve also included a ton of links to helpful resources to boost your PowerPoint skills further.
When you are creating your presentation, it is critical to first focus on the content (what you are trying to say) before getting lost inserting and playing with elements. The clearer you are on what you want to present, the easier it will be to build it out in PowerPoint.
If you enjoyed this article, you can learn more about our PowerPoint training courses and other presentation resources by visiting us here .
🔒 Unlock the PowerPoint Shortcuts Trusted by Industry Leaders KKR, American Express, HSBC, and More!
Join over 114,880 professionals from diverse fields including consulting, investment banking, advertising, marketing, sales, and business development who have supercharged their PowerPoint game with our proven methods.
✅ Customize compelling presentations effortlessly.
✅ Master time-saving techniques for faster deck creation.
✅ Boost your career prospects with top-notch PowerPoint skills.
Get FREE access to the Critical PowerPoint Shortcuts module of our premium training course by entering your name and email below.
DISCLAIMER: PC Users Only!
We respect your privacy and will keep your info safe and confidential.
About The Author
Popular Tutorials
- How to Strikethrough Text (l̶i̶k̶e̶ ̶t̶h̶i̶s̶) in Word, Excel & PowerPoint
- How to Make Animated Fireworks in PowerPoint (Step-by-Step)
- Strikethrough Shortcut (l̶i̶k̶e̶ ̶t̶h̶i̶s̶) for Word, Excel & PowerPoint
- How to Create a Flash Card Memory Game in PowerPoint (Like Jeopardy)
- Keyboard Shortcuts Not Working: Solved
PowerPoint Tutorial Categories
- Strategies & Opinions
- Shortcuts & Hacks
- Pictures, Icons, Videos, Etc.
- New Features
- Miscellaneous
- Charts & Data Viz
We help busy professionals save hours and gain peace of mind, with corporate workshops, self-paced courses and tutorials for PowerPoint and Word.
Work With Us
- Corporate Training
- Presentation & Template Design
- Courses & Downloads
- PowerPoint Articles
- Word Articles
- Productivity Resources
Find a Tutorial
- Free Training
- For Businesses
We help busy office workers save hours and gain peace of mind, with tips, training and tutorials for Microsoft PowerPoint and Word.
Master Critical PowerPoint Shortcuts – Secure Your FREE Training Module and Save Valuable Time!
⌛ Master time-saving expert techniques.
🔥 Create powerful presentations.
🚀 Propel your career to new heights.
We value your privacy – we keep your info safe.
Discover PowerPoint Hacks Loved by Industry Giants - KKR, AmEx, HSBC!
Over 114,880 professionals in finance, marketing and sales have revolutionized their PPT skills with our proven methods.
Gain FREE access to a full module of our premium PowerPoint training program – Get started today!
We hate spam too and promise to keep your information safe.
You are currently viewing a placeholder content from Facebook . To access the actual content, click the button below. Please note that doing so will share data with third-party providers.
Sign up for our daily newsletter
- Privacy Policy
- Advertise with Us
How to Create a YouTube Video with PowerPoint
Few people nowadays have the patience or willingness to sit through multiple slide presentations. Online videos, on the other hand, are a powerful means to build user engagement in an era of lower attention spans. As long as the videos look professional, your audience will pay attention to whatever you have to say.
Follow these simple steps to convert your hard work that went in to creating a PowerPoint into an accessible and compact YouTube video.
Also read: 4 Free Online Tools to Add a Censor Bleep to Your YouTube Videos
Step 1: Clean Up Your Slides
If you want to give a professional finish to the video, try breathing life into the slides first.
Open the file with PowerPoint 2010 and click “View,” followed by “Slide Master,” to apply uniformity in alignment, bullets, fonts and spacing. After saving the Master template, go to “Slide Sorter” view and apply a minimalist, standard design. You can use an academic or corporate template as long as it’s minimal and clean.

Too much text in a slide will disrupt the attention span of the typical YouTube viewer. Get rid of bullet lists, fancy animations, flowcharts and tables. If you previously used a slide to describe something complex, break it down into easily digestible ideas spread across multiple slides.
Use screenshots and full-slide, high-resolution images to fill up your new presentation. PowerPoint 2010 allows you to insert online pictures with a Creative Commons license and from the Bing search engine.

You can also use the “Pictures with Captions” layout along with “Design Ideas” to create a robust background for video frames. Use free stock images for new picture ideas.

Also read: 14 Useful PowerPoint Templates to Set Up a Digital Planner
Step 2: Insert Audio
Background narration is the most important component of a high-quality YouTube video. You can download royalty-free music , but the best YouTube videos always come with speaker narration. Go to “Insert,” followed by “Audio,” where PowerPoint allows you to record your own voice for each slide.

There’s a chance you aren’t getting a very high-quality audio with PowerPoint alone. It’s far better to work with a pre-recorded audio clip and a tight script. You can use a voice recording app like Audiophile or an actual digital voice recorder. Our aim is to achieve professional results by filtering out echo and background noise.

For a fifty-slide presentation, you should aim for no more than ten seconds of recorded narration per slide. Go to “Slide Show,” followed by “Rehearse Timings,” to get the timings right for each slide. Import the MP3 files into their corresponding slides and play them in automatic mode.

Finally, you are only required to set up the slide show. Check the options for “Play Narration” and “Use Timings” along with “Browsed by an individual (window).”

Also read: How to Create and Manage Your YouTube Clips
Step 3: Insert Video Clips (Optional)
If you did a good job with rehearsed narrations and images as described earlier, you can skip this part. However, a mini video clip within a video is a powerful way to retain your YouTube viewer’s attention. Unlike in the past, playing a video clip automatically from your PowerPoint is very easy.
Go to “Insert,” followed by “Video,” where you can embed any video from YouTube’s “Share” menu and play it on your own presentation.

Always make sure that it is your own video. You can always choose Creative Commons videos from YouTube, Vimeo and other sites. Use PowerPoint’s “Playback” option which is displayed after you embed a new video.
Step 4: Save PPT as Video
After clicking “File,” followed by “Save As,” save the PowerPoint as a WMV file. Your video is now ready for upload on YouTube and any other video-sharing sites.

Step 5: Upload Video on YouTube
Upload the desired video output to your YouTube channel. If it is aimed at prospects alone, you might want to keep it private or unlisted with no embedding or comments allowed.

Do you agree that converting your PowerPoint files to a five- or seven-minute video is a good investment of time? Please let us know your thoughts. Want to make the most of your time? Learn these PowerPoint keyboard shortcuts .
Our latest tutorials delivered straight to your inbox
Sayak Boral is a technology writer with over eleven years of experience working in different industries including semiconductors, IoT, enterprise IT, telecommunications OSS/BSS, and network security. He has been writing for MakeTechEasier on a wide range of technical topics including Windows, Android, Internet, Hardware Guides, Browsers, Software Tools, and Product Reviews.


How to Upload a PowerPoint to YouTube: Step-by-Step Guide
Have you ever wondered how to upload a PowerPoint to YouTube? That’s a fairly common question among many Microsoft PowerPoint users.
After creating a PowerPoint presentation, you may want to share it on YouTube to reach a greater audience.
Unfortunately, YouTube can only accept video files. A PowerPoint presentation may have video and audio elements embedded in it, but it is still not a video file.
You need to convert your presentation to a video file to upload it to YouTube. This tutorial will show you exactly how to do that.

Step 1: Create Your PowerPoint Presentation
Create your PowerPoint presentation as you normally would. However, keep in mind that you won’t be doing a live presentation, so try to include everything you need to make a great video, including audio clips.
Your audio could be music, sound bites, a narration (your voice recordings), or a combination of all these. Make sure to use them meaningfully.
Here is how to add audio to your presentation:
1. Click the Insert tab on the ribbon
2. Click Audio from my PC
Browse through the audio files on your computer and select the one you want to add to your presentation.
3. Click the Insert button to add the file
Step 2: Convert Your Presentation to a Video
This next step on how to upload a PowerPoint to YouTube is crucial because you can’t share your file on the widely accessible video platform without converting it to a video format.
Here’s how to convert your presentation to a video.
1. Click the File tab on the PowerPoint (2010 version or later)

2. Click the Export tab
3. Click Create a Video from the list of options

You can tweak some of the settings, including slide durations, video resolution, and narrations.
You can leave the resolution to full HD if you don’t know what to select. Simply let YouTube handle the file compression.
You can simply set how long you want each slide to display, especially if your presentation doesn’t have recorded narrations and timings. For example, you can set individual slides to show for 15 seconds.
4. Next, click the Create Video box below the settings
5. Click Save on the next dialog box to export your presentation in video format
Your PowerPoint presentation is now ready for YouTube.
Step 3: Upload to YouTube
Now that you’ve converted your presentation to a video, it’s time to upload it to YouTube. Here’s how to do that:
1. Sign in to your YouTube account or click the app on your mobile device
2. Click the Create icon on the top right corner of the window
3. Click Upload video

On a mobile device, tap the circled plus sign at the center bottom of the screen and tap Upload a video .
4. Locate the PowerPoint video file and click Open
You may be asked to create a YouTube channel if you don’t already have one. You can rename the file, write a description, set the privacy, and apply other settings when the upload is complete.

Tips to Make Your Video Better
Although your presentation will be viewed on YouTube, you still need to remember a few simple tips for a great video.
- Keep the visuals as simple as they can be; presentations generally work best that way. You don’t want to clutter the entire screen. Instead, allow a few empty spaces on each slide for improved readability
- Highlight only the most essential facts. Your audience should not have to endure a long list of bullet points. Remember that you are presenting, not writing a book
- Make use of themes or templates to give your presentation a uniform feel. You might mar an otherwise good presentation unless you are an expert with lots of experience creating eye-catching yet appealing presentations
- Use audios, effects, and transitions in meaningful ways. You want to engage your audience, but at the same time, you don’t want to appear cheesy
Why You Should Share Your PowerPoint Presentation on YouTube
Learning how to upload a PowerPoint to YouTube gives you the advantage of reaching a wider audience, whether or not they have a presentation program on their computers.
While Microsoft PowerPoint is a fairly popular presentation program, not everyone has ready access to it. Some of your clients, co-workers, students, or friends may not have the software on their computers. Others may have it (or some other similar application) but don’t know how to use it.
However, just about anyone can access YouTube from a computer, smartphone, or other mobile devices. It’s as simple as searching for your video on the platform and clicking play – no downloads or any other technical know-how required.
Closely related to this is that users don’t even need a computer to view your presentation. Not many mobile devices have a PowerPoint program, but they can all play videos, whether it’s an iPod, iPhone, or mobile phone.
Also, you don’t have to worry about specific PowerPoint versions. Usually, presentations in one version of PowerPoint might not work too well on another. A video eliminates all that worry. Users can even view the presentation on a DVD player by downloading it to disk.
You can easily embed the video in your blog or on any web page. Video files have better web support than presentation formats.
In a nutshell, more people can access your PowerPoint presentation if you share it on YouTube. You can copy and share the link to your video to make it easy for people to watch it.
Wrapping Up
Hopefully, you now know how to upload a PowerPoint to YouTube. Don’t worry if your video presentation doesn’t come out as you expected at first. You can also tweak things around until you get exactly what you want. The key is to experiment with the settings during the conversion process.
You can reach more people you can ever imagine with a YouTube presentation. Remember to set proper metadata (or description) so that people can easily find your video on YouTube.
Jamie Keet is a Technology Instructional Coach with a deep-rooted passion for educational technology. With a background that combines a marketing diploma, a degree in management, and a master's in educational technology, Jamie has spent the last 25 years in education, working across all grades and adult learning. His experience in the classroom has shaped his approach to tech education, focusing on making technology accessible and engaging for everyone.
Jamie's goal is simple: to help users feel confident and successful with technology, encouraging them to explore and learn on their own. He believes in breaking down the barriers that prevent people from getting started with technology, whether they're students in a classroom or individuals looking to improve their tech skills.
Outside of his professional work, Jamie enjoys keeping up with the latest tech trends and finding new ways to incorporate them into his teaching. His approach is all about simplicity, clarity, and making technology fun and accessible for all.
Further reading

Boosting Classroom Collaboration with Microsoft Teams

Streamlining Classroom Workflow with Microsoft To Do

Unlocking the Potential of My Day with the Outlook Calendar Update

New Microsoft Outlook Features: Revolutionizing Professional Communication

Discovering Bing Chat: The New Wave of Interactive Browsing

How to Insert Microsoft Excel Data into Microsoft Word and PowerPoint
- Latest Posts
- Microsoft Excel Tutorial
- Microsoft Word Tutorial
- Microsoft PowerPoint Tutorial
- Microsoft OneNote Tutorial
- Microsoft Outlook Tutorial
- Augmented Reality
- Education Technology
- General Tech
- Google Apps Tutorials
- Graphic Design
- Microsoft Forms
- Microsoft OneNote
- Microsoft Power Apps
- Microsoft Sway
- Microsoft Teams
- Microsoft Tutorials
- Online Teaching
- Productivity Apps
- Remote Learning
- Teaching Apps
- Video Editing Help
- Virtual Reality
- YouTube Help
How-To Geek
How to embed a youtube video in powerpoint.
During a presentation, a mix of media always performs best.
Quick Links
Finding a youtube video’s embed code, embedding a youtube video in powerpoint, searching the youtube video in powerpoint.
During a presentation, a mix of media always performs best. Using images, graphs, charts, and videos not only makes your presentation more informative but also more engaging for the audience. If you have a YouTube video you’d like to use during your presentation, it’s as simple as embedding it in a slide. Here’s how.
Rather than linking to a YouTube video in your presentation, embedding it in the slide is usually the better option. It gives your presentation a more professional look because you won't be leaving your slide to pop open the YouTube website. Keep in mind, though, that even with the video embedded in your presentation, you’ll still need to be connected to the internet to play the video.
First, head over to YouTube and find the video you want to embed. Once you’re there, select the “Share” option, which you'll find in the video description.
A window will appear, giving you a few different vehicles for sharing the video. Go ahead and click the “Embed” option in the “Share a link” section.
Another window will appear, providing the embed code along with a few other options. If you wanting to start the video at a particular time, select the “Start at” box and enter the time when you’d like the video to start. Additionally, you can select whether you’d like to player controls to appear and if you want to enable privacy-enhanced mode.
Note: Privacy-enhanced mode keeps YouTube from storing information about visitors that visit your website that the video is embedded on unless they play the video. Since we will be using the embed code in a PowerPoint presentation, this option is not necessary.
Select “Copy” at the bottom right of the window to copy the embed code to your clipboard. Alternatively, select the code and use the Ctrl+C shortcut.
We’re finished with YouTube, for now, so head on over to PowerPoint and open your presentation.
Select the slide where you want to embed the YouTube video. On the “Insert” tab, click the “Video” button.
On the drop-down menu, select the “Online Video” option.
The Insert Video window that appears lets you search YouTube for a video or paste in that embed code you copied from the YouTube website. Paste the embed code and click the arrow to complete the action.
Your video will now appear in the presentation. To resize the video, click and drag the corners.
Note that at first, the video will appear as a black rectangle. Don’t worry---this is normal. Simply right-click the video and then select “Preview.”
This will give you a quick preview of how the video will look during your presentation.
You can also search for a YouTube video from that Insert Video window in PowerPoint. Type in your search terms and then click the search icon.
Several options will appear---888,341 in the case of the Rick Astley’s Never Gonna Give You Up video for which we searched. Select the one you want to use.
Then select “Insert” at the bottom-right of the window.
That’s all there is to it. Generally, we recommend searching the actual YouTube website and using the embed code the way we described earlier---mostly because the site is much easier to search and you can watch the videos before selecting the one you want. Still, if you know exactly what you're after, this method might work fine for you.
Blog > How to add a YouTube Video in PowerPoint
How to add a YouTube Video in PowerPoint
07.08.20 • #powerpointtips.
Sometimes, you want to show your audience a YouTube video during a presentation. Some people do so by opening the browser, going to YouTube and then typing the video title into the search bar, when in fact there is a much easier and more convenient way. In the this post, you'll learn how you can directly insert a YouTube Video into PowerPoint that plays automatically on your slide. Also, we have got some great suggestions about videos you could show your audience.
You can watch our video (which is by the way inserted from YouTube as well) down below and learn how to add a video to your slides in just one minute! If you don't feel like watching the video, you can also follow the step-by-step guide down below.
Step-by-Step Tutorial
- Go to Insert in the PowerPoint task line on the top.
- Click on Video on the top right corner. Then choose the option Online Video .

- A window will open which will ask you to insert the video’s URL.
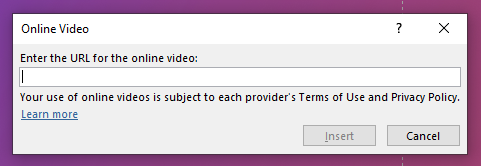
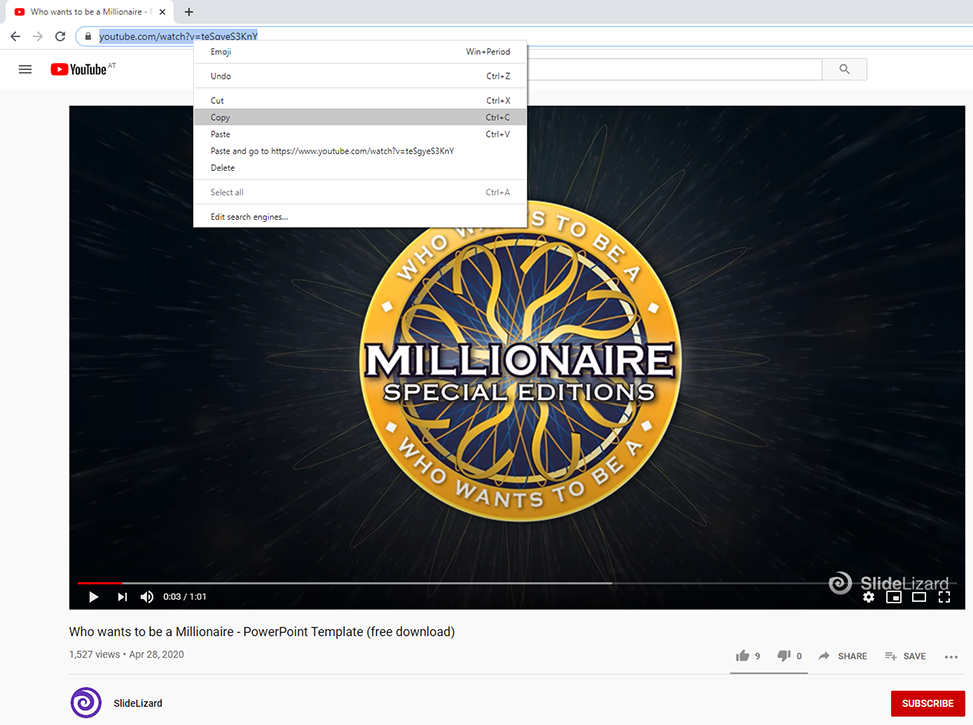
- Open the YouTube video you would like to embed in your browser. You can simply right click on the address bar in the browser and copy the URL. Alternatively, perform a right mouse click on the video, and then click on Copy Video URL .
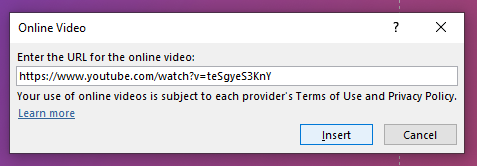
- Go back to PowerPoint and insert the URL by either pressing CTRL+V or right click and then Paste . Then click on Insert .
- Your video will then be inserted on your current slide. Just like any element, you can change its size or move it around now.
- To start the video (either while editing or in presentation mode), simply click on the play button.
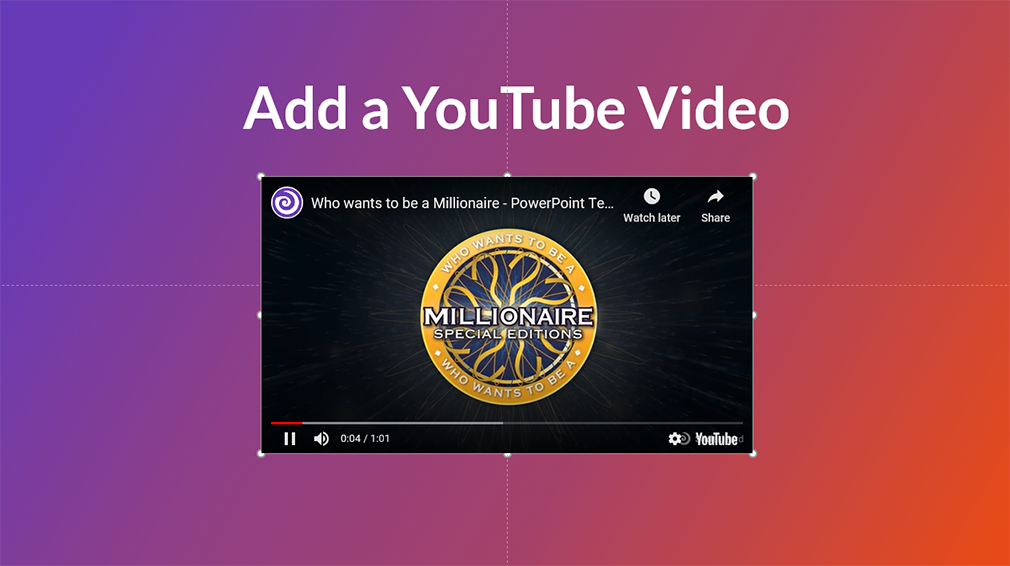
YouTube video with offline playback
With the previously described option, it is necessary to have a stable internet connection while presenting. As that can not always be guaranteed, there is also a way of inserting YouTube videos that work offline. Follow these steps:
- Open the YouTube Video in your Browser. Copy the URL by clicking the address bar and then Right Click > Copy.
- Open the website y2mate.com . Paste your copied URL into the text field, then click Start .

- Choose one of the options for download (and click the Download button. We recommend 1080p or 720p.
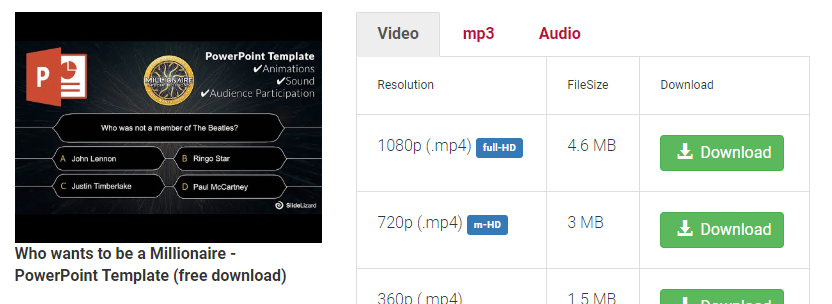
- A window will open, and your video will convert. When it's ready, click Download .mp4" .
- After your file has downloaded, you should see it in your Downloads folder in the browser. By clicking "Show in folder", you'll see where it's saved on your device.

- Right click on the file in your folder and click Copy .
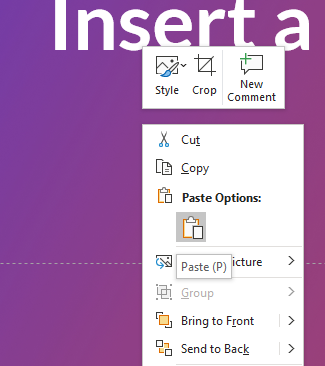
- Go to the PowerPoint slide where you want your video to be placed. Right click and Paste . Your video should now appear and play if you click on it.
What kinds of videos can I use in a presentation?
Videos are an amazing way to liven up your presentation. Especially when you're talking for a long time, the audience tends to get tired. That's where a variation of multimedia elements, such as videos, can be helpful. We recommend putting videos in the main part of a presentation, but of course you may also start or finish by presenting a video to your audience. There is no limit for the type of video, the only guideline you should follow is relevance. Before mindlessly pasting a video to your slide, ask yourself: "What purpose does this video fulfill within my presentation?" Is it supposed to inform and teach the audience, is it something you really want everybody to see, or is it just a funny little clip to lighten the mood? All of those purposes are fine. With this tip, you're one step closer to a wonderful presentation! If you want to learn more about successful presentations and Audience Engagement, check out our blogpost Top 10 Tools for increasing Audience Engagement .

Set the start of your video
After you've added a video from YouTube, it starts to play by default when you click anywhere on the slide during the presentation. That's usually fine, but can sometimes be annoying, e.g. when you have more than one video on one slide. In that case, it is helpful to set the Start to When clicked on . The video then won't start until you click directly on it. You can do that by first clicking on your video, going to the Playback tab on the right and then select When clicked on in the Start-selection. By choosing Automatically here, your video will start automatically, without having to click on it.
Add a video from your device
If you want to add a video that is saved on your computer, you can do so by following the tutorial in our article Insert a local Video .
Useful Keyboard Shortcuts
How can I insert a YouTube video to PowerPoint?
Go to Insert > Video > Online Video. Copy the video URL from the address bar and paste it to the window that opens. Click Insert and your video should appear instantly.
Can I play a video directly on my PowerPoint slides?
Yes. You can insert a video from YouTube by using the URL, and it will be played directly on your slide. In our tutorial , you'll learn how to do so.
Can I play an offline video from YouTube in PowerPoint?
Yes, it is possible to play an offline YouTube video on your PowerPoint slides. We show you how it is done in our tutorial .
Related articles
About the author.

Pia Lehner-Mittermaier
Pia works in Marketing as a graphic designer and writer at SlideLizard. She uses her vivid imagination and creativity to produce good content.

Get 1 Month for free!
Do you want to make your presentations more interactive.
With SlideLizard you can engage your audience with live polls, questions and feedback . Directly within your PowerPoint Presentation. Learn more

Top blog articles More posts

Insert and edit Adobe Illustrator files in PowerPoint

Microsoft Copilot: A Comprehensive Review of the AI tool

Get started with Live Polls, Q&A and slides
for your PowerPoint Presentations
The big SlideLizard presentation glossary
Vocalized pause.
A vocalized pause means the pause when the silence between words is filled by the speaker with vocalizations like "um", "uh" and "er".
Break-out-Room
In live online training, it is sometimes useful to divide the students into small groups for certain exercises, as it would be impossible to have conversations at the same time. Break-out-rooms are used so that people can talk to each other without disturbing the others. When the exercise is over, they are sent back to the main room.
An e-lecture is a lecture that is held online. Many schools and universities offer e-lectures as technical opportunities improve.
Vertical Communication
Vertical communication means that information is passed from one person to the next according to a linear system based on their titles. This type of communication is used when a company follows a hierarchical structure or for important, sensitive information.
Be the first to know!
The latest SlideLizard news, articles, and resources, sent straight to your inbox.
- or follow us on -
We use cookies to personalize content and analyze traffic to our website. You can choose to accept only cookies that are necessary for the website to function or to also allow tracking cookies. For more information, please see our privacy policy .
Cookie Settings
Necessary cookies are required for the proper functioning of the website. These cookies ensure basic functionalities and security features of the website.
Analytical cookies are used to understand how visitors interact with the website. These cookies help provide information about the number of visitors, etc.
- Ad Creative Eye-catching designs that perform
- Social Media Creative Engaging assets for all platforms
- Email Design Templates & designs to grab attention
- Web Design Growth-driving designs for web
- Presentation Design Custom slide decks that stand out
- Packaging & Merch Design Head-turning apparel & merch
- eBook & Digital Report Design Your digital content supercharged
- Print Design Beautiful designs for all things printed
- Illustration Design Visual storytelling for your brand
- Brand Identity Design Expertise & custom design services
- Concept Creation Ideas that will captivate your audience
- Video Production Effortless video production at scale
- AR/3D Design New creative dimensions that perform
- AI-Enhanced Creative Human expertise at AI scale

Turn your presentation into a video
When you make a recording of a presentation, all its elements (narration, animation, pointer movements, timings, and so on) are saved in the presentation itself. In essence, the presentation becomes a video that your audience can watch in PowerPoint.
So you have two options for turning your presentation into a video that's ready to view:
Save/export your presentation to a video file format (.mp4 or .wmv).
Save your presentation as a PowerPoint Show (.ppsx) file. (A PowerPoint Show appears full-screen in Slide Show, ready to view immediately.)
Save as a video file
After you've created your slides and recorded any timing and narrations and laser pointer gestures that you want to include, you're ready to create a video file.

On the File menu, select Save to ensure all your recent work has been saved in PowerPoint presentation format (.pptx).
Select File > Export > Create a Video . (Or, on the Recording tab of the ribbon, select Export to Video .)
In the first drop-down box under the Create a Video heading, select the video quality you want, which pertains to the resolution of the finished video. The higher the video quality, the larger the file size. (You may want to test them to determine which one meets your needs.)
* The Ultra HD (4K) option is only available if you're using Windows 10 or later.
The second drop-down box under the Create a Video heading tells whether your presentation includes narration and timings. (You may switch this setting if you like.)
If you haven't recorded timed narration, by default the value is Don't Use Recorded Timings and Narrations .
The default time spent on each slide is 5 seconds. You can change that timing in the Seconds to spend on each slide box. To the right of the box, select the up arrow to increase the duration, or select the down arrow to decrease the duration.
If you have recorded a timed narration, by default the value is Use Recorded Timings and Narrations .
Select Create Video .
In the File name box, enter a file name for the video, browse for the folder that will contain this file, and then select Save .
In the Save as type box, choose either MPEG-4 Video or Windows Media Video .
You can track the progress of the video creation by looking at the status bar at the bottom of your screen. The video creation process can take up to several hours depending on the length of the video and the complexity of the presentation.
Tip: For a long video, you can set it up to be created overnight. That way, it’ll be ready for you the following morning.
To play your newly-created video, go to the designated folder location, and then double-click the file.
Save as a PowerPoint Show
When someone opens a PowerPoint Show file, it appears full-screen in Slide Show, rather than in edit mode. The viewer begins watching the presentation immediately.
On the File menu, select Save As .
Choose the folder location where you want to store your PowerPoint Show file.
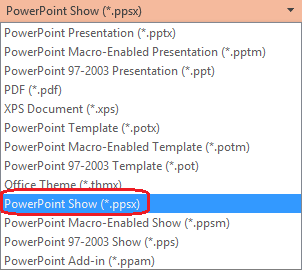
In the Save as type box, choose PowerPoint Show (*.ppsx) .
Select Save .
Why turn your presentation into a video?
When you want to give a high-fidelity version of your presentation to colleagues or customers (either as an e-mail attachment, published to the web, on a CD or DVD), save it and let it play as a video.
You can save your presentation as either an MPEG-4 video file (.mp4) or a .wmv file. Both formats are widely supported and can be streamed over the internet.
Some tips to remember when recording your presentation as a video:
You can record and time voice narration and laser pointer movements in your video.
You can control the size of the multimedia file and the quality of your video.
You can include animations and transitions in your movie.
Viewers do not need to have PowerPoint installed on their computers to watch it.
If your presentation contains an embedded video, the video will play correctly without your needing to control it.
Depending on the content of your presentation, creating a video may take some time. Lengthy presentations and presentations with animations, transitions, and media content will likely take longer to create. Fortunately, you can continue to use PowerPoint while the video is being created
What parts of a presentation won't be included in a video?
The following items won't be included in a video that you create using PowerPoint:
Media inserted in previous versions of PowerPoint. To include these, you can convert or upgrade the media object.
For example, if you inserted the media using PowerPoint 2007, it will be linked and it will play in the presentation. However, when you export the file as a video, the linked media will be dropped. You can convert the file to the new file format (select the File tab, and under Info , select Convert ), or you can right-click the media object and then select it to upgrade; it will embed the file and export it correctly.
QuickTime media (unless you have a third-party QuickTime codec named ffdShow installed and you have optimized for compatibility)
OLE/ActiveX controls
What to do with your video after creating it
After you create a video, you can share it with others by using the following methods:
Email your presentation to others
Save to a file share or other location
Upload it to your organization's Microsoft Stream video-sharing site , as described in the next section, "Save to a video-sharing site."
Save to the Microsoft video-sharing site
After you've created the video file, you can upload it to a video-sharing site. Microsoft Stream is an enterprise video service where people in an organization can upload, view, and share videos. Microsoft 365 business or education subscribers have access to this service from within PowerPoint for Microsoft 365.
Select File > Export , and then select Publish to Microsoft Stream .

Type a title and a description for the video.
Set other options, including whether you want others in your organization to have permission to see the video:

Select the Publish button.
The upload process can take several minutes, depending on the length of the video. A status bar at the bottom of the PowerPoint window tracks the progress, and PowerPoint shows a message when the upload is finished:

Select the message to go directly to the video playback page on Microsoft Stream.
For more information about this service, begin reading with What is Microsoft Stream? It includes information about Office 365 Video vs. Microsoft Stream.
1 The Ultra HD (4K) option is only available if you're using Windows 10 or later. 2 In PowerPoint 2016, the Ultra HD (4K) option isn't available in the Volume License edition.
When someone opens a PowerPoint Show file, it appears full-screen in Slide Show, rather than in edit mode. The viewer begins watching the presentation immediately.
Burn your presentation to a disc

Need more help?
Want more options.
Explore subscription benefits, browse training courses, learn how to secure your device, and more.

Microsoft 365 subscription benefits

Microsoft 365 training

Microsoft security

Accessibility center
Communities help you ask and answer questions, give feedback, and hear from experts with rich knowledge.

Ask the Microsoft Community

Microsoft Tech Community

Windows Insiders
Microsoft 365 Insiders
Find solutions to common problems or get help from a support agent.

Online support
Was this information helpful?
Thank you for your feedback.
How to Upload a PowerPoint 2016 Presentation to YouTube
Once you've finished your PowerPoint presentation, you may want to share it with the world as a video on YouTube. Luckily, the software comes with a tool to convert to .MP4, a format that YouTube accepts.
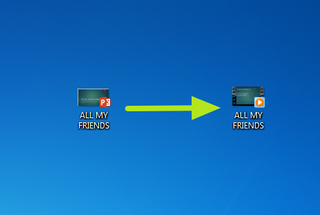
Here are our step-by-step instructions for converting a PowerPoint presentation to a YouTube video. If you just want to share the video file with a friend, skip step 6.
MORE: How to Use Microsoft Word Like a Pro
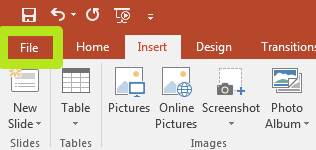
1. Click File.
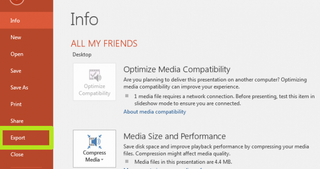
2. Click Export.
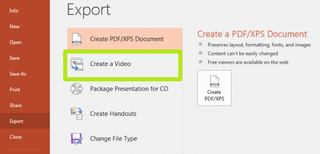
3. Click Create a Video.
4. Click Create Video. If you want to change the video quality, change the added narrations or time spent on each slide, you can tweak those settings here.
Stay in the know with Laptop Mag
Get our in-depth reviews, helpful tips, great deals, and the biggest news stories delivered to your inbox.
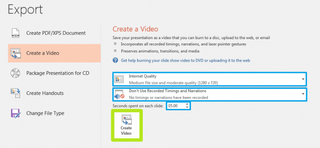
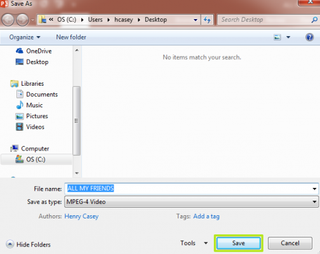
5. Click Save.
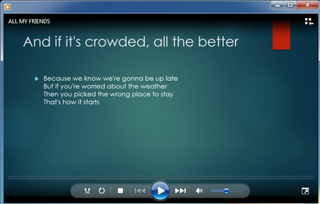
You've converted your YouTube slide into a video.
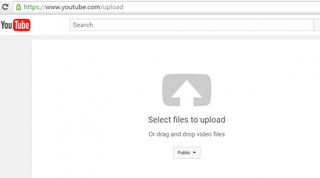
6. Visit https://www.youtube.com/upload to upload.
Microsoft PowerPoint Tips
- Previous Tip
- Change Templates in PowerPoint
- Change a Presentation to Portrait Orientation
- How to Insert a Screen Recording in PowerPoint
- Change Slide Size in PowerPoint
- How to Make a Picture Transparent in PowerPoint
- Convert a Presentation to PDF in PowerPoint
- Add a YouTube Video in PowerPoint
- How to Print Notes with Slides in PowerPoint 2016
How to convert PDF to JPG, PNG, or TIFF
How to add Outlook Calendar to Google Calendar
Qualcomm leans heavily into the future of AI at Computex keynote
Most Popular
- 2 AMD's Strix Point CPUs get a rebrand and 50 TOPS of NPU performance
- 3 Nvidia and Microsoft plan to make Copilot Runtime the only AI toolkit devs need — but what does that mean for you?
- 4 The Acer Chromebook Plus Spin 714 found the secret recipe for on-device AI
- 5 As the Asus ROG Ally X debuts, will handheld gaming be the next gaming laptop?

Our expert, award-winning staff selects the products we cover and rigorously researches and tests our top picks. If you buy through our links, we may get a commission. Reviews ethics statement
- Services & Software
How to Get Microsoft 365 for Free
You could get Microsoft Word, Excel, PowerPoint and other apps for free, saving up to $100 a year with these tips.

- National Silver Azbee Award for Impact/Investigative Journalism; National Gold Azbee Award for Online Single Topic Coverage by a Team; National Bronze Azbee Award for Web Feature Series

- Apple software beta tester, "Helps make our computers and phones work!" - Zach's grandparents

You can use Microsoft Office apps for free.
Microsoft 365 is a productivity suite that includes programs such as Word, PowerPoint, Outlook and OneDrive cloud storage. Because these tools are useful for work and school, you’ll likely want access to them.

A paid Microsoft 365 membership is the most common way to enjoy these apps, and you’ve got multiple tiers to pick from, starting with the $2 a month or $20 a year Microsoft 365 Basic plan. Normally, you’ll pay anywhere from $20 to $100 annually for a subscription depending on the plan you pick. You can sometimes bag Microsoft 365 at no cost.
Here’s how to get Microsoft 365 for free.
Get Microsoft Office 365 Education free if you're a student or a teacher
Say you're a student, teacher or faculty member with an active school email address. You're probably eligible to get access to Office 365 for free through Microsoft, with access to Word, Excel, PowerPoint, OneNote and Teams, plus other classroom tools.
All you have to do is punch in your school email address on this page on Microsoft's website: Office 365 Education . In many cases, you'll be instantly granted access thanks to an automated verification process. If you attend an institution that needs to be verified, it might take up to a month to confirm your eligibility.
College students can also get Microsoft 365 Personal for $3 a month with a valid school email address.

More Tech Tips
- The Best Windows 11 Features
- Ways to Help Your Old Laptop Last Longer
- 5 Ways to Make Your Chromebook More Secure
How to get Microsoft 365 for free if you're not a student or faculty member
Not everyone can take advantage of an email address through an academic institution to get the Microsoft Office suite at no cost. Thankfully, anyone can get a one-month free trial of Microsoft 365. You do need to enter a credit card number. If you don't cancel your subscription before the month is up, you'll be charged $100 for a one-year subscription to Microsoft 365 Family (formerly called Office 365 Home).
The good news is that you can access a number of apps online for free, including Word, Excel, PowerPoint, OneDrive, Outlook, Calendar, My Content, Skype, Designer and Clipchamp as long as you don't need the full suite of Microsoft 365 tools. Here's how to get them:
1 . Go to Microsoft365.com .
2 . Click Sign up for the free version of Office under the "Sign in" button.
3 . Log in to your Microsoft account or create one for free . If you already have a Windows, Skype or Xbox Live login, you have an active Microsoft account.
4 . Select the app you want to use and save your work in the cloud with OneDrive.
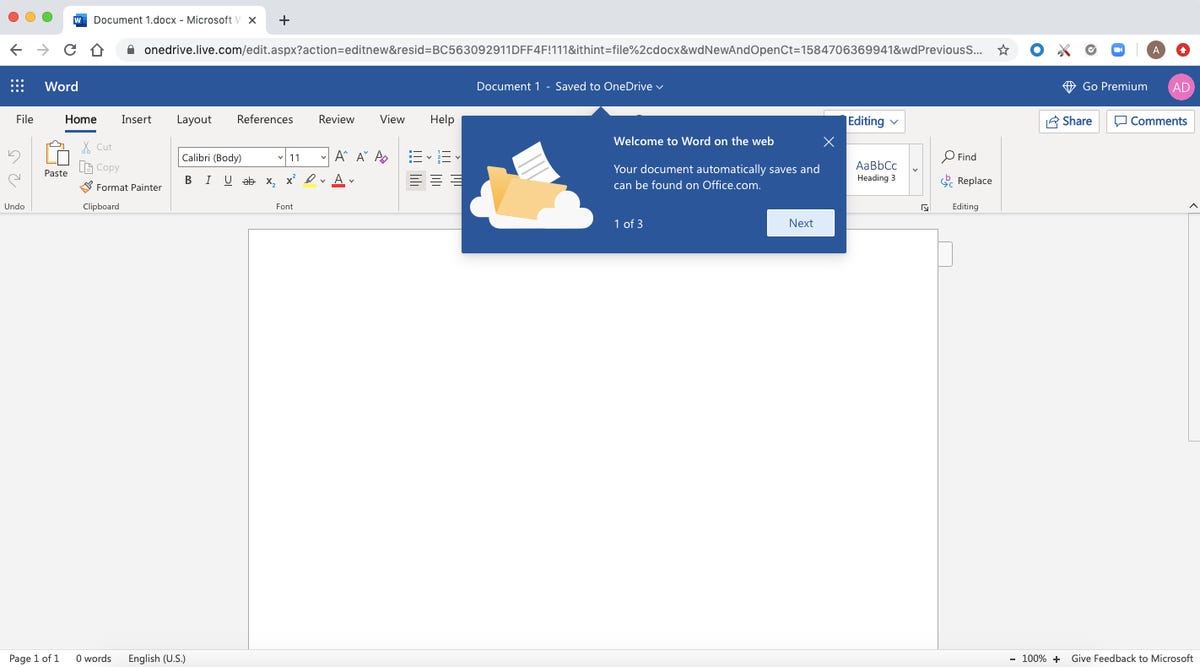
Use the browser-based version of the Microsoft Word app for free.
So what's the catch for the free version?
You might be saying, "Wait a minute, if I can get all of those apps for free, why pay for Microsoft 365 in the first place?" The functionality of the free apps is limited, so they only run in your web browser and you can only use them while you're actively connected to the internet -- there’s no online version. They also have fewer features than the full Microsoft 365 versions.
There are still benefits to the free version, including the ability to share links to your work and collaborate in real-time, similar to what the Google Workspace (formerly G Suite) productivity tools allow. If you're looking for basic versions of each of these apps, the free version should work well for you.
For more productivity coverage, check out what Microsoft 365 Basic offers customers , all of the best features in Windows 11 and how to take screenshots in Windows 10 or 11 . You can also take a look at CNET's list of the best Windows laptops .

- Yes, You Really Need a Password Manager. Here's How to Set One Up Today
- If You Value Your Privacy, Change These Browser Settings ASAP
- Low Storage on Windows 11? Here's How to Free Up Disk Space on Your PC
Services and Software Guides
- Best iPhone VPN
- Best Free VPN
- Best Android VPN
- Best Mac VPN
- Best Mobile VPN
- Best VPN for Firestick
- Best VPN for Windows
- Fastest VPN
- Best Cheap VPN
- Best Password Manager
- Best Antivirus
- Best Identity Theft Protection
- Best LastPass Alternative
- Best Live TV Streaming Service
- Best Streaming Service
- Best Free TV Streaming Service
- Best Music Streaming Services
- Best Web Hosting
- Best Minecraft Server Hosting
- Best Website Builder
- Best Dating Sites
- Best Language Learning Apps
- Best Weather App
- Best Stargazing Apps
- Best Cloud Storage
- Best Resume Writing Services
- New Coverage on Operating Systems

IMAGES
VIDEO
COMMENTS
In PowerPoint, you can create a presentation from scratch, or from a theme with built-in graphics, fonts, and placeholders for your text, images, and content...
Learn everything you need to know to get started using Microsoft PowerPoint! You'll learn all the basics plus more, including: how to choose a design theme...
Get started with PowerPoint for Beginners. Follow this 20-Minute step by step PowerPoint tutorial to start creating presentations smoothly.Contents of this v...
Download HubSpot's PowerPoint Templates and learn how to make a good PowerPoint presentation [FREE TEMPLATES]: https://clickhubspot.com/Create-Beautiful-Powe...
This is the beginning Microsoft PowerPoint course that you've been waiting for! Learn everything you need to effectively use PowerPoint by watching just one ...
10-Minute PowerPoint Presentation Tips • PowerPoint Tips • Learn how to create an engaging 10-minute PowerPoint presentation with these essential tips and tr...
How to make a PowerPoint animation and a PowerPoint presentation with this 12-mins PowerPoint tutorial for beginners! Edit your presentation videos seamlessl...
In this step-by-step tutorial, learn how to upload a PowerPoint presentation to YouTube. We start with enabling the recording tab so you can prepare your Pow...
Step 1: Find the YouTube video you want to embed. Locate the YouTube video that you want to add to your PowerPoint presentation. Finding the right YouTube video is the first step. Make sure it's relevant to your presentation's content and will add value for your audience. Once you've found it, copy the URL from the address bar.
Select the presentation you want to add the video in and click on the arrow located next to the Library button. Now click on the arrow located next to the Media button and select the Media button. You will now see all the videos in your PowerPoint presentations, select your video and click on the arrow located next to the Insert button. You ...
Microsoft PowerPoint is a presentation design software that is part of Microsoft 365. This software allows you to design presentations by combining text, images, graphics, video, and animation on slides in a simple and intuitive way. Over time, PowerPoint has evolved and improved its accessibility to users.
To do that, simply go up to the Home tab and click on New Slide. This inserts a new slide in your presentation right after the one you were on. You can alternatively hit Ctrl+M on your keyboard to insert a new blank slide in PowerPoint. To learn more about this shortcut, see my guide on using Ctrl+M in PowerPoint.
Step 1: Clean Up Your Slides. If you want to give a professional finish to the video, try breathing life into the slides first. Open the file with PowerPoint 2010 and click "View," followed by "Slide Master," to apply uniformity in alignment, bullets, fonts and spacing. After saving the Master template, go to "Slide Sorter" view and ...
By clicking a button, you can easily generate a live poll in PowerPoint. When you click 'Add a slide,' you will be prompted to enter your poll text as well as the poll slide's text. Now that you've gathered the necessary information, you're ready to stage live polls with your audience.
Here's how to convert your presentation to a video. 1. Click the File tab on the PowerPoint (2010 version or later) 2. Click the Export tab. 3. Click Create a Video from the list of options. You can tweak some of the settings, including slide durations, video resolution, and narrations.
Open PowerPoint. In the left pane, select New. Select an option: To create a presentation from scratch, select Blank Presentation. To use a prepared design, select one of the templates. To see tips for using PowerPoint, select Take a Tour, and then select Create, . Add a slide.
Select the slide where you want to embed the YouTube video. On the "Insert" tab, click the "Video" button. On the drop-down menu, select the "Online Video" option. The Insert Video window that appears lets you search YouTube for a video or paste in that embed code you copied from the YouTube website. Paste the embed code and click ...
If you want to learn more about successful presentations and Audience Engagement, check out our blogpost Top 10 Tools for increasing Audience Engagement. Set the start of your video. After you've added a video from YouTube, it starts to play by default when you click anywhere on the slide during the presentation.
Copy the address of the web page from the Address bar of your browser. Switch to PowerPoint for the web and select the slide where you want to place the video. On the Insert tab of the ribbon, in the Media group, select Online Video. In the Online Video dialog box, paste the address you copied in step 2. Select Insert.
Click and drag to draw a rectangle on the slide to hold the YouTube video. Go to YouTube and copy the URL of the video you want to embed. Go to the slide with ActiveX object, right click on the ActiveX object and click on "Properties". Scroll down to the Movie field and insert the copied URL. Another useful video:
On the File menu, select Save to ensure all your recent work has been saved in PowerPoint presentation format (.pptx). Select File > Export > Create a Video. (Or, on the Recording tab of the ribbon, select Export to Video .) In the first drop-down box under the Create a Video heading, select the video quality you want, which pertains to the ...
First, let's go over to the File tab in PowerPoint, and choose Export . Start by clicking on the File tab. Click on Create a Video to export your presentation as a video file. 2. Set How Long Each Slide Shows. In many cases you can let YouTube handle the compression. I'll leave this set to Full HD, and let YouTube handle the compression.
Here are our step-by-step instructions for converting a PowerPoint presentation to a YouTube video. If you just want to share the video file with a friend, skip step 6. 1. Click File.
You're bored with the same prensentation style? Check out my new power point template with Genshin Impact Theme (Dashboard style) *click the link in the image to see the demostration video 😉*
Here's how to get Microsoft 365 for free. Get Microsoft Office 365 Education free if you're a student or a teacher. Say you're a student, teacher or faculty member with an active school email ...