Home Blog Education How to Present a Lesson Plan

How to Present a Lesson Plan

First days are always exciting, and expectation builds up about the contents of the task ahead, especially if you’re starting a class as a student or professor. This interaction will be significant because it will establish and define the subjects to be covered and the set of expectations flowing from the instructor towards the audience.
Perhaps you are ready to begin your career as a teacher and need some guidance; otherwise, you are a seasoned instructor searching for a refresher in your program. No matter which of the above you represent, the truth of the matter is that you are probably seeking a better way to introduce the subjects you’ll be teaching to your students.
What is a lesson plan?
A lesson plan will be the set of subject matter materials you will be teaching during a specific timeframe. The lesson plan should be an index that students can constantly consult to understand better the parts of the learning journey they will go through during each session.
Teachers and professors should have a lesson plan template that happens in every session. This is different from a syllabus because, in the latter case, the whole curriculum of the program will be laid out; however, for each lesson, there should be one individual lesson plan example to guide the instructor in the set timeframe.
When building the materials for the class or lesson’s attention, it’s always essential to share elements like the purpose or rules that guide the learning process . This article will explore the best way to present a lesson plan and drive a learning session successfully from the instructor or professor’s view.
How to write a lesson plan
Education nowadays guides different sorts of students and target specific learning needs. Therefore, it’s important and relevant to understand how lesson plans can change and be varied to truly implement the best learning path for your students. Once you have this part figured out, the next step is to understand how you will transmit the information and use a PowerPoint Presentation to simplify creating and presenting a lesson plan to your students.
Lesson plans will comprise several different sections that will clarify the first questions students can have: How long will the course be? Will it be an online course ? What will be the main objectives? Which subjects will be discussed along with the class?
1. Introduction
As the lesson begins, it’s essential to place a brief yet descriptive introduction about what the session will cover. A good practice is to create a catchy title for each lesson to have an overall understanding of the information they will be receiving.
Example: Digital Marketing Basics: Industry background, historical review years 1980-2010. In this session, we will cover the birth of digital marketing, including all the touchpoints that shaped today’s industry.
2. Audience
If your class is a one-time-only or recurring session, or even a blended learning journey, it’s essential to explain to your students who this class is for; this will allow them to calibrate their expectations about the matter to be taught ahead.
Example: This lesson is directed to professionals who work in traditional marketing, business owners, or communication specialists seeking to have a profound understanding of how digital marketing came to be.
3. Lesson Objectives
This piece is critical because it will allow the students to assess the intention of each lesson. When thinking about the objectives, it’s vital to consider the acquired skills we expect our students to have at the end of the class. Like any other goals in life or business, each one should be actionable and measurable, meaning after each class, students should be able to use what they have learned and put into action the concepts.
Example : Understand and be able to create a timeline framework of reference to explain the story of the Internet.
4. Materials
Suppose the lesson requires using any specific materials, physical or not, including any software or hardware necessary. In that case, it´s important to list or include within the lesson plan so students can set clear expectations on what they might require. This is particularly important if the session you will be delivering requires them beforehand to bring anything.
Example :
- Computer
- Scratch paper
5. Learning Activities
We´ve covered all the logistics by this point; however, now we need to start sharing the actual activities during the lesson. Ideally, this is a play-by-play of how each activity will guide the lesson towards the already established objectives. To add the list of learning activities that will be helpful for your students, take into account how all of them align with each goal and the requirements students need.
Make sure that you add variety to the activities that you are proposing, go ahead and research trends of how many other teachers or professors, students will appreciate your search to engage them in learning.
Also, consider how much time they will take so that you can note it in the next section.
- Create a timeline on the wall with the most important moments of digital marketing history, including creation of social media, mainstream of email, etc.
Time periods
Pairing each learning activity with a specific timeframe will be useful both for instructors and students. Make sure you calculate a reasonable amount of time for each activity and list it within the lesson plan so everyone can set correct expectations. Assigning time slots for each exercise will also help students and teachers stay on track with the lesson and not waste valuable time invested in learning.
Example : Creation of a timeline – 45 min

How to present a lesson plan
We have now listed the components of the lesson plan structure, everything looks beautiful in the draft, but now we need to start planning how we will present the program to the students. This part is challenging because you have to choose a template that makes sense for you and will be helpful for your students to understand.
A PowerPoint presentation is a great way to showcase all the contents of the lesson plan, however, the trick is to decide how you want to structure it.
Lesson Plan Design
By this point, you’ve structured a lesson plan template that can go through any test. Nevertheless, creating the materials to accompany it can be a key in the commitment generates between the students and the professor.
Design and Style
Before adding any text to your presentation template , think about the requirements you have: Does the academic institution where you work require the use of logos? Do you have to follow any visual guidelines? This might be important for the cohesiveness of your presentation.
It’s essential to think about how you would like to present the lesson plan. You may want to keep it simple and have a 1 pager and talk through it to understand your students fully, or perhaps you need to create one full presentation where every slide will be a relevant piece of information. Let’s explore this a bit further.
One Pager Lesson Plan
If your style is more towards simplicity, this is a great solution: succinct, minimalistic, and straight to the point. You can complete a one-page lesson plan with bullets of the relevant data and send it out to students. A great advantage of this format is that you can either send it as a PDF or even as a single image (JPG or PNG), exporting it directly from PowerPoint.
One significant advantage is that your students will only have to check for one source by choosing this simple format when revising the lesson during the class or afterward.
Several pages lesson plan
Almost like a syllabus, a more extended presentation will include several slides so you can include the information in different formats.
For example, you can use the first slide to include the lesson title; afterward, a new slide can define the purpose or introduction of the lesson. In the upcoming slides, you can include materials, contents, and even ad charts or similar to explain how grades will be affected by each lesson’s assignments on the upcoming slides.
Text in the presentation
It’s always good to follow the reliable practices of presentations and include the necessary information without overwhelming students. Don’t add an excessive amount of text to one slide; actually, make sure that every piece of data is helpful for students to plan their time both during and after class.
However, if you will be sending out the presentation to your students before reviewing it, consider that they will be using it for their reference to follow through with your lesson. So make sure all the information is easy to read and accessible.
Additional elements
Learners of all sorts have become increasingly visual, so don’t be afraid to add infographics, images, photographs, icons or any other elements to make your lesson plan presentation more appealing visually.

Final Words
Remember the lesson plan presentation will be the first approach your students will have with the subject matter. Take your time, enjoy the process, and create comprehensive and attractive lesson plan slides that will inspire your students to have thoughtful and deep learning.
1. 1-Slide Lesson Plan PowerPoint Template
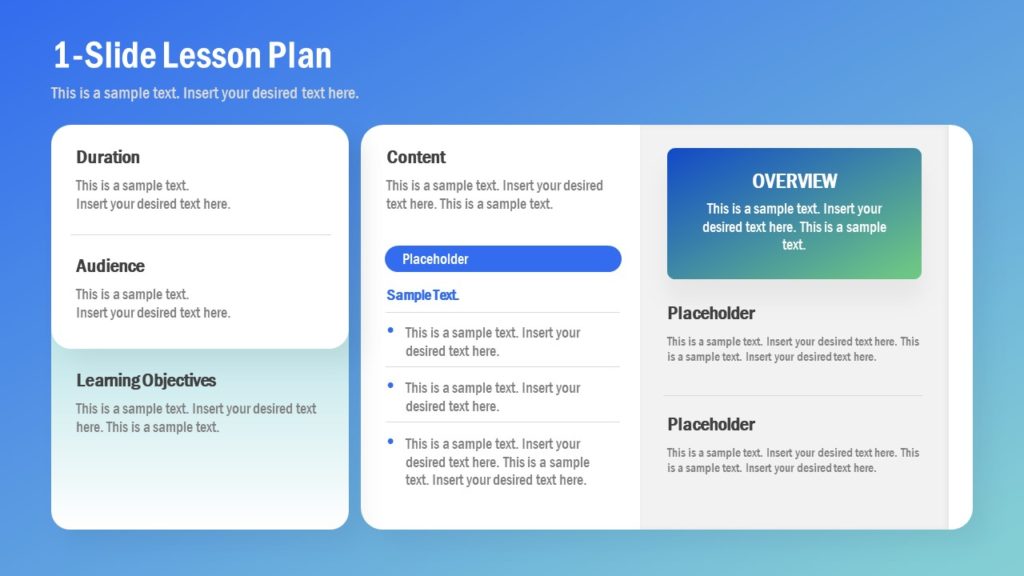
Create a simple and minimalist one-pager lesson plan for your academic uses, course planning, and even as student handouts, with this eye-catching PowerPoint template.
Use This Template

Like this article? Please share
Learning Experience, Learning Styles, Presentation Approaches, Presentation Tips, Presentations Filed under Education
Related Articles

Filed under Presentation Ideas • June 6th, 2024
10+ Outstanding PowerPoint Presentation Examples and Templates
Looking for inspiration before approaching your next slide design? If so, take a look at our selection of PowerPoint presentation examples.

Filed under PowerPoint Tutorials • May 28th, 2024
How to Compress PowerPoint Presentations
You don’t need to end up with gigantic PowerPoint files you cannot email or distribute with ease. Instead, learn how to compress PowerPoint presentations by applying any of these 6 different methods.

Filed under Google Slides Tutorials • May 28th, 2024
How to Add a GIF to Google Slides
With this guide we teach you how to make presentations more interesting by adding GIF images to Google Slides.
Leave a Reply
How to Create an Effective Lesson Plan Presentation
Regardless of the subject or content you’re teaching, having a lesson plan in place prepares you for class by offering detailed guidelines for the session. The lesson plan doesn’t have to be lengthy or complex—it just needs to include elements about what you’re teaching, the method of presenting this material, and what objective and goals you wish your students to achieve as part of the curriculum.
Why Lesson Plans Are Important
It’s crucial for teachers to prepare their lessons in advance and implement the best teaching approaches. Attending a session without a lesson plan can be counterproductive for both students and teachers. Without the right preparation beforehand, classes can end up being unproductive or confusing.
Below are a few reasons why you should consider lesson planning:
Lesson Planning is Handy for Classroom Management
Developing the lesson plan from the learning objectives provides flexibility in adapting to different teaching methods and classroom management techniques. For instance, hybrid or online classes require a different delivery approach from the traditional classes, which means making modifications to any existing plans. With the right foresight and plan in place, classes can stay on topic and effective. Such circumstances underscore how crucial lesson plans are in ensuring that the class runs smoothly, regardless of the learning environment.
Lesson Planning Creates Student Success
Various studies have shown that students benefit immensely from and appreciate well-structured lessons. Thus, success is more likely when students engage and show interest in the material being taught. Using a curriculum guide, teachers can develop valuable lesson plans based on specific objectives and goals (what’s intended for students to learn).
Lesson Planning Is Central to Teacher Success
Teachers’ success is, to some extent, pegged on students’ success. Besides that, the documents you develop as part of the lesson planning process are often part of your assessment by school administrators. What’s more, as you advance your teaching career, your lesson plans serve as a repository for your expanding body of knowledge. Thus, the significance of lesson planning cannot be overlooked when it comes to advancing your career as an educator.
Lesson Planning is Vital in Student Assessment
Lastly, lesson plans turn the learning sessions into clear objectives for students and a way to gauge their understanding of the subject matter. One notable benefit of the lesson plan is tailoring the assessment to a particular objective while considering students’ specific needs. You can use common assessment methods such as quizzes, tests, and homework assignments.
How to Write a Lesson Plan
Lesson plans include different sections that clarify questions students might have about the subject on hand. What are the lesson objectives? What subjects will be covered during the session? How long will the course take?
- Introduction – As the lesson commences, it’s good to have a concise yet vivid introduction about what the lesson will cover. The ideal practice is to create a memorable title for every lesson to create a general understanding of the learning material students will be interacting with.
- **Lesson Objectives –**This section is critical as it allows the students to ascertain each lesson. When it comes to objectives, it is crucial to consider the acquired skills you expect the students to gain by the end of the session. Each objective should be measurable and actionable; meaning after every session, students should be able to apply what they’ve learned.
- Learning Activities – This should be a detailed account of how each activity will lead the class to achieve its predetermined goals. To create valuable activities, consider how each learning activity fits each objective, and the requirements students need.
- Practice – Practices are primarily intended to assess students’ comprehension of the material and aid in memorizing what they have learned in class. Therefore, it is crucial to include this in the lesson plan so that assessments can always be done at the appropriate time.
Today, lesson planning has been made less time-consuming and easier, thanks to smart whiteboards for the classroom . A digital whiteboard like the Vibe Board Pro provides unmatched performance that shows you know your craft and are way ahead of the pack.
Download Our New E-book
The Future of Learning
Download Our New E-book The Future of Learning
Read our privacy policy .
We’ve sent you an email with the PDF download link. Enjoy!
Can't wait? Read now
How Smart Whiteboards Simplify Lesson Plan Creation and Presentation
Not only does using a smart whiteboard make learning accessible , it’s also a great way of enhancing and enriching your lesson plans with interactive activities for the class. Smart whiteboards function as a touch screen for all; during class sessions, you and your students can use it as a digital whiteboard to create a space where students’ engagement, knowledge, and teamwork are appreciated.
While the smart whiteboard aids in making your lesson more engaging, interactive, and educational, you as the teacher can still customize your teachings to what you want them to be. This helps in foiling any hitches in your lesson presentation and makes switching from one topic to another seamless.
Below are more specific ways how smart whiteboards make your lesson plan presentation better:
Take Advantage of Built-in Templates
Once you invest in a smart whiteboard, make sure to take advantage of the wide variety of built-in lesson planning templates. You can use these templates to improve lesson plans while leveraging the technology associated with smart whiteboards. Even better, these templates can be easily customized for every lesson plan and cover different subject matters, allowing you to create new lesson plans without always starting from scratch quickly. How cool is that?
Organize and Present Lesson Plans Better
Smart whiteboards combine the power of the traditional whiteboard and a TV/projector into one hub, allowing you to write on the board while concurrently projecting it to the classroom. This allows you to conduct lesson plan presentations on a larger scale while also letting students see what’s going on.
For instance, if you’re presenting on an extensive topic involving multiple subtopics, a smart whiteboard will help you walk students through each subtopic with ease. Begin with the presentation divided into primary or main sections, highlight key definitions, and add infographics and videos to ensure that every student understands the tiniest detail.
Additionally, you can get students involved in the lesson plan presentation by asking questions, polling them on key points, or allowing them to follow along on their tablets or laptops.
Record Lesson Plan Presentations
Another benefit of using smart whiteboards in the classroom is that a lesson plan presentation can be recorded and accessed long after the session is over. This allows your students to access the material on their own time.
Final Words: Creating a Lesson Plan Presentation
Lesson plan presentation offers students the first interaction with the material they will learn. Take your time, appreciate the process, and create an attractive and comprehensive lesson plan that will encourage your students to have deep and thoughtful learning experiences. Even better, all of this can be made easier with smart whiteboard technology. Leave the spiral notebooks and sticky notes at home. A smart whiteboard is all you need.
What is the presentation stage in lesson planning?
Presentation is usually the core of the lesson plan. During this stage, theteacher introduces the topic and the key subject matter the students need to master. Presenting with smart whiteboards is exceedingly easy and less time-consuming.
What are the 5 steps in lesson planning?
The five steps are:
- Objective: A learning concept or objective is introduced.
- Warm-up: Revise the previous lesson
- Presentation: Present the material using suitable tools and techniques.
- Practice: Students try to apply what they have learned.
- Assessment: Evaluate whether the objectives were achieved
How does lesson planning help teachers?
Planning lessons in advance allows teachers to arrive at class each day prepared to introduce new concepts and facilitate engaging discussions rather than improvising as they go. In other words, without a lesson plan, teachers may be left scrambling, making students lose interest in the material to be learned.
Subscribe to get updates on all things at Vibe
- Lesson Title
- Grade Level
- Subject or Topic
- Preparation
- Instructional Plan or Teaching Sequence
- Differentiation
- Homework/Assignments
- Additional Notes
Tips for How to Write a Lesson Plan for English
Tips for how to write a lesson plan for maths, tips for how to write a lesson plan for science, tips for how to write a lesson plan for art, tips for how to write a lesson plan for physical education, how to create a lesson plan.

Introduction

Steps to Creating an Effective Lesson Plan
1. lesson title.

a. Reflect the Content
B. be engaging, c. be specific, 2. grade level.

a. Grade or Age Group
B. prior knowledge, c. appropriate content, d. cognitive development, recommended for you, 3. subject or topic.

a. Clear Identification
B. alignment with curriculum, c. relevance, d. conciseness, 4. duration.

a. Time Allocation
B. realistic estimate, c. flexibility, d. alignment with schedule, e. include breaks, 5. objective.

b. Measurability
C. alignment, d. realistic expectations, e. relevance, 6. materials.

a. Comprehensive List
B. specifics, c. preparation, d. availability, e. accessibility, 7. preparation.

a. Advance Planning
B. timeline, c. resources, d. checklist, e. contingency plans, 8. instructional plan or teaching sequence, 1. introduction of chapter and topic.

2. Content Presentation

3. Activities and Exercises

4. Assessment

9. Differentiation

a. Understanding Student Diversity
B. inclusive strategies, c. accommodations, d. extensions, e. grouping, f. assessment flexibility, 10. homework/assignments.

a. Assignment Description
C. due date, d. resources, e. grading criteria, 11. reflection.

a. Observations
B. challenges, c. student engagement, d. assessment of learning, f. adjustments, g. next steps, 12. additional notes.

a. Clarifications
B. special considerations, c. reminders, d. alternative approaches, e. references, f. next steps, bonus content.

Sample Lesson Plan
Bonus: tips for crafting subject-specific lesson plans, unlock exclusive content – sign up now.

Focus on Core Skills
- Identify the key language skills you want students to develop, such as reading, writing, listening, and speaking.
- Align lesson activities with specific language goals to ensure a comprehensive approach.
Incorporate Literature
- Integrate literary works that resonate with your students to make the learning experience more engaging.
- Encourage critical thinking and analysis through discussions about themes, characters, and plot structures.
Include Creative Writing
- Devote time to creative writing exercises that allow students to express themselves.
- Provide constructive feedback to nurture their writing skills and foster a love for language.

Clearly Define Objectives
- Specify the mathematical concepts and skills students should grasp by the end of the lesson.
- Break down complex topics into manageable learning objectives.
Utilize Visual Aids
- Integrate visual representations, charts, and diagrams to enhance understanding of mathematical concepts.
- Encourage students to create their visual aids to reinforce learning.
Incorporate Real-World Applications
- Relate mathematical concepts to real-life situations to demonstrate their practical relevance.
- Design activities that challenge students to apply mathematical principles in problem-solving scenarios.

Hands-On Experiments
- Prioritize hands-on experiments to make scientific concepts tangible.
- Ensure safety measures are communicated and followed during practical sessions.
Use Multimedia Resources
- Integrate videos, simulations, and interactive tools to supplement theoretical explanations.
- Appeal to various learning styles by incorporating a multimedia approach.
Encourage Inquiry-Based Learning
- Foster curiosity and critical thinking by structuring lessons around inquiry-based activities.
- Guide students to ask questions, formulate hypotheses, and conduct investigations.

Creative Expression
- Prioritize activities that allow students to express their creativity through various art forms.
- Provide opportunities for experimentation with different materials and techniques.
Art History Exploration
- Explore different art movements and styles to broaden students' understanding of artistic traditions.
- Discuss the cultural and historical context of famous artworks.

Skill Progression
- Design lessons that focus on the progressive development of motor skills and physical abilities.
- Incorporate activities that cater to various fitness levels and interests.
Team Building and Sportsmanship
- Integrate team sports and cooperative activities to promote teamwork and sportsmanship.
- Emphasize the importance of fair play and positive attitudes in physical activities.
Pre-Primary Teacher
Assistant teacher, primary teacher, post graduate teacher, head of department, format of a stellar lesson plan with samples, how to create a lesson plan, different types of lesson plans, common mistakes in lesson plans, wrapping up, good news, frequently asked questions.
Yes, lesson plans can be adapted by adjusting the complexity of tasks, modifying resources, and considering the developmental stages of students. Flexibility is key in catering to various grade levels.
Depending on the subject, you can integrate technology by using educational apps, interactive presentations, or online resources. Ensure that technology enhances the learning experience without being a distraction.
Let's consider a high school Biology lesson about cellular processes. Instead of a traditional lecture, you decide to leverage technology to make the topic more interactive. You introduce an educational app that allows students to explore virtual cells, witness cellular activities, and even simulate experiments. To learn more on how to integrate technology into your classroom, watch this masterclass for free !
Reflection is key. After the lesson, consider what worked well and what could be improved. Collect feedback from students and be open to adjusting your approach based on their responses. Read this blog on Reflection in Teaching to gain insights to practice reflection in your teaching process.
While it's important to have a plan, flexibility is crucial. Be prepared to adapt based on the needs of your students, unexpected class dynamics, or if an activity is taking more or less time than anticipated.
While formats may vary, a typical lesson plan includes above mentioned sections like objectives, materials, procedures, assessment, and closure. The key is clarity and organization to guide effective teaching.
Stay calm and be adaptable. Have a few backup activities or quick engagement strategies on hand. Establish clear classroom expectations to minimize disruptions. Let's say you're in the middle of explaining a complex math concept, and suddenly there's a loud noise from the hallway that grabs everyone's attention. Instead of getting flustered, take a moment to address the distraction calmly. You might say, "It seems like there's a bit of noise from the hallway. Let's all take a deep breath and refocus on our learning.”
It's possible to use existing lesson plans as a template, but tailor them to suit your teaching style, students, and classroom dynamics. Personalizing the content will make it more effective for your students.
Encourage open communication with students and colleagues. Seek feedback on the clarity of instructions, engagement level, and overall effectiveness. Continuous improvement is a key aspect of teaching.

Simran Agarwal
Simran is a writer here at Suraasa and has formerly worked as a Teacher. She is passionate about learning and making a difference through her words.
We use essential cookies to make Venngage work. By clicking “Accept All Cookies”, you agree to the storing of cookies on your device to enhance site navigation, analyze site usage, and assist in our marketing efforts.
Manage Cookies
Cookies and similar technologies collect certain information about how you’re using our website. Some of them are essential, and without them you wouldn’t be able to use Venngage. But others are optional, and you get to choose whether we use them or not.
Strictly Necessary Cookies
These cookies are always on, as they’re essential for making Venngage work, and making it safe. Without these cookies, services you’ve asked for can’t be provided.
Show cookie providers
- Google Login
Functionality Cookies
These cookies help us provide enhanced functionality and personalisation, and remember your settings. They may be set by us or by third party providers.
Performance Cookies
These cookies help us analyze how many people are using Venngage, where they come from and how they're using it. If you opt out of these cookies, we can’t get feedback to make Venngage better for you and all our users.
- Google Analytics
Targeting Cookies
These cookies are set by our advertising partners to track your activity and show you relevant Venngage ads on other sites as you browse the internet.
- Google Tag Manager
- Infographics
- Daily Infographics
- Popular Templates
- Accessibility
- Graphic Design
- Graphs and Charts
- Data Visualization
- Human Resources
- Beginner Guides
Blog Education 27+ Easy-to-Edit Lesson Plan Examples [+ Writing Tips]
27+ Easy-to-Edit Lesson Plan Examples [+ Writing Tips]
Written by: Alice Corner Dec 07, 2023

Lesson plans are the best way to deliver an effective and engaging lesson. Lesson plans also help keep you on track to ensure that your learners hit their goals and targets, in line with your course curriculum.
But sometimes in the high-pressure world of education, it can be difficult to find the time to create inspiring lesson plans on your own.
I’ve gathered together 28 of the best lesson plan examples on the internet that you can use to ensure your lessons are insightful and inspiring.
Table of contents (click to jump ahead):
What is a lesson plan?
What is included in a lesson plan, how to write a lesson plan, preschool lesson plan examples, math lesson plan examples.
- Science lesson plan examples
1. Objectives: know your destination
When writing a lesson plan, start by outlining the learning objectives—what you want your students to take from the session and work backward. Having clear and specific goals helps you plan activities for a successful lesson.
2. Welcome to the hook: make ’em want to learn
Start with an engaging “hook” to capture your students’ attention and make them eager to learn more. This could be a thought-provoking question, an interesting fact, or a surprising tidbit.
Apply a top-down method: plan on a course level the lessons you’re going to include and then go deeper and think about the activities you would like to include in each lesson.
3. Step-by-step: outlining the activities
Now that your students are hooked, it’s time to get down to business. Work on exercises or projects you would like your students to take on. These should serve two important purposes: allowing your students to apply the knowledge they learn in class and allowing you, the teacher, to assess students’ understanding of the materials.
This might include direct instruction (i.e., when you teach the material), guided practice (working together as a class), independent practice (students work on their own) and group activities. Think about the best way to engage students and make sure you include a variety of these activities besides just tests or exams, like quizzes, group discussions, group projects and so on.
Example: If your objective is teaching persuasive writing, your steps might look like this:
- Explanation of persuasive writing techniques and purpose
- Guided practice: analyzing persuasive texts as a class
- Independent practice: having students create a persuasive argument on a given topic
- Group activity: Debating the different arguments in teams
Remember the old adage: “Tell me, and I forget. Teach me, and I remember. Involve me, and I learn.”
4. Check for understanding: keep ’em on track
It’s not uncommon for students to zone out (we’ve all been there), so it’s crucial to regularly check if they’re on track. This means asking questions throughout the lesson and encouraging your students to reflect on the material.
Once you’ve got all these noted down, you can start arranging all the lessons and activities in a meaningful and logical order as well. This applies to the activities within a single lesson too. Answer these questions:
- How much time do you have for the whole lesson?
- What do you plan to start and end the lesson with?
- How much time do you have for each activity?
- If you still have time after all the activities are done, what are you planning to do?
- If you run out of time, what activities are you planning to drop?
As you plan your lesson, keep in mind that not all students learn at the same pace and in the same way. Tailor your activities and materials to accommodate different learning styles, skill levels and interests. This could mean offering choice in assignments, providing extra support for struggling learners, or challenging high-achievers with extended tasks.
Creating a preschool lesson plan involves careful consideration of the developmental needs and interests of young children. Shaping young minds is a rewarding experience, but it can sometimes feel like juggling too many balls at once.
With so many different essential key skills to teach, using a thorough Preschool lesson plan is important for making sure that your learners progress stays on track.
Break your Preschool lesson plans into learning sections
Preschool curriculums can be complex, covering multiple areas of crucial childhood development.
Help visualize each of these areas in their own right by creating a preschool lesson plan that takes a broad overview.
By breaking your lesson plan into learning sections, like this Preschool lesson plan example, you can get a glance at all elements of your students learning at once.

Get an overview of your week with a weekly lesson plan
A weekly lesson plan works great for preschool education planning, as it helps you identify and build lessons around common themes or goals. In the lesson plan template below, weeks have been broken down into different areas of focus.

Use icons in your Preschool lesson plan
Using icons is a great way to communicate visually. Icons are easy to understand, especially when you’re skimming a document.
Take this lesson plan template for example, not only do the icons help communicate the lesson themes, they also make the lesson plan example super engaging and fun.
Using icons can also be a great way to help students who struggle with non-visual learning. For more ways to improve your lesson accessibility, check out this guide to creating a Color Blind Friendly Palette .
Creating a math lesson plan involves careful planning and consideration of various elements to ensure effective teaching and learning. Check out these lesson plan ideas for math tutors for writing the best math lesson plan, as well as some templates you can edit.
Use pops of color in your lesson plans
Just because your lesson plan tackles a complex subject doesn’t mean it has to be boring. In this lesson plan example a mint green color has been used to help break up the design. You could color code different subjects or units if you have multiple classes to teach.

Break your lesson plan into sections to make it easy to follow
Being properly prepared for any eventuality in your lesson starts with good planning. By using sections, like in the lesson plan example below, you can cover all of your bases.
When lesson planning, consider the following:
- Lesson discussion questions
- Activity options for multiple group sizes
- Lesson notes or feedback
In this math lesson plan activity, the teacher has thought through all of the needs of their class.

Think outside the box when lesson planning
When lesson planning, the world, or at least the internet, is your Oyster. Instead of just teaching vocabulary, use scavenger hunts, word searches, or story activities.
Try picking a new activity and building your lesson around that. In the lesson activity example below, Merriam-Webster has a dictionary scavenger hunt that will keep students engaged and entertained throughout your English lesson.

Highlight your lesson objectives at the top of your lesson plan
Your learning objectives should guide your lesson planning, not the other way around.
In this sample lesson plan that focuses on analyzing a film for an English class, the learning objectives are housed within the same section as the lesson plan overview, right on the first page:

If you want to learn how to write an actional learning objective , check out this post on learning objective examples .
Science l esson plan examples
Planning a science lesson can mean anything from experiments to monitoring or diagramming and labelling.
Following a template, like in the science lesson plan examples below, can help make sure that your science lessons run smoothly.
Provide a space for reflection in your science lesson plan
Whilst a lesson plan is a place to schedule your activities, it can also be a great document to refer back to when planning future sessions. Adding a reflection section in your science lesson plan can be a great way to add notes about what worked and what didn’t within your lesson, for future reference.

Break projects down into sections of deliverables
If you’re conducting a difficult lesson, such as a hands-on science project, it can be handy to help yourself and your students by outlining expectations. A checklist can be a great way to make your science lesson plan as effective as possible.
In this lesson plan example, the deliverables have been broken into easy-to-follow checklists.

Use illustrations to bring your lesson plan templates to life
Your lesson plans should inspire you, not bore you! Using illustrations is a great way to bring your lesson plans to life.
In this sample lesson plan, the teacher has used colorful and playful illustrations to reflect the content of the lessons.

When creating Elementary school lesson plans, you need to make sure that you’re keeping a good overview of many different subjects at once.
Having a clear, easy to understand Elementary lesson plan, like in the examples below, is really important for making sure that all your learning objectives are being met.
Break your elementary lesson plans into day and subject sections
Elementary students will often be studying various topics and subjects at once and keeping an overview of this can be difficult. By creating a weekly lesson plan you can make sure that your students stay on track.
In this lesson plan template, subjects and activity have been split across the days, with simple summaries of each section within the lesson plan.

Include notes sections in your lesson plans
Planning a lesson is important, but reflecting on a lesson is essential. Adding notes sections to your lesson plans, like in this weekly lesson plan example, is a great way to remind yourself to evaluate as you go.

Evaluating yourself and your lessons can be a daunting task. Applying various evaluation strategies, such as a SWOT Analysis , is an easy way to give your evaluations focus.
Creating a high school lesson plan involves a more structured approach, as students at this level are typically engaged in more advanced academic subjects.
Ensuring that your High School lesson plans account for success and reinforcing skills is one way to deliver the best education for your learners.
Include indicators of skill in your high school lesson plans
In high school, lesson plans tend to be more advanced. In the high school lesson plan example below, the teacher has included a section for indicators of skill.
Indicators of skill are a great way to measure your students’ understanding of a topic and can be used to help inform your planning and teaching. Add two or three skill indicators into your lesson plans to ensure you know how to identify which students may need additional support from you in teaching.

You can also scroll back to the Math lesson plans section for more ideas on high school lesson plan templates.
Remember how I mentioned you should include timelines in your lesson plan? Well, for a high school lesson plan, you can include a timeline template like this one to make sure your students understand all the dates required for their school project:

When creating art lesson plans, use bright colors, patterns, icons and graphics to create a truly engaging visual art lesson plan, like in the examples below.
Art lessons lend themselves to creative and visual learning , so your Art lesson plans should be creative and visual as well.
Incorporate learning examples in your art lesson plans
Art lesson plans can be one of the most fun to create. Art as a visual medium lends itself to an exciting and decorative lesson plan.
In the art lesson plan example below, the teacher has inserted visual examples to use during the lesson directly into their lesson plan. Collecting all of this information in one place means that you can quickly refer back to your lesson plan mid teaching.

Be creative with your art lesson plan design
If you’re creating an art course, you’re probably a creative person. Why not let that creativity shine in your lesson plan templates?
Fun illustrations and patterns have been used in the lesson plan sample below to create a visually appealing lesson plan design.

When picking colors for your lesson plan design, some schools will need to be aware of color connotations. Certain colors should be avoided due to gang or rivalry associations. Some schools will also want to ensure that all materials produced fit within your school colors.
Use colors and patterns in your art lesson plan designs
As well as colors, patterns can be used, like in this art lesson plan example, to create interest in your lesson plan design.
Picking a patterned but simple background is an easy way to add depth to any lesson plan design.

When creating middle school lesson plans, like in the templates and examples below, it’s important to focus on success and simplicity.
Middle school is a time for make or break for many learners. Skills that they learn in middle school carry them through life and it can be a huge weight to carry. But teaching middle school can also be incredibly rewarding. Here are some tips to help you create an effective middle school lesson plan:
Make note of what success looks like in your lesson plan
In teaching, quite often the end goal is not for the students to just arrive at the correct answer, but to understand the process of getting there. Having this mentality in your mind whilst lesson planning is an excellent way to ensure your students are learning effectively and that you are maximizing your teaching impact.
Add a section to your lesson plans as to what success looks like for you and your students like in the Middle School lesson plan template:

Color code your lesson plan for ease of use
Colors can be a great differentiator in content and color-coding your lesson plans is a great way to make information pop. In this lesson plan example, each day has a different color which makes planning and evaluating much easier.

Related Reading: What Disney Villains Can Tell Us About Color Psychology
Creating simple lesson plans involves breaking down the content into manageable components and incorporating straightforward activities.
Sometimes simple is best—especially when it comes to lesson planning. When you’re panicked mid-teaching, having a simple and straightforward lesson plan that you can take a quick glance at it can be invaluable.
Keep your lesson plan simple for stressful situations
When performing under pressure, staying simple is usually the best option. Using a clean and modern lesson plan design is one way to ensure that you can stay focused on what matters: teaching.
Simple doesn’t have to mean boring, though. Using good design principles and following one or two graphic design trends means that your simple lesson plan template can still look smart.

Use an icon to help differentiate different subject lesson plans
Icons are an easy way to differentiate your lesson plans by subject or topic. In the lesson plan example below, a large book icon has been used at the top of the page so that you can quickly see that this is an English lesson plan.
You could use an icon for each subject you teach, or use icons to tell a story . You could even replace the icon with a photo of your lesson materials!

Use an action plan approach in your lesson planning
In the simple lesson plan example, the tasks in the lesson plan have been labeled as an “action plan” . By keeping the lesson plan design simple, the focus is really on the content of the lesson plan.
Creating an action plan when teaching your lessons is a great mindset for creating engaging lessons and proactive teaching.

Creating an English lesson plan is the best way to keep track of all the learning strands and activities that are needed for learning success.
Imagination, drama, romance and tragedy. English lessons have it all. But they can also be complicated to teach, with many moving parts to any one lesson.
Like you’ll see in the English lesson plan examples below, creating engaging activities to a strict time schedule is perfectly possible with enough planning.
Use your lesson plan to schedule each activity by the minute
Any teacher will know the feeling of reaching the end of your material with 10 minutes left in the lesson.
Avoid running short (or running over!) in your lessons by planning down to the minute. The English lesson plan example below measures out timings for each activity so you finish perfectly on time.
You can use a timer on your interactive whiteboard , or get students to time themselves. Scheduling is a great skill to incorporate into any lesson plan.

Creating a history lesson plan is essential for a successful session no matter if you’re teaching the near past or the ancient history.
Using common teaching resources such as timeline infographics , or imaginative play and learning are exciting ways to make your History lesson plans exciting.
Prepare for history lessons with a history timeline infographic
Teaching history effectively and engagingly relies on the teacher’s ability to bring the past back to life. For some students, mentally visualizing history can be difficult. A timeline infographic is a great way to teach historical events.
When planning your history lesson, make sure you have all of your timelines sorted. You can either prepare your history timelines in advance or get the students to create their own history timeline as part of the lesson activity.
Venngage has a whole range of timeline infographic templates that are easy to customize.

Want to learn more about how to create a timeline infographic ? Check out the video below:
Use themes and historical events to enrich your lesson planning
When planning your history lessons, look for topical themes or historical events that you can anchor your lesson plan around.
In the lesson plan example below, the teacher is using Black History Month as an anchor point for their students’ learning.

Teaching the historical significance of Black History Monthand engaging students in related learning activities throughout February is a great way to contextualize current affairs. There are plenty of resources online to help create your Black History Month lesson plans.
Related Reading: Looking for other global holidays and events to theme your lessons on? Check this Ultimate List of Holidays .
Creating a kindergarten lesson plan involves similar principles to those used for preschoolers but with a bit more structure and focus on foundational academic skills.
We all know that meme “teaching kindergarten is like using a blender without a lid”. Staying organized is super important and having thorough easy-to-follow kindergarten lesson plans is one way to make sure your teaching stays on track.
Use themes to help plan your Kindergarten lessons
Help your kindergarteners embrace learning by using themes to plan their education. Themes are a great way to work through lots of different learning activities under one thematic umbrella.
This kindergarten lesson plan example uses St Patrick’s Day as its thematic anchor and bases Math, Art, Science and more off of one common theme.

Make your lesson plans easy to skim
We’ve all been in a spot when our mind goes blank and we need to quickly refer back to our lesson plan. Especially if you’re interviewing or teaching in front of others.
By making your lesson plans easy to skim, you can quickly regain your train of thought and continue conducting a successful lesson.
In the sample lesson plan below the teacher has used simple blocks, checklists and icons to help ensure their lesson plan is easy to understand at a glance.

When creating eLearning , distance learning, remote learning, digital learning lesson plans—basically, anything outside the usual classroom setup—always be ready for its own set of unique challenges.
Engaging learners from behind a screen, or creating lessons that can exist outside of a traditional classroom environment can be difficult. But proper eLearning lesson plans can help you navigate non-traditional learning environments.
Break your eLearning lesson plan into activities or subjects
With so many people shifting to remote or digital learning keeping track of all of your separate subjects can be difficult. Creating an eLearning lesson plan that is broken into smaller chunks, with space for each topic, is an easy way to keep learning on track.
In this eLearning lesson plan example subjects are color coded and broken into small blocks.

For more examples of eLearning lesson plans, check out this post on course design templates .
Looking for more eLearning resources?
- 7 Ways to use eLearning Infographics
- Digital Learning Communication Resources
- What is an Infographic?
- 10 Types of Visual Aids for Learning
Use a daily schedule when learning remotely
Learning remotely can be a big change for both teachers and students. One way to keep your learning on track is with an easy-to-follow daily schedule. Using a daily schedule as a lesson plan, like in the example below, is one way to maintain a routine during difficult times.

As well as scheduling within your lesson plan, you can also create a calendar to help keep your students on track.
Allow time for creativity and fun in your lesson plans
One of the biggest benefits of eLearning, Remote Learning and Digital Learning is that you can stray from the confines of a traditional classroom.
Giving students the opportunity to explore topics creatively can be one way to engage your learners in difficult times. Every student will have a different learning style and by scheduling structured creative learning activities you can ensure that your entire class has the opportunity to thrive.

To sum up: Use a lesson plan template to write an actionable and easy-to-follow lesson plan
Writing a lesson plan from scratch can be difficult, which is why Venngage has created tons of lesson plan templates you can edit easily. You can also draw inspiration from the different lesson plan examples in this post to customize your lesson plan template.
Simply create a Venngage account, pick the template you want and begin editing. It’s free to get started.
Discover popular designs

Infographic maker

Brochure maker

White paper online

Newsletter creator

Flyer maker

Timeline maker

Letterhead maker

Mind map maker

Ebook maker
How To Create A Lesson Plan: 6 Easy, Effective Steps
April 21st, 2022
Share via Twitter
Share via Facebook
Share via LinkedIn
A lesson plan is a blueprint of your lesson that includes learning goals and the educational elements students need to master the learning outcomes. Lesson planning increases thoughtful and intentional teaching and ensures that students get the most out of each lesson or subject.
Significance of Creating Lesson Plans
Lesson plans are vital to address concepts properly and facilitate the efficient flow of learning. This way, students can become a co-creator of knowledge and understanding. A lesson plan provides structure and helps the teacher create a more conducive environment for teaching and learning. Having a daily agenda that details what the students are to expect is also important to framing the students’ learning experience.
When discussing a lesson plan, it's important to remember that it doesn't need to be a script or a lengthy outline. Instead, even just a few bullet points will help the teacher effectively navigate the session and ensure a positive learning experience.
5 Step Method for Creating a Lesson Plan
Now that you understand the importance of establishing a lesson plan, let's look at what you have to include to make it more effective:
Step 1: Establish the Learning Outcomes
Setting the learning outcomes for a lesson plan is critical for ensuring that students learn consistently across classes or courses. The curriculum (state standards) is the basis for every lesson. Learning outcomes define what the students need to achieve by the end of the lesson. Teaching with the end result in mind increases the likelihood that the expected learning outcomes and activities are aligned.
These outcomes should include clear goals so teachers can align the learning and assessment activities tightly to the objectives.
Step 2: Include Any Relevant Resource Materials for the Lesson
Integrating relevant and interesting learning tools into the classroom helps improve learning and participation. These might include things such as presentations, handouts, online videos, pages from a book, etc.
Step 3: Cite Lesson Plan Procedures
Make sure to provide a level of detail in the descriptions of your lessons that will support efficient instruction and learning. Include all the specific information needed to facilitate a more effective flow of discussion.
In addition to the topic and lesson objectives, identify all the relevant resource materials for the lesson including the delivery method, student grouping, activities, etc.
Step 4: Create Instructional Activities or Independent Practice
Include independent practice or activities that you'd like your students to participate in. Consider different projects on a lesson to assess students on their academic abilities and areas for growth. Instructional practices should address various modalities of learning throughout the lesson.
Step 5: Reflect and Plan Lesson Closure
Once you’ve completed your plan, take a few moments to assess yourself and consider what you can do to improve the lesson plan's effectiveness. Any further thoughts or notes on the future stages should be included here. During closure formative assessment of students’ learning needs to occur. Lesson closing notes are a great way to reinforce what students have learned as students and teachers will both benefit.

Things to Consider When Making a Lesson Plan
Before creating a lesson plan, it’s essential to know the best practices that you can apply for effective implementation. Here are a few points of note:
Prepare and Get to Know Your Students
Before creating a lesson plan, it is critical to understand your students thoroughly. Students do not care what you know until they know that you care. Developing an appropriate professional rapport with your students is vital to their success. Then you should investigate what instructional style best benefits them by identifying their ability, attention span, degree of subject knowledge, the intensity of the lesson, and how they would manage it. Planning a lesson for a specific topic can be complicated and a little overwhelming at first. The good thing is once you’ve created a lesson plan for one topic, you no longer need to start from scratch.
Ensure Mastery of the Topic
Lesson planning may be simple, but you cannot teach something you don’t fully understand. Before creating a lesson plan, double-check your mastery of the concepts, definitions, applications, and search for new updated information on the topic.
Curate Your Tools and Resources
Teachers should consider using new tools such as instructional games, quizzes, and many more formats that can be found online. Simple online research can help teachers find resources that match their lessons to benefit both you and your students.
Prepare a Backup Plan
Things may not always go as planned so it's always a good idea to have a backup plan. Accidents happen, unexpected events occur, unscheduled guests show up for lectures—or a slew of other circumstances might throw your plans off. So, it's always a good idea to think ahead—and always have a Plan B.
Benefits of Creating Lesson Plans
Lesson plans help hone a teacher's skills and fine-tune their responsibilities. The following are a few additional benefits for generating an effective lesson plan.
It Aids in Organizing Online Classes
One of the most critical advantages of lesson plans is that they help you stay organized. This outline creates a macro picture of the course rather than just the individual portions. Teachers can contemplate more about the length of time needed for delivering each subject, as well as the sequence in which each theme will be presented because they will know exactly what to teach even before they can formally begin a discussion.
It Gives You Access to Resources and Tools
Teachers can utilize a lesson plan to determine which tools and resources are appropriate for their content and when to use them. In addition, teachers can use various educational technologies to increase the quality of their online classes.
You may experience challenges or perhaps forget to utilize other tools if you solely focus on one or two resources. It's much easier to plan which materials you’ll need—a lesson plan presents the perfect opportunity to do it.
It Allows for Potential Adjustments
Teachers may discover that particular topics need revisiting, materials need updating, or a lesson requires special attention while developing the lesson plan. Creating a lesson plan provides a foundation for reflection and adjustments for future instruction. Teachers’ reflection and revision of content delivery allows for lesson plans to become artifacts that describe students' progress.
In a Nutshell
Lesson planning enables teachers to design a guided approach to the teaching process and consider various factors such as students' learning styles, prior knowledge, types of intelligence, and hobbies. As a result, lesson plans are essential for assisting students in achieving their short- and long-term learning goals. An effective lesson plan ensures that as a teacher, you are creating not just an efficient teaching environment but a conducive learning environment as well.

More Great Content
We know you’ll love

Stay In the Know
Subscribe to our newsletter today!
Guides & Templates
How to write a lesson plan in 5 simple steps: a recipe for success, craft effective lesson plans effortlessly. learn to set objectives, design activities, and use templates for engaging student learning. streamline your teaching today.

Teachers and tutors face unique challenges when addressing the needs of their students. They must engage them while maintaining rigor, challenge them while meeting their individual learning needs, and provide them with unique lessons that meet predetermined standards and objectives. It’s a tall order.
So, how do educators write a lesson plan that does all of these things without occupying all of their time? They copy each other!
This article discusses five key steps in creating an effective lesson plan, guidelines for structuring a lesson plan, and resources and templates to help you write the most engaging activities for your students.
You don’t need to reinvent the wheel whenever you write a lesson and teach effectively. You just need a reliable method and the right resources.
Before You Start: Planning for Lessons
Before writing a lesson plan, you must know your lesson's why, what, when, who, and how. What objectives are you measuring, and how will students show you what they understand? Who are the students who need to access this lesson? How are you going to deliver the lesson? And when do you anticipate the task will end?
To write a lesson that responds to these questions, you must focus on these essential curriculum components.
- Set clear, measurable objectives
- Identify the appropriate teaching strategies
- Prepare necessary materials and resources
- Create a detailed timeline
- Include differentiated instructions
- Incorporate assessment methods
Have a rough idea of how you envision each component coming together, and list the objectives and core competencies students will demonstrate. Once you have your objective, you will build your lesson plan around it.
Step 1: Define the Objective
You must have a clear learning objective before you even start to plan lessons. You can access standards through your State’s Department of Education, or another educational body, as a reference. Once you know what standards you want to address, you will write a learning objective for the lesson.
Some techniques to help you write a quality objective include the following:
- Make your objective SMART (specific, measurable, attainable, relevant, and time-sensitive).
- Use action verbs like demonstrate, identify, argue, or explain.
- Make sure the objective is student-centered.
- Keep it concise (one sentence).
These examples show what a polished objective looks like.
By the end of this lesson, the student will be able to identify the main topic and two supporting details in a paragraph and share their written response with a partner.
By the end of this lesson, the student will be able to correctly apply the order of operations to solve math problems that include addition, subtraction, multiplication, and division by creating and responding to student-generated problems.
- By the end of this lesson, the student will demonstrate their understanding of a monarch butterfly’s lifecycle by creating a diagram, or other creative representation, to illustrate each stage of a monarch’s life.
Each of these objectives is concise and follows the SMART outline. They are also broad enough to allow for differentiation. For example, a student with dysgraphia may decide to make a video or record a podcast about the lifecycle of a butterfly.
Step 2: Design the Instructional Materials
Different components make up a comprehensive lesson plan. Once your objective is lined out, you must plan the activities and gather or create your instructional materials.
Instructional materials may include any of the following:
- Visual aids
- Handouts or shared files
- Learning technology: digital whiteboards, software, web resources
- Manipulatives
- Supplemental reading or videos
- Supplies (utensils, glue, paint)
The learning supplies you choose will depend on the learning objective and the standards you want your students to demonstrate. Writing the objective first is essential in writing a lesson plan because it steers every following step.
Step 3: Map the Lesson Activities
To maximize student learning and engagement, sequence your lesson’s activities so students have enough time to complete them but not so much time they become bored. Having a variety of activities throughout the lesson that call on different learning styles will help engage each student throughout the lesson.
Pro tip: Break your lesson into four key sequences and determine the pacing or time you want to allow for each.
Generally, each lesson should include the following activities:
Opening/Bell Ringer
Get your students engaged with a brief activity to activate their brains and start thinking about what they will learn that day. A bell ringer activity could be a question that students respond to in a journal, a quick game or riddle, or a problem they solve with a partner. This activity should be short (5 minutes) and lead to the main activity of the lesson.
Instructions and Main Activity
After you wrap up your bell ringer, you will go over your lesson’s objective and give any instructions or background information for your main activity. Remember to differentiate your instruction and allow for several pathways to completion. You will also set any expectations and answer student questions. Your introduction and instructions shouldn’t take more than 10 minutes.
Most of your time will be spent on the main activity of your lesson. The pacing will vary depending on the time needed to gather materials and clean up. If your lesson will take more than one day, allow enough time at the beginning and end of each session to allow for this. Your main activity should conclude with enough time to accommodate your formative assessment and lesson wrap-up.
Formative Assessment
This is where you check in with students to see what they understand from the lesson. It allows you to gauge where your students are with the material so you can determine your next course of action. Your options span a wide range of delivery methods and multimedia options. We will explain this more in the next step.
Before having students move on from a lesson, allow 2-3 minutes to reflect at the end of the task. This could be done with another journal entry or a quick survey at the end of the lesson.
Step 4: Determine Formative Assessment Method
Finding creative, student-centered ways for students to demonstrate their learning is vital to engagement and inclusion, so don’t breeze over this with a worksheet or written quiz. At the end of a unit, you will then have a more formal summative assessment.
Some formative assessment options include the following:
- Note Catchers
- Illustrate an Important Scene
- Think-Pair-Share
- Write a letter to…
- Teach it to the class (or a partner)
- Interactive game
- One minute essay
Deciding which formative assessment to use comes down to understanding your students and how they engage best with a subject based on their age, interest level, and learning styles.
Pro tip: Avoid falling into the trap of using the same type of formative assessment for every lesson. While it may be easier to get into a routine and stick with it, students will be more engaged with variety. It also allows different strengths to shine through.
Step 5: Review and Revise
Reviewing and revising a lesson plan before and after you implement it is essential. You want to ensure that it is clear enough for a substitute teacher to follow without your help. It should also explain where to access all materials and resources for future reference.
Have a colleague or instructional coach review your lesson plan and provide brief feedback to get started. You can return the favor to a colleague and improve both lesson plans. You can also ask a colleague or coach to sit in on the lesson and make observations. Note any hiccups when you deliver the lesson and revise the lesson plan based on what you learned. It may seem time-consuming now, but you can use it again and share it with other teachers, saving much time in the long run.
Lesson Plan Templates and Resources
If you are pressed for time and don’t want to write an entire lesson plan from scratch, you can use several helpful teaching websites with templates and complete lesson plans. While many of these sites require membership to access all resources, they have been vetted and used by real teachers.
Edraw is a graphic diagramming and mind-mapping software with free templates you can download and share. This could work with helping write a lesson plan or creating visual supports and presentations for a lesson. Find their lesson plan template here .

Teachers Pay Teachers
Teacher Pay Teachers is a one-stop shop for all things lesson planning. Resources, lesson plans, and templates are created and used by teachers, which they then share through the platform. It is an excellent resource for teachers and tutors, and you can make extra money sharing your lessons and templates with other educators.
You can find this lesson plan template here .

Study.com uses standard lesson plan formats to create templates teachers can use in their classrooms. Their templates include standards, objectives, materials, activities, and extensions. While you will need to create an account to gain access to all of their templates and resources, there is a wealth of time-saving resources available.

Teachers and tutors do not have to sacrifice all of their free time to write engaging lesson plans. With helpful resources, tips, and templates, the task is easier to complete, and you will start to build your own library of lesson plans to choose from.
Following the five essential steps to write an engaging lesson plan and utilizing teacher-vetted resources is the best way to create lessons loved by students with a little more time and your sanity intact.
Need help streamlining the administrative task for your tutoring business?
Streamlining your lesson planning is just one piece of the pie. Running a tutoring business requires a lot of administrative tasks, which can quickly overwhelm any business owner. Try Practice for free and provide your students with a more enriching experience.
Legal is the least exciting part of a business. But it's important. We worked with our lawyers to create a tutoring contract template, free for any tutor to use. Let us know where to send it:
Give your clients a simple and professional experience
Simple client management designed for teams, free form templates from practice.
Start your coaching journey off right with this simple First Coaching Call Questionnaire Template. Get to know your clients and their needs quickly and easily!
Develop financial confidence and success with our financial coaching feedback form template. Gain valuable insights from your clients with this easy-to-use form.
Ready to get started with your wellness coaching journey? Fill out this comprehensive intake form to help you get the most out of your coaching experience!
More articles from Practice

The Transformative Power of Coaching in Education

How to Create an Effective Template for Tutoring Notes

How To Structure a Tutoring Session

Unlocking Potential with Student Accountability: 8 Powerful Examples

What is the Coaching Cycle — and How to Apply It

What Is Instructional Coaching? A Beginner-Friendly Guide

Educational Empowerment: Developing a Tutoring Program That Transforms Learning

Professional Development
The types of students you might tutor.

About Practice
All you need to know about group coaching.

All You Need to Know About Being a Health and Wellness Coach

Best Practices
15 virtual assistant skills to have on your resume.

Client Success
How to motivate students as a tutor.

A Free First Coaching Session Template to Start Your Program Off Right

How to Charge Customers for Services: A Guide (with Real-Life Examples)

10 Effective Coaching Techniques for Your Business
- PRO Courses Guides New Tech Help Pro Expert Videos About wikiHow Pro Upgrade Sign In
- EDIT Edit this Article
- EXPLORE Tech Help Pro About Us Random Article Quizzes Request a New Article Community Dashboard This Or That Game Popular Categories Arts and Entertainment Artwork Books Movies Computers and Electronics Computers Phone Skills Technology Hacks Health Men's Health Mental Health Women's Health Relationships Dating Love Relationship Issues Hobbies and Crafts Crafts Drawing Games Education & Communication Communication Skills Personal Development Studying Personal Care and Style Fashion Hair Care Personal Hygiene Youth Personal Care School Stuff Dating All Categories Arts and Entertainment Finance and Business Home and Garden Relationship Quizzes Cars & Other Vehicles Food and Entertaining Personal Care and Style Sports and Fitness Computers and Electronics Health Pets and Animals Travel Education & Communication Hobbies and Crafts Philosophy and Religion Work World Family Life Holidays and Traditions Relationships Youth
- Browse Articles
- Learn Something New
- Quizzes Hot
- This Or That Game
- Train Your Brain
- Explore More
- Support wikiHow
- About wikiHow
- Log in / Sign up
- Education and Communications
- Presentations
How to Plan a Presentation
Last Updated: October 8, 2023 Fact Checked
This article was co-authored by Christopher Taylor, PhD . Christopher Taylor is an Adjunct Assistant Professor of English at Austin Community College in Texas. He received his PhD in English Literature and Medieval Studies from the University of Texas at Austin in 2014. There are 8 references cited in this article, which can be found at the bottom of the page. This article has been fact-checked, ensuring the accuracy of any cited facts and confirming the authority of its sources. This article has been viewed 230,120 times.
Presentation planning is a useful and necessary skill in the professional world as well as school. Whether you need to sell a product, or get a passing grade in your class, planning a presentation takes time and dedication. You will want to figure out the best way to construct your material, considering your audience and your presentation's message. From there, work on building your slides and materials. Assemble information in a logical order that best illustrates your point. Practice your presentation regularly before delivering it. This can help you figure out any information that should be cut or restructured.
Assembling Your Best Material

- Write down your most important points. See if you notice a key point emerging. If your audience were to take away one thing from this presentation, what would it be?
- Don't just bombard your audience with facts. Think about what these facts do for your audience. What's the point you're trying to make with the information?

- Are you trying to sell them a product, introduce them to a new idea, alter their way of thinking?
- Think about the kind of people in your audience. Do you have a tougher crowd, or do you have a group of enthusiastic people excited about what you're going to say?

- For example, if you're talking to a company about recycling program, you might discuss how corporate pollution contributes to global warming and how recycling can help the company save money. You wouldn't discuss the melting ice caps as a key point.
- Melting ice caps are a valid concern, but they are a fact or a supporting point.

- Add clarity to your argument by explaining anything the audience may not understand. For example: a brief overview of pollution's effect on climate change.
- Add authority by making connections with existing research, studies, and information. For example, you could mention the consensus in the scientific community that global warming is manmade and cite a few studies.
- Add color to your argument through visuals, like pictures and videos. For instance, you could show a chart of the amount of waste an average corporation produces in one month.
Finding a Trajectory for the Presentation

- Include the basics of introducing yourself. You can say something like, "I'm Clara Thompson from Clean Water Action, and I would like to address your company today."
- Get your audience's attention with a question or a fact. For example, you could ask: "Have you ever passed a body of water covered in green sludge and wondered how this happened? The answer may surprise you."
- You don’t have to write your presentation in chronological order. If you want to work on your main points first and save the introduction for last, you can.

- For example, you're trying to get the corporation to alter their recycling program. Start by overviewing the vast amount of corporate pollution in the world.
- Explain the consequences of this. Show how pollution contributes to climate change, then show what the corporation can do through changes in their policies.

- Common linking statements include things like, "Another important issue...," "Based on this data, you can now see..." and, "This brings me to my main point..."
- For example, "Now that I've shown you the effects of corporate pollution, this brings me to my main point. What can you do to stop it?"

- If you have any graphs or diagrams that will help illustrate your point, use them. Physically seeing information can help make your point more clear.
- You should also see if there are any videos you can include. A brief video of someone succinctly explaining an issue can shake things up a bit.
- Pictures are also nice. Each slide should have a picture related to the topic at hand.
- Make sure not to overuse graphics or visuals. Too many could be overwhelming or distracting for your audience.

- You only need one slide. Recap what your point was. Begin with something like, "As you can see..." and then briefly repeat your main point.
- A visual can help as well. Try adding one last visual aid that sums up your point. A graph or diagram would work well here.
Practicing Your Presentation

- If you're taking longer, cut some information out. You do not want to talk fast to include all information, as this can make you difficult to understand.
- For accuracy, talk in your regular voice. Do not speak too fast or too slow. You want to make sure you can fit in all information talking at a normal rate.

- Are any facts extraneous? It's great to illustrate the effects of global warming, but do you really need five examples of environmental decay? Try to cut it down to two or three.

- You should sound enthusiastic when presenting. Talk without hesitance, and don't use filler words, like "um" or "uh."
- Don't jump between topics. Use your linking sentences, and say things like, "And this brings me to the following..."
- Watch the time. Make sure your presentation isn't going on for too long.
- Watch yourself give the presentation in a mirror so you can correct any distracting movements or gestures.

- Don’t read the information off of your visuals since it could affect your engagement between yourself and the audience.
How Should You End a Presentation?
Expert Q&A

You Might Also Like

- ↑ https://www.ncsl.org/legislators-staff/legislative-staff/legislative-staff-coordinating-committee/tips-for-making-effective-powerpoint-presentations.aspx
- ↑ https://www.comm.pitt.edu/oral-comm-lab/audience-analysis
- ↑ https://columbiacollege-ca.libguides.com/presentations/planning
- ↑ https://extension.oregonstate.edu/sites/default/files/documents/10551/partsofapresentation.pdf
- ↑ https://emedia.rmit.edu.au/learninglab/sites/default/files/Oral_presentations_signalling_2014_Accessible.pdf
- ↑ https://www.indeed.com/career-advice/career-development/how-to-conclude-a-presentation
- ↑ https://www.nottingham.ac.uk/studyingeffectively/preparing/presentations/delivering.aspx
- ↑ https://www.gvsu.edu/ours/oral-presentation-tips-30.htm
About This Article

To plan your presentation, start by spending 5 to 10% of your time summarizing your research and linking it to a main point. A good way to start is with a key question or fact. Then, follow this summary with your research and work, which should take up 60 to 70% of the presentation. This is the body of your presentation, and should be made up of 3 key ideas which lead to your main point. Keep reading for our reviewer’s tips on how to organize the body of your presentation! Did this summary help you? Yes No
- Send fan mail to authors
Reader Success Stories
Queen Khumalo
Jul 13, 2019
Did this article help you?

Daniel Davies
Aug 28, 2016
Sep 28, 2017
Mar 21, 2017
Vishnu Priya
Jun 4, 2017

Featured Articles

Trending Articles

Watch Articles

- Terms of Use
- Privacy Policy
- Do Not Sell or Share My Info
- Not Selling Info
Get all the best how-tos!
Sign up for wikiHow's weekly email newsletter
- CRLT Consultation Services
- Consultation
- Midterm Student Feedback
- Classroom Observation
- Teaching Philosophy
- Upcoming Events and Seminars
- CRLT Calendar
- Orientations
- Teaching Academies
- Provost's Seminars
- Past Events
- For Faculty
- For Grad Students & Postdocs
- For Chairs, Deans & Directors
- Customized Workshops & Retreats
- Assessment, Curriculum, & Learning Analytics Services
- CRLT in Engineering
- CRLT Players
- Foundational Course Initiative
- CRLT Grants
- Other U-M Grants
- Provost's Teaching Innovation Prize
- U-M Teaching Awards
- Retired Grants
- Staff Directory
- Faculty Advisory Board
- Annual Report
- Equity-Focused Teaching
- Preparing to Teach
- Teaching Strategies
- Testing and Grading
- Teaching with Technology
- Teaching Philosophy & Statements
- Training GSIs
- Evaluation of Teaching
- Occasional Papers
Strategies for Effective Lesson Planning
Stiliana milkova center for research on learning and teaching.
A lesson plan is the instructor’s road map of what students need to learn and how it will be done effectively during the class time. Before you plan your lesson, you will first need to identify the learning objectives for the class meeting. Then, you can design appropriate learning activities and develop strategies to obtain feedback on student learning. A successful lesson plan addresses and integrates these three key components:
- Objectives for student learning
- Teaching/learning activities
- Strategies to check student understanding
Specifying concrete objectives for student learning will help you determine the kinds of teaching and learning activities you will use in class, while those activities will define how you will check whether the learning objectives have been accomplished (see Fig. 1).

Steps for Preparing a Lesson Plan
Below are six steps to guide you when you create your first lesson plans. Each step is accompanied by a set of questions meant to prompt reflection and aid you in designing your teaching and learning activities.
(1) Outline learning objectives
The first step is to determine what you want students to learn and be able to do at the end of class. To help you specify your objectives for student learning, answer the following questions:
- What is the topic of the lesson?
- What do I want students to learn?
- What do I want them to understand and be able to do at the end of class?
- What do I want them to take away from this particular lesson?
Once you outline the learning objectives for the class meeting, rank them in terms of their importance. This step will prepare you for managing class time and accomplishing the more important learning objectives in case you are pressed for time. Consider the following questions:
- What are the most important concepts, ideas, or skills I want students to be able to grasp and apply?
- Why are they important?
- If I ran out of time, which ones could not be omitted?
- And conversely, which ones could I skip if pressed for time?
(2) Develop the introduction
Now that you have your learning objectives in order of their importance, design the specific activities you will use to get students to understand and apply what they have learned. Because you will have a diverse body of students with different academic and personal experiences, they may already be familiar with the topic. That is why you might start with a question or activity to gauge students’ knowledge of the subject or possibly, their preconceived notions about it. For example, you can take a simple poll: “How many of you have heard of X? Raise your hand if you have.” You can also gather background information from your students prior to class by sending students an electronic survey or asking them to write comments on index cards. This additional information can help shape your introduction, learning activities, etc. When you have an idea of the students’ familiarity with the topic, you will also have a sense of what to focus on.
Develop a creative introduction to the topic to stimulate interest and encourage thinking. You can use a variety of approaches to engage students (e.g., personal anecdote, historical event, thought-provoking dilemma, real-world example, short video clip, practical application, probing question, etc.). Consider the following questions when planning your introduction:
- How will I check whether students know anything about the topic or have any preconceived notions about it?
- What are some commonly held ideas (or possibly misconceptions) about this topic that students might be familiar with or might espouse?
- What will I do to introduce the topic?
(3) Plan the specific learning activities (the main body of the lesson)
Prepare several different ways of explaining the material (real-life examples, analogies, visuals, etc.) to catch the attention of more students and appeal to different learning styles. As you plan your examples and activities, estimate how much time you will spend on each. Build in time for extended explanation or discussion, but also be prepared to move on quickly to different applications or problems, and to identify strategies that check for understanding. These questions would help you design the learning activities you will use:
- What will I do to explain the topic?
- What will I do to illustrate the topic in a different way?
- How can I engage students in the topic?
- What are some relevant real-life examples, analogies, or situations that can help students understand the topic?
- What will students need to do to help them understand the topic better?
(4) Plan to check for understanding
Now that you have explained the topic and illustrated it with different examples, you need to check for student understanding – how will you know that students are learning? Think about specific questions you can ask students in order to check for understanding, write them down, and then paraphrase them so that you are prepared to ask the questions in different ways. Try to predict the answers your questions will generate. Decide on whether you want students to respond orally or in writing. You can look at Strategies to Extend Student Thinking , http://www.crlt.umich.edu/gsis/P4_4.php to help you generate some ideas and you can also ask yourself these questions:
- What questions will I ask students to check for understanding?
- What will I have students do to demonstrate that they are following?
- Going back to my list of learning objectives, what activity can I have students do to check whether each of those has been accomplished?
An important strategy that will also help you with time management is to anticipate students’ questions. When planning your lesson, decide what kinds of questions will be productive for discussion and what questions might sidetrack the class. Think about and decide on the balance between covering content (accomplishing your learning objectives) and ensuring that students understand.
(5) Develop a conclusion and a preview
Go over the material covered in class by summarizing the main points of the lesson. You can do this in a number of ways: you can state the main points yourself (“Today we talked about…”), you can ask a student to help you summarize them, or you can even ask all students to write down on a piece of paper what they think were the main points of the lesson. You can review the students’ answers to gauge their understanding of the topic and then explain anything unclear the following class. Conclude the lesson not only by summarizing the main points, but also by previewing the next lesson. How does the topic relate to the one that’s coming? This preview will spur students’ interest and help them connect the different ideas within a larger context.
(6) Create a realistic timeline
GSIs know how easy it is to run out of time and not cover all of the many points they had planned to cover. A list of ten learning objectives is not realistic, so narrow down your list to the two or three key concepts, ideas, or skills you want students to learn. Instructors also agree that they often need to adjust their lesson plan during class depending on what the students need. Your list of prioritized learning objectives will help you make decisions on the spot and adjust your lesson plan as needed. Having additional examples or alternative activities will also allow you to be flexible. A realistic timeline will reflect your flexibility and readiness to adapt to the specific classroom environment. Here are some strategies for creating a realistic timeline:
- Estimate how much time each of the activities will take, then plan some extra time for each
- When you prepare your lesson plan, next to each activity indicate how much time you expect it will take
- Plan a few minutes at the end of class to answer any remaining questions and to sum up key points
- Plan an extra activity or discussion question in case you have time left
- Be flexible – be ready to adjust your lesson plan to students’ needs and focus on what seems to be more productive rather than sticking to your original plan
Presenting the Lesson Plan
Letting your students know what they will be learning and doing in class will help keep them more engaged and on track. You can share your lesson plan by writing a brief agenda on the board or telling students explicitly what they will be learning and doing in class. You can outline on the board or on a handout the learning objectives for the class. Providing a meaningful organization of the class time can help students not only remember better, but also follow your presentation and understand the rationale behind in-class activities. Having a clearly visible agenda (e.g., on the board) will also help you and students stay on track.
Reflecting on Your Lesson Plan
A lesson plan may not work as well as you had expected due to a number of extraneous circumstances. You should not get discouraged – it happens to even the most experienced teachers! Take a few minutes after each class to reflect on what worked well and why, and what you could have done differently. Identifying successful and less successful organization of class time and activities would make it easier to adjust to the contingencies of the classroom. For additional feedback on planning and managing class time, you can use the following resources: student feedback, peer observation, viewing a videotape of your teaching, and consultation with a staff member at CRLT (see also, Improving Your Teaching: Obtaining Feedback , http://www.crlt.umich.edu/gsis/P9_1.php and Early Feedback Form , http://www.crlt.umich.edu/gsis/earlyfeedback.pdf).
To be effective, the lesson plan does not have to be an exhaustive document that describes each and every possible classroom scenario. Nor does it have to anticipate each and every student’s response or question. Instead, it should provide you with a general outline of your teaching goals, learning objectives, and means to accomplish them. It is a reminder of what you want to do and how you want to do it. A productive lesson is not one in which everything goes exactly as planned, but one in which both students and instructors learn from each other.
Additional Resources
Video clips of GSIs at the University of Michigan actively engaging students in a practice teaching session: https://crlte.engin.umich.edu/engineering-gsi-videos/
Plan the First Day's Session: How to create to a lesson plan for the first day of class: http://gsi.berkeley.edu/gsi-guide-contents/pre-semester-intro/first-day-plan/
Fink, D. L. (2005). Integrated course design. Manhattan, KS: The IDEA Center. Retrieved from https://www.ideaedu.org/idea_papers/integrated-course-design/
back to top

Contact CRLT
location_on University of Michigan 1071 Palmer Commons 100 Washtenaw Ave. Ann Arbor, MI 48109-2218
phone Phone: (734) 764-0505
description Fax: (734) 647-3600
email Email: [email protected]
Connect with CRLT

directions Directions to CRLT
group Staff Directory
markunread_mailbox Subscribe to our Blog
Home » Lesson Plans » How To Write A Lesson Plan From Scratch
How To Write A Lesson Plan From Scratch
Ask any student, and they’ll claim teachers have it easy. From their point of view, your job is to walk into a classroom, talk about a bunch of indecipherable things that seem to bring you a lot of joy, and grade their papers. It’s the students who are left to do all the heavy lifting by doing homework and sitting exams.
Little do they know about the hard work and thought you invest in your classes. Every time you go into a classroom, you need to have a clear idea of what you’re going to teach and how you will spend class time efficiently and keep all their wandering minds engaged .
Every teacher will agree that the foundation of every good class is a well-crafted lesson plan . But writing one is not a walk in the park and is a skill that cannot be mastered overnight. If you still compare writing each lesson plan to climbing Mount Everest, we’ve got the tips for you.
We’ll break down the basics of how to write a lesson plan that will help you keep your classes organized and your students interested, engaged, and (hopefully) more appreciative of all the work you put in their classes.

Source: @pp99 via Twenty20
Tips for Writing Lesson Plans Suited to Your Class’ Needs
When writing a lesson plan, the first step is to think about your students. While lesson plans guide teachers through a lesson, good lesson plans are always focused on students and not the teacher. Make sure that your plan supports the lesson objective you’ve set out to achieve and that it is adapted to your students’ age, interests, and learning styles.
How you plan your lessons hinges on various factors—most of all, the grade and the subject you’re teaching . A kindergarten lesson plan won’t be the same as a lesson plan for second grade . Preschool lesson plans or plans for 1st graders focus on fun and engaging activities you use to transfer knowledge. In contrast, high school lesson plans focus on direct instruction and assessment methods.
To make the lesson planning process easier, you can always use a lesson plan template . It will contain all important sections and allow you to prepare your lessons more quickly and efficiently. If you’re planning in advance or preparing a more complex lesson that requires several classes, you can also use a weekly lesson plan template .
How To Write a Lesson Plan
The complexity and structure of your lesson plan will depend on the variables unique to your class, the subject matter, or the template you use. Still, certain steps in the process of developing a lesson plan stay the same as you always need to:
- Define a lesson plan objective
- List the necessary materials
- Decide on assessment methods
Lesson Plan Objectives
Before you get into the nit and grit of your lesson plan, you need to have a clear idea of why you’re teaching that particular lesson in the first place. A lesson plan objective outlines in one sentence your expectations about what the students will be able to do or repeat after the lesson is over—not what you’re going to do during the lesson.
When writing an objective, you can rely on the S.M.A.R.T. formula. It helps you keep your lesson objective:
Use concise language and avoid vague verbs, such as learn, understand, or enjoy . Go for the measurable verbs instead—e.g., define, recite, explain, or calculate . Your objective should be specific enough to allow you to determine whether a student has achieved the goal or not.
An example of a well-written objective would be: After the lesson about the local government, the students should be able to identify specific components of local government and write four to six sentences using local government facts and appropriate vocabulary.
Lesson Materials
Once you settle on an objective, it’s time to figure out what you’re going to need to achieve it.
The Materials section of your lesson plan is essentially a list of all items you’ll need during the class. Try to think about every single detail to make sure you can achieve the objective you’ve planned.
Some common materials you can use include:
- Game pieces
- PowerPoint presentations
Assessment Methods
How are you going to establish whether a student has achieved the lesson plan objective? How are they going to demonstrate what they’ve learned? You need to determine the assessment method in advance and choose the one that will allow your students to showcase their new knowledge or skill.

Remember, a traditional test is not always the optimal solution. Assessment methods can also be:
- Class journal entries
- Hands-on activities
- Writing assignments
- Individual and group assignments
- Group activities
- Presentations
What To Do in the Classroom—Planning Your Time
Once you cover the basics of your lesson, it’s time to plan how you’re going to spend the allocated class time and go into detail about learning activities.
Here’s one way you can organize your class:
- Get students’ attention
- Share the objective with students
- Recall prior learning
- Present new information
- Offer guidance
- Give feedback
- Assess students’ performance
- Enhance retention (i.e., let students apply the information to personal contexts)
How you carry out these steps will depend on your group, topic, and your teaching methods, but you should try to plan every step thoroughly and come up with a timeline for your class.
This schedule is not something you should live and die by. Despite your planning, classes take unexpected turns, but you should come prepared even for that scenario. For example, you can plan backup activities in case you finish the lesson ahead of schedule.
You should also allow for some leeway in your timeline because not all students learn at the same pace, and you have to make sure all students cross that finish line.
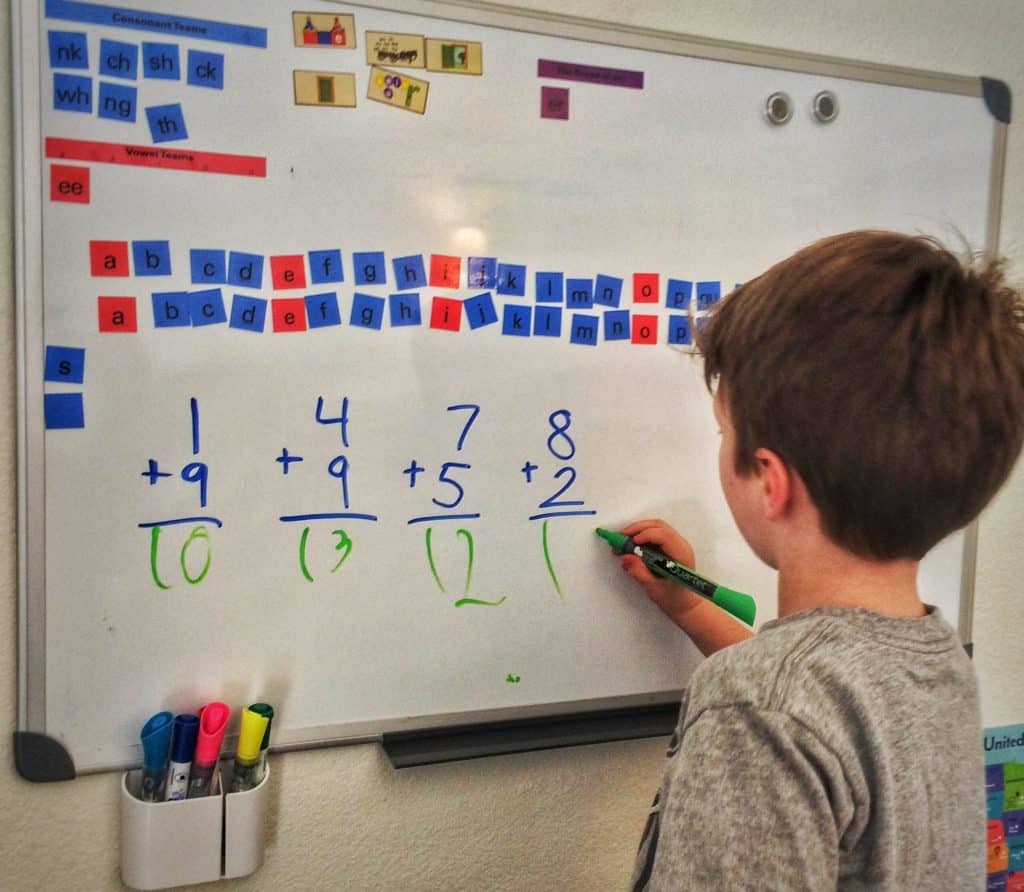
Source: @hhammer87 via Twenty20
Learning Activities
The activities you choose for a particular lesson depend on a variety of factors, including your teaching style, your students’ age, the subject, and the topic of the lesson. You should opt for activities that are fun and stimulating and that help students awaken their creativity or engage their critical thinking skills. Still, no matter how fun you want your class to be, don’t lose sight of your lesson goals and choose the activities that can help you achieve them.
Check out the table below for a few examples of fun activities you can use in different classes:

Source: @SBphoto via Twenty20
Lesson Plans—Online Resources
Writing a lesson plan can be tedious and take hours to complete. It can also be extremely stressful if it’s a Sunday night and you’re staring at a blank sheet of paper. One way out of that situation is to find and download ready-made lesson plans from the internet.
Still, the issue is that free lesson plans often don’t meet the necessary quality standards—they have vague objectives, don’t list out materials, or include lackluster activities.
Paid lesson plans can do the trick as they usually bring more quality, but you can only see a small preview before you take your credit card out. Before you can see the whole lesson plan and gauge whether the plan is suitable for your class, you will have to pay up. With so many lesson plans posted online, sifting through the chaff can take as much time as writing a lesson plan yourself.
Another problem is that most websites charge per downloaded item, and you can end up spending hundreds of dollars on potentially unusable resources every school year. The only way to get your hands on high-quality lesson plans and other teaching materials quickly without breaking the bank is to find a subscription-based platform where you can browse and download as much as you want for a reasonable fixed price.
Get Access to the Best Lesson Plans on Teach Simple
Finding an online lesson plan can save you from writing one yourself, but only if you can find a top-quality plan fast. Having dozens of browser tabs open and filling your hard drive with unusable materials will get you nowhere.
Teach Simple provides lesson plans and other materials made for teachers by other experienced educators. Our contributors are teachers with years of experience who know exactly what can make or break your class.
Our platform is completely subscription-based, meaning that we won’t charge you for each piece of content you download. You can subscribe for free using our 30-day trial and download as many lesson plans as you want at no cost during this period. Once the trial ends, you can choose to continue to enjoy all the advantages Teach Simple has to offer.
What Teach Simple Brings to the Table
With Teach Simple, you’ll no longer have to scour the internet looking for materials you can use for your lesson. Our platform offers:
- High-quality resources —Every material we post is created and reviewed by teachers to ensure we meet the high standards we’ve set for ourselves and the official curriculum guidelines
- Unlimited downloads —As a member, you’ll be able to enjoy the full range of our resource library. You can download everything that catches your eye without additional costs
- A sense of community —Teach Simple is dedicated to helping out teachers on both sides of the equation. That’s why we give 50% of our revenue to our contributing educators, who go above and beyond for every resource they create
- Resource diversity —You can use Teach Simple for all your teaching needs. Our lesson plans cover all levels ( early learning , elementary school , middle school , and above) and subjects ( math , science , ESL lessons , and more). Aside from lesson plans, you can download other materials such as games , e-books , audiobooks , full curriculums , flash cards , and anything else that will help your students have more fun and learn faster
- Special resources —Teach Simple goes beyond traditional academic subjects and includes resources that focus on social-emotional learning , speech therapy , and different social and life skills
Sign up for Teach Simple today , and you’ll never have to worry about being unprepared for your lesson— enrich your classes with a variety of materials your students will love .
Teach Simple’s Lesson Plans—Examples
Here are a few examples of high-quality lesson plans and other resources that await you on our platform:
- Reacting vs. Responding
- Lindbergh’s Flight Across the Atlantic: History—Hands On
- Causes of World War II: The Beginning
- Sea Robbers and Buried Treasure
- Project Geos: A Brave New World Gr. 4–7
- Passport Series: Asia
- World P o litical Leaders Gr. 5 – 8
- Origins of the American Government
- Unsinkable Sub: The Ready-Made Lessons for Last-Minute Days
- Group Project Student Role Sheets: Everything You Need for Successful Group Research Projects
- 3rd Grade Standards for Literacy: Part 4
- Myths From Around the World Gr. 4 – 6
- Hands-On Halloween: Melvis Monster Gr. 1 – 2
- Earth Day: A Micro-Learning Deck
- Prehistoric Art
Share Article:
Download unlimited teaching resources, join free today, teach simple.
The team behind Teach Simple is a small but dedicated group who are passionate about education and making a positive impact on the lives of teachers and students.
We have a lot of interesting articles and educational resources from a wide variety of authors and teaching professionals.
Where To Find Top-Notch Preschool Lesson Plans
Bell work: how to start class off right.
Last Updated on August 1, 2023 by Teach Simple
You are using an outdated browser. Please upgrade your browser or activate Google Chrome Frame to improve your experience.
How to Create an ESL Lesson Plan in 6 Steps
The perfect ESL lesson plan can help you prepare for an almost-perfect ESL class (there will always be surprises).
With clear goals and a solid plan, you can go from flailing to confidently guiding your students through effective ESL lessons.
After a lot of trial and error throughout my years as an ESL teacher, I finally figured out a simple recipe to create ESL lesson plans that work . Now, I’m passing along all those lessons learned to you.
As a bonus, I’ve also included three ready-made plans that you can use in a pinch.
What is an ESL lesson plan
Questions to ask before making a lesson plan, step 1: decide on your lesson plan objectives, step 2: outline your lesson plan, step 3: choose activities to accomplish your lesson plan objectives, step 4: create esl materials and worksheets, step 5: create stellar visual aids for your esl classroom, step 6: the final stages of lesson planning, put it all into practice 3 ready-made esl lesson plans, lesson plan for kids/beginners: “what’s for breakfast”, lesson plan for young adults or adults: “introverts vs. extroverts”, lesson plan for adults/business english: “what makes a good conversation”, during class: troubleshooting your esl lesson plans, my lesson is finished, but there’s still time on the clock., my lesson is too long., the students aren’t interested., 6 great resources for esl lesson planning, ellii (formerly esl library), english speeches (youtube), linguahouse, film english, open culture, final encouragement to esl teachers.
Download: This blog post is available as a convenient and portable PDF that you can take anywhere. Click here to get a copy. (Download)
An ESL lesson plan (or a TEFL lesson plan) is a document that helps ESL teachers organize and structure their teaching so that it can be more effective. It usually includes the overall objectives for the lesson, a breakdown of how the time in class will be used, what activities the students will participate in and what materials will be used.
If you have a curriculum, each lesson plan and its objectives should be tied into the overall goals of the curriculum.
Give these questions some thought before you outline your TEFL lesson plans. Knowing the answers will save you time and aggravation down the road.
1. Will you review what the school is teaching the students? Or will you create new learning goals? If the target language will be new, be sure it’s appropriate for the students’ level.
- Thousands of learner friendly videos (especially beginners)
- Handpicked, organized, and annotated by FluentU's experts
- Integrated into courses for beginners

2. Will you focus on speaking, reading, writing or listening? Or a combination? Your school may have a preference.
3. Will you teach alone or will you have help? The simplest games, for example, can be difficult to teach without translation unless you’re very prepared.
This is the daunting part, but it’s crucial that you know this from the start. Step one is the foundation of everything that follows. Your focus could be:
- a song or a movie (be sure that your school permits this and that it won’t disturb neighboring classrooms). Remember that audio must be played loudly for students to understand it since it’s in a different language.
- a specific grammar point , such as forming questions or practicing the present progressive. Young or beginning learners might need to focus on the conjugation of only one specific verb such as “to be.” More advanced students could practice multiple irregular verb conjugations.
- a general exercise such as understanding a short passage from a “Harry Potter” book .
- a vocabulary group. For example, you might teach cooking, colors, medical terminology or animals.
To keep things organized, include the estimated time spent on each section. For example, a movie outline could be this:
1. Waiting for students to arrive and for the class to calm down — 1 minute
2. Welcome/quick review of previous week/ ask students questions — 3 minutes
- Interactive subtitles: click any word to see detailed examples and explanations
- Slow down or loop the tricky parts
- Show or hide subtitles
- Review words with our powerful learning engine

3. Pass out movie worksheets — 1 minute
4. Play preview of movie — 2 minutes
5. Introduce vocabulary needed to understand movie scene — 5 minutes
6. Individual practice of the vocabulary on student worksheets — 3 minutes
7. Giving answers to worksheets — 2 minutes
8. Listening exercises with the movie (includes playing the movie scenes several times, then going over the answers and letting the students watch the scenes a third time) — 20 minutes
9. Free watching of the movie (always a class favorite, but get permission from your head teacher first) — 6 minutes
- Learn words in the context of sentences
- Swipe left or right to see more examples from other videos
- Go beyond just a superficial understanding

10. Wrap up the class by asking vocabulary review questions — 2 minutes
It’s important to balance organization with time and flexibility for the unexpected . Be ready for the unanticipated questions that can throw off your timing.
Variety is the spice of the ESL classroom. Everyone learns differently. You need activities for visual and audio learners as well as doers.
- Use games in the classroom. Used correctly, games let students test what they’ve learned in a relaxed, exciting way. The key is to make sure everyone participates. Without proper management, weaker or lazier students will quietly sit back and do nothing. In a 45 minute class, a game shouldn’t be longer than 12 minutes. Watch your motivations. There’s a big difference between playing Charades to review animal names vs. playing Hangman to let the teacher relax.
- Balance individual and group work. No lesson is complete without individual work. Everyone needs time to practice material on their own. These activities also help shyer students who can work quietly without the pressure of a spotlight. But group work is useful, too. Students can practice a dialogue with each other and learn from stronger partners. Team activities are often fun and give everyone a chance to relax a little. The drawback of group work, though, is that more advanced students tend to dominate the action. The right mix is essential.
- Repeat recent ESL activities. You can repeat activities. How often depends on how popular the activity is. One of my classes insisted on reviewing vocabulary by playing Pictionary every week. For classes that meet once a week, it’s best to recycle activities once a month if you can. Otherwise, your students might start to lose interest – and perhaps you will as well.
It’s true that the internet has a lot of free worksheets. By all means, use them. But rather than spending time browsing through tons of resources, try to identify a few favorite sites where you can find quality ESL material (see the list of helpful resources at the end of this post).
Once you find the right materials, you’ll have to tailor them to your class’s level . Here are some tips that could make things go faster:
- Reuse workbook materials. Photocopy exercises from a textbook, white-out the answers and let students complete the questions as a review.
- If you do make your own materials, remember to include two sample questions with answers at the very beginning. Kids and low-level students always need a clear model to look at before doing individual work.
- For each grammar point, include five to seven questions.
- Include pictures on the worksheet. No one likes to look at straight, boring text.
- Puzzles of any type are fun and can help to quiet down an energetic class. “Boggle,” word searches or riddles (make sure they aren’t too hard) are always a welcome challenge.
Hang onto your ESL materials for future classes. Especially if you stay at the same school for more than one year, you’ll be able to reuse your materials. Buy a good binder and stick nice copies of your materials in it. It pays to keep your hard work on your computer as well as a USB drive.
You’ll need visual aids that add depth and interest to your class. It could be a PowerPoint presentation, a restaurant menu from home or things from your kitchen. Whatever you choose, make sure it enhances your lesson.
- FluentU builds you up, so you can build sentences on your own
- Start with multiple-choice questions and advance through sentence building to producing your own output
- Go from understanding to speaking in a natural progression.

And if you’re using something that has a technological aspect, make sure you have a back-up plan in case the tech fails you.
- Decide: Is a PowerPoint presentation necessary for this lesson? In class, PowerPoint presentations are good time savers. They can show interesting pictures and answers to questions, saving you the trouble of using the blackboard. Try to minimize using them, however. They take a lot of time to create, and bring the possibility of tech failures.
- Weigh the pros and cons of using videos in ESL classes. Videos quickly gain the attention of the class and are a sure hit. But be careful in selecting your videos. Even Disney movies have language that’s sometimes too difficult for low-level students. Background music, multiple people talking and jokes that don’t transcend cultures are all traps to avoid.
- Find creative ways to add visual aids to your ESL class. Newspapers are an interesting prop. Even if the articles are too difficult, students can find the date, place of publication, price and the weather forecast. Jazz up a food vocabulary class by bringing a banana and an apple. For more advanced students, bring a colander, grater, bottle opener and other cooking items. Pass around currency from other countries.
Look at your lesson’s target language and see if anything already in your home applies. Try not to buy too much. It’s not necessary to spend a lot of money on this.
You’ve made it. Believe me, I sincerely congratulate you. Before you head into class, do a few things first:
- Get advice from other English teachers. Show your coworkers your ESL materials. Especially if you teach in a foreign country, their advice is invaluable. They understand your students better than you do and they’ll see gaps in logic, things that are too hard and cultural pitfalls. Take their advice and change your materials.
- Don’t stress about the outcome of the first class. Nobody’s perfect, and you won’t be either. On the first day, make copies only for that day. You’ll probably come back to your desk with a few things to change for tomorrow. Save trees by not making copies that’ll only go in the recycle bin.
To get you started, here are three ready-made ESL lessons that you can use today, if you’re in a pinch. Each lesson is organized around a video. However, they all address different learning objectives.
The first lesson uses a simple video to practice vocabulary and basic listening comprehension.
The second lesson uses a more difficult video to help students fine-tune their listening comprehension skills.
- Images, examples, video examples, and tips
- Covering all the tricky edge cases, eg.: phrases, idioms, collocations, and separable verbs
- No reliance on volunteers or open source dictionaries
- 100,000+ hours spent by FluentU's team to create and maintain

The third lesson features a thought-provoking video, which serves as a jumping-off point to help advanced students practice their conversation skills.
This lesson plan uses a simple video to teach grammar as well as breakfast food vocabulary . It incorporates several activities focused on questions in the present simple, vocabulary building activities and word games.
The video is short and can be played several times throughout the class if necessary. Because the video is on FluentU, you can toggle the English subtitles on and off depending on the needs of your class.
Warm-up Questions
These can be done in partners or with the whole group, depending on class size. Here are some examples:
What do you eat for breakfast?

What is your favorite food to eat for breakfast?
What do you think is a healthy breakfast?
Play the video
Play the video once (or twice, if you sense that your students are having a hard time understanding).
Activity: “Odd One Out”
For this game, you’ll need to compile a list of vocabulary taken directly from the video, plus one additional “odd word out.”
For example: Bananas, Eggs, Spaghetti, Coffee
Students will be asked to pick the odd one out. Of course, in this case, the answer is spaghetti, as it’s a dinner food, not a breakfast food.
You can ask questions such as Which of these would you not eat for breakfast? You can also follow up and ask students why they chose a particular food.
This activity can be done as a group exercise or individually depending on class size and whether this is done in a classroom or online.
Activity: Flashcards
For this game, you’ll need to compile flashcards related to the vocabulary shown in the video. Additional flashcards can be added for further study and can be food in general or breakfast foods. If you’re having difficulties preparing these materials, you can look at a website such as ESL flashcards for free resources.
The game is merely taking the flashcards and testing the vocabulary knowledge of your students. See if they can get all of the words through to the end without making any mistakes.
Questions in the Present Simple
Here you can ask questions in the present simple and encourage students to ask each other questions. As this is a beginner-level class, I’d focus on positive questions only.
You can model a question-and-answer scenario and then encourage your students to follow with their own questions. Be sure to write the question on the board or share a screen for an online class.
Do you eat breakfast in the morning? Yes, I eat toast with jam every morning.
This activity is to encourage conversation between your students. Longer answers are to be praised.
Do you like fruit for breakfast?
Do your parents eat breakfast?
What is your favorite breakfast food?
You can encourage students to follow up on these questions by asking Why? or Why not?
If you still have time , you can encourage students to play a game related to the class. This would also be an excellent chance to do some free practice or conversation.
Again, you could utilize the flashcards. Encourage students to make full sentences with the object shown on the flashcard and award points in two teams.
Or set up a fake cafe and have children take and place an order.
What do you want for breakfast?
Toast with eggs, please.
In this way, you’re consolidating vocabulary from the beginning of the class.
Think of this lesson plan as a template that can be tweaked depending on the specific topic your class is working on. For example, if your class is studying the past tense rather than the present simple, you can ask different questions like What did you eat for breakfast yesterday?
Or, you can use all the activities as listed but substitute out the video to cover a different vocabulary topic, such as animals , sports or clothing .
The video provided for this activity is called “ Introverts vs. Extroverts .” It’s quite technical, so it requires quite a high level of comprehension. For this reason, it would suit an intermediate to upper-level class of young adult or adult learners . If you need to adjust for different learning levels in the classroom, you can turn on subtitles.
The class is mostly focused on listening and awareness due to the nature of the video.
Tell your students that the title of the video is “Introverts vs. Extroverts,” and ask them the following questions.
Are you an introvert or an extrovert? Tell us a story that highlights this!
What do you know about this topic already?
What do you think this video will be about?
Can you predict any vocabulary form the video?
Students will be encouraged to discuss these questions in pairs or small groups.
Comprehension in Context
Give students a hand-out with the following instructions and questions. Then, play the video twice—once for general comprehension, and once for answering questions.
Choose the best meaning in bold from the recording. Use the context of the video to help you. These are common phrases and phrasal verbs.
1. “It was Carl Jung who coined the terms introversion and extroversion.”
(a) Carl Jung discovered the terms. (b) Carl Jung stole the words from another psychologist. (c) Carl Jung invented the words introversion and extroversion to describe the phenomenon. [Correct]
2. “Introverts prefer to mull things over.”
(a) Introverts quickly forget about things. (b) Introverts think deeply about something before deciding what to do. [Correct] (c) Introverts are forgiving and generous.
3. “…introverts might have stuck to the sidelines…”
(a) Introverts willingly participated in activities. (b) Introverts acted like referees and made sure people followed rules. (c) Introverts stayed hidden to avoid dangerous situations. [Correct]
Free-response questions:
Who responds more strongly to rewards? Introverts or extroverts?
What does “extroversion bias” mean?
Activity: Emotional Profile and Video Discussion
Put students in pairs to discuss their takeaways from the video. They can answer questions like:
Did you agree with the video?
Do you think it’s better to be an introvert or an extrovert in today’s society? Why?
Do you think that being an introvert or extrovert is genetic? Why or why not?
Activity: Quiz and Discussion
For a bit of fun, the students will be encouraged to take this short quiz to determine if they’re an extrovert, introvert or ambivert .
Students will ask their partner questions and fill out the form for them as if they’re a psychologist and a patient. After this, they’ll read out the “prognosis” to their partner.
As a follow-up, you can ask students if they agree with the findings of the quiz.
If there’s time at the end of the class, a quick game such as hangman can be played using the vocabulary from the video.
If your class is set up on FluentU , you can send students away with the link to the video so that they can watch again and practice on their own time using the built-in comprehension quiz and learn mode.
This lesson plan uses a video called “ What Makes a Good Conversation ?” and is mostly about conversation and video analysis. It encourages the students to examine a video at different levels while discussing key lessons and concepts. It would suit an English business class or an advanced adult class, and it’s incredibly adaptable to both an online setting or an in-person class .
Due to the class’s conversational nature, it’s integral to provide sufficient feedback and play the selected clip several times for the students.
You can also encourage note-taking as there will be some questions specifically related to the content of the video.
These questions can be asked in pairs or as a whole group, depending on class size.
Are you a conversationalist? What do you think this means?
Have you ever been involved in an incredibly enriching conversation? Tell us about it!
Have you ever been involved in a very poor conversation? Tell us about it!
What makes a good/productive conversation? What makes a conversation pointless?
Watching to Get the Gist
Show your students the video, and then ask them some general questions about the topic at hand.
What is the video about?
What does a conversation require?
Watching for Detail and Comprehension
Show the video again, and then ask more detailed comprehension questions.
According to the speaker, people don’t know how to have a good conversation anymore. What does she mean? What are the causes of this?
What advice did Henry Higgins give in “My Fair Lady” for people to have good conversations?
How many texts does an average teenager send per day?
What do you think conversational competence means? Can you define it?
What is the speaker’s profession? Or what do you imagine it is?
Follow-up: Personal Questions
Have you ever unfriended/unfollowed someone on social media because they said something offensive?
Do you think that people listen deeply these days?
What advice would you have for someone who wants to improve their conversation skills?
Follow Up: Roleplay
Ask students to get in character using one of these two scenarios.
Business context: you’re having a meeting with a new customer and your boss. It’s taking some time for your boss to arrive, so you have to engage in polite conversation with the customer.
General context: you’re new in a neighborhood and have been invited to a welcome party. Introduce yourself to your new neighbors and have a good conversation with them, following the tips in the video.
At the end of these conversations, conduct a short reflection activity. You can ask questions like: Did you have a great conversation with your partner? Why or why not? What would you change to improve the situation?
Now you’ve got three ready-made plans, as well as a template to help you create even more great plans.
But be forewarned: even the best-laid lesson plans can go awry. Not to worry! You just need to know a few basic troubleshooting strategies. Let’s look at some of the most common problems that arise in an ESL classroom, and what to do if they should happen to you.
Extra time on the clock can mean that your class was too advanced for the lesson, or maybe that you overestimated the time you needed. Either way, go back to your desk and decide what to do differently in the next class.
- Have review games ready. Depending on the class, five minutes of vocabulary Hangman or Pictionary is legitimate. Let the students draw.
- Prepare three or four easy questions for a short conversation with the class. Make the topic similar to your lesson so nothing comes out of left field.
- Write a sentence from the lesson on the board. Give the class 15 seconds to memorize it. Erase the sentence and ask students to tell you what it was.
Know what is a priority. What must you accomplish for the lesson to be a success? Try to focus on that while watching the time. No matter what happens, remember to leave 2 minutes for a quick review. Back at your desk, figure out what went wrong and decide what to change.
There could be a lot of reasons for this. Are your English lessons too hard or too easy? Did they just get yelled at by their previous teacher for poor test results? Did three students just have a fight before you arrived and everyone got in trouble? Are you speaking too fast? Did your materials make sense?
The solution requires some reflection on what happened in order to fix it.
Whether you’re teaching in person or remotely, there are tons of amazing places to find ESL audio and video resources as well as ready-made ESL worksheets online.
Familiarize yourself with these six resources now—they’ll come in handy over and over again as you plan your lessons.
Ellii is an incredibly accessible resource with a well-rounded and extensive catalog of activities ranging from ready-made ESL classes to digital homework activities . They also maintain a regularly updated blog focused on contemporary issues and trends in the ESL world.
Ellii is a subscription-based service, and it’s well worth a subscription for some ready-to-go activities if you’re a bit behind on your planning.

If you want all-in-one learning materials that’ll keep your students engaged, look no further than FluentU.
FluentU takes authentic videos—like music videos, movie trailers, news and inspiring talks —and turns them into personalized language lessons.
Each FluentU video features native English speakers, so your students can gain first-hand experience listening to authentic English conversations. Built-in vocabulary lists and interactive subtitles make these videos accessible, even for beginners.
The best part? Each FluentU video has its own “learn mode” that helps students practice vocabulary and grammar concepts. So, each video functions like a sort of “mini-lesson” where students learn through immersion .
We’re at a time when public debate, discourse and interaction have never been more relevant. Many ESL students don’t just want to learn English but are generally seeking more profound means of communication with people from around the world. The English Speeches YouTube channel compiles historical and contemporary speeches that are often moving, motivational or entertaining. Each speech is captioned with large lettering , and the speeches are categorized by English accent.
Linguahouse provides a wide range of ESL worksheets that are ready to use in class. The worksheets are divided into general, business, elementary and exam preparation, meaning you can utilize these resources for a specific class. You can also tailor the worksheets to suit the needs of a particular student or classroom. Access is free , and the website provides over 1,000 resources.
Film English is run by award-winning speaker, writer and educational trainer Kieran Donaghy . The content is based around (you guessed it) English films and short films. There are many well-prepared classes all devised around a particular video that can be downloaded. The lessons follow a very simple step-by-step format, and many of the topics are related to the themes of relationships, emotions and current issues.
Open Culture is a large-scale platform packed with educational and cultural content . The site is designed to be open-source, and you can draw from a deep well of specific topics and knowledge bases. The ESL section provides many audio and visual resources that can be easily adapted into an engaging and entertaining lesson plan.
As an ESL teacher, you have a hard job that most people can’t do. Making an exciting lesson out of a blank piece of paper is a real challenge. Even seasoned teachers who only use a book have trouble. To save your sanity, remember these points:
- Perfection will never be possible. That’s fine.
- Whatever comes out of your imagination will be awesome.
- Bells and whistles aren’t necessary. It’s the content and the thought behind English lessons that matter.
- When a lesson tanks, shrug it off. Fix what can be fixed. Forget about the rest.
- Teaching is a 50/50 relationship between the student and the teacher. You can do everything right, but if the student doesn’t do their part you’ll still have trouble. Do what you can and leave it at that.
The ESL classroom is an incredibly fun and exciting place. It can also be aggravating at times. But, hey, you’ll never be bored!
Teaching non-English speakers your language is an exciting privilege that you’ll never forget. Best of luck!
Related posts:
Enter your e-mail address to get your free pdf.
We hate SPAM and promise to keep your email address safe

Create Your Course
How to make a microteaching lesson plan, share this article.
The most important goal for good educators is to improve their teaching skills, and maximize student engagement and learning. However, it can be difficult to do this when teaching dozens of students at a time.
That’s where microteaching comes in.
Microteaching enables teachers to experiment with different teaching methods and take the necessary steps to upskill. This process works conjointly with the use of a well-designed microteaching lesson plan that keeps the teacher focused on the lesson and the points they’re trying to pass across to students.
Read on to find out what microteaching is, the necessary microteaching skills teachers should have, and how to create an effective microteaching lesson plan.
Skip ahead:
What is microteaching?
Mini-lessons.
- One-minute lessons
Role-playing
Simulation , case studies.
- Video recording
What is a microteaching lesson plan?
Identify the learning objectives , specify the learning activities , figure out how to assess student understanding , sequence your lesson in an engaging manner , close the lesson, 8 microteaching skills that teachers should have, improve your teaching skills with microteaching.
Microteaching is a teaching technique where a teacher conducts a class for a small group of students at a given time. This approach allows the teacher to focus on honing a specific teaching skill/technique, identify areas where they need to improve, and receive feedback on their performance in real-time. It also allows teachers to demonstrate the depth of their knowledge and understanding of the subject matter in a low-stress environment.
Unlike regular lessons, microteaching sessions usually last between 15 and 30 minutes. During the lesson, the teacher presents a specific topic and uses different teaching methods, such as demonstrations, peer group discussions, and even simulations, to explain the topic. The teacher may also use audiovisual aids to illustrate key points. Most microteaching sessions have a class instructor or supervisor who gives feedback to the teacher on the clarity of their presentation and the effectiveness of their teaching style .
Microteaching can be valuable to teachers at all stages of their careers — from teachers who are new to the profession to experienced teachers who want to improve their skills or learn new teaching styles.
Examples of microteaching styles
If you want to host a microteaching session, here are some styles you could use:
Mini-lessons are the most popular form of microteaching. It involves presenting a brief, focused lesson on a specific topic or skill to a small group of students — it could even be just one student. This method allows you to practice your delivery skills and assess how well the student(s) understood the topic based on the presentation. You can also ask each individual student as well as the class supervisor (if there’s one) for feedback on the lesson.
One-minute lessons
This method is exactly what the name implies — a lesson delivered in just 60 seconds. One-minute lessons are usually used as a way to train educators on how to plan and deliver a value-packed lesson in a dynamic and high-pressure environment.
To use this method, you’ll select a sub-topic of a specific subject that you can explain in a short amount of time. This could be explaining a new concept or demonstrating a particular technique. Then, you need to pool together resources such as diagrams, illustrations, charts, and graphs that can help you deliver information in a clear and concise manner.
There are certain topics or skills that students may understand better if they get actively involved, such as acting out a play. If you’re trying to explain a topic like this to students should try getting the students to assume different roles that are integral to the lesson.
This gives you a way to interact with the students and practice your delivery skills. It also allows the students to assimilate information better because they’re an active part of the lesson — as opposed to being passive listeners.
A great way that you can get your students involved in your lessons is to give them an immersive experience through virtual reality (VR).
With VR headsets, you can transport your students to a simulated scenario where they can interact virtually with the components of the lesson. As students operate in the virtual space, you can explain these lesson components to them and respond to their questions.
Simulation is a great way to teach students skills that are dangerous or require expensive equipment that you don’t have access to at the time. You can also use this method to teach history and take your students to different countries (and even show them what these countries looked like centuries ago) without ever having to go there physically.
This microteaching method involves using real or fictional case studies to teach a lesson. It is commonly used in teacher training and development programs to give teachers the chance to show their ability to apply hypothetical and theoretical concepts and ideas to real-life situations.
If you decide to take this approach, you may ask your students to analyze a case study and discuss possible approaches or solutions to a problem. You can also use case studies to explore important notions and hypotheses.
Video recording
Video recordings can be used in two ways: when there are no students available or when the teacher is conducting lessons for e-learners. In the case where there are no students available, you may present a lesson in an empty classroom while being recorded on video.
When you’re done, the class supervisor can review the video and offer feedback about your performance, including the quality of your lesson material, the pacing, your tone of voice, and your body language. This way, you can hone your delivery and presentation skills, as well as your ability to craft concise, yet explanatory, lesson materials.
If you’re conducting lessons for e-learners, you can share the video with them and ask them for feedback on your teaching style.
A microteaching lesson plan is simply a smaller version of a regular (or macro) lesson plan. It includes all the same elements you can find in a regular lesson plan, but on a much smaller scale.
Read more: Best Microlearning Platforms of 2023
Unlike macro lesson plans that encompass an entire semester or academic year, micro lesson plans contain information on the specific lesson or subject the teacher plans to present on a given day. This means that teachers draw up individual micro lesson plans every day that focuses on brief subjects or topics that students can understand quickly.
How to write a microteaching lesson plan
Writing a micro lesson plan is very similar to writing a regular lesson plan. But to make the process easier, you may benefit from following certain frameworks.
Below’s a 5-step framework for writing a microteaching lesson plan.
Before planning your lesson, you need to stipulate everything you want your students to know by the end of your presentation. These learning objectives should be written in a clear and concise manner that students can easily understand.
For example, Dr. Angela Yu has a web development bootcamp course on Udemy. On the sales page of the course, Dr. Yu clearly explains the learning objectives for the course.
This gives potential students an idea of what they’ll be able to do by the time they finish the course .
When mapping out your microteaching lesson plan, you should consider the specific learning activities your students will engage in to develop the skills required to demonstrate an adequate understanding of the lesson/course. These activities should relate to the learning objectives of your lesson, and enable students to practice and receive feedback on their progress.
For example, if you’re a literature teacher that wants to explain the nuances and motivations of the characters in Williams Shakespeare’s Othello, you could have your students assume the roles of these characters and act out the play in class. Since they’re stepping into different roles, your students will be more likely to explain the reasons for their characters’ actions through their own unique perspectives.
As you map out your specific learning activities , indicate how much time you will spend on each. Also factor in some time for explanation or class discussions. Keep in mind that you’ll need to cover the topic in 30 minutes (maximum) so be careful not to assign too much time to each activity.
As you design the learning activities, ask yourself:
- What can I do to explain the topic?
- How can I get my students actively involved in this lesson?
- What are some relevant analogies, examples, and situations that can help my students understand the topic?
- What can my students do to better assimilate the topic?
Examples of learning activities that students can engage in include:
- Discussions
- Simulations
- Concept mapping
- Reflection journals
- Drills and practice
- Real-world projects
At the end of your lesson, you’ll need to give your students tests, assignments, and problems that will determine just how well they understood the topic. These methods of assessment give students the opportunity to demonstrate the knowledge and skills they learned during the lesson and get feedback from their teacher.
Planning for assessment involves making decisions about:
- the type(s) and number of assessment tasks that will enable your students to demonstrate that they’ve achieved the learning objectives for the lesson
- the criteria with which you’ll make an assessment (e.g. rubrics)
- whether students will be involved in the assessment process or not (e.g. peer assessment)
- the method by which the results of individual tasks will be combined into a final/overall grade
- how you’ll provide feedback to your students
It is helpful to draw up a timeline of the sequence of your lessons. This allows you to keep to time and present your lesson in a smooth and engaging manner.
In 1965, Robert Gagne, a prominent American educational psychologist proposed what he called the events of instruction , which is a nine-step framework for presenting a lesson or course.
- Gain students’ attention: At the beginning of your presentation, you’ll need to present a scenario or stimulus to gain your students’ attention. You could:
- Ask thought-provoking questions to students
- Tell a story or present a problem to be solved
- Use icebreaker activities, case studies, current news, events, etc. to introduce the topic
- Inform students of learning objectives: Here, you’ll break down the learning objectives of the lesson. This gives them a good understanding of what they’re expected to learn and do during and after the lesson. Here are some ways you can do that:
- Outline your learning objectives in the syllabus, presentation slides, and in instructions for papers and projects
- Describe the performance you require from your students
- Describe the criteria for peak performance
- Prior learning: If your lesson is a continuation of a previous lesson or if it’s related to something that your students have learned about in the past, connect the dots. When students recall prior learning, they’ll be able to make better sense of the new information you’ll impart. Here are different ways to recall previous topics:
- Ask students questions about their understanding of previous concepts
- Relate previous course information to the topic you’re presenting
- Give students the opportunity to incorporate ideas from prior learning into the current lesson
- Present the content: The next step is to present the topic in its entirety. The key to doing this effectively is to organize content in a meaningful way, offer demonstrations, and explain new concepts and ideas. Here are some ways to present the lesson content:
- Use different media to present the same content (e.g. physical lecture, video, illustration, demonstration, podcast, group work, reading, etc.)
- Use a blackboard to give students access to lesson content outside the class
- Use active learning strategies to keep your students engaged
- Provide learning guidance: To ensure that your students understand your topic, inform them of additional content and resources they can use to learn more. Here are some methods you can use:
- Support your students by giving them cues, hints, and prompts that can be removed as the student learns the task
- Use different learning strategies to help students memorize information (e.g. role-playing, mnemonics, visualizing, concept mapping, etc.)
- Use analogies, case studies, and metaphors to provide real-world applications and help students connect with new concepts
- Practice: The next step is to have your students apply what they learned to confirm that they correctly understand the topic. Here are a few methods to use:
- Give students assessment opportunities (e.g. individual or group projects, written assignments, presentations, etc.)
- Design quizzes and tests for students
- Provide feedback: Once your students turn in their projects and assignments, give them feedback on how they performed. Also give suggestions on how they can improve their performance. Consider implementing self-evaluation and peer feedback to help students identify learning gaps and low performance in their own — and their peers’ — work.
- Assess performance: To gauge how effective your lesson has been, give your students tests and exams. This way, you’ll be able to check for the progression of competency in knowledge and skills. Don’t forget to use different assessment methods to do this, including quizzes, oral questioning, rubrics, and projects.
- Enhance retention and transfer: The final step is to help learners internalize new knowledge by giving them more opportunities to apply course concepts to real-world situations.
When you put Gagne’s events of instructions into play, be sure to consider how much time you have to present the class. Here are some time management strategies you can employ:
- Estimate how much time each step will take and then add some extra time for it
- In your lesson plan, indicate how much time each class activity will take
- Make some extra time at the end of the class to sum up key points and answer students’ questions
- Plan an extra activity or learning question in case you have more time left at the end of the class
- Make your timeline flexible enough for you to adjust your lesson plan to students’ needs
When you’re done presenting your lesson, you’ll need to close it. There are a few ways you can close a lesson. Here are some of them:
- Emphasize key information
- Correct students’ mistakes
- Preview future topics
- Ask a student to summarize the lesson
Lesson closure helps students internalize important information, link lesson ideas to other concepts, and transfer ideas to new situations.
Microteaching can only be successful when the teacher has the necessary teaching skills that facilitate learning. Since Dwight W. Allen developed microteaching in 1961, nearly 40 teaching skills have been identified. But here are the eight most important ones:
Introduction
The typical attention span of a student for a 60-minute class is 10-15 minutes. So if you’re going to keep the attention of your students, you’ll need to know how to introduce your topic in a way that will interest them.
Stories, analogies, hard-hitting facts, and deep questions are great ways to introduce a topic and get students hooked from the jump. Because of time, try not to make your introduction verbose or disjointed.
Explanation
When you get to the main part of the lesson, you’ll have to rely on your ability to break down complex concepts in a way that’s easily digestible for your students. This involves speaking with clarity, using examples to depict the relationships between different ideas, and crafting strong concluding statements that summarize the key points in the lesson.
Questioning
During and after a lesson, you’ll want to occasionally check in with your students to ensure that they’re correctly assimilating the information you’re passing across to them. The best way to do this is by asking them questions. For the questions to be effective, however, they have to be clear, meaningful, precise, relevant, and specific.
Questions that meet these criteria can help you gauge your students’ knowledge and determine if they have an adequate understanding of the topic.
Stimulus variation
In teaching, stimulus variation refers to the periodic changing of instructional elements and styles to keep students attentive and maintain their motivation. Since stimulus, according to science, incites a functional reaction in an organ or tissue, changing them occasionally activates students’ brains and keeps them alert.
Stimulation variation skills, in education, include:
- Change in speech pattern
- Change in interaction style
- Change in movement
- Change in gestures
- Oral-visual switching
Positive reinforcement
This involves using words or gestures to positively influence your students’ behavior and encourage them to participate in class. These reinforcers let your students know that you care about how much they enjoy and understand your lessons.
You can positively reinforce your lessons by responding to correct answers with a smile, praising a good student, and encouraging a slow learner. This approach yields much better results than scolding or punishing students, or making insulting/sarcastic remarks.
Illustration
When an explanation doesn’t work or isn’t enough to help students understand a topic, you’ll need to integrate illustrations into the lesson. Through interesting illustrations — diagrams, images, cartoons, graphs, flow charts, and more — you can help your students visualize concepts and grasp them better. You can also use examples and non-examples to illustrate a topic for better understanding.
Blackboard writing
If you’re microteaching in a traditional classroom setting, you may use a blackboard to write some notes, draw diagrams, and solve problems/calculations during a lesson. This grabs students’ attention, and highlights important concepts and terms.
If you decide to use blackboards in your class, ensure that your writing is clear and legible. There should be enough spacing between the letters, and an obvious distinction between words and sentences.
Just like you need to know how to introduce a topic to your students, you also need to know how to close the lesson. This can be a bit more tricky than introducing because you have to be sure that your students understand everything you’ve explained to them.
To close your class successfully, you can ask a student(s) to give you a recap of the lesson or you can give them assignments to do. This gives you a clear of whether or not your students understand the topic and are able to apply it in the real world.
Microteaching is an invaluable teaching technique for newbies and experienced teachers alike, as it provides an avenue for them to practice and learn new teaching skills without the pressure that a full class brings.
In addition, teachers are able to receive constructive feedback from both students and class instructors. This way, they can improve their skills, increase their confidence and achieve their teaching-learning goals.
New to the world of microlearning? Check out our post explaining it here.
Ready to start creating on mobile? Check out Thinkific’s mobile app builder here!
Althea Storm is a B2B SaaS writer who specializes in creating data-driven content that drives traffic and increases conversions for businesses. She has worked with top companies like AdEspresso, HubSpot, Aura, and Thinkific. When she's not writing web content, she's curled up in a chair reading a crime thriller or solving a Rubik's cube.
- What Is Microlearning? The Case For Shorter, Bite Sized Learning
- 10 Steps To Creating A Wildly Successful Online Course
- How To Craft Magnetic & Compelling Learning Outcomes
- Essential Questions To Ask In Your Training Evaluation Survey
- Best Equipment & Software For Creating Online Courses
Related Articles
How to outsource aspects of creating your online course.
Building and marketing an online course can take up a lot of time and resources. Here’s a definitive guide on how to outsource aspects of your online course creation and marketing.
How To Teach Guitar Online (Ultimate Guide)
Learn how to teach guitar online using online courses, and how some of the most successful online guitar instructors create a virtual studio.
50+ Online Course Ideas (Plus 4 Steps To Refine Them)
You've got lots of ideas for online courses but no clue how to move forward. Here's how to go from course idea to course creation in 4 steps.
Try Thinkific for yourself!
Accomplish your course creation and student success goals faster with thinkific..
Download this guide and start building your online program!
It is on its way to your inbox
- Grades 6-12
- School Leaders
NEW: Classroom Clean-Up/Set-Up Email Course! 🧽
30 Lesson Plan Examples for Every Grade Level and Subject
Lots of ways to prepare for top-notch learning.

Writing lessons might be a fun activity for you (all the things you’ll do!) or it may be a necessary evil (so many boxes to fill). Either way, it’s an important part of teaching and can make or break your week, month, and year. Whether you’re a brand-new teacher or an experienced educator looking for some new ideas, these lesson plan examples offer inspiration for every subject and every grade level.
Lesson Plan Sections
Preschool lesson plan examples, elementary school lesson plan examples, middle and high school lesson plan examples.
Many lesson plans include some or all of the following sections.
- Objective : These should be specific and measurable. Often they align with Common Core or other learning standards.
- Materials: List any items you’ll need, including worksheets or handouts, school supplies, etc.
- Activities: This is usually the longest section, where you’ll lay out what the lesson and its activities look like. Some teachers write these in great detail. Others include just an overview to help them plan.
- Assessment: How will you assess your students’ learning? This could be a formal assessment or something simple like an exit ticket. ( Get lots of formative assessment ideas here. )
- Differentiation: Describe how you’ll vary the level of difficulty for students at all levels, including any enrichment for early finishers.
Some people think preschool is just playtime, but pre-K teachers know better! Here are some of the ways preschool teachers plan for their lessons.
Weekly Lesson Plan

Venngage/pre-K lesson plan via Venngage.com
Weekly preschool lesson planning helps you plan each day and ensure you’re tackling all the most important skills.
Learn more: Venngage Pre-K Weekly Lesson Plan Template
Pre-K Theme Lesson Plan

Pre-K Printable Fun/Caterpillar and Butterfly Lesson Plan via PreKPrintableFun.com
If you like to plan by theme, try a template like this. It includes space for a variety of activities that fit your topic.
Learn more: Pre-K Printable Fun
Alphabet Letter Lesson Plan

This Crafty Mom/Letter S Lesson Plan via ThisCraftyMom.com
If you’re focusing on a new letter of the alphabet each week, try lesson planning like this. You can see the week at a glance, including all the materials and books you’ll need.
Learn more: Alphabet Letter Lesson Plan by This Crafty Mom
Centers Lesson Plan

Pocket of Preschool/Centers Lesson Plans via PocketofPreschool.com
Your centers need some planning too! Whether you change them out weekly, monthly, or as needed, use plans like these to stay prepared.
Learn more: Pocket of Preschool
Weekly Unit Lesson Plan

This Crafty Mom/weather unit lessons via ThisCraftyMom.com
Adding pops of color and a few images can make it easier to locate the lesson plan you’re looking for in a snap!
Learn more: Weekly Weather Unit Lesson Plan by This Crafty Mom
Since elementary teachers tackle multiple subjects every day, their lesson plans might look like a general overview. Or they may prepare more detailed lesson plans for each topic to help them stay on track. The choice is up to you.
Weekly Overview Lesson Plan

Mrs. Jones Creation Station/lesson plan example via MrsJonesCreationStation.com
Don’t be afraid to write out your lesson plans by hand! A side-by-side setup like this lets you see a whole week at once. We love the use of color to highlight special things like fire drills.
Learn more: Mrs. Jones Creation Station
Yearlong Schedule
Planning a whole year may seem daunting, but it can show you where you’re going to need to stretch a unit and where you can circle back and review. Mrs. D from Mrs. D’s Corner has ideas on how to structure a yearlong lesson plan using Google Sheets.
Learn more: Mrs. D’s Corner
Guided Math Lesson Plan

Tunstall’s Teaching Tidbits/Guided Math lesson plan example via TunstallsTeachingTidbits.com
This example on adding three numbers together can be altered to fit any math lesson plan.
Learn more: Tunstall’s Teaching Tidbits
Art Lesson Plan

Artsy Blevs/lesson plans via TeachandShoot.com
While these are elementary art lesson plan examples, you can easily use this style for teaching art at upper levels too.
Learn more: Artsy Blevs
Special Education Lesson Plans

The Bender Bunch/lesson plan example via TheBenderBunch.com
Lesson planning for special education looks different than general classroom lessons in that the lessons have to cover specific IEP goals and include lots and lots of progress monitoring. The Bender Bunch starts each lesson with independent work (read: IEP practice) and then heads into mini-lessons and group work.
Learn more: The Bender Bunch
Interactive Read-Aloud Plan

The Colorful Apple/interactive read-aloud lesson plan example via TheColorfulApple.com
Interactive read-alouds aren’t something that should be “on the fly.” The Colorful Apple explains how to choose a book, get to know it, and get ready to teach it. Once you’re in the book, sticky notes may be the best lesson-planning tool you have for marking questions and vocabulary words you want to point out to students.
Learn more: The Colorful Apple
Social Studies Lesson Plan

Mrs. Jones’s Class/social studies lesson plan example via MrsJonessClass.com
Including images of your anchor charts is a great idea! That way, you can pull one out and have it ready to go in advance.
Learn more: Mrs. Jones’s Class
5E Lesson Plan for Elementary School

What I Have Learned Teaching/example from 5E lesson planning via WhatIHaveLearnedTeaching.com
The 5Es stand for Engagement, Exploration, Explanation, Elaborate, Evaluate. This type of lesson planning can be helpful for students as they work through each of the 5Es related to the topic you’re studying.
Learn more: What I Have Learned Teaching
Science Lesson Plans

Venngage/Science lesson plan example via Venngage.com
If you like to plan your lessons in more detail, take a look at this elementary science lesson plan example.
Learn more: Venngage Science Lesson Plan Template
Reading Groups Lesson Plan

First Grade Fairy Tales/reading groups lesson plan via TheFirstGradeFairyTales.com
Lots of elementary schools have differentiated reading groups. Use a template like this one to plan for each one, all on one page.
Learn more: The First Grade Fairy Tales
P.E. Lesson Plan

American Coaching Academy/P.E. lesson plan via AmericanCoachingAcademy.com
Gym teachers will love this lesson plan idea, which includes directions for playing the games.
Learn more: American Coaching Academy
Music Class Lesson Plan

Victoria Boler/music lesson plan via VictoriaBoler.com
Plan out the skills and songs you’ll need for a meaningful music class with a lesson plan like this one.
Learn more: Victoria Boler
At the middle and high school levels, teachers often need more detailed plans for each class, which they may teach multiple times a day. Here are some examples to try.
Google Sheets Lesson Plans

Busy Miss Beebe/Google sheets lesson plan example via BusyMissBeebe.com
Google Sheets (or Excel) is terrific for lesson planning! Create a new tab for each week, unit, or class.
Learn more: Busy Miss Beebe
Weekly History Plan

Teachers Pay Teachers/Coaching History lesson plan via TeachersPayTeachers.com
This example shows how you can plan out a week’s worth of lessons at once, and see the entire week all in one spot. This example is for history, but you could use this for math, ELA, or social studies too.
Learn more: Coaching History on Teachers Pay Teachers
Outline and Pacing Guide Lesson Plan

Read it. Write it. Learn it./pacing guide example via ReadItWriteItLearnIt.com
A pacing guide or outline works for both you and your students. Share it at the beginning of a unit to let them know what’s ahead.
Learn more: Read it. Write it. Learn it.
5E Lessons in Middle and High School

Teach Science With Fergy/5E lesson plan via TeachScienceWithFergy.com
5E lesson plans (Engagement, Exploration, Explanation, Elaborate, Evaluate) are great for middle and high school as well. This example is for science, but you can use the 5E structure across all lessons.
Learn more: Teach Science With Fergy
Math Intervention Plans

Lindsay Gould/middle school math lesson plan via TeachersPayTeachers.com
When students are in math intervention, they’re reviewing material they learned last week or last year. Lesson plans need to provide time for them to activate their prior knowledge (and make sure they’re remembering it all correctly) before reteaching and practice.
Buy it: Teachers Pay Teachers
The Sticky-Note Lesson Plan

The Wise & Witty Teacher/sticky note planner via WiseWittyTeacher.com
At some point, you’ll know what students are doing each day, you’ll just need some reminders for questions to ask and key points to cover. The nice thing about using sticky notes for lesson planning is if you get ahead or behind schedule, you can move the entire sticky note lesson to another day.
Learn more: The Wise & Witty Teacher
Read more ways to use sticky notes in the classroom .
Backwards Planning Lesson Plan

Vanderbilt University Center for Teaching/Understanding by Design lesson plan example via cft.vanderbilt.edu
If your school uses Understanding by Design or other backwards planning, you’ll be thinking about the outcome first and working back from there (rather than forward from an activity or task). Backwards planning lesson plans are intensive, but they’re also something you can use over and over, modifying them slightly for each group of students you have.
Learn more: Vanderbilt Center for Teaching
Visual Arts Lesson Plan

Venngage/visual art lesson plan example via Venngage.com
Detailed lesson plans take longer to prepare, but they make it easier on the day (especially if you wind up needing a sub).
Learn more: Venngage Visual Arts Lesson Plan Template
ESL or Foreign Language Lesson Plan

TeachEnglishAbroad.co/ESL lesson plan via TeachEnglishAbroad.co
Whether you’re teaching English as a second language (ESL) or a foreign language to English speakers, this lesson plan style is perfect.
Learn more: Teaching English Abroad
Music Lesson Plan

Melody Soup/lesson plan example via MelodySoup.Blogspot.com
Use a lesson plan like this for choir, orchestra, band, or individual music lessons.
Learn more: Melody Soup
Blended Learning Lesson Plan

Hot Lunch Tray/blended learning lesson plan example via HotLunchTray.com
If your instruction includes both computer-based and in-person elements, this lesson plan idea might be just what you need.
Learn more: Hot Lunch Tray
One-Sentence Lesson Plan

Norman Eng/Introducing the One-Sentence Lesson Plan via CultofPedagogy.com
This kind of lesson planning isn’t for everyone, but the extreme simplicity works well for some. Describe what students will learn, how they will learn it, and how they’ll demonstrate their knowledge.
Learn more: Cult of Pedagogy
Need more help with lesson planning? Come ask for ideas on the WeAreTeachers HELPLINE group on Facebook !
Plus, check out 40 ways to make time for more creativity in your lesson plans ..

WeAreTeachers
You Might Also Like

15 Inspiring Teaching Portfolio Examples (Plus How To Create Your Own)
Show them what you've got. Continue Reading
Copyright © 2024. All rights reserved. 5335 Gate Parkway, Jacksonville, FL 32256
Topic: Presentation Skills

As you can see in the slide (giving presentations)
Step into the world of presentations with this handy lesson! Students explore vocabulary for structuring presentations, read the text of a presentation and watch a video on how to communicate ideas clearly.

Presentation: putting skills into action
With this lesson plan, students practise giving a presentation in English by doing a lot of different speaking activities. The lesson is the third of the three-part series of lessons about delivering presentations.

Moving through your presentation
With this lesson plan, students learn plenty of useful phrases for presentations in English. They also prepare presentation excerpts, and learn how to start a presentation. The lesson is the second of the three-part series of lessons about delivering presentations.

How to nail that presentation
In this lesson about business presentations in English, students discuss presentation structures in depth, watch a video with tips on giving presentations, and learn useful words and phrases related to the topic. The lesson is the first of the three-part series of lessons about delivering presentations.

The city of the future is here
With this lesson plan based on a video about Toyota’s city of the future students learn some useful language for presentations and then practise their presentation skills.

The chair that conquered the world
This lesson plan about the chair that conquered the world includes a variety of tasks for students to learn new vocabulary related to describing furniture design and practise their presentation skills.

How do you like your milk?
In this lesson, students will learn advanced cooking verbs, discuss different types of milk and do an English class project.

Apple’s legendary keynotes
The objective of this lesson plan is to teach students some adjectives for describing products and show them a video analysing Apple’s legendary keynotes.
Subscribe to get premium content
Subscribe to get access to professional, ready-to-use lesson plans in both digital and printable formats . Discover a variety of lesson types: Standard Lessons, Speaking Classes, Critical Reading Club worksheets and Flipped Classroom lesson plans.
Username or Email Address
Remember Me
Purdue Online Writing Lab Purdue OWL® College of Liberal Arts
Welcome to the Purdue Online Writing Lab

Welcome to the Purdue OWL
This page is brought to you by the OWL at Purdue University. When printing this page, you must include the entire legal notice.
Copyright ©1995-2018 by The Writing Lab & The OWL at Purdue and Purdue University. All rights reserved. This material may not be published, reproduced, broadcast, rewritten, or redistributed without permission. Use of this site constitutes acceptance of our terms and conditions of fair use.
The Online Writing Lab at Purdue University houses writing resources and instructional material, and we provide these as a free service of the Writing Lab at Purdue. Students, members of the community, and users worldwide will find information to assist with many writing projects. Teachers and trainers may use this material for in-class and out-of-class instruction.
The Purdue On-Campus Writing Lab and Purdue Online Writing Lab assist clients in their development as writers—no matter what their skill level—with on-campus consultations, online participation, and community engagement. The Purdue Writing Lab serves the Purdue, West Lafayette, campus and coordinates with local literacy initiatives. The Purdue OWL offers global support through online reference materials and services.
A Message From the Assistant Director of Content Development
The Purdue OWL® is committed to supporting students, instructors, and writers by offering a wide range of resources that are developed and revised with them in mind. To do this, the OWL team is always exploring possibilties for a better design, allowing accessibility and user experience to guide our process. As the OWL undergoes some changes, we welcome your feedback and suggestions by email at any time.
Please don't hesitate to contact us via our contact page if you have any questions or comments.
All the best,
Social Media
Facebook twitter.
- International
Claudia Sheinbaum projected to be Mexico's first woman president
By Kathleen Magramo, Maureen Chowdhury, Matt Meyer, Antoinette Radford and Melissa Macaya, CNN
The count: Mexico Elections 2024
Mexico's outgoing president says he will not try to influence sheinbaum in naming future officials.
From CNN's Abel Alvarado in Atlanta

Mexico’s President Andrés Manuel López Obrador said he will not influence newly elected president Claudia Sheinbaum in naming future officials for the country after Sunday’s landslide victory.
“She (Sheinbaum) is the one empowered to make all the decisions. I am not going to influence anything,” López Obrador said during his morning presser on Monday.
“She is going to choose her team,” he added.
However, he suggested that changes would come with the new president because it was part of the “transformation” he started for the country when he took office nearly six years ago.
López Obrador also said he may discuss constitutional reforms with Sheinbaum during the transition period but made it clear that he didn’t “want to impose anything.”
Sheinbaum will take office on October 1. Her term will last six years.
López Obrador, who is Sheinbaum’s political mentor, congratulated her on the win.
“We already spoke yesterday (Sunday); I congratulated her. I am very happy because imagine what it means to hand over the presidency to a woman after 200 years of only men ruling Mexico,” the president said.
The president said that once he hands over the presidential band, he plans to retire from political life entirely and will do so with “a lot of satisfaction.”
“Let it be heard loud and clear: after I finish my term in office, I will retire, and I will never again participate in any public or political act,” he said.
Biden congratulates Sheinbaum for her historic win

US President Joe Biden congratulated Claudia Sheinbaum on her historic presidential win as Mexico's first woman to lead the country's government.
"I look forward to working closely with President-elect Sheinbaum in the spirit of partnership and friendship that reflects the enduring bonds between our two countries," he said in a statement Monday. "I expressed our commitment to advancing the values and interests of both our nations to the benefit of our peoples."
Read Biden's full statement:
"I congratulate Claudia Sheinbaum on her historic election as the first woman President of Mexico. I look forward to working closely with President-elect Sheinbaum in the spirit of partnership and friendship that reflects the enduring bonds between our two countries. I expressed our commitment to advancing the values and interests of both our nations to the benefit of our peoples. I also congratulate the Mexican people for conducting a nationwide successful democratic electoral process involving races for more than 20,000 positions at the local, state, and federal levels."
Mexican peso falls against the US dollar
From CNN's Krystal Hur

The Mexican peso slipped roughly 3% against the US dollar Monday morning.
It comes after Claudia Sheinbaum's projected landslide victory, which has raised concerns that the ruling Morena party will be able to pass more ambitious constitutional reforms, many of which had been sought by outgoing President Andrés Manuel López Obrador.
"Sheinbaum is perceived as more of a technocrat than AMLO, and she also has a background in climate science. Both offer potential shifts in Mexican policy," wrote Bespoke Investment Group researchers in a Monday note.
Latin American leaders celebrate Claudia Sheinbaum's projected win
From CNN's Abel Alvarado

Latin American leaders are celebrating Claudia Sheinbaum's projected win as Mexico's president with leaders referencing a common theme — that her appointment would hopefully see strengthened relationships between countries on the continent.
Sheinbaum will face several challenges, including security, organized crime, energy and immigration, and would also set the tone for the pivotal US-Mexico bilateral relationship .
- Cuban President Miguel Diaz-Canel said in a post on X: "We wish her success in her management, the first for a woman in that position."
- Honduran President Xiomara Castro extended her "sincere congratulations" to Sheinbaum, "as the first female president of Honduras" on X . Castro said she spoke to Sheinbaum following her victory and agreed "to work together for the unity of Latin America and the Caribbean."
- Venezuelan President Nicolas Maduro called her win a "great victory for the Great Homeland. I hug you! Long live Mexico!"
- Bolivian President Luis Arce congratulated her on X and added that they "salute salute all the Mexican people for their democratic vocation and broad participation in the electoral process."
- Colombian President Gustavo Petro described Sheinbaum's appointment as "a triumph for the Mexican people and for their democracy."
- Costa Rica 's presidency referred to the two countries as "brother countries" and congratulated Sheinbaum on her appointment.
Millions turn out for largest election in Mexico's history
From CNN's Tara John and CNN en Español

Sunday’s poll was the largest election in the country’s history. More than 98 million voters were registered to cast a ballot, and 1.4 million Mexicans were eligible to vote abroad.
In addition to the presidency, more than 20,000 positions were being contested by an estimated 70,000 candidates vying to become senators, mayors and governors.
But the elections were plagued by immense violence . There have been more than 20 political killings since September, according to the Mexican government. By some estimates though, that number is even higher. According to Mexican consultancy firm Integralia, at least 34 candidates were murdered in the run-up to the vote.
Voting was suspended for several hours on Sunday in the southeastern Mexican town of Coyomeapan due to violence at the polling centers, according to state electoral authorities.
And while the murder rate fell in Mexico between 2019 and 2022 , in absolute numbers the country is still reeling from historically high levels of around 30,000 homicides each year. The true number is likely higher, experts say.
The violence appeared to have been a top concern for voters as cartels extend their grip through Mexico.
Claudia Sheinbaum has been coy about her security proposals but has pointed to her record as Mexico City mayor, when, according to her team, she improved the police force’s working conditions and intelligence-gathering abilities.
Outgoing Mexican president congratulates Sheinbaum
From CNN's Mia Alberti

Mexico's President Andres Manuel López Obrador has congratulated Claudia Sheinbaum on her expected win in Sunday's presidential election.
"With all my affection and respect I congratulate Claudia Sheinbaum who came out victorious with an ample margin. She will be the first (female) President of Mexico... but also the President, possibly, with most votes obtained in all of the history of our country," he said in a video posted on X.
López Obrador also congratulated the other presidential candidates and the Mexican people, saying he was proud of the large turnout.
Mexico's expected president Sheinbaum pledges to govern all Mexicans "without distinction"
From CNN's Michael Rios

Claudia Sheinbaum has responded to the announcement of her projected victory in Mexico's presidential election early Monday morning, saying her administration would govern all Mexicans “without distinction,” even though not everyone supports her policies.
“Our duty is and will always be to look after every single Mexican without distinction. So even though many Mexicans do not fully agree with our project, we will have to walk in peace and harmony to continue building a fair and more prosperous Mexico,” she told supporters in a speech.
She also spoke about the historical significance of becoming the first female president of the country.
Sheinbaum said her two rivals in the race, Xóchitl Gálvez and Jorge Álvarez Máynez, had called to congratulate her on her projected victory.
Sheinbaum, the candidate from the ruling party, received the most votes in Sunday's elections, according to preliminary results from the National Electoral Institute.
The Electoral Court must validate the presidential election, and if confirmed, Sheinbaum will start her presidency on October 1.
Sheinbaum's large margin shows power of Mexico's ruling party, CNN journalist says
From CNN's Kathleen Magramo

Even though Claudia Sheinbaum was expected to win during campaign polls, her large margin in the votes came as a shock, CNN’s Gustavo Valdes reports from Mexico City.
Sheinbaum might get up to 60% of the vote, which is even higher than outgoing President Andrés Manuel López Obrador when he was elected six years ago, Valdes said.
Sheinbaum is the candidate for the ruling Morena party.
"That gives you an idea of the political power that López Obrador has amassed over the past six years," Valdes told CNN's Rosemary Church.
Valdes said voters told CNN that a woman president would help change Mexico's image of being a "macho" country, where patriarchal culture impedes women's advancements.
"Mexico has actually changed its laws to encourage and actually force the parties to have more female candidates. So so there's a very equal division of power between many woman in congress and the governorships," Valdes said.
Please enable JavaScript for a better experience.
IMAGES
VIDEO
COMMENTS
A lesson plan will be the set of subject matter materials you will be teaching during a specific timeframe. The lesson plan should be an index that students can constantly consult to understand better the parts of the learning journey they will go through during each session. Teachers and professors should have a lesson plan template that ...
Begin with the presentation divided into primary or main sections, highlight key definitions, and add infographics and videos to ensure that every student understands the tiniest detail. Additionally, you can get students involved in the lesson plan presentation by asking questions, polling them on key points, or allowing them to follow along ...
1. Warm your students up with a bell ringer activity. At the beginning of every class, the students' brains aren't primed yet for the content. Ease your students into every lesson with a little warm up known as a bell ringer. These are 3- to 5-minute quick activities that serve as introductions to your lesson.
a. Grade or Age Group. Indicate the specific grade (e.g., 4th grade, 10th grade) or age group (e.g., elementary, middle school, high school) for which the lesson is designed. b. Prior Knowledge. Consider the knowledge and skills that students at this grade level are expected to possess.
Objectives: know your destination. When writing a lesson plan, start by outlining the learning objectives—what you want your students to take from the session and work backward. Having clear and specific goals helps you plan activities for a successful lesson. 2. Welcome to the hook: make 'em want to learn.
Steps to building your lesson plan. Once you've identified the components that need to go into teaching your class, you're ready to use these eight steps to build your lesson plan: 1. Identify the objectives. To build a lesson, you first need to identify the objectives of each class.
Step 2: Include Any Relevant Resource Materials for the Lesson. Integrating relevant and interesting learning tools into the classroom helps improve learning and participation. These might include things such as presentations, handouts, online videos, pages from a book, etc. . Step 3: Cite Lesson Plan Procedures.
Step 2: Design the Instructional Materials. Different components make up a comprehensive lesson plan. Once your objective is lined out, you must plan the activities and gather or create your instructional materials. Instructional materials may include any of the following: Visual aids.
Build in a buffer between each session to take care of any unforeseen issues. Say you want to spend 15 minutes on a class presentation; assign 20 minutes to it instead. Having a realistic lesson timeline helps you stay on track, making sure you have enough time to cover all the key areas of your lesson.
A good lesson plan might include the following: An objective for the lesson. Time requirements for each aspect of the lesson. Specific activities that will be done. Materials that will be used. How the lesson will be differentiated. The method in which you will assess students' progress. Standards that the lesson will address.
If you want to work on your main points first and save the introduction for last, you can. 2. Present your research and work in the body of the presentation. Your body should make up about 60 to 70% of your presentation, so put all your best points here. Think of your body as the path to your point.
Here are some strategies for creating a realistic timeline: Estimate how much time each of the activities will take, then plan some extra time for each. When you prepare your lesson plan, next to each activity indicate how much time you expect it will take. Plan a few minutes at the end of class to answer any remaining questions and to sum up ...
The complexity and structure of your lesson plan will depend on the variables unique to your class, the subject matter, or the template you use. Still, certain steps in the process of developing a lesson plan stay the same as you always need to: Define a lesson plan objective. List the necessary materials. Decide on assessment methods.
Try and think of examples, or see if your students can think of their own. Motivation. Students need to be motivated to learn, or you might as well just throw your lesson plan out of the window. This can be done in lots of ways, like letting them know about a fun game that's coming up, as previously mentioned.
6. Individual practice of the vocabulary on student worksheets — 3 minutes. 7. Giving answers to worksheets — 2 minutes. 8. Listening exercises with the movie (includes playing the movie scenes several times, then going over the answers and letting the students watch the scenes a third time) — 20 minutes. 9.
Customize your lesson plan. Proofread your lesson plan, then match fonts, colors, and elements to your subject and objectives or the learning style of your students. Get creative with millions of images, icons, stickers, shapes, and graphics. Visualize your data easily with charts, graphs, and tables.
Introducing Expectations for Oral Presentations: A 55-Minute Lesson Plan. 1. Do Exercise: Similarities and Differences Between Writing and Speaking. 1. 3-minute free write about similarities between writing and speaking, especially similarities between writing a paper and giving a presentation. 2. 3-minute free speak with peer partner about ...
How to write a microteaching lesson plan. Identify the learning objectives. Specify the learning activities. Figure out how to assess student understanding. Sequence your lesson in an engaging manner. Close the lesson. 8 microteaching skills that teachers should have. Improve your teaching skills with microteaching.
Here's how to write a great lesson plan in a few simple steps: 1. Identify learning objectives. Before you plan your lesson, it may be beneficial to identify the learning objectives for the lesson. Learning objectives are most commonly recognized as statements that clearly outline what your students can expect to learn when new information is ...
30 Lesson Plan Examples for Every Grade Level and Subject. Lots of ways to prepare for top-notch learning. By Jill Staake, B.S., Secondary ELA Education. Aug 3, 2023. Writing lessons might be a fun activity for you (all the things you'll do!) or it may be a necessary evil (so many boxes to fill). Either way, it's an important part of ...
1. Daily. Some teachers create lesson plans for each day of the week. The duration of each plan is the length of one class period or school day, so a teacher might create five lessons per week. Each day has a separate objective and a small assessment at the end to check for students' understanding of the day's content.
Try and think of examples, or see if your students can think of their own. Motivation. Students need to be motivated to learn, or you might as well just throw your lesson plan out of the window. This can be done in lots of ways, like letting them know about a fun game that's coming up, as previously mentioned.
Business. In this lesson about business presentations in English, students discuss presentation structures in depth, watch a video with tips on giving presentations, and learn useful words and phrases related to the topic. The lesson is the first of the three-part series of lessons about delivering presentations. Unlimited Plan Show.
Mission. The Purdue On-Campus Writing Lab and Purdue Online Writing Lab assist clients in their development as writers—no matter what their skill level—with on-campus consultations, online participation, and community engagement. The Purdue Writing Lab serves the Purdue, West Lafayette, campus and coordinates with local literacy initiatives.
Claudia Sheinbaum is projected to win Mexico's presidential election and become the first woman to lead the country's government, according to preliminary results.