- Media and Design

How to Insert a Live Web Page in PowerPoint?
Written by: Bill Whitman
Last updated: April 9, 2024

Inserting a Live Web Page in PowerPoint
To insert a live web page into a PowerPoint slide, you essentially need to use a web browser object or a third-party add-in designed for this purpose. PowerPoint does not natively support embedding live web pages directly into slides, but you can achieve this by using the WebBrowser control in Windows or adopting add-ins like LiveSlides.
Quick summary
- Embedding live web pages in PowerPoint requires using the WebBrowser control or third-party add-ins.
- The WebBrowser control method involves using PowerPoint’s Developer tab to insert a web browser object.
- Third-party add-ins like LiveSlides simplify embedding live web pages into slides.
- Both methods allow for interactive presentations that can display real-time content from the web.
Using the WebBrowser Control
Here at LearnPowerpoint.io, we recommend starting with the WebBrowser control for users comfortable with accessing PowerPoint’s Developer features. This method integrates a miniature web browser directly onto your slide, allowing any live website to be displayed as part of your presentation. Here’s how:
- First, ensure the Developer tab is visible on your PowerPoint ribbon. If not, go to File > Options > Customize Ribbon and check the Developer option.
- Next, on the Developer tab, click on More Controls – the icon with a wrench and hammer.
- Scroll down and select Microsoft Web Browser from the list. Click OK.
- Draw the browser control onto the slide. You can resize it according to your needs.
- To link a specific web page, you need to add some simple VBA code. Press Alt + F11 to open the VBA Editor, insert a new module, and paste a code snippet that directs the browser object to your desired URL on slide show start.
This method is slightly technical but provides a seamless way to integrate any web page directly into your PowerPoint presentation.
Using Third-Party Add-Ins like LiveSlides
For those seeking a more user-friendly approach, third-party add-ins such as LiveSlides offer a straightforward solution to embed live web pages. This method can be especially appealing for users who prefer to avoid the complexities of VBA scripting. Here’s how to use LiveSlides:
- Download and install the LiveSlides add-in from its official website.
- Open PowerPoint and locate the LiveSlides tab on the ribbon.
- Click on the Insert Live Slide button and enter the URL of the web page you wish to embed.
- LiveSlides will then insert a placeholder into your slide which will display the live web page during your presentation.
This method is straightforward and does not require dealing with code, making it accessible to all PowerPoint users.
Whether you opt for the technical route with the WebBrowser control or the simplicity of LiveSlides, incorporating live web pages into your PowerPoint presentations can elevate the level of interactivity and deliver real-time content in an engaging way. Remember, at LearnPowerpoint.io, we’re dedicated to providing our trusted advice to make your presentations more dynamic and informative. Feel confident in exploring these options to insert a live web page in PowerPoint, enhancing the overall impact of your presentations.
Other Categories
- Advanced Features and Interactivity
- Basic Features and Usage
- Slides and Organization
- Text and Formatting

How to Add a Countdown Timer in PowerPoint?

How to Make a Picture Transparent in PowerPoint?

How to Insert a Checkbox in PowerPoint?

How to Insert Audio Clips in PowerPoint?

How to Add Notes in PowerPoint?

How to Use PowerPoint Online?

How to Record Video in PowerPoint?

How to Animate a Chart in PowerPoint?

How to Create a Family Tree in PowerPoint?
Featured posts.
How-To Geek
How to add live web pages to a powerpoint presentation.
Have you ever wanted to demonstrate a live website during a PowerPoint presentation? Here's how you can insert a live webpage into a PowerPoint prese
Have you ever wanted to demonstrate a live website during a PowerPoint presentation? Here's how you can insert a live webpage into a PowerPoint presentation so you can show the exact content you're talking about.
No matter what you're giving a presentation about, sometimes it can be useful to show your audience information from the internet. You could always create a screenshot of the webpage you're demonstrating, but chances are the screenshot may be out of date by the time you give your presentation.
A better solution is to use live information from the web in your presentation. By default, PowerPoint doesn't support inserting a live web page, but you can easily do this with the LiveWeb add-in.
Head to the LiveWeb website (link below), and download the correct version for your version of PowerPoint. We selected the 2007/2010 version in this test.
Once it's downloaded, extract the files as normal.
Now, in PowerPoint, open the Options window. In PowerPoint 2010, you can do this by clicking the File button and selecting Options; in PowerPoint 2007, click the Office orb and select Options.
Select Add-Ins on the left side, then select PowerPoint Add-ins from the Manage menu, and click Go.
This will open the PowerPoint Add-ins window. Click Add New to add the LiveWeb addin we downloaded previously.
Browse to the folder where you extracted the LiveWeb addin, and select it.
PowerPoint may warn you that the addon contains a macro. Click Enable Macros to continue.
Now you should see LiveWeb listed in the Add-Ins window, and you're ready to add a live webpage to your PowerPoint presentation.
Using LiveWeb in PowerPoint
Now that LiveWeb is installed, you're ready to insert live internet data in your presentations. From the Insert tab, select Web Page from the LiveWeb section.
This will open a quick Wizard interface that will help you insert a webpage into your presentation.
Enter the website you'd like to visit in the first line, then click the Add button. Make sure to include http:// in front of the website address. Once you've added the website you wish to visit, click Next.
LiveWeb will automatically refresh the web page, but if you want you can uncheck the box. Click Next to continue.
Now choose how much of the slide you want the webpage to cover, and select where you want to position the page. You can always change this later if you like.
Once it's finished, click Finish to return back to PowerPoint.
LiveWeb will let you know it successfully added the web page to your slide.
You'll now see a Windows 98-style logo in your slide, showing where your live webpage will be located.
Feel free to resize or move the webpage section in your slide however you want.
To view the actual web content, you'll need to start a slideshow. Click the slideshow button at the bottom of the window to switch quickly.
Now you'll see a live webpage loaded right inside your PowerPoint presentation. You can markup the slide as you would any other with PowerPoint tools, or you can interact with the website just as you would in a browser.
If you need to change your webpage, click the Edit Page Property button on the Insert tab.
Enter the new website address you want, and finish as before.
You can also add multiple web pages to a presentation if you'd like. You could even make a webpage comparison like we did with screenshots in our first slide. Only difference here is, the web pages are both live, and you could demonstrate how to use them to your audience.
When you save your presentation, you'll need to save it as a Macro-enabled presentation in .pptm format to preserve the web data. Note that you'll be able to view the presentation on another computer only if it has the LiveWeb addon installed. Since it's a free addon, you could keep a copy of it on your flash drive so you could easily install it if you need to show your presentation on another computer.
Whether you're trying to teach a class about computer usage or demonstrate your new website for your company's board members, the LiveWeb addin makes it easy to incorporate live web pages in your presentations. There are many ways you could use this, so let us know how you use live web pages in your presentations to make information come alive!
If you'd like to use live web data in other Office applications, here's how you can Use Online Data in Excel 2010 Spreadsheets .
Download the LiveWeb Add-in for PowerPoint
- Skip to primary navigation
- Skip to main content
- Skip to primary sidebar
Educational Technology in UT Austin School of Nursing
Serving the learning technology & instructional design needs of faculty in UT's School of Nursing
Educational Technology & Instructional Design
Posted on May 2, 2017 | By Sean White | Filed Under: Media & A/V , Software & Apps , Teaching & Learning | Tagged With: Interactivity , Media , PowerPoint , Website
How to Embed Live Websites into Your PowerPoint Slideshow
Do you get tired of having to switch back and forth between websites and your PowerPoint slideshow during a lecture? Do you wish it were possible to add that website right to your slideshow?
Well, it turns out you can!
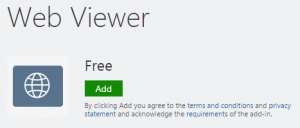
For newer versions of PowerPoint (2013, 2016, Mac), you can download the Web Viewer add-in and place web pages right into a slide within your slideshow.
Note : this add-in only works with secure websites (those beginning with HTTPS) for security reasons.
To install the Web Viewer Add-In
- Open PowerPoint.
- Click the Insert tab.
- In the Add-ins section, click My Add-ins.
- In the Office Add-ins window, click Store.
- In the Search box, type Web Viewer.
This will add the Web Viewer add-in to your PowerPoint allowing you to insert web pages into any slide within your slideshows.
To Embed a Web Page into a Slide
- Click New Slide.
- Select Web Viewer.
- Click Insert.
- Type or paste (CTRL+V) the URL of the website/page you wish to embed.
- Be sure to delete https:// from the URL since it’s already added by default.
- Click Preview to view the page.
- Adjust the size to your liking.
But what if the website you want to add isn’t “secure” (doesn’t include the “s” after “http”)?

Sometimes, Web Viewer doesn’t do exactly what you want since it only works for secure web content. When you need to add a public web page, you can use another add-in called LiveSlides.
LiveSlides works the same way Web Viewer does but offers a little more flexibility.
To learn more about LiveSlides and see how to install and start using it, click here .

Reader Interactions
Leave a reply cancel reply.
You must be logged in to post a comment.
Social Widgets powered by AB-WebLog.com .
- Add Zoom Office Hours to Canvas Navigation
- Give your Canvas Course a “Facelift”
- Student Resources
- Canvas Quick Links
- Create Your Own Canvas Course Navigation
- Question Banks in Canvas
- Discussions in Canvas
- Add People to Your Canvas Course
- Google Apps in Canvas
- Dynamic Content in Canvas
- Downloading multiple files from Canvas to your PC
- How (NOT) to Use Classroom Microphones
- 3 Ways to Get Students to Read Your Syllabus
- Academic Integrity – Faculty Resources
- How Vs. Why Knowledge
- Inclusive Teaching at UT
- Honorlock Getting Started Guide for Faculty
- Best Practices in Zoom
- Zoom Deeper Dive
- Office Hours in Zoom
- Selecting the Right Camera / Microphone in Zoom
- Student Laptop Requirements & Recommendations
- Classroom Response Systems
- File Sharing & Cloud Storage
How To Add Live Web Pages To A PowerPoint Slide
The new web is constantly changing with updated information every few minutes. Take Twitter streams for instance; if you are a busy Tweeter, then there's something new with each blink of the eye. Now, how do you capture such evolving web pages on a PowerPoint slide?
Linking to a web page via a URL is a simple but so old world. Instead you want a PowerPoint solution that lets you stay within the presentation and showcase a web page in its full browsing glory.
That's where LiveWeb , a little free PowerPoint add-in comes into the picture. LiveWeb will add live web pages to a Powerpoint slide and refreshes the web pages in real-time during a slide show. You don't have to go outside your presentation to show your audience a web page.
It is just like using your presentation as a browser. It goes without saying that you need a live internet connection for the live experience (and a good stable one).
A Small Download & A Simple Installation
LiveWeb supports all PowerPoint versions starting from PowerPoint 97 to the latest 2010. Downloading and installing the LiveWeb add-in is a quick affair. The add-in is just 51KB in size.
In PowerPoint 2003, installation of the LiveWeb add-in is from the Tools - Add-ins menu.
In PowerPoint 2007, you have to follow the path: Office Button - PowerPoint Options - Add-Ins - Manage (PowerPoint Add-ins) and click on Go to bring up the box that installs add-ins.
A macro security warning pops up. Enabling macros allows the installation to go through.
Inserting A Web Page On A Slide
Inserting a "˜Live' web page on one of your slides is a simple 3 step process with the LiveWeb add-in.
- From the Insert menu on the Ribbon , click on Web Page in the LiveWeb group.
- The LiveWeb wizard opens up. Enter the URL of the web page that you want to display.
- In the next page, you have the option of enabling a refresh of the web page. A second option enables the placement of a temporary PowerPoint autoshape over the slide to eliminate the whiteouts between page refreshes.
- The last step allows you to set some size and position parameters for displaying the web page on your slide optimally.
- Clicking on OK closes the wizard and now your slideshow is ready to display the web pages that will be refreshed in real-time.
Your slideshow now resembles a full screen browser without toolbar controls. In fact to use the commands for browsing, you have to right click on the browser object.
You can change the properties of the web page slide anytime from the Edit Page Property button on the LiveWeb menu. The size of the inserted web page can be changed by dragging the corner handles of the browser object. You can use the remaining area of the slide for inserting any other PowerPoint element.
Some Uses Of Using A Web Page Within A Slideshow
I went searching for this app when I had to prepare a slideshow on environmental pollution. Instead of showing static images, I decided to use the topical example of the BP oil spill. Integrating a few web pages from BP's own site and others like Reuters and National Geographic helped me show how the popular media is discussing the issue. Extending it to catch real time Twitter net chatter also helped to make the presentation more interactive.
When a slide serves like a web page, many uses can be found for it; from education to displaying information. How will you stretch the utility of the LiveWeb PowerPoint add-in?
Image Credit: HikingArtist.com
Sie benutzen eine ältere Browserversion. Wechseln Sie auf die neueste Version von Google Chrome , Safari , Mozilla Firefox oder Microsoft Edge , um die Site optimal nutzen zu können.
- Produkte iSpring Suite iSpring Learn iSpring Market

Kursverkaufsplattform
- Lösungen Nach Branchen Bildung Einzelhandel Gesundheitswesen Fertigungsbranche Nach Anwendungsfall Online‑Quiz Mobile Learning
- Über iSpring Über uns Vertriebspartner Partner werden Kontaktieren Sie uns
- Community Blog Leitfäden Produktschulung
- Sprache English Français Deutsch Español Italiano Nederlands Português Polski 中文 日本語 العربية Indonesia 한국어
Einbinden einer Webseite in eine PowerPoint-Präsentation
In diesem Artikel erfahren Sie, wie Sie eine Webseite bzw. HTML in eine Microsoft PowerPoint-Präsentation einbinden – auf Ihrem PC oder Mac. Stellen Sie sich vor, Sie befinden sich mitten in Ihrem Webinar oder Ihrer Präsentation bei einem Live-Event. Sie haben Ihr Publikum mit einigen Details fasziniert, haben ihre ungeteilte Aufmerksamkeit, Ihre Geschichte ist dabei, ihren Höhepunkt zu erreichen – eine Demo Ihres Produkts, ein Beweis Ihres Konzepts oder jegliches anderes wertvolles Wissen – und Sie klicken auf den Link, um zur Webseite zu gehen und… dann kommt ein holpriger Moment: Sie schalten den Präsentationsmodus aus, wechseln vom Microsoft PowerPoint -Fenster zu Chrome und schalten dann den Diashow-Modus wieder ein. Als Sie Ihre Aufmerksamkeit wieder Ihrem Publikum widmen, hat dieses das Interesse bereits verloren.
Um solche Situationen zu vermeiden, sollten Sie eine Webseite direkt in Ihre Präsentation einbinden. Das iFrame-Tag hilft Ihnen, ein HTML-Dokument in Ihre PowerPoint-Folien einzubinden.
iSpring Converter Pro
Mit dem benutzerfreundlichen iSpring Converter Pro können Sie schnell und einfach Webseiten in Ihre Microsoft PowerPoint-Präsentationen einbinden.

Was ist ein iFrame?
Ein iFrame (Inline-Frame) ist ein HTML-Element, das eine andere HTML-Seite oder ein HTML-Snippet innerhalb eines Dokuments lädt. Es hilft sozusagen, eine andere Webseite in die übergeordnete Seite einzufügen. Sie können ein iFrame einbauen, um Videos, Werbung und interaktive Inhalte einzubinden. Somit können Sie ein iFrame in Ihre Microsoft PowerPoint-Präsentation einbetten, um Webobjekte einzufügen.
Vier einfache Schritte, um HTML in PowerPoint einzubinden
Manche Menschen haben großen Respekt vor Begriffen wie iFrame und HTML, aber ehrlich gesagt gibt es nichts, worüber man sich Sorgen machen müsste. Sie müssen keine Operationen durchführen, wie beispielsweise HTML-Code einbetten oder andere technische Dinge tun, damit dies funktioniert und Sie eine HTML-Datei in Ihre PowerPoint einfügen.
Mit dem richtigen Add-In für Microsoft PowerPoint können Sie in wenigen Minuten ein Objekt einbinden. Sie müssen nur 4 einfache Schritte durchführen. Hier erklären wir im Detail, wie das Einfügen funktioniert.
1. Kopieren Sie die URL (Webadresse) der Webseite, die Sie in PowerPoint einbinden möchten. Wenn Sie nicht die gesamte Seite einfügen möchten, können Sie die URL eines bestimmten Bereichs der Seite kopieren.
2. Laden Sie für das Einfügen die kostenlose Testversion von Spring Converter Pro herunter. Mit diesem Tool können Sie nicht nur live navigierbare Webseiten, sondern auch Medien einbinden: Audio, YouTube-Videos und viele andere Inhaltsobjekte aus externen Ressourcen – und die ursprüngliche Qualität beibehalten.
3. Öffnen Sie Microsoft PowerPoint. Suchen Sie die Registerkarte iSpring Converter Pro 11 und klicken Sie darauf. Wählen Sie dann die Schaltfläche Web Element in der Symbolleiste.

Fügen Sie die kopierte URL in das geöffnete Fenster ein. Überprüfen Sie nun, ob die von Ihnen eingegebene Adresse korrekt ist und es funktioniert, indem Sie auf die Schaltfläche Vorschau klicken.

Übrigens können Sie Webseiten auch dann anzeigen, wenn keine Internetverbindung zur Verfügung steht. Damit das funktioniert, müssen Sie das gewünschte Webobjekt auf den Computer herunterladen und dann die Datei einfügen, indem Sie Lokaler Pfad anstelle der Web Adresse auswählen.

Hinweis : Wenn Sie zusätzliche Webseiten in Ihre Microsoft PowerPoint-Präsentation einfügen oder die Webseite mit anderen Inhaltsobjekten kombinieren möchten, sollten Sie die Option Fenstergröße: Vollbildmodus auswählen.

4. Nachdem Sie nun Webobjekte, beispielsweise eine HTML-Seite, in PowerPoint eingebettet haben, lassen Sie uns diese abspielen. Damit dies funktioniert, müssen Sie Ihre Präsentation in HTML5 konvertieren. iSpring Converter Pro wird dies für Sie erledigen.
- Klicken Sie in der Symbolleiste von iSpring Converter Pro auf die Schaltfläche Veröffentlichen .

- Wählen Sie die Option Mein Computer , geben Sie den Namen der Präsentation ein und wählen Sie einen Ordner aus, in dem die Präsentation gespeichert werden soll.

- Wählen Sie im Menü Ausgabeoptionen das HTML5 -Format.
- Warten Sie, bis der Veröffentlichungsprozess abgeschlossen ist, und Sie sehen ein Berichtsfenster. Klicken Sie auf die Schaltfläche Kurs ansehen , um zu erfahren, ob er so funktioniert, wie Sie es möchten.

Glückwunsch, es funktioniert! Sie haben erfolgreich eine Webseite in Ihre Microsoft PowerPoint-Präsentation eingebettet. Darüber hinaus können Sie Ihre Präsentation jetzt ganz einfach online teilen. Betrachter können sie direkt in einem Webbrowser auf ihren Computern, Tablets und Smartphones ohne spezielle Tools öffnen, auch wenn PowerPoint nicht auf ihrem Gerät installiert ist.
Wenn Sie Präsentationen online veröffentlichen, können Sie auch sicher sein, dass Ihre Inhalte vor Kopieren oder Ändern geschützt sind. iSpring Cam Pro bietet eine ganze Reihe von Sicherheitseinstellungen, einschließlich Wasserzeichenschutz, Passwortschutz und Domänenbeschränkung.
Wie man eine Internetseite in PowerPoint einbindet: Warum kein Screenshot?
Wir haben bereits eine peinliche reale Situation beschrieben, in der Sie sich befinden könnten, wenn Sie Links in Ihrer Präsentation verwenden, aber was ist mit Screenshots von Webseiten oder einzelnen Bereichen von Webseiten? Natürlich können Sie einfach einen Screenshot erstellen und diesen Screenshot als Bild mit Text und anderen Elementen bzw. Bereichen von Webseiten in Ihre Microsoft PowerPoint einfügen. Aber diese „Technologie“ hat einige Einschränkungen und funktioniert nicht wirklich.
- Screenshots sind statisch . Webseiten haben manchmal in bestimmten Bereichen Animationen, die die Benutzererfahrung cool und ansprechend machen. Wenn Sie HTML-Animationen allerdings als Screenshot in PowerPoint einzubinden versuchen, wird dies nicht funktionieren und Sie verlieren all dies in Ihrer Präsentation.
- Screenshots werden nicht aktualisiert . Abhängig von der spezifischen Webseite kann ein einmal erstellter Screenshot bereits veraltet sein und irrelevante Informationen enthalten. Nehmen Sie die Börse als Beispiel. Schon ein paar Minuten können einen großen Unterschied machen und Ihr Screenshot ist nicht mehr aktuell. Und was ist, wenn Sie Ihre Präsentation ein paar Tage, Wochen oder sogar Monate, nachdem Sie den Screenshot erstellt haben, der Öffentlichkeit zeigen? Genau, das funktioniert nicht.
- Screenshots sind nicht interaktiv . Wenn Sie Ihrem Publikum zeigen möchten, wie es mit Ihrer Webseite interagieren kann, z. B. wie und wo es die Daten finden kann, an denen es interessiert ist, ist ein Screenshot nutzlos.
Also, ja, Sie können Screenshots von Webseiten verwenden, aber sie werden Ihnen nicht helfen, Ihre Präsentation zu verbessern, und sie könnten sogar zu einer Belastung werden, wenn Sie Ihre Präsentation regelmäßig zeigen und daher ständig Screenshots aktualisieren müssen, um auf dem neuesten Stand zu bleiben.
Zusammenfassung
Das Einbinden einer Internetseite in eine Microsoft PowerPoint-Präsentation ist ziemlich einfach, wenn Sie die richtige App haben. iSpring Converter Pro ist eine perfekte Lösung, die ihren Benutzern hilft, ihre Präsentationen zu bereichern und sie relevant und interaktiv zu halten. Auf diese Weise können Sie durch regelmäßige manuelle Aktualisierungen Zeit und Aufwand sparen, die ansonsten aufgewendet werden. Sie müssen den Ablauf Ihrer Präsentation nicht unterbrechen, um von der Registerkarte PowerPoint zu Google Chrome zu wechseln. Sie müssen nur unserem Leitfaden folgen und erhalten eine ständig aktuelle Präsentation, die Sie in Online-Formate umwandeln können, die auf jedem Gerät perfekt angezeigt werden. Beginnen Sie mit der kostenlosen Testversion von iSpring Converter Pro und sehen Sie, wie praktisch und ansprechend es ist, Live-Webseiten in Ihre PowerPoint-Präsentationen einzubinden.
Schneller PowerPoint-in-HTML5-Konvertierer
Konvertieren Sie Präsentationen in HTML5 unter Bewahrung aller Effekte und Übergänge

Inhalt erstellt von:
Sie kombiniert gerne tiefgehende Recherche mit Expertenwissen aus der Branche. Wenn Sie Erkenntnisse über E-Learning haben, die Sie teilen möchten, setzen Sie sich bitte mit uns in Verbindung.
Schreibe einen Kommentar Antworten abbrechen
Deine E-Mail-Adresse wird nicht veröffentlicht. Erforderliche Felder sind mit * markiert
Kommentar *

40 PowerPoint-Tipps und Tricks: Von der Vorbereitung bis zur Durchführung perfekt

Powerpoint Add-Ins und -Plugins: die besten für 2023

Wie man PowerPoint-Präsentation in Videos umwandelt auf Windows und MacOS

So erstellen Sie eine iPad-App mit Hilfe einer PowerPoint-Präsentation
Unseren Blog abonnieren
Bleiben Sie dran, um unsere neuesten E-Learning -Tipps und -Tricks zu erhalten!
Indem Sie “Abonnieren“ klicken, stimmen Sie unserer Datenschutzrichtlinie zu. Alle E-Mails beinhalten einen Link zum Beenden des Abonnements, so dass Sie dieses jederzeit beenden können.
Onlinekurse schnell und einfach erstellen

Wir nutzen Cookies, um Ihnen die bestmögliche Erfahrung auf unserer Webseite zu bieten, und zu Analyse- und Marketingzwecken. Sie können optionale Cookies nach Wunsch aktivieren oder deaktivieren. Weitere Informationen finden Sie in unserer Cookie-Richtlinie .
Cookies verwalten
Essenzielle Cookies sind immer aktiv. Wenn Sie wünschen, können Sie andere Cookies deaktivieren.
Essenzielle Cookies
Analytische Cookies
Social Media-Cookies
This browser is no longer supported.
Upgrade to Microsoft Edge to take advantage of the latest features, security updates, and technical support.
Add live Power BI data to PowerPoint
- 5 contributors
You can use live data from Power BI to help create a story with your PowerPoint presentations. Add individual visuals and whole report pages to your PowerPoint slides with the Power BI add-in or create a new PowerPoint presentation with live data from the Power BI Service. With the Power BI add-in, you can also use recommended content from the add-in to use on an existing slide. You also insert a direct URL link into the Power BI add-in.
After you use your preferred method to load the data, the report or visual will be live and you can select the data as desired. Any changes you make while editing the presentation will automatically save. The next time you open the presentation, the report or visual will appear in the state you last left it in. For more information, see View and present live Power BI data in PowerPoint .
If you don't see the Power BI button, choose Get Add-ins and look for "Microsoft Power BI" in the Office Add-ins store. If the add-in is admin managed, it will appear in a separate ribbon.
If you get a Cannot run Power BI error message when you try to use the Power BI add-in, it is most likely because you need to install WebView2, a component necessary for running Power BI in PowerPoint. WebView2 is very simple and quick to install. See Troubleshoot the Power BI add-in for PowerPoint for details.
Decide how you want to load your data and follow the procedure in one of following sections:
Create a new presentation and add live Power BI data
Add live power bi data to an existing presentation, use the direct url to add live data to a presentation.
The Open in PowerPoint and Export options are not available in national/regional clouds.
Create new presentation from a report or visual
Add the report or visual to a new PowerPoint presentation with the following method:
- Go to the report or visual.
- Make any changes or select filters that you want to the data before you add it to a new PowerPoint presentation.
- Select Share the live data is a report.
- Or, if the live data is in a visual, select More options (...) then Share .
- Specify what users can access the content as described in the sharing reports documentation .
Check the Include my changes box if you want to add the data in its current state.
Select Apply .
- Choose Open in PowerPoint .
- In the Embed live data in PowerPoint dialog that appears, choose Open in PowerPoint . Then a new PowerPoint presentation will open with the visual already loaded into the add-in.

Export a report to add live data to a new presentation
Select Export .
Choose PowerPoint .
Then select Embed live data .

Check the Embed report with the data filters you selected box if you want to export the current state,
Select Open in PowerPoint .
Although this option is located in the Export menu and is labeled "Embed live data", no data actually becomes part of the PowerPoint file. The data remains secure in Power BI.
Use the content recommended by the Power BI add-in
On the slide you want to add live content, type the title of the slide. The title should include the name of the report you wish to add.
select Add-Ins from the top ribbon.
Select the Power BI add-in.
The add-in then automatically scans the title of your slide then suggests Power BI content that might be relevant under the Recommended section.
For example, if the title of your slide is "New stores sales," the add-in shows you a list of Power BI reports that contain those keywords. The add-in also shows you reports you recently visited in Power BI, so you can easily access reports you’re working on or frequently use.
Once you find the report you want, select it to insert it on the page.
When you have the report open on PowerPoint, you can select a specific page or visual to insert. You can also update filters or slicers before you insert it on the page.
If the slide doesn't yet have a title, a dialog will suggest a title based on the content of the add-in. The title can be the report name, the page or visual name, or both.
If you want to allow others to access this report, select the Give people automatic access to this data checkbox, so that when others in your org view this presentation, they can see the data you added to the slide.
You must have permission to share the content you want to insert or you won't have the option to give others access to the data.
When you're ready to insert the page, select the Insert button to add the live content.
If the report you want to add doesn’t appear in the list of recommended content, use the Use the direct URL to add live data to a presentation method.
If you want to add a live report page to your presentation with a URL, there are three ways to get the report page URL, you can get the URL from the Share option, Export option, or directly from the browser's address bar.
Use the Share option if you want to be sure that all users who open the presentation can view the report. With other methods, users can or can't view the report based on their permissions.
Use the following procedure to add live data to a presentation with a URL:
In the Power BI service, open the report to the page you want to insert.
If you want, set the page to your desired state using filters, selection, slicers, etc.
If you use the share method, select Share :
Specify what users can access the content.

- Copy the URL.
Or, if you use a visual:
- Select More options (...) .
- Select Share .
- Then choose Link to this visual to get the visual's URL.
Or to use the browser link:
- Copy the URL from the browser's address bar.
After you copy the URL with one of the previously mentioned methods, go to your PowerPoint Presentation.
Go to the slide you want to add the data.
Select the Power BI add-in from the ribbon.
Paste the URL into the text box.
Select the Insert button and the visual will load into the slide.
Change a direct link to a shareable link
If you have sharable links enabled for your organization and you have permissions to reshare a report, you can turn your link into shareable link in the Power BI add-in. When you use a sharable link, other users viewing the presentation have the required permissions to see the report and don't have to request access when the viewing the presentation. So, you don't have to give everyone access in the Power BI service before you use the report in your presentation. For admins to learn more about how to enable sharable links, read Allow shareable links to grant access to everyone in your organization .
Use the following procedure to create a shareable link to a report in your presentation:
Copy the report page from the browser address bar.
Paste the direct link into the Power BI add-in.
Check the box next to Give people automatic access to this data . The add-in changes the direct link to a shareable link.
Select the Insert button and the report loads into the slide. The report is now accessible to everyone who views the presentation.
Related content
- About storytelling with Power BI in PowerPoint
- View and present live Power BI data in PowerPoint
- Information for Power BI administrators
- Troubleshoot the Power BI add-in for PowerPoint
- More questions? Try asking the Power BI Community
Was this page helpful?
Coming soon: Throughout 2024 we will be phasing out GitHub Issues as the feedback mechanism for content and replacing it with a new feedback system. For more information see: https://aka.ms/ContentUserFeedback .
Submit and view feedback for
Additional resources
- Add, change, or remove transitions between slides Article
- Animate text or objects Article
- Use the Morph transition in PowerPoint Article
- Insert a video from YouTube or another site Article
- Add or delete audio in your PowerPoint presentation Article
- Record your screen in PowerPoint Article

Insert a video from YouTube or another site

In PowerPoint for Microsoft 365, PowerPoint 2021, or PowerPoint 2019, you can insert an online video from YouTube or Vimeo on a slide.
In PowerPoint for Microsoft 365, version 1907 or later, you can also insert an online video from Microsoft Stream, a video service for enterprises—people in an organization can upload, view, and share videos with one another.
The video plays directly from the website, and it has the site's controls for playing, pausing, volume, and so on. The PowerPoint playback features (Fade, Bookmark, Trim, and so on) don't apply to online videos .
Because the video is stored on a web site, rather than in your presentation, you must be connected to the internet in order for the video to play successfully.
Insert a web video
In your web browser, locate the video you want.
Copy the URL of the web page from the Address bar of your browser.
Switch back to PowerPoint and select the slide where you want to place the video.
On the Insert tab of the ribbon, select Video > Online Video .
In the Online Video dialog box, paste the URL you copied in step 2.
Select Insert .
Play the video
If a video is inserted successfully, you can play it either in Normal view or Slide Show.
A Play button appears on the video in Normal view.
In Slide Show, you can interact with videos just as you would in a web browser.
By default, videos from YouTube and Vimeo play in "click sequence." You can play the video without having to click the Play button. Just tap the spacebar to advance to the next step in your click sequence.
Troubleshooting
Not all online videos from these sites are allowed to be embedded. You should check on the video site to find out if a certain video can be embedded.
Internet Explorer 11 is required on your computer
Note: Microsoft 365 apps and services will not support Internet Explorer 11 starting August 17, 2021. Learn more . Please note that Internet Explorer 11 will remain a supported browser. Internet Explorer 11 is a component of the Windows operating system and follows the Lifecycle Policy for the product on which it is installed.
For the purpose of playing videos in PowerPoint, Internet Explorer 11 is required to be on your computer. You don't have to use it to browse the web; you simply have to have it installed, because under the covers, PowerPoint needs its technology to play videos on Windows.
If your operating system is Windows 10, then you already have Internet Explorer 11 installed. If you have an older version of Windows, you can go to this Internet Explorer Downloads page for instructions.
Want to insert a video from your computer instead?
See Insert and play a video file from your computer for all the details.
Terms of Use and Privacy policies
Terms of Use
Privacy Policy
Microsoft Stream:
SlideShare.net:
In PowerPoint 2016, you can insert an online video with an embed code or search for a video by name. Then you can play it during your presentation.
The video plays directly from the website, and it has the site's controls for playing, pausing, volume, and so on. The PowerPoint playback features (Fade, Bookmark, Trim, and so on) don't apply to online videos.
Insert the online video with an "embed" code
On YouTube or Vimeo, find the video that you want to insert.
Below the video frame, click Share , and then click Embed . (If you neglect to click Embed , you'll end up copying the wrong code.)

Right-click the iFrame embed code, and click Copy .

If the highlighted text that you copy begins with "http", STOP. It's the wrong code to copy. Return to step 2 and click Embed :

In PowerPoint, click the slide that you want to add a video to.
On the Insert tab, click Video > Online Video .
In the From a Video Embed Code box, paste the embed code, and then click the arrow.

A video rectangle is placed on your slide, which you can move and resize as you like. To preview your video on your slide, right-click the video rectangle, select Preview , and then click the Play button on the video.
Note: If your video doesn’t embed correctly, double-check that you have installed the required Office updates.
Search for the YouTube video by name
Click the slide that you want to add a video to.

In the Search YouTube box, type the name of the video that you want to insert, and press Enter.
Select the video from the search results, and click Insert .
Note: If your video doesn’t insert correctly, double-check that you have installed the required Office updates.
Preview the video
Once the video rectangle is on your slide, select it, right-click it and choose Preview .
A Play button appears on the video.
Click the video's Play button.
Because the video is on a web site, rather than actually in your presentation, you must be connected to the internet in order for the video to play successfully.
Embed content from Slideshare.net
On a slide in PowerPoint, you can embed content from Slideshare.net , a sharing web site for presentations, infographics, and documents.
On Slideshare.net, any content that can be embedded elsewhere has a Share button on it. That button opens a window where you can copy an embed code like an embed for a video.
On Slideshare.net , find the content you want to embed.
Select the Share button beneath the content frame.
Sharing codes appear in the video frame.
Select the box named Embed .
All the text in the box becomes selected when you do this.
Right-click the selected text and choose Copy .
The text you've copied contains more information than you need, so it needs to be trimmed and re-copied.
Paste the copied text into a text editor such as Word or Notepad.
Select the portion of the text that begins with <iframe src ... and ends with </iframe> . Copy that text.
That's the embed code you need for inserting the content into PowerPoint.
In PowerPoint, go to the slide where you want to insert the content.
On the toolbar ribbon, select the Insert tab, select Video , and then select Online Video .
The Insert Video dialog box opens.
Paste the embed code in the box named From a Video Embed Code , and then press Enter.
It takes a moment for PowerPoint to absorb the content. When it has done so, a black box appears on your slide.

Requirements
Your use of online videos is subject to each provider web site's Terms of Use and Privacy Policy.
SlideShare.net
In PowerPoint for the web, you can insert an online video from YouTube or Vimeo on a slide. (If you have a Microsoft 365 business or education subscription, you can also insert an online video from Microsoft Stream.)
Insert an online video
On a separate tab in your web browser, locate the video you want.
Copy the address of the web page from the Address bar of your browser.
Switch to PowerPoint for the web and select the slide where you want to place the video.
On the Insert tab of the ribbon, in the Media group, select Online Video .
In the Online Video dialog box, paste the address you copied in step 2.
The video is inserted on your slide. You can move the video by dragging with the mouse, and you can resize the video frame by selecting a corner and dragging.
To play the video, you must run Slide Show. On the ribbon, switch to the View tab, and in the Start Slide Show group, select From Current Slide .
(If you've turned off the Simplified Ribbon, you don't have a Slide Show tab; instead use the View tab to start the slide show.)
Slide Show opens, and then you can click the play button to begin.
For related information, see Play a video in PowerPoint for the web .
Trimming a video
PowerPoint for the web can't trim videos, and online videos can't be trimmed. If you have a video that you want to trim, you must save it to your computer, then insert it on your slide in a desktop version of PowerPoint.
Newer Mac versions
In PowerPoint for Microsoft 365 for Mac, PowerPoint 2021 for Mac, or PowerPoint 2019 for Mac, you can insert an online video from YouTube or Vimeo on a slide. Earlier versions of PowerPoint for macOS don't support inserting an online video.
In PowerPoint for Microsoft 365 for Mac, you can also insert an online video from Microsoft Stream, a video service for enterprises—people in an organization can upload, view, and share videos with one another. This feature requires PowerPoint for Microsoft 365 for Mac version 16.27 or later.
Switch to PowerPoint and select the slide where you want to place the video.
On the Insert tab of the ribbon, in the Media group at the right end, select Video . Then select Online Movie .
In the dialog box, paste the URL you copied in step 2.
Click Insert .
The video is added to the slide.
To preview the video, click the Play button that appears on top of video.
Inserting and playing an online video requires a recent version of macOS and PowerPoint for macOS:
PowerPoint version 16.15.18070902 or later
macOS 10.13.4 (High Sierra) or later
A Mac manufactured in 2012 or later
Why can’t I embed a video in PowerPoint?
Add audio to your presentation
Add text to a video
Video and audio file formats supported in PowerPoint
How to Make an Eye-catching YouTube Thumbnail
Create a video for YouTube with a template

Need more help?
Want more options.
Explore subscription benefits, browse training courses, learn how to secure your device, and more.

Microsoft 365 subscription benefits

Microsoft 365 training

Microsoft security

Accessibility center
Communities help you ask and answer questions, give feedback, and hear from experts with rich knowledge.

Ask the Microsoft Community

Microsoft Tech Community

Windows Insiders
Microsoft 365 Insiders
Was this information helpful?
Thank you for your feedback.
Embed a presentation in a web page or blog
When you want to share a presentation or a picture slide show with your friends, family, or colleagues, save it to OneDrive, then you can embed it in a web page or blog.
The embed code you need must be gotten from PowerPoint for the web . It isn't available from the PC or Mac versions of PowerPoint.
Get the embed code
Save your presentation to OneDrive.com. (Storing the presentation to a public folder online is what allows you to embed it on a web page.)
Open your presentation in PowerPoint for the web . On the File tab of the Ribbon, click Share , and then click Embed .

In the Embed box, under Dimensions , select the correct dimensions for the blog or web page.

Under Embed Code , right-click the code, click Copy , and then click Close .
You'll use this embed code in the next procedure. You may want to paste it somewhere handy, like Notepad, so that you don't lose it.
Embed the presentation in a web page or blog post
The HTML that you copied from the OneDrive page is an iframe tag, which is supported in many web authoring systems and blog services. The steps provided here work in some of the most popular blogging services, such as WordPress, Blogger, and TypePad.
Even though WordPress ordinarily doesn’t allow iframes in posts, an exception is made for iframes that host Office for the web. To use HTML editing, don’t use the New Post command at the top of the page. Go to your blog’s dashboard and click Posts > Add New .
In TypePad, don’t use the Quick Compose editor. Go to Blogs , click the name of your blog, and then click Compose , where you can switch from Rich Text to HTML editing.
In Blogger, change the compose window to Edit HTML. You can switch back to compose mode after you finish the next step.
In your blog editor or web page editor, write your content, and then switch to HTML editing.
If you use a blogging service that does not support iframes in posts, consult your blogging service provider for assistance.
With the HTML tag that you copied from the OneDrive page as the most recent item in your Clipboard, press ⌘+V.
Finish writing your post. Preview and publish as you normally would.
Updates to the presentation on OneDrive are automatically reflected on the page where the presentation is embedded.
Embed the presentation in a SharePoint wiki
Once you have the embed code as described above, you can also embed the presentation in a SharePoint wiki. In this case, you paste only the src portion of the copied iframe tag into a Page Viewer Web Part.
On the wiki page click Edit .
With the HTML tag that you copied from the OneDrive page as the most recent item in your Clipboard, press Ctrl+V to paste the tag on the wiki page. This is so that you can easily copy a portion of the tag into the Web Part. You’ll delete the tag from the wiki page before you’re done.
Copy the portion of the tag between quotation marks that begins with http . Don’t include the quotation marks.
On the Editing Tools tab click Insert , and then click Web Part.
In the list of categories, click Media and Content .
In the list of Web Parts , click Page Viewer , and then click Add .
To paste the address you copied in step 3, click open the tool pane , and then in the Link box, press ⌘+V.
Click Apply to preview the page.
Make adjustments to the Web Part as desired. For example, in the Page Viewer editor, expand Appearance and specify height of 332 pixels and width of 407 pixels to fit the presentation in the frame with no scroll bars.
When you are finished, click OK in the Page Viewer editor, and delete the iframe tag from the wiki page.

Need more help?
Want more options.
Explore subscription benefits, browse training courses, learn how to secure your device, and more.
Microsoft 365 subscription benefits
Microsoft 365 training
Microsoft security
Accessibility center
Communities help you ask and answer questions, give feedback, and hear from experts with rich knowledge.
Ask the Microsoft Community
Microsoft Tech Community
Windows Insiders
Microsoft 365 Insiders
Was this information helpful?
Thank you for your feedback.
IMAGES
VIDEO
COMMENTS
PowerPoint for Microsoft 365 PowerPoint 2021 PowerPoint 2019 More... LiveWeb is a PowerPoint add-in that lets you insert a live web page on a slide. With it, you can even refresh the web page in real-time during a slide show. See the LiveWeb site for details on installing and using the add-in.
LiveWeb ist ein PowerPoint-Add-In, mit dem Sie eine Live-Webseite auf einer Folie einfügen können. Damit können Sie sogar die Webseite während einer Bildschirmpräsentation in Echtzeit aktualisieren. Ausführliche Informationen zur Installation und Verwendung des Add-Ins finden Sie auf der LiveWeb-Website .
Inserting a Live Web Page in PowerPoint. To insert a live web page into a PowerPoint slide, you essentially need to use a web browser object or a third-party add-in designed for this purpose. PowerPoint does not natively support embedding live web pages directly into slides, but you can achieve this by using the WebBrowser control in Windows or ...
In PowerPoint 2010, you can do this by clicking the File button and selecting Options; in PowerPoint 2007, click the Office orb and select Options. Select Add-Ins on the left side, then select PowerPoint Add-ins from the Manage menu, and click Go. This will open the PowerPoint Add-ins window. Click Add New to add the LiveWeb addin we downloaded ...
In diesem Tutorial stellen wir Dir das Add-In Webviewer für PowerPoint vor, mit dem Du Webseiten in Deine Präsentation einbinden kannst. Diese integrierten W...
Bei Twitter kam die Frage auf, ob man Webseiten, wie zum Beispiel die hervorragende Seite ClassroomScreen, live in eine PowerPoint Folie einbinden kann. Das Add-In findet man in dem wohl eher…
This guide will show you how to combine a live web page and a PowerPoint file into a seamless presentation experience for your audience. Download SlideDog fo...
To Embed a Web Page into a Slide. Open PowerPoint. Click New Slide. In the Add-ins section, click My Add-ins. Select Web Viewer. Click Insert. Type or paste (CTRL+V) the URL of the website/page you wish to embed. Be sure to delete https:// from the URL since it's already added by default. Click Preview to view the page.
In this video I'll show you how easy it can be to embed live web pages directly into your PowerPoint presentations. LiveSlides is a really easy to use plugin...
Inserting A Web Page On A Slide. Inserting a "˜Live' web page on one of your slides is a simple 3 step process with the LiveWeb add-in. From the Insert menu on the Ribbon, click on Web Page in the LiveWeb group. The LiveWeb wizard opens up. Enter the URL of the web page that you want to display. In the next page, you have the option of ...
With Live Presentations in PowerPoint, audience members can see a presentation on their devices and read live subtitles in their preferred language while you speak. They can use "pinch to zoom" to see the slides more clearly on mobile devices, give feedback, send live reactions to the presenter, and navigate back to review previous slides.
Mit diesem Tool können Sie nicht nur live navigierbare Webseiten, sondern auch Medien einbinden: Audio, YouTube-Videos und viele andere Inhaltsobjekte aus externen Ressourcen - und die ursprüngliche Qualität beibehalten. 3. Öffnen Sie Microsoft PowerPoint. Suchen Sie die Registerkarte iSpring Converter Pro 11 und klicken Sie darauf.
After you copy the URL with one of the previously mentioned methods, go to your PowerPoint Presentation. Go to the slide you want to add the data. Select the Power BI add-in from the ribbon. Paste the URL into the text box. Select the Insert button and the visual will load into the slide.
Weitere Videos finden Sie auf http://www.vidorial.comMit der kleinen Erweiterung Live Web Pages lassen sich ganze Internetseiten in PowerPoint einbinden und ...
Suchen Sie den Ordner, in den Sie das LiveWeb-Add-In extrahiert haben, und wählen Sie ihn aus. PowerPoint warnt Sie möglicherweise, dass das Add-On ein Makro enthält. Klicke auf Makros aktivieren Fortsetzen. Jetzt solltest du sehen LiveWeb Wenn Sie im Fenster „Add-Ins" aufgeführt sind, können Sie Ihrer PowerPoint-Präsentation eine ...
Öffnen Sie Ihre Präsentation in PowerPoint für das Web. Klicken Sie auf der Registerkarte Datei im Menüband auf Freigeben und dann auf Einbetten. Um den HTML-Code zum Einbetten Ihrer Datei in die Webseite zu erstellen, klicken Sie auf generieren . Wählen Sie im Feld Einbetten unter Maße die korrekten Maße für den Blog oder die Webseite aus.
Copy the address of the web page from the Address bar of your browser. Switch to PowerPoint for the web and select the slide where you want to place the video. On the Insert tab of the ribbon, in the Media group, select Online Video. In the Online Video dialog box, paste the address you copied in step 2. Select Insert.
Powerpoint 2010 - Wenn Sie Ihre Website präsentieren möchten können Sie natürlich Screenshots machen und diese als normale Bilder einfügen, doch wenn Sie ste...
Open your presentation in PowerPoint for the web. On the File tab of the Ribbon, click Share, and then click Embed. To create the HTML code to embed your file in the web page, click Generate . In the Embed box, under Dimensions, select the correct dimensions for the blog or web page. Under Embed Code, right-click the code, click Copy, and then ...
2. Insert the Mentimeter add-in. To add the Mentimeter add-in to your PowerPoint presentation, open your PowerPoint presentation and add a new blank slide. Click on the "Home" tab, select "My Add-ins" (far right in the menu), click on "More Add-ins" and select the Mentimeter add-in. The add-in will appear on your slide as an interactive image ...
About Press Copyright Contact us Creators Advertise Developers Terms Privacy Policy & Safety How YouTube works Test new features NFL Sunday Ticket Press Copyright ...
↓↓ POWERPOINT Grundlagenkurs Folge #7 ↓↓ • Wie verlinke ich Internetseiten in PowerPoint?• Wie erstelle ich Hyperlinks für Texte und Bilder?• Wie ändere ich ...