

How to Loop a PowerPoint Slide Show to Repeat Automatically

Set up a PowerPoint Presentation That Loops or Repeats Continuously
by Avantix Learning Team | Updated November 12, 2021
Applies to: Microsoft ® PowerPoint ® 2013, 2016, 2019 and 365 (Windows)
You can set up a PowerPoint slide show to loop or repeat automatically. A looping presentation can be used at events, trade shows or even in a reception area in an office. The easiest way to set up a slide show to loop or replay continuously is to apply automatic transitions and then configure Slide Show settings.
Recommended article: 5 PowerPoint Keyboard Shortcuts to Run a Slide Show
Do you want to learn more about PowerPoint? Check out our virtual classroom or in-person PowerPoint courses >
Screenshots in this article are from PowerPoint 365 but are similar in older versions of PowerPoint.
Step 1: Apply transitions to automatically advance slides during a slide show
Transitions occur between slides when you run a slide show.
To apply transitions to automatically advance slides during a slide show:
- In Normal View or Slide Sorter View, display or select a slide.
- Click the Transitions tab in the Ribbon.
- Select a transition in the Transitions gallery (such as Fade).
- Click Effect Options and choose the desired option. Effect Options change depending on the transition you selected.
- In the Timing group, click the arrows beside Duration to set the timing you want (in seconds) for the transition. You may also type a duration.
- In the Timing group, under Advance Slides, deselect or uncheck On mouse click and beside After, select or click the up and down arrows to set the timing to transition to the next slide. You may also type a duration.
- In the Timing group, click Apply to All.
In the Transitions tab in PowerPoint, you can select the type of transition (such as Fade) as well as timing options:

Step 2: Set up a presentation to loop during a slide show
To set up a PowerPoint presentation to loop during a slide show:
- Click the Slide Show tab in the Ribbon and then click Set Up Slide Show. A dialog box appears.
- Under Show type, if you select Presented by a speaker (full screen), the speaker or those watching the slide show will have control over when they advance slides. This is the default setting for slide shows. If you select Browsed by an individual (window), those watching the slide show do NOT have control over when slides advance. If you select Browsed at kiosk (full screen), those watching the slide show do NOT have control over when slides advance and the presentation automatically loops until those watching press Escape (Esc).
- Under Show options, select Loop continuously until 'Esc'. You will be able to select this option if you selected one of the first two options under Show type.
Below is the Set Up Show dialog box with Presented by speaker selected and looping enabled:

If you want to set specific timings for slides to advance or to add narration, check out the article How to Run a PowerPoint Slide Show Automatically (Set Up a Self-Running Presentation) . If you have audio or video in the presentation, you'll need to set the media to play automatically (on the Playback tab in the Ribbon) and animations will also need to be set to run automatically.
Subscribe to get more articles like this one
Did you find this article helpful? If you would like to receive new articles, JOIN our email list.
More resources
How to Embed a YouTube Video in PowerPoint
How to Hide and Unhide Slides in PowerPoint (with Shortcuts)
How to Insert Video in PowerPoint (from a File on Your PC or a Shared Drive)
PowerPoint Keyboard Shortcuts to Play and Control Video During a Slide Show
How to Add Animation in PowerPoint (Animate Images, Text and Other Objects)
Related courses
Microsoft PowerPoint: Intermediate / Advanced
Microsoft PowerPoint: Design for Non-Designers
Microsoft PowerPoint: Animations Bootcamp
Microsoft Excel: Intermediate / Advanced
VIEW MORE COURSES >
Our instructor-led courses are delivered in virtual classroom format or at our downtown Toronto location at 18 King Street East, Suite 1400, Toronto, Ontario, Canada (some in-person classroom courses may also be delivered at an alternate downtown Toronto location). Contact us at [email protected] if you'd like to arrange custom instructor-led virtual classroom or onsite training on a date that's convenient for you.
Copyright 2024 Avantix ® Learning
You may also like

How to Insert or Type E with an Accent Mark in PowerPoint (È, É, Ê, Ë, è, é, ê, or ë)
You can insert or type e with an accent mark in PowerPoint using built-in tools or keyboard shortcuts (including Alt code shortcuts). The letter e can be inserted with an accent in both upper or lower case in text boxes or placeholders on slides, the slide master or layouts. The following are common accents in upper or lower case – È, É, Ê, Ë, è, é, ê, or ë.

How to Fade a Picture or Part of a Picture in PowerPoint (Using a Gradient)
You can fade a picture in PowerPoint by drawing a rectangle shape on top of the picture and then filling the rectangle with a gradient from opaque to transparent. This technique is often used to fade an image into the background of a slide. Since the rectangle is placed on top of the image and then text may be placed on top of the rectangle, you may need to reorder the objects.

How to Lock an Image, Shape or Other Object in PowerPoint
You can now lock an image, shape or other object in PowerPoint. Objects can be locked in Normal View or Slide Master View. Only PowerPoint 365 users can lock objects to prevent moving and resizing. This is helpful if you want to select and move other objects on the slide or prevent others from moving or resizing an object. You can lock items using the context menu or the Selection Pane.
Microsoft, the Microsoft logo, Microsoft Office and related Microsoft applications and logos are registered trademarks of Microsoft Corporation in Canada, US and other countries. All other trademarks are the property of the registered owners.
Avantix Learning |18 King Street East, Suite 1400, Toronto, Ontario, Canada M5C 1C4 | Contact us at [email protected]
Our Courses
Avantix Learning courses are offered online in virtual classroom format or as in-person classroom training. Our hands-on, instructor-led courses are available both as public scheduled courses or on demand as a custom training solution.
All Avantix Learning courses include a comprehensive course manual including tips, tricks and shortcuts as well as sample and exercise files.
VIEW COURSES >
Contact us at [email protected] for more information about any of our courses or to arrange custom training.
Privacy Overview
Pin it on pinterest.
- Print Friendly
Our Recommendations
- Best Small Business Loans for 2024
- Businessloans.com Review
- Biz2Credit Review
- SBG Funding Review
- Rapid Finance Review
- 26 Great Business Ideas for Entrepreneurs
- Startup Costs: How Much Cash Will You Need?
- How to Get a Bank Loan for Your Small Business
- Articles of Incorporation: What New Business Owners Should Know
- How to Choose the Best Legal Structure for Your Business
Small Business Resources
- Business Ideas
- Business Plans
- Startup Basics
- Startup Funding
- Franchising
- Success Stories
- Entrepreneurs
- The Best Credit Card Processors of 2024
- Clover Credit Card Processing Review
- Merchant One Review
- Stax Review
- How to Conduct a Market Analysis for Your Business
- Local Marketing Strategies for Success
- Tips for Hiring a Marketing Company
- Benefits of CRM Systems
- 10 Employee Recruitment Strategies for Success
- Sales & Marketing
- Social Media
- Best Business Phone Systems of 2024
- The Best PEOs of 2024
- RingCentral Review
- Nextiva Review
- Ooma Review
- Guide to Developing a Training Program for New Employees
- How Does 401(k) Matching Work for Employers?
- Why You Need to Create a Fantastic Workplace Culture
- 16 Cool Job Perks That Keep Employees Happy
- 7 Project Management Styles
- Women in Business
- Personal Growth
- Best Accounting Software and Invoice Generators of 2024
- Best Payroll Services for 2024
- Best POS Systems for 2024
- Best CRM Software of 2024
- Best Call Centers and Answering Services for Busineses for 2024
- Salesforce vs. HubSpot: Which CRM Is Right for Your Business?
- Rippling vs Gusto: An In-Depth Comparison
- RingCentral vs. Ooma Comparison
- Choosing a Business Phone System: A Buyer’s Guide
- Equipment Leasing: A Guide for Business Owners
- HR Solutions
- Financial Solutions
- Marketing Solutions
- Security Solutions
- Retail Solutions
- SMB Solutions
How to Create an Auto-Playing PowerPoint Presentation
Self-running presentations work great at conferences and conventions. Here's how to set one up.

Table of Contents
Creating a self-running PowerPoint, as Microsoft calls it, can be a great addition to your company’s booth at conventions or industry-wide conferences. By featuring photos, infographics and key points in a continuous loop, PowerPoint becomes an effective communication tool to inform others about your company, its goals, and your products or services.
Auto-playing presentations are also great for employee training, meetings where the speaker is absent, and reaching remote clients or customers. Microsoft provides easy steps to turn your PowerPoint into an autoplay presentation.
Setting up the presentation
There are several options for creating a PowerPoint presentation automatically. All of these can be accessed under the Slide Show tab.
Slide Show > Set Up Slide Show
There are three options under this menu:
- Presented by a speaker : This first option requires the viewer to click through each slide. This is the default setting that most PowerPoint presentations are already in and is the mode with which you’re likely most familiar.
- Browsed by an individual : This option will create a slideshow where the viewer cannot control when slides advance. This is an autoplay feature, but the viewer will still have to hit Play to get it started.
- Browsed at a kiosk . Once selected, this option will loop the slide show until a viewer presses the escape button.
If you don’t want your viewers to have access to when the slideshow starts and stops, select the third option. The Loop Continuously option underneath will be automatically selected.
Recording slide timing
Before you begin recording your presentation, it’s important to set the slide time using the rehearsal toolbar. This will give you an idea of how long each slide will run before advancing to the next one. It will also allow you to practice your presentation and understand how long the runtime will be. Like setting up the slide show, this window can be accessed via the Slide Show tab.
Slide Show > Rehearse Timings
The recording window allows users to advance to the next slide, pause the presentation, view the current slide’s time, restart the recording for a slide and view the total runtime of the presentation.
After recording the last slide, PowerPoint will ask whether you want to keep the slide timings or not.
Recording your presentation
Once your slide timings are set, you can record your slide show.
Navigate to Slide Show > Record Slide Show to begin your recording. Click End Show and save your file once you are done recording. After saving, your presentation is ready to be sent to clients, customers or played at your convention or conference booth.
Here are some quick tips to check for before recording your presentation:
- Before beginning your recording, make sure you adjust the Play Narrations and the Use Timings checkboxes.
- If you want all narration and slide transitions included, both boxes should be checked.
- To create a silent sequence of slides, make sure the Play Narrations button is deselected.
What is PowerPoint autoplay?
Autoplay allows you to keep a PowerPoint presentation running. In typical PowerPoint presentations, presenters click from slide to slide manually using a clicker or spacebar on a keyboard.
Luckily, PowerPoint autoplay allows users to set up their slides, so they automatically change. That way, they can focus on their presentation without interruptions. There are options to have slides timed to music or voiceovers and make each slide the same length.
Why is PowerPoint autoplay beneficial?
Autoplay is great for several uses, from delivering announcements throughout a company’s office or a school, to giving speeches and presentations at conventions or work. Presenters can rehearse the timings of the slides and then present without worry. Here are some of the reasons why someone may use PowerPoint’s autoplay features:
- Rehearsal . Practicing your presentation involves timing, and autoplay can be a great tool for learning how to fill time or keeping it short. For example, many teachers and professors require presentations to fill a certain amount of time for class projects. While rehearsing timings, users can determine how much time to spend on each slide. This keeps presenters on track during their presentations, even when they want to speed up due to nerves or pressure.
- Convention booths and exhibits. Trade shows , conventions and networking events are great for companies and salespeople who want to showcase a variety of products and services. People who walk by can look at the presentation and not have to ask employees for information. In addition, a good PowerPoint presentation with eye-catching visuals and information can attract potential customers and clients, which could turn into sales.
- Music videos and tribute presentations. Whether it is a presentation of family vacation photos to the soundtrack of the summer or a lyric video to your favorite song, autoplay allows users to create appealing presentations and videos. These could even be downloaded into MP4 files to share with family and friends.
- Replay and loop at events or other occasions. This is great for offices that have a slideshow of information for their clients or patients. They can show a variety of pictures, information about services, and even the company’s latest news and contact information. Because of this, employees can set up the presentation, walk away and know that their announcements are being made public without even saying a word.

Building Better Businesses
Insights on business strategy and culture, right to your inbox. Part of the business.com network.
- DynamicPowerPoint.com
- SignageTube.com
- SplitFlapTV.com

Creating a Self-Running Slideshow in PowerPoint
Apr 29, 2020 | DataPoint Real-time Screens , How-To
Most people use PowerPoint in meetings and they talk (a lot) while they have a PowerPoint slide show running in the background. They use a mouse or presentation remote to advance to the next slide for the next message.
But our audience are people looking at digital signage or information screens and then there is nobody to advance to the next slide. For our purpose of information delivery on television screens, we need self-running presentations!
This article will describe the options, and settings to get to a self-running and ever-running presentation for digital signage, created in PowerPoint.
PowerPoint Transitions between Slides
Not a real must but we recommend to choose a given transition between slides. In PowerPoint you have transitions and animations. Transitions are animation effects that you see when you advance from one slide to another. Animations in PowerPoint are the effects that you set on specific shapes to emphasize its movement or importance.
Without transitions and animations, a presentation is considered boring and slide advancing is sometimes barely visible. With PowerPoint transitions and animations, a message or presentation is more looking like a video. Just one piece of advice with transitions; use a consistent transition that you use on all slides. Use a smooth transition effect. Never use a random or complex transition effect that is too overwhelming.
To choose a transition effect, select your slide and click the Transitions option from the PowerPoint ribbon. E.g. select the Push transition. Open the Effect Options at the right of the transitions list and choose e.g. the more natural From Right . Preview the transition immediately. Now set an effect for every slide of your presentation.
PowerPoint Advance Slides
Digital signage presentations are mostly self-running presentations like a channel on television. By default, PowerPoint presentations advance manually so, you have to use a mouse to click on the presentation. A mouse click instructs PowerPoint that the current slide is over and that the presenter wants to move to the next slide or message.
To change the advance options, look again at the Transitions menu. At the right, you will find the Timing group with Advance Slide settings. Uncheck the On Mouse Click option. Then check the After option and set a time. Set this value to 00:12.00 when you want to show this slide for 12 seconds. You can check and set a different time for every individual slide. Or just click the Apply To All buttons.

Submit a Comment
Your email address will not be published. Required fields are marked *
Pin It on Pinterest
- StumbleUpon
- Print Friendly
How-To Geek
How to loop a powerpoint presentation.
If you're showing off a lot of photos at a special event, set your presentation to progress at a continuous, automatic loop. Here's how.
Quick Links
Set up your slideshow to be looped, apply automatic slide transitions.
Slideshows are sometimes used to display images at events, such as weddings or trade shows. Whatever the occasion might be, you’ll want to loop your PowerPoint presentation so your guests aren’t staring at a blank screen. Here’s how it’s done.
First, open your PowerPoint presentation in which you would like to loop. Once open, navigate to the “Set Up” group of the “Slide Show” tab and then select the “Set Up Slide Show” button.
The “Set Up Show” window will appear. In the “Show options” group, check the box next to “Loop Continuously until Esc.” Once selected, click “OK” in the bottom-right corner of the window.
Now, when you play your slideshow, it will end only when you press the “Esc” key instead of when you've finished the last slide.
Related: How to Make YouTube Videos Loop Continuously
One caveat: With the way we currently have it set up, the slideshow will proceed only when someone clicks the mouse button. That’s fine if there will be a speaker present at all times. Otherwise, you’ll need to set up automatic slide transitions.
Head back to the “Set Up Show” window by selecting “Set Up Slide Show” in the “Set Up” group of the “Slide Show” tab.
There are a couple of options you need to select, but one important note is that you must first select “Using Timings, If Present” under the “Advance Slides” group.
The next option we select will lock a few things in place (which is why you need to select “Using Timings, If Present” first).
Under the “Show Type” group, select “Browsed at a Kiosk (Full Screen)." The “Loop Continuously until Esc” option will be enabled automatically if you haven’t already turned it on, and the option you’ve selected under “Advance Slides” will remain unchanged.
Select “OK” when ready to proceed.
Without the “Browsed at a Kiosk” option enabled, the automatic slide progressions would be disabled if someone were to press the Back key. With it enabled, the Forward and Back keys are locked, allowing the slideshow to automatically progress unattended without fear of someone breaking it.
Now it’s time to set the timings of the slides. Head over to the “Transitions” tab. In the “Timing” group, check the box next to “After” and set the timing at which you’d like each slide to progress. Note that it doesn’t matter if the box next to “On Mouse Click” is checked or not---it won’t work.
After that, select the “Apply to All” option in the same group.
Now, when you play your slideshow, it will continuously loop without interruption. To exit the slideshow, press the “Esc” button.
- Irresistible Tech Gifts for That Special Dad
- Killer Smartphone Deals We Love
How to Make a Slideshow on PowerPoint
Whether for work or private, use slideshows to get your message across
:max_bytes(150000):strip_icc():format(webp)/ColettaTeske-af57404a91b342578a97252b7dbd720f.jpg "powerpoint presentation automatic slideshow")
- Central Washington University
In This Article
Jump to a Section
Before You Begin
- Step-by-Step: Make a Slideshow on PowerPoint
- Play Music During the Slideshow
- Set up the Slideshow
- Add Timings to Each Slide
- Edit Timings on a Slide
- Create a Video Slideshow
- Save a Slideshow to a CD or Other Removeable Media
When you're ready to present your PowerPoint slides to others, look no further than PowerPoint's slideshow feature. Use this tool for all kinds of slides, but those containing photos work best for most viewers.
Instructions in this article apply to PowerPoint for Microsoft 365 , PowerPoint 2019, PowerPoint 2016, PowerPoint 2013, PowerPoint 2010, and PowerPoint for Mac.
Before you create slides for your slideshow presentation, decide how long to make the slideshow, how it should flow, and the pictures you’ll use.
- Length : A slideshow can be as long or as short as you need. The length of the slideshow should be appropriate for the topic and for your audience’s attention span.
- Outline : It’s always smart to start with an outline; it helps you visualize your slideshow. An outline can be as simple as the list of topics you want to cover.
- Pictures : Choose photos that are clear and tell a story.
With PowerPoint's Photo Album , select the pictures and PowerPoint creates the basic slideshow. Fill your slides with informative text and harmonizing background music, then turn your collection of slides into a self-running photo slideshow with music that can play as a video or be stored on a CD.
When you’re ready to make a photo slideshow with music, PowerPoint gets you up and running quickly. To get started, select Insert > Photo Album > New Photo Album .
Here’s how to add and format pictures for the slideshow using the Photo Album:
Add pictures
Select File/Disk and select the images you want in the picture slideshow.
Enhance photos
Place a checkmark next to the picture you want to enhance and change the orientation, contrast, and brightness. You’ll see the changes in the Preview window.
Add text boxes
To add a slide for text, select the image in the album list you want the text to follow and select New Text Box .
Rearrange slides
Place a checkmark next to the picture you want to move and select the Move Up or Move Down arrows.
Choose a picture layout
Select the Picture layout down arrow and choose how you want the pictures to appear in the slideshow.
Frame the pictures
Select the Frame shape down arrow and choose a frame style. You’ll see a preview in the Album Layout area. This option will not be selectable if the picture layout Fit to slide is enabled.
Select Create when you’re finished.
Your photo slideshow is created in a new file. Add text to the slides and change the look of each slide.
How to Play Music During the Slideshow
Play music in the background during your slideshow to offer an audio counterpoint to all the visuals. The background music starts automatically with the slideshow and plays during all the slides.
To add background music to your presentation, select Insert > Audio > Audio on My PC , choose a music file, then select OK .
The audio icon appears in the middle of the current slide. To move it, drag it to a different place on the slide. When the audio icon is selected, the Playback tab appears. Select Play in Background and make changes to the audio file . Here are some suggestions.
- Preview the music : Select Play to hear what the music will sound like during your slideshow.
- Shorten the duration : Select Trim Audio to remove parts of the beginning and end of the music file.
- Adjust the volume : Select Volume to make the background music louder or softer.
How to Set up the Slideshow
Once your slides are finished, it’s time to set up the slideshow. Start by deciding whether to show the slideshow in a window or full screen.
To set up the slideshow, select Slide Show > Set Up Slide Show and choose one of the following:
- Browsed by an individual (window) : Run the slideshow automatically and inside a window. This option works best when you save the slideshow to a CD.
- Browsed at a kiosk (full screen) : Run the slideshow automatically and at full-screen size. This option works best when you convert the slideshow to a video.
Select OK when you’re finished.
How to Add Timings to Each Slide in the Slideshow
Now it’s time to decide how long each slide will appear in the slideshow. To begin, select Slide Show > Rehearse Timings . The slideshow displays in full screen with a Recording toolbar and a timer.
While timing your presentation, use the Recording toolbar to advance through the presentation.
Select Next (arrow pointing to the right) to go to the next slide when the desired timing has been reached.
Select Pause to start and stop the timing.
Select Repeat to restart recording the time for the selected slide.
When you’re finished and have set the time for the last slide, close the Recording toolbar.
Select Yes to keep the recorded slide timings.
How to Edit Timings on a Slide
If you need to increase or decrease the time for your slideshow, change how long slides appear during the slideshow.
To change the timing for a slide:
Select View > Slide Sorter .
Select Transitions .
Select a slide.
In the Advance Slide After text box, enter how long the slide should appear in the slideshow before proceeding to the next slide, then press Enter .
The new timing applies to the slide.
How to Create a PowerPoint Video Slideshow
The easiest way to distribute and play your slideshow is in video format. This way, anyone can view your slideshow no matter what computer or device they use.
To convert a slideshow into a video:
Save the file.
Select File > Export .
Select Create a Video .
To force a smaller file size, select the Full HD drop-down list and choose a lower quality.
Select Create Video .
Select the destination folder and give the video a descriptive file name.
Select Save . It may take a few minutes to process the file and create the video.
How to Save a Slideshow to a CD or Other Removeable Media
To create a presentation that can be watched on any computer and can be stored on a CD or other removable media:
Select Package Presentation for CD > Package for CD .
Type a name for the CD.
Select Copy to Folder or Copy to CD and follow the on-screen directions.
When you’re finished, select Close .
Get the Latest Tech News Delivered Every Day
- The 8 Best Slideshow Apps of 2024
- Tips for Memorial PowerPoint Presentations
- Loop a PowerPoint Slide Show
- How to Use Copilot in Powerpoint
- How to Do a Voiceover on PowerPoint
- Adding Sounds, Music or Narration to PowerPoint Slide Shows
- How to Make an Image Background Transparent in PowerPoint
- How to Create Digital Photo Albums in PowerPoint
- How to Add Music to PowerPoint
- How to Add Audio to PowerPoint
- How to Hide and Unhide a Slide in PowerPoint
- How to Use Speaker Notes in PowerPoint
- Create a Wedding PowerPoint Presentation
- Edit Music, Sound, or Other Audio Settings in PowerPoint
- How to Change a Black-and-White Picture to Color in PowerPoint
- How to Print PowerPoint Slides
How to Use Autoplay in a PowerPoint Presentation
So you can snooze off more easier
When you must give a presentation at work, Microsoft PowerPoint is the standard tool most people use. However, without some creativity, PowerPoint presentations can end up dull. Learning how to autoplay PowerPoint slides can add some spice to your presentations.
In this article, you’ll learn how to autoplay content in PowerPoint slides. You can automatically play an embedded video when a slide appears or autoplay animations. Finally, you can create a self-running presentation that moves through the next slide using specific timing that you’ve set up and even loop the presentation for continuous play.
Note : The following tips will work on PowerPoint, whether running on a Windows or a Mac computer.

How to Create a Self-Running PowerPoint Presentation
Why create a self-running PowerPoint presentation? You may not want to get distracted by clicking to move your presentation to the next slide. Or you’d like to set up your presentation on a kiosk at a convention. Some presentations that can run themselves may not even need a speaker.
Set Up the Slide Show
By default, PowerPoint presentations are configured to run as “Presented by a speaker”, where you have to click through each slide to trigger transitions throughout the presentation.
To set up Autoplay, first configure the presentation to autoplay how you would like.
- Select Slide Show tab from the menu, then select Set Up Slide Show from the ribbon.

- Use the options on the pop-up window to configure how your presentation will behave during autoplay.

Here’s how each option works:
- Presented by a speaker : The speaker must click through each slide using the mouse click. However, automatic slide timing is still an option if you select it on the right.
- Browsed by an individual : The viewer will need to press Play to start the presentation, but after that, it’ll play on its own.
- Browsed at a kiosk : This option will continue to loop through the presentation until you press the Esc key on the keyboard. This will automatically enable the Loop Continuously option at the bottom of the window.
Rehearse and Set Slide Times
The next step is to set up the slide timing and rehearse your presentation to ensure the time spent automatically on each slide is appropriate.
Using this rehearsal option is also a great way to practice your presentation and ensure that the overall runtime is within your limitations.
To do this:
- Select Slide Show from the menu and choose Rehearse Timings from the ribbon.

- This will start the “Recording” session. In this mode, you’ll need to speak normally using the script you will use during your presentation. When done speaking on a specific slide, select the “Next” arrow to continue to the next slide.
Note : Use the “Pause” button to pause the time for the current slide if you need to collect your thoughts or take a break for any reason. This small window will also show you the overall time for your entire presentation.

- Continue to do this through all of the slides. Finally, press the “x” at the upper right corner to finish recording on the last slide. You’ll see a pop-up message asking if you’d like to save your new slide timings.

Once you’ve saved these changes, your PowerPoint presentation is ready to use. If you’ve kept the default Presented by a speaker setting and enabled the Using timings, if present select under “Advance Slides,” you can start your presentation manually and then let slides advance automatically as you speak.
Record Slide Show (Fully Automated)
If you want to create a fully self-running presentation for a kiosk or send people to run themselves, select the correct option in the “Set Up Show” window described above.
Then, record your presentation by selecting Slide Show from the menu and selecting Record in the ribbon. Next, select From Beginning in the drop-down menu to start recording your presentation in full screen from the first slide.

You can skip this step if you don’t want to record your voice narrating the slideshow. Just make sure you’ve enabled the Show without narration check box in the Set Up Show window.
How to Embed and Autoplay a Video
Another thing you can automate in your PowerPoint presentations is triggering an embedded video file when you click on the slide where you’ve placed it.
In the editing view, right click the video you want to automate and select the down arrow to the right of the Start button.

Select Automatically from the dropdown menu.

Save the PowerPoint presentation. Now, it’ll start playing automatically when you advance to the slide with your embedded video while in presenter view.
Should You Use a Self-Running PowerPoint Presentation?
The option to have your PowerPoint slide show advance automatically can be handy. However, it isn’t always the right approach. For example, a complete, recorded presentation is great if you’re emailing your presentation or offering a download. But a self-running presentation could backfire if you’re drawn into a side conversation or have other things you want to say on the fly. As a result, you may find yourself fumbling to pause your presentation.
If you want more control over your presentation flow, sticking with a manually run presentation might be best for your situation.

Ryan has been writing how-to and other technology-based articles online since 2007. He has a BSc degree in Electrical Engineering and he's worked 13 years in automation engineering, 5 years in IT, and now is an Apps Engineer. Read Ryan's Full Bio
Read More Posts:

Leave a Reply
Your email address will not be published. Required fields are marked *
PowerPoint: How to Launch a Presentation Automatically as a Slide Show

What is a PowerPoint Show?
By default, PowerPoint saves your slide presentation as a PowerPoint presentation file with the .pptx file extension which, when double-clicked, launches PowerPoint. The presentation opens in whatever view was open when you saved it, such as the Normal view or Slide Sorter view. If you want your slide show to immediately launch in the Slide Show view, however, you need to save your file as a PowerPoint Show. In this article, find out how to create a PowerPoint slide show file and learn 2 bonus tips .
To Save a PowerPoint Presentation as a PowerPoint Show:
- Choose the File tab.
- Select Save As .
- Pick the Save as type as PowerPoint Show .
- Type a name for your slide show in the File name text box (you can use the same name and location as your .pptx/presentation file) and click Save . Your PowerPoint slide show file is saved with a .ppsx extension.
Now, the next time you or anyone else opens your presentation from outside of PowerPoint, your slide show immediately launches in Slide Show view. When you navigate past the last slide, the file automatically closes. To open the file for editing, launch PowerPoint first and open it as you would a standard presentation. If you have access to the original presentation, you may prefer to open the .pptx file to edit and save it again as a slide show file. Most importantly, make sure to manage your files, so you are working with the most current version.
PowerPoint Presentation Tips
BONUS TIP: When I save my presentations as a PowerPoint Show, I save the file to my desktop for easy access during speaking and training engagements. If needed, I can also quickly close and re-open the file without launching PowerPoint and without showing everyone all of my slides. Working with a PowerPoint Show also saves a number of steps because it automatically launches with a simple double-click of the mouse.
To move to a specific slide in a presentation while in the slide show view (as either a presentation or show format), just type the slide number and press [Enter] . To make these moves easier, print out a handout of your presentation, which includes slide numbers of each slide for quick navigation. Or, create a simple manual cheat sheet to reference when you want to jump to different slides.
BONUS TIP #2: In addition to saving PowerPoint shows to my desktop, I also add a generic slide to the beginning. For instance, a slide with your organization logo or simply a black slide. Although this may not apply to your presentations, I often navigate in and out of my slide show as I am also demonstrating software features and facilitating discussions within my training classes and conference sessions. With a generic or simple slide at the start, I can launch the slide show with a neutral, blank slide and then use the keyboard shortcut to type the slide number and press [Enter] to move to a specific slide within the presentation.
Were these PowerPoint tips helpful? Grab your handout of other quick and easy PowerPoint shortcuts and discover more PowerPoint techniques here .
© Dawn Bjork, MCT, MOSM, CSP®, The Software Pro® Microsoft Certified Trainer, Productivity Speaker, Certified Speaking Professional

Related Posts
Rulers, Gridlines & Guides: 3 Ways to Simplify PowerPoint Slide Layout June 16, 2022
PowerPoint Presentation Tips: 7 Steps to Banish Bloated Bullets June 13, 2023
Presentation Checklist: Essential Items for a Presenter’s Laptop Bag March 15, 2022
Join Our Tips Newsletter
Receive 477+ shortcuts & more!
How to loop a PowerPoint slideshow so that it automatically starts over as soon as it ends
- To loop a PowerPoint slideshow, you'll need to enable looping in the "Set Up Slide Show" menu.
- Once you set your PowerPoint to loop, it'll start over from the beginning automatically after playing the last slide.
- Visit Business Insider's Tech Reference library for more stories .
If you've designed a Microsoft PowerPoint presentation that's meant to be viewed repeatedly, such as on a kiosk or in a museum installation, you can adjust the settings in PowerPoint so that your slideshow "loops" instead of ending after one viewing.
Getting a PowerPoint to loop is easy. Read on to find out how, using PowerPoint for both Mac and PC.
Check out the products mentioned in this article:
Microsoft office (from $149.99 at best buy), apple macbook pro (from $1,299.00 at apple), acer chromebook 15 (from $179.99 at walmart), how to loop a powerpoint presentation.
1. Open the Microsoft PowerPoint presentation that you want to loop.
2. With your PowerPoint presentation open, click on the "Slide Show" tab, then click on "Set Up Slide Show."
3. In the pop-up window that appears, click on the box next to "Loop continuously until 'Esc'" so that a small checkmark appears inside the box. Feel free to adjust any other settings in this menu as well. Click "OK" when you're finished.
4. To test whether your PowerPoint can loop successfully, click on the "From Beginning" or "Play From Start" button in the Slide Show tab. Click through the slideshow until you reach the end. When your PowerPoint reaches its final slide, it should start over from the beginning automatically. When you're confident that looping is enabled, and you're ready to close the slide show, press the Esc key.
Related coverage from Tech Reference :
How to add a border to slides in powerpoint, and give your slideshow a sleek design, how to embed a youtube video into your microsoft powerpoint presentations using a mac or pc, how to convert google slides to a powerpoint presentation in 4 easy steps, how to create a custom powerpoint template to use or share with others, how to copy or duplicate a powerpoint slide and put it anywhere in your slideshow.
Insider Inc. receives a commission when you buy through our links.
Watch: We compared the $1,200 MacBook Air with the $500 Surface Go, and the results were a mess
- Main content
How to Create a Looping Slideshow in PowerPoint
You can easily create a looping slideshow using PowerPoint. A looping slideshow displays each slide automatically for a certain amount of time. Once that time has elapsed, the slide automatically continues to the next slide. Once the slideshow reaches the end, it repeats from the beginning.
- Open your PowerPoint presentation.
- Click the [Slide Show] tab > From the "Set Up" group, click "Set Up Slide Show".
- From the resulting dialogue box, check "Loop continuously until 'Esc'" under the "Show options" section > Click [OK].
- From the "Slides" preview side panel, click your first slide > Press and hold [Shift] and click your last slide. This will select all of your slides.
- Click the [Transitions] tab > From the "Timing" group, uncheck "On Mouse Click" and check "After".
- To adjust the time you would like each slide to display, click the up and down arrows in the "After:" field within the "Timing" group. When your slideshow reaches the last slide, it will automatically loop back to the beginning.
Posted in Computer Help
Share This Post
April 12, 2024
How to play PowerPoint slides automatically without clicking
Wondering how to make PowerPoint play automatically? We’ll guide you through the process and also show you how Plus AI can help you create the content for your slideshow

Are you setting up a slideshow at a convention or trade show, or maybe in a conference room or waiting area? You can easily set up a Microsoft PowerPoint slideshow to run automatically without a speaker at all. This lets you present your product, service, or company mission to a broad audience without manual intervention.
Here’s how to play PowerPoint slides automatically without clicking to advance through the show as well as how Plus AI can save you time on editing or creating the content.
Set up the slide timings or transitions
Before you set your presentation to play on its own, you’ll want to decide on the timings for your slides.
This allows you to display each slide for a specific amount of time before advancing to the next and is especially important if you use effects for your slides.
For both of the settings below, go to the Slide Show tab and check the box for Use Timings in the Set Up section.

Slide timings
With slide timings, you rehearse and record the timings for all slides. Simply move through the slideshow at a normal pace, use the control to advance to each effect and slide, and save the recorded timings when you finish.
- Go to the Slide Show tab and select Rehearse Timings .

- When the slideshow show begins, stay on the first slide for the amount of time you want and click the Next arrow in the Rehearsal toolbar to advance.

- If necessary, you can use the Rehearsal toolbar to Pause , Play , or Repeat the recording as it progresses.

- At the end of the presentation, press Esc (Escape key) and you’ll see a message letting you know the total duration of the slideshow. To save the recorded timings, click Yes .

You can review the timing for each slide by going to the View tab and choosing Slide Sorter .

When you set up your presentation to play automatically as described below, your slides advance per the timings you recorded.
Slide transitions
Another way to automatically choose the slide advance timings is using the Transitions tab. If you apply slide transitions to enhance the appearance of your presentation , this is a good option. However, you can choose None if you want to advance the slides without an effect between them.
- Select your first slide and go to the Transitions tab.
- Optionally choose an effect in the Transition to This Slide box and set the Duration for the transition to the right. You can enter a number in seconds or use the arrows to move up or down in small increments.

- In the Advance Slide group, uncheck the box for On Mouse Click and check the box for After . Then, enter the seconds for advancing to the next slide to the right.

- Repeat these steps for each slide in the presentation or choose Apply to All .
When you set up your presentation to play automatically as described next, you’ll see your slides advance for the “After” time you entered.
Note : Recording the Slide Timings overrides the Slide Transition “After” settings. If you want to use both, record the timings first and then change the “After” timing for the selected slides.
Make PowerPoint play automatically
Once your slide timings are in place, you can easily set up your PowerPoint presentation to run automatically. Whether you’re revealing a new product or providing an instructional slideshow, you can benefit from this PowerPoint feature.
Tip : New product, new company? Look at these helpful productivity apps for startups .
Open your slideshow in PowerPoint on Windows or Mac and follow these steps to set up automatic play.
- Go to the Slide Show tab and select Set Up Slide Show .

- In the pop-up window, mark Browsed at a kiosk in the Show type section. This automatically loops the slideshow for continuous play and only stops when you press Esc .

- Show options : Check the boxes for those settings you want to use. Note that the Loop setting is marked by default for this Show Type.
- Show slides : Choose all slides, specific slides, or a custom slide show.
- Advance slides : Using Timings is selected by default when you check the box described earlier and works with those timings you set.
- Multiple monitors : Choose the Slide Show Monitor and Resolution (Windows).
- Click OK when you finish.

Edit slides with ease using Plus AI
When you create a self-running presentation, you have to be sure that your slides can speak for themselves. This might require you to adjust the text for clarity or shorten lengthy paragraphs or sentences. Luckily, Plus AI can help you make these types of changes almost effortlessly.
If you are looking at AI presentation makers to speed up your presentation workflow, check out Plus AI. Plus is an add-on that intelligently composes content, arranges slide elements, and more. Once you create or edit a presentation with Plus AI, you can download it as a PowerPoint slideshow and set up autoplay as described above.
Along with rewriting slide content, you can use Plus AI to remix slides for different layouts and create custom designs that you can reuse for future presentations. If you need help from the get-go, you can create slideshows from scratch with attractive templates, custom instructions, and even PDF uploads .
When you can’t be there to walk your audience through the show, you don’t have to postpone or reschedule it; just set it up to play automatically. If that’s not what you need, you can also create informative or entertaining PowerPoint slideshows for patients in a waiting room or meeting attendees who arrive early.
Now that you know how to play a slideshow in PowerPoint automatically, look at how to convert PowerPoint to Google Slides and take advantage of Plus AI.

Latest posts
Latest post.

20 Best Pitch Deck Examples for Startups (And Why They Work)
If the thought of creating a pitch deck makes you nervous, you’re not alone. In this article, I’ll share 20 examples of early pitch decks from successful startups that have raised billions of dollars.
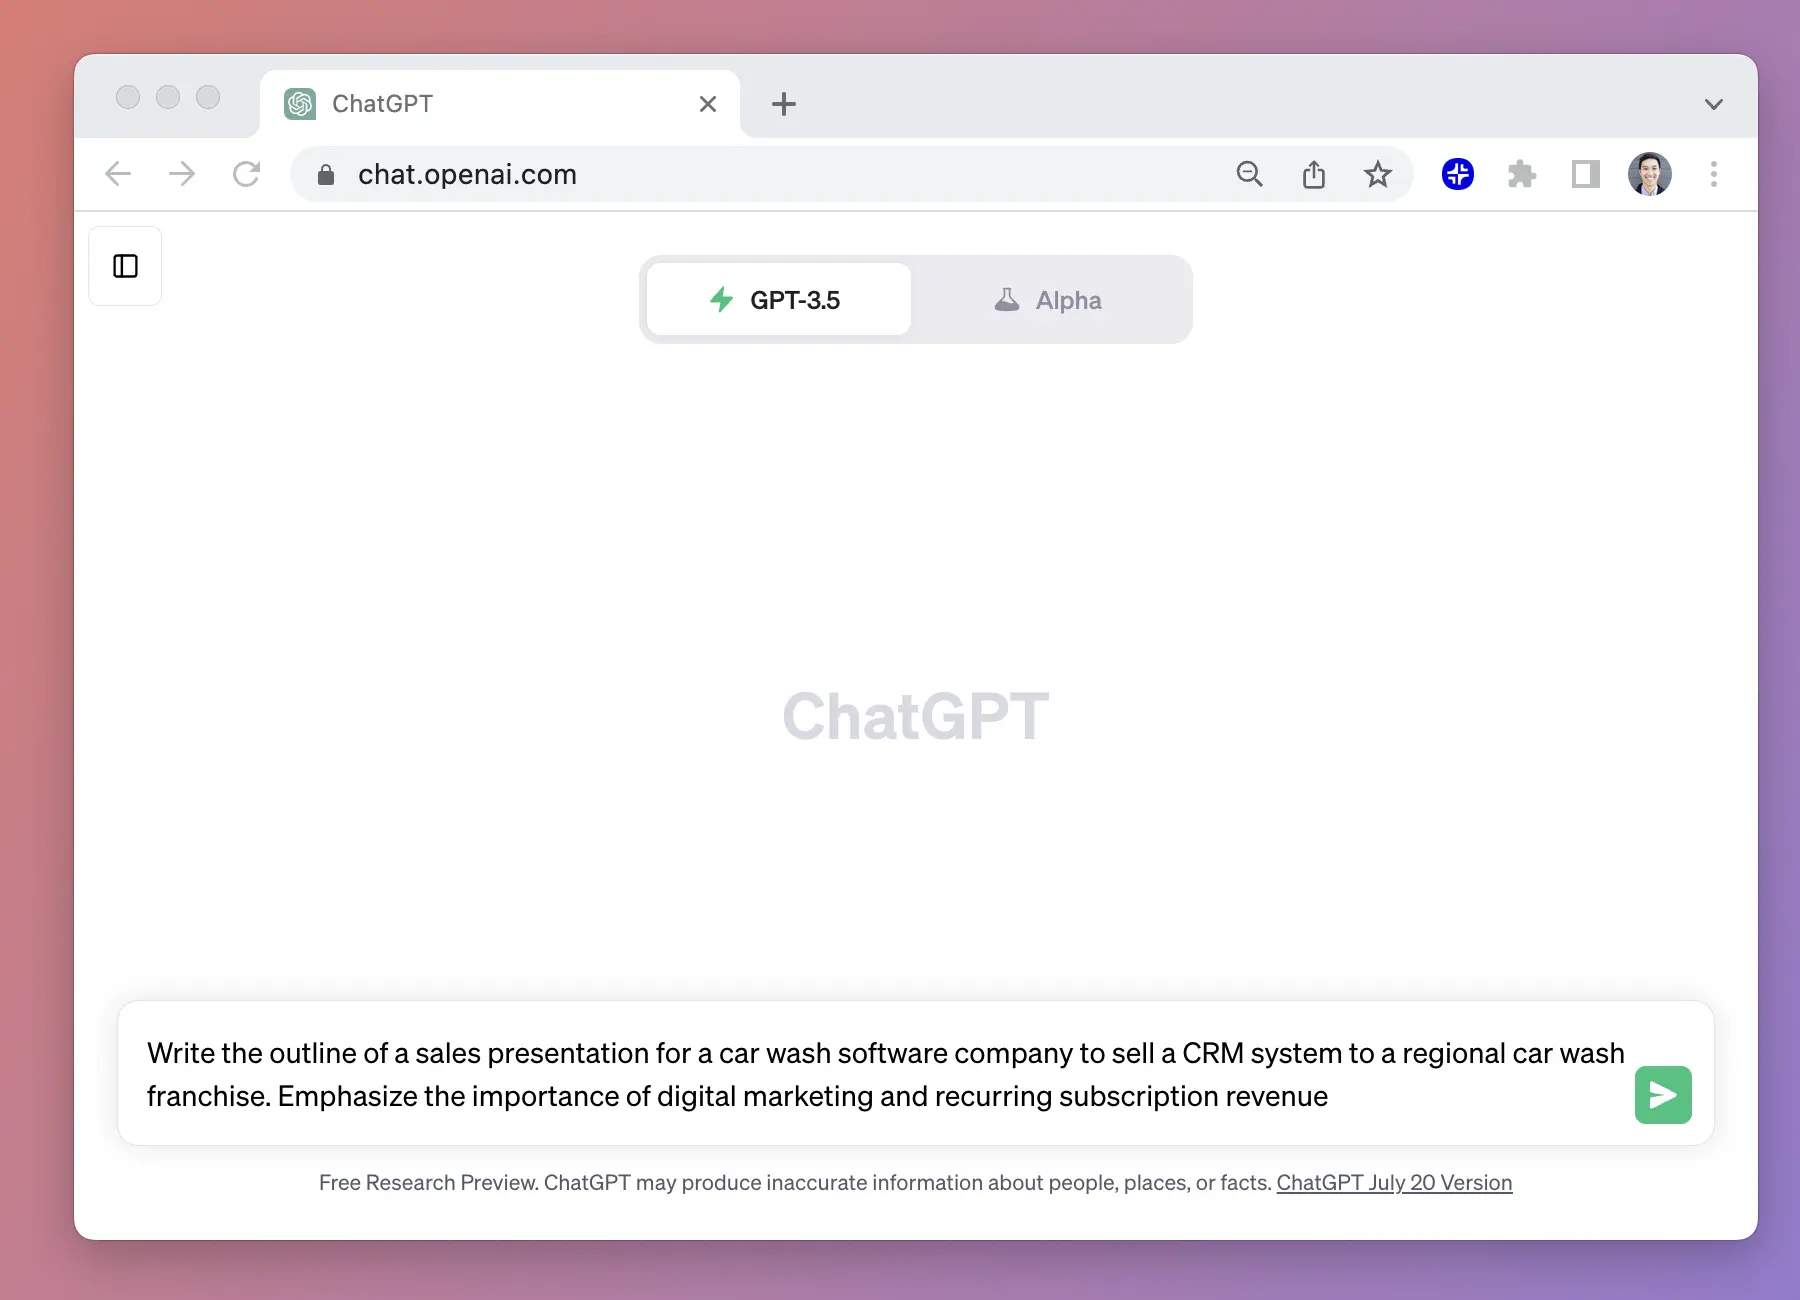
How to use ChatGPT to create PowerPoint presentations
Step-by-step guide to using AI tools to create presentations. Looking for ChatGPT for PowerPoint? Here's a guide to using AI in PowerPoint and Google Slides

Five lessons for building AI apps
Five things we've learned the hard way about building AI-powered apps
More resources

How to end a presentation
Not quite sure how to wrap up your slideshow? We’ll explain what you need to successfully end your presentation along with a tool for creating the slides.

How to start a presentation
Looking for a good way to start a presentation? We’ll walk you through several types of example openings you can use to get your audience’s attention.
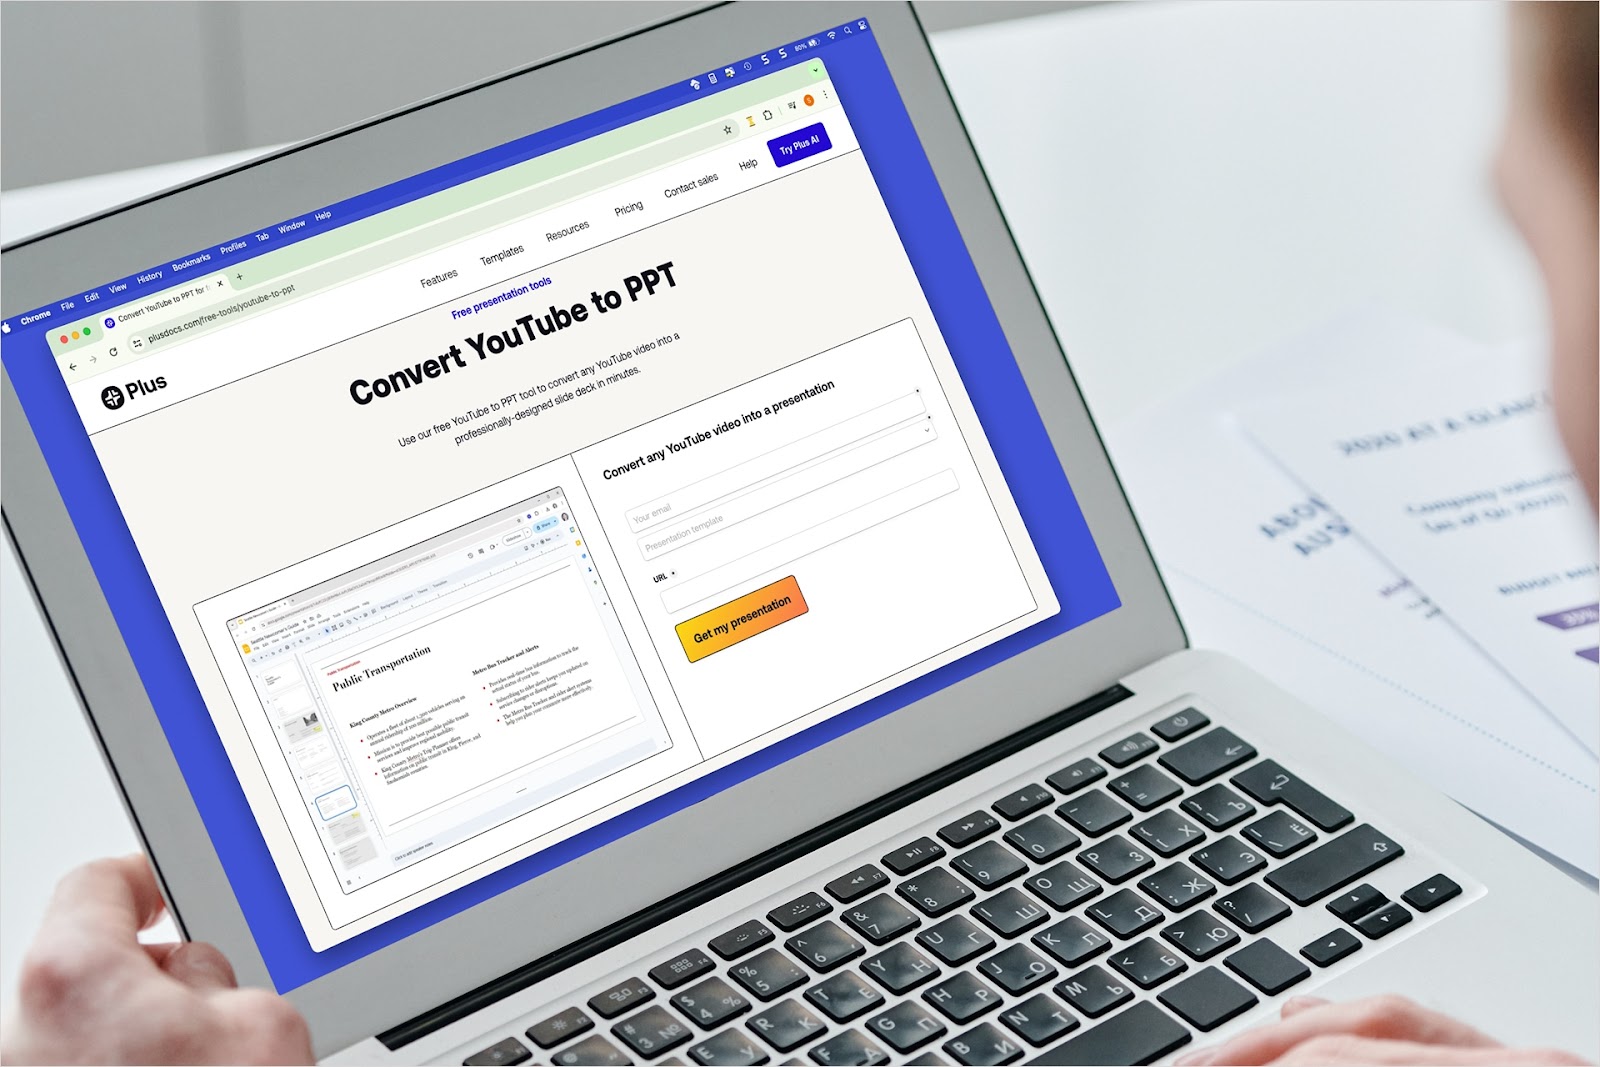
How to convert YouTube to PowerPoint
Have a video that would make the perfect presentation? We’ll show you how to convert YouTube video content to PowerPoint a couple different ways using Plus AI.

A simple guide to slideshows
Learn what slideshows are, how they’re used, common features, and how to choose a slideshow maker. Get started creating your own slideshows today with Microsoft PowerPoint.
What is a slideshow?
What are slideshows used for.

Meetings and presentations
Slideshows are most frequently used to create professional presentations for business meetings, conferences, and educational purposes. A slideshow program allows people to organize content, include visuals, and enhance the overall impact of their message.

Visual storytelling
Because slideshows sequentially display engaging visuals, text, and other multimedia, they’re a strong way to tell a cohesive and compelling narrative from start to finish.

Content creation
Slideshows give content creators a versatile and efficient way to organize information, increase visual appeal, and communicate effectively across different contexts.

Photo and video sharing
Slideshow makers are popular for creating photo and video presentations, especially for events like weddings, birthdays, and vacations. People can add transitions, music, and captions to fully bring the photo-sharing experience to life.

Training and tutorials
Slideshows help break down complex information into digestible chunks with the support of visuals and text, making them ideal for instructional materials, tutorials, and training modules.

Collaborative projects
In collaborative settings, teams use slideshow makers to create joint presentations or reports. The best slideshow makers enable multiple contributors to add their content simultaneously, which helps ensure a cohesive and unified presentation.
What are the features of a slideshow creator?
Slideshow creators vary in what they offer but ideally include:
A library of templates, themes, and images.
If you’re not a designer, this feature is huge. Simply browse the options available in your slideshow maker library to create a polished, professionally designed presentation in a flash. Be sure to confirm that access to the library is free and the images are approved for unrestricted usage.
Audio and video compatibility.
Keeping your audience engaged is key to any successful slideshow presentation. To mix things up, being able to add a multimedia element—like a song or a video clip—will help people stay focused and interested.
Presentation tools.
Handy presenter tools go a long way toward making your slideshow experience seamless. For example, straightforward slide navigation, slideshow keyboard shortcuts, pen and highlighter markup, and adjustable resolution settings.
AI assistance.
With AI revolutionizing content creation, using a slideshow maker that has AI capabilities will enhance efficiency and innovation. Depending on the slideshow app you have, creating an entire slideshow could be as easy as a quick prompt, like “Make a presentation about the benefits of sustainable fashion that has 15 slides.”
Animations.
Like audio and video, animations give your audience a bit of sensory surprise that can capture their attention.
Slide transitions.
Add some pizzazz to how you change slides with visual effects like fading, wiping, and zooming.
Screen recording.
Being able to record your screen in a slideshow maker is helpful when giving an instructional talk, software demonstration, and other types of presentations that require visual aids.
A place to put speaker notes.
Having somewhere to jot a few notes down will help remind you of everything you want to cover as you present.
Different viewing options.
Looking at different views—for example, a presenter view, an audience view, and a high-level view of slide order—is useful when organizing your slideshow’s structure and understanding and preparing for what you’ll see versus what your audience will see.
How do I choose the right slideshow maker?
When choosing a slideshow maker, keep the following questions in mind to make sure you get the most for your money:
Is it scalable with your business?
As your organization grows and changes, it’s important to have flexible technology that adapts to new needs. Having certain features—such as cloud-based collaboration, compatibility with other work apps, and a mobile app—will help ensure that no matter how your business changes, the slideshow maker is up to the task. This also applies to pricing plans. Consider choosing a slideshow app that has a subscription plan (so the software is always up to date), volume-based pricing, or enterprise-level pricing.
Does it have a variety of visual elements?
It’s pretty much a given that a slideshow maker will allow you to add images, but think outside the JPEG box—what other visual elements are available to you? Features like preset themes, free templates, SmartArt, a built-in clip art library, shape tools, background styles, 3D models, and charts and graphs provide diverse ways to switch up how a slideshow looks without relying solely on adding your own images.
Is it easy to use?
You could have the most feature-rich slideshow maker on the market, but if it isn’t easy to use, you probably won’t use it. Or you will, but you’ll be frustrated, waste valuable time, and have difficulty convincing people you work with to use it. As you research slideshow makers, look for videos that show the apps’ interfaces in action to help you decide if they’re intuitive and will have a shorter learning curve.
Does it have collaboration and sharing options?
Because making a slideshow is often a collaborative effort, it’s worthwhile to find a slideshow creator that was designed with this in mind. Pick one that offers editing controls and commenting, as well as the ability to work on a slideshow at the same time as someone else. Having a cloud-based slideshow maker will be key here. You’ll not only save yourself time but also keep things simple by not having multiple versions of the same slideshow.
Explore more about slideshows and slideshow makers
Copilot in powerpoint.
Transform how you make slideshows with the versatile AI in Copilot for PowerPoint.
Improve your presenting skills
Practice presenting with an AI speaker coach to get feedback on body language, repetition, and pronunciation.
Six slideshow tips and tricks
Read up on tips about how to finesse your slideshows to give your most confident presentations.
Get free PowerPoint templates
Show your style with PowerPoint templates in more than 40 categories.
How to make a branded slideshow
Create a cohesive visual identity for your brand that goes beyond adding a logo to every slide.
Try a photo album template
Relive your favorite memories with photo album templates designed for all your unforgettable moments.
The benefits of visual aids in slideshows
Discover why using visual aids helps communicate ideas and messaging more effectively.
Slideshows that reach all learners
Explore the different ways that people learn and how to include all learning styles in your presentations.
Frequently asked questions
How do i make a good slideshow.
Making a good slideshow in PowerPoint is easy:
Plan what you’d like to include in your slideshow.
Launch your slideshow creator.
Choose the theme you’d like.
Import media.
Add text, music, and transitions.
Record, save, and share your slideshow.
Learn more about how to make a slideshow .
How do I add music to a slideshow?
To add music to a slideshow, first make sure that you’re using a slideshow maker with music compatibility. In PowerPoint, follow these steps:
Open your PowerPoint presentation and select the slide where you want to add music.
Click on the Insert tab in the ribbon menu.
Click on the Audio button and select Audio on My PC.
Browse to the folder on your computer where the audio file is located and select it.
Click on the Insert button.
How do I record a slideshow?
The steps for recording a slideshow in PowerPoint will vary depending on the version that you own. Get help with slideshow recording based on your version.
What types of files can I add to a slideshow?
File compatibility in PowerPoint includes the use of JPEGs, PNGs, TIFFs, GIFs, PDFs, MP3s, WAVs, MIDIs, MPEG-4 Videos, and Windows Media Videos.
How do I share my slideshow?
To share your PowerPoint slideshow, follow these steps:
Open your presentation and click Share at the top right of your screen.
If your presentation isn't already stored on OneDrive, select where to save your presentation to the cloud.
Choose a permission level, like Anyone with a link , or maybe just people in your company. You can also control if people can edit or just view the doc.
Select Apply.
Enter names and a message.
Select Send.
Follow Microsoft
Byte Bite Bit
How to Make Slides Automatically Transition in PowerPoint: Step-by-Step Guide
The modern workplace thrives on engaging presentations, and making your PowerPoint slides transition automatically can elevate your delivery . Whether crafting a sleek pitch for clients or a visually stimulating lecture for students, seamless transitions add that professional polish.

To set up automatic transitions, we simply navigate to the “Transitions” tab in PowerPoint. There, we can select our preferred transition style and specify timing to suit the rhythm and flow of our presentation. Click “Apply to All Slides” if we want a consistent transition across the board .
How often have we found ourselves manually advancing slides while juggling other tasks during a presentation? By scheduling transitions, we can focus on our narrative and engagement, rather than the tech. Plus, it’s as easy as checking a box and setting a timer!
- 1.1 Understanding Slide Transitions
- 1.2 Applying Transitions Effectively
- 1.3 Enhancing Transitions with Sound and Timing
- 2.1 Setting Up for Different Presentation Scenarios
- 2.2 Effective Use of Narration and Audio
- 3.1 Automating Slide Progression
- 4.1 Exploring the PowerPoint Ribbon for Transition Options
- 4.2 Mastering Animation and Transition Coordination
Crafting Engaging Transitions in PowerPoint Presentations
Creating engaging transitions in PowerPoint enhances the visual appeal and keeps the audience attentive. We’ll cover the essentials of slide transitions, applying them effectively, and adding sound and timing for a polished presentation.
Understanding Slide Transitions
Slide transitions are the effects we see when moving from one slide to the next. PowerPoint offers many options in the Transitions tab. From Fade to Wipe , each transition brings a unique visual effect. Choosing the right transition depends on the content and tone of our presentation.
The Transitions Gallery displays thumbnails, making it easy to preview and select transitions. Fade transitions, for instance, offer smooth and subtle changes, perfect for professional presentations. Meanwhile, more dynamic effects like Zoom can add excitement to more lively topics.
Applying Transitions Effectively
To apply transitions, we select the slide and navigate to the Transitions tab. Clicking on a transition effect applies it to the selected slide. To ensure consistency, we can use the Apply to All Slides option. This creates a uniform look throughout our presentation.
Customizing each transition adds a personal touch. By adjusting Effect Options , we can change the direction or style of the transition. For example, we might prefer our Fade transition to dissolve from the center or smoothly fade from one side. We can also adjust the transition speed through the Duration setting, making the transition slower or faster.
Enhancing Transitions with Sound and Timing
Adding audio can heighten the impact of our transitions. We can include sound effects from the Transitions tab by selecting Sound . PowerPoint offers a selection of built-in sounds, but we can also upload custom audio clips.
Timing our transitions is crucial for a polished presentation. Under the Advance Slide section, we select After and specify a delay. This ensures our slides advance automatically after a set time. Setting the Duration helps control the pace, making sure transitions aren’t too abrupt or too lengthy. Utilizing both sound and timing ensures a smooth flow and keeps the audience engaged.
Optimizing Presentation Flow and Impact
Navigate through presentation scenarios with ease by customizing your slide transitions in PowerPoint, and enhance your delivery with effective use of narration and audio elements. These elements can dramatically improve the flow and engagement of your presentation.
Setting Up for Different Presentation Scenarios
When prepping PowerPoint for various scenarios, tweaking transitions and timings for an optimal slide show is essential. Whether the presentation is conducted by a speaker**(full screen)**, viewed individually (window) , or displayed at a kiosk, each has unique needs.
If presented by a speaker, ensuring seamless transitions promotes professionalism. Make use of the “Rehearse Timings” feature. This allows practicing, recording, and adjusting the slide timings to suit the spoken content.
For individual browsing, adding interactive elements like hyperlinks or action buttons can engage viewers. Set up slide show options to allow self-navigation with brief pauses between slides.
Effective Use of Narration and Audio
Incorporating narration and audio can heighten a presentation’s impact. Recording narration allows us to convey the message even when we cannot be physically present. The “Record Slide Show” feature in PowerPoint helps us capture voiceovers for each slide, setting precise timing and flow.
Using a microphone ensures clarity and professional sound. Not every slide needs narration; mix narrated slides with key points displayed in text for variety. Optionally, include sound effects to highlight specific points.
To enhance engagement, combine narration with animations so that the audio complements the visual aspects.
Key steps for integrating narration :
- Click on the “Slide Show” tab.
- Select “Record Slide Show” .
- Use a microphone to start recording.
- Adjust timings as needed.
Lastly, remember to save your work frequently. This balance of visuals and audio ensures a compelling and engaging presentation experience for any scenario.
Managing Slide Show Settings for Optimal Performance
Properly configuring your slide show settings can make a huge difference in how your presentation is received by your audience. Here’s how we can ensure smooth and effective automatic transitions for our PowerPoint slides.
Automating Slide Progression
We can automate our slide progression to ensure a seamless flow during our presentations.
First, go to the Transitions tab. This is where we want to adjust slide timings. It’s crucial to set a consistent time for slides to advance. In the Timing group, choose a duration under the Advance Slide section. Make sure to uncheck “On Mouse Click” if we prefer not to manually advance slides.
Next, consider setting our presentation to Loop Continuously . This is perfect for kiosk displays or unattended presentations. We need to click on the Slide Show tab and select Set Up Slide Show . From here, we check the “Loop continuously until ‘Esc’” box.
Lastly, always preview our presentation. This ensures slides progress as intended, and gives us a chance to make any necessary tweaks. Using the Slide Sorter View can help us easily rearrange slides and check our transition settings at a glance.
Following these steps ensures our presentation runs like a well-oiled machine, with slides advancing smoothly and efficiently without a hitch.
Leveraging PowerPoint’s Advanced Features for Transitions
To create compelling presentations, we can utilize PowerPoint’s advanced features to master slide transitions and animations. Instead of default settings, we’ll dive into more powerful options.
Exploring the PowerPoint Ribbon for Transition Options
The PowerPoint Ribbon is where we begin our journey. By heading to the “Transitions” tab , we find various transition effects that can bring our presentation to life. We can see thumbnails of different transitions, which helps in visualizing the impact before applying them.
Here’s a quick step-by-step:
- Select the Slide : Pick the slide we want to work on.
- Transitions Tab : Click on the “Transitions” tab on the ribbon.
- Choose Transition : Select the desired transition effect from the thumbnails.
- Apply to All : If we want a uniform transition, we can click on “Apply to All Slides”.
Additionally, the Transition Settings allow us to tweak the duration and add sounds. This can be found right below the transition effects thumbnails.
Mastering Animation and Transition Coordination
Coordination between animations and transitions is key for a polished presentation. Utilizing the Animation Pane becomes essential when combining these effects. It helps us manage the sequence and timing of each element effectively.
Key tasks include:
- Add Animation : Navigate to the “Animations” tab and choose animations for slide elements.
- Animation Pane : Open the pane to see and organize all animations on our slide.
- Set Timings : Adjust when an animation should play—either “On Click” , “With Previous” , or “After Previous” .
- Advance Slide : Ensure automatic transition settings are enabled. This can be set under the “Advance Slide” options in the Transitions tab, choosing “After” a specific duration.
By syncing animations and transitions, our slideshow will run smoothly without manual intervention, impressively engaging our audience.
By fully utilizing these features, our presentation’s quality and professionalism are significantly enhanced.
Related posts:
- How to Add Music to PowerPoint: A Step-by-Step Guide for Seamless Presentations
- How to Curve Text in PowerPoint: Step-by-Step Guide
- How to Insert GIF into PowerPoint: A Step-by-Step Guide
- How to Present PowerPoint with Notes: Master Speaker Tips
- How to Create a PowerPoint Template: Step-by-Step Guide for Beginners
- How to Create an Org Chart in PowerPoint: Step-by-Step Guide for Beginners
- How to Wrap Text in PowerPoint: A Step-by-Step Guide
- How to Insert a Slide from Another PowerPoint: A Step-by-Step Guide
- How to Change Font on All Slides in PowerPoint: A Step-by-Step Guide
- How to Make a Graph in PowerPoint: Step-by-Step Guide
- How to Use Slide Master in PowerPoint: Streamline Your Presentation Design
- How to Present PowerPoint with Notes: Expert Tips for Seamless Delivery
Leave a Comment Cancel reply
Save my name, email, and website in this browser for the next time I comment.
Set the timing and speed of a transition
You can modify the duration of a transition, modify the transition effect, and even specify a sound to play during a transition. Also, you can specify the time to spend on a slide before advancing to the next.
Set the speed of a transition
Use Duration to set transition speed. A shorter duration means that a slide advances faster, and a larger number makes the slide advance more slowly.
Select the slide that has the transition that you want to modify.
On the Transitions tab, in the Timing group, in the Duration box, type the number of seconds that you want.

Tip: If you want all the slide show's transitions to use the same speed, click Apply to All .
Modify the effect options for a transition
Many, but not all, of the transitions in PowerPoint can be customized.
Select the slide that has the transition you want to modify.
On the Transitions tab, in the Transition to This Slide group, click Effect Options and select the option that you want.

In this example, a Gallery transition is applied to the slide and the From Right option is selected.

A Gallery transition, with the From Right option selected, during a presentation.
Specify a time to advance to the next slide
Advance Slide sets the transition timing by specifying how long a slide stays in view before the transition to the next slide begins. If no timing is selected, slides advance when you click the mouse.
Select the slide that you want to set the timing for.
On the Transitions tab, in the Timing group, under Advance Slide , do one of the following:
To make the slide advance to the next slide when you click the mouse, select the On Mouse Click check box.
To make the slide advance automatically, select the After check box, and then enter the number of minutes or seconds that you want. The timer starts when the final animation or other effect on the slide finishes.
To enable both the mouse and automatic advance, select both the On Mouse Click check box and the After check box. Then, at After , enter the number of minutes or seconds that you want. The slide will advance automatically, but you can advance it more quickly by clicking the mouse.
Tip: If you want all the slides to advance using the same speed, click Apply to All .
Set a sound to play during a transition
On the Transitions tab, in the Timing group, in the Sound list, select the sound that you want.
Note: If you want to use your own sound, in the Sound list, select Other Sound . Then, in the Add Audio dialog box, select the sound that you want, and then click OK
Rehearse your presentation
As you rehearse, the timer records the amount of time you spend on each slide and the total amount of time spent on all slides. The timer automatically starts when you enter Presenter View.
Go to Slide Show > Set Up > Rehearse Timings .

Begin to practice your presentation.
When you reach the last slide or exit Presenter View, PowerPoint prompts you to save the timings.
Pause, start, or reset the timer
The timer automatically starts when you enter Presenter View. However, you can pause and then restart the timer if you need to stop to type notes for the current slide or take a break. See the following table for details.
Rehearsed slide timings aren't turned on by default. If you want to use the timings as you present, you can turn the timing on before you play the slide show. On the Slide Show tab, in Set Up , select the Use Timings check box.
Add speaker notes while you rehearse
On the left side of the notes pane, you can see any speaker notes that you entered for the current slide when you created the presentation. However, you can also type additional notes while you rehearse.
Click inside the notes pane on the right, and then type your meeting notes.
Note: When you exit Presenter View, the additional notes are appended to the end of the notes for the slide that was in view when you typed them.
Turn slide timings off
If you previously recorded your presentation and saved the slide timings, the slides may be set to automatically advance according to the saved timings when you play the slide show. If you don't want to use the timings as you present, you can turn them off.
On the Slide Show tab, in Set Up , clear the Use Timings check box.

Add, change, or remove transitions between slides

Need more help?
Want more options.
Explore subscription benefits, browse training courses, learn how to secure your device, and more.

Microsoft 365 subscription benefits

Microsoft 365 training

Microsoft security

Accessibility center
Communities help you ask and answer questions, give feedback, and hear from experts with rich knowledge.

Ask the Microsoft Community

Microsoft Tech Community

Windows Insiders
Microsoft 365 Insiders
Was this information helpful?
Thank you for your feedback.
Top searches
Trending searches

26 templates

49 templates

11 templates

71 templates

15 templates

first day of school
68 templates
Create your presentation
Writing tone, number of slides.

AI presentation maker
When lack of inspiration or time constraints are something you’re worried about, it’s a good idea to seek help. Slidesgo comes to the rescue with its latest functionality—the AI presentation maker! With a few clicks, you’ll have wonderful slideshows that suit your own needs . And it’s totally free!

Generate presentations in minutes
We humans make the world move, but we need to sleep, rest and so on. What if there were someone available 24/7 for you? It’s time to get out of your comfort zone and ask the AI presentation maker to give you a hand. The possibilities are endless : you choose the topic, the tone and the style, and the AI will do the rest. Now we’re talking!
Customize your AI-generated presentation online
Alright, your robotic pal has generated a presentation for you. But, for the time being, AIs can’t read minds, so it’s likely that you’ll want to modify the slides. Please do! We didn’t forget about those time constraints you’re facing, so thanks to the editing tools provided by one of our sister projects —shoutouts to Wepik — you can make changes on the fly without resorting to other programs or software. Add text, choose your own colors, rearrange elements, it’s up to you! Oh, and since we are a big family, you’ll be able to access many resources from big names, that is, Freepik and Flaticon . That means having a lot of images and icons at your disposal!

How does it work?
Think of your topic.
First things first, you’ll be talking about something in particular, right? A business meeting, a new medical breakthrough, the weather, your favorite songs, a basketball game, a pink elephant you saw last Sunday—you name it. Just type it out and let the AI know what the topic is.
Choose your preferred style and tone
They say that variety is the spice of life. That’s why we let you choose between different design styles, including doodle, simple, abstract, geometric, and elegant . What about the tone? Several of them: fun, creative, casual, professional, and formal. Each one will give you something unique, so which way of impressing your audience will it be this time? Mix and match!
Make any desired changes
You’ve got freshly generated slides. Oh, you wish they were in a different color? That text box would look better if it were placed on the right side? Run the online editor and use the tools to have the slides exactly your way.
Download the final result for free
Yes, just as envisioned those slides deserve to be on your storage device at once! You can export the presentation in .pdf format and download it for free . Can’t wait to show it to your best friend because you think they will love it? Generate a shareable link!
What is an AI-generated presentation?
It’s exactly “what it says on the cover”. AIs, or artificial intelligences, are in constant evolution, and they are now able to generate presentations in a short time, based on inputs from the user. This technology allows you to get a satisfactory presentation much faster by doing a big chunk of the work.
Can I customize the presentation generated by the AI?
Of course! That’s the point! Slidesgo is all for customization since day one, so you’ll be able to make any changes to presentations generated by the AI. We humans are irreplaceable, after all! Thanks to the online editor, you can do whatever modifications you may need, without having to install any software. Colors, text, images, icons, placement, the final decision concerning all of the elements is up to you.
Can I add my own images?
Absolutely. That’s a basic function, and we made sure to have it available. Would it make sense to have a portfolio template generated by an AI without a single picture of your own work? In any case, we also offer the possibility of asking the AI to generate images for you via prompts. Additionally, you can also check out the integrated gallery of images from Freepik and use them. If making an impression is your goal, you’ll have an easy time!
Is this new functionality free? As in “free of charge”? Do you mean it?
Yes, it is, and we mean it. We even asked our buddies at Wepik, who are the ones hosting this AI presentation maker, and they told us “yup, it’s on the house”.
Are there more presentation designs available?
From time to time, we’ll be adding more designs. The cool thing is that you’ll have at your disposal a lot of content from Freepik and Flaticon when using the AI presentation maker. Oh, and just as a reminder, if you feel like you want to do things yourself and don’t want to rely on an AI, you’re on Slidesgo, the leading website when it comes to presentation templates. We have thousands of them, and counting!.
How can I download my presentation?
The easiest way is to click on “Download” to get your presentation in .pdf format. But there are other options! You can click on “Present” to enter the presenter view and start presenting right away! There’s also the “Share” option, which gives you a shareable link. This way, any friend, relative, colleague—anyone, really—will be able to access your presentation in a moment.
Discover more content
This is just the beginning! Slidesgo has thousands of customizable templates for Google Slides and PowerPoint. Our designers have created them with much care and love, and the variety of topics, themes and styles is, how to put it, immense! We also have a blog, in which we post articles for those who want to find inspiration or need to learn a bit more about Google Slides or PowerPoint. Do you have kids? We’ve got a section dedicated to printable coloring pages! Have a look around and make the most of our site!

5 Free Alternatives To Microsoft PowerPoint
M icrosoft PowerPoint has always been the default choice for creating professional meeting briefs or fun little project demonstrations in schools. Its inclusion as a free service for students or working professionals makes it a no-brainer to use. However, for the general public, it can get quite expensive to pay for a subscription just to be able to create simple presentation slides. Although you can subscribe to Microsoft's Office Suite and get more bang for your buck, the pricing still doesn't hit the affordable range for most.
Fortunately, completion has been growing, and a sea of strong contenders offer similar services to PowerPoint. After considering feature sets, here are five of the best free alternatives to Microsoft PowerPoint. At the end of the article, you can find a detailed explanation of why we've chosen the services, alongside useful comparisons that may help you make your decision easier.
Read more: The 20 Best Mac Apps That Will Improve Your Apple Experience
When it comes to productivity apps, Zoho makes some of the better ones in the market. Zoho Sheet, for example, is one of the best Microsoft Excel alternatives out there — owing to its extensive product catalog, there is a great way to view and edit presentations. The aptly named Zoho Show lets you design and demonstrate professional-looking slides, all without having to download the program.
Zoho takes a minimal approach to most of its services, and its PowerPoint application is no different. You'll find that most menus are contextually aware of what tasks you're currently performing, which helps keep unnecessary tools out of the way and bring the important ones in focus. There is also a huge library of customizable templates you can choose from, making it easier to kickstart your presentation work.
Zoho Show is completely free to use for individuals and offers unlimited cloud storage. No features are locked behind a paywall, and rest assured, you can fully rely on this online presentation-making tool for all your needs, be it for school or work.
Canva is a service that can easily climb up to becoming everyone's favorite once they start using it. While most applaud it for its graphic designing prowess, there are many other things Canva can do that you probably aren't aware of . Among them is the ability to craft beautiful slides for your presentations and projects.
By creating a free account, you can access thousands of templates on Canva. You can filter these by use case—maybe you need one for a professional business briefing or a casual one explaining why your pet dog is the best canine. There is a whole section of ready-to-use templates dedicated to mobile-friendly viewing as well, which is something you don't usually find to be as accessible with other tools.
Like most presentation apps, Canva lets you collaborate with your team members and work across devices seamlessly. The Canva app for mobile also lets you control your slides remotely during your presentation. Some menus also feature AI-featured tools to add one-click enhancements to your slides -- unfortunately, these are locked behind premium subscription tiers. However, for the cent percent of the population, Canva can be used without spending a dime to meet a plethora of creative needs.
Apple takes great pride in developing in-house solutions to meet every user requirement. While most of its products dominate the competition in popularity, the same cannot be said for Keynote , the company's version of Microsoft PowerPoint. The program was first released in 2003 with macOS Big Sur and has largely remained one of those icons you glance over and forget about.
However, recent versions of Keynote have made it a compelling alternative to PowerPoint. Not only is it pre-installed on every Apple device, including your iPhone, but it also works best with the iPad touchscreen. Keynote has a largely clean and professional approach to the built-in templates, but nothing is stopping you from going creative. Animations are one of Keynote's strongest suits, allowing you to create near cinematic-looking presentations with just a few clicks.
While you can still use Apple Keynote through iCloud on Windows devices, this alternative is clearly meant for people surrounded by the walled garden of Apple technology. It makes use of features like AirDrop, Live Photos, and VoiceOver — all of which are technologies available across Apple devices. Using Apple Keynote is completely free, and the app has easy exporting tools that make working with Microsoft PowerPoint less of a hassle.
WPS Presentation
WPS Office makes some of the best solutions for creating and editing documents on smartphones , but their service offerings extend to Windows, macOS, and even Linux. WPS Presentation is perhaps the closest you'll get to Microsoft PowerPoint in terms of the user interface and how most tools are bundled in familiar locations.
This PowerPoint app offers real-time collaboration where you can invite your team members and work on the same document remotely. Like most collaboration tools, users can leave comments to suggest changes or add information for other people on the team.
WPS Presentation is not the only free product; you can utilize every app in the WPS Office suite. Unlike most competitors, you don't need to download or use a separate mini-app to make presentations. WPS Office has a document editor, PowerPoint creator, spreadsheet manager, and other tools all within its umbrella. Premium plans for this service exist, but they mostly cater to unlocking features for editing PDFs.
Google Slides
As a netizen, you most likely already have a Google account. Not only is it required to make any meaningful use of your Android phone, but popular services that we take for granted, like Gmail and Drive, all fall under Google's umbrella. One such free service that the tech giant has at its disposal is Google Slides . While the barebones UI might seem lackluster at first, Slides has nearly the same level of functionality as Microsoft PowerPoint and can even be supercharged by add-ons.
All of Google's workspace apps, such as Docs, Sheets, and Slides, provide an intuitive way to work in a team. You can add comments, use annotations, and share the presentation with limited access to others. You can use one of the many predesigned Google Slides templates for simple presentations , or browse for templates that cater to specific needs. Being part of a bigger service catalog has its obvious advantages, such as seamless integration with Google Meet, Gmail, and other products from Google that you already use.
We recommend Google Slides to anyone who needs to create and edit PowerPoint presentations on the go and can't be bothered with working in a complicated environment. The service is also available as an app for Android and iOS, and you can export your presentations in a wide range of formats, including PPT, PDF, or PNG for individual slides.
To Pay Or Not To Pay?
You'll notice that all the services we've mentioned on this list are free to use. In fact, you can use Office 365 apps online for free — including PowerPoint, which makes purchasing a standalone subscription to the Microsoft PowerPoint app quite redundant. However, nearly every free alternative here short of Keynote also offers premium plans, but should you consider buying one?
For the vast majority of people who are looking for a robust software to create, edit, and share presentations with — these free options deliver exceptionally well in every aspect. Some apps like Google Slides and Apple Keynote let you work in smaller teams with the free tier as well. Apps like WPS Office and Canva tend to lock new and exciting features like AI tools behind a paywall, and while these are nice to have, you definitely can do without them.
If you're looking for a presentation tool for a company with multiple people, you can scale up using any of the alternatives mentioned on this list. Both Google Workspace and Zoho offer reliable and enterprise-level plans you can upgrade to. For everyone else — enjoy creating and demonstrating your PowerPoint presentations for free.
Read the original article on SlashGear .

IMAGES
VIDEO
COMMENTS
You can use a self-running presentation to run unattended in a booth or kiosk at a trade show or convention, or you can save it as a video and send it to a client. On the Slide Show tab, select Set Up Slide Show. Presented by a speaker (full screen) Allows the people watching your slide show to have control over when they advance the slides.
How to automatically play PowerPoint presentations across devices How to play PowerPoint slides automatically without clicking on Mac. First, go to the Slide Show Tab and select Set Up Slide Show. When the Set Up Show Window opens, deselect the Presented by a speaker option and consider the following options to set up your automatic slideshow:
Click OK. To set up a presentation to run automatically, but those watching the slide show do NOT have control over when slides advance: Click the Slide Show tab in the Ribbon and then click Set Up Slide Show. A dialog box appears. Under Show type, select Browsed by an individual (window). Click OK.
With Microsoft PowerPoint, you can use a self-running presentation to run unattended in a booth or kiosk at a trade show or convention, or you can save it as...
Step 1: Apply transitions to automatically advance slides during a slide show. Transitions occur between slides when you run a slide show. To apply transitions to automatically advance slides during a slide show: In Normal View or Slide Sorter View, display or select a slide. Click the Transitions tab in the Ribbon.
The recording window allows users to advance to the next slide, pause the presentation, view the current slide's time, restart the recording for a slide and view the total runtime of the ...
Still, at the Slide Show menu, click the From Beginning button to start the slide show. Check that the presentation runs full screen and is self-advancing and self-running. Also, check that the slide advance settings are OK, and sufficient to read the message on the slide. Adjust the duration when needed. Use digital signage software to bring ...
First, open your PowerPoint presentation in which you would like to loop. Once open, navigate to the "Set Up" group of the "Slide Show" tab and then select the "Set Up Slide Show" button. The "Set Up Show" window will appear. In the "Show options" group, check the box next to "Loop Continuously until Esc.".
In this Microsoft PowerPoint 2019 tutorial course you are going to learn how to make PowerPoint Slide advance automatically instead / without having to click...
Start by deciding whether to show the slideshow in a window or full screen. To set up the slideshow, select Slide Show > Set Up Slide Show and choose one of the following: Browsed by an individual (window): Run the slideshow automatically and inside a window. This option works best when you save the slideshow to a CD.
In the editing view, right click the video you want to automate and select the down arrow to the right of the Start button. Select Automatically from the dropdown menu. Save the PowerPoint presentation. Now, it'll start playing automatically when you advance to the slide with your embedded video while in presenter view.
To Save a PowerPoint Presentation as a PowerPoint Show: Choose the File tab. Select Save As. Pick the Save as type as PowerPoint Show. Type a name for your slide show in the File name text box (you can use the same name and location as your .pptx/presentation file) and click Save. Your PowerPoint slide show file is saved with a .ppsx extension.
How to loop a PowerPoint presentation. 1. Open the Microsoft PowerPoint presentation that you want to loop. 2. With your PowerPoint presentation open, click on the "Slide Show" tab, then click on ...
Play a video automatically when a slide appears in Slide Show. In Normal view, click the video in your slide. Click on the Playback tab. Next to Start, click the down arrow, and select Automatically. When you are delivering your presentation in Slide Show View or Presenter View, the video will play automatically when you arrive at the slide.
Open your PowerPoint presentation. Click the [Slide Show] tab > From the "Set Up" group, click "Set Up Slide Show". From the resulting dialogue box, check "Loop continuously until 'Esc'" under the "Show options" section > Click [OK]. From the "Slides" preview side panel, click your first slide > Press and hold [Shift] and click your last slide.
This tutorial will demonstrate how to set up a PowerPoint slide show that will automatically transition the slides on a timer. This feature is helpful when y...
Open your slideshow in PowerPoint on Windows or Mac and follow these steps to set up automatic play. Go to the Slide Show tab and select Set Up Slide Show. In the pop-up window, mark Browsed at a kiosk in the Show type section. This automatically loops the slideshow for continuous play and only stops when you press Esc.
Open the presentation file you wish to automate, then select " Home ". Select anywhere in the left " Slides " pane. Select the individual slide you would like to advance automatically. If you want to advance all of the slides for the same amount of time, select one slide in the left pane, then press " Ctrl " + " A " to highlight ...
To add music to a slideshow, first make sure that you're using a slideshow maker with music compatibility. In PowerPoint, follow these steps: Open your PowerPoint presentation and select the slide where you want to add music. Click on the Insert tab in the ribbon menu. Click on the Audio button and select Audio on My PC.
Here's a quick step-by-step: Select the Slide: Pick the slide we want to work on. Transitions Tab: Click on the "Transitions" tab on the ribbon. Choose Transition: Select the desired transition effect from the thumbnails. Apply to All: If we want a uniform transition, we can click on "Apply to All Slides". Additionally, the Transition ...
Turn slide timings off. If you previously recorded your presentation and saved the slide timings, the slides may be set to automatically advance according to the saved timings when you play the slide show. If you don't want to use the timings as you present, you can turn them off. On the Slide Show tab, in Set Up, clear the Use Timings check box.
AI presentation maker. When lack of inspiration or time constraints are something you're worried about, it's a good idea to seek help. Slidesgo comes to the rescue with its latest functionality—the AI presentation maker! With a few clicks, you'll have wonderful slideshows that suit your own needs. And it's totally free!
Try the AI Menti Builder today! This is the first version of the AI Menti Builder, and we are committed to continually enhancing our AI-generated content to ensure it becomes more accurate. Try it out and let us know what you think! Add a prompt and watch as it instantly crafts an interactive draft of a presentation, fully customizable by you.
Using Apple Keynote. is completely free, and the app has easy exporting tools that make working with Microsoft PowerPoint less of a hassle. WPS Presentation. WPS Presentation app on different ...