Home » How to generate Reports with Python (3 Formats/4 Tools) As Excel, HTML, PDF

How to generate Reports with Python (3 Formats/4 Tools) As Excel, HTML, PDF

Lianne & Justin
- July 23, 2021

In this tutorial, we’ll show you how to generate reports with Python .
Reporting is one of the essential tasks for anyone who works with data information. It is critical but also tedious. To free our hands and minds, we can make a program to automate the report generation process. Besides data analysis, Python is also convenient for automating routine tasks such as reporting.
Following this guide, you’ll use tools with Python to generate reports, as the below common formats:
- HTML (with template)
HTML to PDF
Pdf directly.
If you are looking to generate reports automatically with Python, this tutorial is a great starting point. You’ll know where to start generating your next report!
We are going to show you popular and easy-to-use Python tools, with examples. The example report will include data table s and a chart , the two most common elements within reports.
Let’s get started!
To follow this tutorial, you’ll need to know:
- Python basics , which you can learn with our FREE Python crash course: breaking into Data Science .
- Python pandas basics , which you can learn with our course Python for Data Analysis with projects .
- HTML basics , which you can get a quick overview with HTML Introduction from W3 Schools .
Overview of Python reporting
Before we start, let’s look at an overview of reporting with Python.
The standard formats of reports are Excel, HTML, and PDF. The good news is, Python can generate reports in all these formats. So you can choose any of these formats, depending on the needs of the report’s users.
Below is a summary of what we’ll cover in this tutorial. We’ll need pandas for all the reports, since we need to manipulate and analyze data when building reports.
Create the example report
To show examples of the above, we’ll use stock market data. We’ll generate simple reports based on the historical data of the S&P 500 index from Yahoo! finance.
Below is the code to pull the data for the reports. In summary, we grab the historic data of the S&P 500 and make a summary statistics table based on it.
At the end, you should have two pandas DataFrames sp500_history and sp500_history_summary for reporting:
- sp500_history : the 10 years historical data of S&P 500 Your result will look different than below, since the date changes according to the date when you run the code.
2514 rows × 6 columns
- sp500_history_summary : a simple summary statistics of the above data
Besides these two DataFrames, we’ll also create a line chart showing the series of Close and Close_200ma .
The code below builds the line chart using the matplotlib and seaborn libraries, and saves it as a PNG file on your local computer. This file chart.png will be used in the reports below.

Now we have everything needed ( sp500_history , sp500_history_summary , chart.png ) to generate reports.
Further learning : Please note we generated the above simple report quickly for demonstration only. To learn about using Python for data analysis, please check out our course Python for Data Analysis with projects . The course covers the pandas , seaborn libraries. You’ll learn how to manipulate data, create data visualizations, etc., which is essential to create reports in Python.
Let’s dive into each specific example!
We’ll start with the classic: Excel. Excel is a widely used, powerful data analysis and visualization tool. In many scenarios, you may want to store the report within Excel and share it with others. Others can easily open the spreadsheet, examine the report, and even use it for further analysis in Excel, Python, or other programs.
While there are different tools to save reports as Excel, we’ll use the foundation one: ExcelWriter and the to_excel method in pandas . Here is the summary of the steps. You can read it together with the code below.
- Set up an ExcelWriter with engine ‘openpyxl’ You can also use the engine ‘xlsxwriter’. The general procedure is the same, but the syntax will be different. We are using ‘openpyxl’ since it’s the default engine for xlsx files.
- Export the data from Python to Excel We export DataFrames sp500_history and sp500_history_summary to two separate sheets/tabs.
- Add a line chart in Excel showing the data of Close and Close_200ma Please check the comments in the code below for details. Since Excel is a data visualization tool, we are adding charts directly in Excel. But this is essentially the same chart as the chart.png file we’ve created earlier.
The final saved Excel file has two tabs that look like below:

There is much more styling you can accomplish with this method. Please check out openpyxl documentation .
HTML (Hyper Text Markup Language) is the standard markup language for creating web pages. We can embed an HTML format report easily on a web page, or an email. So it is also popular for different use cases.
We’ll cover two main methods of generating HTML reports in Python. One is the basic one, and the other is to generate one with templates using the library called Jinja 2.
Let’s start with the basic one. We can define HTML code as a Python string, and write/save it as an HTML file.
Here are the general steps of the procedure. You can read it together with the code below.
- Set up multiple variables to store the titles, text within the report
- the head: contains meta information about the HTML page, including the title
- the body: a container for all the visible contents, such as h1 , p , img , table Within the img element, we include the chart.png file saved on your computer. To include the DataFrame as HTML table s, we use the to_html method. For simplicity, we only render the last 3 rows of the DataFrame sp500_history .
- Write the html string as an HTML file
You can open the final HTML report in any modern browser. You can try to match each of the HTML elements to the final report below.

We’ll leave the report as it is. If you want to style this HTML report more, please learn about CSS (Cascading Style Sheets). With CSS, you can control almost everything, including the color of text, font, spacing between elements, background color, and so on.
HTML with template
Besides the basic approach to generate HTML reports, we can also use a templating engine like Jinja2 . With Jinja2 , we can put special placeholders in the template to allow writing code similar to Python syntax; then the template is passed data to render the final document.
So we can easily create an HTML template, then use it with Python-like syntax. This is especially useful when you are using complicated templates for reporting over and over again.
Below are the general steps to use Jinja2 to generate HTML reports:
- Create an HTML template with variables I named it ‘report_template.html’, and saved it under a folder in the current working directory called ‘templates’.

Within such a file, I put in the code below. We are creating the same HTML report as the previous example, but the syntax of Jinja ‘s template is different from Python strings. You can read more about its syntax here . For example, two curly brackets {{...}} are used as placeholders for expressions like variables. We can specify such variable’s value later within this template, which you’ll see soon.
- Create a template Environment object, which will be used to load templates loader=FileSystemLoader('templates') tells Jinja to look for templates stored within a file/folder called ‘templates’. You can use other loader s to load templates in other ways or from other locations, please check the doc for details.
- Load the template from the Environment We load the template file set up earlier called ‘report_template.html’.
- Render the template with variables As you can see, the variables within {{...}} in ‘report_template.html’ are set as specific values. Jinja will embed them within the template.
- Write the template to an HTML file You can open the HTML file in any modern web browser. It should look the same as the previous example of HTML report.

You might wonder, Jinja2 doesn’t seem to be very impressive in this example? It seems similar to the basic approach, except that we use some Jinja2 methods versus the f-string. But imagine if you have a much more complicated report, and you want to reuse it, then Jinja would make it much easier.
Now you have the report in HTML format, what if you also want PDF documents to share with a broader audience? We can use a package called WeasyPrint to convert HTML to PDF.
Using the below code, we convert the HTML file ‘html_report_jinja.html’ to a PDF file called ‘weasyprint_pdf_report.pdf’, with an inline CSS stylesheet. Within the stylesheet, we specified the page size, margin, and the table header and cell border.
The final result is a nice looking PDF below.

What if you’re not familiar with HTML, you just want the PDF format report? Python also has a solution for that. We’ll use this Python package called FPDF .
I would strongly suggest you read the short minimal example tutorial on the FPDF website before using the package.
The challenge to generate our report with FPDF is to show the tables of data. So before using FPDF , we define a function below to loop through the columns and rows of a DataFrame to display it on cells in the PDF.
Then, we can use FPDF to display the report. The general procedure is:
- Set up basic setting for a PDF page with FPDF
- Lay out each item we want to see in the report Please see the details in the comments below. It is helpful to match the code with the final PDF.
- Output the PDF file
The final PDF report looks like below.

You might have heard about another popular tool called ReportLab . We picked FPDF since it seems to be easier to learn.
In summary, you’ve learned examples of using Python to generate reports as Excel, HTML (with template), and PDF.
Each of them is good for different scenarios:
- If you want an Excel file, then do Excel
- If you want to embed HTML to web pages, or are just good at HTML, use HTML. You can also convert HTML to PDF after
- If you only want PDF, you can go with PDF directly too
Each of these methods/packages has a lot more techniques. Hope you got the basics within this tutorial, and are ready to explore details on your own!
After generating reports using Python, it is also convenient to automatically send emails to share the reports. Please check out How to Send Emails using Python: Tutorial with examples .
Further learning : if you want an interactive web-based report/dashboard, we highly recommend plotly Dash . You can either take our comprehensive introductory course: Python Interactive Dashboards with Plotly Dash , or read our article with an example: 6 Steps to Interactive Python Dashboards with Plotly Dash .
We’d love to hear from you. Leave a comment for any questions you may have or anything else.
- Automation , Data Science , Excel report , HTML , PDF , Python Report , Python reporting , Report Generation
7 thoughts on “How to generate Reports with Python (3 Formats/4 Tools)<br /><div style='color:#7A7A7A;font-size: large;font-family:roboto;font-weight:400;'> As Excel, HTML, PDF</div>”

Que buenos ejemplos. Muchas gracias.

I found this library than better in terms of efficiency: https://github.com/MatteoGuadrini/pyreports
Thanks for the suggestion, John

Is there a way to create nice tables with nice headers and colour formatting and add dynamic data from dataframes into them and then paste those tables in Word? I meed to produce a final document in Word. I’m using the docx library now.
Is there a way to include a table of contents in your Word document and your html document from python?
Hi Runy, we’ve never tried to do that in Word so sorry can’t help.

Hi there, we have an open-source library for creating reports using Python that also may be helpful! You can find it at https://datapane.com / https://github.com/datapane/datapane .
If you want to jump straight in, here are the docs: https://docs.datapane.com/reports/overview/
Leave a Comment Cancel Reply
Your email address will not be published. Required fields are marked *
Save my name, email, and website in this browser for the next time I comment.
More recent articles

How to build XGBoost models in Python With a step-by-step example
This is a practical guide to XGBoost in Python. Learn how to build your first XGBoost model with this step-by-step tutorial.

What is gradient boosting in machine learning: fundamentals explained Must read before implementing
This is a beginner’s guide to gradient boosting in machine learning. Learn what it is and how to improve its performance with regularization.

What are Python errors and How to fix them
This is a tutorial to Python errors for beginners. Learn their types and how to fix them with general steps.
Learn Python for Data Analysis

with a practical online course
lectures + projects
based on real-world datasets
We use cookies to ensure you get the best experience on our website. Learn more .
Last updated on June 3, 2020
5 Python Libraries for Reporting and Factsheets
Posted by Felix Zumstein - Comments
Python is a popular tool for all kind of automation needs and therefore a great candidate for your reporting tasks. There is a wealth of techniques and libraries available and we’re going to introduce five popular options here. After reading this blog post, you should be able to pick the right library for your next reporting project according to your needs and skill set.
Table of Contents
Plotly dash.
Before we begin, here is a high level comparison of the libraries presented in this post:
I am probably not exaggerating when I claim that almost all reporting in Python starts with Pandas . It’s incredibly easy to create Pandas DataFrames with data from databases, Excel and csv files or json responses from a web API. Once you have the raw data in a DataFrame, it only requires a few lines of code to clean the data and slice & dice it into a digestible form for reporting. Accordingly, Pandas will be used in all sections of this blog post, but we’ll start by leveraging the built-in capabilities that Pandas offers for reports in Excel and HTML format.
Pandas + Excel
Required libraries : pandas , xlsxwriter
If you want to do something slightly more sophisticated than just dumping a DataFrame into an Excel spreadsheet, I found that Pandas and XlsxWriter is the easiest combination, but others may prefer OpenPyXL . In that case you should be able to easily adopt this snippet by replacing engine='xlsxwriter' with engine='openpyxl' and changing the book/sheet syntax so it works with OpenPyXL:
Running this will produce the following report:

Of course, we could now go back to the script and add more code to style it a bit nicer, but I leave this as an exercise to the reader…
Pandas + HTML
Required libraries : pandas , jinja2
Creating an HTML report with pandas works similar to what’ve just done with Excel: If you want a tiny bit more than just dumping a DataFrame as a raw HTML table, then you’re best off by combining Pandas with a templating engine like Jinja :
First, let’s create a file called template.html :
Then, in the same directory, let’s run the following Python script that will create our HTML report:
The result is a nice looking HTML report that could also be printed as a PDF by using something like WeasyPrint :

Note that for such an easy example, you wouldn’t necessarily need to use a Jinja template. But when things start to become more complex, it’ll definitely come in very handy.
xlwings allows you to program and automate Excel with Python instead of VBA. The difference to XlsxWriter or OpenPyXL (used above in the Pandas section) is the following: XlsxWriter and OpenPyXL write Excel files directly on disk. They work wherever Python works and don’t require an installation of Microsoft Excel. xlwings, on the other hand, can write, read and edit Excel files via the Excel application, i.e. a local installation of Microsoft Excel is required. xlwings also allows you to create macros and user-defined functions in Python rather than in VBA, but for reporting purposes, we won’t really need that.
While XlsxWriter/OpenPyXL are the best choice if you need to produce reports in a scalable way on your Linux web server, xlwings does have the advantage that it can edit pre-formatted Excel files without losing or destroying anything. OpenPyXL on the other hand (the only writer library with xlsx editing capabilities) will drop some formatting and sometimes leads to Excel raising errors during further manual editing.
xlwings (Open Source)
Replicating the sample we had under Pandas is easy enough with the open-source version of xlwings:

So where does all the formatting come from? The formatting is done directly in the Excel template before running the script. This means that instead of having to program tens of lines of code to format a single cell with the proper font, colors and borders, I can just make a few clicks in Excel. xlwings then merely opens the template file and inserts the values.
This allows us to create a good looking report in your corporate design very fast. The best part is that the Python developer doesn’t necessarily have to do the formatting but can leave it to the business user who owns the report.
Note that you could instruct xlwings to run the report in a separate and hidden instance of Excel so it doesn’t interfere with your other work.
xlwings PRO
The Pandas + Excel as well as the xlwings (open source) sample both have a few issues:
- If, for example, you insert a few rows below the title, you will have to adjust the cell references accordingly in the Python code. Using named ranges could help but they have other limitations (like the one mentioned at the end of this list).
- The number of rows in the table might be dynamic. This leads to two issues: (a) data rows might not be formatted consistently and (b) content below the table might get overwritten if the table is too long.
- Placing the same value in a lot of different cells (e.g. a date in the source note of every table or chart) will cause duplicated code or unnecessary loops.
To fix these issues, xlwings PRO comes with a dedicated reports package:
- Separation of code and design : Users without coding skills can change the template on their own without having to touch the Python code.
- Template variables : Python variables (between double curly braces) can be directly used in cells , e.g. {{ title }} . They act as placeholders that will be replaced by the values of the variables.
- Frames for dynamic tables : Frames are vertical containers that dynamically align and style tables that have a variable number of rows. To see how Frames work, have a look at the documentation .
You can get a free trial for xlwings PRO here . When using the xlwings PRO reports package, your code simplifies to the following:
All that’s left is to create a template with the placeholders for title and df :

Running the script will produce the same report that we generated with the open source version of xlwings above. The beauty of this approach is that there are no hard coded cell references anymore in your Python code. This means that the person who is responsible for the layout can move the placeholders around and change the fonts and colors without having to bug the Python developer anymore.
Required libraries : pandas , dash
Plotly is best known for their beautiful and open-source JavaScript charting library which builds the core of Chart Studio , a platform for collaboratively designing charts (no coding required).
To create a report though, we’re using their latest product Plotly Dash , an open-source framework that allows the creation of interactive web dashboards with Python only (no need to write JavaScript code). Plotly Dash is also available as Enterprise plan .
How it works is best explained by looking at some code, adopted with minimal changes from the official getting started guide:
Running this script and navigating to http://localhost:8050 in your browser will give you this dashboard:

The charts look great by default and it’s very easy to make your dashboard interactive by writing simple callback functions in Python: You can choose the year by clicking on the slider below the chart. In the background, every change to our year-slider will trigger the update_figure callback function and hence update the chart.
By arranging your documents properly, you could create an interactive web dashboard that can also act as the source for your PDF factsheet, see for example their financial factsheet demo together with it’s source code .
Alternatives to Plotly Dash
If you are looking for an alternative to Plotly Dash, make sure to check out Panel . Panel was originally developed with the support of Anaconda Inc. , and is now maintained by Anaconda developers and community contributors. Unlike Plotly Dash, Panel is very inclusive and supports a wide range of plotting libraries including: Bokeh , Altair , Matplotlib and others (including also Plotly).
Required libraries : datapane
Datapane is a framework for reporting which allows you to generate interactive reports from pandas DataFrames, Python visualisations (such as Bokeh and Altair), and Markdown. Unlike solutions such as Dash, Datapane allows you to generate standalone reports which don’t require a running Python server—but it doesn’t require any HTML coding either.
Using Datapane, you can either generate one-off reports, or deploy your Jupyter Notebook or Python script so others can generate reports dynamically by entering parameters through an automatically generated web app.
Datapane (open-source library)
Datapane’s open-source library allows you to create reports from components, such as a Table component, a Plot component, etc. These components are compatible with Python objects such as pandas DataFrames, and many visualisation libraries, such as Altair:
This code renders a standalone HTML document with an interactive, searchable table and plot component.

If you want to publish your report, you can login to Datapane (via $ datapane login ) and use the publish method, which will give you a URL such as this which you can share or embed.
Hosted Reporting Apps
Datapane can also be used to deploy Jupyter Notebooks and Python scripts so that other people who are not familiar with Python can generate custom reports. By adding a YAML file to your folder, you can specify input parameters as well as dependencies (through pip, Docker, or local folders). Datapane also has support for managing secret variables, such as database passwords, and for storing and persisting files. Here is a sample script ( stocks.py ) and YAML file ( stocks.yaml ):

Publishing this into a reporting app is easy as running $ datapane script deploy . For a full example see this example GitHub repository or read the docs .
Required libraries : pandas , reportlab
ReportLab writes PDF files directly. Most prominently, Wikipedia uses ReportLab to generate their PDF exports. One of the key strength of ReportLab is that it builds PDF reports “at incredible speeds”, to cite their homepage. Let’s have a look at some sample code for both the open-source and the commercial version!
ReportLab OpenSource
In its most basic functionality, ReportLab uses a canvas where you can place objects using a coordinate system:
ReportLab also offers an advanced mode called PLATYPUS (Page Layout and Typography Using Scripts), which is able to define dynamic layouts based on templates at the document and page level. Within pages, Frames would then arrange Flowables (e.g. text and pictures) dynamically according to their height. Here is a very basic example of how you put PLATYPUS at work:
Running this script will produce the following PDF:

ReportLab PLUS
In comparison to the open-source version of ReportLab, the most prominent features of Reportlab PLUS are
- a templating language
- the ability to include vector graphics
The templating language is called RML (Report Markup Language), an XML dialect. Here is a sample of how it looks like, taken directly from the official documentation:
The idea here is that you can have any program produce such an RML document, not just Python, which can then be transformed into a PDF document by ReportLab PLUS.
Python offers various libraries to create professional reports and factsheets. If you are a good at HTML + CSS have a look at Plotly Dash or Panel or write your HTML documents directly with the help of the to_html method in Pandas.
If you need your report as Excel file (or if you hate CSS), Pandas + XlsxWriter/OpenPyXL or xlwings might be the right choice - you can still export your Excel document as PDF file. xlwings is the better choice if you want to split the design and code work. XlsxWriter/OpenPyxl is the better choice if it needs to be scalable and run on a server.
If you need to generate PDF files at high speed, check out ReportLab. It has a steep learning curve and requires to write quite some code but once the code has been written, it works at high speed.
xlwings Newsletter
Everything about xlwings and python in excel.
- Python GUIs
- 1:1 Coaching
- Search Python GUIs
PDF Report generator Generate custom PDF reports using reportlab & pdfrw
If your job involves generating PDF reports, invoices, etc. you have probably thought about automating that with Python. Python has some great libraries for working with PDF files, allowing you to read and write PDFs from scripts. But you can also use these libraries as the basic of simple GUI tools, giving you an easy way to auto-fill or edit PDF reports on the desktop.
In this tutorial we'll be using two libraries to create a custom PDF report filler. The data will be collected using a Qt form: just edit the fields, press "Generate" to get the filled out form in the folder. The two libraries we'll be using here are --
- reportlab which allows you to create PDFs using text and drawing primitives
- pdfrw a library for reading and extracting pages from existing PDFs
While we could use reportlab to draw the entire PDF, it's easier to design a template using external tools and then simply overlay the dynamic content on this. We can use pdfrw to read our template PDF and then extract a page, onto which we can then draw using reportlab . That allows us to overlay custom information (from our app) directly onto an existing PDF template, which we save under a new name.
In this example we're entering the fields manually, but you can modify the application to read the data for the PDF from an external CSV file & generate multiple PDFs from it.
Template PDF
For testing I've created a custom TPS report template using Google Docs and downloaded the page as PDF. The page contains a number of fields which are to be filled. In this tutorial, we'll write a PyQt form which a user can fill in and then write that data out onto the PDF at the correct place.

The template is in A4 format. Save it in the same folder as your script.
If you have another template you'd prefer to use, feel free to use that. Just remember that you'll need to adjust the positions of the form fields when writing it.
Laying out the Form view
Qt includes a QFormLayout layout which simplifies the process of generating simple form layouts. It works similarly to a grid, but you can add rows of elements together and strings are converted automatically to QLabel objects. Our skeleton application, including the full layout matching the template form (more or less) is shown below.
When writing tools to replace/automate paper forms, it's usually a good idea to try and mimic the layout of the paper form so it's familiar.
The above will give us the following layout in a window when run. You can already type things into the fields, but pressing the button won't do anything yet -- we haven't written the code to generate the PDF or hooked it up to the button.

Purchasing Power Parity
Generating a pdf.
For PDF generation using a base template, we'll be combining reportlab and PdfReader . The process is as follows --
- Read in the template.pdf file using PdfReader , and extract the first page only.
- Create a reportlab Canvas object
- Use pdfrw.toreportlab.makerl to generate a canvas object then add it to the Canvas with canvas.doForm()
- Draw out custom bits on the Canvas
- Save the PDF to file
The code is shown below, this doesn't require Qt, you can save to a file and run as-is. When run the resulting PDF will be saved as result.pdf in the same folder.
Since the process of generating the PDF is doing IO, it may take some time (e.g. if we loading files off network drives). Because of this, it is better to handle this in a separate thread. We'll define this custom thread runner next.
Running the generation in a separate thread
Since each generation is an isolated job, it makes sense to use Qt's QRunner framework to handle the process -- this also makes it simple later to for example add customizable templates per job. We're using the same approach seen in the Multithreading tutorial where we use a subclass of QRunner to hold our custom run code, and implement runner-specific signals on a separate subclass of QObject .
We've defined two signals here:
- file_saved_as which emits the filename of the saved PDF file (on success)
- error which emits errors as a string for debugging
We need a QThreadPool to add run our custom runner on. We can add this onto our MainWindow in the __init__ block.
Now we have the generator QRunner defined, we just need to implement the generate method to create the runner, pass it the data from our form fields and the start the generation running.
In this code we first disable the generate_btn so the user can't press the button multiple times while the generation is taking place. We then construct a dictionary of data from our widgets, using the .text() method to get the text from QLineEdit widgets, .value() to get the value from the QSpinBox and .toPlainText() to get the plain text representation of the QTextEdit . We convert the numeric value to a string, since we are placing text.
To actually generate the PDF we create an instance of the Generator runner we just defined, passing in the dictionary of data. We connect the file_saved_as signal to our generated method (defined at the bottom, but not doing anything yet) and the error signal to the standard Python print function: this will automatically print any errors to the console.
Finally, we take our Generator instance and pass it to our threadpool's .start() method to queue it to run (it should start immediately). We can then hook this method up to our button in the __init__ of our main window e.g.
If you run the app now, pressing the button will trigger the generation of the PDF and the result will be saved as result.pdf in the same folder as you started the app. So far we've only placed a single block of text on the page, so let's complete the generator to write all our fields in the correct place.
Completing the generator
Next we need to finish the text placement on the template. The trick here is to work out what the per-line spacing is for your template (depends on the font size etc.) and then calculate positions relative to the first line. The y coordinates increase up the page (so 0,0 is the bottom left) so in our code before, we define the ystart for the top line and then subtract 28 for each line.
For most of our form fields we can just output the text as-is, since there are no line breaks. If the text entered is too long, then it will overflow -- but if we wanted we can limit this on the fields themselves by setting a max length in characters, e.g.
For the comments field, things are a little more tricky. The field can be much longer, and lines need to be wrapped over multiple lines in the template. The field also accepts line breaks (by pressing Enter) which cause problems when written out to the PDF.

As you can see in the above screenshot, the line breaks appear as black squares in the text. The good news is that just removing the line breaks will make it easier to wrap: we can just wrap each line to a specified number of characters.
Since the characters are variable width this isn't perfect, but it shouldn't matter. If we wrap for a line-full of the widest characters (W) any real line will fit.
Python comes with the textwrap library built in, which we can use to wrap our text, once we've stripped the newlines.
But we need to account for the first line being shorter, which we can do by wrapping first to the shorter length, re-joining the remainder, and re-wrapping it, e.g.
The comment markers on the wrap lines (45 & 55) show the wrap length needed to fit a line of Ws into the space. This is the shortest possible line, but not realistic. The values used should work with most normal text.
To do this properly we should calculate the actual size of each length of text in the document font and use that to inform the wrapper.
Once we have the lines prepared, we can print them onto the PDF by iterating through the list and decrementing the y position for each time. The spacing between the lines in our template document is 28.
This gives the following result with some sample lorem ipsum text.

Automatically showing the result
When the file is created our runner returns the filename of the created file in a signal (currently it is always the same). It would be nice to present the resulting PDF to the user automatically, so they can check if everything looks good. On Windows we can use os.startfile to open a file with the default launcher for that type -- in this case opening the PDF with the default PDF viewer.
Since this isn't available on other platforms, we catch the error and instead show a QMessageBox
Create GUI Applications with Python & Qt6 by Martin Fitzpatrick — (PySide6 Edition) The hands-on guide to making apps with Python — Over 10,000 copies sold!
Complete code
The complete code for PyQt5, PySide2, PyQt6 or PySide6 is shown below.
Generating from a CSV file
In the above example you need to type the data to fill in manually. This is fine if you don't have a lot of PDFs to generate, but not so much fun if you have an entire CSV file worth of data to generate reports for. In the example below, rather than present a list of form fields to the user we just ask for a source CSV file from which PDFs can be generated -- each row in the file generates a separate PDF file using the data in the file.
You can run this app using the template.pdf and this example CSV file to generate a few TPS reports.
Things to notice --
- We now generate multiple files, so it doesn't make much sense to open them when they're finished. Instead, we always show the "complete" message, and only once. The signal file_saved_as has been renamed to finished and we've removed the filename str since it's no longer used.
- The QLineEdit to get the filename is disabled so it's not possible to edit directly: the only way to set a source CSV file is to select the file directly, ensuring it's there.
- We auto-generate the output filenames, based on the import filename and the current row number. The filename is taken from the input CSV: with a CSV named tps.csv files will be named tps-1.pdf , tps-2.pdf etc. Files are written out to the folder the source CSV is in.
- Since some rows/files might miss required fields, we use .get() on the row dictionary with a default empty string.
Possible improvements
If you feel like improving on this code, there are a few things you could try
- Make the template and output file location configurable -- use a Qt file dialogs
- Load the field positions from a file alongside the template (JSON) so you can use the same form with multiple templates
- Make the fields configurable -- this gets quite tricky, but you particular types ( str , datetime , int , etc.) can have specific widgets assigned to them
For a complete guide to building GUI applications with Python, see our PyQt6 tutorial . Using another library? We also have a PyQt5 tutorial , PySide6 tutorial and PySide2 tutorial .
Never miss an update
Enjoyed this? Subscribe to get new updates straight in your Inbox.
You can unsubscribe anytime. Just ham, no spam.

Martin Fitzpatrick has been developing Python/Qt apps for 8 years. Building desktop applications to make data-analysis tools more user-friendly, Python was the obvious choice. Starting with Tk, later moving to wxWidgets and finally adopting PyQt.
Interested in contributing to the site? Find out more .
PDF Report generator was published in examples on March 01, 2021 (updated September 13, 2023 ) . Feedback & Corrections welcome in our public issue tracker .
pdf pyqt5 pyqt6 pyside2 pyside6 reportlab report generator threads pyqt python qt qt5 qt6
Python Report Builder | Tutorial

Try Explo . Customer-facing analytics for any platform
Today, businesses heavily rely on reports to gain insights, make informed decisions, and drive growth. Python, a powerful programming language with extensive libraries and frameworks, offers robust tools for building reports efficiently and at scale. In this blog post, we will explore the process of building custom reports in Python, and its key features and provide a step-by-step tutorial for those wishing to create their own custom reports.
Overview of a Python Report Builder
Building reports in Python involves utilizing libraries such as pandas, matplotlib, and seaborn to extract, manipulate, analyze, and visualize data. These libraries provide a seamless workflow for generating professional reports. Users can extract data by establishing various database connections, clean and preprocess data, create a wide range of visualizations, and finally assemble final reports.
Versatility, ease of use, and extensive community support make Python a great choice for report generation. By leveraging Python’s flexibility, businesses can create powerful, data-driven reports that provide valuable insights and facilitate informed decision-making.
Step-by-Step Tutorial
Now that we have a good understanding of what a Python Report Builder is, let’s take a practical look at how to use it.
The first step is connecting to your data source. To build reports in Python, establishing a connection to the data source is crucial. You can connect to various data sources, including SQL databases , CSV files, or APIs. This step ensures that you have the necessary data to generate a report. Once the data is acquired, you can clean and preprocess the data. Pandas is a popular library in Python used for data cleaning tasks, such as handling missing values, removing duplicates, and transforming data types.
Next, you can begin creating the report. Python offers powerful libraries like Matplotlib and Seaborn for data visualization. Matplotlib provides a flexible and customizable interface for creating publication-quality plots. Seaborn, built on top of Matplotlib, simplifies the creation of visually appealing statistical graphs. These libraries allow you to generate a wide range of visualizations, including bar charts, line plots, scatter plots, histograms, and heatmaps. By visualizing data, you can identify patterns, trends, and outliers, enabling you to derive meaningful insights from your data.
With the data prepared and visualizations created, it's time to assemble the report. Python provides libraries like Pandas and XlsxWriter to generate reports in various formats, including Excel spreadsheets and PDFs.These libraries allow you to organize the data, insert visualizations, and customize the report layout. Additionally, you can include text, titles, and captions to provide context and explanations for the insights presented in the report. Python’s flexibility enables you to tailor the report to your specific requirements and create professional-looking deliverables.
The last step is to automate the report. To streamline the reporting process and save time, automation is essential. Python provides several libraries, such as Schedule and CronTab, which enable you to schedule report generation at specific intervals. By automating the report generation, you can ensure that up-to-date insights are readily available to stakeholders without manual intervention.
Data-driven decision-making is paramount for businesses to thrive in today’s competitive landscape. Python’s robust ecosystem of libraries and frameworks provides excellent platform-building reports that extract actionable insights from data. By following the step-by-step tutorial outlined in this blog, you can leverage Python’s capabilities to create automated and visually appealing reports.
Alternative Solution
Additionally, by adopting Explo’s Report Builder, businesses can unlock advanced reporting features and take their data reporting to the next level. Embrace the power of data and make informed decisions with Explo’s Report Builder today.
Recent Blogs

Discover how to use Copilot for Analytics with this step-by-step tutorial. Copilot for Analytics helps simplify report creation, optimize data models, and empower your team with insightful analytics.

Discover how AI Analytics revolutionizes data analysis with machine learning and deep learning technologies. Uncover insights for smarter decisions.
Get Started Now
404 Not found
How to create PDF reports in Python using Pandas and Gilfoyle
To save time, i created a python package for generating pdf reports and presentations. here's how you can use it to create automated ecommerce and marketing reports..

While reporting is often quite a useful way to stay on top of your data, it’s also something you can automate to save time, even if your reports include custom sections of analysis. To speed up the reporting process, I built a Python package that generates stylish looking PDF reports directly from Pandas dataframes.
My PDF report generator package, Gilfoyle, uses the Jinja2 templating library to first populate HTML templates configured to resemble PowerPoint presentations. It then uses Weasyprint to render the HTML to PDF, producing a customisable presentation that looks crisp on any screen.
It’s easy to use, allows you to use HTML and CSS to control the styling, and can be automated to save you more time. In this project I’ll show you how you can use it to create a monthly marketing report for each of your marketing channels based on your Google Analytics data.
Load the packages
First, open a Jupyter notebook and install my GAPandas and Gilfoyle packages by executing the below pip commands in a Jupyter cell, then import the packages. If you’re not pulling live data from the Google Analytics API, you can skip the GAPandas bit and just load your data straight into Pandas.
Configure GAPandas
Next, configure some variables you can use within the Google Analytics API queries that define your JSON client secrets keyfile location, the Google Analytics view ID, and the start and end date for your reporting window. I use a 13-month period, since this shows the full year, plus the same month last year, allowing year-on-year change metrics to be calculated.
Create a monthly report for all channels
Now GAPandas is set up, we can make use of the monthly_ecommerce_overview() helper function in GAPandas. You can write your own API queries out yourself if you like, but this makes the process much quicker and easier and cuts down massively on code repetition. The query below will fetch the key metrics for all sources and mediums and group the data by month and year.
Create an organic search report
To create the data for your other marketing channels, it’s simply a case of passing in the required Google Analytics API filter parameter to the filters argument. Here, we’re setting the argument to ga:medium==organic to return only the data on organic search.
Create a direct traffic report
We can now repeat the process for direct (or untracked) sessions, which are identified with the filter ga:medium==(none) .
Create an email traffic report
The way your email traffic is tracked may depend on the utm tracking parameters you’ve configured in your emails, but for my site, they all go neatly under the ga:medium==email tracking parameter.
Create a referral report
Finally, since there’s minimal social or paid search activity on this site, I’ve pulled in the referral traffic from other sites linking in. You can, of course, make these as specific and granular as you want by adding more complex filters or by passing in a segment API query argument.
Assemble your report
Now we’ve got our data into Pandas, we can move on to the creation of the PDF itself, which is done using my Gilfoyle package. To use Gilfoyle, we first instantiate the Report class and tell it the name of our output file, which I’ve called example.pdf , and then use get_payload() to obtain the initial payload.
The get_payload() function returns a Python dictionary, which we can see in its empty form below. All our later functions basically populate this dictionary with pages, which get passed to Gilfoyle and used to render the reports using specially named variables that map to placeholders in the template.
Add a chapter page
For our first page, we’ll add a chapter cover using the add_page() function. We pass in the original payload dictionary from above, define the page_type as a chapter and set the page_title to “Example report”, and the page_subheading to “March 2021”. We reassign the output of add_page() back to the payload dictionary. If you print this, you’ll see that a page has been added to the pages list, which contains the placeholder values for our template.

Add a report
Next, we’ll take our df_all dataframe containing the Google Analytics data for all channels, and add it to a report. To do this, we repeat the process above but set the page_type to report , and the layout to simple . We then pass the df_all dataframe to the page_dataframe value. I’ve set this to head(13) so it displays the first 13 rows in the dataframe.
If you display the revised payload returned from the last add_page() function, you’ll notice that our new page has been added to the pages list in the dictionary. Gilfoyle has converted the original Pandas dataframe into an HTML table, added some styling elements to improve its appearance, and written it back to the dictionary, so it can be inserted into the template.

Adding metrics to your report
By default, if you create a report with the simple layout, Gilfoyle will just include a table. However, with a little extra effort you can also include metrics, and a range of other features. To add metrics we need to create a Python list called metrics which contains a dictionary for each metric “tile”. The metric tile requires a metric_title , i.e. Sessions, the value of the metric in the current period, and the value of the metric in the previous period.
For my report, I want to select a bunch of common metrics, and show the value in the most recent month, and the value in the same month last year. For the df_all dataframe, the value for the Sessions metric is located at loc[0] , while the value for the same period last year is located at loc[12] , so my individual metric data would look like this.
If you print the output of the metrics list, you’ll see that Gilfoyle has included the metric_title as “Sessions”, and has extracted “23376” as the value in the last period, and has calculated that this is “Up 37% on last year”. All we need to do now, is repeat this process for each of the metrics we want to show on our report page.

Render a simple report
Now we’ve got a chapter and a simple report, one with metrics and one without, let’s render the output to PDF. When doing this, Gilfoyle will first create the template in HTML and then save the output to pdf . All you need to do is run create_report() and provide the payload dictionary and the output type.
Create a full report covering all channels
Here’s the report we generated as a PDF. In seconds, Gilfoyle has taken the outputs of our Pandas dataframes, which were created by querying your Google Analytics data, and has created a fairly attractive PDF report containing monthly data on each metric, as well as a range of metric tiles, which make it easier to see what’s improved and what hasn’t.
There’s loads more you can do with Gilfoyle, including adding in commentary, alert messages, graphs, and much more. This is just scratching the surface, but it should be plenty to get you up and running and should help you save valuable time building reports and presentations at work.
Matt Clarke, Saturday, April 24, 2021

How to analyse Google Analytics demographics and interests with GAPandas

How to use sort_values() to sort a Pandas DataFrame

How to calculate abandonment and completion rates using the Google Analytics API

How to identify SEO keyword opportunities with Python

How to drop Pandas dataframe rows and columns

How to create an ABC XYZ inventory classification model

How to use Pandas from_records() to create a dataframe

How to calculate an exponential moving average in Pandas

How to use the Pandas map() function

How to use Pandas pipe() to create data pipelines

How to use Pandas assign() to create new dataframe columns

How to measure Python code execution times with timeit
Other posts you might like.

How to use the Pandas truncate() function
Have you ever needed to chop the top or bottom off a pandas dataframe, or extract a specific section from the middle if so, there’s a pandas function called truncate()....

How to use Spacy for noun phrase extraction
Noun phrase extraction is a natural language processing technique that can be used to identify and extract noun phrases from text. noun phrases are phrases that function grammatically as nouns....

How to use the Pandas filter() function
The pandas filter() function is used to filter a dataframe based on the column names, rather than the column values, and is useful in creating a subset dataframe containing only..., get the newsletter.
- Datascience Portfolio
- Dissertation
- Comment Policy
- Advanced Criminology (Undergrad) Crim 3302
- Communities and Crime (Undergrad) Crim 4323
- Crim 7301 – UT Dallas – Seminar in Criminology Research and Analysis
- Crime Science (Graduate) Crim 7381
- GIS in Criminology/Criminal Justice (Graduate)
- Crime Analysis (Special Topics) – Undergrad
- Code Snippets TOC

Andrew Wheeler
Creating automated reports using python and jupyter notebooks.
Deborah Osborne had a chat with Chris Bruce the other day about general crime analysis, and they discussed the regular reading of reports. I did this as well when I worked at Troy New York as the lone analyst. I would come in and skim the ~50 reports for the prior day.
The chief and mayor wanted a breakdown of particular noteworthy events, so I would place my own notes in a spreadsheet and then make a daily report. My set up was not fully automated but close – I had a pretty detailed HTML template, and once my daily data was inputted, I would run a SPSS script to fill in the HTML. I also did a simple pin map in batch geo (one thing that was not automated about it) and inserted into the report.
I had two other quite regular reports I would work on. One was a weekly command staff report about overall trends and recent upticks, the other was a monthly Compstat meeting going over similar stats. (I also had various other products to release – detective assignments/workload, sending aggregate stats to the Albany Crime Analysis Center.)
If I had to do these again knowing what I know now, I would automate nearly 100% of this work in python. For the reports, I would use jupyter notebooks (I actually do not like coding in these very much, I much prefer plain text IDEs, but they are good for generating nice looking reports I will show.)
Making Reports in Jupyter Notebooks
I have provided the notes to fully automate a simple report here on Github . To replicate, first you need to download the Dallas PD open data and create a local sqlite database (can’t upload that large of file to github).
So first before you start, if you download the .py files, you can run at the command prompt something like:
Just replace the cd path to wherever you saved the files on your local machine (and this assumes you have Anaconda installed). Then once that is done, you can replicate the report locally, but it is really meant as a pedogological tool – you can see how I wrote the jupyter notebook to query the local database. For your own case you would write the SQL code and connection to whereever your local crime data is store.
Here is an example of how you can use string substitution in python to create a query that is date aware for when the code is run:

Part of the hardest part of making standardized reports is you can typically make the data formatted how you want, but to get little pieces looking exactly how you want them is hard. So here is a default pivot table exported in a Jupyter notebook for some year to date statistics ( note the limitations of this , why I prefer graphs and do not show a percent change).

And here is code I wrote to change font sizes and insert a title. A bit of work, but once you figure it out once you are golden.

You can go look at the notebook itself, but I also have an example of generating a weekly error bar chart (much preferred over the Compstat YTD tables):

Final note, to compile the notebook without showing any code (the police chief does not want to see your python code!), it looks like this from the command line.
I have further notes in the github page on automating this fully via bat files for windows, renaming files to make them update to the current date, etc.
Why Automate?
I know some analysts are reading this and thinking to themselves – I can generate these reports in 30 minutes using Excel and Powerpoint – why spend time to learn something new to make it 100% automated? There are a few reasons. One is pure time savings in the end. Say for the weekly report you spend 1 hour, and it takes you three work days (24 hours) to fully automate. You will recover your time in 24 weeks.
Time savings is not the only component though. Fully automating means the workflow is 100% reproducible, and makes it easier to transfer that workflow to other analysts in the future. This is an important consideration when scaling – if you need to spend a few hours once a week forever, you can only take on generating so many reports. It is better for your time to do a one time large sink into automating something, than to loan out a portion of your time forever.
A final part is the skills you develop when generating automated reports are more similar to data science roles in the private sector – so consider it an investment in your career as well. The types of machine learning pipelines I create at my current role would not be possible if I could not fully automate. I would only be able to do 2 or maybe 3 projects forever and just maintain them. I fully automate my data pipelines though, and then can hand off that job to a DevOps engineer, and only worry about fixing things when they break. (Or a more junior data scientist can take over that project entirely.)
Share this:
Posted by apwheele on July 10, 2021
https://andrewpwheeler.com/2021/07/10/creating-automated-reports-using-python-and-jupyter-notebooks/
- Dashboards are often not worth the effort | Andrew Wheeler
Leave a comment Cancel reply
- Search for:
Recent Posts
- New preprint and Monitoring Time Between Events
- Power for analyzing Likert items
- Some musings on plagiarism
- Grabbing the NHAMCS emergency room data in python
- Matching mentors to mentees using OR-tools
Site RSS Feeds
- RSS - Posts
- RSS - Comments
Follow Blog via Email
Enter your email address to follow this blog and receive notifications of new posts by email.
Email Address:
Top Posts & Pages
- New preprint and Monitoring Time Between Events
- Making nice margin plots in Stata
- Group based trajectory models in Stata - some graphs and fit statistics
Stack Exchange

- Already have a WordPress.com account? Log in now.
- Subscribe Subscribed
- Copy shortlink
- Report this content
- View post in Reader
- Manage subscriptions
- Collapse this bar
pyreports 1.7.0
pip install pyreports Copy PIP instructions
Released: Apr 19, 2024
pyreports is a python library that allows you to create complex report from various sources.
Verified details
Maintainers.

Unverified details
Project links.
- documentation
GitHub Statistics
- Open issues:
View statistics for this project via Libraries.io , or by using our public dataset on Google BigQuery
License: GNU General Public License v3 (GPLv3) (GNU General Public License v3.0)
Author: Matteo Guadrini
Maintainer: Matteo Guadrini
Tags pyreports, reports, report, csv, yaml, export, excel, database, ldap, dataset, file, executor, book
Requires: Python >=3.7
Classifiers
- OSI Approved :: GNU General Public License v3 (GPLv3)
- OS Independent
- Python :: 3
Project description

pyreports is a python library that allows you to create complex reports from various sources such as databases, text files, ldap, etc. and perform processing, filters, counters, etc. and then export or write them in various formats or in databases.
Test package
To test the package, follow these instructions:
Install package
To install package, follow these instructions:
Why choose this library?
pyreports wants to be a library that simplifies the collection of data from multiple sources such as databases, files and directory servers (through LDAP), the processing of them through built-in and customized functions, and the saving in various formats (or, by inserting the data in a database).
How does it work
pyreports uses the tablib library to organize the data into Dataset object.
Simple report
I take the data from a database table, filter the data I need and save it in a csv file
Combine source
I take the data from a database table, and a log file, and save the report in json format
Report object
Reportbook collection object, tools for dataset.
This library includes many tools for handling data received from databases and files. Here are some practical examples of data manipulation.
Command line
Official docs.
In the following links there is the official documentation , for the use and development of the library.
- Managers: doc
- Executor: doc
- Report: doc
- data tools: doc
- examples: doc
- API: io , core
Open source
pyreports is an open source project. Any contribute, It's welcome.
A great thanks .
For donations, press this

For Telethon
The Telethon Foundation is a non-profit organization recognized by the Ministry of University and Scientific and Technological Research. They were born in 1990 to respond to the appeal of patients suffering from rare diseases. Come today, we are organized to dare to listen to them and answers, every day of the year.

Adopt the future
Acknowledgments
Thanks to Mark Lutz for writing the Learning Python and Programming Python books that make up my python foundation.
Thanks to Kenneth Reitz and Tanya Schlusser for writing the The Hitchhiker’s Guide to Python books.
Thanks to Dane Hillard for writing the Practices of the Python Pro books.
Special thanks go to my wife, who understood the hours of absence for this development. Thanks to my children, for the daily inspiration they give me and to make me realize, that life must be simple.
Thanks Python!
Project details
Release history release notifications | rss feed.
Apr 19, 2024
Jul 14, 2023
Sep 27, 2022
Aug 4, 2022
Jun 27, 2022
Apr 29, 2022
Apr 15, 2022
Aug 5, 2021
Jun 5, 2021
May 26, 2021
Download files
Download the file for your platform. If you're not sure which to choose, learn more about installing packages .
Source Distribution
Uploaded Apr 19, 2024 Source
Built Distribution
Uploaded Apr 19, 2024 Python 3
Hashes for pyreports-1.7.0.tar.gz
Hashes for pyreports-1.7.0-py3-none-any.whl.
- português (Brasil)
Supported by

Modern Data
Generate html reports with python, pandas, and plotly.
The report generated by the IPython notebook described in this post (or this Python script ) can be downloaded here .
Generating reports or dashboards at your company? Consider Plotly Enterprise – fully secure, on-premise instances of Plotly.
Plotly generates rich, interactive graphs using d3.js. You can easily create and embed these graphs into HTML reports to share with your team using a well-known data science language, like Python, MATLAB, or R. This post shows you how using Python and Pandas.
If you’re new to Pandas, we recommend these free, online tutorials:
Learn Pandas collection by Hernan Rojas.
Pandas Cookbook collection by Julia Evans.
Open this IPython notebook to follow along with the steps below.
step 1: create the plotly graphs you want to embed
You can embed any Plotly graph into an HTML report as an iframe. The syntax for embedding is described here .
We recommend generating the graphs and report containing them in the same Python script, as in this IPython notebook . This way, you can automatically generate new reports with the latest data, optionally using a task scheduler like cron.
You can get started with the Plotly Python client in under 5 minutes – see here for a walk-through .
STEP 2: Write a script that creates an html report
The last section of the IPython notebook (or this Python script ) creates this HTML document as a string, then writes it to a file.
We recommend the css libraries Bootstrap and Skeleton for quick, clean styling of HTML reports.
Questions? Suggestions? Reach us through StackOverflow , Twitter , or feedback[at]plot[dot]ly.
Create PDF Documents in Python With ReportLab
Python Assets
ReportLab is an open source toolkit for creating PDF documents from Python. It is a very extensive library with many features, from small texts and geometric figures to large graphics and illustrations, all of which can be included in a PDF. In this post we will be approaching to its general features and main functions to create this type of documents.
The library is simply installed via pip :
The source code is hosted on this Mercurial repository .
First Steps 
ReportLab includes a low-level API for generating PDF documents directly from Python, and a higher-level template language—similar to HTML and the template systems used in web development—called RML. Generally, the second option is usually more convenient for those who must make exhaustive use of the capabilities of the library when generating documents. For the rest of the cases, the low-level API that we will describe in this article will suffice. However, you can find the official documentation for the package in its entirety at this link .
The most basic code that we can find using ReportLab is the one that generates an empty PDF document, which is the following.
The first thing we do is import the reportlab.pdfgen.canvas module, then we create an instance of the canvas.Canvas class passing it the name or path of the file we want to generate as an argument, and finally we call the Canvas.save() method that effectively saves the changes to the document.
While our c object represents the entire file we're working on, a canvas should be thought of simply as a blank sheet of paper on which to write, draw, or whatever. These writing or drawing operations will always occur between the creation of the document (line 3) and the method that saves the changes (line 4).
Let's start, then, by writing our first text in the document (remember that this line is located between the previous two).
Now when you open the hello-world.pdf file you will find our little message in the bottom left corner of the page.
As you may have guessed, the first two arguments passed to drawString() indicate the (x, y) position at which the text will appear. Unlike most popular desktop application development libraries, in ReportLab the origin of the coordinates (that is, the (0, 0) position) is at the bottom left. That means the Y-position increases as you go up the screen, and the X-position increases as you scroll to the right. This inversion of the Y axis can be a bit confusing at first, but it does not present any additional difficulty, just remember these issues when positioning the objects.
That said, it is essential to know what the measurements of each sheet are when generating the document. Height and width correspond to standard A4 measurements, which is used by default when creating a canvas . Sheet dimensions are expressed in points , not pixels, with one point equaling 1/72 inch. An A4 sheet is made up of 595.2 points wide ( width ) and 841.8 points high ( height ).
By creating an instance of canvas.Canvas we can specify an alternate dimension for each of the sheets via the pagesize parameter, passing a tuple whose first element represents the width in points and the second, the height. We said that the default dimensions are those of to the A4 standard; the reportlab.lib.pagesizes module provides the dimensions of other standards, such as letter , which is the most widely used in the United States.
Thus, to create a document with the dimensions used in the United States, we would do the following.
And to use the dimensions of standard A4:
Which results in a document equal to the first one we created, because pagesize is A4 by default.
Now that we know the height and width of our sheet, we can use them to calculate different positions within it. For example, to write our message in the upper left corner with margins of (approximately) 50 points:
In this case we have added a call to c.showPage() before saving the document. This method tells ReportLab that we have finished working on the current sheet and want to move on to the next one. Although we haven't worked with a second sheet yet (and it won't appear in the document until anything has been drawn) it's good practice to remember to do so before calling c.save() .
We'll come back to writing later, first let's look at how to draw some basic geometric shapes and lines.
Geometric Shapes and Lines 
ReportLab allows you to draw lines, rectangles, circles and other figures in a simple way. For example, to draw a line we call the line() method indicating the position of the two points of the segment: x1, y1, x2, y2 .
For a rectangle, rect(x, y, width, height) .
roundRect() operates similarly, but a fifth argument indicates the radius by which the ends are curved.
In the case of circles, the position of the center is indicated followed by the radius.
Lastly, for ellipses the arguments are similar to those for lines.
Putting all this together we can generate a PDF document like the following.

Other methods for generating shapes include bezier() , arc() , wedge() , and grid() . We will talk about the latter at the end of the article.
So far, both the text and the figures that we have drawn have used the default styles (basically black and white colors). You may have noticed that the functions we have been using do not support arguments such as foreground or background to indicate the color of each drawing in particular. Instead, the styles are set directly on the canvas (the sheet), and all operations on the sheet that follow this setting will use the indicated styles. When we change the sheet ( showPage() ), the styles are lost and must be set again if necessary.
So, for example, the setFillColoRGB() method sets the fill color of any object drawn on the sheet, so the following code outputs the text "Hello world!" and a square both in red.
Note that functions that draw shapes include the fill argument ( False by default) to indicate whether they should be colored.
Also, the setStrokeColorRGB() method sets the border color of shapes.
And to alter the font and size of the text drawn via drawString() , we use setFont() .
Although drawString() is sufficient for some words, it is somewhat inconvenient when drawing medium or large texts, since it is not capable of accepting line breaks. For tasks like this, ReportLab includes text objects , a more specialized way of drawing text.
At first we must create the proper object, indicating where we want to position the text.
Once this is done, we proceed to configure the different styles from the created object. For example, here we also have a setFont() method, but it acts on this particular object and not on the rest of the sheet.
Via the textLine() method we add lines of text to our object.
Once the text is written, we draw it on the sheet.
Other methods for formatting text include setCharSpace() , setWordSpace() , and setLeading() , which take the size of the distance as an argument (in points) between respectively two characters, two words, and two lines.
To insert images in a PDF document, ReportLab makes use of the Pillow library, which is simply installed via pip install Pillow .
The drawImage() method takes as arguments the path of an image (it supports multiple formats such as PNG, JPEG and GIF) and the (x, y) position at which you want to insert it.
We can shrink or enlarge the image by indicating its dimensions via the width and height arguments.
When we need to make calculations from the dimensions of an image, it is convenient to open it first via ImageReader() . For example, if we want to place an image in the upper left corner of the sheet, it will be necessary to know a priori the height of the image to calculate the position on the Y axis:
When generating grids, ReportLab makes our work easier by providing the grid() method, instead of having to do it manually via line() or lines() functions, which takes as its first argument a list of positions in X and as its second a list of positions in Y.
And here is the result:

As you may have noticed, xlist indicates the positions on the X axis of the start of each of the vertical lines, while ylist indicates the start (on the Y axis) of the horizontal ones. Based on this information, the library is in charge of constituting the grid in its entirety.
As an illustration, consider the following code that generates, using this method, a grid of students with their respective grades.

(If you are from the US, think of 10-1 grades as A-F grades, "Approved" as "Passing", and "Disapproved" as "Not passing".)
Conclusion 
We have examined the main features of ReportLab, although it is only a small selection of its vast collection of functionalities as we have discussed at the beginning of the article. Those who require a more exhaustive use of the library will have already known the basics and I refer them once again to the official documentation to get involved in the most complex tools.
How to Automate Data Exports and Email Reports with Python – a Step-by-Step Guide

In today's data-driven world, automation is key to streamlining tasks and saving time. In this beginner-friendly tutorial, I'll walk you through the process of automating data exports from a PostgreSQL database and sending them as an email attachment using Python.
This step-by-step guide will help you grasp the fundamentals of working with databases, data manipulation, and email communication, all while automating these processes with a Python script.
Business Context
Imagine you're a part of an organization where your managers expect a weekly report filled with valuable insights. But creating this report is far from a straightforward task.
To get the information you need, you have to manually run ten different database queries, gather the results, and then meticulously compile them into an Excel spreadsheet. It's a time-consuming and error-prone process that can leave you exhausted.
In this scenario, wouldn't it be a game-changer if Python could take the reins and handle this entire process for you?
Picture this: Every week, without any manual intervention, Python seamlessly extracts the required data, compiles it into a neat Excel sheet, and even sends it off to your managers like clockwork.
This tutorial will help you learn how to do this. I'll walk you through the steps to automate this process, making your weekly or monthly reporting a breeze, and freeing you up to focus on more critical tasks.
Table of Contents
Prerequisites, how to set up your virtual environment, how to set up your sample database, how to set up logging and environment variables, how to extract the data from the database, how to structure the booking data with the bookinginfo class, how to convert the data into an excel sheet, how to combine the functionalities, how to send an email with the bookings data report, how to test the flow, how to schedule the application, wrapping up.
Before you get started, make sure you have the following:
- Python installed on your computer. You can download Python from Python.org .
- Basic knowledge of the Python programming language
- Familiarity with sending emails in Python
- PostgreSQL installed on your computer. You can download PostgreSQL from here .
Before you start coding, you'll need to make sure you have all the necessary tools and libraries installed.
To ensure that you have a clean and isolated environment, you'll create a virtual environment using venv .
Create a project directory and navigate to it in the terminal:
Create a virtual environment named env using the following command:
Python now ships with the pre-installed venv library to create virtual environments.
Activate the virtual environment like this:
Note: if you're on Windows, you'll need to use source env/Scripts/activate to activate the environment.
You should see (env) in your terminal prompt, indicating that the virtual environment has been activated.
How to Install the Required Libraries
Now that you've created the virtual environment, you can install the following libraries:
- psycopg2 : Python adapter for PostgreSQL, enabling Python applications to interact with PostgreSQL databases.
- pandas : A versatile data manipulation and analysis library for Python, ideal for working with structured data.
- xlsxwriter : Python module for creating and formatting Excel (XLSX) files, useful for generating reports and spreadsheets.
To install the libraries, run the following command:
In this section, I will guide you through setting up a demo database named "airlines" that we'll use throughout this tutorial. The database includes three tables: bookings , flights , and airports_data .
I will provide you with an SQL script file named airlines_db.sql that creates the database and populates it with sample data. To set up the database, you will need PostgreSQL installed on your system.
Download and Install the Database
- Download the SQL script file "airlines_db.sql" from here .
- Open your terminal or command prompt.
- Use the following command to install the database. Make sure you have the PostgreSQL command-line tools installed and that you can access the psql command. Replace postgres with your PostgreSQL username if it's different.
This command will execute the SQL script and create the "airlines" database with the bookings , flights , and airports_data tables.
Schema Description
The main schema in the database is bookings . Let's take a closer look at the tables in the "airlines" database:

Table bookings.bookings
The "bookings" table is designed to store crucial information about bookings made for flights. Each booking is uniquely identified by the book_ref , which is a character(6) field. The total_amount field is a numeric(10,2) type and represents the total cost of the booking.
To track the booking date and time, the table includes a book_date field of type bigint . This table serves as the central repository for booking data and is essential for tracking passenger reservations, costs, and booking dates.
Table bookings.flights
The "flights" table is dedicated to capturing comprehensive details about flights, including information about their statuses, scheduled and actual times of departure and arrival, and other important flight-related data.
The primary key for this table is the flight_id , an integer identifier. Each flight is associated with a specific flight number denoted by the flight_no field, a character(6) type.
To understand the flight's origin and destination, the departure_airport and arrival_airport fields store the departure and arrival airport codes as character(3) types, respectively.
The status field is a character varying(20) that records the flight's status, which must be one of 'On Time,' 'Delayed,' 'Departed,' 'Arrived,' 'Scheduled,' or 'Cancelled.' The table also includes fields for scheduled departure and arrival times ( scheduled_departure and scheduled_arrival ) and actual departure and arrival times ( actual_departure and actual_arrival ).
Furthermore, this table establishes two essential foreign keys: flights_arrival_airport_fkey and flights_departure_airport_fkey , which link to the airport_code in the "airports_data" table. This establishes connections between flights and their respective departure and arrival airports.
Table bookings.airports_data
The "airports_data" table serves as a repository for data related to airports and their geographic locations. Each airport is identified by a unique character(3) code stored in the airport_code field, which also serves as the primary key.
The timezone field, of type text , records the specific timezone of the airport, providing essential information for scheduling and operational purposes. The airport_name field is a character varying type that holds the name of the airport. Additionally, the table includes the city field as a character varying type, indicating the city in which the airport is situated.
These details enable the "airports_data" table to provide a comprehensive overview of airport locations and information. This serves as a reference for the "flights" table through the flights_arrival_airport_fkey and flights_departure_airport_fkey foreign keys, facilitating the association between flights and their respective departure and arrival airports.
In this section, we'll configure logging to provide informative messages and handle errors throughout the code. We'll also set up environment variables to securely store sensitive information and configuration parameters. These practices enhance code readability, maintainability, and security.
Logging Configuration
We will utilize Python's built-in logging module to configure a logging system. Logging is essential for tracking the execution flow of the code and capturing important information or errors.
The logging.basicConfig method is called to define the format of log messages and set the logging level to INFO .
- Format : The format parameter specifies the format of log messages. In this case, each log entry includes a timestamp, log level (for example, INFO, ERROR), and the actual log message.
- Log Levels : We set the logging level to INFO , which means the logger will record informational messages. You can also use higher severity levels, such as WARNING or ERROR , for more critical issues.
You can learn more about logging in Python in this tutorial .
How to Manage Environment Variables
We will create a .env file to manage environment variables. Environment variables are used to store sensitive information and configuration settings, allowing us to keep such data separate from the code.
In this case, we set environment variables for email credentials and database connection details.
Here's a breakdown of the variables:
- EMAIL : The email address to be used for sending emails.
- PASSWORD : The password associated with the email account.
- EMAIL_PORT : The port for the email server (for example, SMTP server). The default is 587 for secure email transmission (TLS/SSL).
- SMTP_SERVER : The SMTP server address, often specific to the email service provider.
- DB_HOSTNAME : The hostname or IP address of the PostgreSQL database server.
- DB_NAME : The name of the PostgreSQL database.
- DB_PORT : The port number for connecting to the database (default is 5432 for PostgreSQL).
- DB_USERNAME : The username for authenticating with the database.
- DB_PASSWORD : The password for the database user.
Make sure you run source .env to load the environment variables.
By using environment variables, sensitive data like passwords and email credentials can be kept separate from the code, reducing the risk of accidental exposure or unauthorized access. The code can access these variables at runtime, ensuring security and flexibility in configuration.
Let's start by setting the database configurations.
The DB_CONFIG dictionary is used to store the configuration parameters for connecting to the PostgreSQL database. These parameters include the host, database name, username, and password. These values can be set through environment variables.
How to Connect to the Database
Before we extract the data from the database, we need to connect to our database. We will use the psycopg2 library to connect to the PostgreSQL database.
We will start by defining a DataExporter class that will contain methods to extract the database and generate the Excel sheet.
The class constructor initializes the DataExporter with the database configuration stored in the DB_CONFIG dictionary .
Next, let's define a method that connects to the database.
The __connect_to_database private method is responsible for establishing a connection to the PostgreSQL database. It uses the psycopg2 library to create a connection and a cursor for executing SQL queries. If the connection fails, it logs an error and raises an exception.
You can learn more about exception handling in Python here .
How to Fetch Data from the Database
Now we'll define another private method that connects to the database and fetches the total number of bookings and the total amount from the database.
This private method retrieves booking data from the database for a specified time range.
It takes two datetime objects as arguments, start_timestamp and end_timestamp . It also constructs a SQL query to retrieve the count of bookings and the total booking amount for that time range.
The query is executed, and if it's successful, the method returns the data as a tuple. We convert the tuple into a list and append the timeframe for which data was extracted to the list. If an error occurs during the database interaction, it logs an error and returns None .
Using the above method, you can extract booking data for various timeframes, whether it's for a week, a month, a year, or any custom time range of your choice.
In this section, we will define a BookingInfo class in booking_info.py , which serves as a structured container for booking data retrieved from the database. The class encapsulates booking-related information, making it easier to work with and present the data.
The BookingInfo class is designed to organize and represent booking data returned from the database. It receives a list of values containing total bookings, total booking amount, and a timestamp as input and converts the total amount to a Decimal type. The class offers methods for accessing and presenting this data in a structured manner.
The constructor of the BookingInfo class takes a data_list as input, which is expected to be a list containing the following elements:
- total_bookings : An integer representing the total number of bookings.
- total_amount : A floating-point value representing the total booking amount.
- timestamp : A timestamp associated with the booking data.
The __init__ method initializes private instance variables ( __total_bookings , __total_amount , and __timestamp ) with the values from the data_list . It also converts the __total_amount to a decimal type for precise handling of monetary values.
The __str__ method is implemented to provide a string representation of the BookingInfo object. It returns a string in the format "Total Bookings: X, Total Amount: $Y", where X is the total number of bookings and Y is the total booking amount formatted as dollars.
Getter Methods
The class provides three getter methods to access the encapsulated data:
- get_total_bookings() : Returns the total number of bookings as an integer.
- get_total_amount() : Returns the total booking amount as a Decimal type.
- get_timestamp() : Returns the timestamp associated with the booking data as a string.
By encapsulating the booking data within the BookingInfo class, the code is more organized, readable, and reusable. This structured approach simplifies the handling of booking information throughout the application, making it more intuitive to work with and present the data.
Now that you can retrieve data from the database for a specific time range, you can also generate an Excel sheet based on the extracted data.
To do this, let's define another private method to create the Excel sheet.
The __convert_to_excelsheet method within the DataExporter class is responsible for structuring and converting extracted booking data into an Excel sheet.
It accepts two input parameters. The first parameter, data , is expected to be a list containing specific booking data. This data includes the total number of bookings, the total booking amount, and a timestamp for which data was extracted. The second parameter, sheet_name , represents the desired name for the Excel sheet that will contain the formatted data.
A key aspect of the method is the structuring of the data. To achieve this, the method initiates the creation of a BookingInfo object, referred to as booking_info . The BookingInfo object provides a structured representation of the booking data, which simplifies the subsequent formatting and presentation.
Following the creation of the booking_info object, a new dictionary called data is generated. This dictionary is designed to structure the data in a format suitable for conversion into an Excel sheet.
The dictionary consists of two key-value pairs:
- The first pair uses an empty string as the key and contains a list with two header values, "Total Bookings" and "Total Amount ($)".
- The second pair uses the timestamp obtained from booking_info.get_timestamp() as the key and includes a list with two elements: the total number of bookings ( booking_info.get_total_bookings() ) and the total booking amount ( booking_info.get_total_amount() ).
This dictionary allows the data to be inserted in the excel sheet as below:

Then, the structured data dictionary is converted into a pandas DataFrame, referred to as df . Dataframes are a commonly used data structures for handling tabular data in Python. This step streamlines the manipulation and export of the data for further processing or visualization.
To create the Excel sheet, the code uses the pd.ExcelWriter context manager with the "xlsxwriter" engine. This context manager ensures that the Excel file is appropriately prepared for data insertion. The sheet_name parameter is supplied to specify the name of the sheet within the Excel file.
The data within the DataFrame, df , is then written to the Excel sheet. The to_excel method is used in conjunction with the writer object, and the index parameter is set to False . This specific configuration excludes the default row numbers that are typically included in Excel sheets.
Now let's write a public method that the users can use to extract the data from the database and convert the extracted data into the Excel sheet file.
This method accepts several parameters, including start_timestamp and end_timestamp , which define the beginning and end of the time period for data extraction. There's also an optional sheet_name parameter that allows the user to specify the name of the Excel sheet. By default, the sheet is named "Bookings Data.xlsx" to provide a convenient default option.
Upon execution, the method initiates the data retrieval process by calling the __fetch_from_database method, an internal private method of the class, with the specified time range.
If the data retrieval is successful and data is available, the method proceeds to call the __convert_to_excelsheet method. This structures and formats the data for insertion into the Excel sheet.
If, on the other hand, no data is available for the provided time range, the method logs an error message and returns "False" to indicate that the Excel sheet generation was unsuccessful.
In this section, you will learn how you can use Python to send an email with a bookings data report as an attachment.
Create a mailer.py file and add the following content:
As usual, we have configured the logger and environment variables in our script.
The core functionality is encapsulated within the send_email function. This function takes three parameters:
- to_email : The recipient's email address.
- subject : The subject of the email.
- attachment_name : The filename of the attachment, which should be the bookings data report in this context.
Within the function, we construct an email message using the MIMEMultipart class. This message includes the sender's email address, recipient's email address, subject, and a plain text body with a simple message.
The script allows attaching the bookings data report as an attachment. It reads the attachment file, encodes it, and adds it to the email message. This ensures that the recipient can easily access and download the data report from the email.
You can learn how you can add attachments while sending emails using Python here .
The create_default_context function from the ssl library creates a secure SSL context for email communication. Finally, the script connects to the SMTP server, logs in using the sender's email address and password, sends the email, and logs a success message upon successful transmission.
Let's finally test the flow of the application.
In this section, we will automate the monthly reports. Create a main.py file and add the following content:
In the above code, we create two timestamp objects, start_timestamp and end_timestamp , to specify a time range. We have the start date set to May 28, 2023 at midnight and the end date set to August 20, 2023 just before midnight.
Next, we create an instance of the DataExporter class, which handles the data export and Excel sheet generation. The generate_excelsheet method of this instance is called with the previously defined timestamps to create a report related to bookings.
Finally, the code sends an email with the generated Excel sheet as an attachment using the send_email function.
Next, our goal is to automate the report scheduling process. We aim to schedule report deliveries for two distinct scenarios: on every Monday for the previous week's data, and on the 1st day of every month for the previous month's information.
To schedule the execution, you will need to install the schedule library:
Once the library is installed, here's how you can do automate the monthly and weekly reports:
The above script uses the schedule library to run the main function daily at midnight. The main function calculates the timestamps for data extraction and Excel sheet generation. After generating the Excel sheet, the script sends it via email to a specified recipient.
If the script runs on a Monday, it sets up to generate a weekly report. It calculates the start_timestamp and end_timestamp for the previous week. The start_timestamp is set to the previous Monday at midnight (00:00:00), and the end_timestamp is set to the previous Sunday just before midnight (23:59:59). The Excel sheet is named "Weekly Report.xlsx."
On the 1st day of the month, the script shifts its focus to generating a monthly report. It calculates the start_timestamp and end_timestamp to encompass the entire previous month. The start_timestamp is set to the first day of the previous month at midnight (00:00:00), while the end_timestamp is set to the last day of the previous month just before midnight (23:59:59). The Excel sheet is named "Monthly Report.xlsx."
In this tutorial, you learned how you can leverage Python to automate generating a report and sending it to email recipients. I hope you found the tutorial helpful!
Future Scope
- You can add the email recipients in a database and fetch their list from there instead of hardcoding them in the code itself. This will make the application more configurable.
- You can also use Cron Jobs to automate the execution of the script every day at midnight. In that case, you won't need the schedule library.
Here's a link to the Github Code Repository .
Application Developer at Thoughtworks India
If you read this far, thank the author to show them you care. Say Thanks
Learn to code for free. freeCodeCamp's open source curriculum has helped more than 40,000 people get jobs as developers. Get started
- How to Make Malware Persistent in Python
Welcome! Meet our Python Code Assistant , your new coding buddy. Why wait? Start exploring now!
Disclaimer: This guide is intended for educational purposes only. Readers are advised not to implement the techniques described on systems they do not own or without proper authorization. The author assumes no responsibility for any misuse of the information provided.
In this guide, you'll learn how to make malware persistent using Python. Like the actual meaning of persistence, in the context of malware, persistence refers to the ability of malicious software to maintain a presence on a system beyond its initial execution. When malware achieves persistence, it ensures that it remains active and operational on the infected system, even after reboots or attempts to remove it.
Say, for example, you built malware that is supposed to give you access to a target's computer ( a reverse shell ), similar to what we built in this tutorial . If you successfully deliver the malware to the target and they execute it, you'll definitely gain access to their system. But the moment they finish working on their computer and shut it down, you lose access. This is the setback this guide aims to address. By making your malware persistent, even if the target shuts their computer down, the moment they turn it back on, because our malware is persistent, it'll get executed again and begin operation on the infected computer.
You may be wondering how this is possible. Well, this is possible because, on most operating systems, files are automatically started (executed) when the system comes on. Luckily for us, these files that are started automatically when the system boots are easily accessible. We can easily add our malicious files to the startup files, and every time the computer boots, our malware will be executed.
Table of contents:
Persistence on Windows OS
Persistence on linux, changed the report_to_file() method, created a new function at the beginning: setup_persistence(), packaging and testing on windows, packaging and testing on linux, additional notes.
Starting with Windows, On your Windows search bar, simply type in regedit . You can also use the Windows key + R , and then type regedit . Whichever you prefer. The regedit command will open up the Windows Registry editor. You should see:
From here, open up HKEY_CURRENT_USER > SOFTWARE > Microsoft > Windows > CurrentVersion > Run .
You should see a screen similar to:
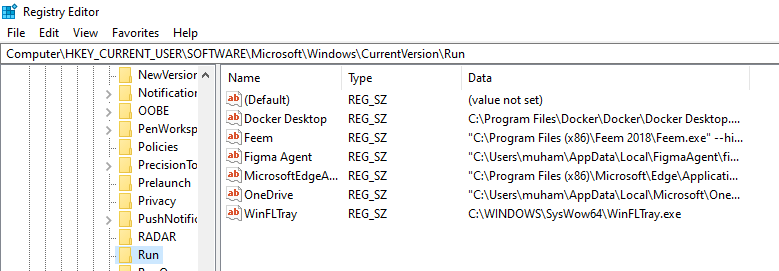
These are the files that are automatically executed when this system comes on. So, all we need to do is add our malware here. Doing that is also simple. We can achieve that from our command prompt.
We'll try to add a new executable to the above location in our registry. Open up your command prompt (cmd) and enter the following command.
This command basically uses the reg utility to manipulate the Windows Registry. Here's a breakdown of each part:
- reg add : This part initiates a registry modification action.
- HKCU : This specifies the registry hive to which the modification will be applied. HKCU stands for HKEY_CURRENT_USER , which is a section of the registry where user-specific settings are stored (as we have seen).
- \Software\Microsoft\Windows\CurrentVersion\Run : This is the registry key (or path) where the modification will occur. Specifically, it's the location where Windows stores programs that should be launched automatically when the current user logs into their account.
- /v Index : This specifies the name of the registry value being modified. In this case, it's creating or modifying a value named Index within the Run key.
- /t REG_SZ : This specifies the data type of the registry value being added or modified. In this case, it's setting the type to a REG_SZ , which means it's a string value.
- /d C:\Users\test : This provides the data for the registry value. Here, it's setting the data to C:\Users\test, which means it's configuring Windows to launch the program located at C:\Users\test automatically when the user logs in.
You may have already guessed that the parameter we'll need to change is the \d . We will copy our malware to a different location on the targets' system - One that is not very interacted with, so they don't suspect it. A good one is AppData .
After copying our malware to AppData , we pass its path to the /d parameter. So essentially, we will tell the registry to run our malware in the AppData upon every system startup.
This is what the registry will look like after running the above command:
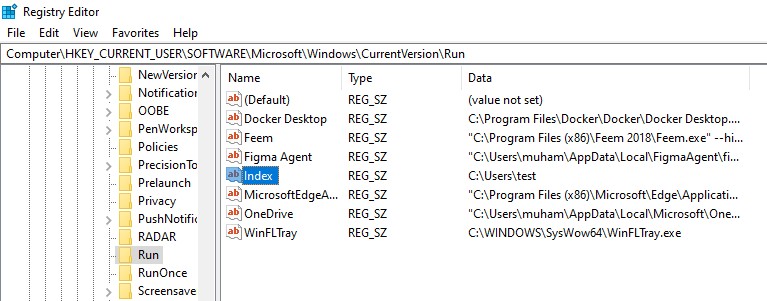
You can see we now have the index included. But this will not do anything because the /d parameter I passed was a dummy one. It does not exist. You can simply right-click Index and delete it as we implement the actual thing soon.
On Linux, there are multiple ways to make a program persist, such as Systemd services, Cron jobs, .bashrc and more.
In this tutorial, we'll make our malware persistent by adding it to the cron table ( crontab ) of the computer. In Linux, crontab is a utility that allows you to schedule commands or scripts to run automatically at specified times or intervals. It is part of the cron service, a time-based job scheduler in Unix-like operating systems.
Essentially, we are going to put our malware in a hidden location, similar to what we did on Windows, and add the location to our crontab , specifying that it should be executed at every startup or reboot.
To access our cron table, open up your Linux terminal and type in:
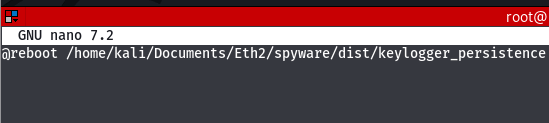
Yours will most likely be blank or include some comments. I just included an application there to explain some concepts. From the entry above, the @reboot specifies that the given executable or application should be executed whenever the system gets started.
Implementing Persistence in Python
Now that we understand persistence, let's implement it in Python. For this demonstration, I'll be using the keylogger that we built in this tutorial . We'll also make it cross-platform to work on Windows and Linux.
For the keylogger, I'll use the same code explained in the said tutorial with some additions to make the program persistent and cross-platform. Don't worry, I'll explain the additions. So open up a new Python file, name it meaningfully like keyboard_persistent.py or keyboard_persistence.py
Essentially, here's the full working code:
I assume you're already familiar with the keylogger tutorial. If not, simply add the above setup_persistence() function (along with its required modules) to any Python program you want to be persistent and call it. Again, we're just using the keylogger tutorial for demonstration purposes.
The next sections outline the changes done to the original keylogger code.
We have extended it to first check the OS the program is executed on. For Windows, instead of creating the KeyloggerLogs folder in the same directory as was implemented in the original keylogger, we are creating it in the Documents folder. This is because we are hiding our keylogger in AppData . Usually, the AppData is not always writable. So we may not see our keystrokes. Also, if the keylogger is being executed on a Linux machine, it creates the KeyloggerLogs folder in the /root/Documents directory.
This method is the main functionality of this tutorial. The setup_persistence() function is designed to achieve persistence on Windows and Linux operating systems by copying the current executable file to a specific location and creating a registry entry or cron job to run the executable on system startup.
For Windows, it copies the executable to the \AppData\ location and creates a registry entry under HKCU\Software\Microsoft\Windows\CurrentVersion\Run to run the executable on startup.
For Linux, it creates a directory ~/.config/KaliStartup and copies the current Python executable ( sys.executable) to that location with the name KaliStartup . It then creates a cron job entry using the crontab command to run the KaliStartup executable on system reboot ( @reboot ).
I used the names MicrosoftEdgeLauncher on Windows and KaliStartup on Linux so that they appear as harmless programs and prevent suspicion. You can name yours whatever flavor (distribution) of Linux you're using. I am using Kali.
Notice the setup_persistence() function is called right after defining it.
Packaging Our Program
We have a full tutorial on how to convert Python files to executables. Check it out here .
Now that we have written code to make our keylogger persistent, let's package it on both OSs using PyInstaller . We also need to install the keyboard module for logging the keystrokes. All are covered in the keylogger tutorial .
Install them using the following command:
It's generally a good practice to package a program on the particular OS it will be executed on. Since our program is cross-platform, we'll package and test it on both Windows and Linux.
On Windows, open up your cmd, navigate to your working directory (where your code is) and run:
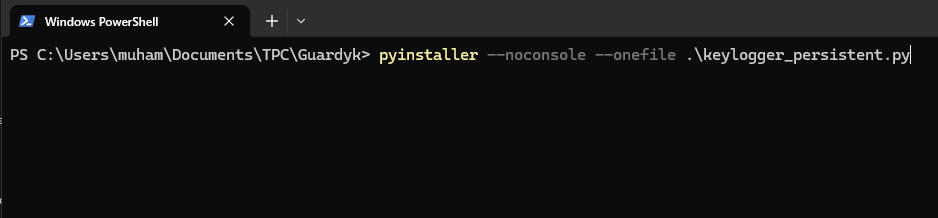
This command, using PyInstaller , converts the Python script keylogger_persistent.py into a standalone executable file ( --onefile ), configured to run without displaying a console window when executed ( --noconsole ).
Give it a minute or two to package your Python file to an executable.
Afterwards, you should see a dist folder in your working directory:
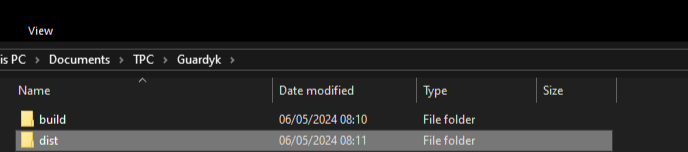
Inside the dist folder, you should see the packaged keylogger :
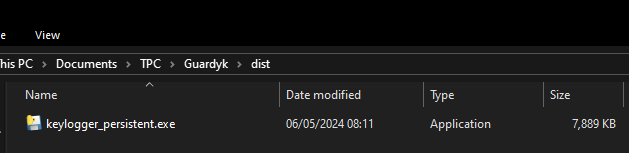
So just double-click this, and your program should start running. Go to your registry and you should see our keylogger being referenced for execution at startup:

In my AppData folder:
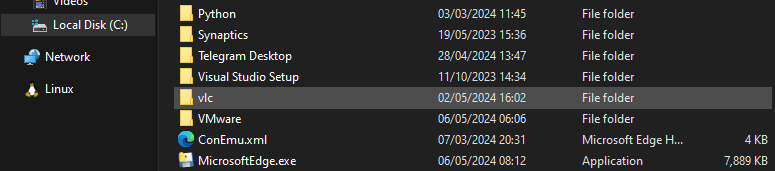
Please ignore the fact that vlc is being highlighted. Our MicrosoftEdge.exe ( keylogger ) is successfully placed in our AppData .
Now let's check our keylogs in KeyloggerLogs folder:
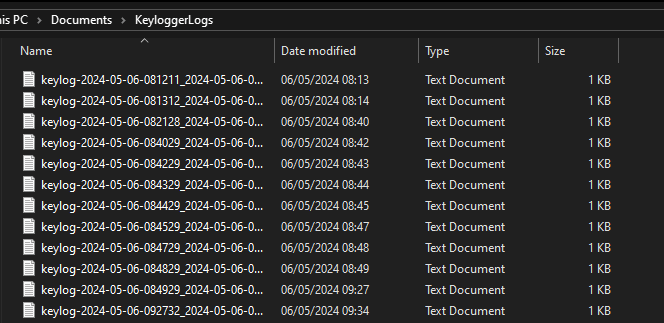
Pretty cool right? Restart your computer as many times as possible and you'll see the program will keep running (logging).
Packaging on Linux is quite similar to Windows. On Linux, usually Pyinstaller is installed by default. But if for some reason you don't have it, you can install it and keyboard by running:
Please note that the keyboard library on Linux can only be used with admin privileges. So for everything will do regarding this program, please do it as an admin.
But remember, that's just for the keyboard module. It has nothing to do with persistence. The restriction is just for the keyboard library. Even without persistence, running a program using the keyboard library requires admin access. So yes, our program is pretty effective.
If you use another variant of malware, such as a reverse shell or spyware , it'll work seamlessly on all users. But this is a demo. You'll see the results anyway.
Moving on, using your terminal, navigate to the directory where your keylogger_persistent.py folder is and run:
Again, this command, using PyInstaller , converts the Python script keylogger_persistence.py into a standalone executable file ( --onefile ), configured to run without displaying a console window when executed ( --noconsole ).
Afterwards, you should see a dist folder:
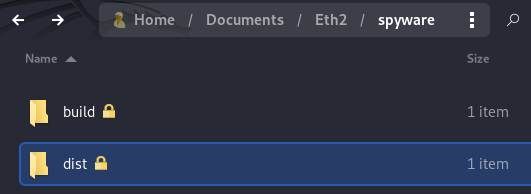
Inside the dist folder, you should see the packaged executable:
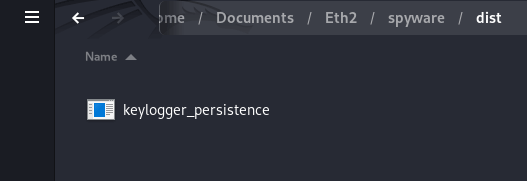
Now that you have seen the exe , you can simply double-click it. I prefer to run my programs from the terminal because I can see if there are any errors. On the terminal, you can navigate to your working directory and run it like this:
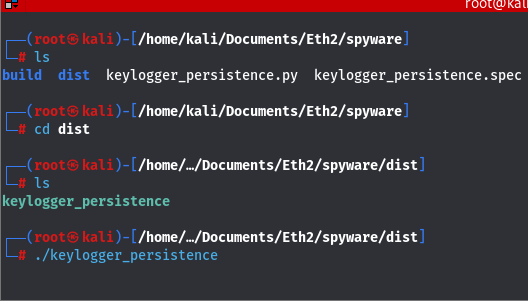
After running the keylogger, open up your crontab by running:
You should see:

We can now see that our keylogger has been added to our cron table. Every time the computer is restarted, our keylogger will be executed.
We can also see the directory where the KaliStartup (keylogger) is saved. /root/.config/KaliStartup/ . Let's browse there to confirm:
Finally, let's check our keylogger files from /root/Documents/Keyloggerlogs :
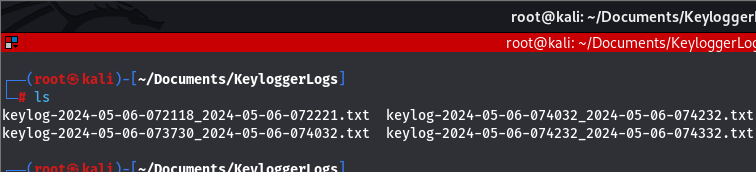
You can use the cat command to read the contents of the files. There you have it. We have successfully made our keylogger persistent on Windows and Linux!
Please know that for testing purposes, we used the txt format to record the keystrokes . In a real-world scenario, you would want to use email reporting to receive the keystrokes. You can simply run the program with report_method="email" instead.
Also, while running this program, my Anti-Virus was on and the program executed successfully. But while testing with other variants of malware (not this keylogger), I noticed that the AV was preventing the program from running. I believe that was because that particular variant was executing system commands.
In a nutshell, if this program gets caught by an AV, just turn it off for testing purposes. But please don't forget to turn it back on.
If you want to build other variants of malware, check out these tutorials:
How to Create a Reverse Shell in Python
- How to Create A Fork Bomb in Python
- How to Make a Ransomware in Python
We also have a comprehensive tutorial on how to convert Python files to executables. Check it out here .
Finally, if you want to level up from being a script kiddie to a pro hacker, check out our Ethical Hacking with Python EBook where we build malware along with awesome 35+ ethical hacking tools!
You can always check the complete code of this tutorial here .
Happy hacking ♥
Liked what you read? You'll love what you can learn from our AI-powered Code Explainer . Check it out!

- How to Build Spyware in Python
Create a spyware in Python in this guide. Learn to build a surveillance tool that captures live video streams via a client-server architecture, with practical insights into network communication and video handling using OpenCV.

- How to Make a Keylogger in Python
Creating and implementing a keylogger from scratch that records key strokes from keyboard and send them to email or save them as log files using Python and keyboard library.

Building a reverse shell in Python using sockets that can execute remote shell commands and send the results back to the server.
Comment panel
Got a coding query or need some guidance before you comment? Check out this Python Code Assistant for expert advice and handy tips. It's like having a coding tutor right in your fingertips!

Join 40,000+ Python Programmers & Enthusiasts like you!
- Ethical Hacking
- Machine Learning
- General Python Tutorials
- Web Scraping
- Computer Vision
- Python Standard Library
- Application Programming Interfaces
- Game Development
- Web Programming
- Digital Forensics
- Natural Language Processing
- PDF File Handling
- Python for Multimedia
- GUI Programming
- Cryptography
- Packet Manipulation Using Scapy
New Tutorials
- How to Make a Pacman Game with Python
- How to Exploit Command Injection Vulnerabilities in Python
- How to Extract Metadata from Docx Files in Python
Popular Tutorials
- How to Convert Speech to Text in Python
- How to Read Emails in Python
- How to Extract Tables from PDF in Python
- How to Encrypt and Decrypt Files in Python
Claim your Free Chapter!

Navigation Menu
Search code, repositories, users, issues, pull requests..., provide feedback.
We read every piece of feedback, and take your input very seriously.
Saved searches
Use saved searches to filter your results more quickly.
To see all available qualifiers, see our documentation .
- Notifications
Have a question about this project? Sign up for a free GitHub account to open an issue and contact its maintainers and the community.
By clicking “Sign up for GitHub”, you agree to our terms of service and privacy statement . We’ll occasionally send you account related emails.
Already on GitHub? Sign in to your account
No module named 'distutils' on Python 3.12 #732
SyberiaK commented Jan 31, 2024
- 👍 1 reaction
sapozhkov commented Feb 21, 2024
- 👍 6 reactions
- ❤️ 3 reactions
Sorry, something went wrong.
Paulprojects8711 commented Mar 16, 2024
ftnext commented Mar 17, 2024
- 👍 2 reactions
No branches or pull requests
- Remember me Not recommended on shared computers
- Customizations
How to access name of the current stage mesh in python.

By [Si...] , September 2, 2022 in Customizations
Recommended Posts
When we are using single mesh to create report, I am able to get the name of imported mesh in python.
gom.app.project.parts[Part].actual.name
But in stage project, I am not able to get the names of Imported mesh. As I change active stage the name of mesh should also change but it is not happening.
In explorer, it is changing with change is stage but when you rename it, it renames the first mesh.
My question is : How to access Current Stage Mesh name in python.
Link to comment
Share on other sites, please sign in to comment.
You will be able to leave a comment after signing in
- Digital Services
- Training Center
- Add-On Development Documentation
- Create New...
IMAGES
VIDEO
COMMENTS
We'll cover two main methods of generating HTML reports in Python. One is the basic one, and the other is to generate one with templates using the library called Jinja 2. Let's start with the basic one. We can define HTML code as a Python string, and write/save it as an HTML file.
Here's how to first page of the report should look like: Image 5 — First page of the PDF report (image by author) Of course, yours will look different due to the different logo and due to sales data being completely random. And that's how you create data-visualization-powered PDF reports with Python. Let's wrap things up next. Conclusion
After you import it, you should always take a look at your dataset and then merely link report to it: report = ProfileReport(df) Now you simply have "to tell" Pandas Profiling to make a report ...
Panel was originally developed with the support of Anaconda Inc., and is now maintained by Anaconda developers and community contributors. Unlike Plotly Dash, Panel is very inclusive and supports a wide range of plotting libraries including: Bokeh, Altair, Matplotlib and others (including also Plotly).
The process is as follows --. Read in the template.pdf file using PdfReader, and extract the first page only. Create a reportlab Canvas object. Use pdfrw.toreportlab.makerl to generate a canvas object then add it to the Canvas with canvas.doForm() Draw out custom bits on the Canvas. Save the PDF to file.
Building reports in Python involves utilizing libraries such as pandas, matplotlib, and seaborn to extract, manipulate, analyze, and visualize data. These libraries provide a seamless workflow for generating professional reports. Users can extract data by establishing various database connections, clean and preprocess data, create a wide range ...
HTML (Hyper Wording Markup Language) is the standard markup language for creating web pages. We can embed an HTML format report easily on one web turn, or the mail. So it is also popular on different use cases. Create Power BI visuals using Python in Power BI Office - Power BI. We'll cover twin main methods of originating HTML reports in Plain.
To create space between cells, you can use the set_xy() method to specify a specific position for the next element or the ln() method to create vertical space. Below you can see a few examples of cells and their layouts. You can find the respective code by the cell name.
Add a chapter page. For our first page, we'll add a chapter cover using the add_page() function. We pass in the original payload dictionary from above, define the page_type as a chapter and set the page_title to "Example report", and the page_subheading to "March 2021". We reassign the output of add_page() back to the payload dictionary. If you print this, you'll see that a page ...
Sample code showing how to use the Python connector to query Snowflake, saving each result as a CSV. To share a report, the API call includes the parameters and destination of the report, e.g. 'send the Daily Report for Berlin to the #team-berlin Slack channel'. The system then builds the report using these parameters and sends it to the ...
So first before you start, if you download the .py files, you can run at the command prompt something like: cd D:\Dropbox\Dropbox\PublicCode_Git\Blog_Code\Python\jupyter_reports python 00_CreateDB.py. Just replace the cd path to wherever you saved the files on your local machine (and this assumes you have Anaconda installed).
Welcome to our new Generate Reports with Python automatically series. You'll generate an example report in different formats.In this Part 4 video, we'll gen...
pyreports is a python library that allows you to create complex reports from various sources such as databases, text files, ldap, etc. and perform processing, filters, counters, etc. and then export or write them in various formats or in databases.
How to Create the Report. Next, we need to create the report using a Python library such as ReportLab or PyPDF2. Here is an example code snippet for creating a PDF report using ReportLab: from reportlab.pdfgen import canvas. # Create a new PDF document. pdf = canvas.Canvas("report.pdf") # Write the report title.
step 1: create the plotly graphs you want to embed. You can embed any Plotly graph into an HTML report as an iframe. The syntax for embedding is described here. We recommend generating the graphs and report containing them in the same Python script, as in this IPython notebook. This way, you can automatically generate new reports with the ...
First Steps. ReportLab includes a low-level API for generating PDF documents directly from Python, and a higher-level template language—similar to HTML and the template systems used in web development—called RML. Generally, the second option is usually more convenient for those who must make exhaustive use of the capabilities of the library ...
There is a huge list of libraries that we can use for generating the reports from the Excel files in Python e.g., xlrd, openpyxl, pandas, numpy, xlsxwriter, matplotlib, plotly. Let's take an example of a small dataset stored in a file data.xlsx to demonstrate automating the calculation of total sales. In this example we will be using: 1.
Applying Excel formulas through Python. You can write Excel formulas through Python the same way you'd write in an Excel sheet. For example, let's say we wish to sum the data in cells B5 and B6 and show it on cell B7 with the currency style. sheet['B7'] = '=SUM(B5:B6)'. sheet['B7'].style = 'Currency'.
Welcome to our new Generate Reports with Python automatically series. You'll generate an example report in different formats.In this Part 1 video, we'll go ...
Dataframes are a commonly used data structures for handling tabular data in Python. This step streamlines the manipulation and export of the data for further processing or visualization. To create the Excel sheet, the code uses the pd.ExcelWriter context manager with the "xlsxwriter" engine.
In order print Tabular Data in Terminal use tabulate module. from tabulate import tabulate. # Create a header of the table data. table_heading = ["Heading 1", "Heading 2", "Heading 3"] # a list of list containing inner list as rows of table.
🔮Welcome to the Python, Jupyter Notebook Series🔮In this video, join TD as he demonstrates the process of creating custom PDF templates using Python, Jupyt...
Writing the code (I am using Jupyter Notebook, It works smoothly with Pandas and matplotlib). Importing libraries and reading file. import pandas as pd import numpy as np data = pd.read_csv ...
Module 1 • 8 hours to complete. In this module, you will demonstrate your skills in Python - the language of choice for Data Science and Data Analysis. You will apply Python fundamentals, Python data structures, and work with data in Python. By working on a real project, you will model a Data Scientist or Data Analyst's role, and build a ...
renderPDF.draw(line_plot(), the_canvas, 0, 0) the_canvas.showPage() the_canvas.save() The arguments to renderPDF.draw() are (in order) the Drawing object you already know how to create, the canvas onto which you want to paste the drawing and the horizontal and vertical position of the drawing on the page (as measured from the bottom left).
We'll try to add a new executable to the above location in our registry. Open up your command prompt (cmd) and enter the following command. $ reg add HKCU\Software\Microsoft\Windows\CurrentVersion\Run /v Index /t REG_SZ /d C:\Users\test. This command basically uses the reg utility to manipulate the Windows Registry.
Workflow to create a table in KNIME. Source: print screen by the author. We need this new node to extract the year number from the 'Date' column. Then, using the 'GroupBy' node, we can group use that number to group the values. Without this step, data for every single day would be displayed in the table, which would make it useless.
Steps to reproduce. Install Python 3.12. Install speech_recognition and pyaudio with pip ( pip install SpeechRecognition and pip install pyaudio) Create a Python script with this code: import speech_recognition as sr mic = sr. Microphone () print ( 'hello') Launch the script.
When we are using single mesh to create report, I am able to get the name of imported mesh in python. gom.app.project.parts [Part].actual.name. But in stage project, I am not able to get the names of Imported mesh. As I change active stage the name of mesh should also change but it is not happening. In explorer, it is changing with change is ...