How to Create a Presentation with PowerPoint Online

An online version of PowerPoint was introduced in 2010, a few years after the Google Docs release, which came out as early as 2007. Over the years, the product, along with other Microsoft Office apps, underwent major changes, making it more user-friendly and feature-rich for end users.
Given the rise of inter-device connectivity and cloud support, tools like Microsoft 365, particularly its Word, Excel, and PowerPoint web-based counterparts, have considerably increased their capabilities, matching the performance of desktop versions. In this article, we will talk about PowerPoint Online, also called PowerPoint for Web, and how it can help presenters craft presentations and access them on the go wherever they log in.
Table of Contents

What is PowerPoint Online
Advantages of powerpoint online, getting started with powerpoint for the web, how to create a powerpoint online presentation, collaboration and sharing, saving and exporting, tips for creating high-quality slides in powerpoint online, troubleshooting common issues in powerpoint online.
- Conclus i on
PowerPoint for the Web, which was previously called PowerPoint Online, is a web-based version of PowerPoint that enables creating, viewing, editing, and sharing PowerPoint presentations online. Unlike Google Slides, PowerPoint for the Web provides better native support for PowerPoint files. It makes it possible to seamlessly work with PowerPoint files and features through a web-based browser, with OneDrive support to share and store your data. PowerPoint for the web is free to use but has limited features. However, if you are a Microsoft 365 subscriber, you can get better features when using the web-based version of PowerPoint.
PowerPoint for the web provides the same benefits as the desktop version of PowerPoint, with the added advantage of accessing these features anywhere using an Internet browser. Below is a list of advantages of using PowerPoint Online.
Easy Accessibility
You can access PowerPoint features anywhere using an Internet-connected browser without installing the PowerPoint app on your device. Furthermore, you can also upload and access files from your device anytime, anywhere, via the web.
Support for Native PowerPoint Features
Be it online collaboration, cloud storage, or access to version history, you can get native PowerPoint features via a web-based version of PowerPoint without the need to worry about compatibility issues. Furthermore, unlike Google Slides or other web-based variants of PowerPoint, PowerPoint for the web helps access native PowerPoint features without causing compatibility issues such as incorrect display of certain themes or support for various animations available in the offline version.
OneDrive Integration
The integration of PowerPoint for the web with OneDrive allows instantly storing, sharing, and accessing different versions of a file using the cloud storage support of OneDrive.
Easy Sharing
The OneDrive integration enables the online version of PowerPoint to be used for instantly sharing presentations online using a link with a specific access level (view only or editing privileges).
Online Collaboration
While PowerPoint’s offline version also provides collaboration features, using PowerPoint for the web can provide a smoother experience when looking for real-time changes to a PowerPoint file.
Version History
PowerPoint files saved with the web version come with a version history, where you can access older file versions to restore according to need. This feature is also available for the offline version, which you must turn on upload to OneDrive. In other words, version history is only supported for PowerPoint files that are saved online.
Cross-Platform Compatibility
Since you only need a web browser and a Microsoft account to access PowerPoint Online, there are no issues with having a compatible device to use the app. This means you can access PowerPoint Online using any device that can run a modern Internet browser.
Accessibility Features
PowerPoint for the web is among the few platforms that provide accessibility features for persons with disabilities, such as image ALT text and support for screen readers.
PowerPoint for the web is regularly updated, providing access to the latest features for end users.
To get started, go to Office.com or powerpoint.office.com and select the PowerPoint icon to access PowerPoint for the web. You will require a Microsoft account to log in.

Once logged in, you can create a new PowerPoint presentation or upload one from your device. All you need for accessing the web version of PowerPoint is a modern Internet browser and a device that can support it. This web-based version of PowerPoint works with all commonly used browsers and their variants, including Chrome, Mozilla Firefox, Microsoft Edge, Safari, Opera, and others.

From Office.com, you can create new PowerPoint presentations from scratch or via a template, upload new ones, or open an existing one saved to OneDrive.
Create a New Presentation with PowerPoint for the Web
Click Create or use a PowerPoint template from the options to create a new PowerPoint presentation. You can start with a specific theme or use a blank template. You can also browse through themes via Office.com to find one that best suits your needs.

Upload a PowerPoint Presentation
To upload a PowerPoint presentation, click Upload after logging into Office.com and select a file from your device.

Open an Existing PowerPoint Presentation Online
All PowerPoint presentations saved from a device are automatically uploaded to OneDrive and can be accessed via PowerPoint’s online version. As mentioned earlier, you can upload and save presentations and access them anytime.

Adjusting the Ribbon Menu Layout
You can toggle between the classic and single-line ribbon interface to suit your preferences. The Ribbon menu can also be adjusted to stay available or hidden periodically.

Naming Your Presentation
It is best to name your presentation to ensure it is easy to search and open later via OneDrive. Otherwise, a generic name will be assigned to the presentation (e.g., Presentation 1). To name your presentation, click on the generic name at the top and type in the new name.

Formatting and Design
As you start formatting your slides, the Designer feature will provide you with options to create layouts for your slides. You can optionally use this feature to get started with the basic design for your slides or use the Design tab to select design elements.

Like the desktop app, the Design tab in PowerPoint Online provides access to themes, background and slide size adjustment options, and theme variants to help you design your slides.

Adding Content
The Insert tab provides all the necessary options to add new slides, tables, pictures, shapes, icons, SmartArt, text boxes, audio, video, cameo to insert Live camera feed, and other options.

Formatting Pictures
Like the desktop version of PowerPoint, pictures can be added from your device, stock images, or via Bing search. The Picture tab can be used to format added pictures after selecting them. Various options in this tab allow you to crop, add a picture frame, and adjust the picture on the slide.

You can also access Format Options via the right-click menu.

This will open a sidebar providing options to adjust the selected image’s width, height, angle, shadow, reflection, and text margins.

Formatting Videos
PowerPoint for the web allows formatting videos via the Shape tab and Format Options via the right-click menu. The Shape tab can give a frame or shape to the video, adjust the outline, manage how it is displayed on the slide, and adjust the size of the video. Sometimes, the Shape tab might be replaced with the Video tab to show editing options. This change is particularly visible if the user is not logged in and is editing the presentation as a Guest user. The Format Options enable editing the video’s width, height, angle, text margins, shadow, and reflection.

Formatting Audio
Two major options for formatting added audio clips include the Playback tab and Audio Format tab. The Playback tab can adjust the volume, playback trigger, and other related options.

The Audio Format tab includes picture styles for the audio icon, border stylizing, rotation, and other formatting options to adjust how the audio clip appears on the slide.

Annotation Options
The Draw tab gives various tools like pens and highlighters to annotate slides or draw on the screen. Other tools include an eraser, lasso, draw with touch, and stencil.

Transitions and Animations
Like the desktop version of PowerPoint, the Transitions tab for the web version gives transitions to use for your slides. You can adjust the effects of added transitions and duration once you have added a transition for a slide.

The Animations tab can be used to apply standard transitions and adjust effects, triggers, and duration for the animations according to need.

SlideShow, Review, and View
The SlideShow tab is used to start the SlideShow from the beginning of the current slide or to initiate a Live presentation with a QR code and link for viewing the presentation Live. You can also use Rehearse with Coach, use subtitles, and edit subtitle settings. You can also learn more about some of these features from our post about how to present a PowerPoint Online .

If you are searching for the features to check spelling and grammar, comments, changes, and accessibility options, head to the Review tab.

Most PowerPoint users know that the viewing options are available at the bottom of the PowerPoint interface. However, you can also access them from the View tab in PowerPoint. The same features are available for PowerPoint for the web. This includes options like switching between Slide Sorter, Immersive Reader, and Normal View and access to Notes, Zoom, and Fit to Window options.

To share your PowerPoint presentation, click Share from the top left corner of PowerPoint Online. You can create a sharing link according to specific settings, copy the existing link, link to a slide, or view and manage access to the presentation.

Collaborators can be invited via email or link by adjusting whether a user has view-only or editing privileges.

Once the settings have been configured, a link can be generated to copy and share with users. When configuring settings, you can also directly send the link with a message to an end user.

Users collaborating on the slide deck with their names are shown at the top. A generic name is assigned to the collaborator if it’s a guest.

You can see the comments added by collaborators on the presentation by going to Comments.

Next to the Comments button is the Catch-up button that tracks and shows the changes made by real-time collaborators as you work on the presentation.

You can also access sharing options via File -> Share . You can open sharing options or generate an embed code for the presentation from here.

When generating an embed code, you can adjust the width, height, and slide advancement options and generate a code for a website.

To switch between viewing modes, you can change to view only and editing options as you collaborate or open the presentation in the desktop app. These options can be helpful for you to adjust how you wish to work or review the presentation.

To save your presentation, go to File -> SaveAs to save a copy to OneDrive, download a copy of the PowerPoint presentation, rename the file, or download the file in an alternative format such as PDF, ODP, or image.

When saving a copy of the presentation on OneDrive, you can select an existing folder or create a new one to select the file location.

You can consider the tips below to create visually appealing slides with PowerPoint Online.
Focus on Design Consistency
Use a consistent design with a color scheme, fonts, alignment, and graphics tailored to a specific format. Don’t use too many changes that might make the content appear muddled.
Avoid Heavy Multimedia
Since PowerPoint for the Web is an online platform, not everyone might have the required Internet bandwidth or hardware to run heavy presentations smoothly. Using multimedia content in moderation can help avoid such issues.
Uncluttered Slides
Cluttered slides on an online interface will likely cause compatibility issues for some viewers or the slides might not appear properly on some browsers and devices. To avoid this, try to create uncluttered slides. Using minimalist slides might just be the best way to go.
Even the Distribution of Slide Elements
By evenly distributing slide elements with proper alignment, you should be able to create online slides that are easy for the eyes to follow.
Choose Imagery Carefully
When selecting icons, graphical elements, and pictures, try not to use imagery that is too flashy and might cause issues when opened across different browsers and devices. You can use icons from the built-in icons library in PowerPoint and select pictures that don’t visually overpower the viewer.
Get Design Ideas
You can get design ideas using PowerPoint Designer to adjust your design for visual appeal and design consistency.
Productivity Shortcuts
PowerPoint for the web primarily provides most of the features in the desktop app. Below are some tips and tricks for productivity when using the web version of PowerPoint. For some shortcuts listed below, PC users must use CTRL, whereas Mac users will use Command.
- Insert New Slide using CTRL+M hotkey (Command+M for Mac)
- Use F5 to start the slideshow and Esc to end the slideshow
- CTRL+D duplicates the slide (Command+D for Mac)
- CTRL+Shift+D deletes the slide (Command+Shift+D for Mac)
- Use CTRL+S to save slide (Command+S for Mac)
- Use CTRL+W to close the presentation (Command+W for Mac)
- To open printing options, use CTRL+P (Command+P for Mac)
- Zoom in with CTRL+Plus button (Command+Plus button for Mac)
- Zoom out with CTRL+Minus button (Command+Minus button for Mac)
- Insert a table with CTRL+T (Command+T for Mac)
- Insert a hyperlink with CTRL+K (Command+K for Mac)
- Align text with CTRL+L for left, CTRL+E for center, and CTRL+R for right (Replace CTRL with Command for Mac)
Screen Freezes When Working with PowerPoint for the Web
If your screen freezes while you’re working, the web version of PowerPoint is likely encountering an issue when saving the file, showing elements, or inserting content. You can wait a while, and the issue should be resolved. Also, check your Internet connection to see that you are connected. You might want to close additional tabs and review your system usage to see if your hardware is overwhelmed due to resource-intensive apps or multiple browser tabs.
Slide Elements Don’t Appear Properly
If your browser isn’t compatible or uses a browser plugin that blocks slide elements, you might encounter issues viewing slides. Use a compatible browser and turn off any plugins that might interfere with PowerPoint’s online interface.
File Upload or Download Issues
When you are unable to upload or download files, it is likely that your Internet connection is unstable or disconnected. Check your connection to resolve the issue.
Unable to Login
This is likely caused by incorrect credentials or a recent change in credentials, such as a password. If you cannot log in despite no apparent issues, try to clear your browser’s cache or switch to another browser to see if you can log in.
PowerPoint for the web provides most features available for the desktop version and some sharing and collaboration features that require uploading the file online for use. You will notice that some of these features are smoother when used with the online version compared to the desktop version. Furthermore, the online version of PowerPoint provides access regardless of whether you have PowerPoint installed on your device. If you are someone who does not have a Microsoft 365 subscription and needs to access a PowerPoint file, you can log in for free with a Microsoft account with limited features. Alternatively, if the online version is not an option for you, you can still learn how to create a PowerPoint presentation in the installed version of Office.

Like this article? Please share
Microsoft PowerPoint, PowerPoint Online Filed under PowerPoint Tutorials
Related Articles

Filed under PowerPoint Tutorials • June 28th, 2024
How to Represent Branching Scenarios in PowerPoint
Do you have a situation to expose with multiple possible outcomes? If so, check our guide on branching scenarios in PowerPoint.

Filed under PowerPoint Tutorials • June 21st, 2024
How to Make PowerPoint Full Screen
Experience your presentation design as in the day of the event. Learn how to make a PowerPoint go Full Screen with this tutorial.

Filed under PowerPoint Tutorials • June 18th, 2024
How to Create a Funnel in PowerPoint
Learn how to create a funnel in PowerPoint from SmartArt graphics and PowerPoint Shapes. Recommendations for Funnel PPT Templates included.
Leave a Reply
Got any suggestions?
We want to hear from you! Send us a message and help improve Slidesgo
Top searches
Trending searches

education technology
240 templates

9 templates

19 templates

meet the teacher
30 templates

35 templates

financial analysis
82 templates
Free online presentation maker
Try our new tool to edit this selection of templates for people that want to let their creativity run free. create interactive resources easily, quickly and without the need for any software. a really useful tool for teachers and students. move the content, add images, change colors and fonts or, if you prefer, start from scratch..

It seems that you like this template!
Create your presentation create personalized presentation content, writing tone, number of slides, investment business plan.
Rewards come after a great investment, and this applies especially to companies. You’ll need to attract potential investors and other people to put their trust in your project. With this free presentation template, you can explain your business plan, your market research and everything you need to strike a new...

Premium template
Unlock this template and gain unlimited access
Pregnancy Breakthrough
Giving birth to a baby is a beautiful occasion, a manifestation of love between two people. Obstetrics are key during pregnancy, so how about giving a presentation about the latest breakthrough in this field? Our free medical template will come in handy.

Web Project Proposal
We live in the internet era, which means that web design is currently one of the most demanded skills. This free template is perfect for those designers who want to present their web project proposal to their clients and see a preview of the final work.

Internship Report
Your stay at a company can teach you an incredible amount of things, how could you keep track of it all? Luckily, there’s a solution for that: Internship reports! Some degrees require you to hand out an internship report at the end of your stay at the company, and making...

Engineering Project Proposal
What is the best way to build your own successful future? Giving a presentation made thanks to our new free business template! Your audience will appreciate your engineering project proposal, paving the way for new deals and investments.

New and interesting technologies are being used for teaching. This means that you don’t need to be at school or at the university to take courses. If you need to prepare a webinar or you must give a presentation to talk about e-learning and these kind of advances in education,...

Sketchnotes Lesson
There’s an increasing trend in education regarding visual techniques to help students learn concepts, and it’s called sketchnotes. This free presentation template focuses on this design, so you can turn a lesson into an easy teaching experience.

Christmas Recipe
Do you have a sweet tooth? We bet you love Christmas—the snow, the presents, the happy times… and the food! We can help you deliver an awesome presentation with this free template designed for cooking recipes!

Science Fair Newsletter
Creativity and innovation are also words closely tied to science, since people are always looking for new inventions and applications. Are you organizing a science fair and want to keep people up to date? How convenient—here’s our latest free template focused on this topic!

Minimal Charm
Are you looking for a monochromatic theme that is interesting at the same time? How about using a simple and clean theme, along with black-and-white pictures, to convey business or corporate content in a professional way?

Kawaii Interface for an Agency
Take a look at these slides and tell us, aren't they super cute? Their resemblance to a computer interface, the gradients on the backgrounds and the kawaii illustrations make this template an adorable one! Talk about your agency and the services you offer and watch your audience react with a...

Notebook Lesson
These are the last days before the Summer break! We know that there are some pending lessons that you need to prepare for your students. As they may be thinking about their friends and their holidays, catch their attention with this cool template!

Science Education Center
Albert Einstein believed that “the important thing is to never stop questioning.” When it comes to science and research, we need to investigate and to ask for answers. Teach your students about the value of questioning in your Science Education Center!

Magical Wizard World Minitheme
I solemnly swear I’m up to no boring presentations! Use this Slidesgo template that looks like a magical map to give a magical speech and surprise your audience. You don’t need be a wizard to be able to edit the resources on these slides, you only need to open Google...

Minimalist Marketing Plan
Defining a good marketing strategy is not enough to get new clients and investors. You need to present your data and next steps with an elegant presentation in order to create a great impact! Use our minimalist template now!

Food is quite important in our lives, don’t you think so? If you are a chef, we have designed the perfect template for your curriculum. Have a look at it now!

Bicycle Shop
Begin your path with a single pedal stroke! Do you own a bike company? Give some general information about you to your customers, tell them what you do and what you sell. Keep moving!

Hairdresser Portfolio
Peter Coppola said that “life is more beautiful when you meet the right hairdresser.” That’s true! If you are a stylist willing to show your work to the public, use his modern template.
- Page 1 of 68

Register for free and start editing online
Unsupported browser
This site was designed for modern browsers and tested with Internet Explorer version 10 and later.
It may not look or work correctly on your browser.
- Presentations
How to Create & Present a PowerPoint Presentation Online
More than ever, it's difficult to gather everyone in a single room for a presentation. Instead, presentations take place online and over virtual meetings.
I'll bet you're asking yourself, "how do I present a PowerPoint presentation online?"

How do you make Microsoft PowerPoint presentations online successful? It's a combination of design guidelines and tech tips, and we've put those together for you.
If you want to see the best way to share PowerPoint presentations online , you're in the right place. This tutorial will help you master PowerPoint online presentation mode. Let's start learning how to show a PowerPoint presentation online.
Tips to Create the Best Online PowerPoint Presentations
Aren't all PowerPoints the same? Without reservation, I'd say "no." Tailor your presentation to how and where you'll present it to the audience.
If you're learning how to present a PowerPoint online, consider the specifics. The best way to share PowerPoint presentations online is to consider the differences in how your audience sees the content.
Let's look at three key design tips that help you learn how to show a PowerPoint presentation online:
1. Simplify Your Slides
It's always important to create readable slides. But as you create presentations for the online world, it's more important than ever to simplify slides to battle distractions.

When you give a presentation online, you're competing for attention. Viewers have many monitors, distractions in their home or office, and other tasks to finish. That means that cluttered slides quickly fall to the bottom of the viewer's priorities.
Remember, as you learn how to show a presentation online: slim down your slides . Less content means less to think about for your viewers. Let your slides support your speaking points, not the other way around.
2. More Graphics, Less Text
Here's the thing. If you're going to ask the audience to hold time to join you for virtual PowerPoint presentations, you've got to give them a reason to show up. If your presentation is full of text, your audience might wish you had sent an email instead.
That's why the best way to share PowerPoint presentations online is to make them visual. Use lots of charts, graphs, and infographics to make it worth seeing the presentation live. Use your speaking points to add analysis and background information.

Actively search for opportunities to convert text-heavy slides to more graphic versions. It's the best way to create an online presentation that holds attention.
Learn more about infographics that work well for online presentations in our tutorial below:
3. Send a Pre-Read Version
If you're searching for the best way to share PowerPoint presentations online, you might have noticed that more people are working remotely. That means that we're working on different schedules, reviewing the content on our own time.
That's why it helps to send a pre-read, a copy of the presentation before your virtual PowerPoint presentations. Before you enter PowerPoint online presentation mode, send a copy for your audience to review.

When you send a pre-read, there are many advantages to help you make your Microsoft PowerPoint presentations online:
- Having already seen the content, your audience is more attuned to your speaking points versus the slide visuals.
- The audience will come prepared with questions, increasing engagement.
- There's a copy to keep for future reference, helping you to reduce follow-up questions.
A great way to send your file before you make your Microsoft PowerPoint presentation online is to create a PDF. Learn how to do that in this tutorial:

The Best Way to Share PowerPoint Presentations Online
Now that you know the tips for successful slide designs, you might wonder, "how do I present a PowerPoint presentation online?" The rapidly growing world of remote work means that many of us are searching for the best way to share PowerPoint presentations online.
Let's tackle how to use PowerPoint's features for virtual PowerPoint presentations:
1. Create an Office.com Account
If you found this tutorial by asking, "how do you create an online presentation?" then there's a secret you're sure to appreciate. The process of sharing virtual PowerPoint presentations starts by creating an account on Office.com .

When you create an Office.com account, you unlock some advantages. One is that you've got access to the free online editions of all the Office apps, including PowerPoint.
You'll also get free OneDrive storage, which is key to sharing your presentation online. To create presentations online, start with creating an account so that you can save your PPTX file online.
2. Save Your Presentation to OneDrive
At this point, your path to creating the best online PowerPoint presentation depends on whether you've already created a presentation. Here's how to move forward:
- If you already started a PowerPoint presentation, sign into your new Office.com account in the PowerPoint app. Save your presentation to OneDrive.
- If you haven't started a PowerPoint presentation, create a new one in PowerPoint Online. The presentation will automatically save to OneDrive.
If you started to create your presentation on the desktop version of PowerPoint, let's save it to OneDrive. It's Microsoft's cloud storage service. It's also the best place to save a PowerPoint presentation to share online.

If you created your presentation in PowerPoint online, your presentation is already stored in OneDrive. It's already available to share.
To learn more about PowerPoint Online, make sure to check out our tutorial:

3. Launch the Present Live Option
Now that your presentation is uploaded let's use the Present Live feature. In your web browser, jump over to PowerPoint.com , a fast shortcut to the PowerPoint's online version. If you're not already logged in, enter the same Office credentials that you set up earlier.
You'll see a list of PowerPoint presentations saved to your OneDrive. Double-click on your desired presentation to open it.

Now, browse to the Slide Show menu. Click on Present Live to kick off your presentation.

The first time you use this feature, you might be asked to set a few preferences. Make sure to select your preferred microphone for audio.
4. Send the Presentation Link
Believe it or not, you're already ready to go live. Send the link that PowerPoint Online gives you. Your audience is added to your live presentation.
As you can see below, there's a useful starting screen that includes a QR code you can easily send. You'll see the number of attendees that have joined before you go live.

To set your audio options, use the Present Live > Audio Settings drop-down. Make sure you're using the best available microphone for top quality audio.

That's it! You're ready to give your presentation online, no other tools or apps needed. Anyone who joins the link will see the active slide, plus a voiceover (and a neat transcription office) as you give your presentation.
How Do I Present a PowerPoint Presentation Online With Zoom?
Maybe your organization has recently started to use Zoom. It's one of the most popular ways to host online meetings. And it's rapidly finding its way into many companies. It's a great way to host an online call, complete with audio, and share your presentation.
One of the best online PowerPoint presentation setups combines the app with Zoom. See our guide to using the two for a PowerPoint online presentation mode setup below:

The Best Source for Designs to Create Presentations Online
Throughout this tutorial, we've talked about techniques that have helped you learn how to present a PowerPoint online. You've got the tips and tricks to help you succeed with virtual PowerPoint presentations.
But what about another technique that helps you create the best online PowerPoint presentation? The best way to succeed is to use a great template that works well in PowerPoint online presentation mode .
Envato Elements is an all-you-can-download option with the best templates that show you how to show a PowerPoint presentation online with style. One subscription unlocks everything.

If you're still wondering how to show a PowerPoint presentation online that's professional, it helps to have these designs. It's the best way to level up your design without learning graphic design all on your own.
Let's look at three of the best templates (out of the thousands included) for virtual PowerPoint presentations:
1. Social Media Trends - PowerPoint Template

The social media landscape is always changing. Your audience is sure to appreciate a presentation that keeps them up to speed on the trends that influence the leading social platforms. Maybe you'll even help your audience answer "how do I present a PowerPoint presentation online?" with the latest social data help.
2. Infographic Timeline PowerPoint Template

Infographics bring together two powerful presentation tools: information and graphics . The best way to share PowerPoint presentations online is to lean on these types of illustrations. With the help of this template, you'll have no shortage of creative ways to present novel ideas with ease.
3. Cobalt Business PowerPoint Template

Business templates are popular options for the best online PowerPoint presentations. Cobalt is perfect to create presentations online that feel polished and professional. You've got the charts, graphs, and layouts that are sure to help you give your best presentation yet.
With Elements, you never have to worry about learning to create presentations online from scratch. You start with a pre-built design and leverage those assets to your advantage.
Another Source for Templates For Virtual PowerPoint Presentations
You've already seen Envato Elements, a powerful platform to download unlimited templates. It's one of the best ways to share PowerPoint presentations online with great designs.
But maybe you don't need everything . In that case, you need a single impressive design for PowerPoint online presentation mode . Envato Market is the perfect choice for you.

On Envato Market, you've got plenty of designs to choose from. It keeps costs at a minimum thanks to the single purchase model. Grab a template and get started now.
If you've searched Envato Elements and GraphicRiver and you're still looking for the right template, here's an article with even more great templates to help you out:

You Learned How to Present a PowerPoint Online
Your presentation is meant to be seen. You might have started this tutorial wondering "how do you create an online presentation?" and by now, you've got the secrets to success.
A great reminder for your virtual PowerPoint presentation is to use the designs you saw in this article. Use those PowerPoint designs to create presentations online that have great designs.
Your presentation is meant to be seen. With the help of the PowerPoint online presentation mode, you're ready to do that today.

Productivity
The PowerPoint Online Guide: How to Make and Present Slideshows Anywhere

Over the past thirty years, PowerPoint has become synonymous with presentations. Give a speech, present a new product, share finances in a board meeting—all are typically done with a PowerPoint presentation. That’s easy enough if you’re presenting from your laptop and have Microsoft Office installed.
Or it can be far more difficult. You might need to email your slide deck to the event organizer—and hope they have the same version of PowerPoint installed. Or you may carry your PowerPoint file around on a flash drive to open it on the presentation computer. Neither are great solutions, especially for all the times you need to make a last-minute change to your slides or if you don’t typically use Microsoft Office.
A Quick Guide to Office Online

If you’ve ever used the iPad or Android tablet versions of Office, Office Online will feel instantly familiar. The basics are the same. Each Office Online app includes an Office-style toolbar with Home , Insert , Design , and other tabs to organize core editing tools. Office Online apps don’t include all of their Windows features. They include instead a focused set of editing tools that, for most documents, spreadsheets, and presentations, are all you need.
The big difference is that the apps are online. Instead of emailing files back and forth, or syncing changes via OneDrive or Dropbox then sending messages to colleagues when something’s finished, changes happen automatically in Office Online. Your team can open files at the same time, make changes or add comments, and Office will save and sync it to all your OneDrive accounts automatically. Office Online apps also work everywhere. Open any browser, go to Office.com, and your work is ready to pick up where you left off.
Office Online is free for personal use—log into Office.com with a Microsoft account and fill up OneDrive’s free 5GB of storage with all your Office files. A business version is included with Office 365 for business and enterprise accounts as well.
The basics are the same. If you’ve used PowerPoint before, you’ll feel at home in PowerPoint online. Here are the things to keep in mind, the tips to help you work efficiently in your browser, and ways to work around Office Online’s limitations.
A Quick PowerPoint Online Tour

Select a template or open an existing presentation to open it in PowerPoint Online. With a similar design to recent versions of PowerPoint for Mac and Windows, you’ll find the core text and design tools on the main Home tab, options to add images and embedded videos and tables in the Insert tab, slide and template options in the Design tab, animations in the Transitions and Animations tab, and so on. If you can’t find the feature you need, type what you need in the Tell me what you want to do box to search through PowerPoint’s features and documentation.
Need to edit a picture or tweak a SmartArt graph? Select it, and a new Format tab will appear with additional tools as in desktop PowerPoint.

You may not need to look through the toolbars for tools, though. Select text in a slide and PowerPoint shows quick formatting options in a pop-over to change the font, color, and more. Or right-click on most other elements to find their quick editing options. You can then double-click on the toolbar to hide it and increase your workspace, if you’d like, relying on the popover tools to work faster.
Add a new slide: Ctrl + M or CMD + M
Move slides up or down: Ctrl + arrow or CMD + arrow
Add a comment: Alt + N
Go to next slide in Slideshow view: N
Go to previous slide in Slideshow view: P
Go to a specific slide in Slideshow view: G , then type slide number
Exit Slideshow view: Esc
How to Add Presentations to PowerPoint Online

PowerPoint Online is part of Microsoft’s OneDrive file storage. Open a PowerPoint file in OneDrive, and it’ll first show a preview with the option to edit it online.
But surprisingly, PowerPoint Online also works with Dropbox. That gives you another way to open your presentations online. You can save your presentations to either OneDrive or Dropbox, and then when you open PowerPoint Online, you can search through your presentations from both services. Either way, any change you make will automatically be saved to the original file.
The Dropbox integration only works for newer .pptx files. To open .ppt files, download them first, then upload them to PowerPoint Online or OneDrive. When you open them there, PowerPoint will automatically make a copy then convert the presentation to the new format so you can edit it online.
Or, if you have a PowerPoint file on your computer, open PowerPoint Online first, click the Upload a Presentation button, then select your presentation to upload it to OneDrive and open it for editing in PowerPoint Online at the same time.
How to Collaborate on PowerPoint Presentations

Want someone else to proofread your slides, or add their research to a team presentation? That’s easy in PowerPoint Online. From your presentation, click the Share button in the top right toolbar.
The default option is to email an invite link along with a message to your collaborators. You can choose to make the presentation editable or view only and can require a Microsoft account or not.

Or, you can copy a share link to send to anyone or share publicly online if you’d like. Select the Get a link tab to copy a link to your presentation—again, as a view-only presentation or with permission to edit. Here, if you make an editing link, anyone can tweak the presentation without signing into an account.
PowerPoint Online will show an icon beside the slide your collaborator is currently editing and will mark the section they’re working on in the same color. You can’t see the exact changes they make while they’re editing—changes take a few seconds to sync—so it’s best not to edit the same slide others are editing at the same time.
Want to chat with your collaborators? As long as everyone has a Skype account, you can open a Skype sidebar and talk with them in your PowerPoint presentation.
What’s Not In PowerPoint Online?

The core editing features are all here. You can add and edit text, photos, shapes, and SmartArt in PowerPoint online, add core transitions and animations to slides and elements, and present your presentation all from PowerPoint Online.
One of the main differences from PowerPoint’s desktop apps are the embedding options. In desktop versions of PowerPoint, you can embed video and audio from your computer, along with data from other Office apps and macros. In PowerPoint Online, you can embed online videos from YouTube—along with graphs and data from PowerBI and other add-ins in the Office Add-ins pane.
Animations are also more limited in PowerPoint Online. It includes only eight transitions, including Fade and Push , with animations that don’t require graphics acceleration. If you add a presentation that uses other animations from PowerPoint for Windows or Mac, you’ll need to select others or present without animations.
Fonts are another core difference. PowerPoint Online includes 18 fonts, including Arial, Comic Sans, Courier New, Garamond, Georgia, Rockwell, Tahoma, Times New Roman, and Verdana. You can’t install 3rd party fonts or choose fonts you have installed on your computer.
So, to make sure your PowerPoint presentations look great everywhere, stick with the fonts included with PowerPoint Online. That’s easy as they’re the only options in PowerPoint Online, but if you use another PowerPoint app, try using the Web fonts as they’re mainly fonts that work everywhere.
If you upload a presentation that uses a font not included in PowerPoint Online, you can still view the text in the correct font in PowerPoint Online on your computer or another computer with that font installed. If you don’t have the font installed, PowerPoint Online will replace that font with another similar font.
Beyond that, though, PowerPoint Online is surprisingly full-featured. It includes everything you need for making and showing presentations online—as long as you don’t need to use custom fonts, embed non-YouTube videos, or build advanced animations.
How to Present PowerPoint Presentations From Your Browser

Once you’ve finished creating your presentation, it’s time to present it. That’s as easy in PowerPoint Online as in the desktop apps. You can start the slideshow from the slide you’re currently editing via the Slide View button in the lower right-hand corner. Or, click the View tab and select to start the slideshow from the beginning or current slide.

PowerPoint Online will switch your browser to a full-screen preview mode. Click anywhere on the screen to go to the next slide, or tap your right and left arrows on your keyboard to navigate between slides. When finished, click again at the end of the presentation or press the Esc key to exit the slideshow and switch back to the windowed editor mode.
PowerPoint also includes controls on the lower left of the slideshow view, along with options in the right-click menu to switch slides or jump to a specific slide.

PowerPoint Online doesn’t include presenter view to show lecture notes on one screen while presenting your presentation on another—but there’s a workaround. While you’re giving your presentation full-screen, your browser with the original PowerPoint Online tab won’t show your slide content (Chrome hides the original window; Safari shows a Exit Full Screen placeholder). Instead, you can open a new tab or window and open your presentation there as well.
When you switch slides, move your mouse to your projection screen and click to advance—then move your mouse back to your laptop’s screen and select the next slide in your other PowerPoint Online window. Another option is to open your presentation in PowerPoint’s mobile apps and use your phone or tablet to view lecture notes while presenting from your laptop.
How to Convert PowerPoint Presentations Online

PowerPoint Online—unlike PowerPoint for Windows or Mac—can only open .pptx presentation files made with a newer version of PowerPoint. If you open an older .ppt file or a .odp presentation from another app, PowerPoint Online can convert the file to .pptx on the fly so you can edit the presentation.
But once you’ve opened the presentation, you can export it in 3 formats: PowerPoint, ODP (used with OpenOffice), or PDF. Click the File tab in the toolbar to open the core PowerPoint menu, select Download As , then choose the file format you want. PowerPoint Online will convert your presentation and save it to your computer so that you can share the original file with others.
The best option is to share the PowerPoint presentation directly in PowerPoint Online—but when you need a traditional presentation file, that’s a handy way to get it.
How to Save All Your Presentations to PowerPoint Online

There’s one trick to make PowerPoint Online the presentation app that’s always ready when you need it is: Save all your presentations to OneDrive or Dropbox. That way, whenever you need to present something, it’ll be a few clicks away inside PowerPoint Online.
If you already use OneDrive or Dropbox to sync your files, you’re halfway there. Save every new presentation there, every time. Whenever someone sends you a presentation, save it there also.
App automation tool Zapier can do that for you automatically. One of the most common ways to share presentations is through email—so Zapier can watch your Gmail or IMAP-powered email account for new presentation files. With Gmail, you can include a search to watch for presentation files. Use has:presentation to watch for any presentation—though note that this will also include Google Slides presentations which won’t work with PowerPoint Online. Or, use filename:pptx OR filename:ppt to watch for all PowerPoint attachments.

Then, Zapier can save the presentation file to online storage to open and edit it in PowerPoint Online. The simplest is OneDrive since it’s PowerPoint Online’s core storage, though you could use Dropbox instead as it only takes a few extra clicks to open your presentations there.
You can save the presentation in any folder, and add a customized file name if you’d like. Then select the attachment from Gmail or your IMAP email and have Zapier copy that file to OneDrive or Dropbox. Next time you need to present something someone emailed you, don’t open your email app—instead, open PowerPoint Online and open the presentation there directly.
Ready to save any presentation you get emailed to PowerPoint Online? These Zaps will help you get started in a few clicks—remember to set up your search or filter to watch only for PowerPoint files:
Save new Gmail attachments to OneDrive
Save new email attachments to OneDrive
Save new attachments in Gmail to Dropbox
Back up new IMAP email attachments to Dropbox
That’s PowerPoint Online. It’s a handy way to tweak and present your presentation, even if you don’t have a copy of PowerPoint installed. And it just might be the new presentation app you need for a more focused, free way to make presentations anywhere.
Need more presentation tips and tools? Check out these other Zapier guides:
Get productivity tips delivered straight to your inbox
We’ll email you 1-3 times per week—and never share your information.

Matthew Guay
Matthew Guay is an editor and writer in Bangkok. When he's not writing, he's likely reading a new book or exploring random streets in a new city. Follow Matthew at @maguay.
- Technology trends
Related articles

How to text from a computer (on Mac and Windows)
How to text from a computer (on Mac and...
How to make a phone call from your computer (on Mac and Windows)
How to make a phone call from your computer...

How to split text in Excel and Google Sheets

15 iOS home screen layout ideas to organize your iPhone
15 iOS home screen layout ideas to organize...
Improve your productivity automatically. Use Zapier to get your apps working together.

PowerPoint 101: The Ultimate Guide for Beginners

Are you struggling with PowerPoint? You need a quick design in PowerPoint but don't know where to start? Don't worry, you have nothing to be ashamed of.
In this article, we're going to refresh the most important PowerPoint basics so you can take advantage of this Microsoft software and create high-impact presentations at any time!
Millions of users worldwide use Microsoft 365 services , making PowerPoint the presentation design software with the highest market share. And with good reason! PowerPoint's features stand out for its usability and originality . We can tell you that PowerPoint is pretty intuitive software, and it's a great option to choose when working with presentations on a daily basis. So, are you ready for a quick PowerPoint 101 class?
Let ' s see what you ' re going to learn today with this PowerPoint Guide :
What is PowerPoint?
What are the best uses of powerpoint, powerpoint basics: what are the components of powerpoint workspace, mastering powerpoint: what are the main features of powerpoint, what are powerpoint templates and where to find them, time to practice how to make a presentation in powerpoint.

Microsoft PowerPoint is a presentation design software that is part of Microsoft 365 . This software allows you to design presentations by combining text, images, graphics, video, and animation on slides in a simple and intuitive way.
Over time, PowerPoint has evolved and improved its accessibility to users. For this reason, it has been adapted to the main operating systems and modalities:
- PowerPoint Online
Additionally, you can use Word and Excel in this online version. That way, you'll be able to make real-time changes in the cloud without fearing losing your files. Sounds great, right?
PowerPoint has a versatile range of uses. Here's a list of the different tasks you can complete with this presentation design software:
- Business presentations or Pitch decks.
- Marketing, Sales and HR plans.
- Project briefs and timelines.
- Inductions to new employees.
- Seminars and educational classes.
- Professional portfolio of photos or designs.
- Presentations of a research summary.
- Presentations for special occasions.
These are just a few examples of the multiple possibilities this Microsoft software offers. Your imagination is the only limit!
Stay tuned as we continue with this PowerPoint 101 Guide...

In order to deeply understand this presentation design software, you need to recognize its main components. Now it's time to learn about the PowerPoint basics!
A quick note before going any further: when opening PowerPoint, some of the commands in the ribbons will look grayish and won't be highlighted when you hover the mouse over them.
This happens since some commands need to be selected in order to function. For example, if you want to change the color of a text, you first need to select it.
That being said, let's start with this Guide for PowerPoint beginners:
PowerPoint Main Window
The first aspect to learn is PowerPoint Main Window. To facilitate the explanation, we've organized its main elements with numbers from 1 to 10:

Based on that, the main components of PowerPoint window are the following:
1. Quick Access Toolbar: allows you to customize commands to have them at hand. You only have to select it and go to "More commands."
2. Title Bar: shows you the name of your file and other "Suggested options" like Slide Master View . These options will vary depending on the use you give to the commands.
3. File Tab: you will see the Home Menu (PowerPoint backstage) by selecting it. There, you can create a new presentation, save it, print it, export it, and many other options.
4. The Ribbon: it's where PowerPoint tabs and tools are. These tools can also be called "commands" or “features.”
5. More Button or Down Arrow: these arrows allow you to view more tools or layout options in PowerPoint.
6. Slides Pane: shows your slides in thumbnail size. By right-clicking, you can access additional options for customizing each slide. Perfect for PowerPoint beginners!
7. Slide: PowerPoint's blank canvas and the frame to be seen when presenting the file.
8. Placeholders: they are dotted boxes that will store your content.
9. Status Bar: allows you to view the slide number, grammatical errors, speaker notes, and the comments on your file.
10. Zoom: allows you to enlarge or minimize your PowerPoint workspace. The range goes from 10 to 400%.
PowerPoint Tabs
The PowerPoint tabs are the control desk of your presentation . Since PowerPoint's features are too many, they're organized in tabs.
You can come and go between tabs as you need. Once you click on a tab, it will open its ribbon, and there, you'll be able to see all the tools related to that particular category.
This PowerPoint tutorial for beginners will give you an overview of all PowerPoint tabs . Pay attention to the following list:
- Transitions Tab
- Animations Tab
- Slide Show Tab
- Recording Tab
1. Home Tab
The Home tab is the most common tab of PowerPoint. This is the tab you'll probably use the most if you're designing a presentation deck from scratch.

It allows you to add new slides and change the text characteristics : font, size, boldness, underlining, alignment, etc. If you've ever used Microsoft Word, these features will be familiar to you.
Also, you will find commands to edit the characteristics of the geometric shapes you insert. This includes: fill color, line color, sharpe effects, among others.
2. Insert Tab
The Insert tab is exactly what its name says it is. In this ribbon, you'll find all the options concerning adding a new element to your PowerPoint presentation .

You can insert a picture, some geometric shapes, icons, WordArt graphics, among others. We can tell you that this tab is really helpful for PowerPoint beginners!
For example, if you have a lot of data in PowerPoint , you could add a chart or diagram to show your information in a more visual way. Also, you can embed videos or music into PowerPoint really easily.
- PowerPoint tip for beginners: To be able to write text on your slides, you need a text box. So, if you're designing your presentation from scratch, remember to go first to the Insert tab and add a text box to start writing.
3. Design Tab
If you are one of those people who enjoy choosing the design of a PowerPoint presentation, this tab will be your favorite.

The Design tab offers a wide range of premade designs , allowing you to get more polished slides. Even better, if you explore its ribbon, you can adjust the color palette and change the overall style of your PowerPoint deck.
The PowerPoint interface, as this basic PowerPoint Tutorial, is really intuitive. We believe that you won't have any problem with this tab!
4. Transitions Tab
Using transitions in PowerPoint is a dynamic way to move from one slide to the next during a presentation. This feature is PowerPoint's stamp, so don ' t miss it!

Some PowerPoint transitions are really classic, like wiping the old slide to present the new one. Others are somewhat over the top, like the “Vortex” or the “Airplane” effect.
If you click on each kind of transition, you'll see a preview on how it would look when presenting. Really cool, right?
5. Animations Tab
In case you want to add special effects for certain elements in your slides , the Animations tab in PowerPoint will interest you.

Like the Transitions tab, you will find various animation effects in this ribbon. It's a matter of trying and choosing the best one according to your needs!
6. Slide Show Tab
As its name says, the Slide Show tab is about presenting your slides . We really like that it gives you several options to show up your presentation!

Considering that you're a PowerPoint beginner, you're not likely to use the Slide Show tab very much.
But if you're curious about this command, you must read our article: How to Make a PowerPoint Slideshow that Runs Automatically?
7. Review Tab
The Review tab is not often used by PowerPoint beginners either.
However, if your job is related to writing or if you work at an international company, this tool can be extremely useful!

With this tab, you can check the slide's spelling, translate the text in real-time, and add comments to your slides . This last function can be helpful to give feedback to a colleague.
8. View Tab
This View tab allows you to change the view of your PowerPoint slides and make handouts from them, among other things.

As you can see, the majority of its commands are really specific. So you won't have any issues while designing, test and see!
In this section, our favorite command for PowerPoint beginners is Slide Master . Explore more about this tool in our guide!
9. Recording Tab
In the last versions of this design presentation software, PowerPoint added the Recording tab. As its name says, it allows you to record all your presentation slides .

This ribbon has advanced commands, so the most common action for a PowerPoint beginner is to take a screenshot or record the screen sequentially .
10. Help Tab
Finally, there is the Help tab. If you have any problem or question concerning how to use PowerPoint, you may go here to look for a solution.
In the latest versions, Windows has added a “Show Training” option. You can click this command to practice the PowerPoint basics since it will download training templates.

As a beginner in PowerPoint, you must recognize the objective of each PowerPoint tab to be able to master the software . But, in order to conduct an outstanding presentation deck, you also need to dominate its most important features. Let's see some of them in the next section!
If you feel ready to delve deeper into PowerPoint's tools, this section is for you.
As you may know , 24Slides specializes in creating outstanding presentations for any Design Project . So, we asked one of our experts about her favorite PowerPoint features, and we want to share them all with you!
Carmen Navarrete , Graphic Designer at 24Slides, highlighted the following features that will make your presentations stand out from the crowd:
PowerPoint Feature #1: Crop to Shape
This first PowerPoint feature is simple but effective!
Let's see how to use it:
- First, choose an image you want to cut and insert it into your workspace.
- Once inserted, select it with the mouse.
- Go to the "Picture Format" tab.
- Press the arrow of the "Crop" button (right side of the screen).
- Select "Crop to Shape."
- Choose your favorite shape and customize your PowerPoint presentation!

PowerPoint Feature #2: Merge Shapes
If you don't like any figure enough, you can create one from scratch!
This is possible thanks to the "Merge Shapes" option. Follow these steps to unleash your creativity:
- First choose an image you want to cut.
- Check the list of PowerPoint shapes (Insert tab > Shapes).
- Choose two or three figures you want to merge (they can be the same figure).
- Select the figures you are going to merge (see the image).
- Once selected, go to the "Shape Format" tab.
- Press the "Merge Shapes" option and the type of merge you want (test and choose!).

- A new figure will appear, and you must fill it with the image from the first step.
- Stay on the Shape Format tab and go to "Shape Fill" (button in the middle of the ribbon).
- Select "Picture Fill" and browse for your image.
- Select the image to fill your new figure, and that's it!

- PowerPoint tip for beginners: When your merged figure is ready, paste the image to the background of your slide to achieve a better result. This way, you can use your image as a canvas and see if both elements fit well.
PowerPoint Feature #3: Insert Icons
This PowerPoint feature is quite easy to follow for PowerPoint beginners!
Just follow these steps:
- Go to the Insert tab.
- Select the "Icons" option.
- A Microsoft 365 library will open, where you can search for the required icon.
- Now, you must insert it into your presentation and adapt it to your design.
- If you have an active Microsoft 365 subscription, you'll have access to a larger number of icons in PowerPoint.
- PowerPoint tip for beginners: If you want to learn more about icons in PowerPoint, read our article on How to Use Icons to Make Amazing PowerPoint Presentations .
PowerPoint Feature #4: Insert SmartArt
PowerPoint's SmartArt is one of the most popular and accessible tools to dominate while learning about PowerPoint basics.
To use it in your slide deck, you must:
- Select SmartArt.
- See all SmartArt categories and choose your favorite based on your needs.
- Add the text you have prepared and adapt it to your presentation.

We want to give you some ideas to master this SmartArt tool in PowerPoint: you can make timelines , flowcharts , and even a Venn diagram in just a few seconds. Try and see!
PowerPoint Feature #5: Remove Background
If you don't know how to use Photoshop and want to remove the background from an image, in this PowerPoint 101 Guide, we show you how:
- First choose the image you want to remove the background from.
- Insert the image in the PowerPoint workspace.
- Select the image and go to the "Picture Format" tab.
- Select "Remove Background" (first option on the left).
- You can keep and remove parts of the image with the first two tools of the ribbon (see image).
- Keep in mind that all the sections highlighted in purple will be deleted.

- We recommend zooming in to keep or remove parts of the image with more detail.
- Once you're done, press the "Keep Changes" button.
- Finally, adapt the new image to your PowerPoint presentation.

- PowerPoint tip for beginners: Choose a high-contrast photo or image for best results. In other words, the outline of the person or object you want to cut out must have clear edges and cannot blend with the image's background color.
PowerPoint Feature #6: Add Speaker Notes
The latest PowerPoint feature is a command you can use to prepare your speech before presenting to an audience.
Learning how to add speaker notes in PowerPoint is simple:
- Select the slide that needs some notes.
- Usually, there is a footer below the slide, but if not, you will have to activate it.
- Go to the View tab and select "Notes."
- The Speaker Notes section will appear, and you can add whatever you want!

- PowerPoint tip for beginners: In case you want to practice your entire presentation and have a lot of notes, go to the View tab and select "Notes Page" (fourth command). You'll be able to see all your Speaker Notes faster!
PowerPoint Feature #7: PowerPoint Translator
If you've ever wondered how to translate your PowerPoint Slides, we'll explain the step by step here:
- Go to the Review tab.
- Select the text you want to translate.
- Press the “Translate” button.
- A panel will open on the right side of the screen.
- Choose the language you need and you'll see the translation in real-time.
- If you press Insert, the text will change to the new translation!
PowerPoint Feature #8: Screen Recording
The process of recording your screen in PowerPoint is straightforward and intuitive. Let's see:
- Go to the “Record” or “Recording” tab.
- Press the "Record Slide Show" button or the “From Beginning” button (depending on your PPT version).
- A new window will open.
- Select the red record button and start recording!
- When you're done, select “Export.”
- By default, the video will be 1080p. If you want to lower the video quality, go to "Customize export."
- Name the video, save it to a folder and that's it!
As you may have noticed, this software has endless PowerPoint design options for beginners. We encourage you to try and test each functionality!
However, we're clear that PowerPoint has different features, so it can be hard to know where to start. That's why understanding PowerPoint basics is crucial if you truly want to master this software!
Our PowerPoint 101 Guide continues; stay tuned to discover more great stuff about this Microsoft software. Keep reading!
A PowerPoint template is a pre-made design that you can use for your own means, and that will save you a lot of time!
Templates in PowerPoint are a great resource for designing since all the structure is already done, and you only have to update the content . We can tell you they're the perfect resource for PowerPoint beginners!
They can be incredibly specific. For example, there are templates for a SWOT analysis or a complete Marketing report. Otherwise, templates can also be very general, with several slides with a similar design.
If you struggle with the artistic part of designing presentations, downloading PowerPoint templates will be a life changer!

How to download PowerPoint templates for free?
If you didn't know, 24Slides has an extensive repository of PowerPoint templates. But how to obtain them? It's really simple:
- First, create an account on our Free Templates Website with the button “Register” (that way, you can download everything without problems!).
- Think about the graphics you need and the ideal structure for your presentation deck (you can also change the color palette later!).
- Download it in PowerPoint format (if you prefer it in Google Slides format, you'll also find this type in our repository).
- Edit and change everything you need for your PowerPoint presentation!
24Slides Designers specialize in business and corporate PowerPoints, but you'll also find other types of templates on our website: Data templates, Timelines, Roadmaps, Matrixes, Diagrams, and more.
Keep in mind that a well-designed PowerPoint deck helps you communicate stronger messages to your audience . Don't waste this opportunity to make your presentation shine!

If you want to learn more about how to master PowerPoint, do not miss the last section. We'll show you some PowerPoint basics from the software itself!
A PowerPoint 101 Guide wouldn't be that useful with no examples. So, if you enjoy the step-by-step guides, this section is for you.
Below, we'll show you how to make a simple PowerPoint presentation. But first, here are some tips to be more efficient in the process:
- Be clear about what type of presentation you're going to create (is it corporate, playful, or more creative?).
- Make a draft with the most important information you need to add and, thus, generate a good structure in your presentation .
- Get inspired by examples on the internet , but adapt them to your needs and audience.
- If you will create a business presentation, keep in mind your brand identity .
- Make sure your PowerPoint works , you may need to update to the latest version or pay for the subscription.
Step 1: Make a draft to structure your presentation
As we said before, writing a draft or script of your content will be vital to start on the right foot as a PowerPoint beginner.
This advice is so important that we choose it as the first step to learning how to make a PowerPoint presentation. Remember: Planning is key!

Regarding the process of planning, we share some good practices:
- If your presentation will be very long , write down all subtitles and content in a Word document. This will help you organize your ideas and give a correct sequence to your narrative. In addition to avoiding redundancies in the message you want to communicate.
- If your presentation will use many visual resources , we recommend choosing high-quality images. This will help you have a starting graphic base. Some good free image repositories are Freepick , Unsplash , and Adobe Stock .
- If your presentation is based on data , have all your results summarized or your most relevant conclusions at hand. The idea of making a PowerPoint presentation is to show your information in the simplest way possible for your audience.
Step 2: Create a new document in PowerPoint
Once you check that all the functions are working fine with the software, please open it and go to the File tab. If you've ever used Word or Excel, you'll probably find this Home Menu familiar.
In short, this is the main page of PowerPoint, where you can create a new presentation or open an older one. Let's see:

In order to follow this part of our PowerPoint Tutorial correctly, take into consideration the following points:
- On the lower side of the screen, you'll find your recently opened PowerPoint files. This option is great for saving some time.
- If you don't find the presentation you're looking for, click on the “Open” option at the left bar and find older files.
- Don't forget to save your presentation with a relatable name so you won't lose sight of it!
Step 3: Choose the perfect design for your presentation
With your information ready in a draft, it's time to choose the design of your PowerPoint slide deck. You must imagine that the available design options are endless!
For practical reasons, you have three options regarding the design:
- Start a design from scratch (very difficult for a PowerPoint beginner).
- Choose an established PowerPoint design or layout.
- Download a PowerPoint template and modify some details.
Don't worry if you don't know how to continue! In this PowerPoint 101 class, we're going to explain step by step the second option:
How do you set a default design in PowerPoint?
- First, go to the Design tab.
- Open the list of options by clicking on the third arrow.
- Choose the design you like the most for your PowerPoint presentation.

If you want to explore more PowerPoint designs, there is a way to research online. For that, you only need to:
- Go to the File tab (first tab, next to the Home tab).
- Select "More themes" (see image).

- Use the search engine and write the keyword you want (it can be related to your business or it can be a color).
- Check the list of PowerPoint themes and choose your favorite.
- Wait a few minutes while it loads and keep designing in PowerPoint!

How do you change the layout of one slide in PowerPoint?
In this PowerPoint 101 Guide, you will also learn how to configure the layout of each slide.
Keep in mind that to have a high-impact presentation, you must adapt your slides' design to the type of content you'll add. And using layouts is perfect for this purpose.
To change the layout type in PowerPoint, follow these steps:
- Right-click on the slide you want to change.
- Select the "Layout" option.
- You will find more than ten layout models.
- Choose the one that best suits your content.
- Repeat these steps for each slide (if you wish or require).

How do you customize your slides in PowerPoint?
The design process in this PowerPoint 101 Guide doesn't stop there.
You also can customize your presentation's color palette , font style, background format , and graphics effects .
Just go to:
- Design tab > Variants.
- Select Colors, Fonts, Effects or Background Styles (as you need).
- If you're inspired and want to create your own background in PowerPoint, select Background Styles > Format Background.
- Finally, custom your slides as you want!

Step 4: Add all your information to your presentation
Now, it's time to add all your information to your slides. If your script is long, take your time to copy each part of it.
In this PowerPoint Tutorial, we're going to show how our design is going so far. We design at your side!

Step 5: Add transitions or animations to your presentation
The stamp of PowerPoint is its transitions and animations! Naturally, our PowerPoint 101 has considered these essential commands.
If you want to add them to your presentation and make your speech more fluid, follow these steps:
- Go to the tabs section of PowerPoint.
- Select "Transitions" or "Animations" and try your favorite effects.
- Remember that if you select Transitions, these will modify the entire slide, while Animations can be added to each element individually.
When choosing one Animation, you can eliminate it if you aren't 100% convinced. You only need to:
- Select the Animation number that appears on the corner.
- Press the "Delete" or "Backspace" button on your keyboard.
- Choose another Animation in PowerPoint if you want!

This “PowerPoint for dummies” is full of tips and tricks! So here is one more: Don't overuse transitions or animations in PowerPoint ; they can make your presentation slower and unprofessional . Use this tool in a subtle way!
Step 6: Refine the final details
As always, every final product must be reviewed. Especially if you're learning the PowerPoint fundamentals with us.
We recommend reviewing each slide of your PowerPoint presentation one final time. In this process, you will be able to:
- Add icons if your presentation requires it.
- Change any image or illustration if they don't convince you.
- Change transitions or animations.
- Customize your presentation's color palette .
- Proofread your slides' text or add more information.
- Add speaker notes to your presentation.

Step 7: Slideshow your presentation
When your presentation is finished, it's essential to know how to make a PowerPoint slideshow. This way, you can see your slides from the exact same perspective your audience will see them.
To slideshow your presentation in PowerPoint, follow these simple steps for PowerPoint beginners:
- Position yourself on your first slide.
- Go to the bottom right of the software.
- Select the "Slide Show" button (see image).
- Have a look of your presentation by clicking on each slide or pressing the right arrow on your keyboard.
- To go out from the Slide Show mode, you have to press the ESC key.

Now you can present your slides like an expert!
When you master this presentation design software, you'll be able to create amazing things in PowerPoint : infographics, diagrams, charts, pitch decks, business cards, calendars, you name it!
This was our PowerPoint Guide for beginners. We hope that our compilation today will be useful for conducting more professional presentations in the future and, why not, achieve all your goals!
Don't forget to share this PowerPoint 101 Guide with your co-workers or whoever you want!

Want to boost your beginner PowerPoint skills? Check out this content:
- How to Work with Multiple Images in PowerPoint
- How to Add a Timer to Your Powerpoint Presentations
- PowerPoint Charts, Graphs, & Tables Made Easy | Tips & Tricks
- How To Use PowerPoint Design Ideas - All Questions Answered!
- 36 Fun Icebreakers for Your Next Presentation
- The Cost of PowerPoint Presentations: Discover the hidden expenses you might overlook!
Create professional presentations online
Other people also read

Tutorial: Save your PowerPoint as a Video
How To Convert Google Slides To PowerPoint and Vice Versa

How To Add Animations To PowerPoint
Critical PowerPoint Shortcuts – Claim Your FREE Training Module and Get Your Time Back!
How to Make a PowerPoint Presentation (Step-by-Step)
- PowerPoint Tutorials
- Presentation Design
- January 22, 2024
In this beginner’s guide, you will learn step-by-step how to make a PowerPoint presentation from scratch.
While PowerPoint is designed to be intuitive and accessible, it can be overwhelming if you’ve never gotten any training on it before. As you progress through this guide, you’ll will learn how to move from blank slides to PowerPoint slides that look like these.

Table of Contents
Additionally, as you create your presentation, you’ll also learn tricks for working more efficiently in PowerPoint, including how to:
- Change the slide order
- Reset your layout
- Change the slide dimensions
- Use PowerPoint Designer
- Format text
- Format objects
- Play a presentation (slide show)
With this knowledge under your belt, you’ll be ready to start creating PowerPoint presentations. Moreover, you’ll have taken your skills from beginner to proficient in no time at all. I will also include links to more advanced PowerPoint topics.
Ready to start learning how to make a PowerPoint presentation?
Take your PPT skills to the next level
Start with a blank presentation.
Note: Before you open PowerPoint and start creating your presentation, make sure you’ve collected your thoughts. If you’re going to make your slides compelling, you need to spend some time brainstorming.
For help with this, see our article with tips for nailing your business presentation here .
The first thing you’ll need to do is to open PowerPoint. When you do, you are shown the Start Menu , with the Home tab open.
This is where you can choose either a blank theme (1) or a pre-built theme (2). You can also choose to open an existing presentation (3).
For now, go ahead and click on the Blank Presentation (1) thumbnail.

Doing so launches a brand new and blank presentation for you to work with. Before you start adding content to your presentation, let’s first familiarize ourselves with the PowerPoint interface.
The PowerPoint interface

Here is how the program is laid out:
- The Application Header
- The Ribbon (including the Ribbon tabs)
- The Quick Access Toolbar (either above or below the Ribbon)
- The Slides Pane (slide thumbnails)
The Slide Area
The notes pane.
- The Status Bar (including the View Buttons)
Each one of these areas has options for viewing certain parts of the PowerPoint environment and formatting your presentation.
Below are the important things to know about certain elements of the PowerPoint interface.
The PowerPoint Ribbon

The Ribbon is contextual. That means that it will adapt to what you’re doing in the program.
For example, the Font, Paragraph and Drawing options are greyed out until you select something that has text in it, as in the example below (A).

Furthermore, if you start manipulating certain objects, the Ribbon will display additional tabs, as seen above (B), with more commands and features to help you work with those objects. The following objects have their own additional tabs in the Ribbon which are hidden until you select them:
- Online Pictures
- Screenshots
- Screen Recording
The Slides Pane

This is where you can preview and rearrange all the slides in your presentation.
Right-clicking on a slide in the pane gives you additional options on the slide level that you won’t find on the Ribbon, such as Duplicate Slide , Delete Slide , and Hide Slide .

In addition, you can add sections to your presentation by right-clicking anywhere in this Pane and selecting Add Section . Sections are extremely helpful in large presentations, as they allow you to organize your slides into chunks that you can then rearrange, print or display differently from other slides.

The Slide Area (A) is where you will build out your slides. Anything within the bounds of this area will be visible when you present or print your presentation.
Anything outside of this area (B) will be hidden from view. This means that you can place things here, such as instructions for each slide, without worrying about them being shown to your audience.

The Notes Pane is the space beneath the Slide Area where you can type in the speaker notes for each slide. It’s designed as a fast way to add and edit your slides’ talking points.
To expand your knowledge and learn more about adding, printing, and exporting your PowerPoint speaker notes, read our guide here .
Your speaker notes are visible when you print your slides using the Notes Pages option and when you use the Presenter View . To expand your knowledge and learn the ins and outs of using the Presenter View , read our guide here .

You can resize the Notes Pane by clicking on its edge and dragging it up or down (A). You can also minimize or reopen it by clicking on the Notes button in the Status Bar (B).
Note: Not all text formatting displays in the Notes Pane, even though it will show up when printing your speaker notes. To learn more about printing PowerPoint with notes, read our guide here .
Now that you have a basic grasp of the PowerPoint interface at your disposal, it’s time to make your presentation.
Adding Content to Your PowerPoint Presentation
Notice that in the Slide Area , there are two rectangles with dotted outlines. These are called Placeholders and they’re set on the template in the Slide Master View .
To expand your knowledge and learn how to create a PowerPoint template of your own (which is no small task), read our guide here .

As the prompt text suggests, you can click into each placeholder and start typing text. These types of placeholder prompts are customizable too. That means that if you are using a company template, it might say something different, but the functionality is the same.

Note: For the purposes of this example, I will create a presentation based on the content in the Starbucks 2018 Global Social Impact Report, which is available to the public on their website.
If you type in more text than there is room for, PowerPoint will automatically reduce its font size. You can stop this behavior by clicking on the Autofit Options icon to the left of the placeholder and selecting Stop Fitting Text to this Placeholder .
Next, you can make formatting adjustments to your text by selecting the commands in the Font area and the Paragraph area of the Home tab of the Ribbon.

The Reset Command: If you make any changes to your title and decide you want to go back to how it was originally, you can use the Reset button up in the Home tab .

Insert More Slides into Your Presentation
Now that you have your title slide filled in, it’s time to add more slides. To do that, simply go up to the Home tab and click on New Slide . This inserts a new slide in your presentation right after the one you were on.

You can alternatively hit Ctrl+M on your keyboard to insert a new blank slide in PowerPoint. To learn more about this shortcut, see my guide on using Ctrl+M in PowerPoint .
Instead of clicking the New Slide command, you can also open the New Slide dropdown to see all the slide layouts in your PowerPoint template. Depending on who created your template, your layouts in this dropdown can be radically different.

If you insert a layout and later want to change it to a different layout, you can use the Layout dropdown instead of the New Slide dropdown.
After inserting a few different slide layouts, your presentation might look like the following picture. Don’t worry that it looks blank, next we will start adding content to your presentation.

If you want to follow along exactly with me, your five slides should be as follows:
- Title Slide
- Title and Content
- Section Header
- Two Content
- Picture with Caption
Adding Content to Your Slides
Now let’s go into each slide and start adding our content. You’ll notice some new types of placeholders.

On slide 2 we have a Content Placeholder , which allows you to add any kind of content. That includes:
- A SmartArt graphic,
- A 3D object,
- A picture from the web,
- Or an icon.
To insert text, simply type it in or hit Ctrl+C to Copy and Ctrl+V to Paste from elsewhere. To insert any of the other objects, click on the appropriate icon and follow the steps to insert it.
For my example, I’ll simply type in some text as you can see in the picture below.

Slides 3 and 4 only have text placeholders, so I’ll go ahead and add in my text into each one.

On slide 5 we have a Picture Placeholder . That means that the only elements that can go into it are:
- A picture from the web

To insert a picture into the picture placeholder, simply:
- Click on the Picture icon
- Find a picture on your computer and select it
- Click on Insert
Alternatively, if you already have a picture open somewhere else, you can select the placeholder and paste in (shortcut: Ctrl+V ) the picture. You can also drag the picture in from a file explorer window.

If you do not like the background of the picture you inserted onto your slide, you can remove the background here in PowerPoint. To see how to do this, read my guide here .
Placeholders aren’t the only way to add content to your slides. At any point, you can use the Insert tab to add elements to your slides.
You can use either the Title Only or the Blank slide layout to create slides for content that’s different. For example, a three-layout content slide, or a single picture divider slide, as shown below.

In the first example above, I’ve inserted 6 text boxes, 3 icons, and 3 circles to create this layout. In the second example, I’ve inserted a full-sized picture and then 2 shapes and 2 text boxes.
The Reset Command: Because these slides are built with shapes and text boxes (and not placeholders), hitting the Reset button up in the Home tab won’t do anything.
That is a good thing if you don’t want your layouts to adjust. However, it does mean that it falls on you to make sure everything is aligned and positioned correctly.
For more on how to add and manipulate the different objects in PowerPoint, check out our step-by-step articles here:
- Using graphics in PowerPoint
- Inserting icons onto slides
- Adding pictures to your PowerPoint
- How to embed a video in PowerPoint
- How to add music to your presentation
Using Designer to generate more layouts ideas
If you have Office 365, your version of PowerPoint comes with a new feature called Designer (or Design Ideas). This is a feature that generates slide layout ideas for you. The coolest thing about this feature is that it uses the content you already have.
To use Designer , simply navigate to the Design tab in your Ribbon, and click on Design Ideas .

NOTE: If the PowerPoint Designer is not working for you (it is grey out), see my troubleshooting guide for Designer .
Change the Overall Design (optional)
When you make a PowerPoint presentation, you’ll want to think about the overall design. Now that you have some content in your presentation, you can use the Design tab to change the look and feel of your slides.
For additional help thinking through the design of your presentation, read my guide here .
A. Picking your PowerPoint slide size
If you have PowerPoint 2013 or later, when you create a blank document in PowerPoint, you automatically start with a widescreen layout with a 16:9 ratio. These dimensions are suitable for most presentations as they match the screens of most computers and projectors.
However, you do have the option to change the dimensions.
For example, your presentation might not be presented, but instead converted into a PDF or printed and distributed. In that case, you can easily switch to the standard dimensions with a 4:3 ratio by selecting from the dropdown (A).
You can also choose a custom slide size or change the slide orientation from landscape to portrait in the Custom Slide Size dialog box (B).

To learn all about the different PowerPoint slide sizes, and some of the issues you will face when changing the slide size of a non-blank presentation, read my guide here .
B. Selecting a PowerPoint theme
The next thing you can do is change the theme of your presentation to a pre-built one. For a detailed explanation of what a PowerPoint theme is, and how to best use it, read my article here .
In the beginning of this tutorial, we started with a blank presentation, which uses the default Office theme as you can see in the picture below.

That gives you the most flexibility because it has a blank background and quite simple layouts that work for most presentations. However, it also means that it’s your responsibility to enhance the design.
If you’re comfortable with this, you can stay with the default theme or create your own custom theme ( read my guide here ). But if you would rather not have to think about design, then you can choose a pre-designed theme.
Microsoft provides 46 other pre-built themes, which include slide layouts, color variants and palettes, and fonts. Each one varies quite significantly, so make sure you look through them carefully.
To select a different theme, go to the Design tab in the Ribbon, and click on the dropdown arrow in the Themes section .

For this tutorial, let’s select the Frame theme and then choose the third Variant in the theme. Doing so changes the layout, colors, and fonts of your presentation.

Note: The theme dropdown area is also where you can import or save custom themes. To see my favorite places to find professional PowerPoint templates and themes (and recommendations for why I like them), read my guide here .
C. How to change a slide background in PowerPoint
The next thing to decide is how you want your background to look for the entire presentation. In the Variants area, you can see four background options.

For this example, we want our presentation to have a dark background, so let’s select Style 3. When you do so, you’ll notice that:
- The background color automatically changes across all slides
- The color of the text on most of the slides automatically changes to white so that it’s visible on the dark background
- The colors of the objects on slides #6 and #7 also adjust, in a way we may not want (we’ll likely have to make some manual adjustments to these slides)

Note: If you want to change the slide background for just that one slide, don’t left-click the style. Instead, right-click it and select Apply to Selected Slides .
After you change the background for your entire presentation, you can easily adjust the background for an individual slide.

Inside the Format Background pane, you can see you have the following options:
- Gradient fill
- Picture or texture fill
- Pattern fill
- Hide background
You can explore these options to find the PowerPoint background that best fits your presentation.
D. How to change your color palette in PowerPoint
Another thing you may want to adjust in your presentation, is the color scheme. In the picture below you can see the Theme Colors we are currently using for this presentation.

Each PowerPoint theme comes with its own color palette. By default, the Office theme includes the Office color palette. This affects the colors you are presented with when you format any element within your presentation (text, shapes, SmartArt, etc.).

The good news is that the colors here are easy to change. To switch color palettes, simply:
- Go to the Design tab in the Ribbon
- In the Variants area, click on the dropdown arrow and select Colors
- Select the color palette (or theme colors) you want
You can choose among the pre-built color palettes from Office, or you can customize them to create your own.
As you build your presentation, make sure you use the colors from your theme to format objects. That way, changing the color palette adjusts all the colors in your presentation automatically.
E. How to change your fonts in PowerPoint
Just as we changed the color palette, you can do the same for the fonts.

Each PowerPoint theme comes with its own font combination. By default, the Office theme includes the Office font pairing. This affects the fonts that are automatically assigned to all text in your presentation.

The good news is that the font pairings are easy to change. To switch your Theme Fonts, simply:
- Go to the Design tab in the Ribbon
- Click on the dropdown arrow in the Variants area
- Select Fonts
- Select the font pairing you want
You can choose among the pre-built fonts from Office, or you can customize them to create your own.
If you are working with PowerPoint presentations on both Mac and PC computers, make sure you choose a safe PowerPoint font. To see a list of the safest PowerPoint fonts, read our guide here .
If you receive a PowerPoint presentation and the wrong fonts were used, you can use the Replace Fonts dialog box to change the fonts across your entire presentation. For details, read our guide here .
Adding Animations & Transitions (optional)
The final step to make a PowerPoint presentation compelling, is to consider using animations and transitions. These are by no means necessary to a good presentation, but they may be helpful in your situation.
A. Adding PowerPoint animations
PowerPoint has an incredibly robust animations engine designed to power your creativity. That being said, it’s also easy to get started with basic animations.
Animations are movements that you can apply to individual objects on your slide.

To add a PowerPoint animation to an element of your slide, simply:
- Select the element
- Go to the Animations tab in the Ribbon
- Click on the dropdown arrow to view your options
- Select the animation you want
You can add animations to multiple objects at one time by selecting them all first and then applying the animation.
B. How to preview a PowerPoint animation

There are three ways to preview a PowerPoint animation:
- Click on the Preview button in the Animations tab
- Click on the little star next to the slide
- Play the slide in Slide Show Mode
To learn other ways to run your slide show, see our guide on presenting a PowerPoint slide show with shortcuts .
To adjust the settings of your animations, explore the options in the Effect Options , Advanced Animation and the Timing areas of the Animation tab .

Note: To see how to make objects appear and disappear in your slides by clicking a button, read our guide here .
C. How to manage your animations in PowerPoint

The best way to manage lots of animations on your slide is with the Animation Pane . To open it, simply:
- Navigate to the Animations tab
- Select the Animation Pane
Inside the Animation Pane, you’ll see all of the different animations that have been applied to objects on your slide, with their numbers marked as pictured above.
Note: To see examples of PowerPoint animations that can use in PowerPoint, see our list of PowerPoint animation tutorials here .
D. How to add transitions to your PowerPoint presentation
PowerPoint has an incredibly robust transition engine so that you can dictate how your slides change from one to the other. It is also extremely easy to add transitions to your slides.
In PowerPoint, transitions are the movements (or effects) you see as you move between two slides.

To add a transition to a PowerPoint slide, simply:
- Select the slide
- Go to the Transitions tab in the Ribbon
- In the Transitions to This Slide area, click on the dropdown arrow to view your options
- Select the transition you want
To adjust the settings of the transition, explore the options in the Timing area of the Transitions tab.
You can also add the same transition to multiple slides. To do that, select them in the Slides Pane and apply the transition.
E. How to preview a transition in PowerPoint

There are three ways to preview your PowerPoint transitions (just like your animations):
- Click on the Preview button in the Transitions tab
- Click on the little star beneath the slide number in the thumbnail view
Note: In 2016, PowerPoint added a cool new transition, called Morph. It operates a bit differently from other transitions. For a detailed tutorial on how to use the cool Morph transition, see our step-by-step article here .
Save Your PowerPoint Presentation
After you’ve built your presentation and made all the adjustments to your slides, you’ll want to save your presentation. YOu can do this several different ways.

To save a PowerPoint presentation using your Ribbon, simply:
- Navigate to the File tab
- Select Save As on the left
- Choose where you want to save your presentation
- Name your presentation and/or adjust your file type settings
- Click Save
You can alternatively use the Ctrl+S keyboard shortcut to save your presentation. I recommend using this shortcut frequently as you build your presentation to make sure you don’t lose any of your work.

This is the standard way to save a presentation. However, there may be a situation where you want to save your presentation as a different file type.
To learn how to save your presentation as a PDF, see our guide on converting PowerPoint to a PDF .
How to save your PowerPoint presentation as a template
Once you’ve created a presentation that you like, you may want to turn it into a template. The easiest – but not technically correct – way, is to simply create a copy of your current presentation and then change the content.
But be careful! A PowerPoint template is a special type of document and it has its own parameters and behaviors.
If you’re interested in learning about how to create your own PowerPoint template from scratch, see our guide on how to create a PowerPoint template .
Printing Your PowerPoint Presentation
After finishing your PowerPoint presentation, you may want to print it out on paper. Printing your slides is relatively easy.

To open the Print dialog box, you can either:
- Hit Ctrl+P on your keyboard
- Or go to the Ribbon and click on File and then Print

Inside the Print dialog box, you can choose from the various printing settings:
- Printer: Select a printer to use (or print to PDF or OneNote)
- Slides: Choose which slides you want to print
- Layout: Determine how many slides you want per page (this is where you can print the notes, outline, and handouts)
- Collated or uncollated (learn what collated printing means here )
- Color: Choose to print in color, grayscale or black & white
There are many more options for printing your PowerPoint presentations. Here are links to more in-depth articles:
- How to print multiple slides per page
- How to print your speaker notes in PowerPoint
- How to save PowerPoint as a picture presentation
So that’s how to create a PowerPoint presentation if you are brand new to it. We’ve also included a ton of links to helpful resources to boost your PowerPoint skills further.
When you are creating your presentation, it is critical to first focus on the content (what you are trying to say) before getting lost inserting and playing with elements. The clearer you are on what you want to present, the easier it will be to build it out in PowerPoint.
If you enjoyed this article, you can learn more about our PowerPoint training courses and other presentation resources by visiting us here .
🔒 Unlock the PowerPoint Shortcuts Trusted by Industry Leaders KKR, American Express, HSBC, and More!
Join over 114,880 professionals from diverse fields including consulting, investment banking, advertising, marketing, sales, and business development who have supercharged their PowerPoint game with our proven methods.
✅ Customize compelling presentations effortlessly.
✅ Master time-saving techniques for faster deck creation.
✅ Boost your career prospects with top-notch PowerPoint skills.
Get FREE access to the Critical PowerPoint Shortcuts module of our premium training course by entering your name and email below.
DISCLAIMER: PC Users Only!
We respect your privacy and will keep your info safe and confidential.
About The Author

Popular Tutorials
- How to Strikethrough Text (l̶i̶k̶e̶ ̶t̶h̶i̶s̶) in Word, Excel & PowerPoint
- How to Make Animated Fireworks in PowerPoint (Step-by-Step)
- Strikethrough Shortcut (l̶i̶k̶e̶ ̶t̶h̶i̶s̶) for Word, Excel & PowerPoint
- How to Create a Flash Card Memory Game in PowerPoint (Like Jeopardy)
- Keyboard Shortcuts Not Working: Solved
PowerPoint Tutorial Categories
- Strategies & Opinions
- Shortcuts & Hacks
- Pictures, Icons, Videos, Etc.
- New Features
- Miscellaneous
- Charts & Data Viz
We help busy professionals save hours and gain peace of mind, with corporate workshops, self-paced courses and tutorials for PowerPoint and Word.
Work With Us
- Corporate Training
- Presentation & Template Design
- Courses & Downloads
- PowerPoint Articles
- Word Articles
- Productivity Resources
Find a Tutorial
- Free Training
- For Businesses
We help busy office workers save hours and gain peace of mind, with tips, training and tutorials for Microsoft PowerPoint and Word.
Master Critical PowerPoint Shortcuts – Secure Your FREE Training Module and Save Valuable Time!
⌛ Master time-saving expert techniques.
🔥 Create powerful presentations.
🚀 Propel your career to new heights.
We value your privacy – we keep your info safe.
Discover PowerPoint Hacks Loved by Industry Giants - KKR, AmEx, HSBC!
Over 114,880 professionals in finance, marketing and sales have revolutionized their PPT skills with our proven methods.
Gain FREE access to a full module of our premium PowerPoint training program – Get started today!
We hate spam too and promise to keep your information safe.
You are currently viewing a placeholder content from Facebook . To access the actual content, click the button below. Please note that doing so will share data with third-party providers.
- Content Types
Presentations Keep your audience engaged.
Documents Formalize your branding.
Videos Add movement to your brand.
Infographics Share information visually.
Whiteboards Brainstorming, plan, and design.
Charts and Graphs Bring life to your data.
Social Media Graphics Create scroll-stopping content.
Forms & Surveys new Visual forms that convert.
Mockups Create high-quality mockups in seconds.
Printables Create content for printing.

- Features & Assets
AI Designer
Interactivity
AI Image Generator
Integrations
Data Widgets
Collaborations
Social Scheduler
Branded Templates
Presenter Studio
Free Educational Resources See All
Visme Video Tutorials Watch videos on how to use Visme.
Ebooks Read in-depth knowledge for your industry.
Graphic Design Videos Learn design principles & best practices.
Live Webinars Interact with the experts live.
Free Online Courses Get certified with free online courses.
Our Blog See All
- Presentations
Video & Animations
Digital Marketing
Infographics
Design for Business
Data Visualization
Design Inspiration
For Work All Teams
Agencies & Consulting Manage multiple brands.
Education Use Visme in the classroom.
Nonprofit Bring life to your cause.
Enterprises Create visual content at scale.
- Perfect For These Roles
Marketers Creative content that shines.
Human Resources Improve internal communication.
Sales Teams Close more deals with your content.
Training Development Create interactive training content.
Templates See All
Presentations 1000+ layouts and themes.
Chart & Maps Get data visualization ideas.
Social Media Graphics Browse templates for every platform.
Infographics Find the right format for your information.
Documents Templates for every business document.
Videos & GIFs Find the perfect preanimated template.
Branded Templates Get a bundle of templates that match your brand.
Forms & Surveys new Forms for engagement and conversions.
- Other Templates
Website Graphics
Survey Results
Case Studies See All

How the Florida Panthers Maximize Their Workflow & Win New Clients Using Visme

Converting More Leads from Existing Traffic with Visme’s Interactive Form Builder

How the Denver Broncos Use Visme to Visualize Data, Execute Strategies & Wow Partners

How a Consultancy Uses Visme to Create Engaging Client-Facing Content
Created with Visme See All
Infographics / Data Viz
Document / EBooks
Forms / Surveys
- Request a Demo
- Sign Up Free
- Free Educational Resources
Online Presentation Maker for Engaging Presentations
Create Your Presentation It’s free and easy to use.

- Online presentation maker with 900+ slide layouts.
- Millions of images, icons and graphics to choose from.
- Dozens of chart types to visualize data and numbers.

Chosen by brands large and small
Our presentation maker is used by over 27,500,000 marketers, communicators, executives and educators from over 133 countries that include:

EASY TO EDIT
Presentation Templates
Avoid the trouble of having to search for just the right template or create your own slide design from scratch by tapping into our library of more than 900 slide design layouts for practically every content need, from diagrams, charts and maps to image collages and quote slides.

Create your presentation View more templates
Features of the Presentation Maker
Beautiful presentation themes.
Choose from one of our presentation themes with hundreds of available slide layouts for you to pick from and build a beautiful presentation. Find slide layouts to fit any type of information you need to communicate within your presentation and customize them to perfectly fit your brand or topic.
Create Your Presentation

Build your presentation
With fully customizable slides, text blocks, data visualization tools, photos and icons to help tell your story, you can easily build creative and cool presentations as quickly as you need. Build the perfect slides with Visme’s easy-to-use presentation editor.

Customize every aspect of your presentation with your own images and text
Choose from over a million images, thousands of icons, dozens of charts and data widgets to visualize information in an engaging way. Apply a color scheme to all your slides with one click. Add animation effects, transitions, interactivity, pop-ups, rollovers and third-party content such as live websites and social media feeds.

Record yourself presenting
Once you’ve created your presentation, do more than only share or download it. With Visme’s Presenter Studio, you can record your presentation and share it with your audience.
- Record your screen, audio, and video, or switch off your camera for an audio-only presentation.
- Present asynchronously on your own time, at your own pace. Let your colleagues watch it at their convenience.
More Great Features of the Presentation Maker
Share your presentation.
Visme makes it easy to create and share presentations online. Our presentation software allows you to present online by generating a link to access your presentation, share privately by sending a password protected link to friends and colleagues, or even turn your presentation into a lead generation tool by requiring email sign-in before viewing.

LEARN ABOUT PRESENTATIONS
What is a Presentation ?
A presentation is a sequence of slides that tell a story or teach an audience about a topic. These are often used in business as ways of demonstrating something and in the classroom as teaching aids. While PowerPoint long dominated the presentation industry, Visme’s free online presentation maker allows you to create even more beautiful and engaging content.
With Visme's engaging presentation maker, you can start with a template, dive into one of our themes with various slide ideas, or mix and match slides from different templates to create your own masterpiece.

Use the presentation maker to take the trouble out of presentation design.
Creating a slide deck for an important presentation can take several hours, if not days. Our free presentation maker provides a searchable slide library with 900+ layouts that you can fully customize. With so many options, you can easily find the exact slides that you need instead of searching for the right template or building a slide design from scratch.
EVERYTHING YOU NEED + MORE
More Than a Presentation Maker
Visme’s online presentation tools allow you to create an interactive online presentation that will blow your audience away. Add interactive elements, animate your slides and create a presentation that will have your viewers talking for days to come.
MAKE IT ENGAGING
Create interactive presentations with popup and rollover effects that allow your viewer to interact with your design to learn more information.

VISUALIZE YOUR DATA
Charts & Graphs
Share data, statistics, simple numbers and more in your presentation slides with Visme’s easy-to-use charts, graphs and other data widgets.

BEAUTIFY YOUR CONTENT
Stock Photos & Graphics
Choose from over a million stock photos, icons, illustrations, characters, lines, shapes and more to create an engaging presentation design.
HOW IT WORKS
Make Presentations in 5 Steps
Whether you’re creating a presentation to pitch your business, to inform your industry or to update your team or supervisors, you want your slideshow to be equal parts beautiful and informative. Visme makes it easy with our powerful presentation maker.
Mix and match template styles and slide ideas, customize with your own ideas, insert design elements from our asset library, present online with presenter notes and more.
- Sign up for free or log into your Visme account and create a new project.
- Choose one of our beautiful themes under the Presentations content category or select a pre-designed presentation template.
- Add new slides from our theme library to help guide your presentation design.
- Customize text boxes, fonts, colors, photos, icons, charts, data visualization tools and so much more within your slides.
- Quickly and easily share or present your slideshow by clicking Share in the top navigation bar and viewing our share options.
How to Use the Presentation Maker
Before creating your slide deck, make sure to create an outline with all the major points that you need to include within your presentation.
Start creating your slides. You can easily use our free presentation slides and templates to help you create a well-designed and informative presentation.
Easily replace any image with millions of free images within our editor, as well as diagrams, charts, icons, illustrations and maps.
Insert your own text by clicking on any text box and typing in your own information (or you can simply copy and paste it from your outline).
Our free presentation maker online also comes with built-in animation effects. Add transitions, audio, pop-ups, rollovers and interactive buttons to wow your audience.
Use the Presenter View to rehearse your delivery. Use the timer to make sure you don’t go over the allotted time. You can easily add presenter notes that only you will see while you present.
Generate a public or private URL to share with anyone or embed your slide deck on your website or blog by clicking the Share button in the Visme editor.
Download as an editable PowerPoint or in HTML5 to keep all of your animations and interactivity intact for offline presenting.
Questions About the Presentation Maker
How can i create an account with visme, how much does it cost to create a presentation with the presentation maker app, can i create animated projects, is it possible to make interactive projects with the presentation maker, how do i present my slide deck, how can i create a slide deck in a few minutes.

Your presentations deserve to be beautiful and so does the rest of your content
Sign up. It’s free!
How to Make an Interactive PowerPoint Presentation: An Expert Guide (Free Downloadable Playbook)

Zhun Yee Chew

Are your PowerPoint presentations lacking impact and failing to engage your audience? You’re not alone. I experienced that before. I used to spend hours carefully crafting the perfect PowerPoint presentations only to be met with disinterested faces.
In a world where attention spans are getting shorter, traditional PowerPoint presentations often struggle to hold the interest of the audience. So here’s the hard truth: unless you adapt and embrace interactivity in your PowerPoint presentations, your valuable hard work and content run the risk of getting lost in presentations.
Fret not, as in this comprehensive guide, we will share with you expert tips on how to make an interactive PowerPoint presentation through interactive animations, transitions, hyperlinks, quizzes, games, and many more.
And perhaps the sweetest part of the deal is that you will also have access to a downloadable playbook of 60+ pages with a wealth of tutorials, templates, cheat sheets, resources and tools to elevate your PowerPoint skills from average to extraordinary through interactive PowerPoint presentations.
Are you prepared to impress those who once found your presentation dull? If your answer is a resounding ‘yes,’ then let’s begin.
What is an Interactive Presentation?
What is an interactive powerpoint presentation.
Interactive PowerPoint presentations are simply PowerPoint presentations that are made interactive to convey information in a more dynamic and engaging manner.
Creating an interactive PowerPoint presentation involves deciding if you want to make your slide content interactive or if you want your audience to interact with your slides.
Interactive PowerPoint presentations can generally be divided into two main dimensions: interaction with slide content through interactive elements and fostering interaction with the audience.

Interaction with Slide Content:
In the first dimension, PowerPoint presentations are made interactive through enhancing the slides content with interactive elements, usually native to PowerPoint.
We will cover interactive elements including:
- Transitions
- Interactive data visualization
- Annotations.
They function to enhance slide interactivity through adding movement to static objects, enabling non-linear slides navigation, as well as adding a dynamic touch to data and information presentation.
Audience Interaction:
In the second dimension, PowerPoint presentations are made interactive through interaction between the presenter and the audience, usually with the help of PowerPoint add-in tools. We will cover:
- Assessments
- Brainstorming
- Collaborative multimedia uploading
Once you have decided which strategy you would like to use, you can then follow these step-by-step guide and the following expert tips to turn your PowerPoint slides into an interactive experience!
Benefits of an Interactive Presentation
The fact that you are still reading this suggests that you don’t need further convincing on the benefits of interactive PowerPoint presentations.
However, if you do, here are some quick statistics:
68% of individuals hold the belief that interactive presentations have a greater potential for being remembered. Webinar Care
This means that a simple action of making your PowerPoint slides interactive has a profound impact on how your presentation is received by the audience. From our years of experience creating interactive PowerPoint presentations, they generally:
- Increases engagement , motivation and knowledge retention .
- Result in better impression and more impactful messaging being conveyed.
- Allow presenters to better tailor their content or offerings to the audience or clients because they can gather real-time feedback .
- Open up room for creative storytelling and showcases.
Interactive Puzzle PowerPoint Templates
Master the tricks to turn your PowerPoint into an interactive experience today!
Expert Tips on How to Make an Interactive PowerPoint Presentation – Before Presenting
1. add animations, but use them judiciously.
The first and most straightforward way of making your PowerPoint presentations interactive is through adding animations to your slides. However, so many people use PowerPoint animations the wrong way. PowerPoint animations are more than just making bullet points or images appear or fly in during your presentation.
Remember, using animations excessively in your PowerPoint presentation will only reduce the appeal and professionalism of your slides. The key is to use them judiciously and purposefully. Before you hit the “Animations” tab, ask yourself, “Does this animation enhance the message I want to convey to my audience?”
2. Add 3D PowerPoint Animations Using PowerPoint Native 3D Stock Elements
Did you know that PowerPoint has free animated 3D elements you can use? We recommend you to try them up to instantly upgrade your presentation from ordinary to extraordinary.
❓ How? Simply go to Insert > 3D models > stock 3D models > animated models. And you will find a wide range of free 3D models ranging from food and animals to plants and characters, and many more. You can also select different animation scenes by heading to the Animations tab.
3. Add Animations With Triggers for Visual Excitement
You can take your PowerPoint animations up a notch by incorporating combining animations with triggers to create interactive pop-ups with extra information . These on-click pop-ups are valuable when presenting a map or when you want to explore specific aspects of an object or topic in more detail. You can also use these pop-ups as markers to alert the audience to exciting elements within different parts of the slide, as such:
❓How? To create on-click pop-ups in your PowerPoint slides, first add shapes that will become clickable buttons, one to “open” the pop-up and the other to “close” the pop-up. Then, add text boxes with extra information you want to show, as well as entrance and exit animations. Combine the animations with “triggers” to activate the animations when the open or close buttons are clicked on.
For a more detailed tutorial on this pop-up animation, download our Interactive PowerPoint Playbook below. 👇
4. add non-linear slide transition.
A quick way to add interactivity to your PowerPoint slides is by using PowerPoint transitions. The first we want to discuss is PowerPoint Zoom. PowerPoint Zoom enables you to zoom in and out of and navigate to specific sections or slides on click, anytime during your presentation.
To access the PowerPoint Zoom feature : click on Insert in the PowerPoint ribbon > Zoom > then choose Slide , Section , or Summary Zoom . Each of these PowerPoint Zoom option serves slightly different functions:
- Slide Zoom: zooms into specific slides
- Section zoom: zooms into specific sections
- Summary Zoom: creates a summary slide for the different slides or sections in your PowerPoint presentation for easy navigation.

❓ How? To set up PowerPoint slide zoom , select the starting slide where you wish to implement the Zoom effect. Next, click Insert > Zoom > Slide Zoom . Here, you can pick the specific slide or slides you want to zoom in on. Click the Insert button, and thumbnails of the chosen slides will be added to your current slide.
Alternatively, for a more manual setup process, you can also set up a navigation menu at the beginning of your presentation that allows the audience to jump to different sections or slides using hyperlinks. Read more in the Hyperlinks section below.
5. Add PowerPoint Morph
Like PowerPoint Zoom, PowerPoint Morph empowers presenters to create dynamic transitions that elevate the visual storytelling in their presentations. But PowerPoint Morph brings storytelling to a whole new level and adds a layer of intrigue to your slides by simulating object transitions or evolution across slides. It functions similarly to animations but offers a smoother and more organic visual experience, without the need for complex setup steps.
Personally, we think the outcomes generated by PowerPoint Morph are more professional and polished-looking as compared to traditional animations. And if you are looking for a more advanced-looking presentation, try this 3D morph animation In PowerPoint .
We’d also like to share with you the numerous applications of PowerPoint Morph contributed by our colleagues and PowerPoint professionals at ClassPoint:
- Moving background
- Rotating wheel
- Rotating cogs
- Photo gallery
- Slide Zoom with Morph
- Creative reveal
- Parallax effect
- Continuous slide transition
- Phone frame
- Movie frame
Gain access to free templates for all these PowerPoint Morph applications and effects by downloading our Interactive PowerPoint Playbook. 👇
6. add hyperlinks – they can link to so many more places than just websites.
Much like PowerPoint Zoom, hyperlinks enable presenters to create interactive menus and navigation structures, allowing audiences to jump to specific slides or sections effortlessly. However, while PowerPoint Zoom primarily focuses on creating a visual and interactive overview of content within a single presentation, hyperlinks extend this capability to connect with external resources, web content, or even additional PowerPoint files.
There are a few ways you could add hyperlinks to your PowerPoint presentation to transform it into an interactive experience effortlessly:

4 Ways You Can Add Hyperlinks to PowerPoint:
- Slide Transition : You can navigate to specific slides in a non-linear manner by simply inserting a hyperlink into your current slide. Head over to Insert > Link > This Document and select the slide you want to link to. You can apply hyperlinks to text, shapes, or pictures.

- Interactive Navigation Menu : Adding an interactive navigation menu at the beginning of your presentation allows clear navigation between different slides and sections in your presentation. Head over to Insert > Link > This Document and select the slides you want to link to.

- Action Buttons : With hyperlinks, you can also create Action Buttons in your PowerPoint presentations to make your PowerPoint slides behave like interactive web pages, allowing users to navigate, explore, and engage with the content in a dynamic and user-friendly manner. Head over to Insert > Action Buttons and choose from the selection.

- Embedded Content : You can also hyperlink your PowerPoint slides to embedded content like PDFs, spreadsheets, and even web pages. Simply click Insert > Object and select the file you would like to embed in your PowerPoint slides. This way, you can remove the hassle of toggling between various files or windows during your presentation.

Expert Tips on How to Make an Interactive PowerPoint Presentation – When Presenting
1. turn your powerpoint slides into interactive quizzes.
The traditional way to add interactive quizzes to PowerPoint is through an unfavorable process of combining complex animations with triggers and hyperlinks. Let’s be honest, it takes an eternity! Even though PowerPoint offers an extensive range of presentation tools, it does not have audience interactivity built at its core.
The good news is, audience interactivity can actually be effortlessly achieved with the various PowerPoint add-ins as listed below:
| Interactive PowerPoint Add-In | Quiz | Game | Poll | Q&A |
|---|---|---|---|---|
| ClassPoint | ✔️ | ✔️ | ✔️ | |
| Mentimeter | ✔️ | ✔️ | ✔️ | |
| Hypersay | ✔️ | ✔️ | ||
| Poll Everywhere | ✔️ | |||
| Slido | ✔️ | ✔️ | ✔️ | |
| Slide Lizard | ✔️ | ✔️ | ✔️ | |
| Zeetings | ✔️ | |||
| Aha Slides | ✔️ | ✔️ | ✔️ |
We will get to polls and games in a bit. For now, let’s show you how you can turn your PowerPoint slides into an interactive quiz in a just a few clicks with PowerPoint add-ins like ClassPoint , which offers a wide range of interactive quizzes from Short Answer and Word Cloud , to Multiple Choice questions.
How to Create An Interactive Quiz in PowerPoint In A Few Clicks
Once you have downloaded ClassPoint, you will have a suite of additional interactive quiz features added to your PowerPoint ribbon.

To turn your PowerPoint slide content into interactive quizzes, simply click on any of the interactive quiz features and add them to your slide. Enter PowerPoint Slideshow mode and you can start the quiz immediately.
2. Run Gradable Assessments inside PowerPoint
With the versatile PowerPoint add-in, ClassPoint , you can also create assessments and collect real-time responses right inside PowerPoint. This is wonderful news for teachers! All you have to do is set up interactive Multiple Choice questions and enable Quiz Mode .

ClassPoint’s Quiz Mode introduces an automatic grading feature to your Multiple Choice questions within PowerPoint presentations created with ClassPoint. This feature not only automates the grading process but also includes automatic star ratings, the option to select difficulty levels, and provides a quiz summary along with an exportable quiz report, making it the perfect tool for classroom formative assessments in PowerPoint!
3. Incorporate Annotations During Slideshow
Another unique way to interact with your PowerPoint slides is through the use of annotations. With annotations, you as the presenter can interact with your slides to draw your audience’s attention to specific details, highlight key points, and tell a more coherent story.
There are 3 ways you could use annotations in PowerPoint:
- PowerPoint Draw Tab: To utilize the PowerPoint Draw Tab, click on the “Draw” tab in your PowerPoint ribbon and begin annotating anywhere on your slides using built-in features like the pen, highlighter, and Ink to Shape. However, please note that PowerPoint Draw only allows annotation in Edit mode.

- PowerPoint Pen Tools: Another option for native PowerPoint annotation tools that permit annotation during slideshow mode can be found by clicking the pencil icon located in the bottom right-hand corner of your screen during a presentation. You can use the pen, highlighter, or laser tools to annotate any part of your slides during the presentation.

- ClassPoint Toolbar: The ClassPoint toolbar serves as an enhanced, free alternative to PowerPoint’s existing pen tools. It offers a broader range of additional annotation features, including text boxes, shapes, spotlight effects, fully customizable pens and highlighters, and more. This enables you to transform your PowerPoint slides into a creative canvas that will captivate your audience throughout your presentation.
4. Run Ice Breakers and Brainstorming Sessions in PowerPoint
The uses of interactive PowerPoint add-ins like ClassPoint are not only limited to teaching and learning. Give your PowerPoint meetings and presentations a strong start with a collaborative and dynamic brainstorming experience.
You can enhance your PowerPoint presentations and turn them into an interactive brainstorming experience by incorporating Word Cloud in PowerPoint, inviting participants to instantly contribute ideas, keywords, or concepts. This allows everyone to dynamically visualize emerging trends and interesting ideas.

❓ How? To start a brainstorming session in PowerPoint, click on the “Word Cloud” button in your PowerPoint ribbon once you have downloaded ClassPoint to add the “Word Cloud” feature in your PowerPoint slides. Then enter PowerPoint slideshow mode to start brainstorming!
5. Add Draggable Slide Objects (And Why It’s Better than Animations!)
Similar to animations, draggable objects allow you to interact with your slide objects freely during slideshow mode, except than you can do so with full control of where you want the slide elements to go!
This dynamic presentation feature adds an element of visual interest that captures your audience’s attention and can be a valuable tool for explaining complex ideas. Moreover, it has the potential to serve various purposes, such as revealing hidden information or acting as a movable marker to indicate your position on the slide content. You can also use it for group drag-and-drop activities, such as matching, categorizing, sorting, and more. You can either perform these actions yourself to provide a visual explanation or engage your audience by letting them instruct the movement of images and text on the slide.
❓ How? Draggable objects is a unique tool that is possible inside PowerPoint with the use of the add-in ClassPoint. Download ClassPoint, free PowerPoint add-in, the select any shape, image, illustration, or text on your slide to become draggable by clicking on “Draggable Objects” in your PowerPoint ribbon, and toggling “Drag enabled” on the side panel.

In slideshow mode, click on the draggable objects hand from the ClassPoint toolbar at the bottom of your screen to start dragging your slide objects around!
6. Create Playable Games In PowerPoint (Without Animations or Hyperlinks)
Much like interactive quizzes, PowerPoint games add a layer of interactivity and fun to PowerPoint presentations. However, what sets PowerPoint games apart is their ability to introduce competition through gamification.
Here are 3 ways you can instantly gamify your PowerPoint slides with gamification elements :
- Set Up a Point and Reward System : Define how your participants can earn stars and points, and award stars to them when they have accomplished a goal during your presentation.
- Add Levels and Badges to PowerPoint : Every game benefits from having levels and badges, and your PowerPoint game is no exception. You can create a simple game within PowerPoint by incorporating questions into your slides and defining the points and scores needed to progress to higher levels. When it comes to badges, you have the creative freedom to tailor them to your audience. For example, in an educational setting, badges can be skill-focused, while in a social gathering, they can take the form of fantasy characters that participants aspire to collect
- Add a Leaderboard to PowerPoint : Leaderboards are essential to keep track of scores or points during a PowerPoint game. You can of course create a manual leaderboard using PowerPoint’s tables and hyperlinks, but an easier and more straightforward way of implementing a leaderboard in your PowerPoint is using add-ins like ClassPoint and Vevox .
With these fundamentals of gamification in place, you are now ready to create fun and exhilarating games in PowerPoint.
Here is a full walk-through on how you can create a PowerPoint game in a few simple steps.
If you are an educator, this free trivia PowerPoint template and these 5 interactive PowerPoint game templates tailored for the classroom will be useful for you.
Expert Tips on How to Make an Interactive PowerPoint Presentation – After Presenting
1. run real-time polls in powerpoint.
Think of a memorable presentation you have attended? Did it use live polls? We bet it did! Live polling are especially helpful after a PowerPoint presentation to gather feedback for future improvement.
Traditional poll tools require presenters to switch between tabs during presentation. Thanks to PowerPoint add-ins such as ClassPoint , Mentimeter and Poll Everywhere , this is no longer the case. And by eliminating the need to switch between different applications or tabs, the presentation experience becomes more fluid and engaging.
2. From Static to Interactive Data Visualisation
Incorporating interactivity through data visualization after a presentation concludes is a potent strategy for enhancing audience engagement and comprehension. Once the primary content delivery is complete, you can transition into a dynamic display of data or feedback you have gathered from your audience using interactive charts, graphs, or infographics.
This approach empowers your audience to explore the information at their own pace, dig deeper into specific data points, and ensure a two-way communication between the presenter and the audience. Whether it’s zooming in on specific trends, toggling between different data sets, or going through feedback, interactive data visualization encourages active participation and a deeper connection with the presented information.
We recommend the following 2 ways to display data into your presentation:
- Insert tables, charts and graphs, and add a touch of interactivity through animations.
Below is a list of 10 PowerPoint animations most suitable for different kinds of graphs and charts:
| Graph/Chart Type | PowerPoint Animation |
|---|---|
| Pie chart | Wheel |
| Bar chart | Wipe |
| Line chart | Draw |
| Area chart | Wipe |
| Gantt Chart | Motion path |
| Funnel Chart | Appear |
| Tree Map | Zoom |
| Waterfall Chart | Appear |
| Bubble Chart | Grow/Shrink |
| Scatter Plot | Zoom |
- Embed a website with data you want to go over. I’m not talking about a link that leaves PowerPoint for your default browser, but an actual embedded browser that loads your websites without leaving PowerPoint! Plus you can insert the page as a picture into your slide and start annotating on it!
Now that you have a collection of strategies and tips at your disposal, you are better prepared to leave your old and dusty PowerPoint toolkit behind and embrace these refreshing ideas. Whether your ultimate aim is to create a captivating classroom experience, deliver a memorable business pitch, or simply wow your friends and peers during PowerPoint nights , don’t forget to:
- Add animations, but use them sparingly.
- Make use of non-linear transitions and storytelling.
- Turn simple transitions into stunning visual experience with PowerPoint Morph.
- Make creative use of polls, quizzes and games.
- Make your presentation human with Bitmoji.
- Build anticipation with interactive presentation tools like annotations and drag and drop.
- Try out these 160 fun PowerPoint ideas for your next presentation!
To read more about Interactive PowerPoint Presentations, you can download our Interactive PowerPoint Playbook, which includes comprehensive guides, tutorials on various interactive PowerPoint presentation methods, cheat sheets, and a wide range of resources for mastering the art of creating interactive PowerPoint presentations.
About Zhun Yee Chew
Try classpoint for free.
All-in-one teaching and student engagement in PowerPoint.
Supercharge your PowerPoint. Start today.
500,000+ people like you use ClassPoint to boost student engagement in PowerPoint presentations.
- Create a presentation Article
- Add and format Article
- Design a presentation Article
- Share and collaborate Article
- Give a presentation Article
- Set up your mobile apps Article
- Learn more Article

Create a presentation
Create a presentation in powerpoint for the web.

With PowerPoint for the web running in your web browser, you can:
Create presentations that include images, videos, transitions, and animations.
Get to your presentations from your computer, tablet, or phone.
Share and work with others, wherever they are.
If you're using the desktop version of PowerPoint on a Windows PC, see the PowerPoint Quick Start .
If you're using the desktop version of PowerPoint on a Mac, see Office for Mac Quick Start Guides and PowerPoint for Mac Help .
Create, open, and name a presentation
Go to powerpoint.office.com .

Select New blank presentation , open a Recent file, select one of the themes , or start with a presentation template .
To name the presentation, select the title at the top and type a name.
If you need to rename the presentation, select the title and retype the name.

Add a slide
Select the slide you want your new slide to follow.
Select Home > New Slide .
Select Layout and the you type want from the drop-down.

When working in PowerPoint for the web, your work is saved every few seconds. You can select File > Save a Copy to create a duplicate copy in another location.
Or choose File > Download As to save a copy to your device.

When you're online, AutoSave is always on and saves your changes as you work. If at any time you lose your Internet connection or turn it off, any pending changes will sync as soon as you’re back online.

Need more help?
Want more options.
Explore subscription benefits, browse training courses, learn how to secure your device, and more.

Microsoft 365 subscription benefits

Microsoft 365 training

Microsoft security

Accessibility center
Communities help you ask and answer questions, give feedback, and hear from experts with rich knowledge.

Ask the Microsoft Community

Microsoft Tech Community

Windows Insiders
Microsoft 365 Insiders
Was this information helpful?
Thank you for your feedback.
How to create an effective PowerPoint presentation (2024 guide)
Jun 24, 2024
Posted by: Regine Fe Arat
Creating a compelling PowerPoint presentation is an essential skill in today's professional world.
Whether you're presenting to colleagues, clients or a large audience, a well-designed and engaging presentation can make a significant impact.
This guide will walk you through making a powerful, effective PowerPoint presentation. Let’s get straight into it with the most important part of all: Your audience.
Understanding your audience
Effective, tailored communication is the foundation of any successful presentation.
To connect with your audience and deliver your message effectively, you must understand:
- who they are,
- what they care about and
- what they hope to gain from your presentation.
Researching your target audience and adapting your content ensures you create a presentation that resonates with them on a deeper level. This connection means you’re more likely to keep them engaged and motivated throughout.
Let’s look at the key steps to understanding your audience and crafting a presentation that speaks directly to their needs and interests.
Analyzing your target audience
Before creating your presentation, it's crucial to understand your target audience. Consider factors such as their background, knowledge level, interests and expectations.
For example, if you're presenting to a technical audience, you may include more detailed information and jargon. If you’re presenting to children, you might want to add some fun slide transitions that you wouldn’t use in a corporate environment.
Tailoring the presentation to the audience
Once you understand your audience, tailor your presentation accordingly. Adjust the content, language and tone to resonate with your audience.
If you’re presenting to a client, can you align your presentation with their branding and messaging to create a sense of harmony? How can you create a compelling call to action if it's a business presentation ?
Use relevant examples, stories and case studies your audience can relate to, and always present the information in a way that’s easy to understand and engage with.
Planning and organizing content
A well-structured presentation is essential for effectively communicating your ideas and engaging your audience.
The key to success is carefully planning and organizing your content before creating your PowerPoint slides.
Take time to develop your key ideas, structure your presentation flow and create a clear outline to deliver a compelling and memorable presentation. Let’s look at how to do that.
Developing key ideas
Start by identifying the key ideas and messages you want to convey in your presentation. Focus on the most critical points and organize them logically.
Use mind maps, outlines or brainstorming techniques to organize your thoughts and ensure your presentation has a clear structure.
Structuring your presentation
Once you have your key ideas, craft your presentation to flow smoothly and engage your audience.
Begin with an attention-grabbing introduction, followed by the main content divided into clear sections or topics.
Use transitions to seamlessly move from one section to another, and end with a strong conclusion that reinforces your main points.
Designing visual elements
Your PowerPoint presentation’s visuals play a big role in capturing your audience's attention and reinforcing your key messages.
Carefully designing your slides can create an engaging and visually appealing presentation that effectively communicates your ideas.
Be mindful of your audience. They will appreciate it if you can include an element that represents them. It could be a color combination of a company’s logo or a symbol that represents a group.
Let’s explore the principles of effective slide design to ensure your visual elements enhance your presentation.
Choosing the right fonts
Select easy-to-read, visually appealing fonts. Stick to a maximum of two or three font styles throughout your presentation for consistency.
Use font sizes large enough for your audience to read, typically 24 points or larger for body text and 36 points or larger for titles.
Using engaging backgrounds and themes
Choose backgrounds and themes that complement your content and enhance the look of your presentation.
Skip the distracting backgrounds that take away from your message.
Incorporating high-quality images and videos
Incorporate visuals such as images, charts, graphs and videos to make a more memorable and engaging presentation.
Use high-quality images that are relevant to your topic and add visual interest to your slides. Avoid too many decorative elements that can clutter your slides.
Using PowerPoint effectively
PowerPoint is the perfect tool for creating dynamic, engaging presentations. However, to make the most of this software, it's essential to understand its features.
In this section, we'll explore everything from animations to best practices for supporting your key messages and keeping your audience engaged .
Utilizing slide layouts and templates
PowerPoint offers various slide layouts and templates to save time and ensure consistency. Choose a layout that suits your content and conveys your message effectively.
Customize the templates to fit your presentation style or branding, but avoid overloading your slides with too much text or information.
Adding animations and special effects
Use animations and special effects sparingly to emphasize key points or catch the audience’s attention. Too many animations can be distracting and take away from your content.
Stick to simple animations that enhance your message rather than overpowering it. Use animations consistently throughout your presentation to maintain a cohesive look and feel.
Applying color schemes and design themes
Choose a color scheme that aligns with your branding (or your client’s) and creates a visually appealing presentation. Contrasting colors for text and backgrounds ensure readability.
Applying design themes consistently throughout your presentation creates a polished and professional look.
Proper formatting and citations
Ensure that your presentation follows proper formatting guidelines and includes accurate citations for any external sources.
Bullet points or numbered lists break down information into easily digestible chunks, making it easier to keep your audience interested.
Including slide numbers and a clear agenda or table of contents helps your audience navigate your presentation.
Always proofread your slides for any typos before finalizing your presentation.
Delivering an engaging presentation
Delivering an engaging presentation is more than just creating great slides; it also requires strong communication skills and the ability to connect with your audience.
In this section, we'll focus on presentation delivery, providing you with techniques and strategies to captivate your audience and effectively convey your message.
Enhancing presentation skills
Work on your presentation skills to become a confident and compelling speaker. Regular practice is one of the best ways to become a great speaker.
Go beyond boring slides and speeches and use storytelling techniques to make your content more relatable and memorable.
Practice active listening and reply to your audience's reactions and questions. If they seem bored, jazz it up a little with humor.
Impromptu speaking is also ideal for engaging your audience. While it can be scary to move away from your script and slides, it can be very effective.
Using effective body language and eye contact
Good body language is vital in engaging your audience. Maintain a confident posture, use gestures to highlight key points and make eye contact with your audience.
Avoid reading from your slides — use them as visual aids to support your message.
Consider what side of the slides you want to stand on. Generally speaking, you want to be to the audience’s left of the screen. You want the audience to listen to you before looking at the slides.
Using voice and tone to engage the audience
Vary your voice and tone to keep your audience interested and engaged.
Use pauses for emphasis, adjust your speaking speed and modulate your volume to create a dynamic presentation. If you have an impactful slide, let the audience sit with it for a moment.
It’s also important to speak clearly. Properly pronouncing words and not mumbling ensures your audience understands your message.
Tips for a successful presentation
Creating and delivering a successful PowerPoint presentation requires careful planning and practice.
In this section, we'll provide you with valuable tips and best practices for elevating your presentation skills, from rehearsing to gathering feedback.
Preparing and practicing beforehand
Preparation and practice are key to delivering a successful presentation.
Work backward when planning your presentation: What date is the presentation? Plan weekly milestones to ensure you don’t feel overwhelmed with everything you need to do.
Give yourself time to research your topic, gather relevant information and organize your content.
Rehearse your presentation multiple times to grasp the flow and timing. Practice in front of a mirror, colleagues or friends for feedback to make necessary improvements.
Tips for dealing with technical issues
Technical issues can disrupt your presentation and cause unnecessary stress. Be prepared with backup copies of your presentation on different devices or online platforms.
Familiarize yourself with the presentation equipment and venue beforehand to minimize potential technical problems.
Have a plan in case of unexpected issues. Printing handouts and preparing to deliver your presentation without slides are great ways to get ahead of issues.
Engaging the audience with Q&A sessions
If you can, allocate time for a Q&A session at the end of your presentation to engage with your audience and address their questions.
Encourage participation by asking open-ended questions and actively listening to their responses.
Be prepared to handle challenging questions with grace and professionalism. Use the opportunity to clarify any unclear points or provide additional insights.
The last card
Creating a good PowerPoint presentation requires effective design, careful planning and engaging delivery.
Understanding your audience, organizing your content, effectively using visuals and enhancing your presentation skills can captivate your audience and leave a lasting impact.
Keep exploring the Pip Decks website and our resources to discover more tips, tutorials and templates for even better PowerPoint presentations.
What is the 10 20 30 rule of PowerPoint?
The 10-20-30 rule is a guideline for effective PowerPoint presentations.
It suggests:
- using no more than 10 slides,
- limiting the presentation duration to 20 minutes and
- using a font size of at least 30 points for optimal readability.
What are the 5 golden rules of PowerPoint presentations?
The five golden rules of PowerPoint presentations are:
- Keep it simple and concise
- Use visuals to enhance your message
- Maintain a consistent design and color scheme
- Use clear fonts
- Practice and prepare for a confident delivery
Level up your career with Pip Club
Join 100,000+ leaders who get unique tips every week on storytelling, leadership and productivity - plus exclusive how-to guides, first-dibs on upcoming Pip Decks and our very best discounts.
Nearly there...
Check your inbox to confirm your email.

No spam, no email sharing - ever. Privacy Policy
One of the few newsletters I look forward to. — Dave Cunningham, Head of DesignOps @ NHS

You might find these articles useful
Become a pro at giving a speech in 2024, speech practice guide: perfect your public speaking skills, 8 powerful public speaking tips for introverts.
Find the perfect PowerPoint presentation template
Bring your next presentation to life with customizable powerpoint design templates. whether you're wowing with stats via charts and graphs or putting your latest and greatest ideas on display, you'll find a powerpoint presentation template to make your ideas pop., presentations.
Help your data, insights, and recommendations make a statement with beautiful and easily customizable presentation templates.

Certificates
Celebrate accomplishments big and small with customizable certificate templates. From gift certificates to awards for finishing a course or training, find a template that highlights their accolades.
Boost visibility for your show, project, or business with easily customizable poster templates. Find templates for all your promotion needs and make them uniquely yours in a flash.

Keep track of whatever you need to in style. From personal planning to promotional calendars, find templates for every kind of project and aesthetic.

Infographics
Say more with less using helpful and easily customizable infographic templates. Add clarity to business presentations, school projects, and more with these helpful templates.

Start with the best PowerPoint templates

Elevate your storytelling
Tips, tricks, and insider advice from our business and design experts
A quick way to create beautiful, powerful PowerPoint presentations
Create captivating, informative content for PowerPoint in just a few minutes—no graphic design experience needed. Here's how:

1. Find the perfect PowerPoint template
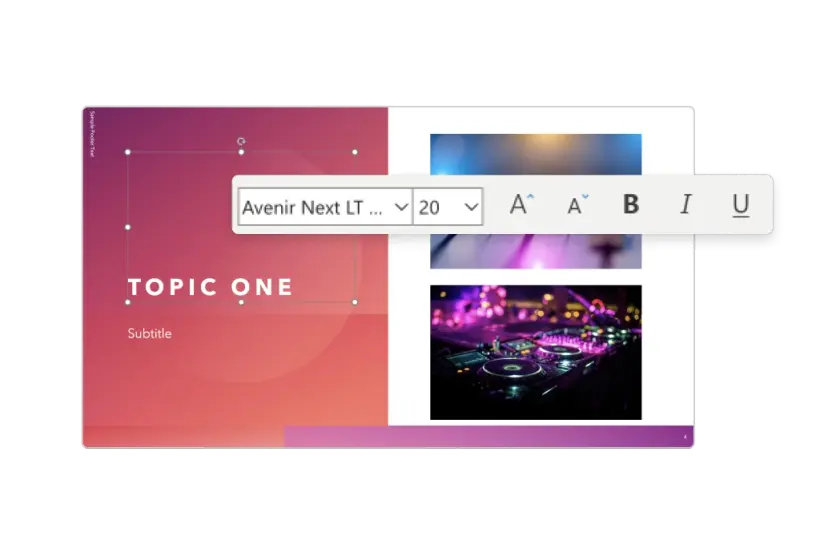
2. Customize your creation

3. Show it off
Let's create a powerpoint design, frequently asked questions, where can i find slide templates and themes that i can customize.
To find customizable slide templates and themes, you can explore the business presentations templates or search by PowerPoint templates . Once you find a template that resonates with you, customize it by changing its color scheme, add in your own photos, and swap out the font.
How do I use pre-made PowerPoint templates?
After you've chosen a PowerPoint template to use, customize it. Explore [design tips] on how to customize a deck that resonates with your brand while putting emphasis on the topic at hand. Play with other design elements, like photo shapes, to make each slide unique.
How can I make or edit my own custom PowerPoint templates?
Start from scratch by creating your own PowerPoint template . Follow tips for designs and business presentations so that your unique template is cohesive and relevant to your brand. Incorporate your brand's color scheme and graphics so that all your slides aren't text only.
What kinds templates can I get online for PowerPoint?
You can get PowerPoint templates that have modern designs, animated ones, or even hand-drawn art in each slide. The color schemes range from bold to subtle. Each template's slides are also organized based on what you may want to include in your presentation . You can use the template as a starting point and customize its specific details from theme.
Popular categories

Microsoft 365 Life Hacks > Presentations > PowerPoint Tips: Make The Most of Your Presentation
PowerPoint Tips: Make The Most of Your Presentation
Got a presentation coming up but you’re not that familiar with PowerPoint ? We can help you get started with some easy PowerPoint tips and tricks that’ll help you create an impactful presentation , no matter what the occasion.

Our PowerPoint for beginners tips will show you how to:
- Make an outline.
- Choose a theme.
- Find a font.
- Use visuals.
- Not use too much text.
- Limit your color.
- Use a free online “speaker coach”.

Tell your story with captivating presentations
Powerpoint empowers you to develop well-designed content across all your devices
Outline your presentation before you start. Don’t spend time making unnecessary slides for your presentation. Create an outline before you start. Not only will this make it easier to put the content on the slides, but it will also let you know how many slides you need to make. Rather than winging it and making slides as you go, use your outline to make your slides efficient and organized . Working without an outline can sometimes lead to jumbled slides with more information than you need.
Choose a theme and template. Not everybody is a graphic designer, so coming up with the perfect slide theme and template can seem hard. Thanks to PowerPoint templates, it isn’t. Find a free online template that gives you the design, layout, color scheme, and aesthetic you want. Be sure to choose something that fits what you’re talking about (e.g. Don’t use a whimsical theme with bright colors and butterflies if you’re presenting a serious topic.)
Find the right font . Knowing which font to use for your presentation isn’t always easy. When it comes to the basics of selecting the best font, follow best-practice recommendations that say an easy-to-read sans-serif font is preferred. Fonts like Arial, Calibri, Helvetica, and others like it make for simple fonts that are easy to read. Although, there are some serif fonts that still look great on PowerPoint and are easy to read on high-resolution screens. When you’re building out the format of your slides, a great way to distinguish the title section from the body text is by using a different font for each or bolding your title font.
Use visuals . Words on a page aren’t nearly as engaging as visuals. Keep your audience’s attention during your presentation by using visuals like graphics, animations, photos, and videos. PowerPoint makes it easy to insert clipart, tables, graphs, and much more by using the features built into the program. You can also include gifs and YouTube videos to up the ante on your presentation.
While it’s great to use fun gifs or YouTube videos to enhance your presentation, don’t go crazy. Eventually, your audience will get tired of looking at a five-second loop on a gif as you speak, and videos don’t always have the impact you want. Videos can be distracting to your audience because they change the pace of your presentation, so it’s a good idea to limit the number of videos you include.
Tip: If you’re going to lay words over a picture, use a colored box with the opacity down around 50% to create more contrast between the image and the words.
Limit your text. Your audience doesn’t want to read; they want to listen to you. Don’t fill your slides with long sentences and complex phrasing. Instead, include only the most important points of what you want to say. The PowerPoint 6×6 rule suggests limiting your slides to six lines with a maximum of six words per line. Following this rule makes for slides that include only the most important points while avoiding information overload. Using bullet points is a great way to stick to the 6×6 rule.

Go easy on the colors. Be careful of the colors you use when making a PowerPoint presentation. Too many bright colors can be hard on the eyes and reduce the contrast between the letters, making them hard to read. It’s generally a good idea to use a black or white font with a color that makes the font pop against the background. Black on white is always easy to read, and white looks great against most solid colors. If you’re not sure how a specific font color looks against a background, sit back in your chair, and try to read it. If it’s hard to read with the font and background you have, it’s a good idea to change one or both.
Use a free online “speaker coach”. Rehearsing in front of a mirror is good, but using free speaker coaching software is even better. Do you say “um” a lot? Are you talking too fast? Did you use a culturally insensitive term? A free digital “coach” with built-in AI will catch all that stuff and more.It’s the best way to assess your strengths and weaknesses and identify areas of growth.
These PowerPoint tips are enough to get you started on your presentation. Soon, you’ll be creating and presenting a beautiful deck.
Get started with Microsoft 365
It’s the Office you know, plus the tools to help you work better together, so you can get more done—anytime, anywhere.
Topics in this article
More articles like this one.

How to introduce yourself in a presentation
Gain your audience’s attention at the onset of a presentation. Craft an impressionable introduction to establish tone, presentation topic, and more.

How to add citations to your presentation
Conduct research and appropriately credit work for your presentation. Understand the importance of citing sources and how to add them to your presentation.

How to work on a group presentation
Group presentations can go smoothly with these essential tips on how to deliver a compelling one.

How to create a sales presentation
Engage your audience and get them interested in your product with this guide to creating a sales presentation.
Everything you need to achieve more in less time
Get powerful productivity and security apps with Microsoft 365

Explore Other Categories
Turn your PPT or PPTX files into a PDF document instantly.
Select converter:, how to convert ppt to pdf free.
- Select your PowerPoint from your computer.
- Our online PPT to PDF converter will turn your PPT or PPTX into a PDF in seconds.
- Download your new PDF and save it to your computer. When the conversion is done, your PPT, PPTX, and PDF files will be automatically deleted.
The Best PPT to PDF Converter
Our free PDF converter is the best solution for converting PowerPoint to PDF files. With our easy-to-use PowerPoint to PDF converter, you can quickly convert your PowerPoint presentations to PDF format while preserving the precise formatting and layout of your slides.
A suite of useful tools
Our easy-to-use tools make it possible to merge PDFs, split PDFs, compress PDFs, and even delete PDF pages. With several helpful online tools ready for you to use, editing your files has never been easier.
Consider a membership
You can continue to use our online PowerPoint to PDF converter for free, or sign up for a paid subscription for instant and limitless access to our full suite of tools. Added benefits include converting multiple PPT or PPTX files at the same time and unlimited file sizes.
Easy online access
As long as you can access the Internet, you can turn PPT and PPTX files to PDF whenever you need them, and you can access our other file conversion tools, too. Additionally, our PowerPoint to PDF converter works on any device or OS, like Mac or Windows, that can upload and download files.
All PPT, PPTX, and PDF files uploaded to our server will be encrypted using 256-bit SSL Encryption at the time of download. This is done to help combat against anyone who may want to view your data. Additionally, we will not share or sell your data to anyone else.
Automatic file deletion
After your PowerPoint file has been successfully converted, our PPT to PDF converter automatically deletes any remaining PPT, PPTX, or PDF documents, just in case you forgot to delete them manually to ensure your data remains secure.
- Faster conversions
- Unlimited conversions
- Unlimited file size
- Advanced features
Please wait or sign up to convert the next file.
You need the PRO version to use the full functionality of the PDF Converter.
How to add Grammarly to Microsoft Office on Windows
To use Grammarly in Microsoft Office, install Grammarly for Windows by following these steps:
- Download Grammarly for Windows .
- Double-click the downloaded file and follow the prompts to complete the installation.
In Microsoft Word, Grammarly for Windows will show a list view of suggestions and will let you filter suggestions by category:
In Outlook, PowerPoint, OneNote, and Excel, Grammarly’s suggestions will appear one by one on a draggable widget:
If you use Microsoft Office on a Mac, follow the steps in this article: How to add Grammarly to Microsoft Office on Mac
Note: If Grammarly does not appear in your Microsoft Office products, please see our article Grammarly for Windows and Mac doesn’t work in Microsoft Office products for system requirements and troubleshooting steps. If your current version of Microsoft Office is not compatible, we suggest trying the Grammarly Editor . For more information about the Grammarly Editor , check out this article .
IMAGES
VIDEO
COMMENTS
And when you need more functionality, you can work on the presentation together in the PowerPoint desktop app and all of your changes will be saved online. To convert your Google Slides to PowerPoint, go to File > Download > Microsoft PowerPoint (.pptx). Then open the file in PowerPoint. See more at Get started with Sheets.
Easily edit Microsoft PowerPoint presentations online without converting them, and layer on Slides' enhanced collaborative and assistive features like comments, action items, and Smart Compose. ...
One person. Sharing and real-time collaboration. PowerPoint for the web and PowerPoint desktop app for offline use. Premium templates, fonts, icons, and stickers with thousands of options to choose from. Dictation, voice commands, and transcription. Advanced spelling and grammar, in-app learning tips, use in 20+ languages, and more.
Select New blank presentation, open a Recent file, select one of the themes, or start with a presentation template. To name the presentation, select the title at the top and type a name. If you need to rename the presentation, select the title and retype the name.
Create a New Presentation with PowerPoint for the Web. Click Create or use a PowerPoint template from the options to create a new PowerPoint presentation. You can start with a specific theme or use a blank template. You can also browse through themes via Office.com to find one that best suits your needs.
Free online presentation maker. Try our new tool to edit this selection of templates for people that want to let their creativity run free. Create interactive resources easily, quickly and without the need for any software. A really useful tool for teachers and students. Move the content, add images, change colors and fonts or, if you prefer ...
On Office Online, pick PowerPoint for the web. Under Let's Get Started, pick New blank presentation. To name your presentation file, on the orange Top Bar, select the existing file name, such as Presentation1, and type a new file name. Begin creating your presentation. Note: PowerPoint for the web automatically saves your changes as you go, and ...
To create presentations online, start with creating an account so that you can save your PPTX file online. 2. Save Your Presentation to OneDrive. At this point, your path to creating the best online PowerPoint presentation depends on whether you've already created a presentation. Here's how to move forward:
PowerPoint Online is Free and incredibly powerful. Many of us have not used this great program in a while and I would highly recommend giving it another look...
Select a template or open an existing presentation to open it in PowerPoint Online. With a similar design to recent versions of PowerPoint for Mac and Windows, you'll find the core text and design tools on the main Home tab, options to add images and embedded videos and tables in the Insert tab, slide and template options in the Design tab, animations in the Transitions and Animations tab ...
Turn your ideas into compelling presentations using professional-looking templates. Use animations, transitions, photos, and videos to tell one-of-a-kind stories. Co-author team presentations at the same time, from anywhere.
PowerPoint for the web. Turn your ideas into compelling presentations using professional-looking templates. Use animations, transitions, photos, and videos to tell one-of-a-kind stories. Co-author team presentations at the same time, from anywhere. Start using PowerPoint for free Learn more about PowerPoint.
Amp up your presentations with the ability to pre-record slideshows and pitch decks with Canva's presentation maker. Create talking presentations and make sure that you land every talking point for asynchronous meetings or onboarding presentations. Delight your audience while presenting with Magic Shortcuts.
Create stunning presentations with Google Slides. Discover slide templates for every use case, use AI to generate unique visualizations, and more. ... Import Microsoft PowerPoint or Canva presentations online, and enhance your collaboration with Slides' features like comments, action items, and granular sharing controls. ...
Microsoft PowerPoint is a presentation design software that is part of Microsoft 365. This software allows you to design presentations by combining text, images, graphics, video, and animation on slides in a simple and intuitive way. Over time, PowerPoint has evolved and improved its accessibility to users.
Click the upload button next to Create to import your PPTX file. Select your Powerpoint file (PPTX) from your computer and import it into Visme. Your presentation will now appear in your dashboard for you to jump in and make changes right inside Visme. Add photos, vector icons, new text blocks, animations and more until your PowerPoint is complete.
To do that, simply go up to the Home tab and click on New Slide. This inserts a new slide in your presentation right after the one you were on. You can alternatively hit Ctrl+M on your keyboard to insert a new blank slide in PowerPoint. To learn more about this shortcut, see my guide on using Ctrl+M in PowerPoint.
By adding boxes, you'll create a visually pleasing structure that guides your audience through the content. In the "Insert" menu, select "Table" and opt for a one-by-one table. Change the table color to a light gray shade, elongate it, and position it neatly to the left of your text. To improve readability and aesthetics, increase the spacing ...
While PowerPoint long dominated the presentation industry, Visme's free online presentation maker allows you to create even more beautiful and engaging content. With Visme's engaging presentation maker, you can start with a template, dive into one of our themes with various slide ideas, or mix and match slides from different templates to ...
To turn your PowerPoint slide content into interactive quizzes, simply click on any of the interactive quiz features and add them to your slide. Enter PowerPoint Slideshow mode and you can start the quiz immediately. Read here for an in depth tutorial and 50 use cases on creating interactive quizzes in PowerPoint. 2.
Create a presentation. Open PowerPoint. In the left pane, select New. Select an option: To create a presentation from scratch, select Blank Presentation. To use a prepared design, select one of the templates. To see tips for using PowerPoint, select Take a Tour, and then select Create, . Add a slide.
Select New blank presentation, open a Recent file, select one of the themes, or start with a presentation template. To name the presentation, select the title at the top and type a name. If you need to rename the presentation, select the title and retype the name.
Creating a compelling PowerPoint presentation is an essential skill in today's professional world. Whether you're presenting to colleagues, clients or a large audience, a well-designed and engaging presentation can make a significant impact. This guide will walk you through making a powerful, effective PowerPoint presentation.
Find the perfect PowerPoint presentation template Bring your next presentation to life with customizable PowerPoint design templates. Whether you're wowing with stats via charts and graphs or putting your latest and greatest ideas on display, you'll find a PowerPoint presentation template to make your ideas pop.
We can help you get started with some easy PowerPoint tips and tricks that'll help you create an impactful presentation, no matter what the occasion. Our PowerPoint for beginners tips will show you how to: Make an outline. Choose a theme. Find a font. Use visuals. Not use too much text. Limit your color.
Easy online access. As long as you can access the Internet, you can turn PPT and PPTX files to PDF whenever you need them, and you can access our other file conversion tools, too. Additionally, our PowerPoint to PDF converter works on any device or OS, like Mac or Windows, that can upload and download files.
In Outlook, PowerPoint, OneNote, and Excel, Grammarly's suggestions will appear one by one on a draggable widget: If you use Microsoft Office on a Mac, follow the steps in this article: How to add Grammarly to Microsoft Office on Mac