
- Get started with computers
- Learn Microsoft Office
- Apply for a job
- Improve my work skills
- Design nice-looking docs
- Getting Started
- Smartphones & Tablets
- Typing Tutorial
- Online Learning
- Basic Internet Skills
- Online Safety
- Social Media
- Zoom Basics
- Google Docs
- Google Sheets
- Career Planning
- Resume Writing
- Cover Letters
- Job Search and Networking
- Business Communication
- Entrepreneurship 101
- Careers without College
- Job Hunt for Today
- 3D Printing
- Freelancing 101
- Personal Finance
- Sharing Economy
- Decision-Making
- Graphic Design
- Photography
- Image Editing
- Learning WordPress
- Language Learning
- Critical Thinking
- For Educators
- Translations
- Staff Picks
- English expand_more expand_less

Word Tips - How to Create a Bibliography or Works Cited Page in Word
Word tips -, how to create a bibliography or works cited page in word, word tips how to create a bibliography or works cited page in word.

Word Tips: How to Create a Bibliography or Works Cited Page in Word
Lesson 16: how to create a bibliography or works cited page in word.
/en/word-tips/how-to-create-a-table-of-contents-in-word/content/
How to create a bibliography or works cited page in Word
If you need to write a research paper, chances are you'll also be required to include a bibliography . Or you might be asked to include a works cited page or a list of references . These are all just different names for the same thing: a list of sources —such as books, articles, or even websites—that you used to research and write your paper. A bibliography makes it easy for someone else to see where you found your information. A short bibliography might look something like this:

You could create a bibliography manually, but it would take a lot of work. And if you ever decide to add more sources or use a different reference style, you’ll have to update everything all over again. But if you take the time to input your sources into Word, it can create and update a bibliography automatically. This can save you a lot of time and help ensure your references are accurate and correct.
Step 1: Choose a reference style
When you're creating a bibliography, you'll need to follow the guidelines of the required style guide . Different academic disciplines use their own styles guides, such as MLA , APA , and Chicago . Fortunately, Word comes with several built-in style guides; all you need to do is select the one you want to use, and Word will help you format your bibliography correctly.
To do this, click the References tab, then select the desired style in the Citations & Bibliography group.

You can use this same method to change the reference style at any time.
Step 2: Add citations and sources
Whenever you use information from one of your sources, you'll need to give credit—or cite them. This is known as making a citation. You'll include citations whenever you use information from a source or when you quote a source directly.
To add a citation, select the desired location for the citation in your document, click the Insert Citation command on the References tab, and select Add New Source .

A dialog box will appear. Enter the requested information for the source—like the author name, title, and publication details—then click OK .

The citation will appear in the document, and the source will be saved. You can quickly add another citation for the source by clicking Insert Citation and selecting the source from the drop-down menu.

Step 3: Insert the bibliography
Time for the easy part! Once you've added all of your sources, you can create your bibliography in just a few clicks! Just select the Bibliography command, then choose the desired style.

The bibliography will appear at the end of your document. Your sources will already be formatted to match the selected style guide. You should still double-check each of your sources against your style guide to make sure they're correct. If you need a quick reference for MLA, APA, or Chicago formatting, we recommend the Purdue Online Writing Lab .
If you add more sources to your document, you can easily update your bibliography—just click it and select Update Citations and Bibliography .

No matter how many sources you include in your document, Word's built-in tools make it easy to create and organize a bibliography. If you want further guidance with the process, check out this tutorial from Microsoft on how to Create a Bibliography .
/en/word-tips/changing-your-default-settings-in-word/content/
- Translators
- Graphic Designers
Please enter the email address you used for your account. Your sign in information will be sent to your email address after it has been verified.
4 Easy Steps to Creating a Bibliography in Microsoft Word

The assignment's in front of you: Write a research paper and include a bibliography with properly cited sources. If you want to make the assignment as painless as possible, do what experienced academic writers do and go straight to Microsoft Word® to build your bibliography as you write.
With several options for online access to Microsoft Word , you'll find that the software offers a great way to streamline the process of creating a bibliography and proper in-text citations as you begin the research process. Doing this as you write—instead of waiting for the end to put all the citations together into a bibliography, references, or works cited list—makes writing a research paper so much easier.
Step 1: Choose a style from the References tab

For this first step in creating your bibliography in Microsoft Word, locate the References tab at the top of your screen. Next, look for the Citations & Bibliography group under the References tab. Click the drop-down box next to Style in the Citations & Bibliography group and choose the appropriate style for your paper. The available styles are listed in alphabetical order, and likely will include some styles you've never heard of before, such as:
- Gost – Name sort
- Gost – Title sort
- Harvard – Anglia
- ISO 690 – First element and date
- ISO 690 – Numerical reference
After completing this step, it's time to write your paper and add citations.
Step 2: Insert citations in the text of your document
At this point in the progress of your research paper, you'll need to insert a citation wherever source information is needed in the text. Whether this is a direct quote or paraphrasing the writing of another, citations are required for all research.
To insert a citation, click the References tab. In the Citations & Bibliography section, click the Insert Citation button to add a new source.

A window like the one in the image above should then pop up, allowing you to enter all the source information, including type of source, author, title, year, publisher and city of publication. The fields will change based on what type of source you choose. For example, if you choose to add a source that is a journal article—one of the most common types of sources used in research—the fields will be: Author, title, journal name, year, and page numbers (since these are the details required in a citation for a journal article). However, if you choose the type of source as sound recording, the fields will include: Composer, performer, title, year, city, state, and country.
This is one of the great benefits to using Microsoft Word to create your paper and accompanying bibliography. The software ensures that the unique details of each source—whether it's a website, piece of artwork, or journal article—are correctly collected on the front-end in the writing process. When you reach the end of your initial draft, your sources should be already included and managed, allowing you to create a bibliography at the literal touch of a button.
A note on placeholders
You'll notice that when you press the Insert Citation button, you're given two choices: Add new source and add new placeholder. You should choose "Add new source" if you have most of the source's information. However, if you don't have very much information about the source but know that you are writing a paragraph or sentence that needs to be cited, you can choose "Add new placeholder" to create a placeholder citation for the text.
Step 3: Manage your sources
After you input all your sources for citations within your text, you will be able to manage the sources and include some (or all) in a master list. Clicking on Manage Sources within the Citations & Bibliography section allows you to do this. Once clicked, this will take you to a list version of all the sources you have inputted thus far, allowing you to add them to (or subtract them from) a master list. It will also allow you to make any changes that are needed.

Now from this menu, you can add, delete, and edit your sources. You will also be able to preview the sources' bibliography format in the lower pane of the window that opens when you manage sources.
Step 4: Add the bibliography
Now that you've completed your paper and added all sources, creating the bibliography is the easy part. Simply place your cursor where you want the bibliography to be in your paper, click on the References tab, then click Bibliography in the Citations & Bibliography section. When you do this, a drop-down arrow will allow you to choose the correct title for your bibliography—either Bibliography, References, or "Works Cited." Once you've chosen the title, click Insert Biography and voila! Your bibliography is inserted and formatted exactly as it should be for the style you've chosen.

- Academic Writing Advice
- All Blog Posts
- Writing Advice
- Admissions Writing Advice
- Book Writing Advice
- Short Story Advice
- Employment Writing Advice
- Business Writing Advice
- Web Content Advice
- Article Writing Advice
- Magazine Writing Advice
- Grammar Advice
- Dialect Advice
- Editing Advice
- Freelance Advice
- Legal Writing Advice
- Poetry Advice
- Graphic Design Advice
- Logo Design Advice
- Translation Advice
- Blog Reviews
- Short Story Award Winners
- Scholarship Winners

Need an academic editor before submitting your work?
TechRepublic
Account information.

Share with Your Friends
How to add a bibliography to a Word document
Your email has been sent

A bibliography is a list of sources referred to in a document. Many scholarly documents require one, and you probably had to create a few while in school. The list comprises citations, which include the title, author, publisher, date of publication, and so on for each source. You’ll use a bibliography to credit quotes and other facts to lend legitimacy to your document. The technical process in Microsoft Word is similar to footnote/endnotes or indexing and has three steps: Adding the sources as a citation, citing the citation, and then generating the bibliography. I’ll show you how simple it is to add sources and generate a bibliography.
I’m using Office 365 , but you can use earlier versions of Word . When using the .doc format, you will lose some features. You can work with your own document or download the demonstration .docx and .doc files . Word’s browser edition will display existing bibliographies, but you can’t add or edit sources or generate a bibliography while in the browser.
How to add a source in Microsoft Word
Sources can be any kind of published work, from books to articles on the web. The information you include for a source will depend on you or the publisher. Word supports several styles, but the three most common are Modern Language Association (MLA), American Psychological Association (APA) and Chicago. These styles determine the information needed and how that information is formatted. We won’t cover individual styles in this article–you will need to do a little research to determine what your publisher or recipient requires.
First, you need a source, so let’s run through a quick example.
- After entering the quote or fact that requires verification, click the Reference tab.
- In the Citations & Bibliography group, choose the appropriate style. APA is the default and, for our purposes, we’ll retain it.
- Click Insert Citation and choose Add New Source from the dropdown list.
- In the resulting dialog, enter the fields required by your style ( Figure A ). You can enter the name using first name lastname or lastname , first name format. Separate multiple authors with a semi-colon ( ; ).
- Click OK. As you can see in Figure B , Word adds a text reference to the citation. (Don’t worry if your results don’t match mine.)

Most of these fields ( Figure A ) are self-explanatory, though I want to call your attention to two options:
- Show All Bibliography Fields: When enabled, it shows a lot more fields. Most of us will never need those fields, but they’re available.
- Tag Name: This field is automated–it’s comprised of the author’s name and year. Word uses this tag internally to identify each citation.

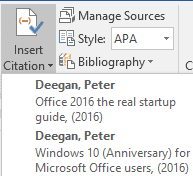
Once the citation exists, you don’t have to enter the information again. When referencing that source again, click Inert Citation in the Citations & Bibliography group and choose it from the resulting dropdown ( Figure C ).

Note about the author name and tags: When entering author names, you should be consistent because of the tags. Word uses the first three characters of the first name you enter: Susan Harkins 2001 is Sus01 but Harkins, Susan 2001 is Har01.
Before we continue, enter a few more sources using the different types of sources (books, periodicals, etc.)–you’ll want more than one citation when you create the bibliography. Notice that the fields change with different source types. Although this tool is flexible, it can’t correct typos. Be careful with your case, spelling, and so on. Bibliographies are very difficult and tedious to proof after the fact.
How to add a bibliography in Microsoft Word
After you have added all your sources and cited (marked) all your text references, you’re ready to create the bibliography. It’s similar to adding an index or table of contents—Word does most of the work for you. To add the bibliography, follow these steps.
- Click where you want to insert the bibliography—usually at the end of the document.
- Click the Reference tab. Then, click Bibliography in the Citations & Bibliography group.
- From the resulting dropdown list, choose a bibliography. There are several, and I suggest you explore the options at another time.
That’s it! Everything you need is already in the document. Word will pull everything together for you. Figure D shows the results of choosing the first item in the dropdown list.

If you had chosen a style other than APA, the list would be formatted a bit differently, but Word knows where to put all the commas, periods, what needs to be italicized or in quotes, and so on.
Understanding sources
If you don’t get all the items you expected, you might need to take one more step. In the Citations & Bibliography group, click Manage Sources. If there are citations in the left list (which is the master list) that aren’t in the current list to the right but should be in the current document’s bibliography, copy them to the current list ( Figure E ). You can also see a preview of the APA style. Then, try again. This isn’t a bug–you control which citations go in the document and which don’t. Once you add a source, it’s available to other documents.

The Source Manager gives you access to all sources. You can search for a title or sort by author. You can edit a source. Sources are stored separately from the document, so you can cite a source that you created for one document in another. The master and current lists represent all sources and sources for the current document, respectively.
You can edit a source without using the Manage Sources dialog. You can do a lot from the citation at the document level because these “text” references are actually field codes. Simply click it and then click the dropdown arrow to display the available options shown in Figure F .

How to fix a known bug with the APA style
There is a known bug with the APA style (sixth), and fortunately, it has an easy fix. If you end up with multiple citations from the same author, Word might fill in the title when it isn’t supposed to. If this happens, try this quick fix.
- Click the citation (code)—the one in the document that follows the in-text reference.
- Click the dropdown arrow and choose Edit Citation.
- Click Title checkbox and click OK.
Share your experiences of creating a bibliography in Word
Creating a bibliography in Word is easy. You can create a custom style if necessary, but doing so requires specialized knowledge in .xml development. If you’ve had trouble with a complex document and worked through it, share your experience in the comments section below.
Send me your Microsoft Office question
I answer readers’ questions when I can, but there’s no guarantee. Don’t send files unless requested; initial requests for help that arrive with attached files will be deleted unread. You can send screenshots of your data to help clarify your question. When contacting me, be as specific as possible. For example, “Please troubleshoot my workbook and fix what’s wrong” probably won’t get a response, but “Can you tell me why this formula isn’t returning the expected results?” might. Please mention the app and version that you’re using. I’m not reimbursed by TechRepublic for my time or expertise when helping readers, nor do I ask for a fee from readers I help. You can contact me at [email protected] .
Subscribe to the Developer Insider Newsletter
From the hottest programming languages to commentary on the Linux OS, get the developer and open source news and tips you need to know. Delivered Tuesdays and Thursdays
- 50 time-saving tips to speed your work in Microsoft Office (free PDF)
- Cost comparison calculator: G Suite vs. Office 365
- Microsoft Office has changed, how you use it should too
- How to use Excel's advanced sorting options
- How to add a drop-down list to an Excel cell
- How to use Windows 10 Task Scheduler to run Office 365 tasks
- Best cloud services for small businesses
- Best to-do list apps for managing tasks on any platform
- More must-read Microsoft-related coverage

Create a TechRepublic Account
Get the web's best business technology news, tutorials, reviews, trends, and analysis—in your inbox. Let's start with the basics.
* - indicates required fields
Sign in to TechRepublic
Lost your password? Request a new password
Reset Password
Please enter your email adress. You will receive an email message with instructions on how to reset your password.
Check your email for a password reset link. If you didn't receive an email don't forgot to check your spam folder, otherwise contact support .
Welcome. Tell us a little bit about you.
This will help us provide you with customized content.
Want to receive more TechRepublic news?
You're all set.
Thanks for signing up! Keep an eye out for a confirmation email from our team. To ensure any newsletters you subscribed to hit your inbox, make sure to add [email protected] to your contacts list.
- Delete a Page in Word
- Convert PDF to Word
- Page Numbers in Word
- Double Space in Word
- Table of Contents in Word
How to create a bibliography in Word on Windows and Mac
A bibliography is an important part of any well-structured college essay, dissertation, article, or other researched writing sample. It lets your readers know what sources you used as building blocks for your work, and isn’t too difficult to make without a template tool. Still, if you’d like to skip a few steps, there’s a terrific bibliography generator built right into Microsoft Word .
Add a new citation in Microsoft Word
Manage your sources in word, create a bibliography in word, update a bibliography in word, what you need.
Microsoft Word
What’s a college paper without a bibliography? Here’s how to use Microsoft Word to build a quick and easy bibliography for your next assignment or presentation.
To add a new citation in Word for a source you’ve never used before, you’ll need the basic details for it, whether it's a book, article, website, or another source. So, make sure you have the information handy and then follow these steps.
Step 1: Go to the References tab and the Citations & bibliography section of the ribbon.
Step 2: Choose your writing format in the Style drop-down menu, which likely displays as APA by default. You’ll find the most common formats in the list, like MLA, Chicago, and others.
- 4 high-end features Windows laptops still have over MacBooks
- How to customize the Windows 11 Start Menu
- How to optimize Windows 11 and Windows 10 for gaming
Step 3: Select Insert citation in the same section of the ribbon and pick Add new source .
Use the Type of source drop-down box to pick the kind, and you’ll see the fields beneath update to accommodate the source type.
Step 4: Add the necessary details for your source. Optionally, you can check the box for Show all bibliography fields if the ones you want don’t display.
Step 5: When you finish, select OK to save the source, and you’ll see it added to your content in the format you selected.
After you add a source to your paper, you can make edits to it or reuse it. Plus, your sources are saved to a master list that allows you to use them in other Word documents.
Step 1: On the References tab, select Manage sources in the Citations & bibliography section of the ribbon.
Step 2: When the box opens, you’ll see the Master list of sources on the left. If you added one using the section above, you’ll see it in this list as well.
- To add an existing source to the current document, select it and pick Copy in the center. This moves it to the Current list so that you can easily insert it into your current document (explained below).
- To edit a source, select it and choose Edit . Then, make your changes and pick OK to save them.
- To add a new source, select the New button, enter the details, and pick OK to save the source.
Step 3: When you finish with the Source Manager, select Close .
With sources in the Current List in the Source Manager, you can quickly add an in-text citation. Select the Insert citation button on the References tab and pick the source from the drop-down list.
When you’re ready to insert a bibliography, Word automatically uses the sources you’ve added to the Source Manager list.
Step 1: Place your cursor in the document where you want the bibliography and go to the References tab.
Step 2: Confirm the writing format is correct in the Style drop-down box, whether you’re using APA, MLA, or another style.
Step 3: Select the Bibliography drop-down menu in the Citations & bibliography section of the ribbon. You’ll see a few built-in options you can choose from with different headings.
If you prefer one without a heading, choose Insert bibliography .
Step 4: Pick the option you want and it’ll pop into your document.
Because Word creates your bibliography automatically, you can update it easily if needed, just like when you include a table of contents . You might add more citations or edit the details for a source.
Step 1: Select the bibliography and then choose the Update citations and bibliography button on the top left.
Step 2: You’ll see the list of references update to include any additions or changes.
College is tough enough without worrying about how to create a bibliography for your paper. Hopefully, this how-to gets you off to a great start!
Now that you know how to create a bibliography in Word, take a look at how to double-space your paper or how to add page numbers in Word.
Editors' Recommendations
- There are two versions of Windows 11. Here’s how to decide between them
- Insane deal gets you Microsoft Office for Mac or Windows for $25
- How to draw in Microsoft Word
- How to choose between a MacBook and a Windows laptop
- How to get the word count in Apple Pages

Your Windows 11 product key is about as important as your social security number. Well, at least as far as your PC’s operating system goes. This is a random combination of numbers, letters, and dashes that you’ll seldom need, but when you do, you’re going to need to know where to find it. For Windows 11 users, there are multiple ways to access this crucial code, but we highly recommend writing it down and storing it in a safe place, too.
Want to play games on your Mac? It's easier than you might think. In fact, it's not too complicated to play just about any game on Mac. Bugs, performance issues, and compatibility issues aren't non-existent, and it takes a few more hoops to jump through, but if you're a dedicated Mac gamer, we know you won't mind.
Returning Windows 10 or 11 to their defaults with a factory reset can be a great way to improve performance, clear our old unnecessary software, and make your PC feel like-new again. While you can always use our Windows speed up tricks to give your system a boost, sometimes there's no substitute for starting from scratch.
Here's how to factory reset Windows 10 and Windows 11 to get your PC feeling right again.
How to create a bibliography in Word

Creating a bibliography is important for academic papers. You don’t need to install any additional software in Word to do this
Creating a bibliography in Word – Step 1: Entering sources
To create a bibliography in term papers or other academic papers, you must first enter the sources in Word.
- Open Word and click on the “References” tab.
- Click on “Manage sources” to open the source manager. You will see a list of all the sources you have already entered.
- To add new sources, click on the “New” button.
- Here you can first define the source type. Depending on your selection, you can enter different information about the source. For example, different information is requested for eBooks than for online sources.
Step 2: Insert citations
After you have added the source, you can cite it in Word.
- Place the cursor at the end of the text you wish to quote.
- In the References tab, you can define the citation style under “Format template”. Here you can select different formatting such as APA style, MLA formatting or Harvard citation
- Then click on the “Insert citation” button and select the source you created in the first chapter. Alternatively, you can also add a new source here. The source reference will now be inserted into the text
3rd step: Insert bibliography
After you have entered the sources in your document and placed the citations, create the bibliography:
- Place your cursor in the desired position and click on the “Bibliography” button.
- Here you can select a format and insert the bibliography into your document using the “Insert bibliography” button.

Inserting a watermark in Word
Planting coriander: instructions for the garden and balcony, related articles, apply excel formula to entire column: this is..., recall mail in outlook, word: sort table by alphabet, show rulers in word, converting csv to vcf: it’s really easy, outlook: show preview window again, key combination for the unequal sign, outlook: enter vacation – this is how it..., open csv file: this is how it works, leave a comment cancel reply.
Save my name, email, and website in this browser for the next time I comment.
Search for: Search Button
Understanding Citations and Sources in Microsoft Word
The workload of students and academics has been made a lot easier with the arrival of Citation features in Word. They are useful for everyone, not just in academia.
Citations are individual references to source material you’ve quoted in your document. A Bibliography is a list of citations and sources used in your document.
Word can manage lists of sources and citations then create a bibliography automatically.
- Maintain a list of the source material you’re using in the document (Word calls these ‘Sources’).
- Make sure the citations are in the correct format or style.
- Move the citations with the quoted material if you rearrange the document.
- Make a Bibliography from the accumulated citations and sources.
Any university student will know about citations and the precision required. Many excellent essays have had marks deducted for just tiny formatting mistakes in citations. We often use citations in a less formal way.
We’ll show you the source, citation and bibliography options in Word which cover many common citation formats.
Note: ‘Style’ in this context is different from Microsoft Word ‘Styles’ which format text and objects throughout a document. For this article we’ll talk about ‘Style/s’ to mean Citation/Bibliography styles (APA, Chicago etc.) or ‘Word Style/s’ to mean the MS Office formatting system.
Citations for everyone
While citations and bibliographies are mainly for education and academic use they can be applied more widely. Use the features to narrate a document, for personal or internal reference only. It’s a way for an author or journalist to track the sources used while writing. The final document can be published without the citations.
Where are Citations?
The citation options are on the References tab, Citations & Bibliography.

First let’s look at how to add citations and placeholder sources into a document. That’s the way most people start using citations in Word.
Then we’ll check out the various parts of the Citation and & Bibliography system.
Quick Start
Here’s how to quickly start using citations. It’s not necessarily the best way but it’s the most common.
Type in your text or paste in a quote then go to References | Citations and Bibliography | Insert Citation.

Add New Source – create a source (book, document etc.) for the citation. This opens a full source dialog box .
Add New Placeholder – a placeholder is a short form source that you can quickly complete. For a placeholder you just type in a shortname (Word calls it a Tag Name).

Tag or Placeholder Names can only have letters and numbers with no spaces.
Many people use the Placeholder to quickly add a citation without too much disruption to the flow of your writing.
Word adds the citation in brackets showing just the placeholder/tag name.

Later you can go to Manage Sources and fill in the rest of the details for the placeholder. When you’ve done that, any citations will be updated with the full details.
Once you’ve added the citations:
- Go to Manage Styles and complete details of any placeholder sources.
- Choose a citation style
- Insert a bibliography
Better Start to Citations
The better way is to manage your sources first. You might not be able to add them all, but you can at least add to your document the main sources you’ll be relying upon.
Go to the Manage Sources dialog and either:
- Copy sources from the Master List to current document.
- Add new sources
Once you’ve done that, it’s a lot easier to insert citations because they’ll appear automatically in the Insert Citations drop-down box.
Adding sources first lets you focus on writing with less distraction each time you have to add a new source or placeholder.
Change the citation style to whichever option you need.
Citation options
There are some options under individual citations.

Edit Citation , a slightly misleading name, should be ‘Citation options …’ Add a specific page reference or prevent Author, Year or Title being displayed for this citation only.

Edit Source , the quick way to change the source including ‘filling out’ a placeholder source or tag.
Convert citation to static text
Update Citations and Bibliography , updates all the related fields. Use this to make sure all the details are consistent throughout the document.
Source Manager for citations in Word Word’s Similarity Checker warns about plagiarism Citation and Bibliography tools beyond Word Add a Bibliography to Word documents
About this author

Office-Watch.com
Office 2021 - all you need to know . Facts & prices for the new Microsoft Office. Do you need it? Office LTSC is the enterprise licence version of Office 2021.
Office 2024 what's known so far plus educated guesses. Microsoft Office upcoming support end date checklist.
Latest from Office Watch
- HUGE news - Excel gets Regular Expression functions
- Surprise! Microsoft recommends Windows 11
- Goggles 🥽 emoji in Word, Excel, PowerPoint and Outlook
- Beware the unexpected when copying an image from Word/Office
- How to make a Gantt Chart in Excel
- A $125 Billion lesson in why cloud backups are vital
- How Word pastes into your document
- Make monsters and pipes with the Terantopia font
- Avoid the traps when adding Excel info into a Word document
- Circle & Sphere calculations in Excel using Pi 𝜋
- How to list all fonts in a Word document
- Face with rolling eyes 🙄 emoji in Word, Outlook, Office
- Glasses 👓 emoji in Word, Excel, PowerPoint and Outlook
- Calendar extras added to new Outlook
- Changes to PDFs made by Microsoft Office
- It's official - Calibri beats Aptos in font poll
- Vmware Workstation Pro is now free
- A quiet month of security fixes for Microsoft Office
- How Mark of the Web stops bad document infections
- Introducing Reading Coach to enhance Reading Fluency with AI
Citations and Bibliography
Locked lesson.
- Lesson resources Resources
- Quick reference Reference
About this lesson
Learn to cite your sources for a college paper or report.
Lesson versions
Multiple versions of this lesson are available, choose the appropriate version for you:
2013 , 2016 , 2019/365 .
Exercise files
Download the Word document used in the video tutorial and try the lesson yourself.
Quick reference
When to use.
A reference for the purpose of acknowledging the relevance of the works of others to the topic of discussion to uphold intellectual honesty or avoid plagiarism.
https://en.wikipedia.org/wiki/Citation
Bibliography
A list of the sources and citations used to support your paper, typically 3 sources per paper in academic settings.
Instructions
Add a citation after a quote.
- In your document, click the References Ribbon , Citations & Bibliography group.
- Click the Style arrow and choose a style. This is usually specifically stated by your instructor as to which style he/she requires.
- Click at the end of the text that you want to cite.
- Click Insert Citation and then select Add New Source .
- Choose the Type of Source.
- Enter the citation details and click OK . As you complete these steps for each citation, it is added to the Insert Citation button so you will not have to re-type it if you reference it again.
Create a bibliography (aka “references” list) from your sources
If this is a formal paper, you will include the Bibliography of your Citations. It is standard to place the bibliography at the end of a document.
- Go the end of your document to the top of a new blank page.
- On the References tab, in the Citations & Bibliography group, click Bibliography .
- Select one of the predesigned formats listed.
- As new citations are added, click the Bibliography Title and choose “Update Bibliography”.
- 00:05 All right, citations and bibliographies.
- 00:07 If you are in school and writing papers, you're going to be using a citation and
- 00:12 then building the bibliography off of it.
- 00:14 So let's go ahead and find out where those are.
- 00:16 In Microsoft Word, they're on the References ribbon.
- 00:18 There's a section over here called Citations and Bibliography.
- 00:21 You can insert a citation, manage your sources, choose your style, and
- 00:25 here of course is the Bibliography button.
- 00:27 Now, if you are required to do these,
- 00:28 generally your instructor will tell you which style they want you to use and then,
- 00:32 of course, you'd come in here and choose it.
- 00:34 I'm going to stick with the APA style.
- 00:36 That's pretty common.
- 00:37 And now I'm going to click behind the sentence where I want to insert my
- 00:42 citation.
- 00:43 Now, of course I did actually pull this definition from Wikipedia.
- 00:47 So I'm going to very slyly copy that.
- 00:50 Now, I'm gonna go into my Insert Citation right up here and add my new source.
- 00:55 When I click this, now I simply need to tell it, is this a book?
- 00:59 Now, notice all the fields changed.
- 01:00 Depending on what I choose, the fields will change.
- 01:03 So I'm gonna go ahead and stick with a website.
- 01:06 Now, the website itself is, let's see,
- 01:10 name a website is here and, wait, the URL is here.
- 01:13 Now, the name of the website does never include https, I wanna get rid of that and
- 01:18 then the page of the website is going to be just this section right here.
- 01:23 So you can really break this down to its proper levels.
- 01:27 So name of the website, and then page of the website, and
- 01:30 then the full URL right here.
- 01:31 Of course, I'm gonna go ahead and type in the year, and
- 01:35 I can show all the bibliography fields or get rid of all of them.
- 01:39 And notice I've got a tag name as well.
- 01:42 So if I need to look up tags in my document statistics,
- 01:45 I can find it there as well.
- 01:47 Then I'm going to hit OK on this.
- 01:48 I didn't put an author on that on.
- 01:49 So look what showed up, wiki/Citation 2020.
- 01:53 I'm done with that one.
- 01:54 So I'm going to wipe out that line.
- 01:55 Let's do it again on the next one.
- 01:59 I'm gonna change some stuff up this time.
- 02:01 I'm going to add this citation to the end of the first line.
- 02:05 Right back up here, Insert Citation.
- 02:08 Notice, it's got the last one I used 'cause a lot of times,
- 02:10 you'll use that same citation over and over.
- 02:12 It feels kind of nice it's on a list, saves you typing.
- 02:15 So now I'll go ahead and click on Add a New Source which
- 02:18 is going to be a website and I'm gonna put my URL here.
- 02:22 And I drop it again right here and get rid of the www.
- 02:27 And of course, clean it up a little bit more, get rid of this stuff and
- 02:31 put it in the proper sections.
- 02:33 And put on my year, this time, I am going to add an author name, author name.
- 02:40 And here we go, and then go ahead and click Edit.
- 02:44 So notice this time I actually have an author's name and then the year.
- 02:49 And let's see, get rid of this line as well.
- 02:53 Okay, let's build a bibliography.
- 02:54 So the bibliography generally goes on a separate page entirely, so Ctrl+Enter.
- 03:00 To drop me to the second page, and oh, the hard work to do this.
- 03:04 Click on Bibliography, choose which one you want,
- 03:07 basically which title you want at the top of it.
- 03:10 I'll go ahead and choose, I'm gonna click that one and there you go.
- 03:13 My bibliography is done.
- 03:15 When I went to college in the early 90s and high school in the '80s, and
- 03:19 I gotta tell you, we had to this by hand.
- 03:21 I mean, there were books on how to properly do citations and bibliographies.
- 03:26 Count your blessings that Microsoft Word has put them
- 03:28 all in one little group called Citations and Bibliographies.
- 03:31 It is so wonderful to get in here.
- 03:34 I want to show you a couple of more things.
- 03:35 When you click on the bibliography it's similar to the table of contents,
- 03:39 you get an update and you get options right over here to change them.
- 03:43 Also, when I come up here and I click on my citations, there is also a field with
- 03:47 a drop down arrow of things you can change in there as well.
- 03:50 So don't give up, right when it's in there doesn't mean it's done,
- 03:53 you can still adjust and tweak things as you need them.
- 03:56 So this is great, use this.
Lesson notes are only available for subscribers.
Facebook Twitter LinkedIn WhatsApp Email
© 2024 GoSkills Ltd. Skills for career advancement
How to Create an Annotated Bibliography in Microsoft Word
An annotated bibliography is an important part of any research document. Let's see how to create one with the help of Microsoft Word.
Sometimes, the value of scholarship is in the documents you create to prove it. Every scholar wishes not to get bogged down by paperwork. But look at it this way—the academic document advertises your credibility and the thoroughness of your research. It is also the Kevlar against plagiarism (and sometimes the cause of it).
Every academic document has its own nuts and bolts. Today, let's talk about an important one— the annotated bibliography .
An annotated bibliography is a list of citations to journals, books, articles, and other documents followed by a brief paragraph. The paragraph(s) is a description of the source and how it supports your paper.
It is the one document that can make your and your professor's life easier as you end your research paper with a flourish.
The Annotated Bibliography: Let's Define It
It's important not to confuse an annotated bibliography with a regular bibliography or works cited.
A regular bibliography is simply a list of source citations. Nothing more. The screen below is an example of a regular bibliography. As you can see, it doesn't go into deeper detail about the books or sources mentioned.
An annotated bibliography has a few more parts to it. It is easy to get the idea from the meaning of the word “annotation”. According to Merriam-Webster, an annotation is:
A note added to a text, book, drawing, etc., as a comment or explanation.
Here's what a common annotated bibliography looks like. I am sure you can instantly make out the extra parts that go into framing it.
As you can see, the sample above starts with the usual bibliographic citation. Then, it includes a summary and a clear evaluation of the source you used for researching your topic. The intent behind adding your own summary and analysis after the primary or secondary source is to define the topic area and how it applies to your research. You have to add an annotation each time that you create a new source.
It is a lot of work. But this effort from you helps the reader find useful information at a glance. It tells the reader how each borrowed information has helped the progress of the paper. And, it offers everyone a window into your thinking behind the topic you have selected.
Using Word to Create an Annotated Bibliography
The easiest way to create an annotated bibliography in Microsoft Word? Use a template to save time.
But it is always better to create one from scratch and sharpen your research writing skills in the process. It is not difficult, so don't hold yourself back. You have to keep in mind the style of the documentation required for your research. There are distinguishing differences between the APA, AMA, and MLA Styles.
I am going to follow the MLA (Modern Language Association) Style and show how to create a well-formatted document in Microsoft Word in five basic steps.
1. Set Up Your Word Document . Go to Ribbon > Layout > Margins > Normal (1-inch margins on all sides).
2. Set the font. MLA recommends a serif font (e.g., Times New Roman). Go to Home > Font and choose Times New Roman and 12 pt . Also, go to the Paragraph group and choose 2.0 for double-spaced line settings.
Start the Annotated Bibliography
3. Choose the location. An annotated bibliography begins on a new page that follows the end of your research sections. Type “Annotated Bibliography” at the top and center-align it on the page. It should be capitalized and centered—not bolded or underlined.
4. Choose your sources. Research and record the information that pertains to your topic. A properly formatted citation comes first, and you have to cite your source according to the MLA Style.
The MLA citation style for a book follows this sample sequence:
Author, A.A. Write the Title of Work in Italics . Publisher City, State: Publisher, Year of Publication. Medium.
Example: Smith, J. Just a Good Book That You Can Cite . New York, NY: Cambridge University Press, 2016. Print.
The citation is the most important part—so do follow the format religiously by following the style format guide. There are many online sources that cover the popular citation styles in more detail.
5. Indent the second line. The second line of the citation uses a hanging indent to offset half-an-inch from the left margin. Just hit enter at the end of the first line and then press the Tab key to create the hanging indent. You can also adjust it with the hanging indent marker on the ruler. So, your citation will look like this:
As you can see above, each individual citation will start flush from the 1-inch margin. But everything from the second line will be offset 0.5 inches to the right.
To set the hanging indents, you can also go to Ribbon > Paragraph > Click on the Paragraph settings arrow to display the dialog box. Under Indentation , click on Special > Hanging . By default, the hanging indent is set to 0.5 inches.
Microsoft Word does not always like to space things properly. So, you might have to tweak it by hand and indent everything from the second line onward.
Use Microsoft Word's Bibliography Tool
Microsoft Word has a built-in bibliography tool you can use to manage your citations. On the Ribbon , go to the References tab.
In the Citations & Bibliography group, click the arrow next to Style . This looks slightly different on Microsoft Word for Mac, but can be found in the same area.
Click the style that you want to use for the citation and source, e.g., MLA.
Select the location where you want to start the citation. Then, click Insert Citation .
Two options are available in the dropdown menu.
- You can add the source information for the citation.
- You can also add a placeholder to create a citation and fill in the source information later.
If you choose Add New Source , enter all the citation details in the Create Source box. Click OK .
You can preview the citation in the Manage Sources dialog box.
Microsoft Word also helps you manage your long list of sources. The Office Support page also explains the nitty-gritty of bibliographies.
You can also use online citation generators, though there is more value in doing it yourself. As in everything, practice makes perfect. If you are a Word newbie, take time to learn all the tricks the Office suite has up its sleeve . And remember, automatic citation apps can make bibliographies easier to write.
If you're trying to create an annotated bibliography on Windows for Mac, then you'll be relieved to hear that the process is almost identical.
Write the Annotation
Just to remind you again: the annotation begins below the citation. The annotated text is also indented below the citation. The first line of the citation that begins with the author's last name is the only text that is flush left in the entire bibliography.
The paragraphs you include will depend on the aim of your bibliography. Some annotations may summarize, some may analyze a source, while some may offer an opinion on the ideas cited. Some annotations may include all three paragraphs. In brief: it can be descriptive, analytical, or critical. But it follows a specific order…
- The first paragraph is a summary of the source.
- The second paragraph is an evaluation of the source.
- The last paragraph can look into the relevance of the source material for the research.
In the MLA Style, annotated bibliographies have to be arranged alphabetically according to the last names of the first author mentioned in each of the citations. So, just copy-paste each annotation in the proper order.
A Few Resources for the MLA Style
One of the best videos I could find on YouTube that explains the entire process in detail comes from Columbus State Library.
It's also useful to keep these two official documentation sites bookmarked.
- The APA Style
- The MLA Style Center
The Purdue Online Writing Lab is a useful resource for understanding style formats quickly. Lastly, if you need to cite a YouTube video in MLA Style , then this guide could be helpful.
Is Writing an Annotated Bibliography Hard?
The research is the hard part. Don't make turning your research into the desired format harder than it should be. It really isn't. Academicians have turned it into something mystical!
Just pay attention to the little details. If you are used to the APA Style, a move to MLA Style can spark mistakes. That could be the difference between a pat on the back or a red mark.
- Skip to main content
- Skip to secondary menu
- Skip to primary sidebar
- Skip to footer
Erin Wright Writing
Writing-Related Software Tutorials
How to Insert Citations in Microsoft Word (Step-by-Step)
By Erin Wright
Managing citations for research papers, theses, dissertations, and other nonfiction works can be overwhelming. However, you can ease the process by learning how to insert citations in Microsoft Word using the software’s citation and bibliography tools.
This tutorial covers six topics:
- How to select a citation style
- How to insert citations for new sources
- How to insert citations for existing sources
- How to edit sources
- How to use citation placeholders
- How to insert bibliographies, reference lists, or works cited lists
Important Note: At the time this tutorial was published, Microsoft Word did not offer the most up-to-date formatting for several of our primary style guides , including APA, Chicago, MLA, and Turabian. Therefore, I encourage you to review the available styles before using the citation and bibliography tools. We will cover the steps to customize citation and bibliography styles in a separate tutorial.
This tutorial is also available as a YouTube video showing all the steps in real time.
Watch more than 200 other writing-related software tutorials on my YouTube channel .
The images below are from Word in Microsoft 365. The steps are the same in Word 2021, Word 2019, and Word 2016. However, your interface may look slightly different in those older versions of the software.
How to Select a Citation Style in Microsoft Word
- Select the References tab in the ribbon.

- Select your citation style from the Style menu in the Citations & Bibliography group.

How to Insert Citations for New Sources in Microsoft Word
- Place your cursor where you want to insert the citation.

- Select the References tab in the ribbon (see figure 1).
- Select the Insert Citation button in the Citations & Bibliography group.

- Select Add New Source from the drop-down menu.

- Select the source type from the Type of Source menu in the Create Source dialog box.

- Enter the source information into the bibliography fields.

- (Optional Step) Select Show All Bibliography Fields if you need to add additional information.

- (Optional Step) Enter the source information into the additional fields.

- Select the OK button.

Your citation should appear in your text.

How to Insert Citations for Existing Sources in Microsoft Word
Once you enter a source, as shown in the section above, you can create additional citations for that source without reentering the information.
- Place your cursor where you want to insert the citation (see figure 3).
- Select the Insert Citation button in the Citations & Bibliography group (see figure 4).
- Select the source from the drop-down menu.

Your citation should appear in your text (see figure 11).
How to Edit Sources in Microsoft Word
When you edit an existing source, you will also edit any existing citations for that source in your current document.
- Select the Manage Sources button in the Citations & Bibliography group.

- Select the source you want to edit in the Master List or the Current List in the Source Manager dialog box.

Pro Tip: The Master List is stored in your computer and is accessible in all your documents. The Current List is part of your current file and is only accessible in that file. By default, Word stores new sources in the Master List and the Current List.
- Select the Edit button.

- Enter your edits in the Edit Source dialog box. (Select Show All Bibliography Fields , if necessary.)

- Select Yes or No in the alert box stating that you will be updating the source in both the Master List and the Current List. (Strongly consider selecting Yes to update both lists if you plan to cite this source in future documents.)

- Select the Close button in the Source Manager dialog box.

How to Use Citation Placeholders in Microsoft Word
You can use placeholders if your source information is not available.
- Place your cursor where you want to insert the citation placeholder.
- Select Add New Placeholder from the drop-down menu.

- (Optional Step) Change the name of the placeholder in the Placeholder Name dialog box.

Pro Tip : You can use the same placeholder in the future by selecting it from the Insert Citation drop-down menu (see figure 12).
- When you are ready to replace the placeholder with a source, complete the steps in How to Edit Sources above.
How to Insert Bibliographies, Reference Lists, or Works Cited Lists in Microsoft Word
These steps will only work if you inserted your sources using Word’s citation and bibliography tools.
- Place your cursor where you want to insert the bibliography, reference list, or works cited list.
- Select the Bibliography button in the Citations & Bibliography group.

- Select Bibliography , References , or Works Cited from the drop-down menu.

Your bibliography, reference list, or works cited list should appear in your document.
Related Resources
How to Create Hanging Indents in Microsoft Word
How to Insert Footnotes and Endnotes in Microsoft Word
How to Convert Individual Footnotes to Endnotes in Microsoft Word (and Individual Endnotes to Footnotes)
How to Create a Cover Page in Microsoft Word (Built-In and Custom)
How to Add Citations and a Bibliography in Google Docs
Updated May 21, 2023
- Microsoft Word Tutorials
- Adobe Acrobat Tutorials
- PowerPoint Tutorials
- Writing Tips
- Editing Tips
- Writing-Related Resources
- PRO Courses Guides New Tech Help Pro Expert Videos About wikiHow Pro Upgrade Sign In
- EDIT Edit this Article
- EXPLORE Tech Help Pro About Us Random Article Quizzes Request a New Article Community Dashboard This Or That Game Popular Categories Arts and Entertainment Artwork Books Movies Computers and Electronics Computers Phone Skills Technology Hacks Health Men's Health Mental Health Women's Health Relationships Dating Love Relationship Issues Hobbies and Crafts Crafts Drawing Games Education & Communication Communication Skills Personal Development Studying Personal Care and Style Fashion Hair Care Personal Hygiene Youth Personal Care School Stuff Dating All Categories Arts and Entertainment Finance and Business Home and Garden Relationship Quizzes Cars & Other Vehicles Food and Entertaining Personal Care and Style Sports and Fitness Computers and Electronics Health Pets and Animals Travel Education & Communication Hobbies and Crafts Philosophy and Religion Work World Family Life Holidays and Traditions Relationships Youth
- Browse Articles
- Learn Something New
- Quizzes Hot
- This Or That Game
- Train Your Brain
- Explore More
- Support wikiHow
- About wikiHow
- Log in / Sign up
- Computers and Electronics
- Microsoft Office
- Microsoft Word
How To Create a Works Cited in Microsoft Word
Last Updated: April 19, 2023 Tested
Inserting In-Text Citations
Using footnotes or endnotes, creating your bibliography.
This article was co-authored by wikiHow staff writer, Jennifer Mueller, JD . Jennifer Mueller is a wikiHow Content Creator. She specializes in reviewing, fact-checking, and evaluating wikiHow's content to ensure thoroughness and accuracy. Jennifer holds a JD from Indiana University Maurer School of Law in 2006. The wikiHow Tech Team also followed the article's instructions and verified that they work. This article has been viewed 112,120 times. Learn more...
Microsoft Word has many automatic features that can help you write a report or academic paper. Among these, you can keep a list of sources and citations to automatically generate a bibliography (also called a "Reference List" or "Works Cited") at the end of your paper. If you need footnotes or endnotes, Word has features that can help you format those as well.
Things You Should Know
- Click Style within the "References" tab in Microsoft Word to select your desired citation style.
- Click Add New Source to enter info about a source, which can then be used when you next click Insert Citation .
- Click Bibliography under the "References" tab to open a menu of different bibliography formats, including an MLA Works Cited.

- Make sure the edition is the same as the one you need to use. Word typically offers the most recent edition of each style, but if you have an older version of Word you may need to upgrade. If you have a subscription version, simply download the latest update. [1] X Research source

- A dialogue box will appear with the necessary fields for the citation, including spaces for the author, title, year of publication, city, and publisher. Enter all the information you have for your source, then click "OK."
- If you have additional information about the source that doesn't fit into any of these basic fields, check the box next to "Show All Bibliography Fields."
Tip: If you don't have all the information for the source, or if you don't want to interrupt your train of thought to add a new source, you can click "Add New Placeholder" instead. This alerts you that you need to add a citation there.

- To edit an individual citation, such as if you wanted to add a page number for a direct quote, right-click the citation for citation options and click "Edit Citation." [2] X Research source

- Choose the source you want to edit from your master list. As you edit, you'll see a preview of the final citation in the lower box.
- If you inserted placeholders while you were writing, you can also use this menu to add information for those sources.

- Word will automatically create a superscripted number in your text and move the cursor to the footnote or endnote field.
Keyboard shortcuts:
Insert Footnote: Alt+Ctrl+F (PC); Command+Option+F (Mac) Insert Endnote: Alt+Ctrl+D (PC); Command+Option+E (Mac)

- By default, footnotes or endnotes will continue sequential numbering throughout your document. If you want the numbers to restart at the beginning of each new section or chapter, you can specify this in the settings.
If you need to convert footnotes to endnotes, click on the "Insert" menu, then "Footnote," then "Options." Select "Convert" from the menu, then click on "Endnotes."

- You can also use the "Placeholder" tool if you don't yet have all the information for the source and need to add it in later.
- Check the formatting against your style guide to make sure it's correct before you continue.

- Similarly, you can double-click a superscripted footnote number in the text to check that footnote, edit, or add to it. While you can also simply scroll down the page, this is a quicker way to get there.
To delete a footnote or endnote, highlight the footnote or endnote number in your text and press the delete key. Word will automatically renumber your other footnotes or endnotes to accommodate for the deletion.

- For example, if you're writing your paper in MLA style, you would want a "Works Cited" bibliography. Assuming you chose MLA as the style for your source citations, the "Works Cited" format would be the first format option in the "Bibliography" drop-down menu.

- The bibliography is considered a separate object from the paper you're writing, and will automatically start on a new page.
Tip: You don't have to wait until you've finished writing your paper to create your bibliography. Word will auto-populate your bibliography with any new sources you add after the bibliography has been generated.

- For example, if you made a typographical error when entering the information about the source, that error would carry over into your bibliography.
Expert Q&A
- The steps and information in this article are accurate for Word for Office 365, Word 2019, Word 2016, Word 2013, Word 2010, and Word 2007. If you have a different edition of Word, your menu options may differ slightly. [10] X Research source Thanks Helpful 0 Not Helpful 0
You Might Also Like

- ↑ https://support.office.com/en-us/article/how-do-i-upgrade-office-ee68f6cf-422f-464a-82ec-385f65391350
- ↑ https://support.office.com/en-us/article/create-a-bibliography-citations-and-references-17686589-4824-4940-9c69-342c289fa2a5
- ↑ https://support.office.com/en-us/article/insert-footnotes-and-endnotes-61f3fb1a-4717-414c-9a8f-015a5f3ff4cb?ui=en-US&rs=en-US&ad=US
- ↑ https://guides.lib.umich.edu/c.php?g=283073&p=1888261
- ↑ https://www.pcworld.com/article/2687533/how-to-use-microsoft-words-works-cited-tools-sources-footnotes-and-more.html
- ↑ https://edu.gcfglobal.org/en/word-tips/how-to-create-a-bibliography-or-works-cited-page-in-word/1/
About This Article

- Send fan mail to authors
Is this article up to date?

Featured Articles

Trending Articles

Watch Articles

- Terms of Use
- Privacy Policy
- Do Not Sell or Share My Info
- Not Selling Info
wikiHow Tech Help Pro:
Level up your tech skills and stay ahead of the curve
Stack Exchange Network
Stack Exchange network consists of 183 Q&A communities including Stack Overflow , the largest, most trusted online community for developers to learn, share their knowledge, and build their careers.
Q&A for work
Connect and share knowledge within a single location that is structured and easy to search.
How to add a new Citation & Bibliography Style to Microsoft Word?
In Microsoft Word, there are 12 Citation & Bibliography Styles available as shown in the following screenshot:

However, there doesn't seem to be an easy way to add a custom or new Citation & Bibliography Style. And unfortunately, my university uses its own unique Citation and Bibliography Style, which is a slightly modified Chicago style. Basically, they use an ampersand, &, instead of "and" to refer to two authors, for example. And they put the year after the author(s) without a period in-between in the bibliography.
So I basically need to add a new Citation & Bibliography Style to Microsoft Word that is a copy of the Chicago style but with these two slight differences.
My research on this suggests that this is possible via XML files. I've edited XML files before but where is the XML file of the Chicago style, for example? [Edit: The path seems to be %APPDATA%\Microsoft\Bibliography)
And which parts do I need to change in the Chicago style in order to turn the "and" between authors into an ampersand "&", and to remove the period between the author(s) and the year in the bibliography (it doesn't exist in in-line citations)?
The APA style uses the ampersand but, unfortunately, the rest of its formatting is significantly different from Chicago, and overall Chicago is closer to my targeted style. I've tried to compare the APASixthEditionOfficeOnline.xsl and CHICAGO.XSL files to see if I can spot the differences that give me a clue as to what I need to change, given that APA uses the ampersand and Chicago uses "and", but unfortunately my level of XML knowledge, combined with the size of those files, prevented me from spotting the part(s) that need to be changed. Also, both styles put a period after the author(s) in the bibliography.
Thanks for any help or tips with this.
- microsoft-word
- bibliography
4 Answers 4
It's difficult to work with the built-in style .xsl stylesheets, so the following are just some suggestions. The main difficulty is identifying the appropriate point for the change - depending on what it is, you might be able to make a single change, or you might have to make a lot of rather similar changes. This is primarily because these stylesheets try to implement a fairly large set of "small" rules. However an implementer does that, it's always going to be difficult to identify the point where changing an XSL template inside the stylesheet is going to have the right impact. Using a language that is not particularly familiar and providing no internal documentation doesn't help.
Another unfortunate problem is that you may have to provide your modified .xsl to anyone else who needs to work on your document.
But for example, I would suggest that you start by saving a copy of Chicago.xsl in the folder that you identified (the one in your user area, not the one under Program Files or Program Files (86). Call it Xhicago.xsl, perhaps.
Then, when you restart Word, you should see two identical styles listed in the relevant dropdown. Now open the .xsl in a suitable editor (I currently use Visual Studio Code here, with suitable plugins for .xml and other file types).
All that said, you could at least try the following as it may help you establish whether it's enough for your current needs.
I suggest that you start by saving a copy of Chicago.xsl in the folder that you identified (the one in your user area, not the one under Program Files or Program Files (86). Call it Xhicago.xsl, perhaps.
Then, when you restart Word, you should see two identical styles listed in the relevant dropdown. Now open a test document that already contains some citations and a bibliography, and switch between the two Chicago stylesheets using Word's dropdown. You should see no changes in the output, but Word may flicker a bit.
Open the Xhicago.xsl in a suitable editor (I currently use Visual Studio Code here, with suitable plugins for .xml and other file types).
IMO the first thing to change is the XmlVersion so you can see the difference between the original Chicago and your new one. Search for
and you should see code like this (if you are using a significantly different version of Chicago.xsl you may see some difference from what I see).
Change the 16 to (say) 18 (I think Microsoft might have moved on since my version already) then save the .xsl. Here I don't generally need to close it while testing the changes. Personally I would also write an XML comment - apart from anything else, it really helps you to find the stuff you changed. e.g.
Personally I also prefer to wrap up the old code inside just in case I need it again.
Now, restart Word again and reopen your test document. You should be able to see two different "Chicago" styles in the dropdown, with two different version numbers.
Next, in the .xsl, look for
and you should see a chunk of code like this:
What this does is to set up a local variable that contains the word that the .xsl will use when it needs an "and", at least when you're using an English Language ID.
Whenever Word wants to generate the text for a citation or the whole bibliography, it passes an XML file to the .xsl. That file contains all the relevant citations, and also a whole bunch of other settings. Some of these are general settings, such as "should there be an 'and' before the final author in a list of authors", and some are settings associated with different built-in stylesheets. Further, there may be settings for many different language codes. So for example, the XML may contain "and" for English but "et" for French. As far as I know there is nowhere that lets you configure these settings - they are hard-coded in Word somewhere.
So before changing this code, you need to consider what the impact might be.
First, as far as I can tell, the word "and" is only defined in one element in the incoming XML. So if you want "and" for a list of Authors, but not for "Translators", you can't rely on the incoming XML to provide it to you. The change I am going to suggest will change "and" to "&" in every place where the .xsl references this incoming value. Further, it's not going to take any account of the language ID. But here's my suggested code:
Now save the .xsl again. When you switch to the Chicago style and back to the Xhicago style, you should see the changes reflected in the Bibliography (although you may have to update the Bibliography). If you made any coding errors the chances are that you won't see any change, and in fact the next time you restart Word, you probably won't see the Xhicago style in the list either - Word won't load the sheet unless it's a valid .xsl and has some special templates that Word expects.
However, if everything is working and you have a Book with authors
in Chicago in the citation you should see
and in the Bibliography you should see
In Xhicago you should see
respectively.
Now I wouldn't really much like that comma after Luke, and you can probably get rid of it (again, with perhaps a wider impact than you might hope) by looking for
and changing the text there to
Save that, and test it.
Finally, getting rid of the dot between the authors and the year is problematic for even more reasons than we have discussed above. e.g. it's not necessarily a "dot before the year". e.g., what if there isn't a year? (and we haven't even discussed the situation where you have "et. al." instead of actual author names).
What may fix this for a list of book authors is to search for
and change the code to
BTW, it's probably worth checking around to see if anyone at your uni. has already done this work. I've certainly done minor modifications for people from time to time, but I do not think getting it all right for all situations for all "cultures" is really a practical proposition without spending a lot of time on the problem. Although I think the internal structure of the XML that Word passes to the XSL may be described in the ISO 29500 standard for the .docx, I found this whole area very confusing and decided the only thing that would help would be to have a stylesheet that iterated through all the XML that Word is providing. I am sure it could be improved in a number of ways, but here is my "explore.xsl". Obviously, you can't use it like a regular sheet, but you put it in the same folder as the other .xsl files and switch to it in the usual way in Word.
Incidentally, Microsoft's documentation on what you need to put in a .xsl is quite old now. I don't think it explains all that well that some of the "options" implemented by code within the main "choice", e.g.
were needed in earlier versions of Word, but are not needed in later ones, and vice versa. Also, at one time, the Mac version of Word supported a different FootnoteCitation layout from the normal Citation layout. However, that disappeared in Mac Word 2016 and I don't think it has come back.
Finally, you will find other .XSL files used by the Bibliography system in the Microsoft Office folders under Program Files (or the (86) version). As far as I know these are not used in producing the Citation and Bib texts, just used for some or all of the Bibliography-related dialog boxes that Word uses.
But here's that explore.xsl:
- What the hell?! Why did anyone delete my comment of thanks?! How exactly was my comment breaking any rules?! I was just thanking yokki for an answer that obviously required an insane amount of time to research, write, and put together! What on earth is going on here? – Rok Apr 3, 2020 at 11:58
- It would be mighty weird and awkward if superuser "prefers" that one doesn't thank the publisher of a good answer in a comment on that answer! – Rok Apr 4, 2020 at 18:37
- Yeah, I can understand that. These comments between us right now are certainly worth deleting later on, especially because there are several of them. I just think that one comment of thanks really shouldn't be frowned upon. As long as a user isn't really posting 3 comments, for example, just to say thanks, then I think appreciation for useful answers is good and useful feedback for answer publishers, and it also "adds to the conversation". It shows, for example, that the question publisher didn't just "settle" for an answer but they liked one. – Rok Apr 4, 2020 at 21:32
- Yeah, if they create a "frame pop-up" feature, for example, where I can hover the cursor over your name to click something to chat with you, then I could use that feature for thanks, but digging through the website menus to find the Chat feature, to begin with, then creating a room, then inviting you to it or adding your name to it ... I think that's overkill and can potentially be seen as obtrusive. – Rok Apr 5, 2020 at 9:47
I basically need to add a new Citation & Bibliography Style
You can install additional styles. One of them might be more suitable for you:
- Associação Brasileira de Normas Técnicas (ABNT)
- Association for Computing Machinery (ACM)
- American Medical Society (ACS)
- American Medical Association (AMA)
- American Sociological Association (ASA)
- Council of Science Editors (CSE)
- Harvard – AGPS
- Harvard – Anglia
- Harvard – Exeter
- Harvard – Leeds
- Humana Press
- Lecture Notes in Computer Science (LNCS)
- Modern Humanities Research Association (MHRA)
Source Install additional Word reference styles (Mac + Windows)
You can also use a custom style to get the exact format you want. See the following links for details:
Bibliography & Citations 102 – Building Custom styles
Create Custom Bibliography Styles
Create new citation styles for MS Word
My research on this suggests that this is possible via XML files. I've edited XML files before but where is the XML file of the Chicago style, for example?
It's located within Bibliography/Style within C:\Program Files (x86)\Microsoft Office\Office16\Bibliography\Style for Office 2016. The exact path will vary based on the version of Office you have installed.
Create Custom Bibliography Styles indicates everything that is required for a new citation style. Given that the process requires multiple XML files, it would be difficult to quote the link, but how you create your own style wasn't the question anyways.
- @Rok - I actually never said it would be easy to define your own citation style. You simply asked where the files were stored, which I provided, the documentation was an attempt to fully educate you on the entire process – Ramhound Apr 2, 2020 at 22:32
Adding a new citation and bibliography style to Microsoft Word can be done by creating or editing an XML file that defines the style rules. You can use the existing style files as templates and modify them according to your needs. The style files are located in the %APPDATA%\Microsoft\Bibliography folder on your computer. You can also download custom style files from online sources and copy them to the same folder.
To create a new style file, you can follow these steps:
- Open an existing style file (such as CHICAGO.XSL) in a text editor or an XML editor.
- Save the file with a new name (such as MYSTYLE.XSL) in the same folder.
- Edit the file to change the style name, description, and rules.
- Save the file and close the editor.
- Restart Microsoft Word and go to the References tab.
- In the Citations & Bibliography group, click the arrow next to Style and select the new style from the list.
To edit an existing style file, you can follow these steps:
- Locate the style file (such as CHICAGO.XSL) in the %APPDATA%\Microsoft\Bibliography folder and make a backup copy of it.
- Open the style file in a text editor or an XML editor.
- Make the changes you want to the style name, description, and rules.
- In the Citations & Bibliography group, click the arrow next to Style and select the edited style from the list.
To add a new reference to Word, you can watch this video: [How to add APA 7th reference style to MS Word?] . It shows you how to use the Source Manager to add, edit, and reuse sources, and how to insert citations and bibliographies in your document.
You must log in to answer this question.
Not the answer you're looking for browse other questions tagged microsoft-word bibliography citations ..
- The Overflow Blog
- How to prevent your new chatbot from giving away company secrets
- Introducing Staging Ground: The private space to get feedback on questions...
- Featured on Meta
- Testing a new version of Stack Overflow Jobs
Hot Network Questions
- Homebrew spell acting as one-way mirror
- Any C/C++ definition generators for Vim?
- Is Jon Voight faking being blind in "U-Turn" (1997)?
- Who has the final say in making revisions to a manuscript after it has been returned by reviewers?
- Physical reality of physics properties
- 1990s-early 2000s sci-fi TV show about aliens who came to earth and had beautiful white ships
- Taking wine samples from HK to Shenzhen
- AD&D Which guns can thieves use?
- Culture of conferences and registration fees
- How to plot mutiple spiric sections of a torus in a single plot?
- Post Apocalyptic Military
- Feynman claimed "The ear is not very sensitive to the relative phases of the harmonics." Is that true?
- What does "the" mean here? (As used in Japanese)
- 200 A Main Panel pass thru lugs to 200 A Subpanel
- Falsifying Business Records Unanimous Jury
- Drawing n boxes in a row
- Center of mass thought experiment
- Why was the Workers Party of Britain not invited to the BBC Election Debate?
- What is the theological difference between anthropomorphism and theanthropism?
- Does Shadow Step work in concert with Find Familiar?
- Felt QX60 Upgrade
- How to Create a Fake AggregateResult Object for Testing in Salesforce Apex?
- What does "Belgian" really mean, in the Fast and Furious series?
- Punishment for breaking Yom Tov
This browser is no longer supported.
Upgrade to Microsoft Edge to take advantage of the latest features, security updates, and technical support.
Create Custom Bibliography Styles
- 10 contributors
Create a custom bibliography style in Word by learning the steps (and XML code) you need to construct a simple custom style. Also, learn to make a more complex style file. Before we start, there is some information that you need to know:
The bibliography sources you create are all listed in the following local file: %AppData%\Microsoft\Bibliography\Sources.xml.
The Sources.xml file won't exist until you create your first bibliography source in Word. All bibliography styles are stored in the user's profile here: %AppData%\Microsoft\Bibliography\Style.
Building a basic bibliography style
First, create a basic bibliography style that the custom style will follow.
Set up the bibliography style
To create a bibliography style, we will create an XML style sheet; that is, an .xsl file called MyBookStyle.xsl, using your favorite XML editor. Notepad will do fine. As the name suggests, our example is going to be a style for a "book" source type.
At the top of the file, add the following code:
As the comments indicate, Word uses HTML to represent a bibliography or citation within a document. Most of the preceding XML code is just preparation for the more interesting parts of the style. For example, you can give your style a version number to track the changes you make, as shown in the following example.
More importantly, you can give your style a name. Add this tag: <xsl:when test="b:StyleNameLocalized">; and then give your style a name, in the language of your choice, by using the following code.
This section contains the locale name of your style. In the case of our example file, we want our custom bibliography style name, "Simple Book Style," to appear in the Style drop-down list on the References tab. To do so, add the following XML code to specify that the style name be in the English locale (Lcid determines the language).
Your style will now appear under its own name in the Bibliography Style dropdown list-box in the application.
Now, examine the style details. Each source type in Word (for example, book, film, article in a periodical, and so forth) has a built-in list of fields that you can use for the bibliography. To see all the fields available for a given source type, on the References tab, choose Manage Sources , and then in the Source Manager dialog box, choose New to open the Create Source dialog box. Then select Show All Bibliography Fields .
A book source type has the following fields available:
State/Province
Country/Region
Number of Volumes
Short Title
Standard Number
In the code, you can specify the fields that are important for your bibliography style. Even when Show All Bibliography Fields is cleared, these fields will appear and have a red asterisk next to them. For our book example, I want to ensure that the author, title, year, city, and publisher are entered, so I want a red asterisk to appear next to these fields to alert the user that these are recommended fields that should be filled out.
The text in the <xsl:text> tags are references to the Sources.xml file. These references pull out the data that will populate each of the fields. Examine Sources.xml in \Microsoft\Bibliography\Sources.xml) to get a better idea about how these references match up to what is in the XML file.
Design the layout
Output for bibliographies and citations is represented in a Word document as HTML, so to define how our custom bibliography and citation styles should look in Word, we'll have to add some HTML to our style sheet.
Suppose you want to format each entry in your bibliography in this manner:
Last Name, First Name. (Year). Title. City: Publisher
The HTML required to do this would be embedded in your style sheet as follows.
When you reference a book source in your Word document, Word needs to access this HTML so that it can use the custom style to display the source, so you'll have to add code to your custom style sheet to enable Word to do this.
In a similar fashion, you'll need to do the same thing for the citation output. Follow the pattern (Author, Year) for a single citation in the document.
Close up the file with the following lines.
Save the file as MyBookStyle.XSL and drop it into the Styles directory (\Microsoft\Bibliography\Style). Restart Word, and your style is now under the style dropdown list. You can start using your new style.
Create a complex style
One of the issues that complicate bibliography styles is that they often need to have a significant amount of conditional logic. For example, if the date is specified, you need to show the date, whereas if the date is not specified, you may need to use an abbreviation to indicate that there is no date for that source.
For a more specific example, in the APA style, if a date is not specified for a website source, the abbreviation "n.d." is used to denote no date, and the style should do this automatically. Here's an example:
APA website source with no date entered: Kwan, Y. (n.d.). Retrieved from https://www.microsoft.com APA website source with date entered: Kwan, Y. (2006, Jan 18). Retrieved from https://www.microsoft.com
As you can see, what is displayed is dependent upon on the data entered.
The output of virtually every style needs to change depending on whether you have a "Corporate Author" or a "Normal Author." You'll see how to use one of the most common rules for implementing such logic into your style, allowing you to display a corporate author if the corporate author is specified, and a normal author if the corporate author is not specified.
Solution overview
To display a corporate author only if appropriate, use the following procedure.
To display a corporate author
Add a variable to count the number of corporate authors in the citation section of the code.
Display the corporate author in the citation if the corporate author is filled in. Display the normal author in the citation if the corporate author is not filled in.
Add a variable to count the number of corporate authors in the bibliography section of the code.
Display the corporate author in the bibliography if the corporate author is filled in. Display the normal author in the bibliography if the corporate author is not filled in.
Getting started
Let's start by changing the citation. Here is the code for citations from last time.
Step 1: Define a new variable in the citation section to count the number of corporate authors
Declare a new variable to help determine whether a corporate author is available. This variable is a count of the number of times the corporate author field exists in the source.
Step 2: Verify that the corporate author has been filled in
Verify that the corporate author has been filled in. You can do this by determining if the count of corporate authors is non-zero. If a corporate author exists, display it. If it does not exist, display the normal author.
Now that you've made the change for citations, make the change for the bibliography. Here's the bibliography section from earlier in this article.
Step 3: Define a new variable in the bibliography section
Once again, let's start by adding a counting variable.
Step 4: Verify that the corporate author has been filled in
Verify that a corporate author exists.
Here's the complete final code.
This article showed how to create a custom bibliography style in Word, first by creating a simple style, and then by using conditional statements to create a more complex style.
- What's new for Word 2013 developers
- Office 365 Developer Blog
- Word for developers website
Support and feedback
Have questions or feedback about Office VBA or this documentation? Please see Office VBA support and feedback for guidance about the ways you can receive support and provide feedback.
Was this page helpful?
Coming soon: Throughout 2024 we will be phasing out GitHub Issues as the feedback mechanism for content and replacing it with a new feedback system. For more information see: https://aka.ms/ContentUserFeedback .
Submit and view feedback for
Additional resources

Contribute to the Microsoft 365 and Office forum! Click here to learn more 💡
April 9, 2024
Contribute to the Microsoft 365 and Office forum!
Click here to learn more 💡
Word Forum Top Contributors: Stefan Blom - Charles Kenyon - Doug Robbins - MVP Office Apps & Services (Word) - Suzanne S. Barnhill - Bob Jones AKA: CyberTaz ✅
May 10, 2024
Word Forum Top Contributors:
Stefan Blom - Charles Kenyon - Doug Robbins - MVP Office Apps & Services (Word) - Suzanne S. Barnhill - Bob Jones AKA: CyberTaz ✅
- Search the community and support articles
- Microsoft 365 and Office
- Search Community member
Ask a new question
Microsoft Word: References; Citations; Works Cited & Bibliography
What is the differences between:
(1) References
(2) Citations
(3) Works Cited &
(4) Bibliography ?????
Look forward to hearing answers from Word Guru(s)
Report abuse
Reported content has been submitted
- Volunteer Moderator |
- Article Author
2 people found this reply helpful
Was this reply helpful? Yes No
Sorry this didn't help.
Great! Thanks for your feedback.
How satisfied are you with this reply?
Thanks for your feedback, it helps us improve the site.
Thanks for your feedback.
Replies (3)
Question info.
- Norsk Bokmål
- Ελληνικά
- Русский
- עברית
- العربية
- ไทย
- 한국어
- 中文(简体)
- 中文(繁體)
- 日本語
How-To Geek
How to use footnotes and endnotes in microsoft word.
Whether you use Microsoft Word for personal or professional writing, sometimes you may want to add supplemental notes to sections of your work.
Quick Links
What are footnotes and endnotes, how to insert footnotes and endnotes, how to configure footnotes and endnotes in word 2016, how to cross-reference footnotes and endnotes in word 2016.
Whether you use Microsoft Word for personal or professional writing, sometimes you may want to add supplemental notes to sections of your work. Maybe you want to make a side comment on one of your arguments, or you need to cite another author's work without distracting from the main text. Luckily, Word has useful tools for adding footnotes and endnotes to your writing.
We're using Microsoft Word 2016, but Word has supported footnotes and endnotes since at least Word 2007. Depending on the version of Word you're using, the menus we walk through in this guide may look a little different. But don't worry---the features and functions are the same.
Footnotes and endnotes are both ways of adding extra bits of information to your writing outside of the main text. Think of them like verbal asides, only in writing. You can use footnotes and endnotes to add side comments to your work or to cite other publications like books, articles, or websites. The only difference between footnotes and endnotes is where they appear in your document.
As the name suggests, footnotes are attached to the bottom of the page containing the sentence they correspond to. Endnotes, on the other hand, are added to the end of a section or document. Which one you should use in your writing depends on your personal preference or---if you're writing for school or work---your organization's publication standards.
Fire up Microsoft Word, and then open the document to which you'd like to add footnotes (or create a new document if you're just getting started). Switch to the "References" tab on Word's Ribbon.
Here, you'll find a bunch of useful features for annotating your text, including tools for inserting a table of contents, adding citations, and generating a bibliography . The second group on this tab contains the footnote and endnote features we want.
To add a footnote, place your insertion point in your text where you want the footnote to appear, and then click the "Insert Footnote" button.
Word adds a small superscript number where you placed the insertion point.
And then immediately shifts focus to the footnote pane and places the insertion point at your new footnote, so you can start typing it right away.
Footnotes appear at the bottom of the page beneath a short horizontal line. Each time you add a footnote on this page, another number will be added to the list.
Once you've added your footnotes, you can hover your cursor over each sentence's reference marker to see a preview of the footnote within the text.
You can also quickly tab between footnotes in both the main text and the footnote list at the bottom of the page by clicking the "Next Footnote" button in the navigation bar.
Or, click the dropdown menu arrow on the "Next Footnote" button to select a different navigation option. You can choose to go to the previous footnote or navigate to the next or previous endnote.
The steps for inserting endnotes are essentially the same. Place your insertion point where you'd to annotate, and then click the "Insert Endnote" button on the "References" tab of Word's Ribbon.
Just like with footnotes, Word attaches a superscript number containing an endnote. But this time, the list of notes it generates appears at the end of the current section or the end of the document (you can customize where they appear, and we'll talk more about that in a bit).
Word has basic default settings for footnotes and endnotes, but you can adjust these settings at any time from the menu on the References tab.
Click the arrow in the lower right corner of the "Footnotes" menu.
This brings up a Footnote and Endnote window where you can customize the location, appearance, and format of all your footnotes and endnotes.
Change the Location of Footnotes and Endnotes
By default, Word puts footnotes at the bottom of the page and endnotes at the end of the document, but you can change where these notes appear.
Under "Location" in the Footnote and Endnote menu, find the "Footnotes" option (it should be selected by default when you first open the menu). Open the dropdown menu to the right of that option and you can change your footnote location to either the bottom of the page or below the text. If you choose the latter option, Word places your footnotes immediately after the main body of text instead of at the bottom of the page.
To change the default location of endnotes, select the "Endnotes" option, and then open the dropdown menu to its right. There, you can change endnote placement to the end of the current section or the end of the document.
Convert Footnotes to Endnotes (and Vice Versa)
Another option is to convert all of your footnotes to endnotes or vice versa. Instead of changing each one individually, this option lets you change them all at once. If you're working on a document with a lot of notes, this option can come in handy.
Under the "Location" section of the Footnote and Endnote menu, click the "Convert" button.
The Convert Notes dialog box pops up, giving you three options: 1) Convert All Footnotes to Endnotes, 2) Convert All Endnotes to Footnotes, and 3) Swap Footnotes and Endnotes. Select the option you want, and then click the "OK" button.
Change the Layout of Footnotes and Endnotes
By default, Word creates footnote and endnote lists with the same layout as the page on which they appear. However, you can adjust this from the Footnote and Endnote window by clicking the "Columns" dropdown menu and selecting the number of columns you'd like to use.
You can set your footnotes and endnotes to display in up to four different columns on the page.
Customize the Format of Footnotes and Endnotes
Word also lets you choose from several options for formatting how your footnotes and endnotes are numbered. It's generally a good idea to choose a different numbering system for each note type, especially if you're using a combination of footnotes and endnotes in the same document. This helps you and your reader quickly distinguish between the two at a glance.
In the Format section, click the dropdown arrow to the right of the "Number Format" option. Select your desired number format.
You can also label your notes with a custom symbol instead of a standard numbering system. Next to the Custom Mark option, click the "Symbol" button.
The Symbol menu will open. Select the symbol you'd like to use to label your notes, and then click the "OK" button.
Your selected icon should appear in the "Custom Mark" box, and Word will now use this symbol to label your notes.
By default, Word numbers footnotes and endnotes in individual series starting at "1" (or a, i, I, etc.) and continuing throughout the document. However, you can customize both the starting point and continuity of your notes.
If you want your footnotes or endnotes to start somewhere other than the first number in the series (for example, 2 instead of 1), click the arrows in the "Start At" dropdown box to increase or decrease the beginning value. One example of where this might be useful is if you're writing a book that contains endnotes and you're saving each chapter as a separate Word document. You could configure each chapter's document to start numbering endnotes where the last chapter left off.
To change the continuity of your numbering series, click the dropdown menu arrow next to the "Numbering" option.
You'll see three options for numbering your footnotes and endnotes: Continuous, Restart Each Section, and Restart Each Page. If you want your footnotes and endnotes to be numbered continuously from the beginning of your document to the end, select the "Continuous" option. If you'd prefer to have your notes numbered by chapter or section, select the "Restart Each Section" option. Or select "Restart Each Page" to number your notes by page.
Apply Your Changes to the Document
After configuring the above options, you'll need to select how you want your changes applied to your document. At the bottom of the menu, click the dropdown menu arrow next to the "Apply Changes To" option.
If you want your changes to apply to every page and section of your document, select the "Whole Document" option. Or select "This Section" to apply changes only to the section of the document you're currently in. (Note that this option will not appear if you have no section breaks in your document.)
Once you're satisfied with your settings, click the "Apply" button in the bottom right of the menu.
You can also insert a new footnote using your selected settings by clicking the "Insert" button in the lower left corner of the menu.
If you want to use the same footnote or endnote more than once throughout your text, there's an easy way to do it without having to insert the same thing over and over again.
Place your insertion point where you want a reference inserted into the text. On the References tab, click the "Cross-Reference" button.
In the Cross-Reference window, choose either "Footnote" or "Endnote" from the "Reference Type" dropdown menu.
Next, click the "Insert Reference To" dropdown menu.
The "Footnote Number" option inserts the number of the footnote in regular text, while the "Footnote Number (Formatted)" option inserts the number of the footnote in superscript. The "Page Number" option inserts the number of the referenced page instead of the footnote number. The "Above/Below" option inserts either the word "Above" or "Below" depending on where the original footnote appears in relation to the cross-reference. Select your desired option.
Word lets you create hyperlinks between cross-references so you can easily find the same footnote everywhere it appears in your document. The "Insert as Hyperlink" option is checked by default, so you can click any cross-reference and automatically be taken to the part of the document containing the original footnote. We recommend leaving this option checked, but you can uncheck it if you prefer.
Under the "For Which Footnote" option, select the footnote you'd like to cross-reference, and then click the "Insert" button at the bottom of the menu.
Copilot tutorial: Find references in Word file

Duration: 59 seconds
Explore how you can improve your home research with Copilot in Word. Quickly locate and cite key references, like association rules, to make more informed decisions.
Duration: 47 seconds
Watch how effortless it is to find references in Word files using Microsoft Copilot. Simply ask Copilot to show you the specific content you need, and it will link you directly to that section of the document.
Try in Word
See more videos

Chat about a Word file

Write faster

Summarize a document
Browse all Copilot videos

Need more help?
Want more options.
Explore subscription benefits, browse training courses, learn how to secure your device, and more.

Microsoft 365 subscription benefits

Microsoft 365 training

Microsoft security

Accessibility center
Communities help you ask and answer questions, give feedback, and hear from experts with rich knowledge.

Ask the Microsoft Community

Microsoft Tech Community

Windows Insiders
Microsoft 365 Insiders
Was this information helpful?
Thank you for your feedback.
IMAGES
VIDEO
COMMENTS
Create a bibliography. With cited sources in your document, you're ready to create a bibliography. Put your cursor where you want the bibliography. Go to References > Bibliography, and choose a format. Tip: If you cite a new source, add it to the bibliography by clicking anywhere in the bibliography and selecting Update Citations and Bibliography.
To add a citation, select the desired location for the citation in your document, click the Insert Citation command on the References tab, and select Add New Source. A dialog box will appear. Enter the requested information for the source—like the author name, title, and publication details—then click OK.
Step 1: Choose a style from the References tab. First choose a style from the References tab. For this first step in creating your bibliography in Microsoft Word, locate the References tab at the top of your screen. Next, look for the Citations & Bibliography group under the References tab. Click the drop-down box next to Style in the Citations ...
To add the bibliography, follow these steps. Click where you want to insert the bibliography—usually at the end of the document. Click the Reference tab. Then, click Bibliography in the ...
Step 1: Go to the References tab and the Citations & bibliography section of the ribbon. Step 2: Choose your writing format in the Style drop-down menu, which likely displays as APA by default ...
To add a citation to your document, first add the source you used. On the References tab, click the arrow next to Bibliography Style, and click the style that you want to use for the citation and source. For example, social sciences documents usually use the MLA or APA styles for citations and sources.
Creating a bibliography in Word - Step 1: Entering sources. To create a bibliography in term papers or other academic papers, you must first enter the sources in Word. Open Word and click on the "References" tab. Click on "Manage sources" to open the source manager. You will see a list of all the sources you have already entered.
Type in your text or paste in a quote then go to References | Citations and Bibliography | Insert Citation. Add New Source - create a source (book, document etc.) for the citation. This opens a full source dialog box. Add New Placeholder - a placeholder is a short form source that you can quickly complete.
To create a titled bibliography, select the Bibliography drop-down arrow and pick the style you want to use from Bibliography, References, or Works Cited. For a non-titled bibliography, select "Insert Bibliography" instead. You'll see your chosen style appear in your document. From there, make any edits you like to the text, font, and layout.
It is standard to place the bibliography at the end of a document. Go the end of your document to the top of a new blank page. On the References tab, in the Citations & Bibliography group, click Bibliography. Select one of the predesigned formats listed. As new citations are added, click the Bibliography Title and choose "Update Bibliography".
In the Citations & Bibliography group, click the arrow next to Style. This looks slightly different on Microsoft Word for Mac, but can be found in the same area. Click the style that you want to use for the citation and source, e.g., MLA. Select the location where you want to start the citation.
Place your cursor where you want to insert the citation. Figure 3. Cursor placed for citation insertion. Select the References tab in the ribbon (see figure 1). Select the Insert Citation button in the Citations & Bibliography group. Figure 4. Insert Citation button. Select Add New Source from the drop-down menu.
Click at the end of the sentence or phrase that you want to cite. On the Reference tab, click Insert Citation and then do one of the following: To add the source information, click Add New Source, and then, in the Create Source dialog box, click the arrow next to Type of Source, and select the type of source you want to use (for example, a book ...
2. Click "Add New Source" to enter information about a source. On the "References" tab, click the "Insert Citation" button in the "Citations and Bibliography" group. Any sources you've already entered will appear in a drop-down. Select "Add New Source" if the source you want to cite isn't already listed.
Microsoft Microsoft Word 2016 training video on how to use the citation and bibliography tools to insert a citation or short reference of your sources as wel...
Switch to the "References" tab on the Ribbon, and then click the "Insert Citation" button. The popup menu that appears shows any sources you have already added (we'll get to that in a moment), but to add a new source, just click the "Add New Source" command. In the Create Source window that appears, you can enter all of the relevant ...
Create a bibliography. With cited sources in your document, you're ready to create a bibliography. Put your cursor where you want the bibliography. Go to References > Bibliography, and choose a format. Tip: If you cite a new source, add it to the bibliography by clicking anywhere in the bibliography and selecting Update Citations and Bibliography.
Edit the file to change the style name, description, and rules. Save the file and close the editor. Restart Microsoft Word and go to the References tab. In the Citations & Bibliography group, click the arrow next to Style and select the new style from the list. To edit an existing style file, you can follow these steps:
Step 1: Define a new variable in the citation section to count the number of corporate authors. Declare a new variable to help determine whether a corporate author is available. This variable is a count of the number of times the corporate author field exists in the source. <!--Defines the output of the Citation-->.
To add a citation to your document, first add the source you used. On the References tab, click the arrow next to Bibliography Style, and click the style that you want to use for the citation and source. For example, social sciences documents usually use the MLA or APA styles for citations and sources.
In reply to SaeedR_706's post on September 18, 2012. Yes, Word has a References tab, from which you can insert citations and create a list titled either "Bibliography" or "Works Cited." If you mouse over the latter two in the Bibliography gallery, you will see that the definition for both is the same. I assumed you wanted to know what the ...
Place your insertion point where you want a reference inserted into the text. On the References tab, click the "Cross-Reference" button. In the Cross-Reference window, choose either "Footnote" or "Endnote" from the "Reference Type" dropdown menu. Next, click the "Insert Reference To" dropdown menu.
Downloading a free template does some of the heavy lifting, automating some formatting. Using the MLA template. To get a correctly formatted paper, Go to FILE > New and search for "APA" or "MLA" depending on what style you want. Many things will format automatically, but make sure you check the easy gotchas, like spelling errors (words ...
Copilot tutorial: Find references in Word file. Duration: 59 seconds. Explore how you can improve your home research with Copilot in Word. Quickly locate and cite key references, like association rules, to make more informed decisions.